


P 51d mustang 60cc hangar 9 build
 05-25-2015, 05:48 PM
#1
I am a kit builder from way back. I built and flew my first RC airplane back in 1973 when I was a mere 14 year old. It was a SIG Kadet 3 channel with a K&B 40 and a Futaba 6 channel radio. AHHHH the good old days when we didn't have to worry about the government trying to stop us from flying stuff. It's been 42 years 35 planes 4 helicopters and a hex-copter later and I'm starting on ARF kits. I heard someone say just putting them together. THATS A LAUGH. When I'm done I will have changed a few things. This will be my 2nd ARF. The first being a 60 size Ugly Stick that I put a DLE 20 on. Man that's a great combo if you like haulace great acrobatics.
The first change was the motor. I figured the fuel injected Evolution was the cats meow but they never could make it work properly so I went with the DLE 61. I'm sure I will have to adjust the throttle and choke locations. The second change will be the radio. I am still a Futaba guy so all but the elevator servos will be changed to the Futaba 3305MG. I tested these out on a Ugly Stick with a DLE 20 on it with great success. Very strong and quick. The elevators will still be spectrums as the stabs where built just for these servos.
The retracts will stay the same. E-Flite 60cc electrics.
Well here we go. I read some post that where complaining about the covering being loose. As you can see that's not the case with this one.
Last edited by coxco; 05-25-2015 at 06:05 PM.
 05-25-2015, 06:25 PM
#2
So the first thing I did was to go though the parts and check them out. The first thing I found was the canopy did not have enough glue where it counts. I cleaned it up and re-glued it where it counts. I also read ahead and did the paint removal to be ready for the canopy glue down.
Last edited by coxco; 05-25-2015 at 08:11 PM.
06-16-2015, 02:08 PM
#3
It's been a while but been working on it. I painted the interior of the cockpit parts. I had to cut the dashboard stickers and move them into place on the backside of the dash to make them fit in the right place. I also drilled holes in the dash back plate to let a little light through so the gauges could be seen better. I got most of these parts installed.


10-26-2015, 07:18 AM
#6
I have been VERY busy and do not always have time to post but the build continues.
I did a few mods on the dash board cover so the canopy glue will stick really good. I scratched the inside of the dash with a hobby knife to get the paint off. The paint is not on there very good anyway


I did a few mods on the dash board cover so the canopy glue will stick really good. I scratched the inside of the dash with a hobby knife to get the paint off. The paint is not on there very good anyway
Last edited by coxco; 10-26-2015 at 07:45 AM.
10-26-2015, 09:14 AM
#7
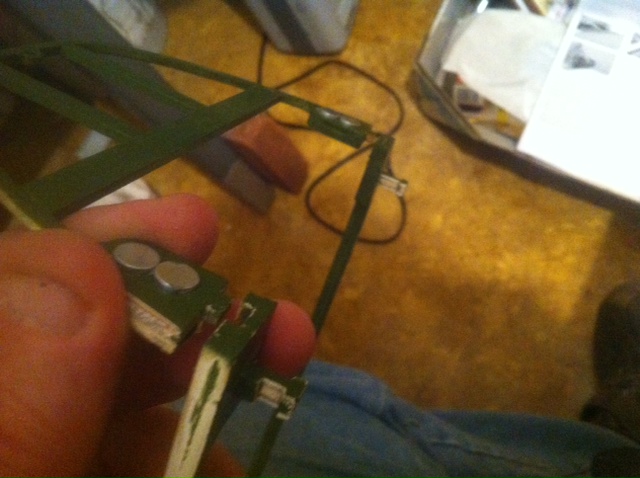
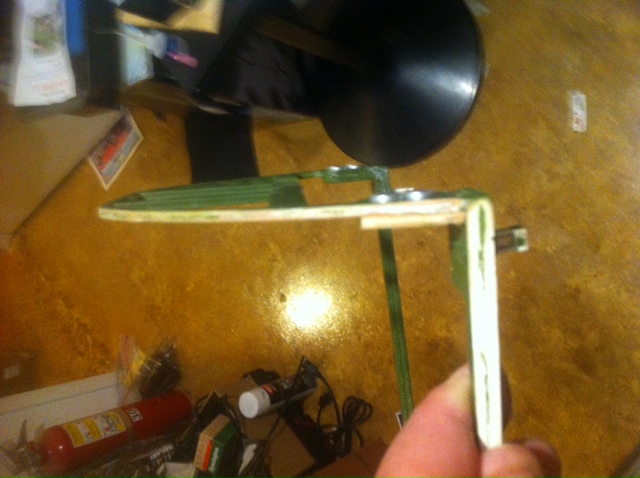
This is the windshield and canopy bracing with the magnets in place. You will need to do this before installing the windshield and the back canopy to keep them in line.


Make sure you used the blue painters tape or it will peel the Monokote off the wood.
Make sure you used the blue painters tape or it will peel the Monokote off the wood.
10-26-2015, 05:24 PM
#8

My Feedback: (-1)
Join Date: Nov 2006
Location: Shepherdsville,
KY
Posts: 204
Likes: 0
Received 0 Likes
on
0 Posts
Your build has my attention....
I am building the TF 60cc Zero
I want to put in a sliding canopy it looks as if
you have done that here.. would you help me
tips tricks and know hows... Im hoping that you
can help....
I am building the TF 60cc Zero
I want to put in a sliding canopy it looks as if
you have done that here.. would you help me
tips tricks and know hows... Im hoping that you
can help....

 10-31-2015, 03:52 PM
#14

Keep it going,, I bought mine a few weeks ago, Just got started on it a little at a time. ,, had pure hell getting the right wing to line up with the center section, it was crooked, and no where near being correct, no amount of sanding and filing on the tabs or slots would allow it to work. ended up having to knock the rear alignment tab out of the center section, make a new one, install it, line it up and then cut a section of the bottom wing out to hysol the new tab in. Sand the wingtubes of the center section. I sure hope the left wing goes easier.
Would love to see pics of a DLE-61 in it, assuming you are going to try and use a slimline pitts muffler, curious if it will all fit on the sides in the cowl. Im just about sold on the DLE-55 RA I have seen that they fit completely, without cutting out the sides of the cowl..
Would love to see pics of a DLE-61 in it, assuming you are going to try and use a slimline pitts muffler, curious if it will all fit on the sides in the cowl. Im just about sold on the DLE-55 RA I have seen that they fit completely, without cutting out the sides of the cowl..
Last edited by raron455; 10-31-2015 at 06:26 PM.
11-09-2015, 10:46 AM
#15

I had the wing tube alignment problem with the right rear wing tube in the center section of my plane. Some careful measuring found the fiberglass tube to be 1/4 inch out of square where it is glued to the rib near the flap servo. I cut the wood around the tube loose from the ribs(3) and assembled the right panel to the center wing with the tube floating on the aluminum. I had to remove the sheeting from the bottom covering the fiberglass tube for access. 1 small opening behind the servo panel and a larger piece from the root rib in to the 3rd rib. With the trailing edge clamped for alignment I glued u-shaped air-ply pieces on both sides of each rib to clamp the fiber glass tube to the ribs. I reinstalled the original pieces of sheeting (still covered) and sealed the edges with packaging tape to prevent the wind peeling the covering. If I ever have to recover the plane I will refinish that area, as for now no one notices the repair.
After having to cut into my TF GS P 51 wings to reinforce the gear mount structure I consider this to be a minor flaw in an other wise excellent design. I plan to get another one soon and I hope the manufacturer fixes this defect but if not I can deal with it easily.
This P 51 model flies so much better than my TF P 51 that I am going to retire them all and get new Hanger 9 P 51s, I plan to convert one to electric and modify the fuse to B model outlines. The slow, stable landing speed makes it well worth the trouble and expense. It is nice to fly a warbird that is so low stress to take off and land.
I have 25 flights on mine now and the wind has been blowing hard and cross wind for all but one take off and it is still easier to fly this model in bad weather than the TF. I had one dead stick when it had just passed me and I was able to do a 180 turn and glide back for a wheel landing with no damage. This is not possible to do with my TF P 51s, They go down wherever they are pointed when the motor stops.
11-09-2015, 11:46 AM
#16
Sjhanc,,,,
What engine do you have in yours?? I was considering the dle 55ra or 61, but Im not so sure anymore. Have yet to see one in person, the few videos I have seen of this plane it looks like a slug in the air, I am reading weights of 27-30lbs. So with a 55 thats not so good,,, scale speed maybe?? Im really looking at larger engines, 80cc rear carbed, maybe dle-85, with a custom slim muffler and hopefully wont have to cut the side of cowl. That would allow a more scale size 4 blade prop, instead of the small one the 55 can handle,,still not sure..
Had to work to get the right wing fitted, left one slid right in, perfect..
11-09-2015, 12:03 PM
#17
Saw one at the Ocala Salute to Vet's last week with a DA-50 and it flew fine.
Mine is decked out and right around 24 pounds and that's dual batteries, tank drops, lights, power safe rx and a ZP62
Mine is decked out and right around 24 pounds and that's dual batteries, tank drops, lights, power safe rx and a ZP62
Last edited by BarracudaHockey; 11-09-2015 at 01:59 PM. Reason: Edited for correct motor size!
11-09-2015, 01:08 PM
#18
The P 51 D that BarracudaHockey saw fly at Ocala is mine pictured above. I was amazed at the performance I get with a DA 50R, a larger engine is not necessary unless you plan to load it heavy with scale detail. If you are going with 4 blade props a big electric motor or gas motor 80cc's or bigger is required. I am flying my TF B model with a smaller Varioprop (19.9 inches Dia.-17 inch pitch) turned by a Rimfire 50cc brushless on 12s lipo packs.
Bigger motors will turn bigger props or more blades. They will add weight which means higher wing loading so the comparison between the lighter plane at 25-27 lbs. or bigger motor and heavy plane (30-35 lbs.) comes out even at top speed unless you go electric, in which case very high speeds are possible (140 mph+).
I recently flew my H 9 P 51 D at OTOW with 3 other warbirds ( a TF Mustang, a Corsair, and a P 47) all with equal or bigger motors than mine and I had no trouble keeping up with them. In fact after we landed I noticed some engine tuning going on.
Another consideration is that the engine compartment was designed for an engine that was never released and the smaller the motor you install-the easier it will be. Pilots who go for big motors will have to engineer it themselves and I can say from experience with the TF and the H 9 Mustang that the TF has more room for bigger motors and their mufflers. Also engine and especially muffler cooling needs special attention to detail in the H 9, some thing that was not as important with the TF plane. I have flown several of them for years with no extra baffles, etc., while I had to angle mount my DA 50r in the H 9 to get the muffler's manifold into the cooling airflow from the chin scoop to prevent vapor lock and dead stick landings. And a baffle was need to prevent muffler heat from reaching the carb. I ended up remounting the engine in three different positions with 3 different mufflers so that it would taxi around my yard without vapor lock. It will now run on the ground for an entire tank (32 oz's) at idle and full throttle. In the air I have no problems.
11-09-2015, 01:30 PM
#19
I will post a video of my flight with the other warbirds as soon as I edit it down to an upload size for youtube. You will see that it is no slug in the air. It is possible that the planes you have seen are using the manufacturer's CG which ,for my plane turned out to be very nose heavy. After I removed 1/2 lb. of nose lead and moved 14 ounces of batteries from the firewall back to the wing trailing edge I was able to take out most of the up trim it needed for level flight. Nose heavy planes have to fly at a higher angle of attack which tends to make the flight performance sluggish and limits top speed and control responce. My plane is very light on the controls and its slow flight is way slower than my TF birds, landing speed has been described by other club members as "walking speed".
I have included a link to a short video of some of my landings I made for another thread. Some of the landings are of the H 9 P 51. Keep in mind that most are in high cross-wind conditions but you can compare the difference between the TF and the H 9 planes in landing speeds. The older TF D model only weighed 21 lbs. so it is flying at the ideal weight for that plane. The other TF plane weighs 29 lbs. and the H 9 Mustang is at 27 lbs.
https://www.youtube.com/watch?v=sy2utXwbCgw
11-09-2015, 02:26 PM
#20
I almost forgot, I use 22-12 props while most other pilots use 10 inch or less pitch. The 22-12 size gives me much better top speed and excellent vertical climb (2-3 vertical rolls). Reed valve motors like the DA deliver their horsepower and torque peak at lower RPMs while piston port and crankshaft valve motors favor higher RPMs (they work best with smaller diameter and lower pitch). When you under-prop a reed motor you don't get any where near the power it can produce. They will wind up to 8000 RPMs but the HP and Torque is lower at those crank speeds than equivalent crank ported motors (front crank port or rear rotor valve) this last is the best with all prop sizes. For any given prop size a crank port motor will wind it higher than a reed valve motor. Reed valve motors give better low speed and idle performance and if you lug them with big high pitch props they can surprise you with what they will do.
11-10-2015, 01:04 PM
#21

My Feedback: (10)

Join Date: Apr 2002
Location: Tustin,
CA
Posts: 415
Likes: 0
Received 0 Likes
on
0 Posts
I have been flying mine now for a few months with well over 75 flights using a DA60 with a 22x12 prop and I can tell you it flies it just fine. The plane weighs in the neighborhood of 28lbs and I can get a good 125mph+ on a straight and level pass. I have my timer set for 8 minutes with a 32oz tank and have about a little less than 1/2 tank left! It will amaze you just how slow this plane will fly, especially at half flaps. I had the Aero Works P-51 which flew fantastic also, unfortunately lost it in a mid-air, so replaced it with the H-9 and have been very happy since.
11-10-2015, 01:30 PM
#22
https://youtu.be/MLaCwzXl8Ew
This is the link to an edited video of my H 9 P 51 D in a tail chase with 3 other warbirds, a TF P 51, A P 47, and a Corsair. I use a DA 50r and the others are equal or larger motors. The total length of the flight was over 16 minutes for me and the others took off before me, so I had to shorten it for youtube.
This is the link to an edited video of my H 9 P 51 D in a tail chase with 3 other warbirds, a TF P 51, A P 47, and a Corsair. I use a DA 50r and the others are equal or larger motors. The total length of the flight was over 16 minutes for me and the others took off before me, so I had to shorten it for youtube.
11-10-2015, 06:14 PM
#23
rslsft is another H 9 pilot who seems to be very happy with the performance his plane is giving him. I have only seen one other in my area and he had a minor problem that prevented him from flying that day. I know that other members of my club bought their planes before I did but I don't fly in the summer heat here in Florida so I may have missed seeing them. I know that a DA 50r is below the engine size my plane is rated for and I did not expect the performance I am getting. Other pilots that have seen it fly have a hard time believing what they are seeing. In my opinion the airframe has a superior wing design that is going to fly well no matter what engine you use. I have flown 3 meter gliders in thermal contests and in that level of competition the wing and its airfoil is everything. I read about difficulties with gear doors blowing off at high speeds or refusing to close so I delayed installing them. I did install the tail gear doors and had trouble so I temporarily removed them. I didn't want small details to hold up my fun with a new plane.
I don't work for Horizon or Hanger 9 so I have to spend my money on what I think is the best product, all things considered. I have never bought a perfect model airplane so I am prepared to do what I think is necessary for it to perform the way I like.
My planes are always an on-going project that I enjoy improving with better parts and equipment.
11-11-2015, 10:08 AM
#24
My Feedback: (10)
Join Date: Apr 2002
Location: Tustin,
CA
Posts: 415
Likes: 0
Received 0 Likes
on
0 Posts
sjhanc,
After seeing your video, although it's not the same as seeing it in person, I was impressed with it's performance with the DA 50! I agree with you, the flight envelope of this plane is very good. My old AW P-51 would want to tuck into the turn if you pulled a little too hard where as this one just turns tighter. I balanced mine at the very rearward part of the CG range and is not pitch sensitive at all and requires just a touch of down elevator with inverted flight. Landings are a breeze also, just keeping a little throttle over the threshold of the runway, then letting the plane settling down on its mains. The only thing I had to get used to, was taking off a little slower as the electric gear don't like to retract if the air load on them get too high. I just use a half flap setting and take off about 1/2 throttle, hit the gear switch, and wait til the gear are up before advancing the throttle. Works great.
After seeing your video, although it's not the same as seeing it in person, I was impressed with it's performance with the DA 50! I agree with you, the flight envelope of this plane is very good. My old AW P-51 would want to tuck into the turn if you pulled a little too hard where as this one just turns tighter. I balanced mine at the very rearward part of the CG range and is not pitch sensitive at all and requires just a touch of down elevator with inverted flight. Landings are a breeze also, just keeping a little throttle over the threshold of the runway, then letting the plane settling down on its mains. The only thing I had to get used to, was taking off a little slower as the electric gear don't like to retract if the air load on them get too high. I just use a half flap setting and take off about 1/2 throttle, hit the gear switch, and wait til the gear are up before advancing the throttle. Works great.
11-11-2015, 10:38 AM
#25
I bought a set of electric retracts and used them for 7 months. After a ride in a full scale P 51 C and being surprised by the retraction speed I watched several videos of full scale planes and timed their retraction speed from the time I saw the first strut break lock until the struts were in the wing at 3 seconds +/- 1/4 second. My electrics were taking 9.8 seconds to cycle up or down and during that time the current draw on the flight packs was excessive until the gear were up. The manufacturer said to vary the voltage from 4.8 to 9 volts for retract speed. Unfortunately, the difference in time was only .5 seconds from low to high voltage. To solve the gear down current issue I bought a set of air retracts which cycle much faster but will still stall at higher air speeds. I hit the switch as soon as it lifts off but both off them accelerate so quickly I frequently have to roll inverted to get them to lock up.
I have some spare housing blocks and I am going to experiment with changing the ramp slightly to see if it helps. I think that rounding the up lock corners slightly might help.
I don't know what you would do in the case of the electrics but an idea might be to change the linear actuators to a more powerful Firgelli that might work.