


125% (1/4 scale) Anderson TA-152H
 08-03-2014, 09:38 PM
#1


Since the pancakes are getting closer to being done and the F-14 needs a bunch of CAD time and Money to finish it, i started planning the next project back in may.. I'm a FW-190 nut, so why not do the Premier 190 in the form of the TA-152H and then take a known performer in scale competition and good flyer and make it (better?) bigger by blowing it up 125%! It didn't help either than Evan twisted my arm a bit when he found out my evil plans and offered to buy two... 
First up was getting the anderson plans and enlarging them 125%. This gives an airplane with the following dimensions:
142.5" wingspan
107.5" Long
Maybe 125% is a bit to big? NEVER! plus its a three piece wing, so it makes it doable
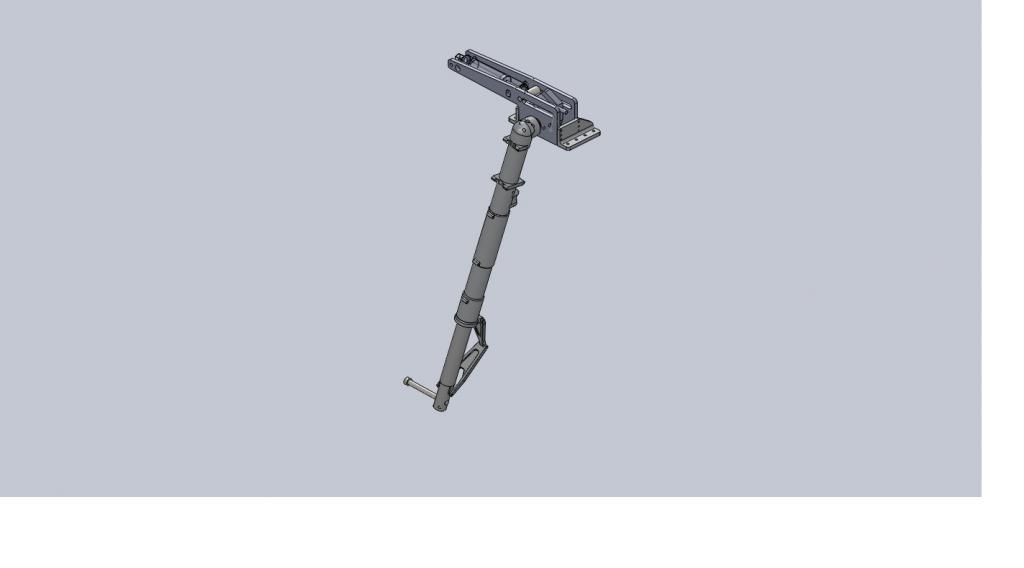
I also took a few nights to draw up a VERY detailed set of CNC machined main landing gear struts for the TA-152 as the Sierra gear just wouldn't look right IMO on this thing. Price wise, they will be within $100-200 of the Sierra gear and will have ALL of the gear door mounting bosses and detail you would see on the real strut machined into them.

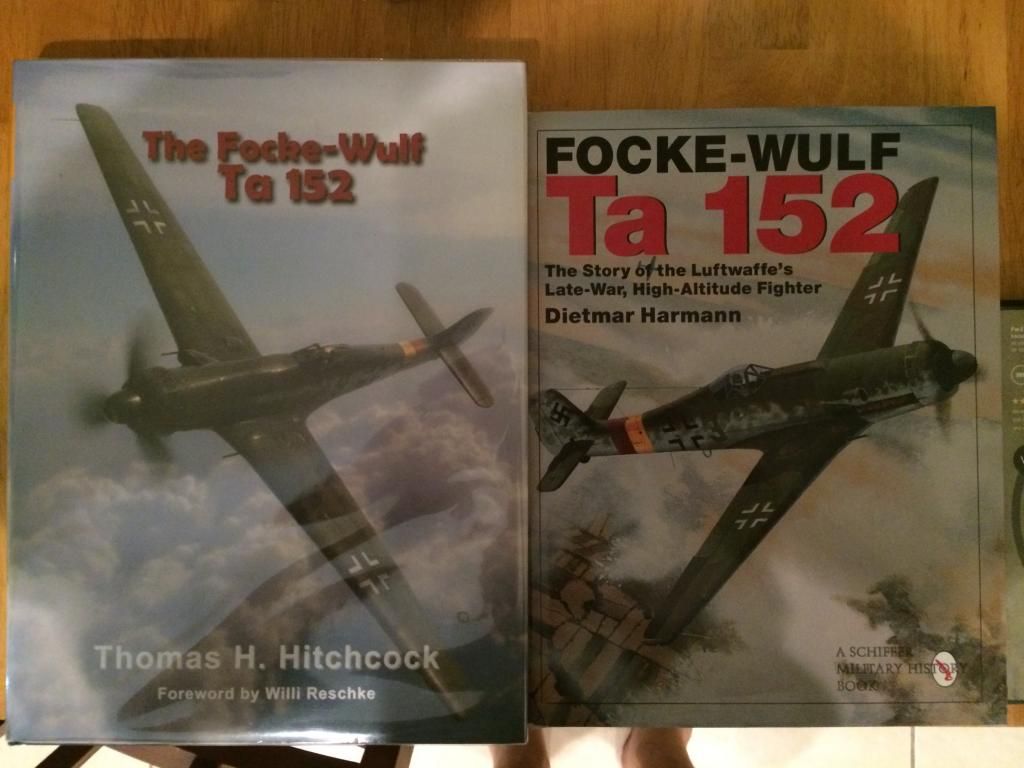
For reference, i'm using the following two books:
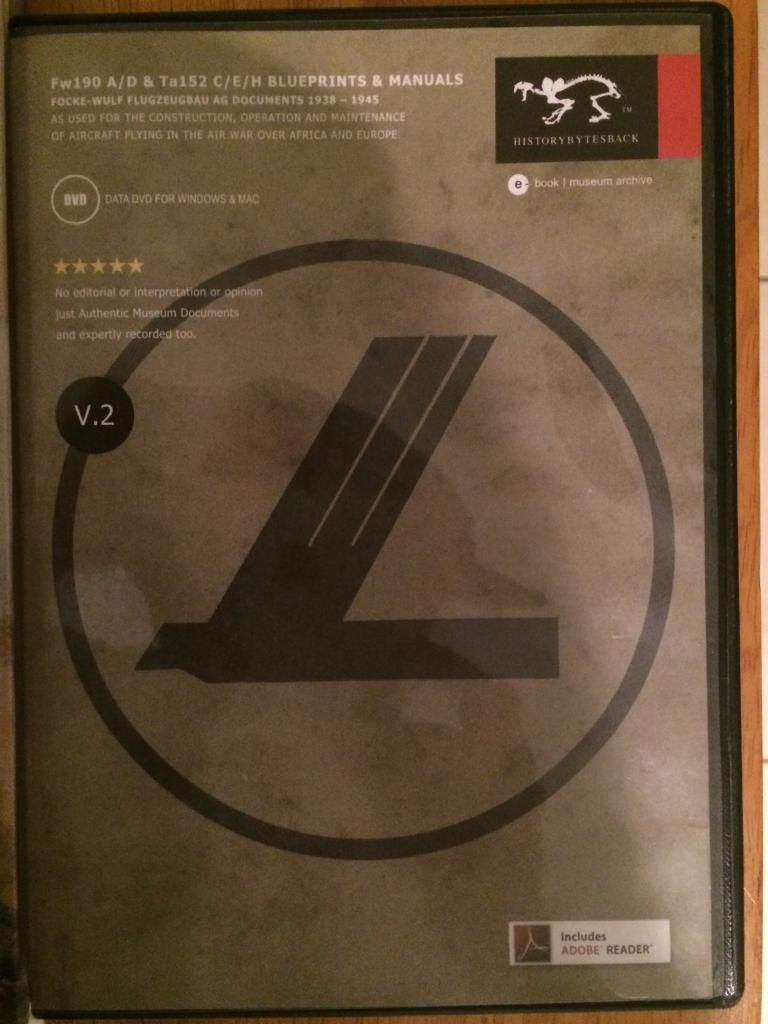
And purchases this "blue-print" DVD set off ebay, it contains a good bit of prints, but not a complete set like you would expect by reading their description of it:
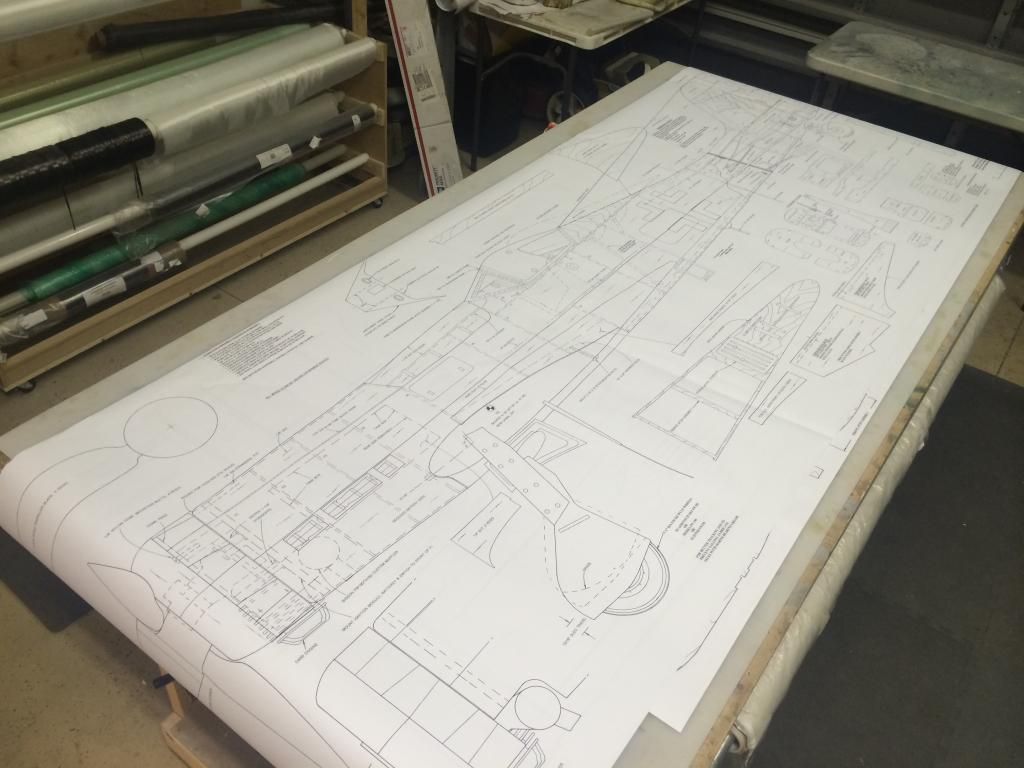
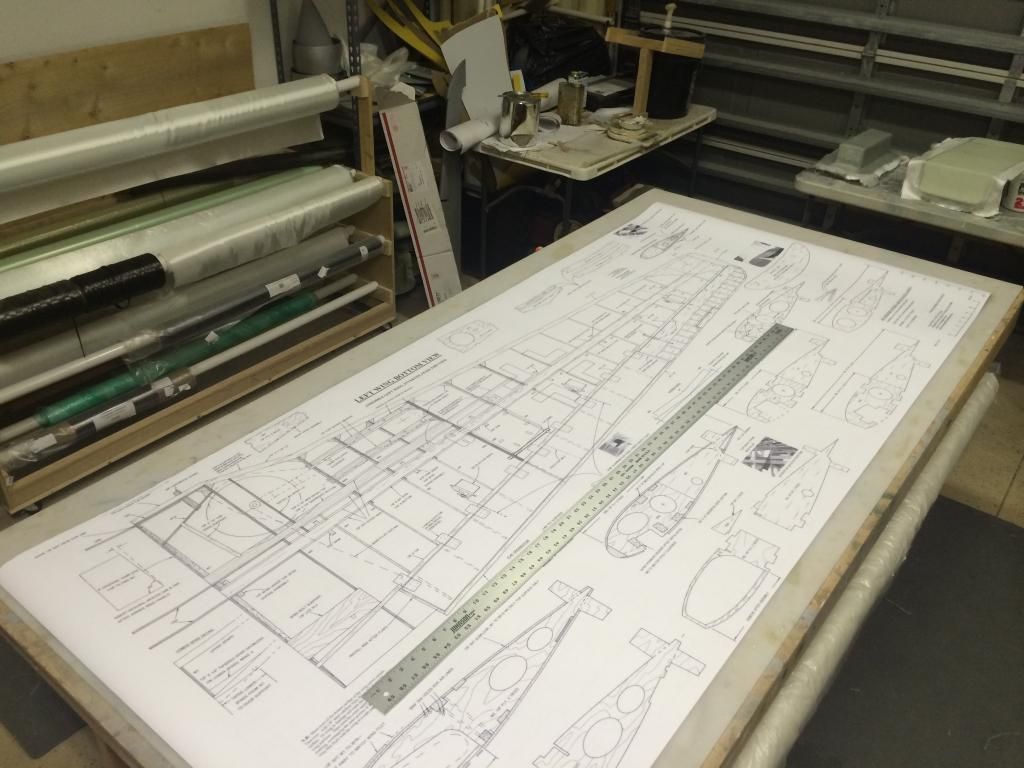
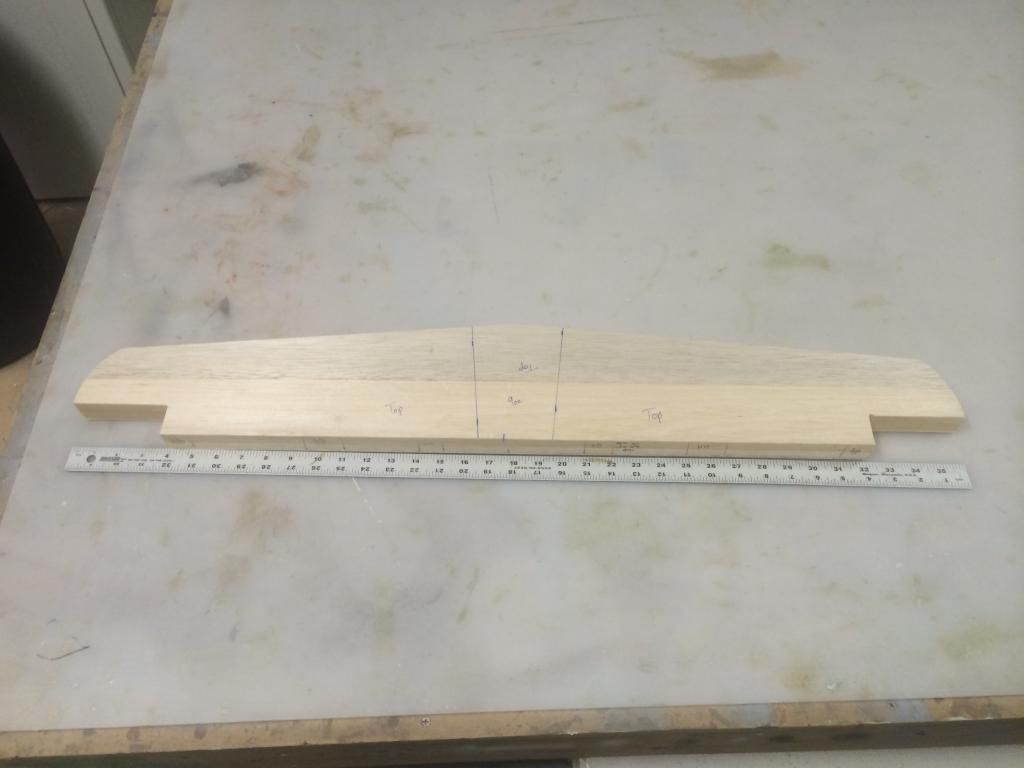
Then I took the plans, had then scanned and began converting some of the parts into CAD for laser cutting. Basically all of the wing parts are laser cut, while the fuselage parts and vertical stab parts were hand cut. The Horizontal stab ribs were modified to allow a 2 piece removable stab and cut on my CNC router. The stab was then built (over 2 months ago!) in about a 2 night stint.
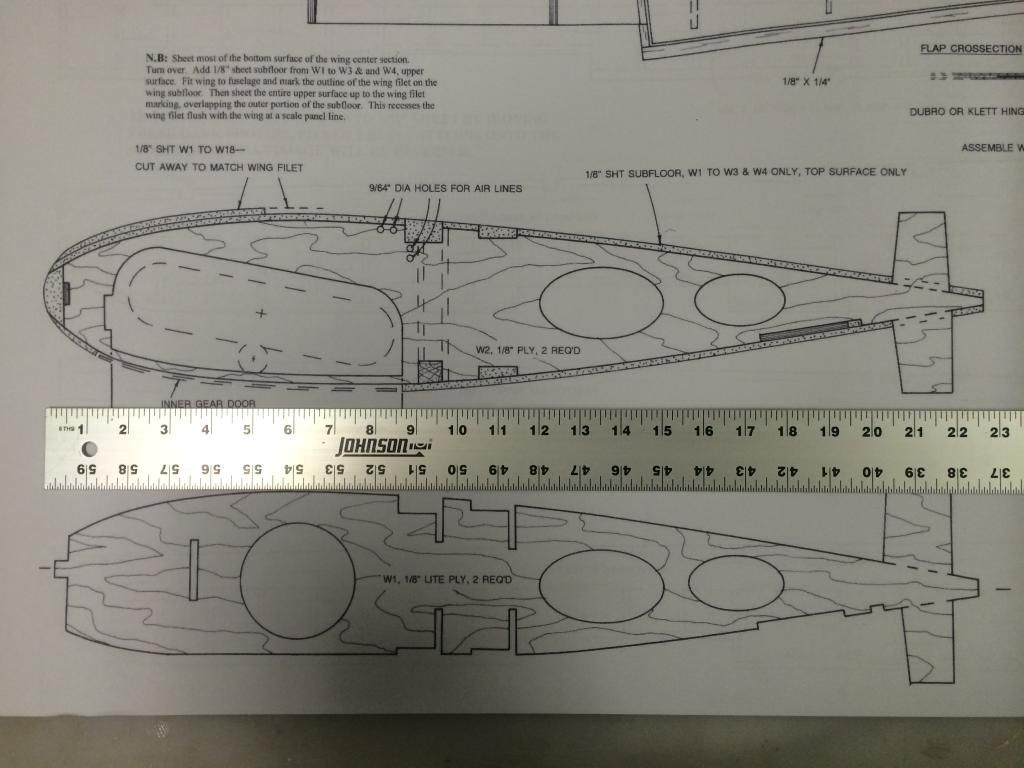
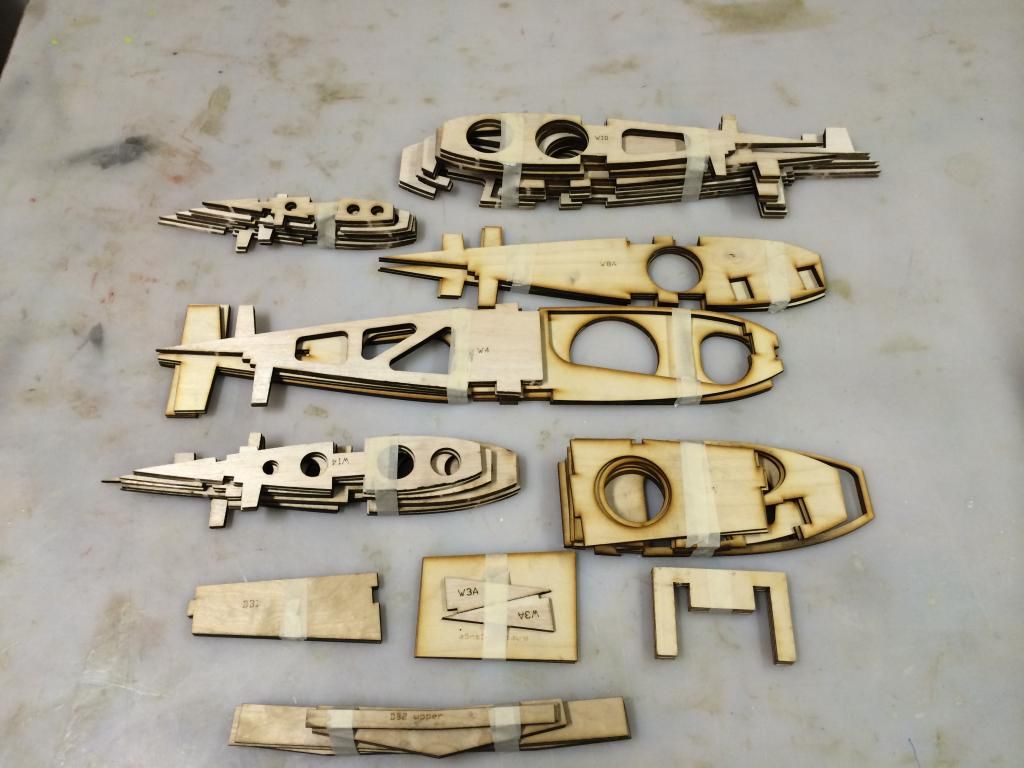
Then using some 1/4" Luan underlayment all of the fuselage and cowl bulkheads were cut:
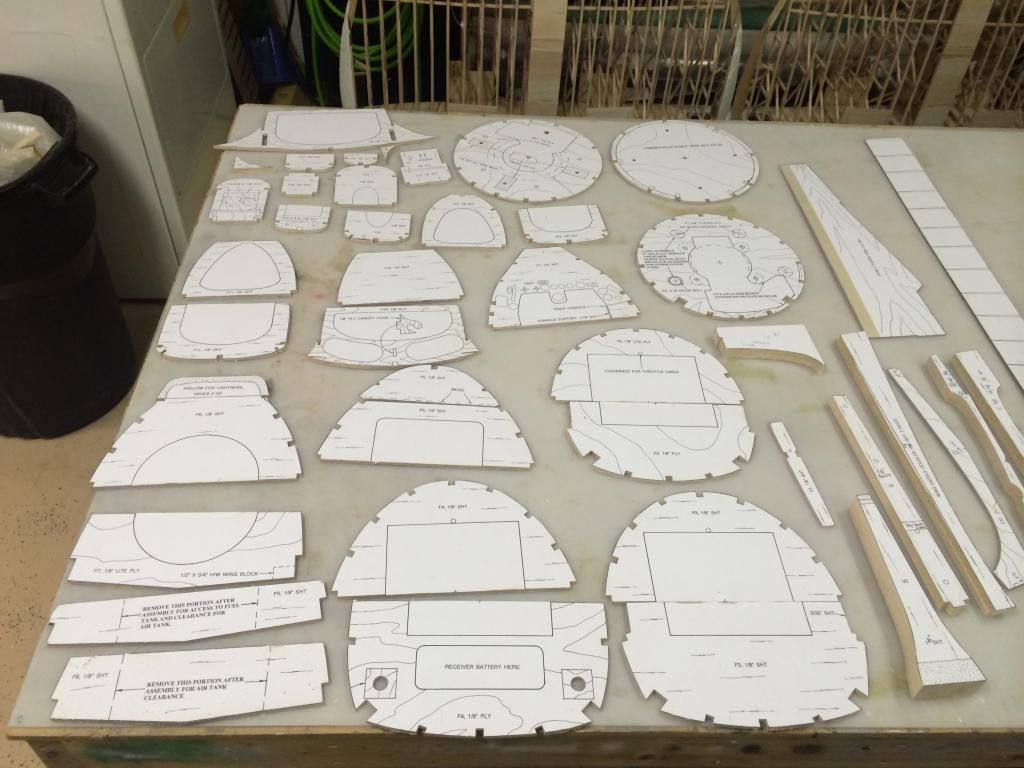
Then the balsa tail parts and thin ply portions were cut out to give a complete fuselage and tail section short kit:
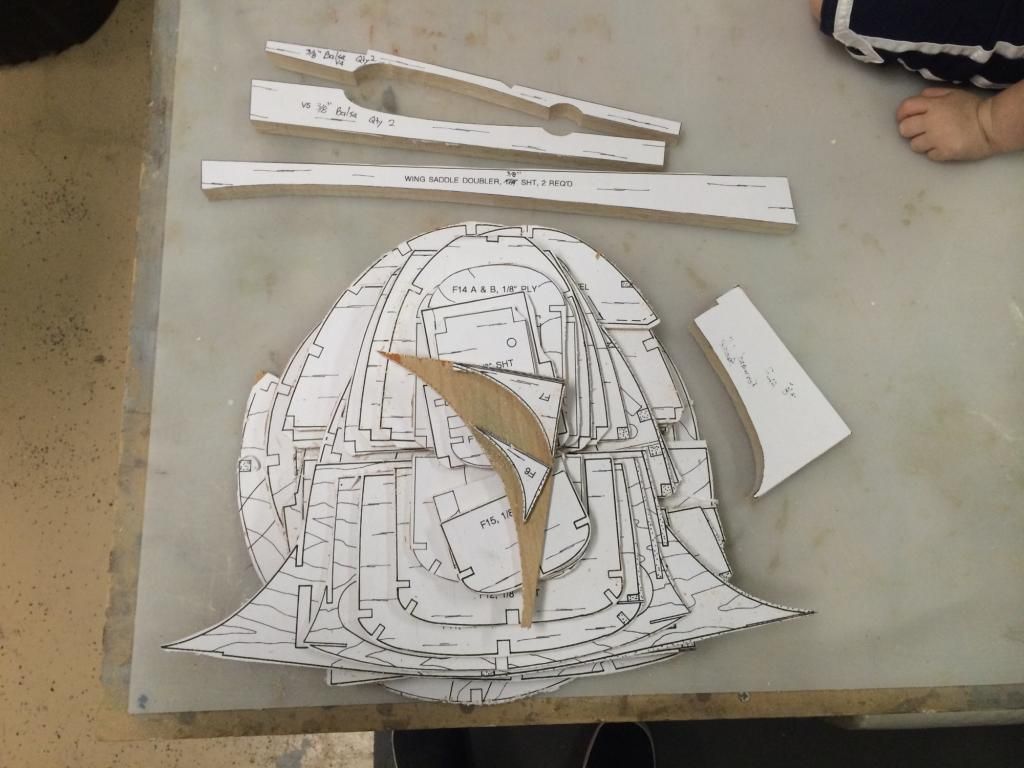
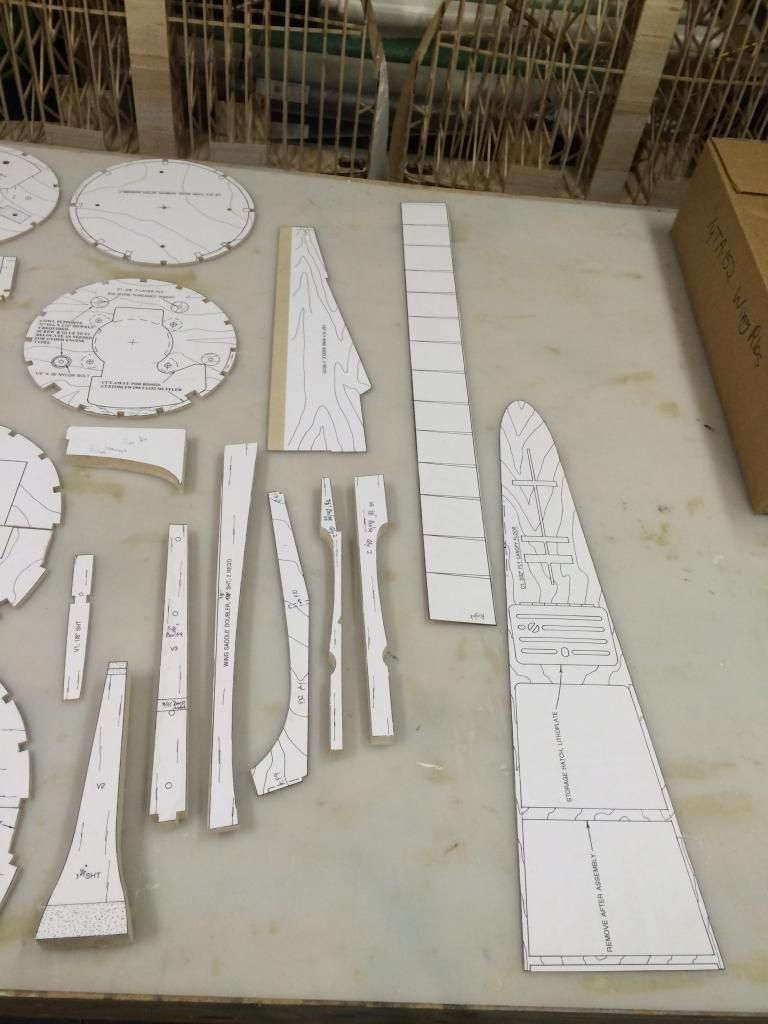
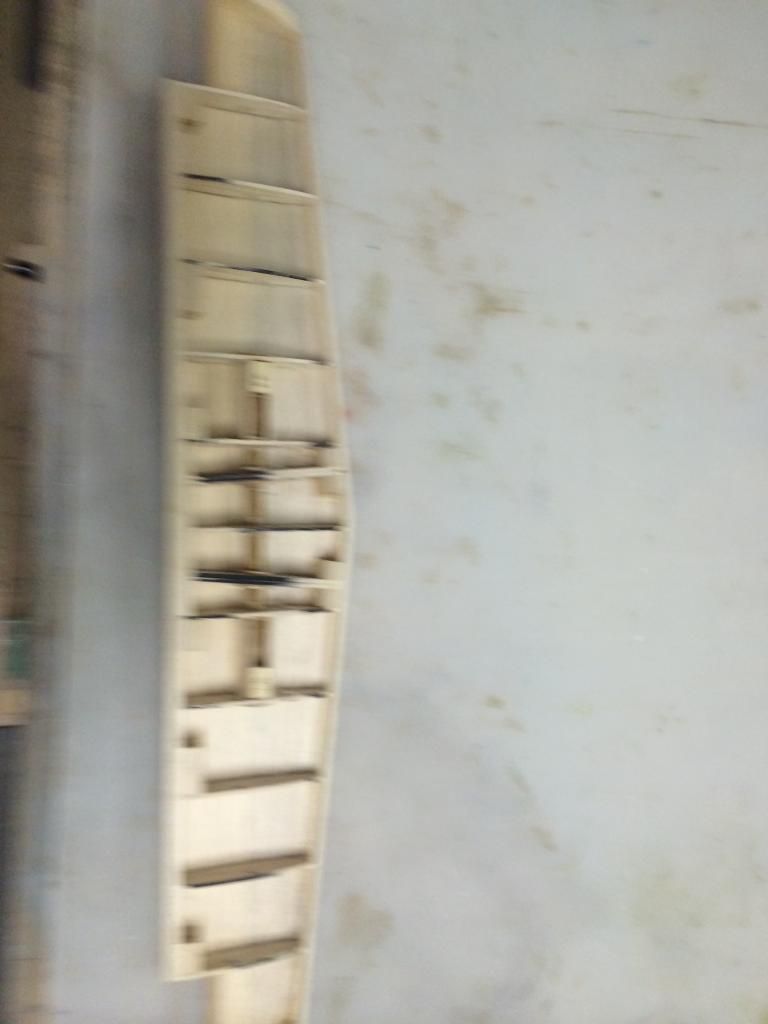
I also received my laser cut wing ribs a few weeks ago.. The balsa ribs are 3/16" with a 1/8" ply and 1/16" ply doublers to "sandwhich" the ribs:
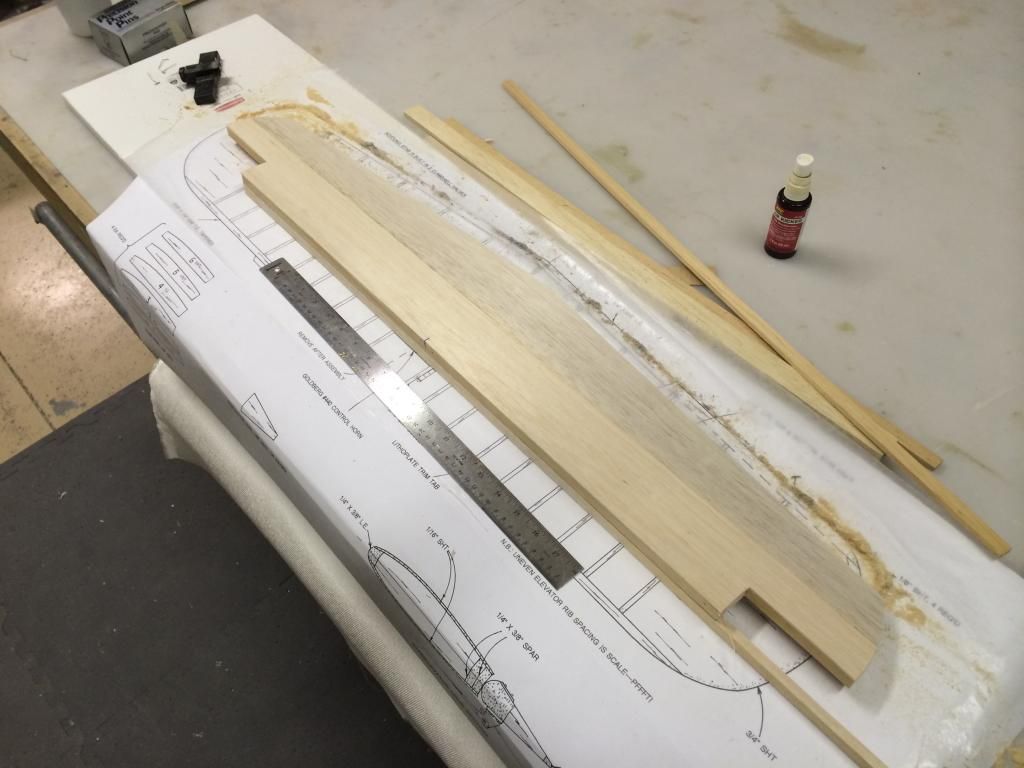
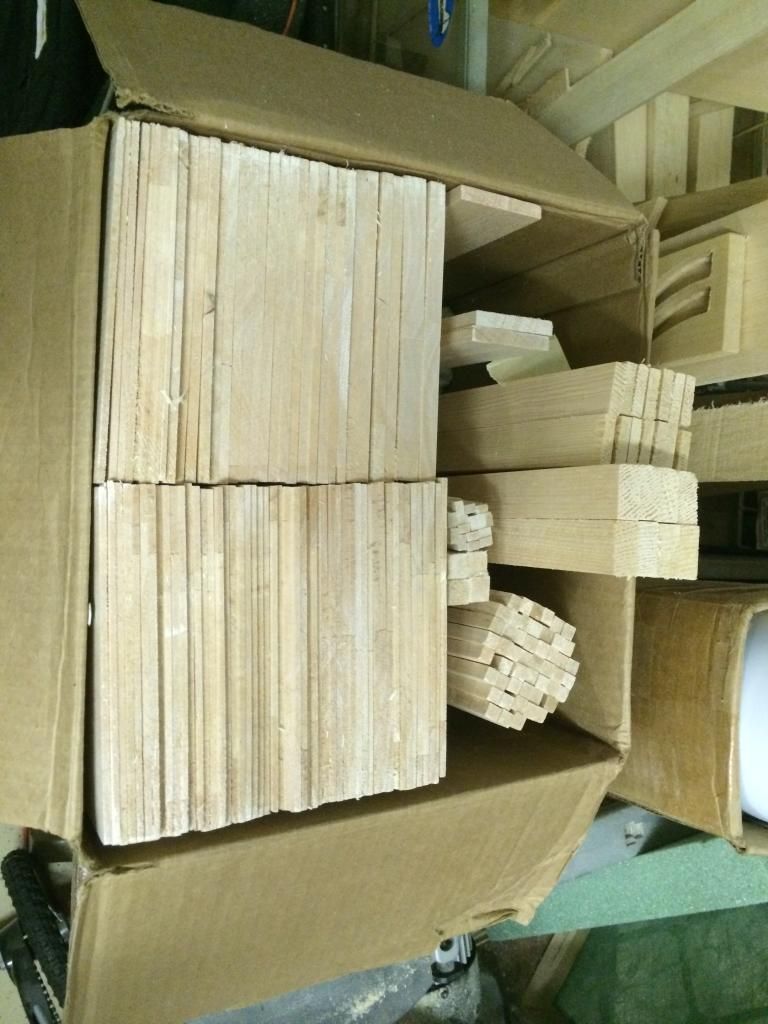
And a HUGE box of balsa arrived as well as some 1/4"x1" and 1/2"x1" Spruce for the wing spars:
That pretty much brings everyone up to date.. I'm waiting on the wing tubes and sockets to arrive, then I can begin building up the first wing panels so I can have all of the sub-assemblies needed for the fuselage.
Which brings me to the next bit of the project.. Since Evan is getting two and i'm building my own, i'm going to detail and mold the fuselage (which means Fiberglass short kits will be available, pricing already determined ) . In order to help offset some of the costs of the tooling and the landing gear design, i'm thinking of doing a kickstart project to help offset this cost. In this kickstart project, will be a few different rewards (a pair of 1/4 and 1/5 Rivet "burners), DVD how-to series of Detailed (much more detailed than what i put on youtube or build logs) plug construction, detailing, molding, vacuum bagging etc, and of course some TA-152 short kits (and short kits with landing gear)... If any of you guys are interested, i'd like to hear as the interest dictates whether i take the time to do them or not.
Also since the Pancakes are not done yet, this is a project that gets attention while the pancakes have stuff drying on them, so it will probably be early to mid fall before things Really start to progress onwards (i was hoping for late august, but life (mostly work) keeps getting in the way).
First up was getting the anderson plans and enlarging them 125%. This gives an airplane with the following dimensions:
142.5" wingspan
107.5" Long
Maybe 125% is a bit to big? NEVER! plus its a three piece wing, so it makes it doable


I also took a few nights to draw up a VERY detailed set of CNC machined main landing gear struts for the TA-152 as the Sierra gear just wouldn't look right IMO on this thing. Price wise, they will be within $100-200 of the Sierra gear and will have ALL of the gear door mounting bosses and detail you would see on the real strut machined into them.


For reference, i'm using the following two books:

And purchases this "blue-print" DVD set off ebay, it contains a good bit of prints, but not a complete set like you would expect by reading their description of it:

Then I took the plans, had then scanned and began converting some of the parts into CAD for laser cutting. Basically all of the wing parts are laser cut, while the fuselage parts and vertical stab parts were hand cut. The Horizontal stab ribs were modified to allow a 2 piece removable stab and cut on my CNC router. The stab was then built (over 2 months ago!) in about a 2 night stint.


Then using some 1/4" Luan underlayment all of the fuselage and cowl bulkheads were cut:

Then the balsa tail parts and thin ply portions were cut out to give a complete fuselage and tail section short kit:


I also received my laser cut wing ribs a few weeks ago.. The balsa ribs are 3/16" with a 1/8" ply and 1/16" ply doublers to "sandwhich" the ribs:

And a HUGE box of balsa arrived as well as some 1/4"x1" and 1/2"x1" Spruce for the wing spars:

That pretty much brings everyone up to date.. I'm waiting on the wing tubes and sockets to arrive, then I can begin building up the first wing panels so I can have all of the sub-assemblies needed for the fuselage.
Which brings me to the next bit of the project.. Since Evan is getting two and i'm building my own, i'm going to detail and mold the fuselage (which means Fiberglass short kits will be available, pricing already determined
) . In order to help offset some of the costs of the tooling and the landing gear design, i'm thinking of doing a kickstart project to help offset this cost. In this kickstart project, will be a few different rewards (a pair of 1/4 and 1/5 Rivet "burners), DVD how-to series of Detailed (much more detailed than what i put on youtube or build logs) plug construction, detailing, molding, vacuum bagging etc, and of course some TA-152 short kits (and short kits with landing gear)... If any of you guys are interested, i'd like to hear as the interest dictates whether i take the time to do them or not.Also since the Pancakes are not done yet, this is a project that gets attention while the pancakes have stuff drying on them, so it will probably be early to mid fall before things Really start to progress onwards (i was hoping for late august, but life (mostly work) keeps getting in the way).
 08-04-2014, 08:01 AM
#3
Lynn,
i think i do. The physical down lock for the gear is built into the retract mechanism, the scale downlock will be either a dummy or a working helper cylinder. The real 152 used a hydro-mechanical lock that locked the hydraulic cylinder in the extended position to lock the gear down. In the up position it used a electromechanical hook to hold it up like the rest of the 190 series
Thomas
08-04-2014, 08:04 PM
#4

Lynn,
i think i do. The physical down lock for the gear is built into the retract mechanism, the scale downlock will be either a dummy or a working helper cylinder. The real 152 used a hydro-mechanical lock that locked the hydraulic cylinder in the extended position to lock the gear down. In the up position it used a electromechanical hook to hold it up like the rest of the 190 series
Thomas
i think i do. The physical down lock for the gear is built into the retract mechanism, the scale downlock will be either a dummy or a working helper cylinder. The real 152 used a hydro-mechanical lock that locked the hydraulic cylinder in the extended position to lock the gear down. In the up position it used a electromechanical hook to hold it up like the rest of the 190 series
Thomas
I will be watching this build with interest. Also interested in your experience with the wing aspect of the build.
08-05-2014, 10:57 AM
#5
I am thinking of removing the Sierra downlink, and adding a dummy cylinder (with the correct angle) just for static judging, then re-installing the stock down link for the flying portion of competition.
I will be watching this build with interest. Also interested in your experience with the wing aspect of the build.
I will be watching this build with interest. Also interested in your experience with the wing aspect of the build.
08-05-2014, 12:11 PM
#6
Yah, that sucks. Unfortunately, Sierra is the only game in town really, unless you have the coin to manufacture them yourself. I am not willing to go that far, and seriously, the Sierra gear (other than the downlink) are scale enough for Top gun, or any of the other scale rules/events. (AMA Nats, Scale Masters). As My aircraft will be for competition, Swapping the downlink for static will suffice for now. I have not made enough of a name for myself (or slept with the right person  ) to get invited to Top gun yet.
) to get invited to Top gun yet.
08-05-2014, 12:40 PM
#7
Yah, that sucks. Unfortunately, Sierra is the only game in town really, unless you have the coin to manufacture them yourself. I am not willing to go that far, and seriously, the Sierra gear (other than the downlink) are scale enough for Top gun, or any of the other scale rules/events. (AMA Nats, Scale Masters). As My aircraft will be for competition, Swapping the downlink for static will suffice for now. I have not made enough of a name for myself (or slept with the right person ) to get invited to Top gun yet.
) to get invited to Top gun yet.
08-06-2014, 12:56 AM
#9
https://www.volks.co.jp/page_ex.jsp?...075&version=en Here is the book that accompanies the plastic model. I highly recommend both.
08-06-2014, 07:40 AM
#10
David Andersen commented to me that his 1/5th model would actually thermal at idle! I can only imagine that you could get an even lower wing loading going to 1/4 scale.
I have followed a lot of builds on this aircraft, and it could be quite possible, that other than David himself, there has not been one of these completed yet by another builder. I have most of the hard stuff out of the way. The trailing edge was very tricky for me. An area to pay attention too, and in fact, If I were to do another one, would probably re-engineer it.
I have followed a lot of builds on this aircraft, and it could be quite possible, that other than David himself, there has not been one of these completed yet by another builder. I have most of the hard stuff out of the way. The trailing edge was very tricky for me. An area to pay attention too, and in fact, If I were to do another one, would probably re-engineer it.
08-06-2014, 09:44 AM
#12
Senior Member
My Feedback: (1)

Join Date: May 2003
Location: Czech Republic
Posts: 634
Likes: 0
Received 0 Likes
on
0 Posts
I have one of this wings on the table on and off (actually starting second one).
Now with help of a friend who is much more skilled than I. The thing I would say - golden Brian Taylor.
Wing is really complicated and with the tabs on both sides of the ribs. Sometimes I would say the plan is not really clear as well.
Anyway I want it finished even if I will get Fliteskin wing and use the fuse I build already.
Back to the subject - Interesting build and good luck
08-06-2014, 10:10 AM
#14
What I did on my wing was to make a straight center line down the Leading edge stock. Then I made center marks on the fronts of the ribs, this way I new the L.E. was straight.
My wing is really straight, with the 2 degrees of washout at the tips. The tricky thing is that you start to build it upside down to accommodate the retract mounts etc. I am sure you will devise a method, but it is by far the most complicated wing, I have dealt with, in 30+ years.
My wing is really straight, with the 2 degrees of washout at the tips. The tricky thing is that you start to build it upside down to accommodate the retract mounts etc. I am sure you will devise a method, but it is by far the most complicated wing, I have dealt with, in 30+ years.
08-06-2014, 10:25 AM
#15
What I did on my wing was to make a straight center line down the Leading edge stock. Then I made center marks on the fronts of the ribs, this way I new the L.E. was straight.
My wing is really straight, with the 2 degrees of washout at the tips. The tricky thing is that you start to build it upside down to accommodate the retract mounts etc. I am sure you will devise a method, but it is by far the most complicated wing, I have dealt with, in 30+ years.
My wing is really straight, with the 2 degrees of washout at the tips. The tricky thing is that you start to build it upside down to accommodate the retract mounts etc. I am sure you will devise a method, but it is by far the most complicated wing, I have dealt with, in 30+ years.
08-06-2014, 11:44 AM
#18
Senior Member
My Feedback: (1)
Join Date: May 2003
Location: Czech Republic
Posts: 634
Likes: 0
Received 0 Likes
on
0 Posts
What I did on my wing was to make a straight center line down the Leading edge stock. Then I made center marks on the fronts of the ribs, this way I new the L.E. was straight.
My wing is really straight, with the 2 degrees of washout at the tips. The tricky thing is that you start to build it upside down to accommodate the retract mounts etc. I am sure you will devise a method, but it is by far the most complicated wing, I have dealt with, in 30+ years.
My wing is really straight, with the 2 degrees of washout at the tips. The tricky thing is that you start to build it upside down to accommodate the retract mounts etc. I am sure you will devise a method, but it is by far the most complicated wing, I have dealt with, in 30+ years.
The major problem was late installation of retracts mounts and I would say that some of the center ribs are not really correct in terms of wing tube location.
Or it was my kit cutter...
The confusing thing is when you have the wing done upside down it can be skinned only up to the main spar to avoid conflict with the rib tabs.
The shims under main spar is something special to Andersen designs too.
Can I ask - when you rotate the wing, the shims shall be still in place?
08-06-2014, 12:07 PM
#19
One thing that REALLY helped me out, is I have a copy of the construction article of the 1/6th scale, which was the original design. The 1/5th was blown up from that one. This construction article appeared in RCM, in the early 90's. If you have a hard time finding it, let me know, and I can send you a copy. all of the info you can obtain, is helpful.
Another thing to watch, With the dihedral set as per the plans, and the landing gear blocks set according to how my kit was cut, the landing gear do not sit as they should. By this I mean the wheels are not 90 degrees to the ground when extended. I am noticing that my wheels are going in too far, so my mounts need to be modified slightly to fix this. I will use a router and jig to accomplish this. I am mentioning this as an area to watch, as it was one of many problems I encountered. Not so much with the design Per se, but my kit cutter was terrible, and I have replaced almost everything they cut for me. Looks like you went the right way Invert, and just cut it yourself.
Another thing to watch, With the dihedral set as per the plans, and the landing gear blocks set according to how my kit was cut, the landing gear do not sit as they should. By this I mean the wheels are not 90 degrees to the ground when extended. I am noticing that my wheels are going in too far, so my mounts need to be modified slightly to fix this. I will use a router and jig to accomplish this. I am mentioning this as an area to watch, as it was one of many problems I encountered. Not so much with the design Per se, but my kit cutter was terrible, and I have replaced almost everything they cut for me. Looks like you went the right way Invert, and just cut it yourself.
08-06-2014, 01:17 PM
#20
One thing that REALLY helped me out, is I have a copy of the construction article of the 1/6th scale, which was the original design. The 1/5th was blown up from that one. This construction article appeared in RCM, in the early 90's. If you have a hard time finding it, let me know, and I can send you a copy. all of the info you can obtain, is helpful.
Another thing to watch, With the dihedral set as per the plans, and the landing gear blocks set according to how my kit was cut, the landing gear do not sit as they should. By this I mean the wheels are not 90 degrees to the ground when extended. I am noticing that my wheels are going in too far, so my mounts need to be modified slightly to fix this. I will use a router and jig to accomplish this. I am mentioning this as an area to watch, as it was one of many problems I encountered. Not so much with the design Per se, but my kit cutter was terrible, and I have replaced almost everything they cut for me. Looks like you went the right way Invert, and just cut it yourself.
Another thing to watch, With the dihedral set as per the plans, and the landing gear blocks set according to how my kit was cut, the landing gear do not sit as they should. By this I mean the wheels are not 90 degrees to the ground when extended. I am noticing that my wheels are going in too far, so my mounts need to be modified slightly to fix this. I will use a router and jig to accomplish this. I am mentioning this as an area to watch, as it was one of many problems I encountered. Not so much with the design Per se, but my kit cutter was terrible, and I have replaced almost everything they cut for me. Looks like you went the right way Invert, and just cut it yourself.
 08-06-2014, 08:40 PM
#22
I can do it buddy! I will have to redesign the retract mechanism for 1/5 scale, but we can get you going. It seems my gear has a pretty large demand in 1/5th scale, so once i get some free time away from work, ill work on the design for that.
Thomas
08-07-2014, 02:48 PM
#23
Member
Join Date: Aug 2011
Location: Texas TX
Posts: 70
Likes: 0
Received 0 Likes
on
0 Posts
I am thinking of removing the Sierra downlink, and adding a dummy cylinder (with the correct angle) just for static judging, then re-installing the stock down link for the flying portion of competition.
I will be watching this build with interest. Also interested in your experience with the wing aspect of the build.
I will be watching this build with interest. Also interested in your experience with the wing aspect of the build.
My idea is the same with regards to having a scale "static" retraction arm for the Sierra gear. A good looking one piece so it can support the weight...then switch it out for the functional flat one during flight. If you find a source I want to piggy-back on an order!
08-07-2014, 03:26 PM
#24
Grimmace -- Dude, I have been beating this drum, for my Vailly 190, for some time now! Right Thomas?! My idea is the same with regards to having a scale "static" retraction arm for the Sierra gear. A good looking one piece so it can support the weight...then switch it out for the functional flat one during flight. If you find a source I want to piggy-back on an order!
My idea is the same with regards to having a scale "static" retraction arm for the Sierra gear. A good looking one piece so it can support the weight...then switch it out for the functional flat one during flight. If you find a source I want to piggy-back on an order!Bimba air cylinders from McMaster Carr, but figured I did not want to pay that much for a functional cylinder, just for static.
08-07-2014, 07:16 PM
#25
Member
Join Date: Aug 2011
Location: Texas TX
Posts: 70
Likes: 0
Received 0 Likes
on
0 Posts
In all honesty, I was most likely going to scratch build something here from telescoping tubes etc., and adding any other detail to make it scale. At first I was looking at the
Bimba air cylinders from McMaster Carr, but figured I did not want to pay that much for a functional cylinder, just for static.
Bimba air cylinders from McMaster Carr, but figured I did not want to pay that much for a functional cylinder, just for static.