


1/4 Scale P-38
 01-25-2016, 01:10 PM
#1

Thread Starter
well guys for the past few years real life kicked in and I spent too much time drawing for others plus working a real job. I finally decided to work on 1 of my 2 life long bucket list projects. the first is a 3rd scale Grumman F3F I had started then sent what I had to Jerry Bates as he was abt to work on one for a private client so I will wait on those plans then enlarge them.
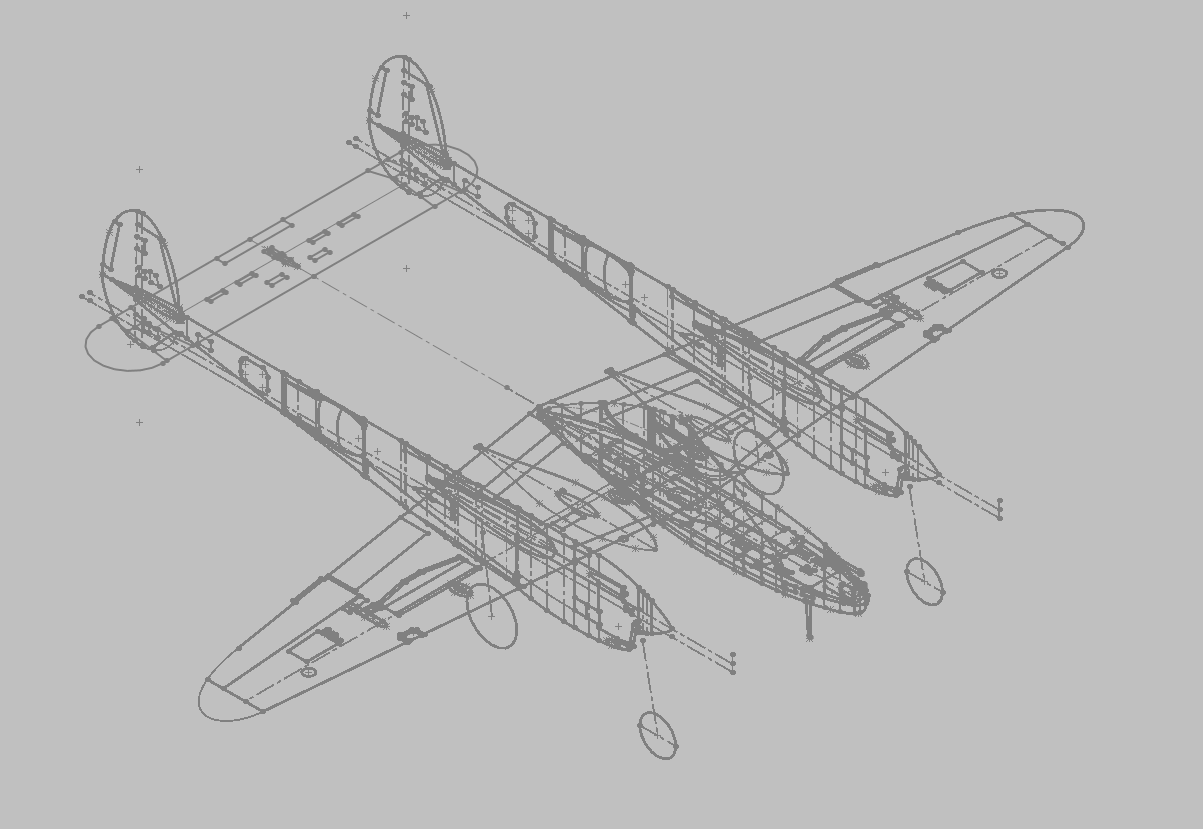
the second is the one I will be working on here a 1/4 scale P-38J-LO Lightning which I will show here from start to finish IE design stage through build.
I have access to 22k of factory drawings for it and will be using Leroy Weber's superscale drawings as the base drawings and Solidworks 2016 for drawing them up.
It will be fairly slow due to the complicated plane that it is. I had started once but after getting ahold of the factory drawings etc found several dimensions were off so will be starting from scratch.
I posted the Weber drawings and the factory drawings I downloaded so far on my site you can get them from the below links
http://www.proflooney.net/p-38_super...le_drawing.pdf
http://www.proflooney.net/P-38/p-38factorydrawings.rar
 01-25-2016, 01:22 PM
#4
Thread Starter
thanks last job I did was the full scale B-24 for the movie "Unbroken" the nice part is most of the stuff like wings etc was cgi so only had to really deal with the fuse ))
01-26-2016, 12:31 AM
#5
Thread Starter
Well got my outlines traced tonight. I used Leroy Webers drawings as a base and verified all dimensions with the factory drawings. I will probably start with the stab then move onto the wing

 01-26-2016, 09:25 AM
#7
Thread Starter
haha Hope you have plenty of patience. I am ok with certain planes drawing them up but the pod and booms gonna be a pain to get lofted up properly but we shall see
01-26-2016, 10:10 AM
#8
Thread Starter
the best I can make out for the wing washout is root rib has 2 deg pos incidence and the tip rib has 3 deg neg incidence which puts the tip at -1 incidence hmm
01-26-2016, 01:41 PM
#9
Thread Starter
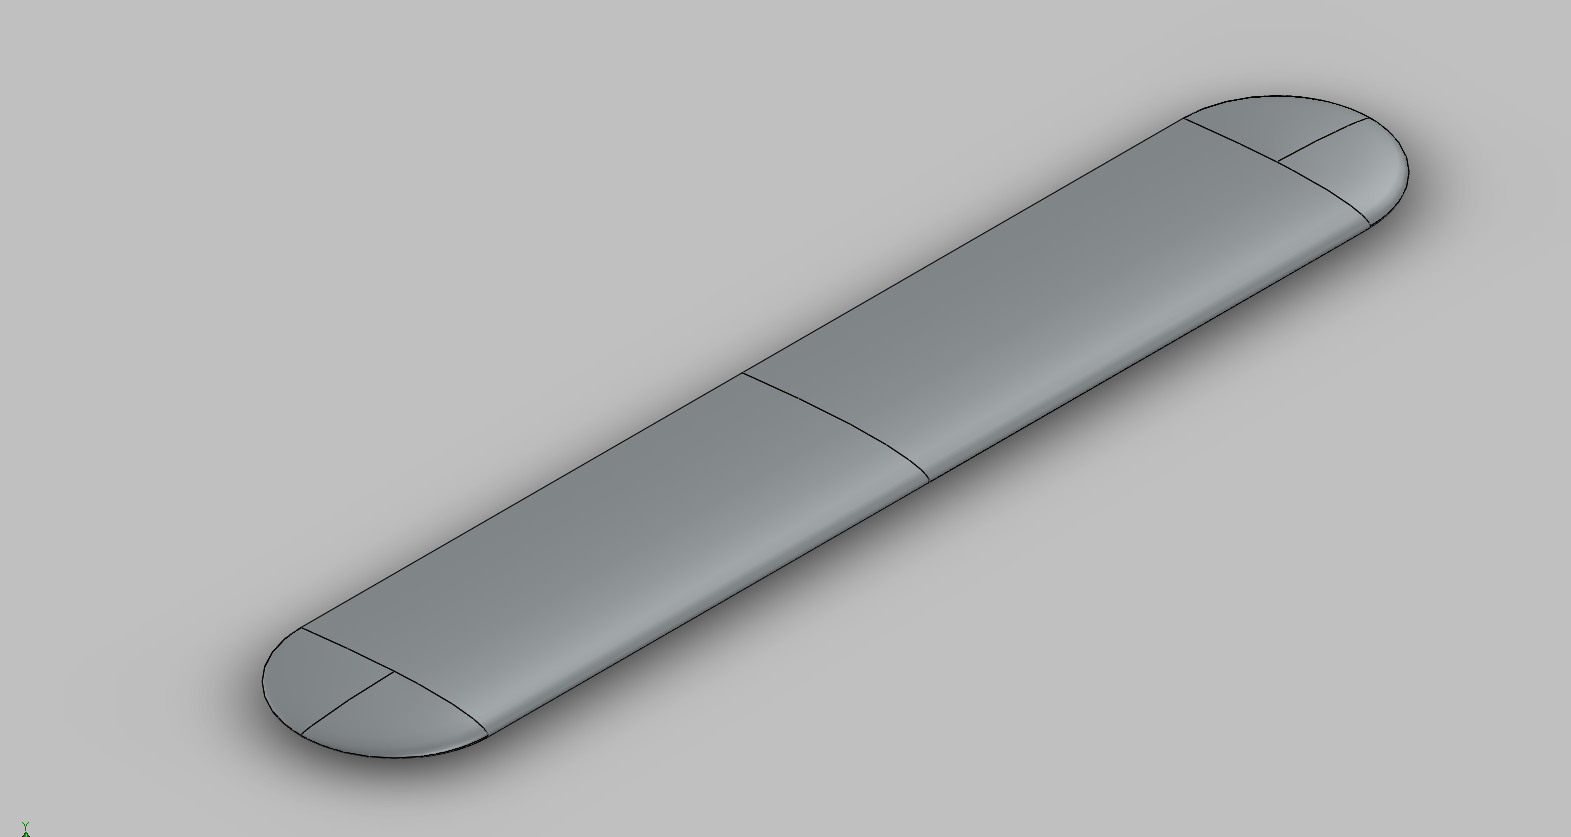
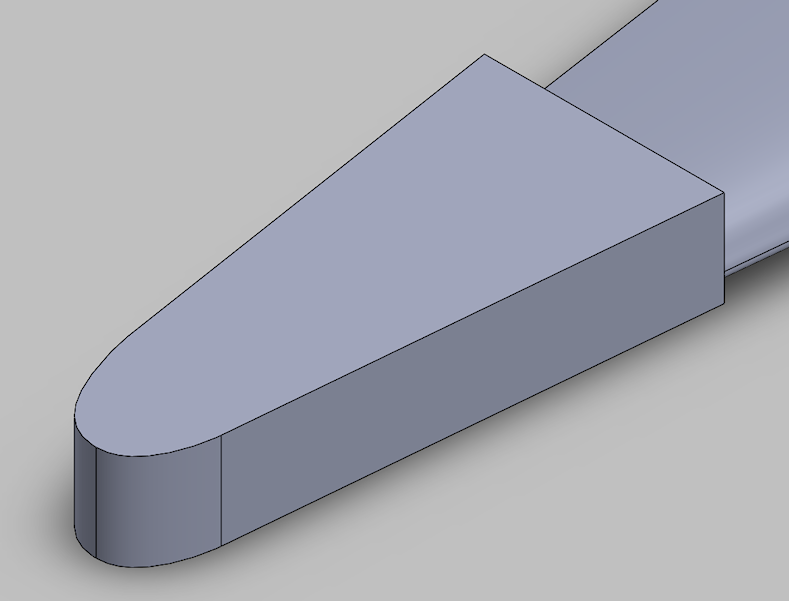
Ok abt time to get ready for work but got the stab lofted. tonight when I get home I will work on the framing and elevator. I added a ton more than normal Guides to it to ensure everything was straight
01-26-2016, 08:56 PM
#10
My Feedback: (60)
Join Date: Dec 2001
Location: Litchfield Park,
AZ
Posts: 7,677
Likes: 0
Received 25 Likes
on
23 Posts
For a grand total of 5 degrees of wash out which is a HUGE amount and, IMHO, will probably be very noticeable. I generally use somewhere around 1.5-2 degrees and I don't think I would ever use more than 3 degrees in an extreme case. Just my .02 cents of course.
01-27-2016, 03:23 PM
#11
Thread Starter
Well tonight I got the formers made for the stab will do the rest the framing tonight and work on the elev.
yea chad I usually like to zero it out so will do the 2 deg pos to the outer boom then will set the tip to -2 so I have a zeroed out washout. I talked to Jerry Bates today and we discussed what drawings showed etc and came to conclusion that zeroing it out would be the best course of action. the actual aircraft had an extreme washout built in but we dont need quite as much. also I think you misunderstood my meaning earlier when i said -3 deg that was from the 2 deg incidence not from zero so that would have only been a difference of 3 degrees so we going to lower it to 2 degrees.
yea chad I usually like to zero it out so will do the 2 deg pos to the outer boom then will set the tip to -2 so I have a zeroed out washout. I talked to Jerry Bates today and we discussed what drawings showed etc and came to conclusion that zeroing it out would be the best course of action. the actual aircraft had an extreme washout built in but we dont need quite as much. also I think you misunderstood my meaning earlier when i said -3 deg that was from the 2 deg incidence not from zero so that would have only been a difference of 3 degrees so we going to lower it to 2 degrees.
01-28-2016, 12:24 PM
#14
Thread Starter
Well I got started on the wing. I am not very good designing WWII planes from the ground up I am more in the WWI category or modifying other designs. This plane has me cussing like a sailor to get everything lined up and hoping it works then having to redo it. so looks like I finally at least have the root wing figured out
01-29-2016, 01:30 AM
#17
Thread Starter
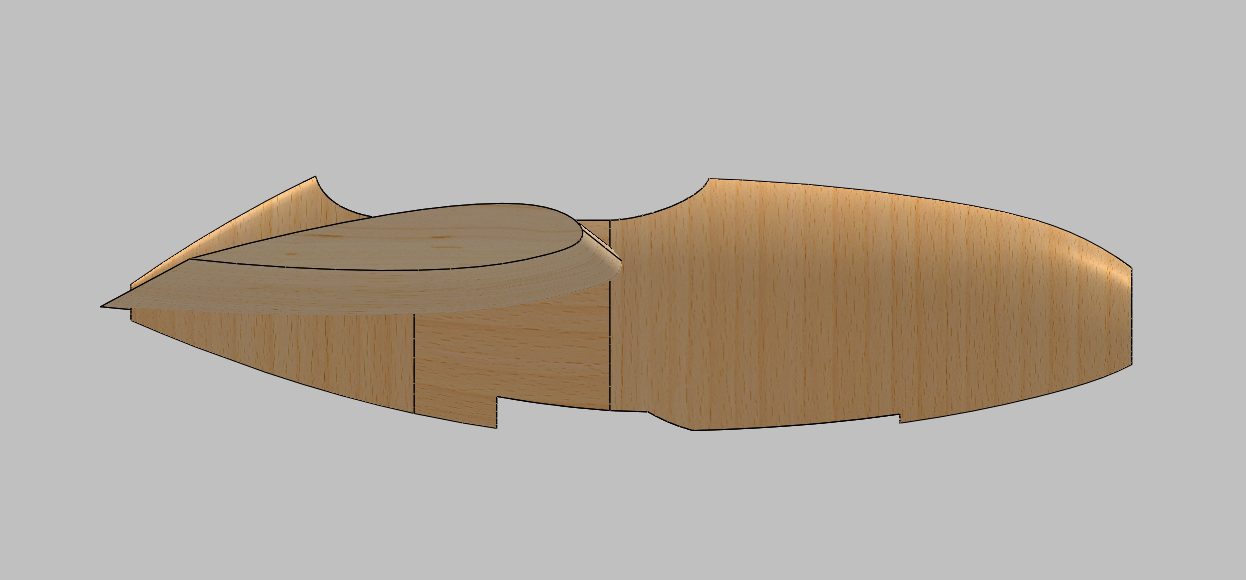
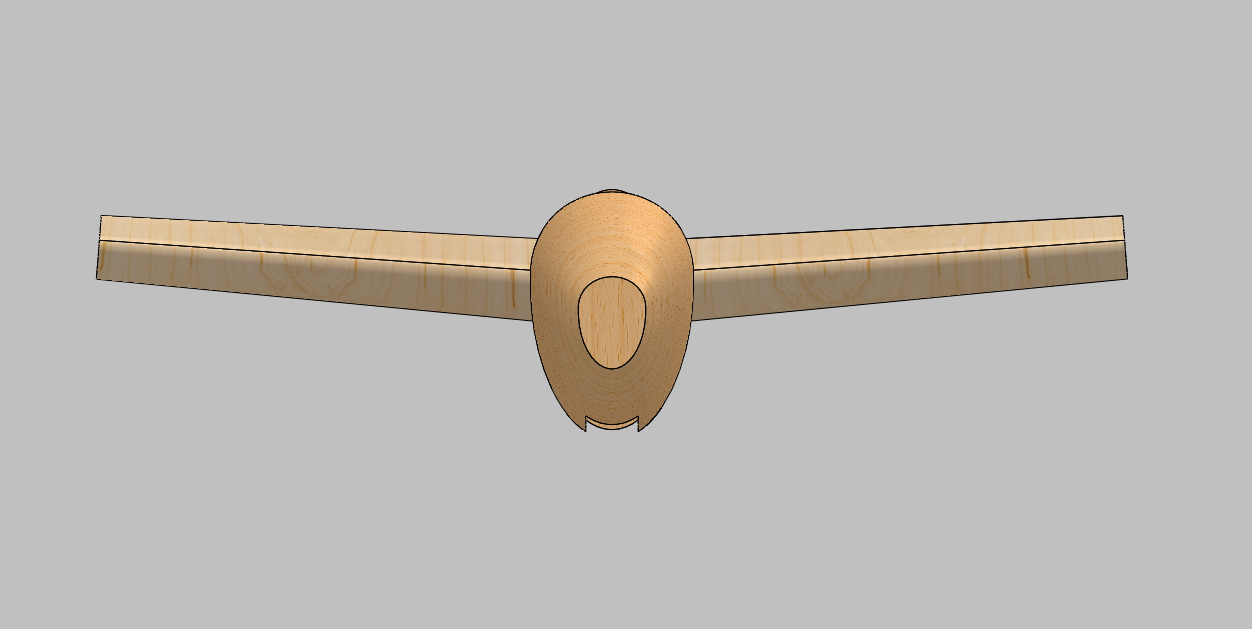
Well got the Pod lofted and am happy with it as it turned out really well. tomorrow will make a few formers and wing ribs to get it started and work out how best to frame it so I can have a full cockpit


02-02-2016, 01:56 PM
#18
Thread Starter
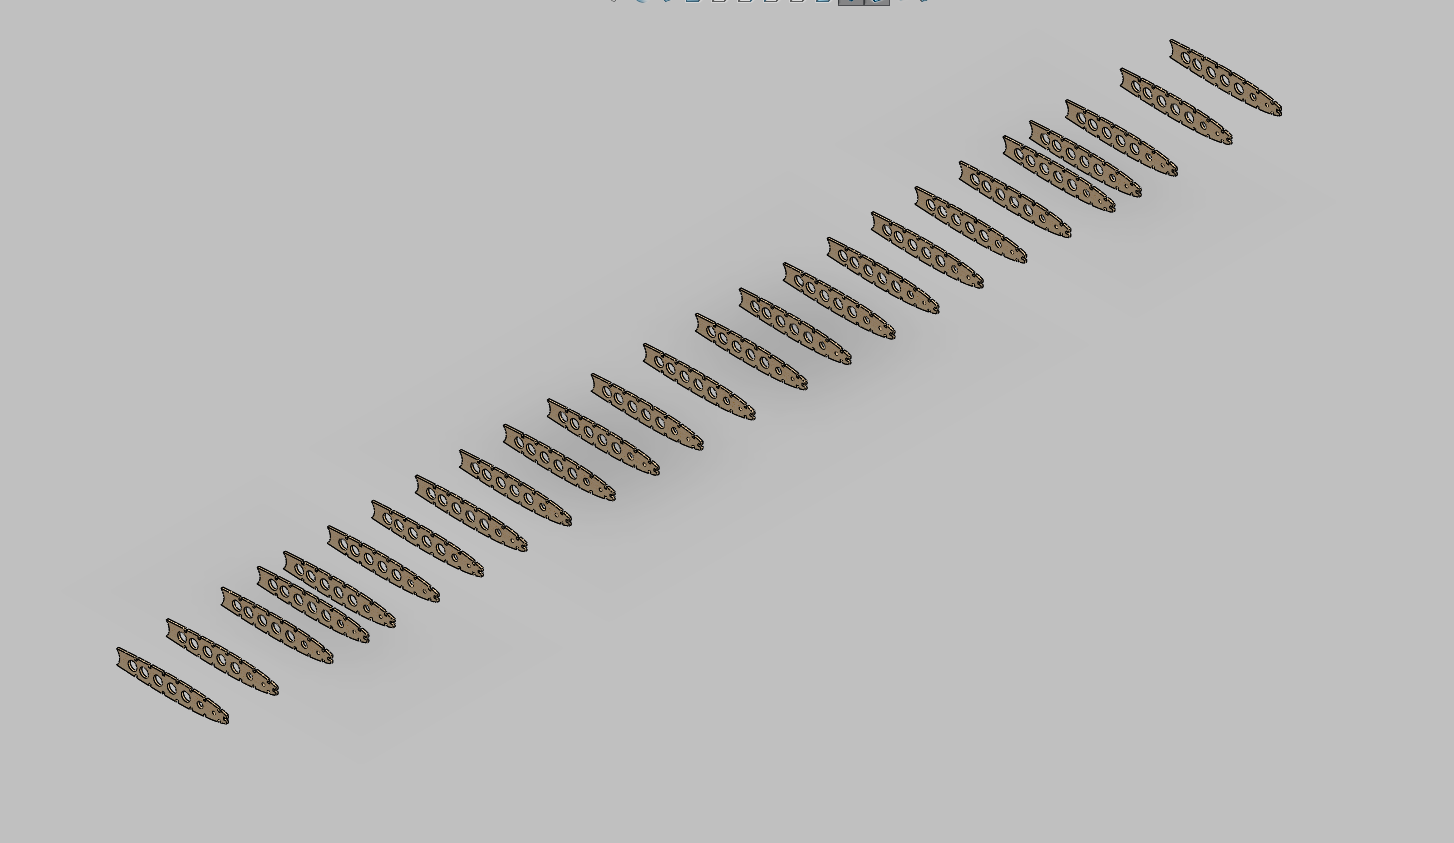
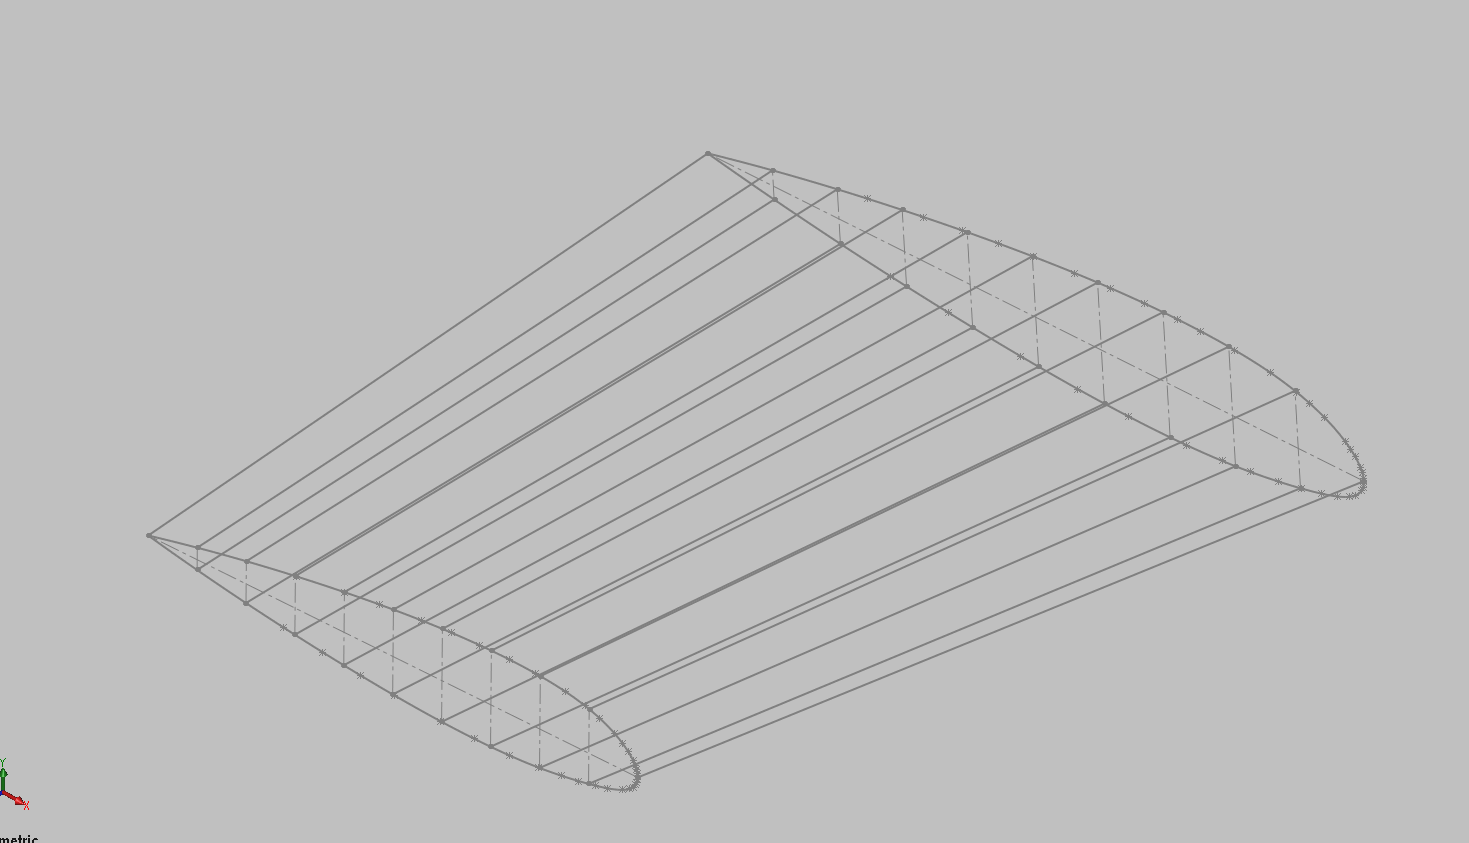
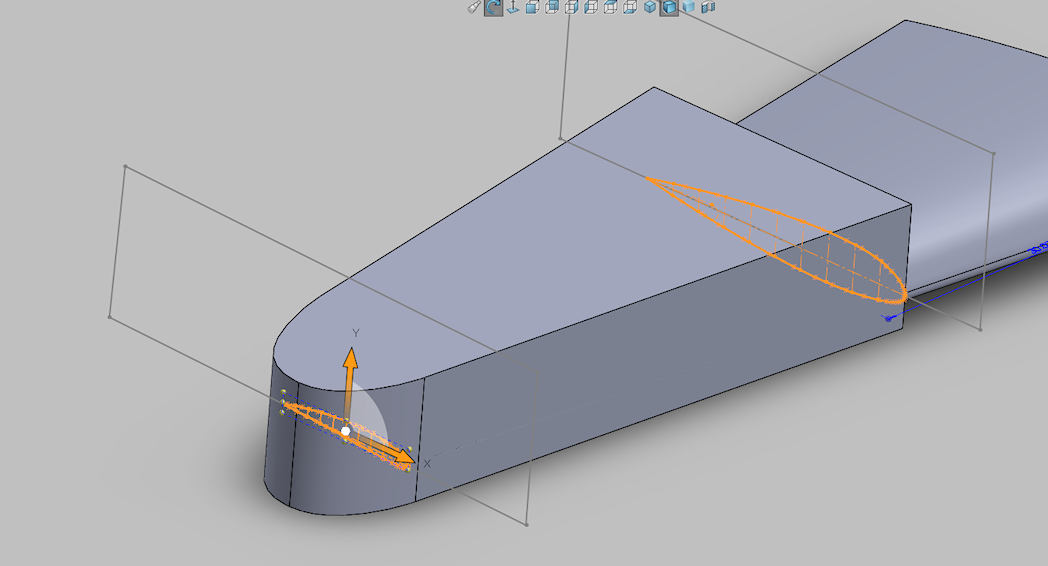
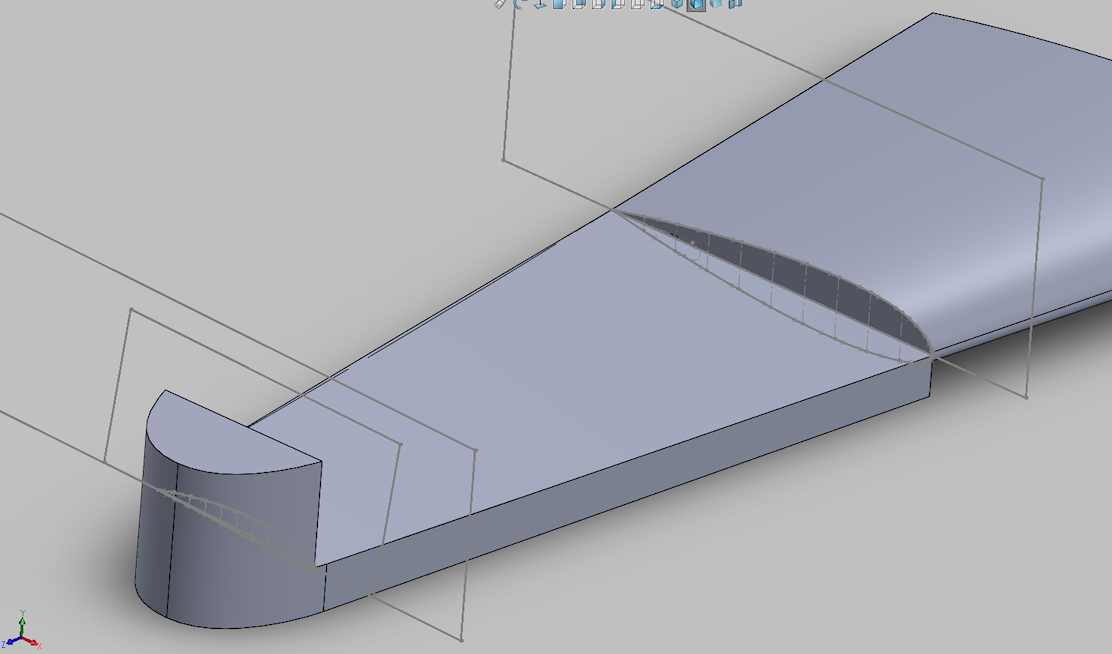
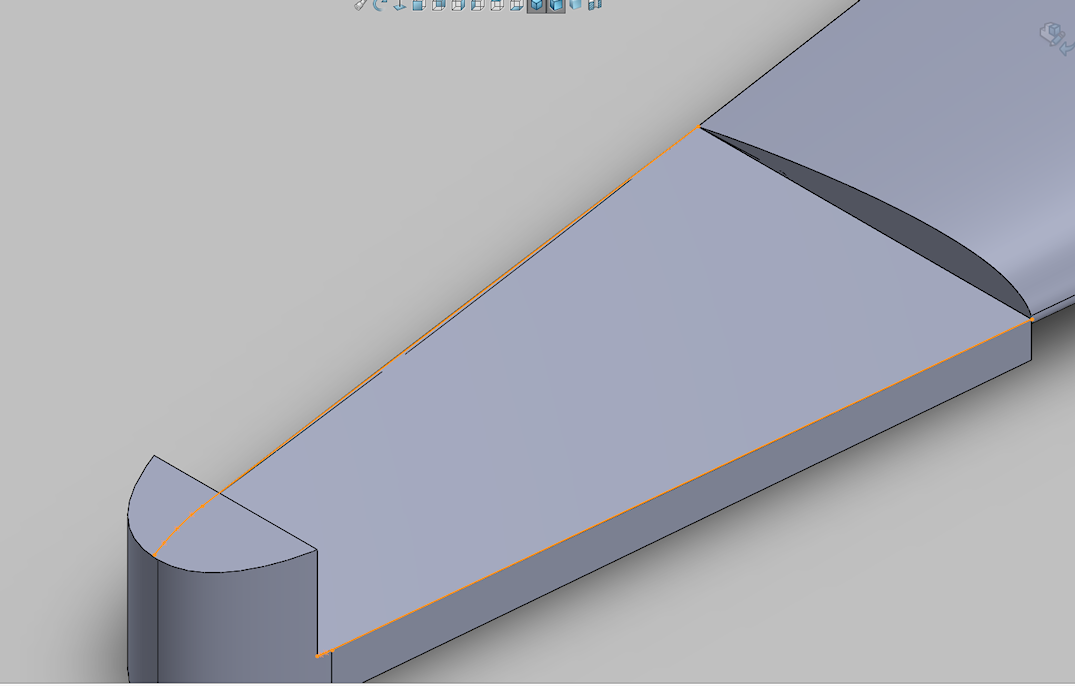
Ok guys using some great ingenuity I got the wing lofted. for those that use solidworks and want to know how I did it Here is what I did.
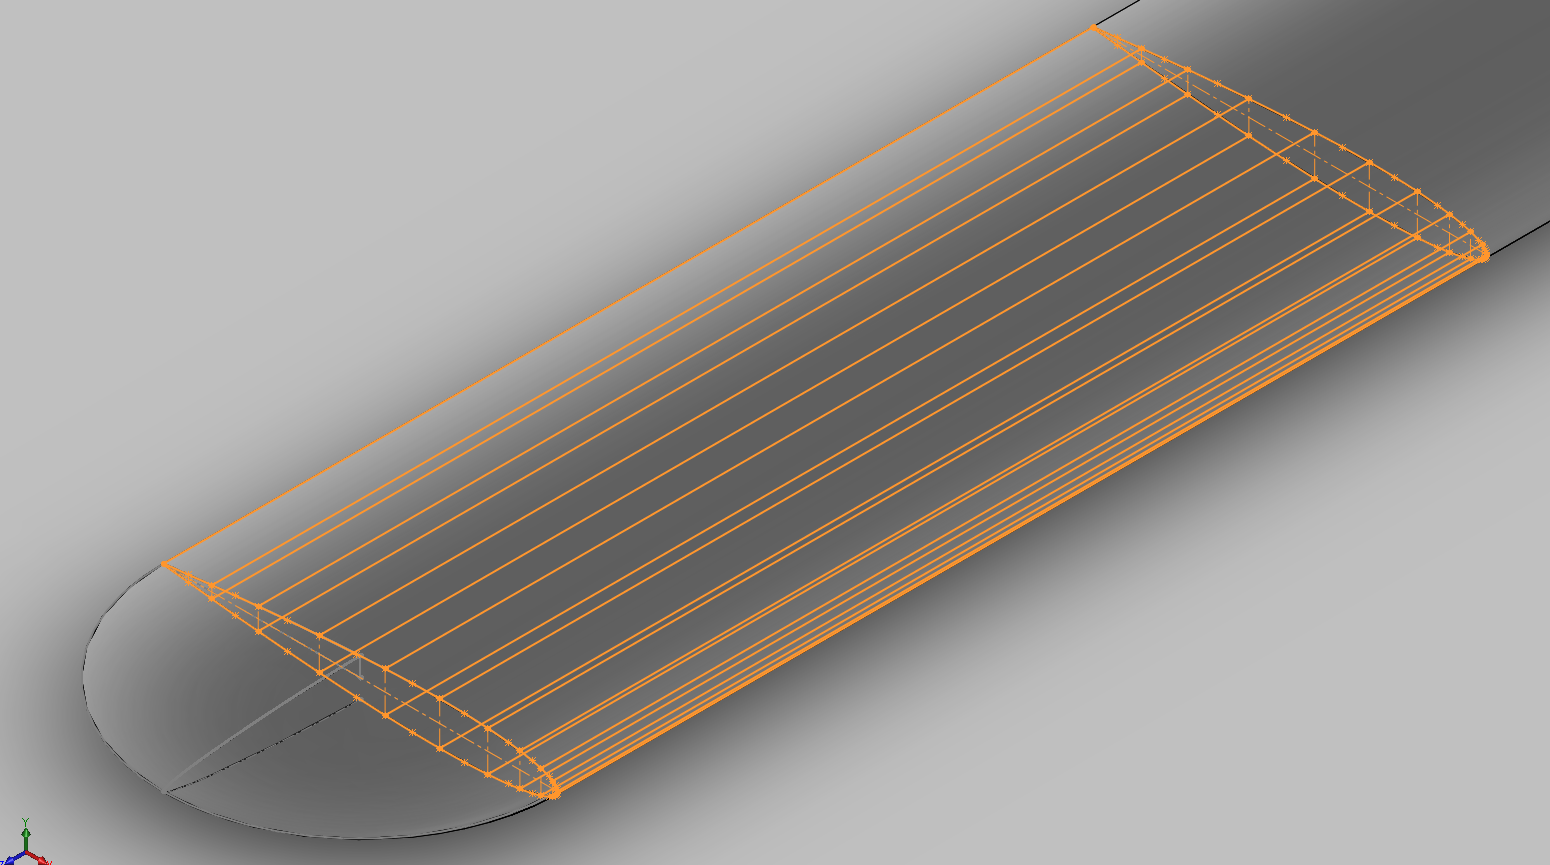
the hardest part on lofting some wings is that once you throw in the washout on your loft it is really hard to get the guide curves at the proper angles etc. now when setting up for the loft you need the outline of the wing to lay it out. now here is the trick. You Need to extrude the wing outlines. this gives the shape to your guides in the correct place. but that doesnt help you much yet. Now you have your root and tip rib in the proper locations for lofting. what you need to do is that the centerline of each rim and use it to do a lofted cut between the two. this will give you a warped surface matching your washout.
Now that you have that loft cut out you use the edges to create a 3D sketch to give you your guides at the proper angles. it sounds complicated but once you see it it is super easy so I will show some screenshots in the order I described above.
02-04-2016, 07:06 AM
#20
My Feedback: (2)
I am following your build with great interest. I just started learning 3D drawing and building a 3 axis CNC router to make molds and parts. The P-38 is my favorite WWII airplane. My first project will be a T-33 and a P-38 is on my want list. Thank you for taking the tie to document your build.
02-04-2016, 09:32 AM
#21
Thread Starter
thanks sid. im on a short break til sunday as wifes dads home from hospital. he hurt leg earlier this yr and they put him in rehab inpatient so til sunday i been watching over him to be sure he gets round ok. but sun i will take the shapes i got from my wing loft and start framing up the wing
02-10-2016, 11:05 AM
#24
Thread Starter
Ok guys here is todays numbers for anyone wanting to watch me draw on these plans. also guys in the little join me bar next to the head icon is a chat bubble in case you want to chat or have a question
https://join.me/569-129-138
https://join.me/569-129-138
