Go Back  RCU Forums > RC Airplanes > RC Warbirds and Warplanes
Reload this Page >

Fokker RC 1/4 FW 190a

Community
Search
Notices
RC Warbirds and Warplanes Discuss rc warbirds and warplanes in this forum.

Fokker RC 1/4 FW 190a

Thread Tools
 
Search this Thread
 
Old 02-18-2018, 10:08 AM
  #76  
tfarmer96
Thread Starter
 
tfarmer96's Avatar
 
Join Date: Nov 2005
Location: Wylie, TX
Posts: 1,969
Received 0 Likes on 0 Posts
Default

While I'm working up front might as well get the baffles done
Attached Thumbnails Click image for larger version

Name:	DSCF3454.jpg
Views:	104
Size:	105.8 KB
ID:	2255074   Click image for larger version

Name:	DSCF3455.jpg
Views:	85
Size:	127.1 KB
ID:	2255075   Click image for larger version

Name:	DSCF3456.jpg
Views:	76
Size:	135.6 KB
ID:	2255076   Click image for larger version

Name:	DSCF3458.jpg
Views:	68
Size:	98.8 KB
ID:	2255077   Click image for larger version

Name:	DSCF3459.jpg
Views:	53
Size:	90.3 KB
ID:	2255078   Click image for larger version

Name:	DSCF3461.jpg
Views:	53
Size:	96.8 KB
ID:	2255079   Click image for larger version

Name:	DSCF3462.jpg
Views:	59
Size:	104.0 KB
ID:	2255080  
Old 02-18-2018, 07:22 PM
  #77  
tfarmer96
Thread Starter
 
tfarmer96's Avatar
 
Join Date: Nov 2005
Location: Wylie, TX
Posts: 1,969
Received 0 Likes on 0 Posts
Default

And I'm down to the final part.
Attached Thumbnails Click image for larger version

Name:	DSCF3463.jpg
Views:	60
Size:	153.1 KB
ID:	2255131   Click image for larger version

Name:	DSCF3464.jpg
Views:	60
Size:	130.7 KB
ID:	2255132   Click image for larger version

Name:	DSCF3465.jpg
Views:	60
Size:	136.1 KB
ID:	2255133   Click image for larger version

Name:	DSCF3467.jpg
Views:	60
Size:	137.6 KB
ID:	2255134   Click image for larger version

Name:	DSCF3468.jpg
Views:	61
Size:	131.9 KB
ID:	2255135   Click image for larger version

Name:	DSCF3469.jpg
Views:	69
Size:	132.6 KB
ID:	2255136  
Old 02-19-2018, 07:44 AM
  #78  
BobH
My Feedback: (2)
 
Join Date: Mar 2003
Location: Springfield, VA,
Posts: 8,049
Received 21 Likes on 21 Posts
Default

Good job there. You have the engine offset and properly baffled.
Old 02-27-2018, 06:09 PM
  #79  
tfarmer96
Thread Starter
 
tfarmer96's Avatar
 
Join Date: Nov 2005
Location: Wylie, TX
Posts: 1,969
Received 0 Likes on 0 Posts
Default

Ok got the DLA 128 all run in this weekend. I hooked up my Futaba 18sz with temp sensors on all the jugs.


Old 02-27-2018, 06:26 PM
  #80  
tfarmer96
Thread Starter
 
tfarmer96's Avatar
 
Join Date: Nov 2005
Location: Wylie, TX
Posts: 1,969
Received 0 Likes on 0 Posts
Default

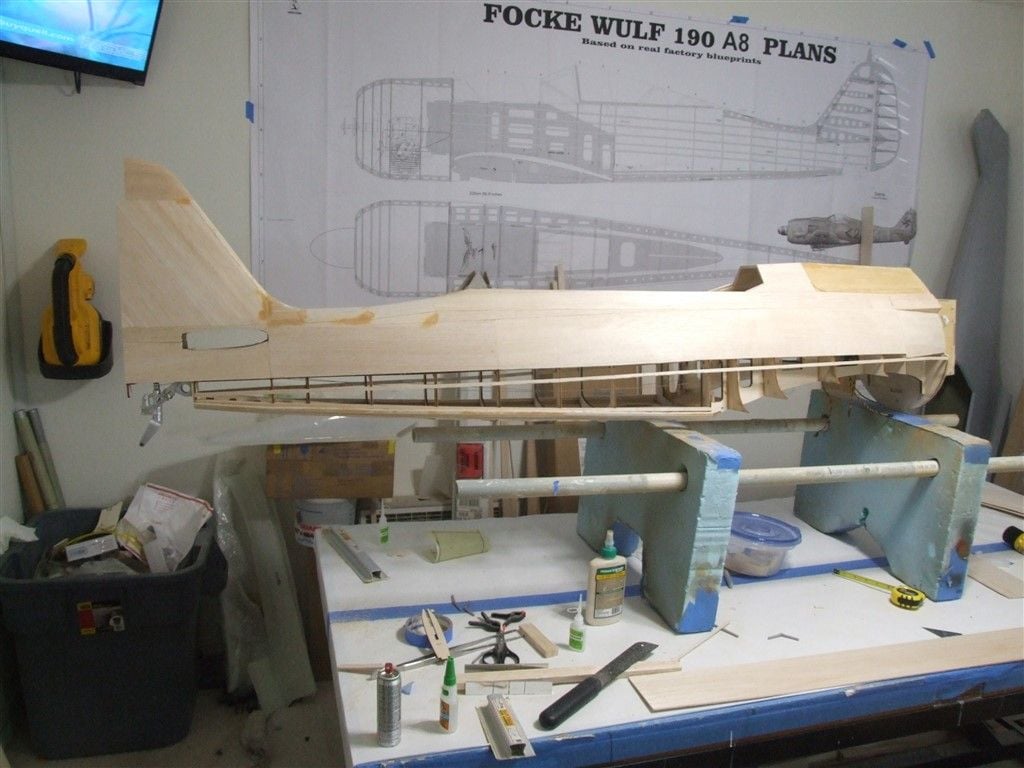
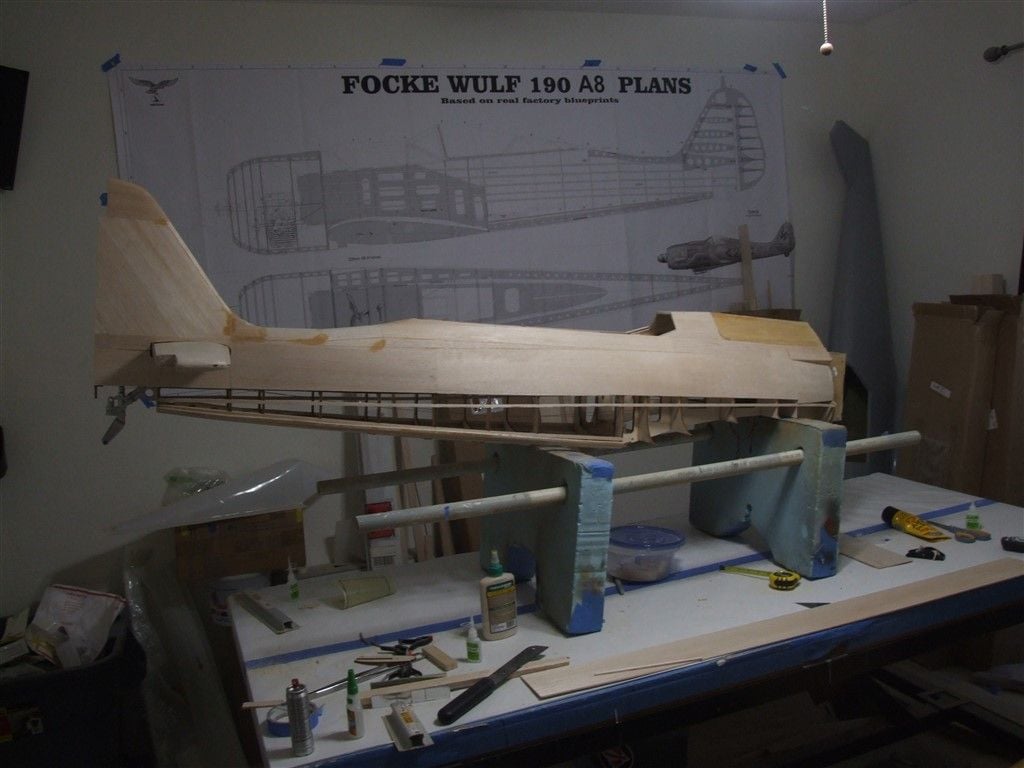
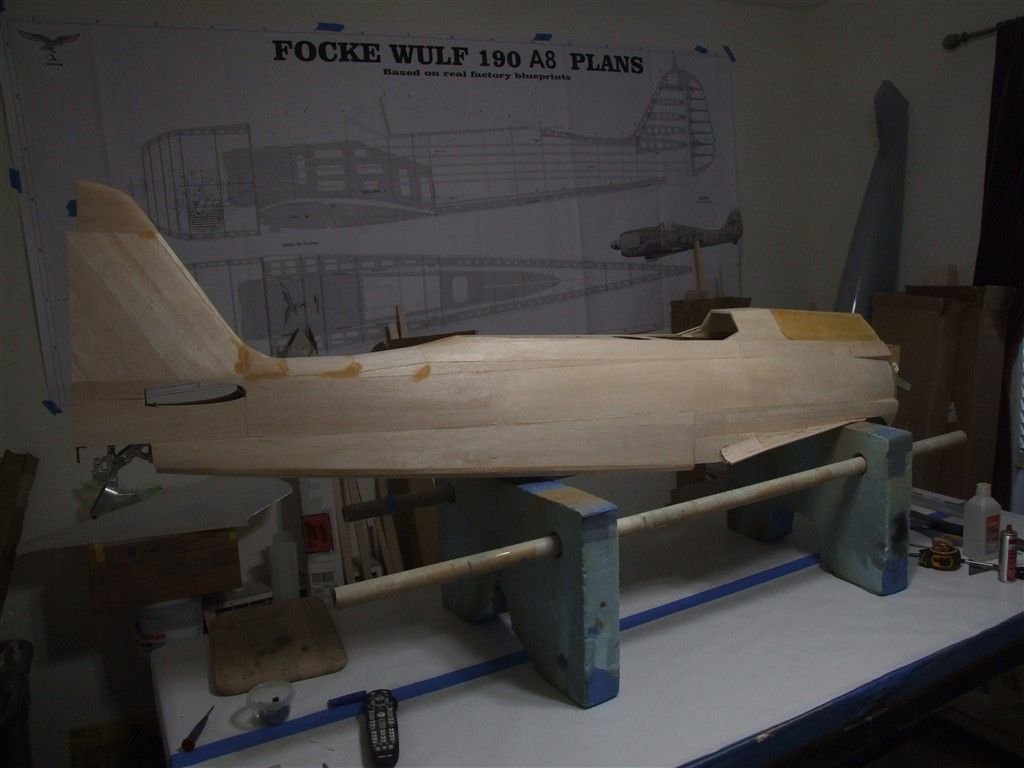
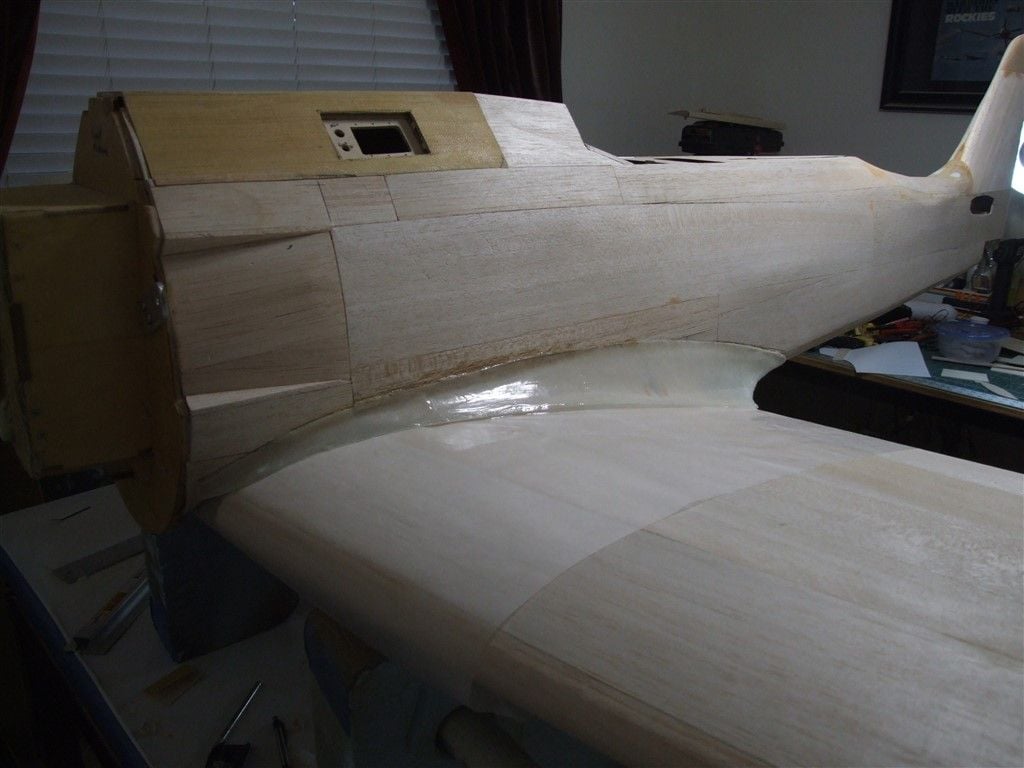
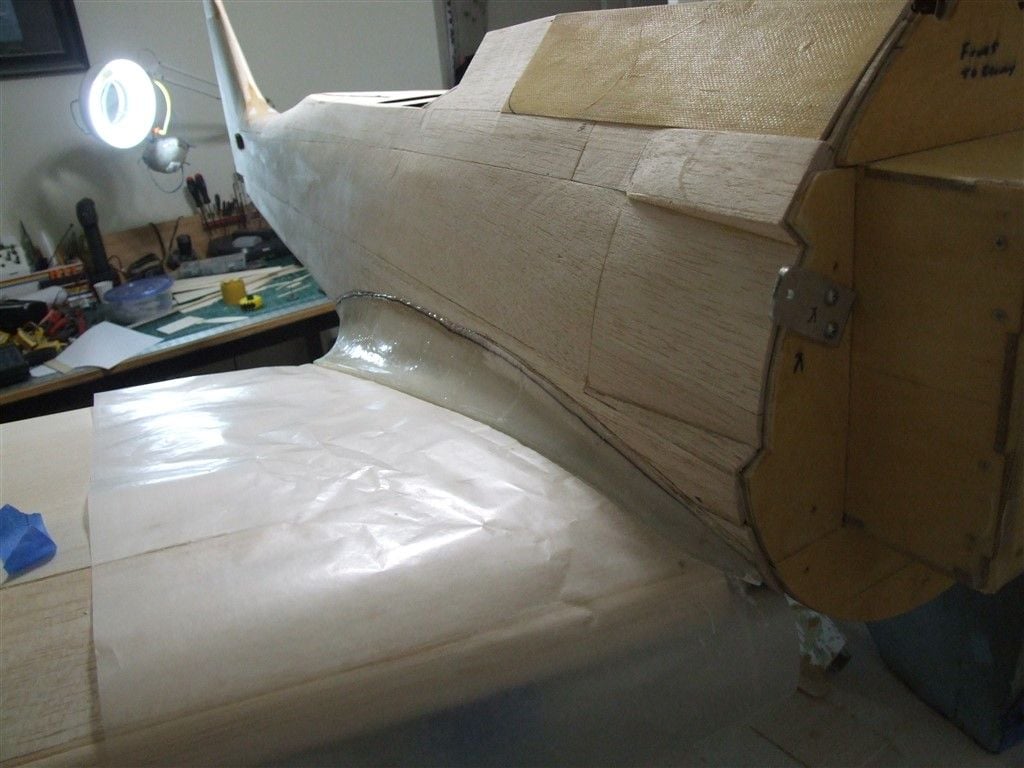
Got the cowling all setup finally things never end up like you think they are going to. I checked out the Ziroli with the dla128 and did my setup like his but I have added a lot more exit air.
Attached Thumbnails Click image for larger version

Name:	DSCF3470.jpg
Views:	53
Size:	118.4 KB
ID:	2256416   Click image for larger version

Name:	DSCF3471.jpg
Views:	55
Size:	104.2 KB
ID:	2256417   Click image for larger version

Name:	DSCF3472.jpg
Views:	64
Size:	129.5 KB
ID:	2256418   Click image for larger version

Name:	DSCF3473.jpg
Views:	80
Size:	134.7 KB
ID:	2256419  
Old 02-27-2018, 06:29 PM
  #81  
tfarmer96
Thread Starter
 
tfarmer96's Avatar
 
Join Date: Nov 2005
Location: Wylie, TX
Posts: 1,969
Received 0 Likes on 0 Posts
Default

Ran my pull pull and test fit some thing. Now its time to build a boat. The head scratching is pretty much over with
Attached Thumbnails Click image for larger version

Name:	DSCF3474.jpg
Views:	73
Size:	127.8 KB
ID:	2256420   Click image for larger version

Name:	DSCF3476.jpg
Views:	76
Size:	115.9 KB
ID:	2256421   Click image for larger version

Name:	DSCF3477.jpg
Views:	56
Size:	224.6 KB
ID:	2256422   Click image for larger version

Name:	DSCF3478.jpg
Views:	59
Size:	150.7 KB
ID:	2256423   Click image for larger version

Name:	DSCF3479.jpg
Views:	60
Size:	168.5 KB
ID:	2256424  
Old 02-28-2018, 06:48 PM
  #82  
tfarmer96
Thread Starter
 
tfarmer96's Avatar
 
Join Date: Nov 2005
Location: Wylie, TX
Posts: 1,969
Received 0 Likes on 0 Posts
Default

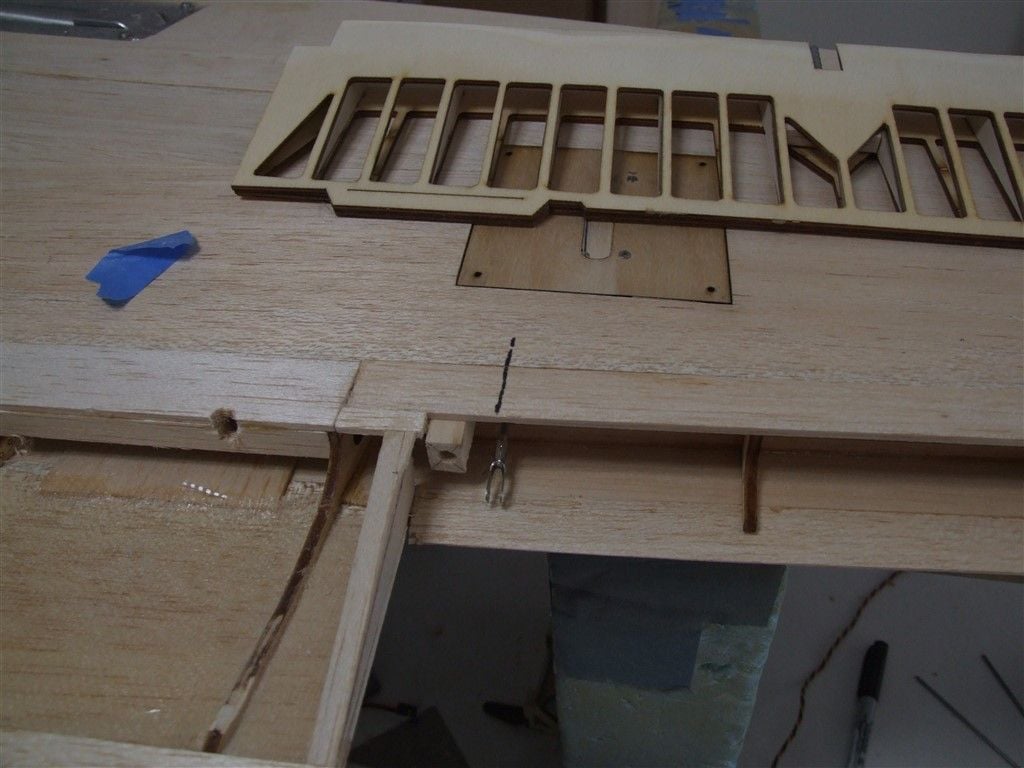
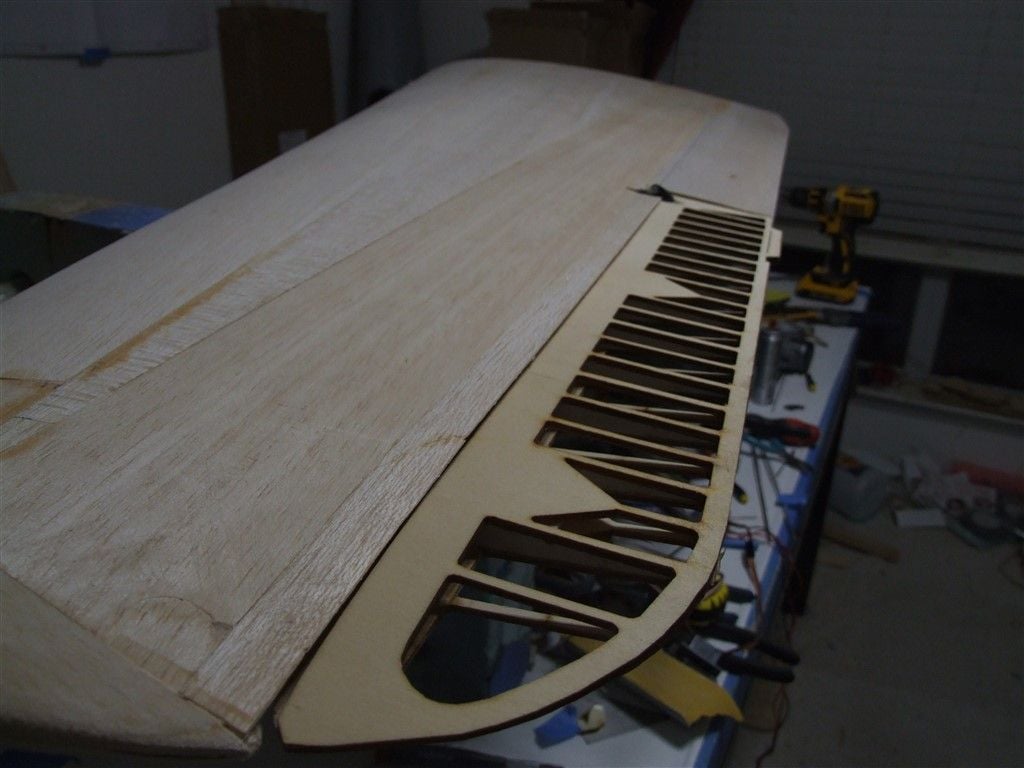
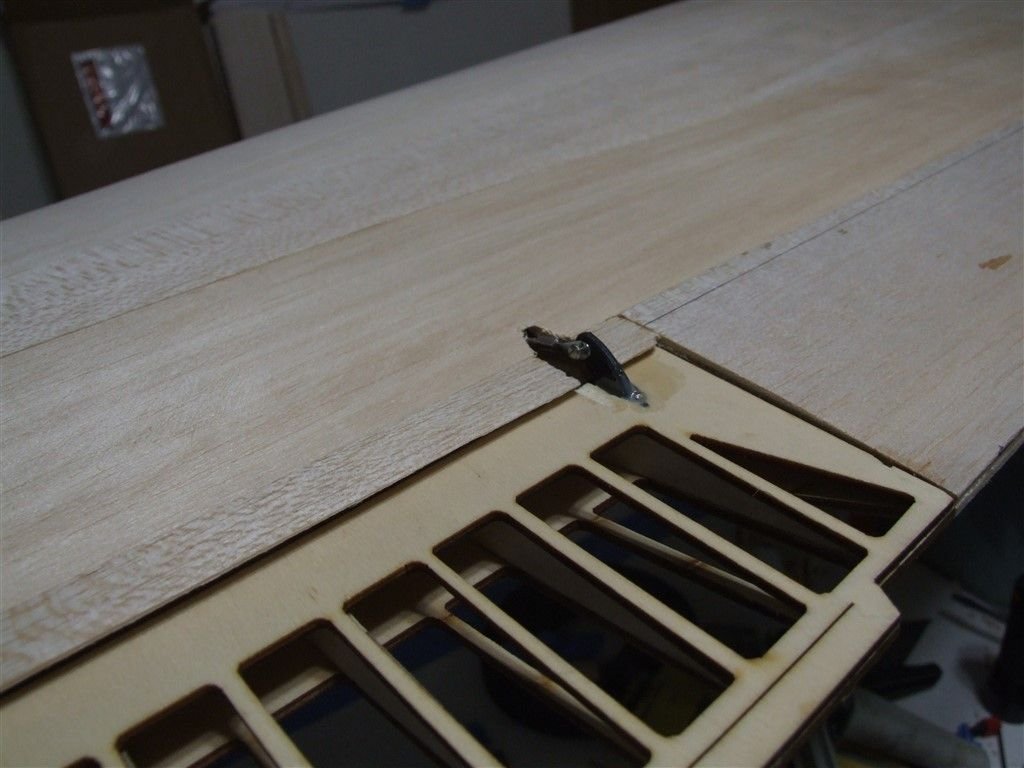
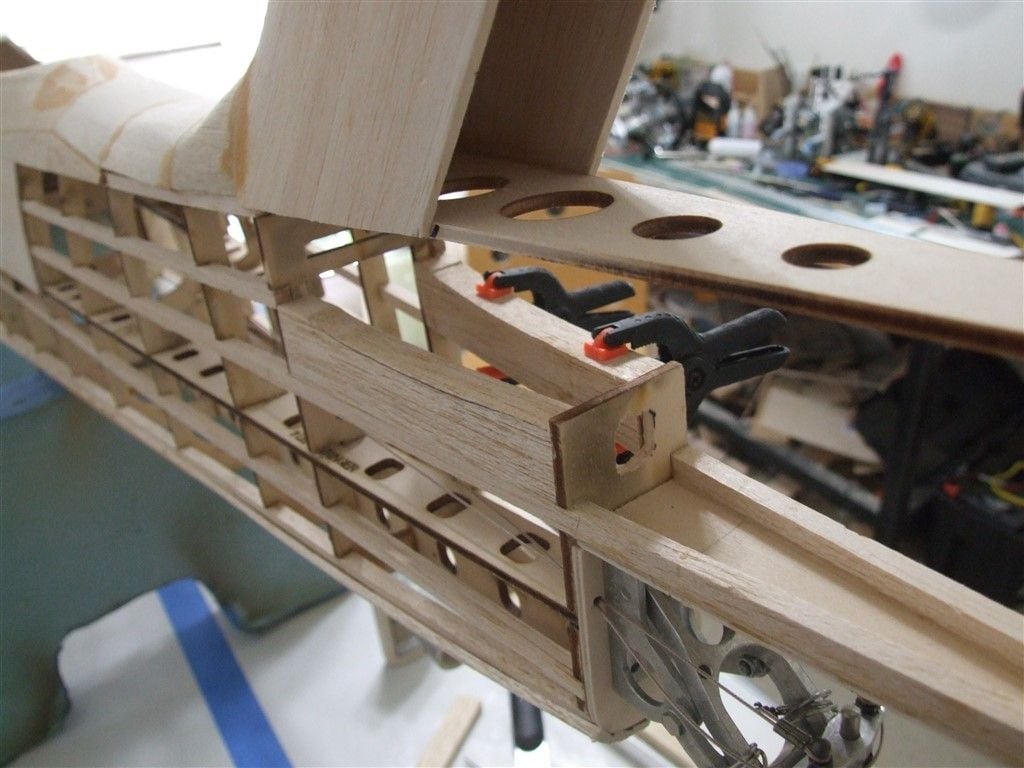
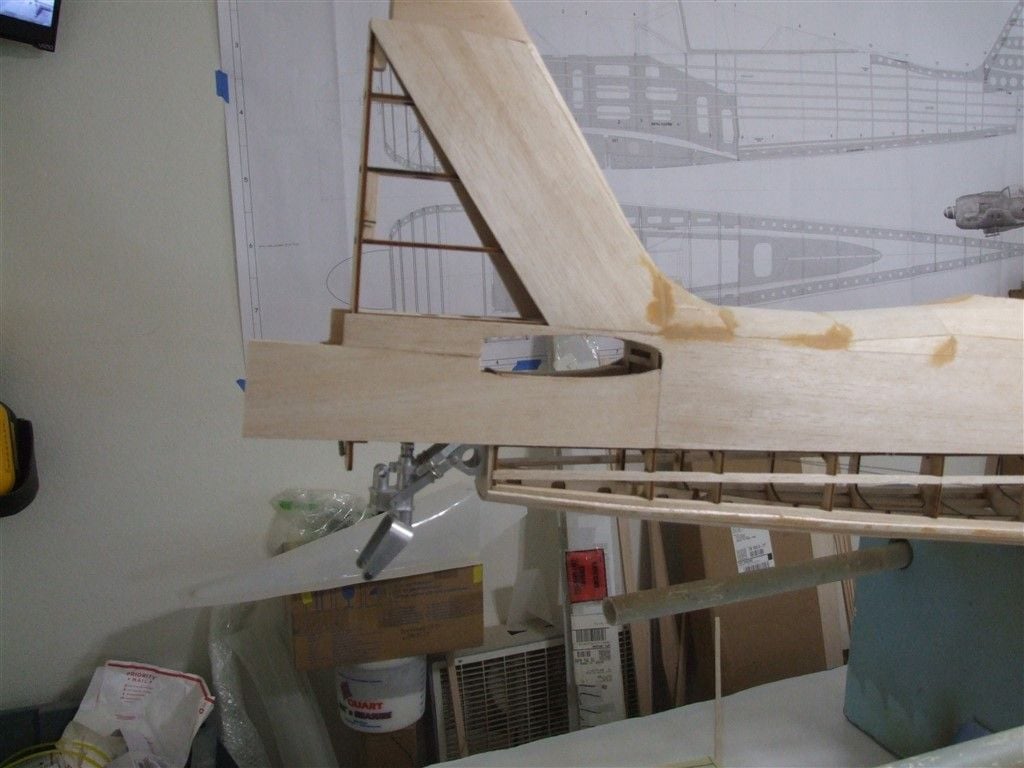
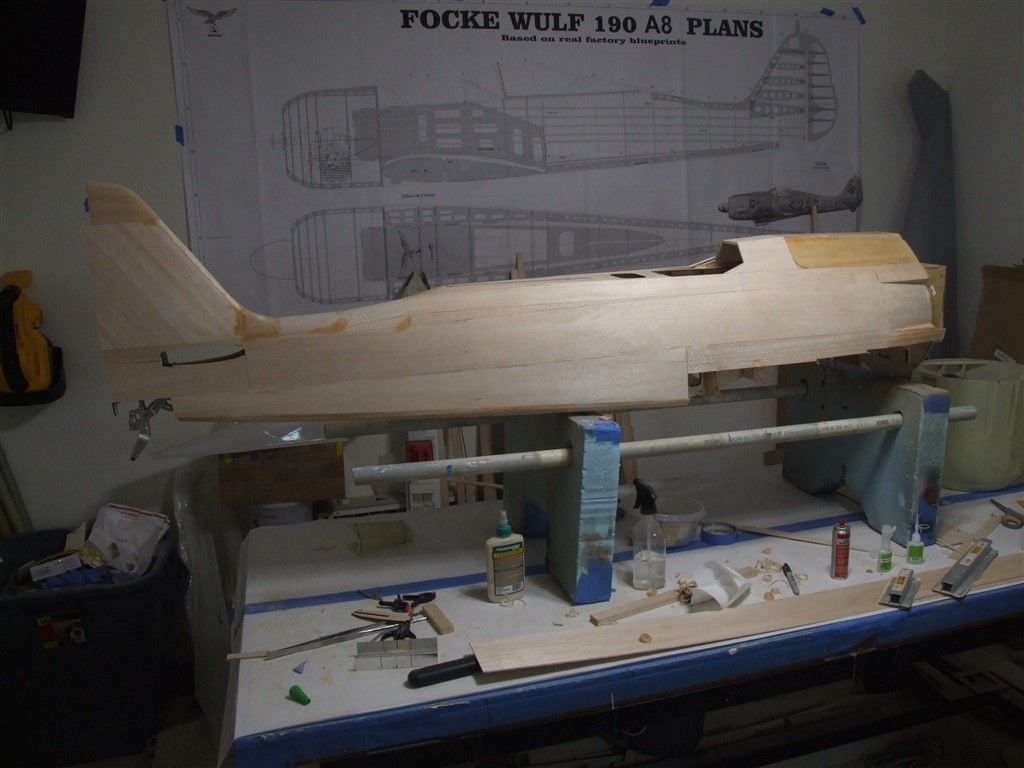
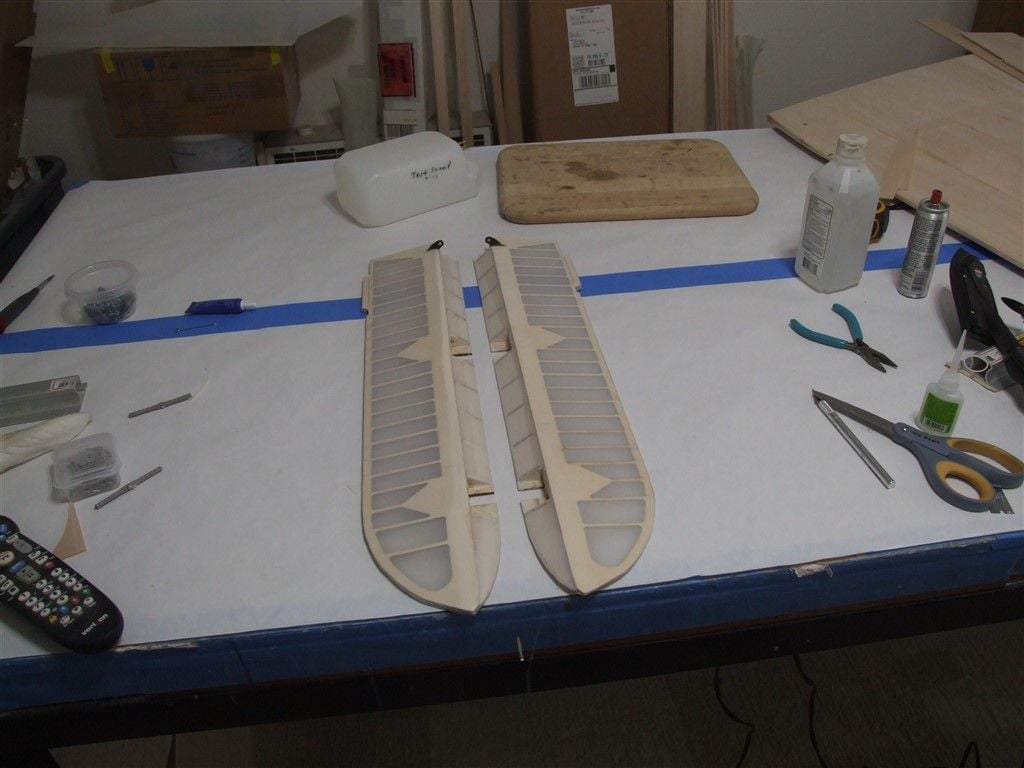
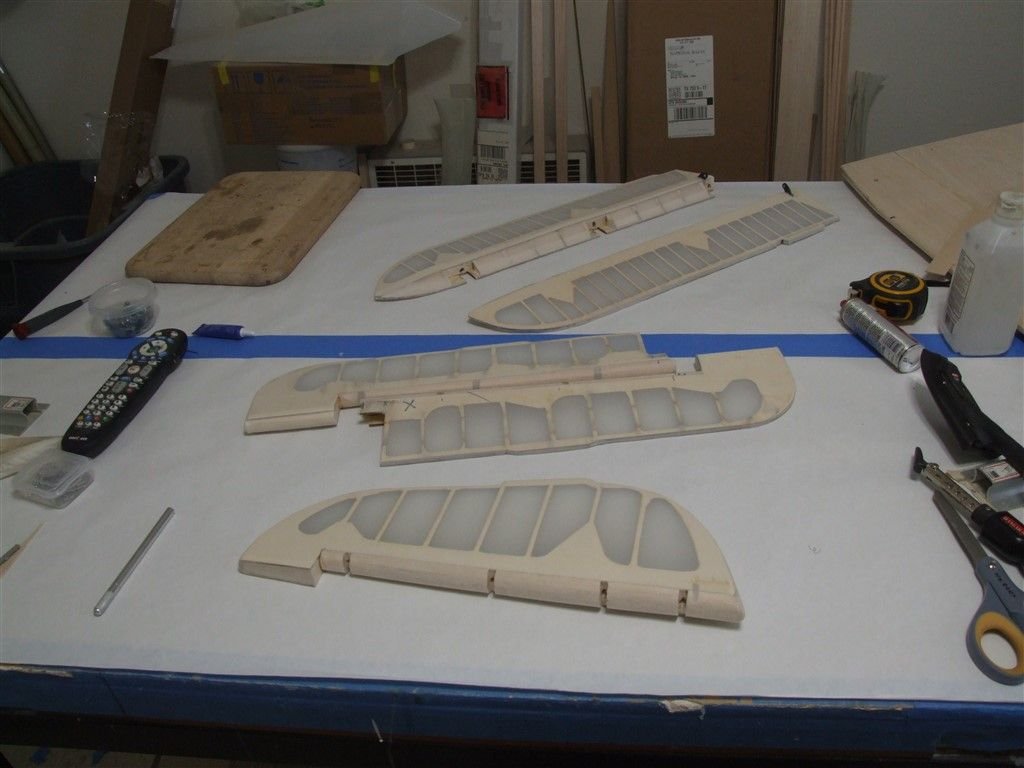
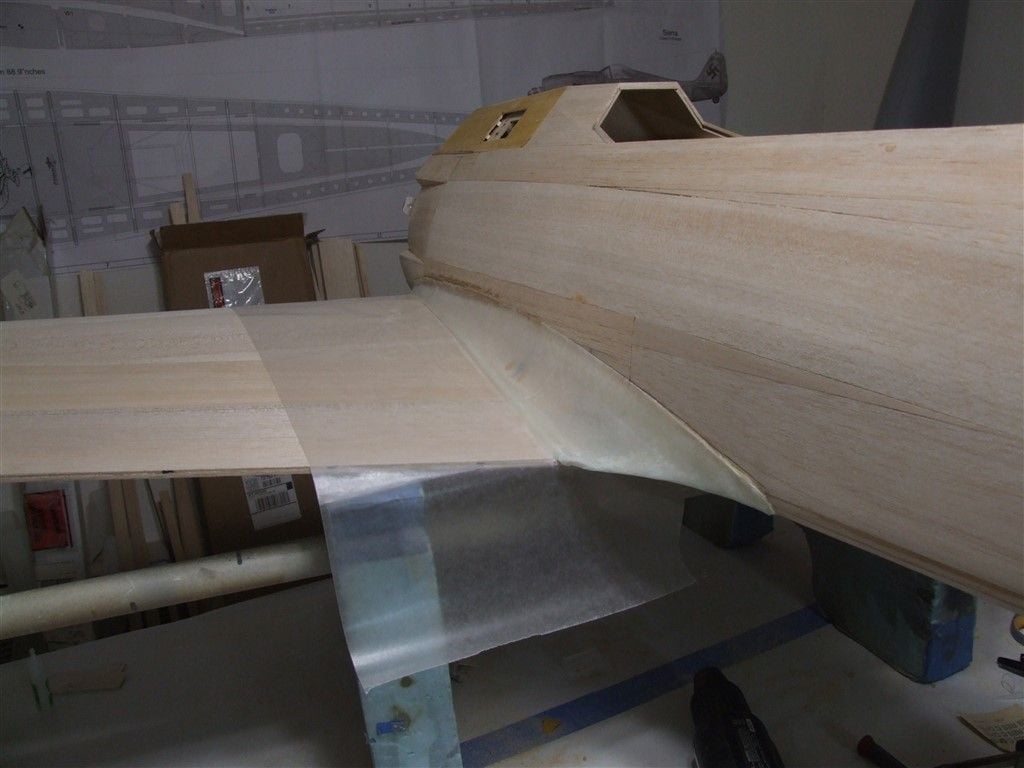
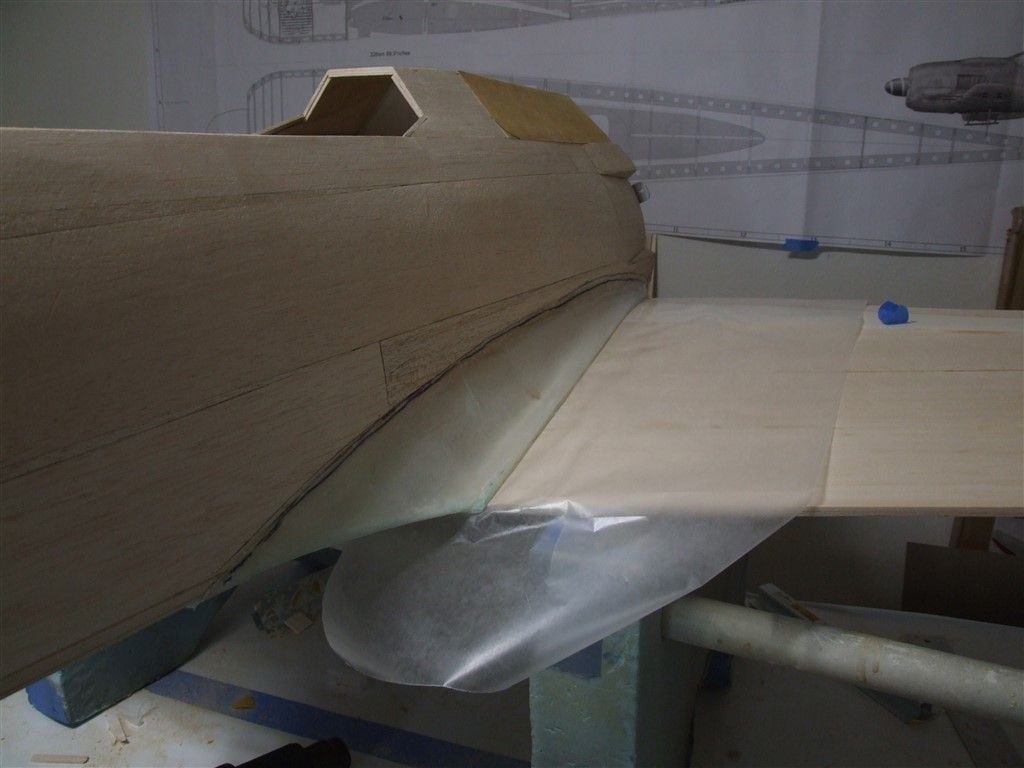
Made that boat planking more round for now will finish it with the rest of the sanding of the fuse. Got the rudder ready for covering. I will be using pull pull for both the tail gear and the rudder. I just used that push rod to help me figure out where to cut my slots for the horns.
Attached Thumbnails Click image for larger version

Name:	DSCF3480.jpg
Views:	55
Size:	145.6 KB
ID:	2256512   Click image for larger version

Name:	DSCF3481.jpg
Views:	57
Size:	152.3 KB
ID:	2256513   Click image for larger version

Name:	DSCF3482.jpg
Views:	60
Size:	160.6 KB
ID:	2256514   Click image for larger version

Name:	DSCF3484.jpg
Views:	67
Size:	126.5 KB
ID:	2256515   Click image for larger version

Name:	DSCF3486.jpg
Views:	74
Size:	70.8 KB
ID:	2256516   Click image for larger version

Name:	DSCF3487.jpg
Views:	64
Size:	91.8 KB
ID:	2256517   Click image for larger version

Name:	DSCF3490.jpg
Views:	64
Size:	131.0 KB
ID:	2256518   Click image for larger version

Name:	DSCF3494.jpg
Views:	63
Size:	137.5 KB
ID:	2256519  


Last edited by tfarmer96; 03-01-2018 at 10:48 AM.
Old 03-01-2018, 04:20 PM
  #83  
tfarmer96
Thread Starter
 
tfarmer96's Avatar
 
Join Date: Nov 2005
Location: Wylie, TX
Posts: 1,969
Received 0 Likes on 0 Posts
Default

Running 6 oz cloth on the motorbox just incase.
Attached Thumbnails Click image for larger version

Name:	DSCF3495.jpg
Views:	52
Size:	110.3 KB
ID:	2256582   Click image for larger version

Name:	DSCF3496.jpg
Views:	52
Size:	132.4 KB
ID:	2256583   Click image for larger version

Name:	DSCF3497.jpg
Views:	51
Size:	128.4 KB
ID:	2256584   Click image for larger version

Name:	DSCF3498.jpg
Views:	61
Size:	138.4 KB
ID:	2256585  
Old 03-01-2018, 08:40 PM
  #84  
jagdpanther9
 
jagdpanther9's Avatar
 
Join Date: Nov 2014
Location: Southern Minnesota USA
Posts: 225
Likes: 0
Received 2 Likes on 2 Posts
Default

hi terry, what size are the ball links that you are using for your steering control arm ?
Old 03-02-2018, 05:37 AM
  #85  
tfarmer96
Thread Starter
 
tfarmer96's Avatar
 
Join Date: Nov 2005
Location: Wylie, TX
Posts: 1,969
Received 0 Likes on 0 Posts
Default

Originally Posted by jagdpanther9
hi terry, what size are the ball links that you are using for your steering control arm ?
I used the 256 ball links. Keep in mind you will need to drill your holes in that arm closer to the center and probably use a belt sander to grind the arm to fit. All of these FW190 are tight back there and I have always had to modify that part.....Its just Wulf stuff.

https://www.towerhobbies.com/cgi-bin...?&I=LXK090&P=7
Attached Thumbnails Click image for larger version

Name:	Capture555555.JPG
Views:	56
Size:	78.3 KB
ID:	2256615  
Old 03-09-2018, 03:47 PM
  #86  
tfarmer96
Thread Starter
 
tfarmer96's Avatar
 
Join Date: Nov 2005
Location: Wylie, TX
Posts: 1,969
Received 0 Likes on 0 Posts
Default

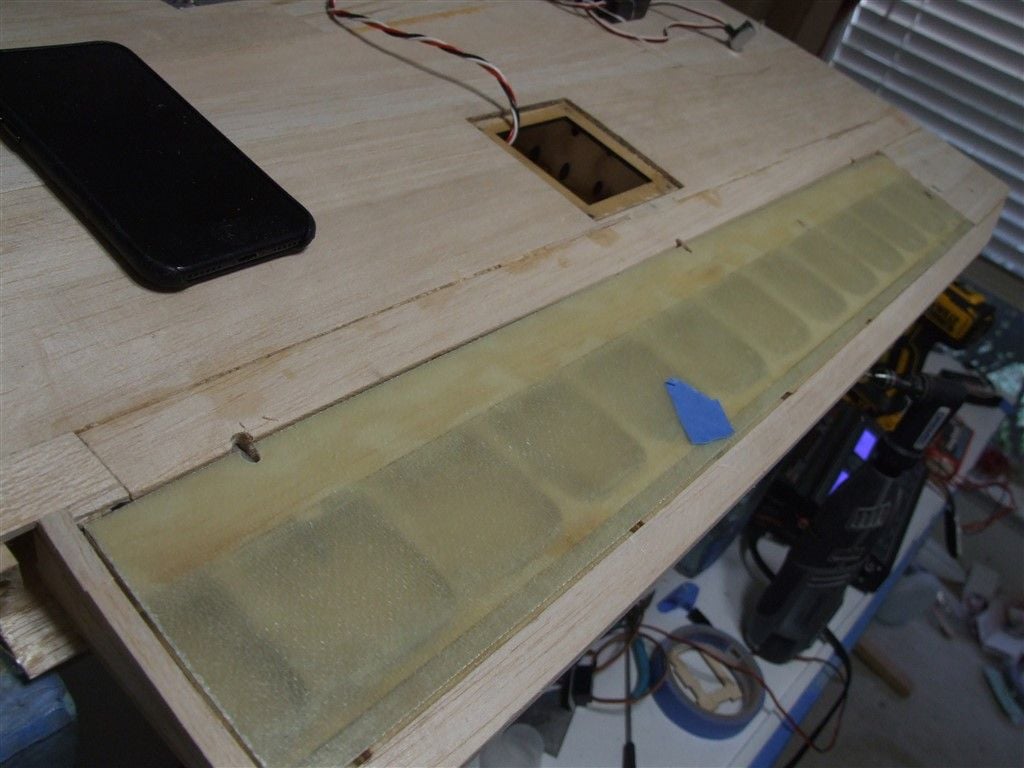
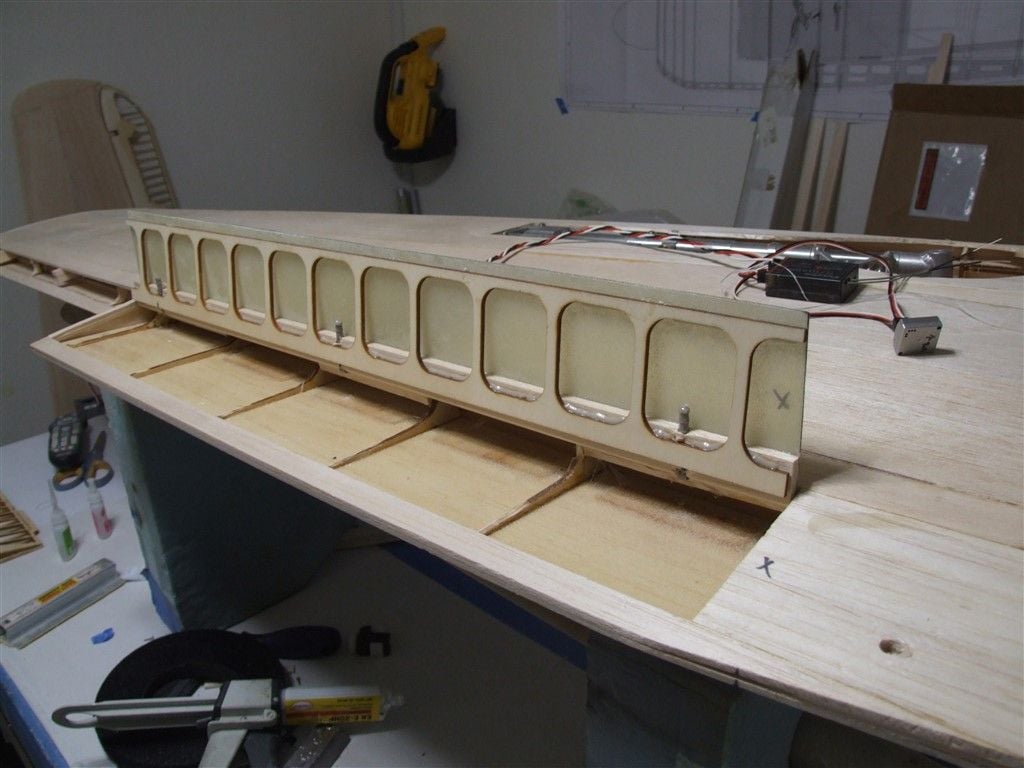
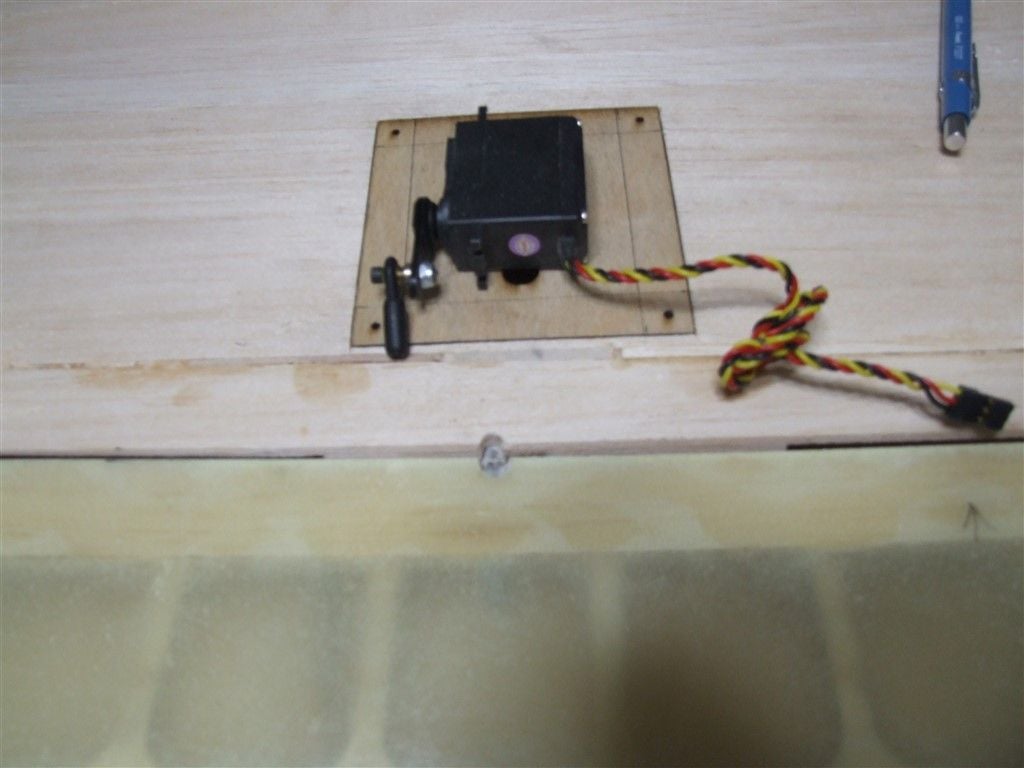
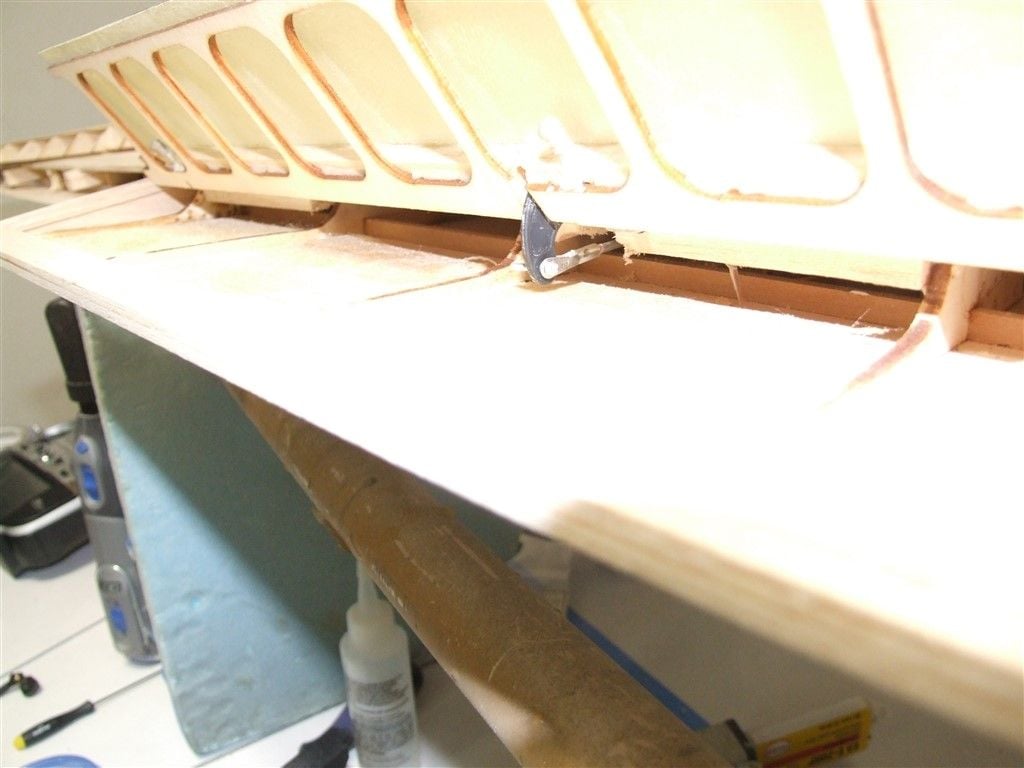
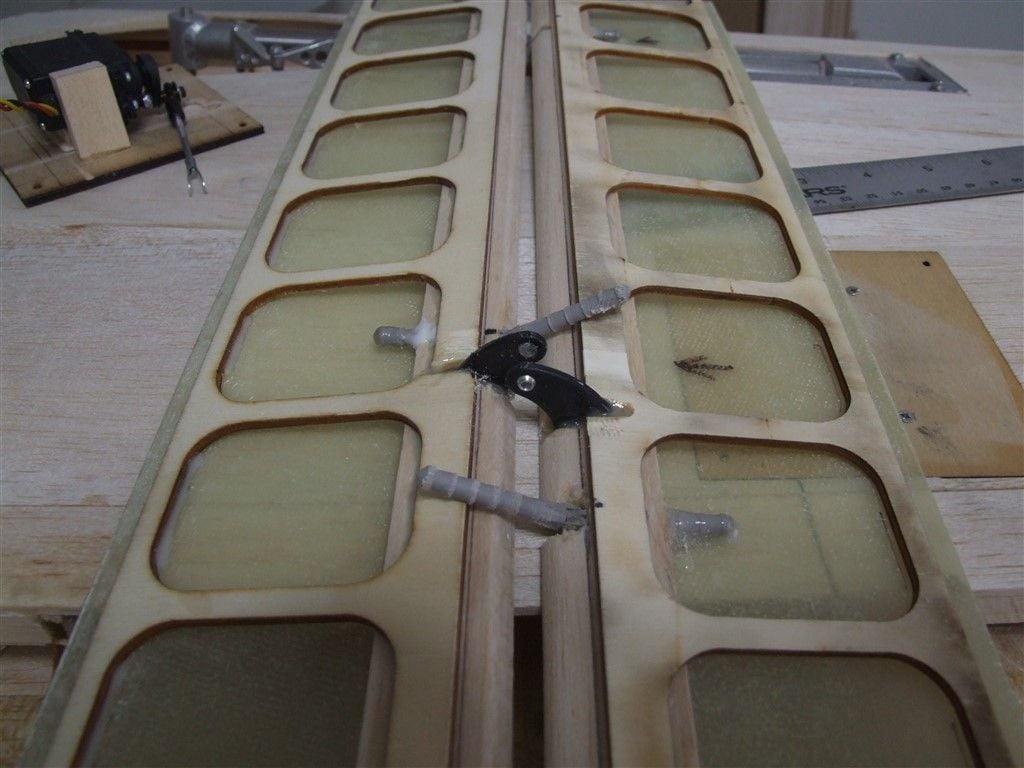
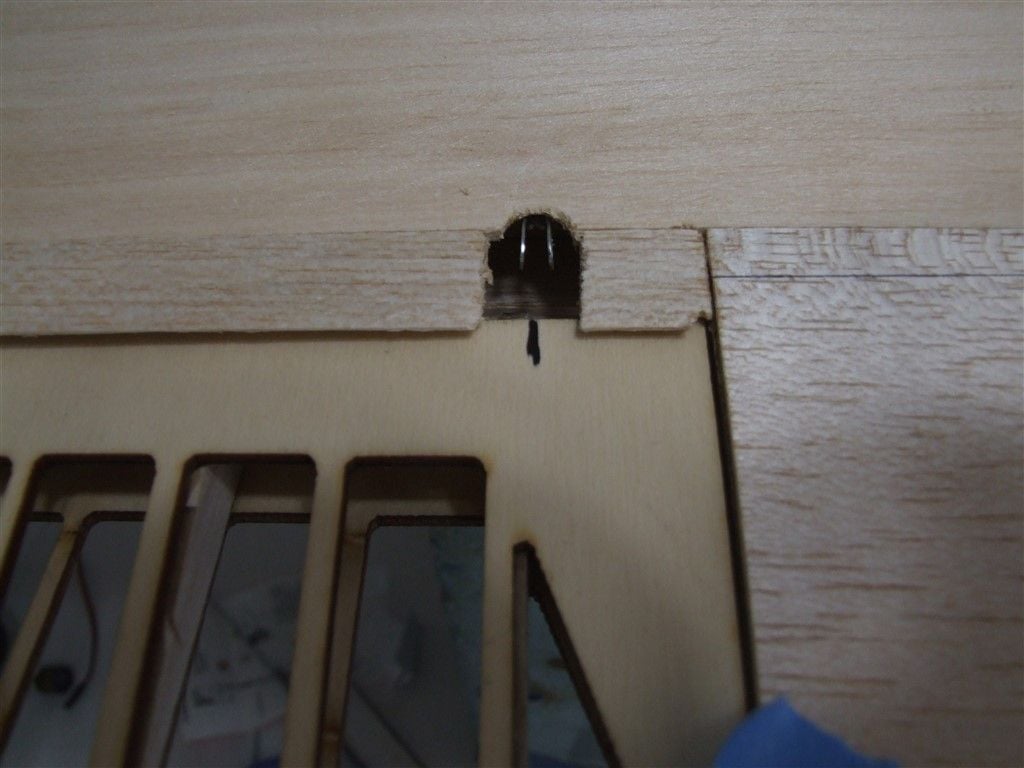
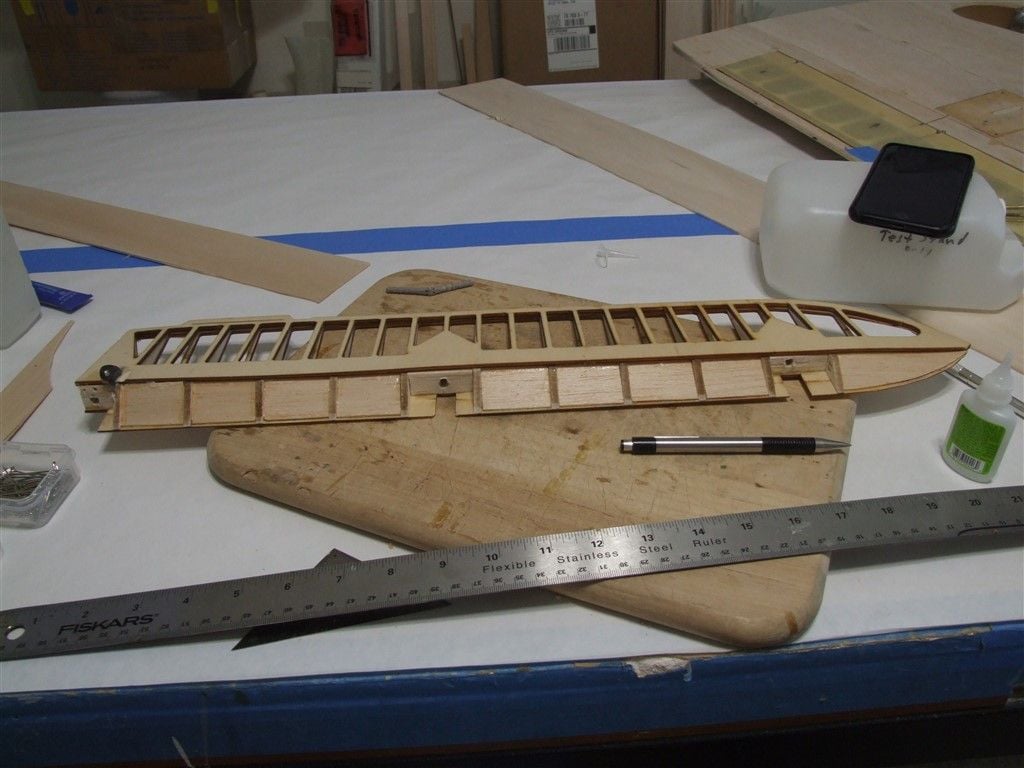
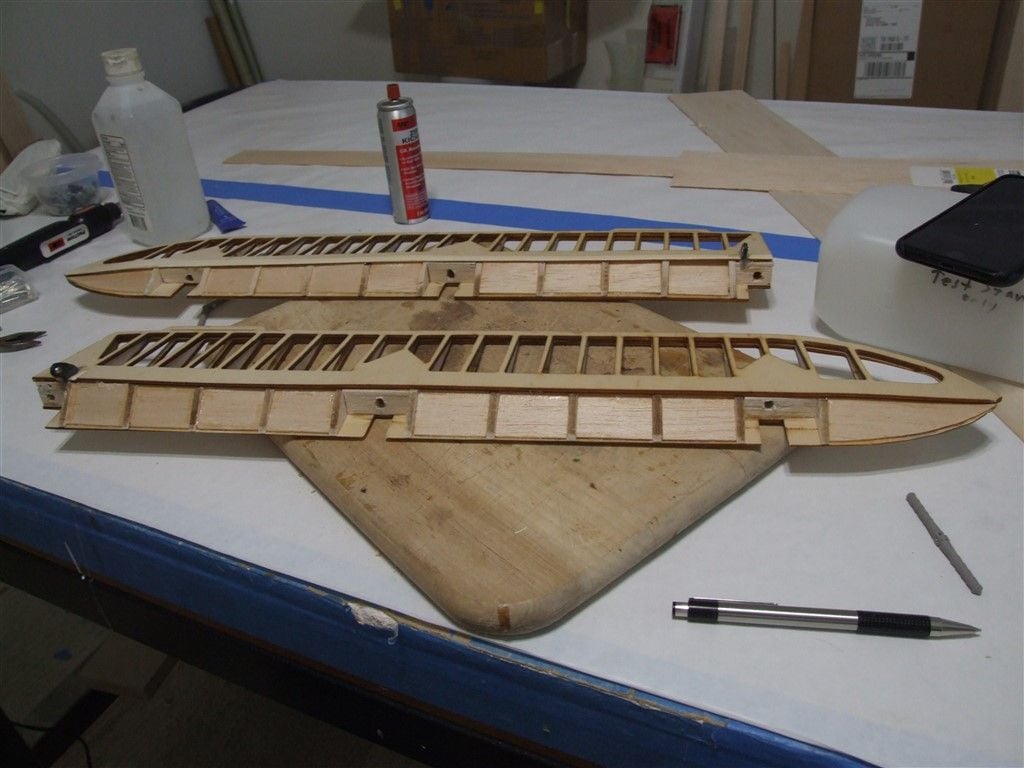
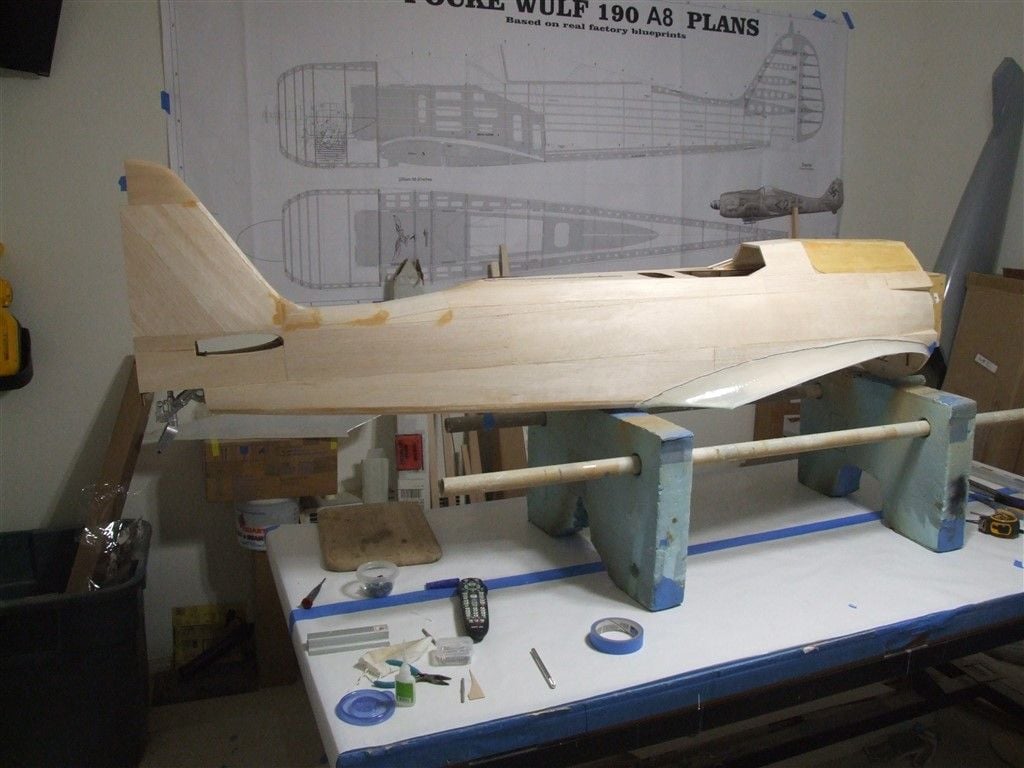
Put in my wing hold down block. Made it out of oak. drilled and tap for 1/4 X20. Glassed the inside of the flap and cut in my servo hatches. Going to let the resin cure for a bit and do the other side.
Attached Thumbnails Click image for larger version

Name:	DSCF3499.jpg
Views:	48
Size:	111.8 KB
ID:	2258668   Click image for larger version

Name:	DSCF3500.jpg
Views:	42
Size:	111.4 KB
ID:	2258669   Click image for larger version

Name:	DSCF3502.jpg
Views:	44
Size:	148.4 KB
ID:	2258670   Click image for larger version

Name:	DSCF3504.jpg
Views:	43
Size:	136.9 KB
ID:	2258671   Click image for larger version

Name:	DSCF3507.jpg
Views:	44
Size:	156.5 KB
ID:	2258672   Click image for larger version

Name:	DSCF3509.jpg
Views:	49
Size:	150.8 KB
ID:	2258673   Click image for larger version

Name:	DSCF3512.jpg
Views:	50
Size:	140.8 KB
ID:	2258674  
Old 03-09-2018, 06:16 PM
  #87  
tfarmer96
Thread Starter
 
tfarmer96's Avatar
 
Join Date: Nov 2005
Location: Wylie, TX
Posts: 1,969
Received 0 Likes on 0 Posts
Default

Got the aileron the working they way I want it.


Old 03-10-2018, 08:05 AM
  #88  
tfarmer96
Thread Starter
 
tfarmer96's Avatar
 
Join Date: Nov 2005
Location: Wylie, TX
Posts: 1,969
Received 0 Likes on 0 Posts
Default

Just got to finish the wheel cut out and the building is pretty much done on this side.
Attached Thumbnails Click image for larger version

Name:	DSCF3513.jpg
Views:	46
Size:	112.8 KB
ID:	2258709   Click image for larger version

Name:	DSCF3517.jpg
Views:	47
Size:	111.2 KB
ID:	2258710   Click image for larger version

Name:	DSCF3519.jpg
Views:	45
Size:	119.0 KB
ID:	2258711   Click image for larger version

Name:	DSCF3521.jpg
Views:	47
Size:	118.2 KB
ID:	2258712   Click image for larger version

Name:	DSCF3522.jpg
Views:	47
Size:	147.3 KB
ID:	2258713   Click image for larger version

Name:	DSCF3524.jpg
Views:	52
Size:	109.8 KB
ID:	2258714  
Old 03-10-2018, 12:58 PM
  #89  
tfarmer96
Thread Starter
 
tfarmer96's Avatar
 
Join Date: Nov 2005
Location: Wylie, TX
Posts: 1,969
Received 0 Likes on 0 Posts
Default

So its official. I'm waiting on the last kit part to dry so I can shape the other wing tip. its all just finish work from here on out.
Attached Thumbnails Click image for larger version

Name:	DSCF3528.jpg
Views:	44
Size:	144.1 KB
ID:	2258746   Click image for larger version

Name:	DSCF3530.jpg
Views:	42
Size:	144.8 KB
ID:	2258747   Click image for larger version

Name:	DSCF3531.jpg
Views:	42
Size:	131.8 KB
ID:	2258748   Click image for larger version

Name:	DSCF3532.jpg
Views:	41
Size:	133.9 KB
ID:	2258749   Click image for larger version

Name:	DSCF3534.jpg
Views:	43
Size:	126.3 KB
ID:	2258750  
Old 03-10-2018, 06:19 PM
  #90  
tfarmer96
Thread Starter
 
tfarmer96's Avatar
 
Join Date: Nov 2005
Location: Wylie, TX
Posts: 1,969
Received 0 Likes on 0 Posts
Default

And that's the other one. Well that's it nothing else to glue together out of the kit. Looks like its time to button up the fuse.
Attached Thumbnails Click image for larger version

Name:	DSCF3535.jpg
Views:	44
Size:	104.7 KB
ID:	2258774   Click image for larger version

Name:	DSCF3536.jpg
Views:	53
Size:	128.9 KB
ID:	2258775   Click image for larger version

Name:	DSCF3537.jpg
Views:	54
Size:	121.3 KB
ID:	2258776  
Old 03-11-2018, 06:21 PM
  #91  
tfarmer96
Thread Starter
 
tfarmer96's Avatar
 
Join Date: Nov 2005
Location: Wylie, TX
Posts: 1,969
Received 0 Likes on 0 Posts
Default

The plan was to just cleanup and not do anything today. well that's just not how it worked out. so I stated on my linkages.
Attached Thumbnails Click image for larger version

Name:	DSCF3538.jpg
Views:	46
Size:	137.9 KB
ID:	2258878   Click image for larger version

Name:	DSCF3539.jpg
Views:	48
Size:	140.9 KB
ID:	2258879   Click image for larger version

Name:	DSCF3541.jpg
Views:	45
Size:	84.9 KB
ID:	2258880   Click image for larger version

Name:	DSCF3542.jpg
Views:	45
Size:	142.1 KB
ID:	2258881   Click image for larger version

Name:	DSCF3543.jpg
Views:	48
Size:	123.7 KB
ID:	2258882  
Old 03-11-2018, 06:22 PM
  #92  
tfarmer96
Thread Starter
 
tfarmer96's Avatar
 
Join Date: Nov 2005
Location: Wylie, TX
Posts: 1,969
Received 0 Likes on 0 Posts
Default

I decided to do a little live fire testing


Old 03-24-2018, 05:25 PM
  #93  
tfarmer96
Thread Starter
 
tfarmer96's Avatar
 
Join Date: Nov 2005
Location: Wylie, TX
Posts: 1,969
Received 0 Likes on 0 Posts
Default


Time to get the flaps setup and the other aileron done. Its almost time to start the finish sanding.
Old 03-24-2018, 05:26 PM
  #94  
tfarmer96
Thread Starter
 
tfarmer96's Avatar
 
Join Date: Nov 2005
Location: Wylie, TX
Posts: 1,969
Received 0 Likes on 0 Posts
Default

And 2 short videos of testing.


Old 04-15-2018, 04:09 PM
  #95  
tfarmer96
Thread Starter
 
tfarmer96's Avatar
 
Join Date: Nov 2005
Location: Wylie, TX
Posts: 1,969
Received 0 Likes on 0 Posts
Default

Getting to the end of the job now. Got the stab worked out with the sheeting.


Old 06-25-2018, 03:52 PM
  #96  
jagdpanther9
 
jagdpanther9's Avatar
 
Join Date: Nov 2014
Location: Southern Minnesota USA
Posts: 225
Likes: 0
Received 2 Likes on 2 Posts
Default

any new progress terry?
Old 06-25-2018, 04:22 PM
  #97  
tfarmer96
Thread Starter
 
tfarmer96's Avatar
 
Join Date: Nov 2005
Location: Wylie, TX
Posts: 1,969
Received 0 Likes on 0 Posts
Default

So Im pretty much down to the finish work.


Last edited by tfarmer96; 06-25-2018 at 04:41 PM.
Old 06-25-2018, 05:07 PM
  #98  
tfarmer96
Thread Starter
 
tfarmer96's Avatar
 
Join Date: Nov 2005
Location: Wylie, TX
Posts: 1,969
Received 0 Likes on 0 Posts
Default


And the over the wing fairing
Old 06-25-2018, 07:40 PM
  #99  
jagdpanther9
 
jagdpanther9's Avatar
 
Join Date: Nov 2014
Location: Southern Minnesota USA
Posts: 225
Likes: 0
Received 2 Likes on 2 Posts
Default

looking awesome!
Old 07-07-2018, 06:01 PM
  #100  
tfarmer96
Thread Starter
 
tfarmer96's Avatar
 
Join Date: Nov 2005
Location: Wylie, TX
Posts: 1,969
Received 0 Likes on 0 Posts
Default

Time to button up the bottom sand the fuse and finish up the wing fairings.


Contact Us - Archive - Advertising - Cookie Policy - Privacy Statement - Terms of Service -

Copyright © 2024 MH Sub I, LLC dba Internet Brands. All rights reserved. Use of this site indicates your consent to the Terms of Use.