Another Ziroli 101" B-25 thread

 06-27-2017, 04:24 PM
#53

Thread Starter
Getting back into this build now that I completed the Rascal and have room for it once more. I can't get over how light this plane is in comparison to the Rascal. Those NGH 38CC 4 strokes should have no problems yanking this bird around. I would not be surprised if this entire plane once fully built and ready to fly weighs less than the Fuse of the Rascal.
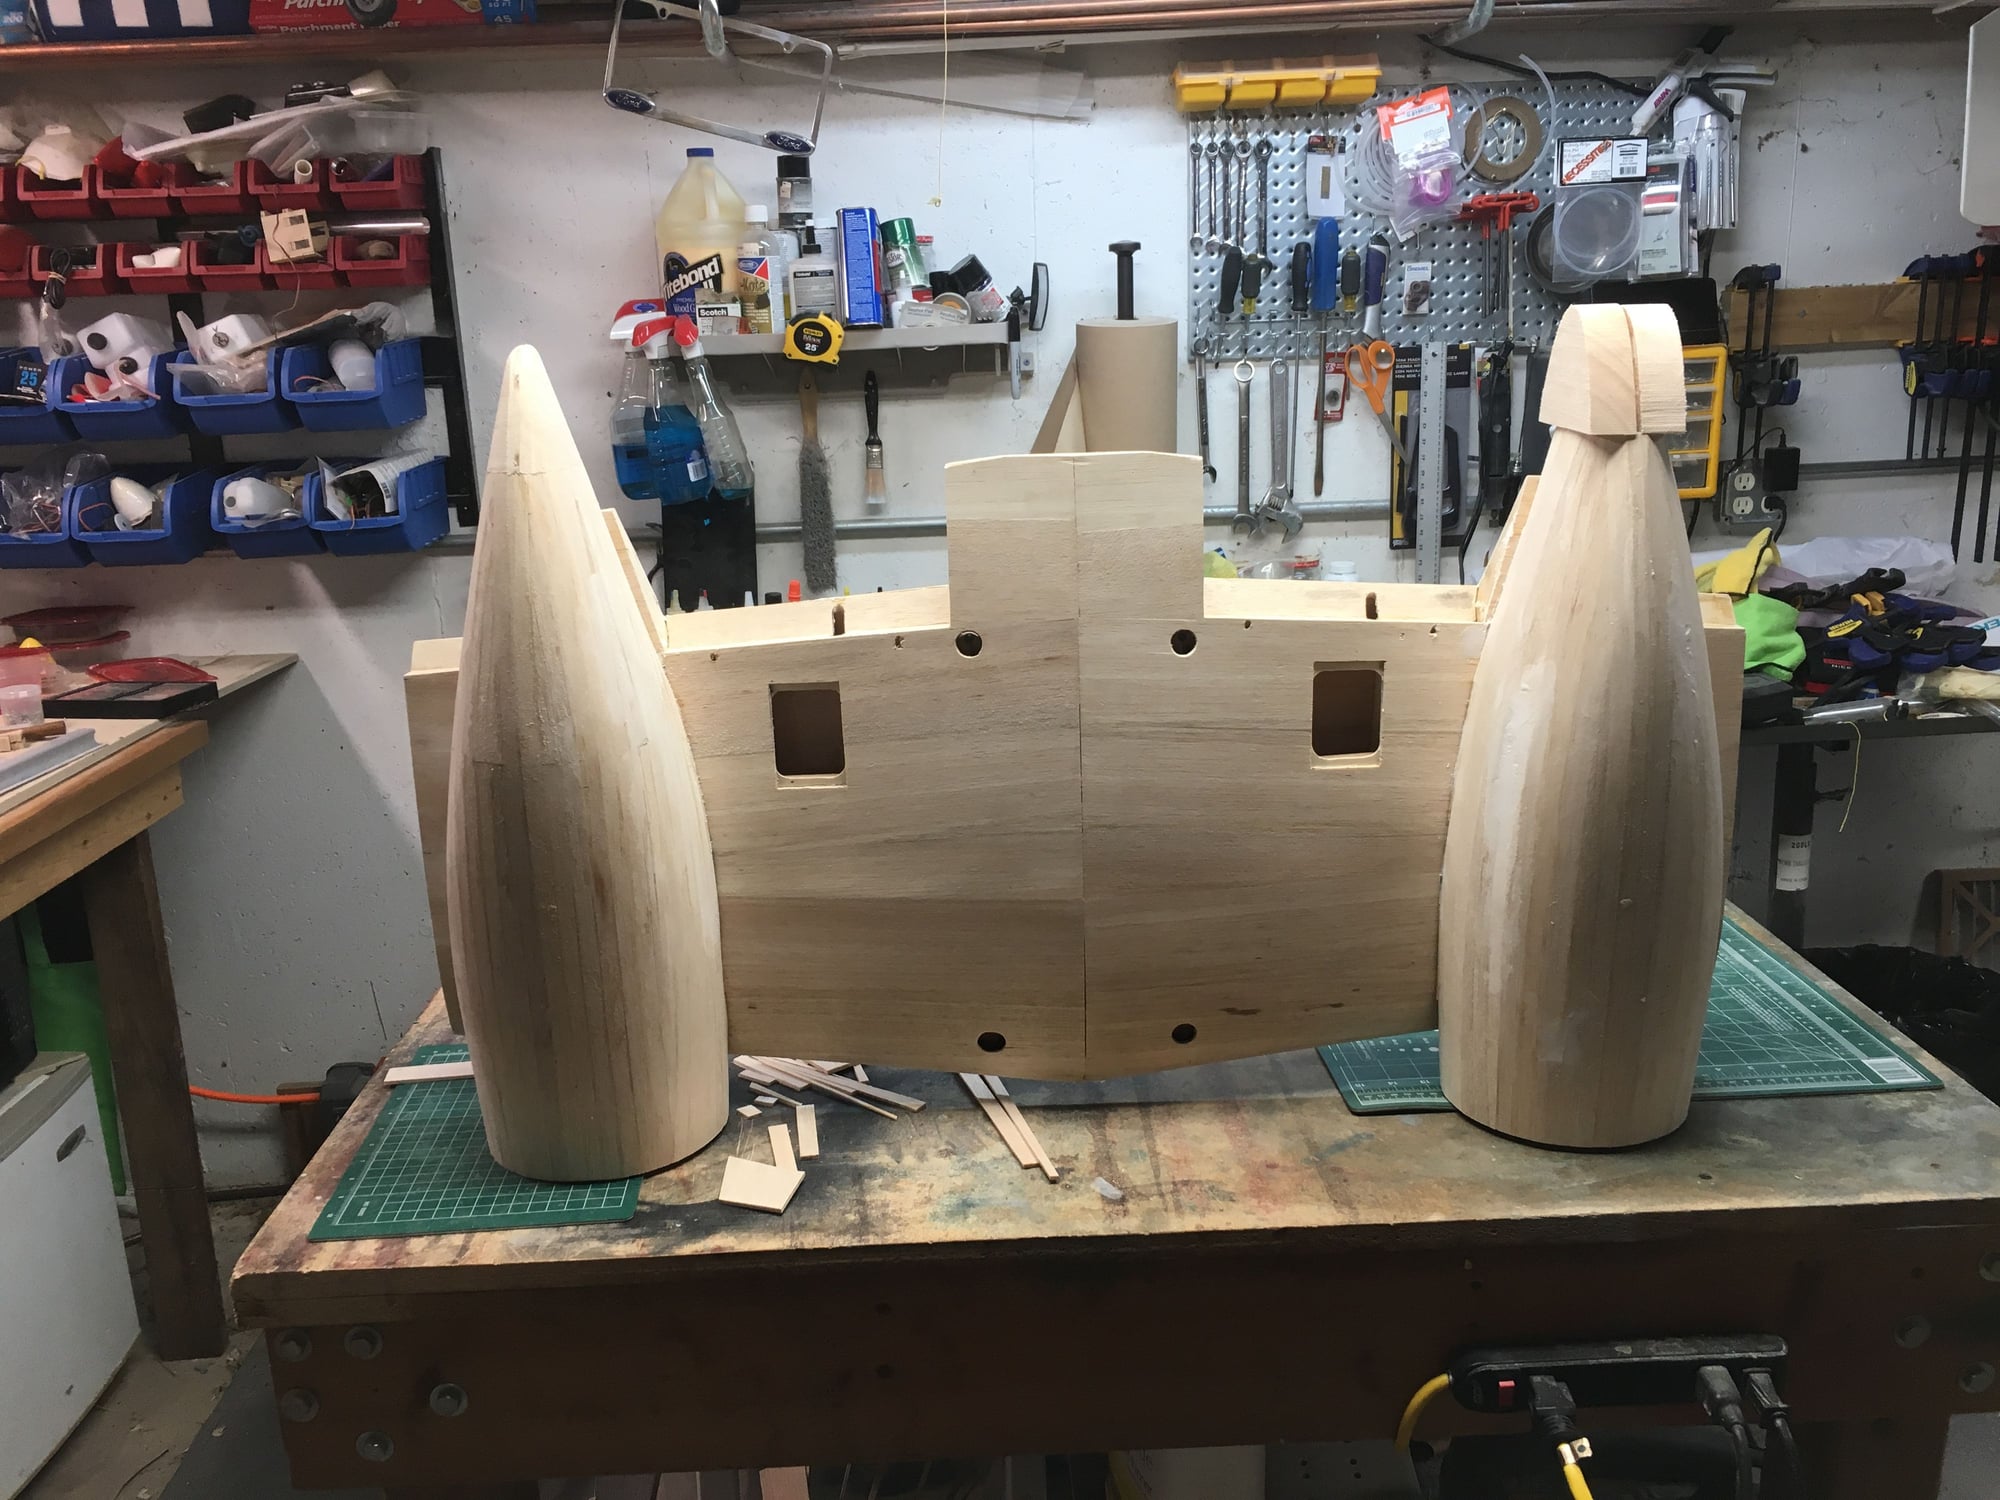
Fitting the wing to the fuse, almost done, just need to do a little more sanding to the hardwood blocks and epoxy them in, then drill and tap for the hold down bolts, and I can move on to getting the horizontal stab aligned and set.
Fitting the wing to the fuse, almost done, just need to do a little more sanding to the hardwood blocks and epoxy them in, then drill and tap for the hold down bolts, and I can move on to getting the horizontal stab aligned and set.
01-07-2018, 04:36 PM
#54
Thread Starter
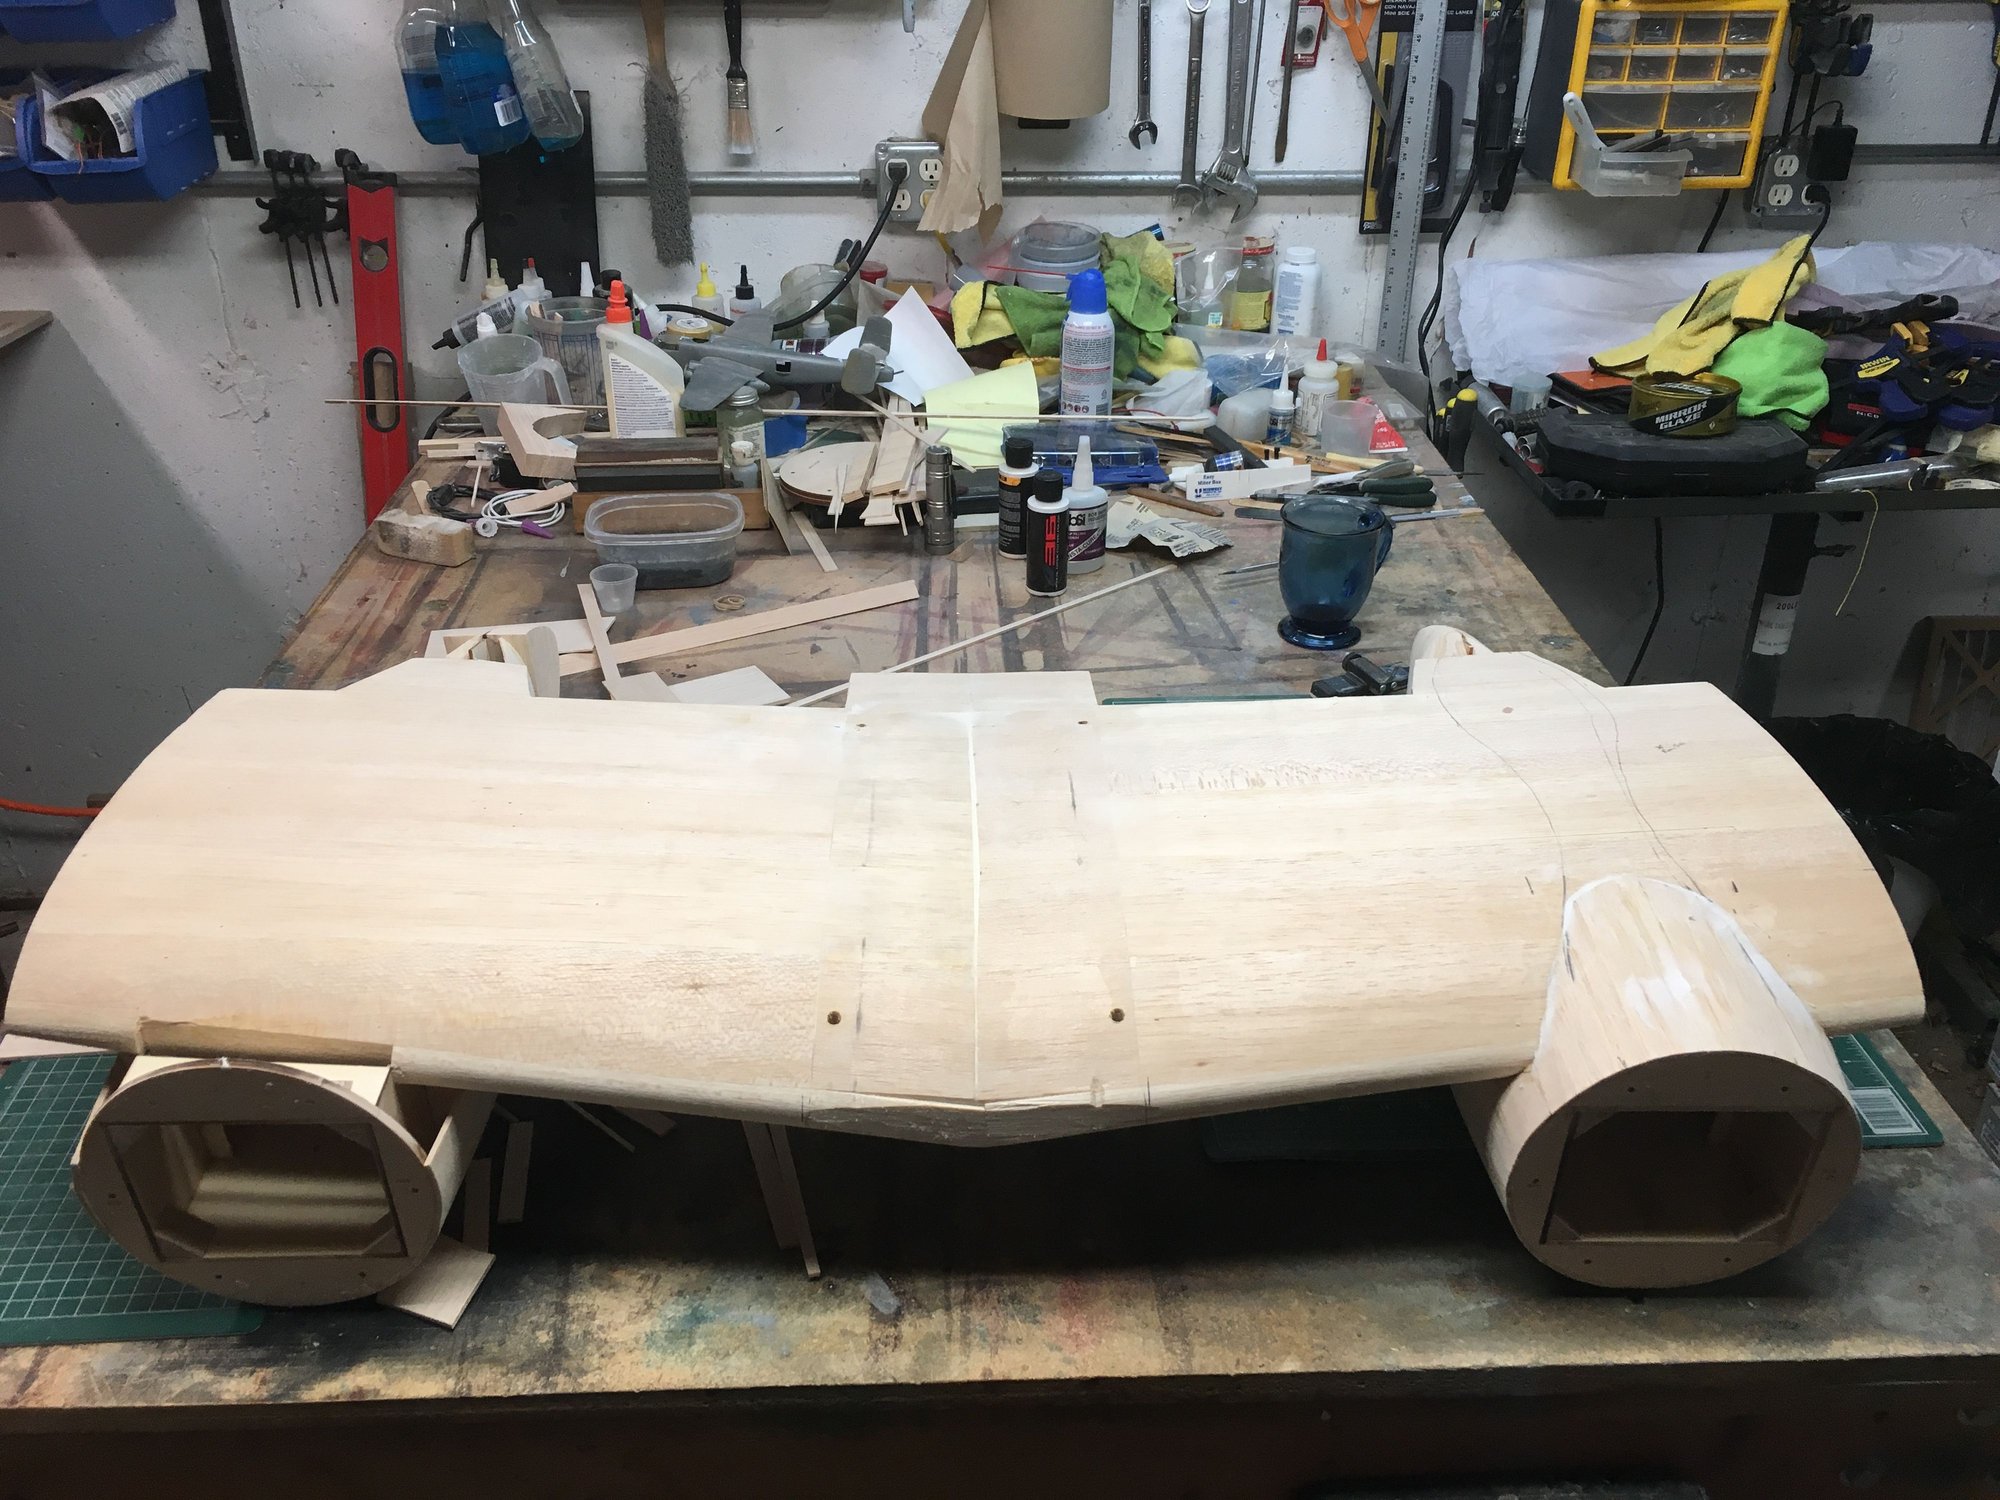
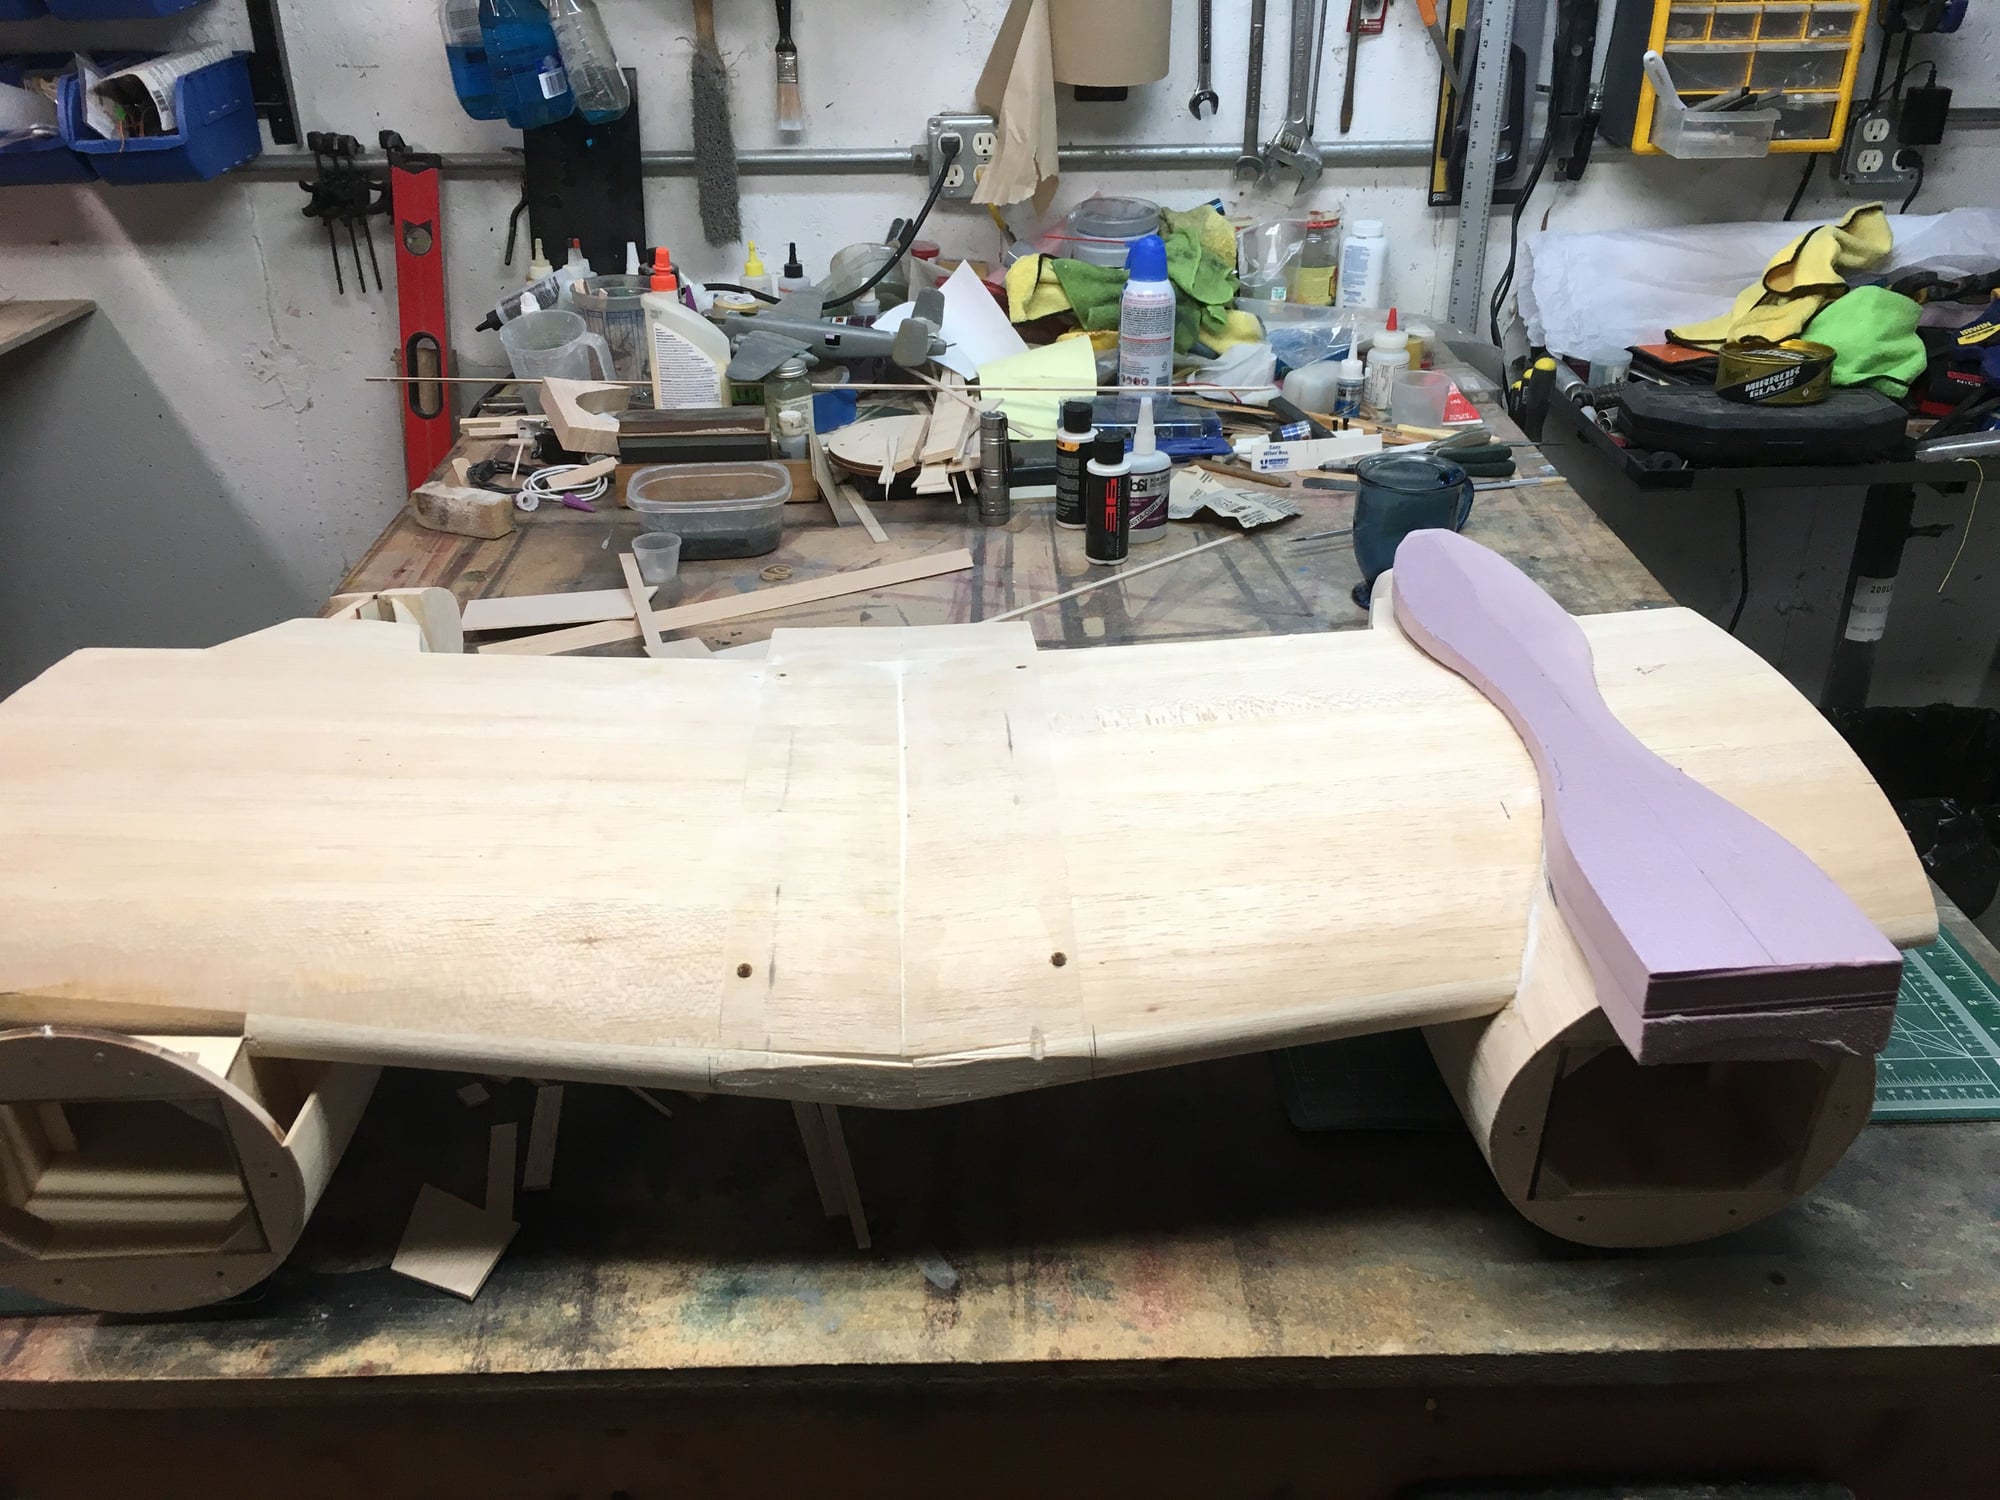
After a slight side track to build a 4*60 with retracts, I now have the benches cleared and have the 25 plans down again. Started working on the right aileron and outer flap. some sanding, and put the plywood piece I missed for the horn and they are ready to glass. Since I haven't worked on it for over a year I forgot how the ailerons hinge and have to go through my parts to see if I have them. Once I have the flaps and ailerons done, I can put the wing together and start working on the nacelles. They are the last of the big assemblies to get worked on, then the rest is the fine details and really hard stuff, Gear Doors and BombBay. I still need the main wheels, fuel tanks, and some servos, but should have all the rest.
01-13-2018, 03:57 PM
#55
Thread Starter
Time for an update. Worked on the right wing, made a few mistakes with the aileron and flap, but have them corrected now, and ready to apply the hinging.


Once I have them hinged, and get the other wing done, then I will work on the nacelles. After reading some other builds and the issues with the flaps binding on the nacelle, I decided to do it last to match the flaps since there is plenty of leeway there. I am thinking that I will probably give all the wood a coat of Minwax WB Poly to harden it up a bit as it is getting all kinds of dents from moving them around the shop.
Completed 4 episodes of Andromeda on Netflix while working on it.
01-13-2018, 07:20 PM
#56

Good to see you're back at her! I've been plodding along... I have a few more things to do to clear coat, then I can just about put her together to run the engines... Think Spring!
01-13-2018, 07:30 PM
#57
Thread Starter
I have a long way to go before I can even think about paint! LOL I still need to make the mold for the nose gear door, and make the hatch covers for the rudder servos from the mold I made for them. Right now my goal is to finish the outer wing panels and get them glassed and ready for paint, then move on to the fuse and get the tail pieces shaped, and get it ready to glass. Then I can move on to the center section and get the nacelles built as that is the last of the big parts to build. The last part then is the bombbay shell. Have to figure out how I am going to attach it to the wing and have working doors. A long road ahead. I still haven't purchased the canopy kit, or cowls.
01-14-2018, 11:58 AM
#59

My Feedback: (60)
Join Date: Dec 2001
Location: Litchfield Park,
AZ
Posts: 7,677
Likes: 0
Received 25 Likes
on
23 Posts
I have a long way to go before I can even think about paint! LOL I still need to make the mold for the nose gear door, and make the hatch covers for the rudder servos from the mold I made for them. Right now my goal is to finish the outer wing panels and get them glassed and ready for paint, then move on to the fuse and get the tail pieces shaped, and get it ready to glass. Then I can move on to the center section and get the nacelles built as that is the last of the big parts to build. The last part then is the bombbay shell. Have to figure out how I am going to attach it to the wing and have working doors. A long road ahead. I still haven't purchased the canopy kit, or cowls.
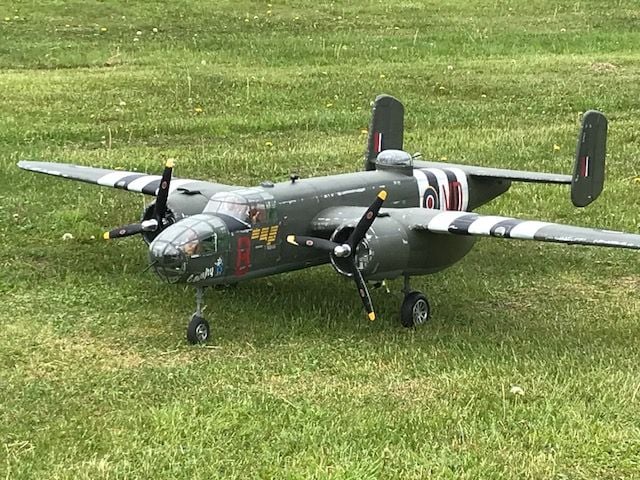
Reminds me of an old saying. "How do you eat a whole elephant?" "One bite at a time!." I've got a "whole elephant" that I've been working on for about eight years now that should (knock on wood) fly this year. I know exactly how you feel acdii! Your big Mitchell looks great though so keep up the momentum. Onward and upward!
01-14-2018, 04:23 PM
#60
Thread Starter
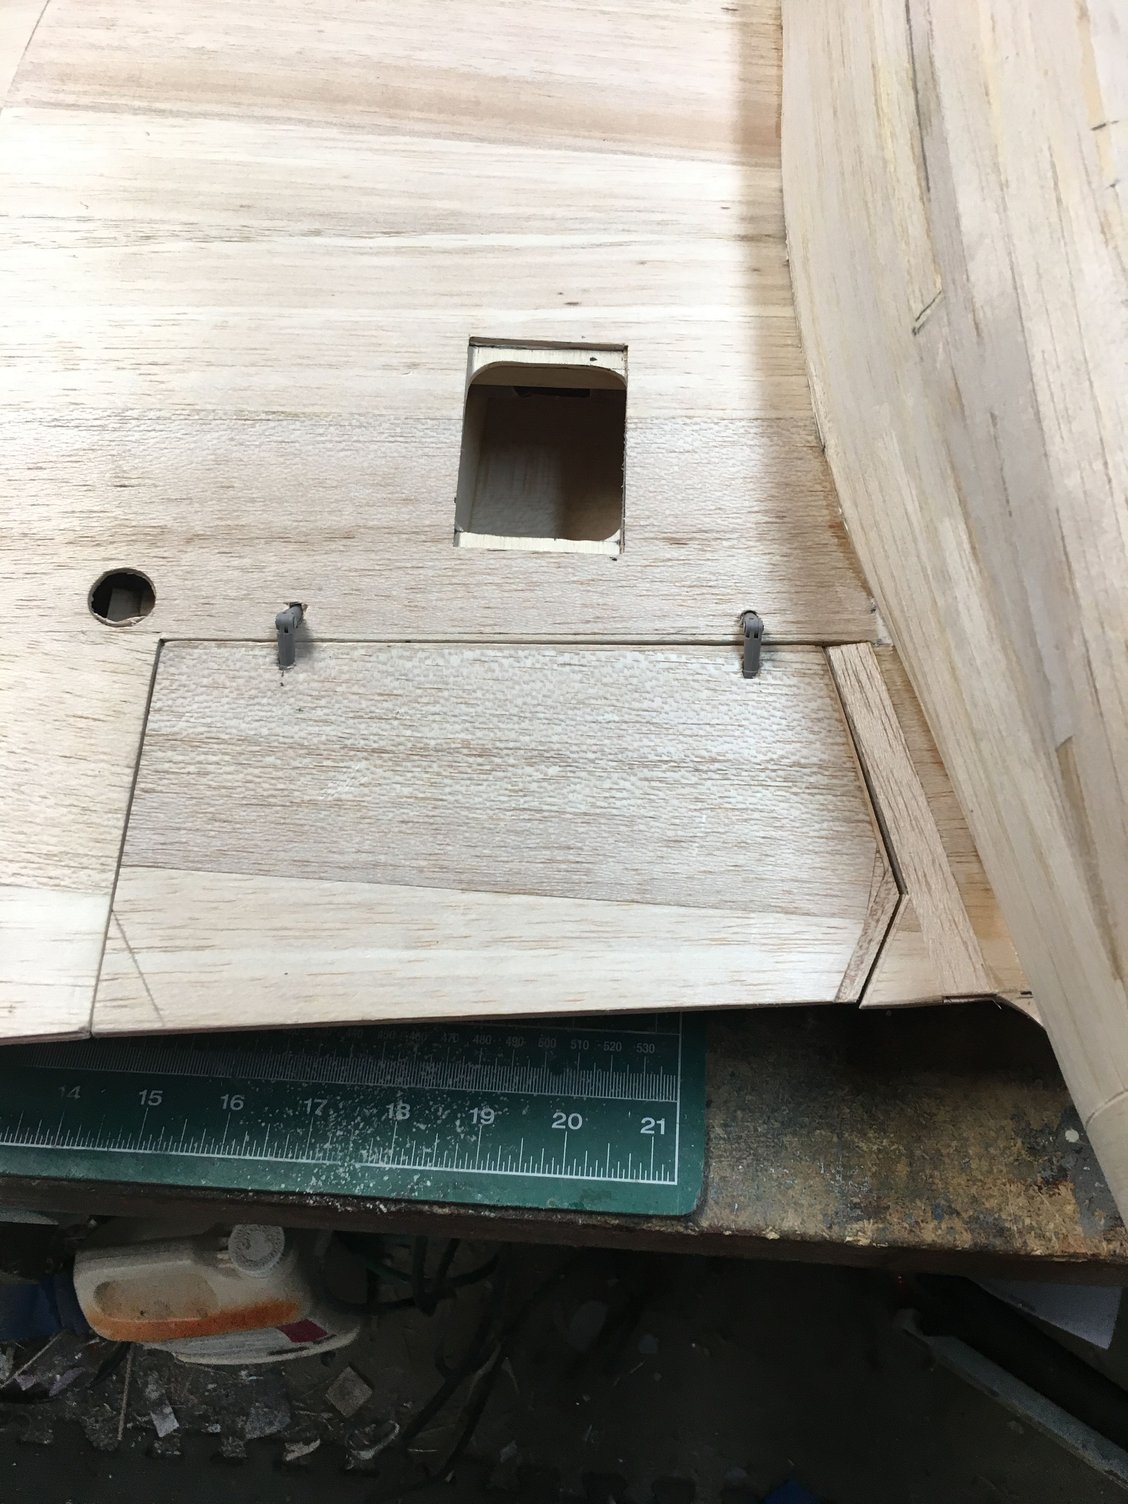
Right wing all set, aileron and flap hinged and moving freely. Left wing the flap is set, working on the aileron. Again I forgot to add the plywood for the horn, and remembered at the last moment, AFTER I applied the medium CA to the face of the aileron, so my fingers got a little stuck getting them installed, but they are installed. Just need sanding and shaping, then I can hinge it and build the nacalle portion of the flap. Now to peel the glue off my fingers.
01-15-2018, 06:15 AM
#61
My Feedback: (13)
Reminds me of an old saying. "How do you eat a whole elephant?" "One bite at a time!." I've got a "whole elephant" that I've been working on for about eight years now that should (knock on wood) fly this year. I know exactly how you feel acdii! Your big Mitchell looks great though so keep up the momentum. Onward and upward!


 02-25-2018, 04:59 PM
#65
Thread Starter
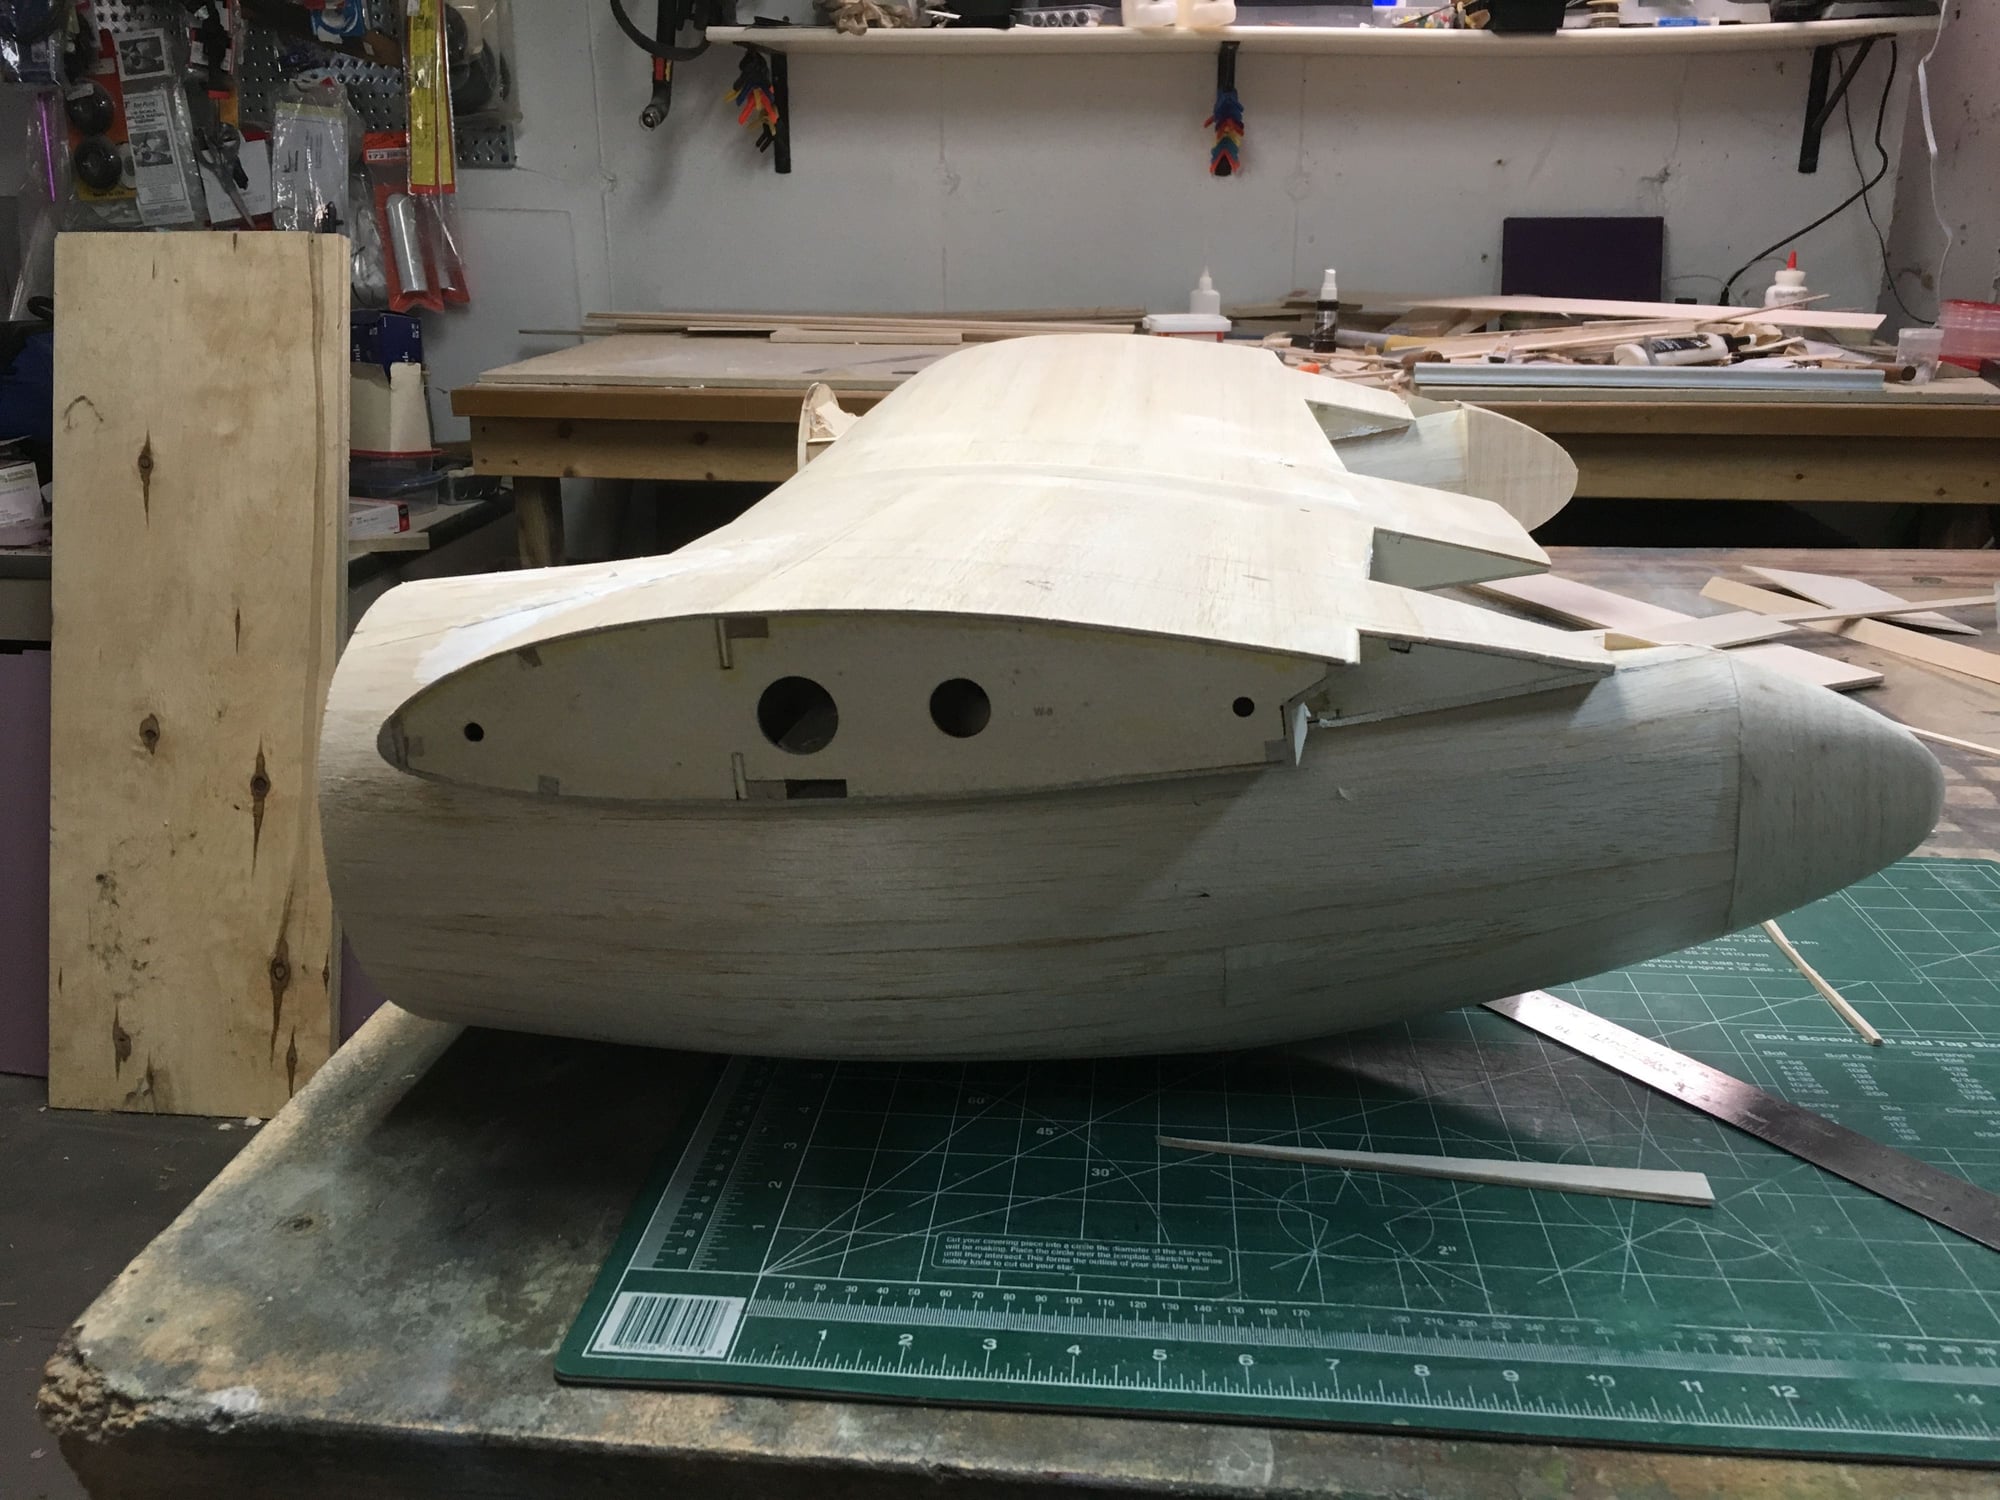
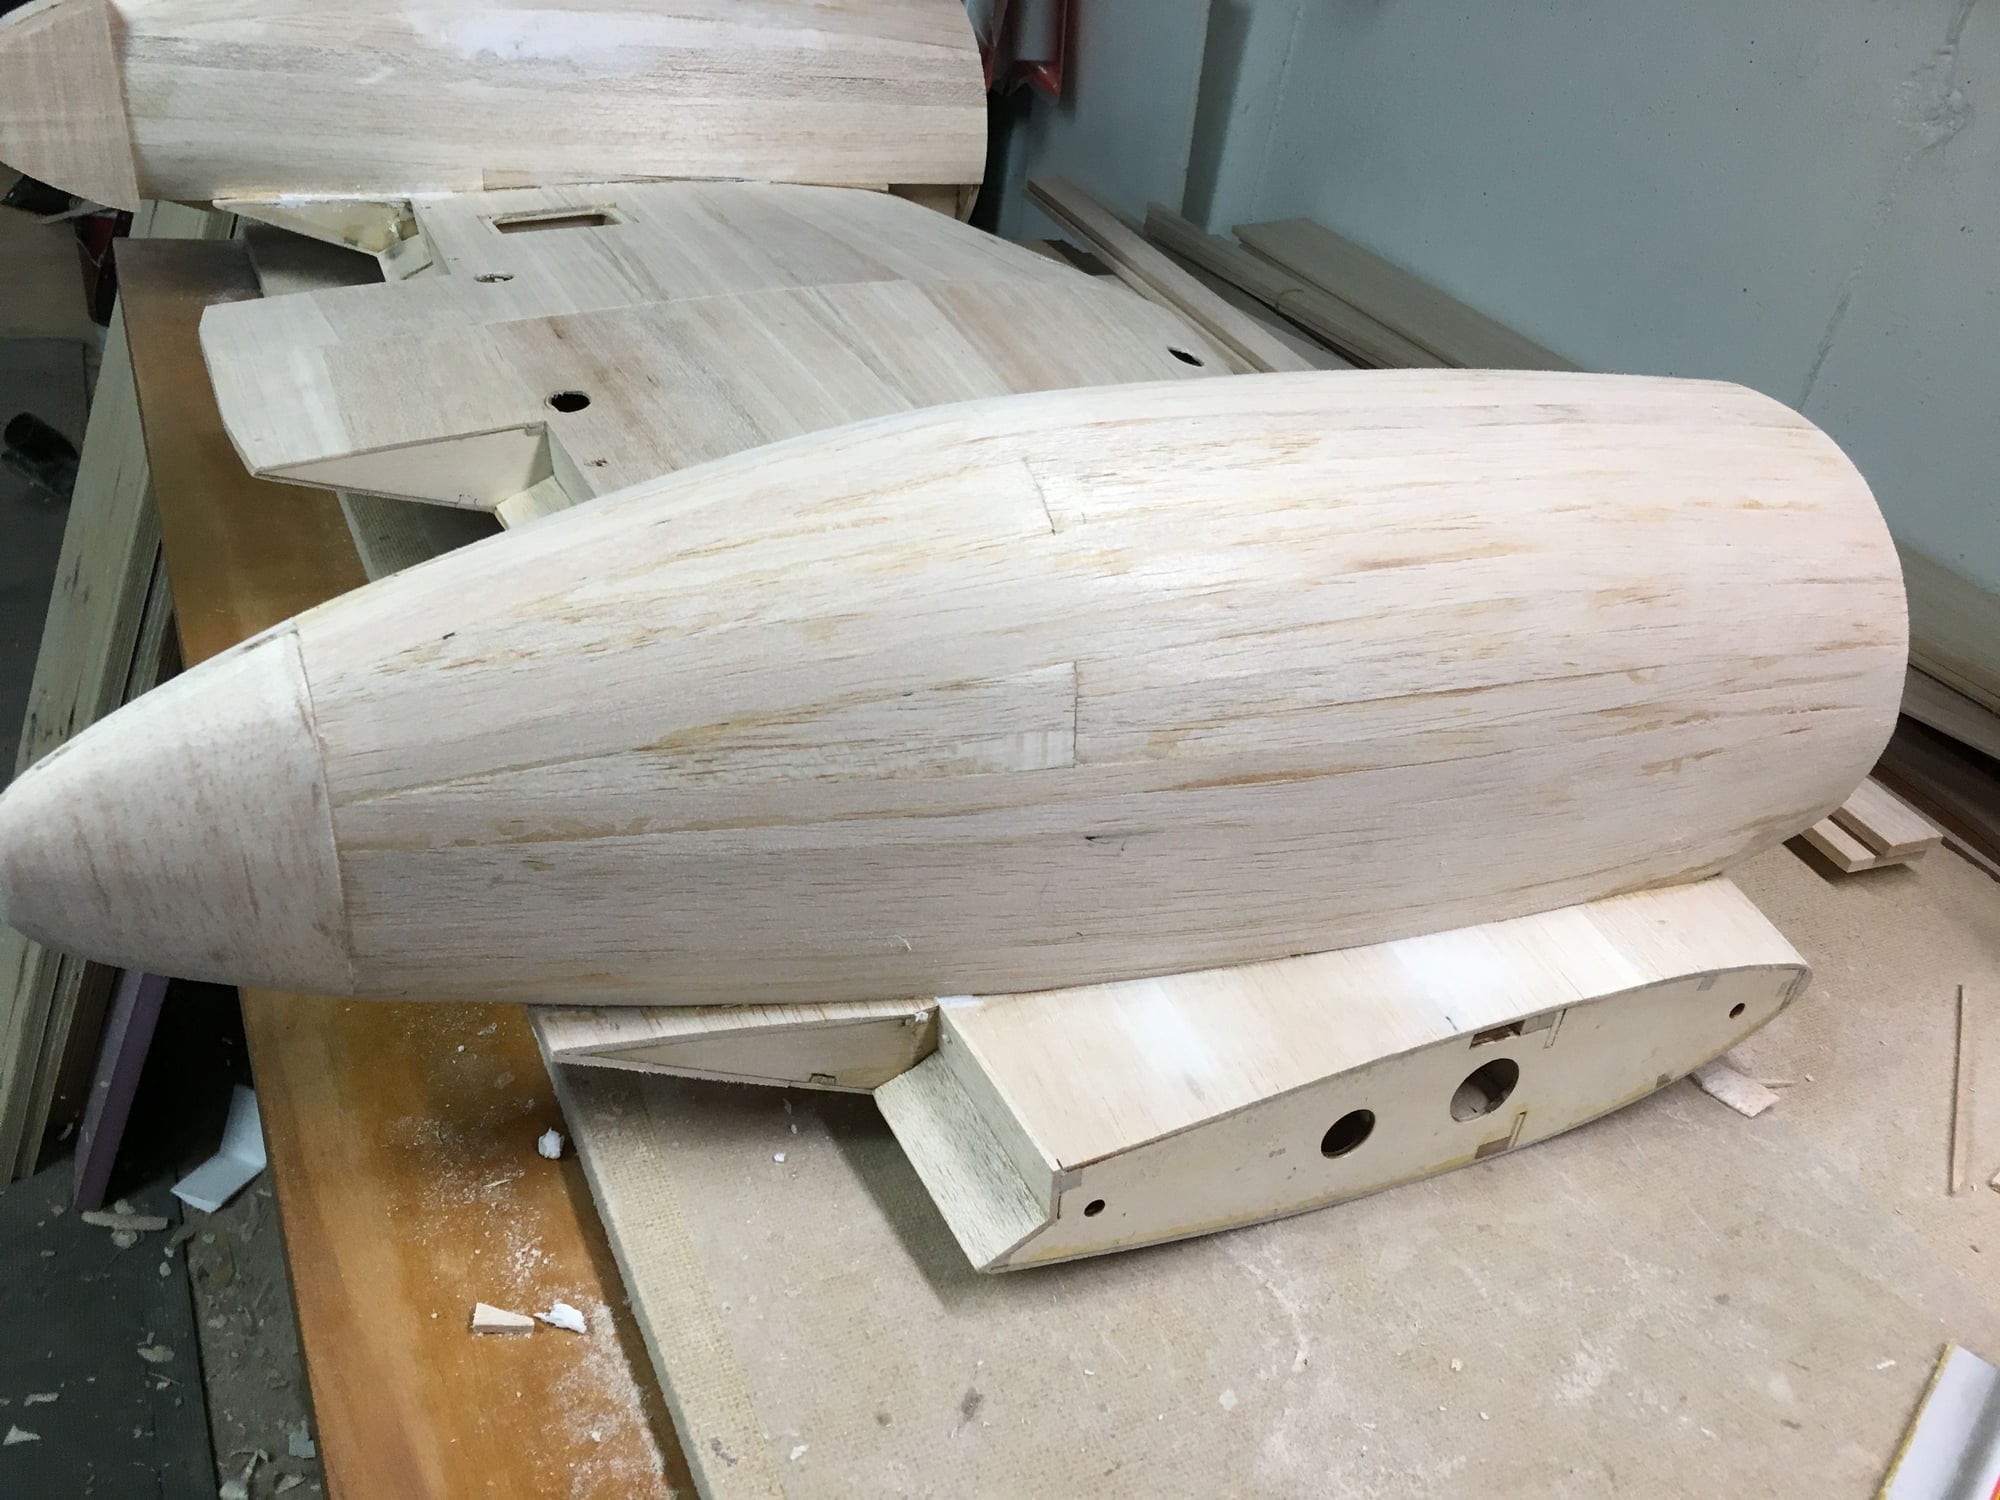
More progress today, one nacelle planked and ready for the top piece to be glued on and finish shaped, the other one has the bulkheads in and waiting on the epoxy for the gear rails to set before I can plank it.


I have a picture for the inside of hte nacelle, but the darn thing wont upload from my phone.
I have a picture for the inside of hte nacelle, but the darn thing wont upload from my phone.
02-25-2018, 06:18 PM
#66
I hate planking, Nice job. I'm 99% ready. Prop hubs on the way. I'll install new batteries in April. The engines will probaly be run in the next couple of weeks. It's starting to get warmer up here (shouldn't have said that)
03-31-2018, 03:31 PM
#68
Thread Starter
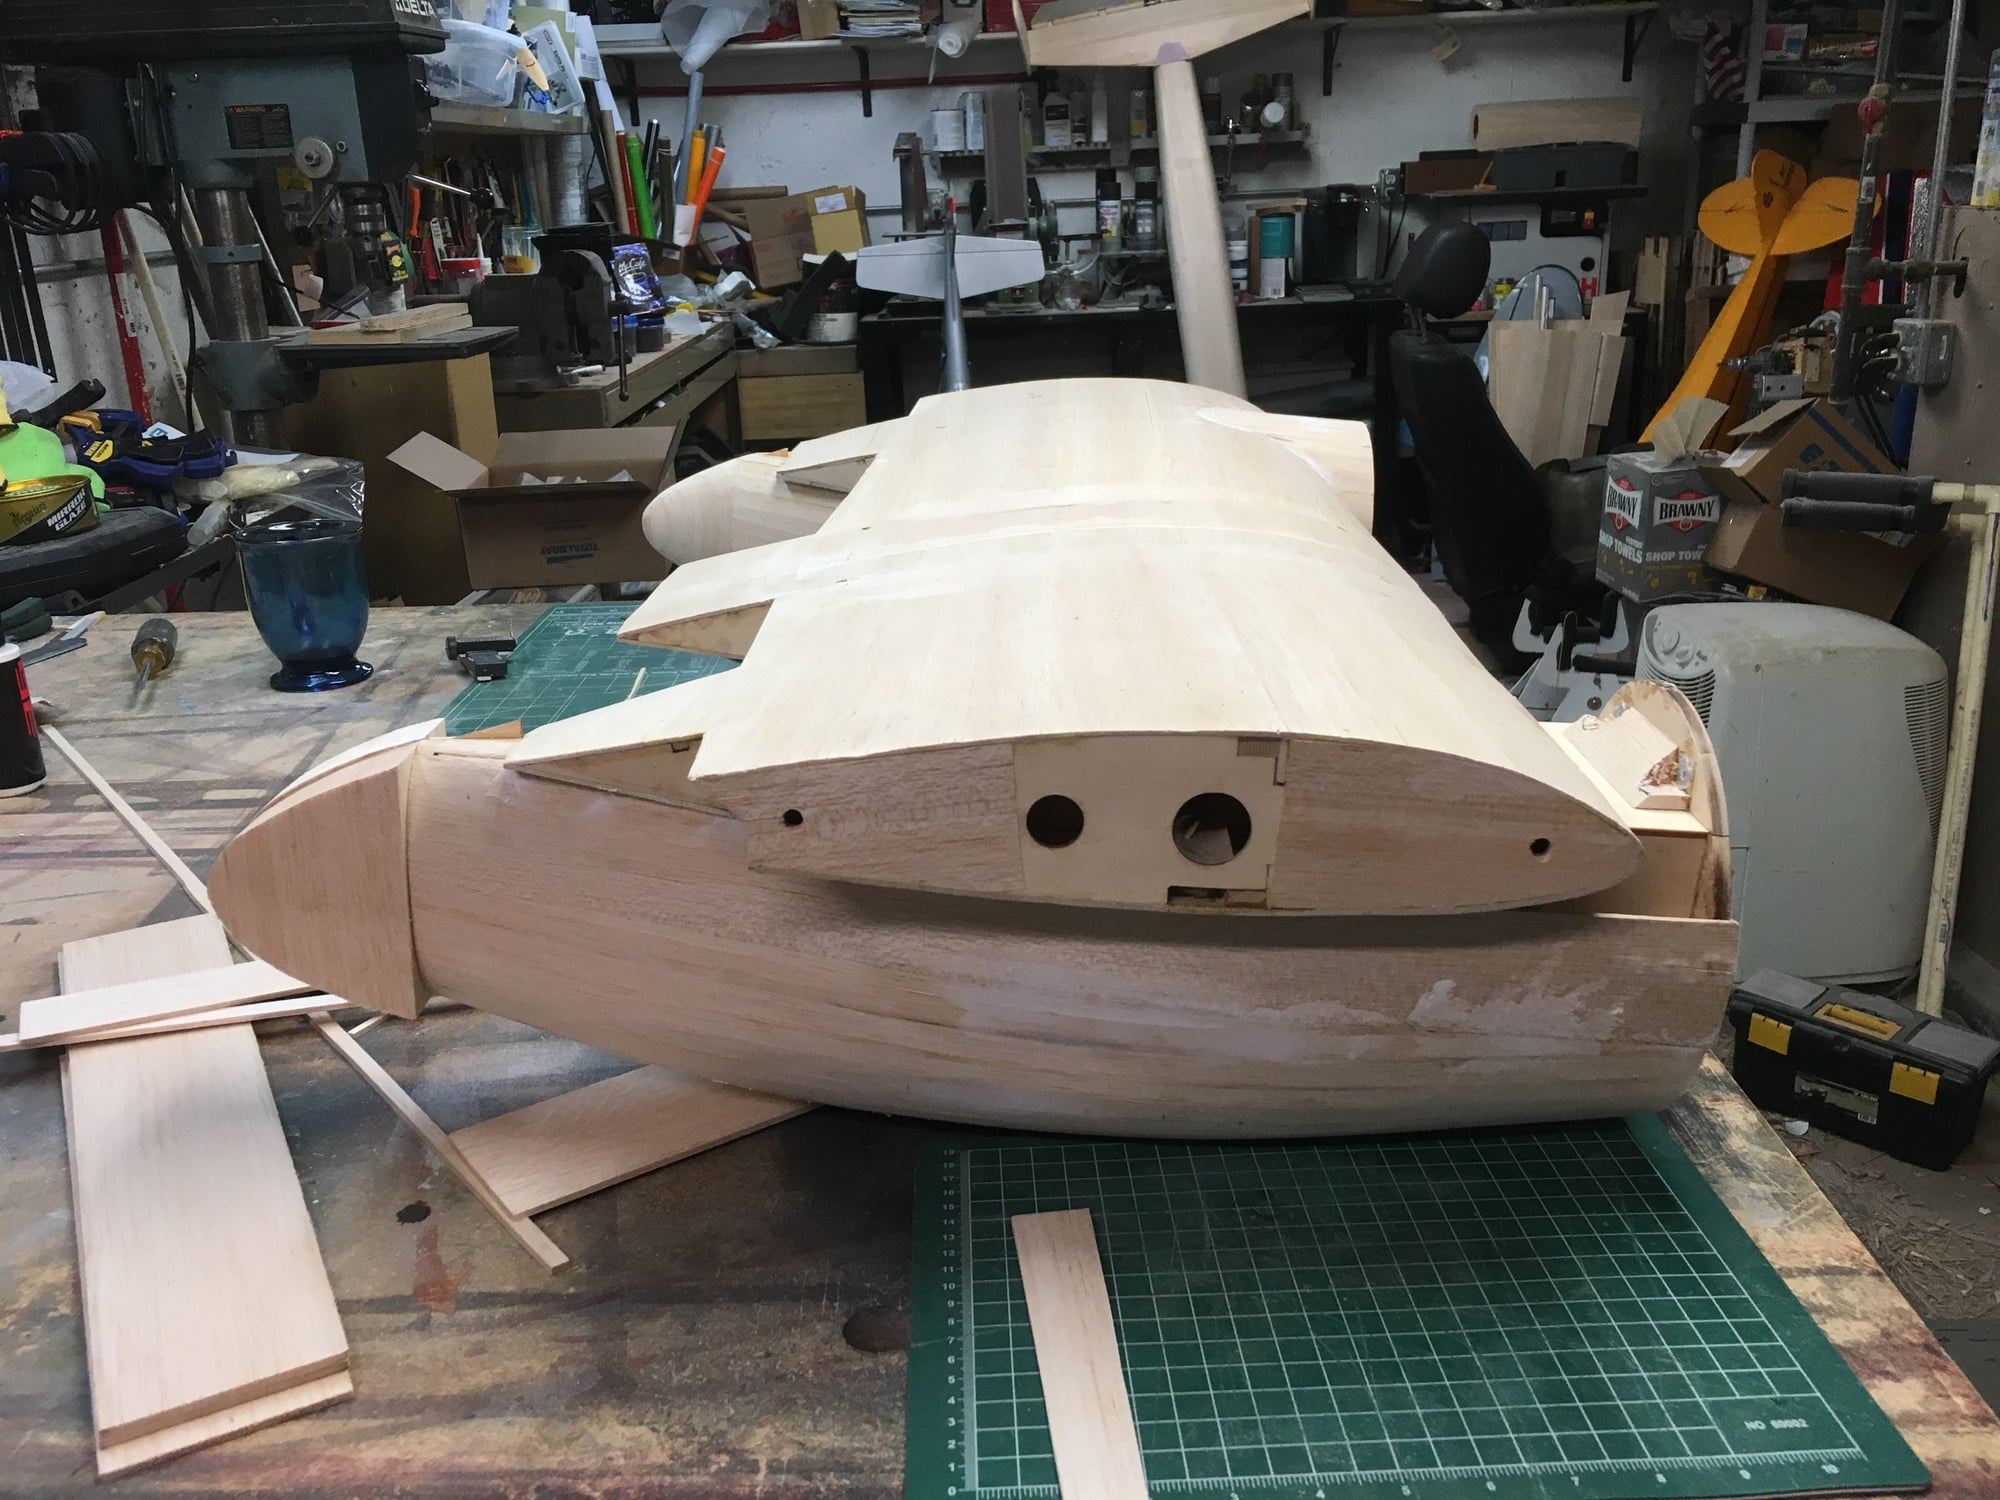
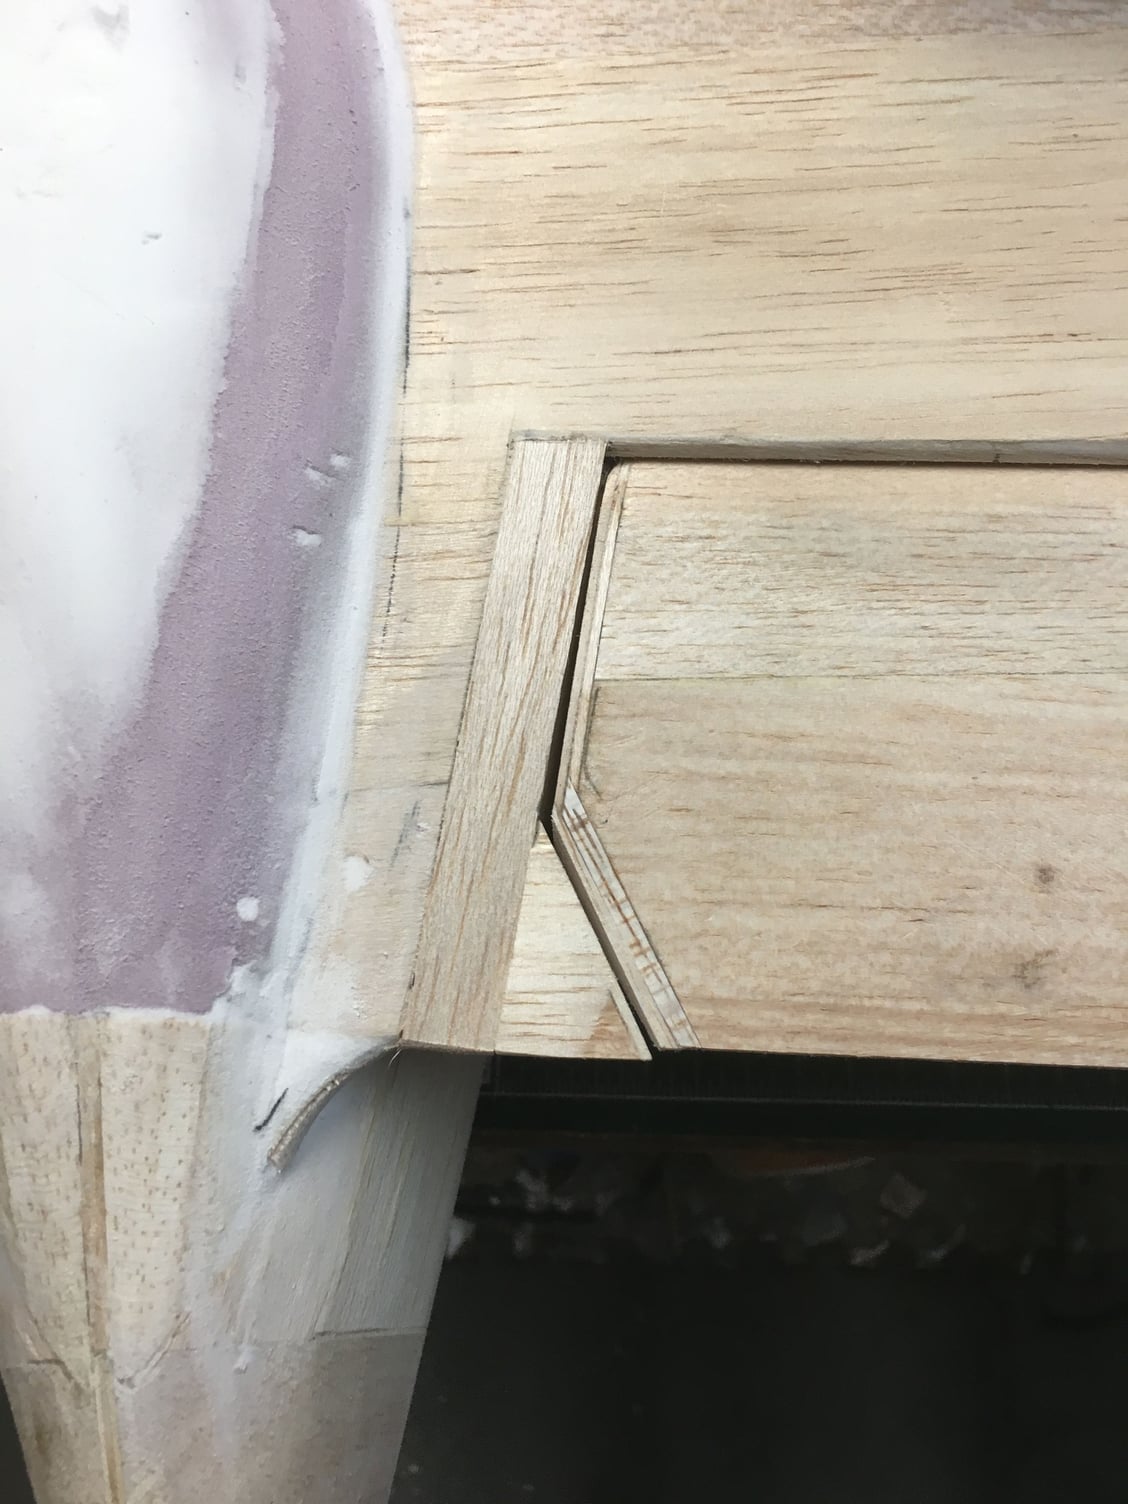
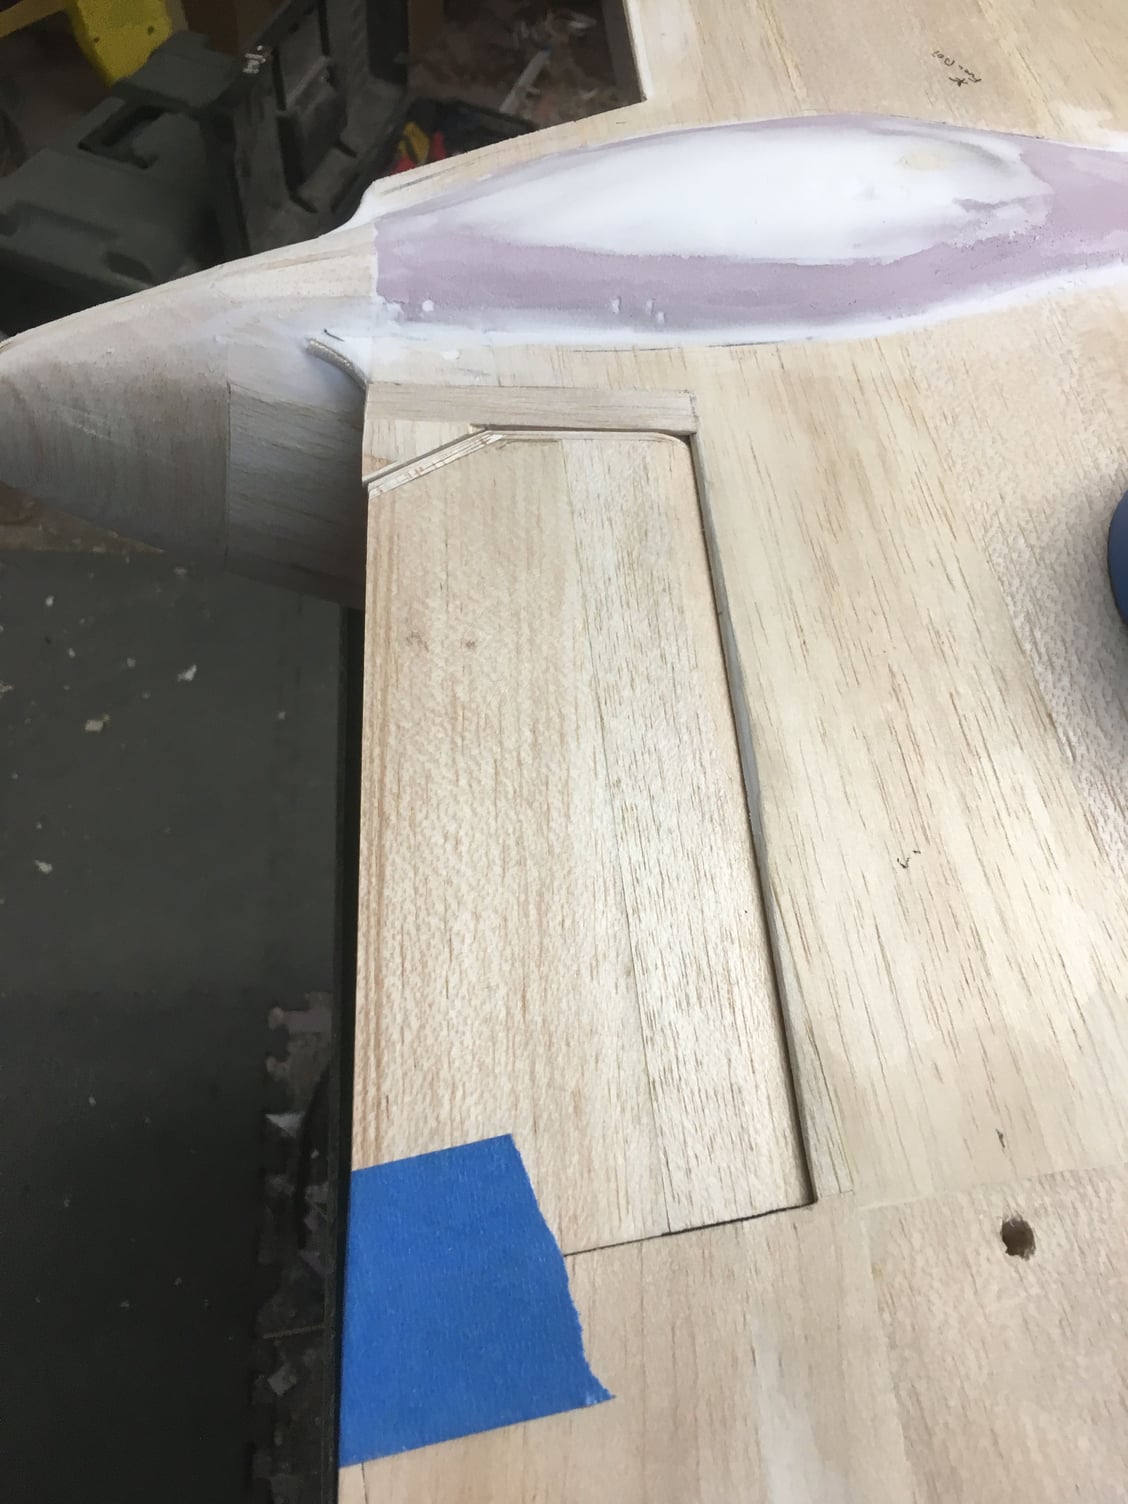
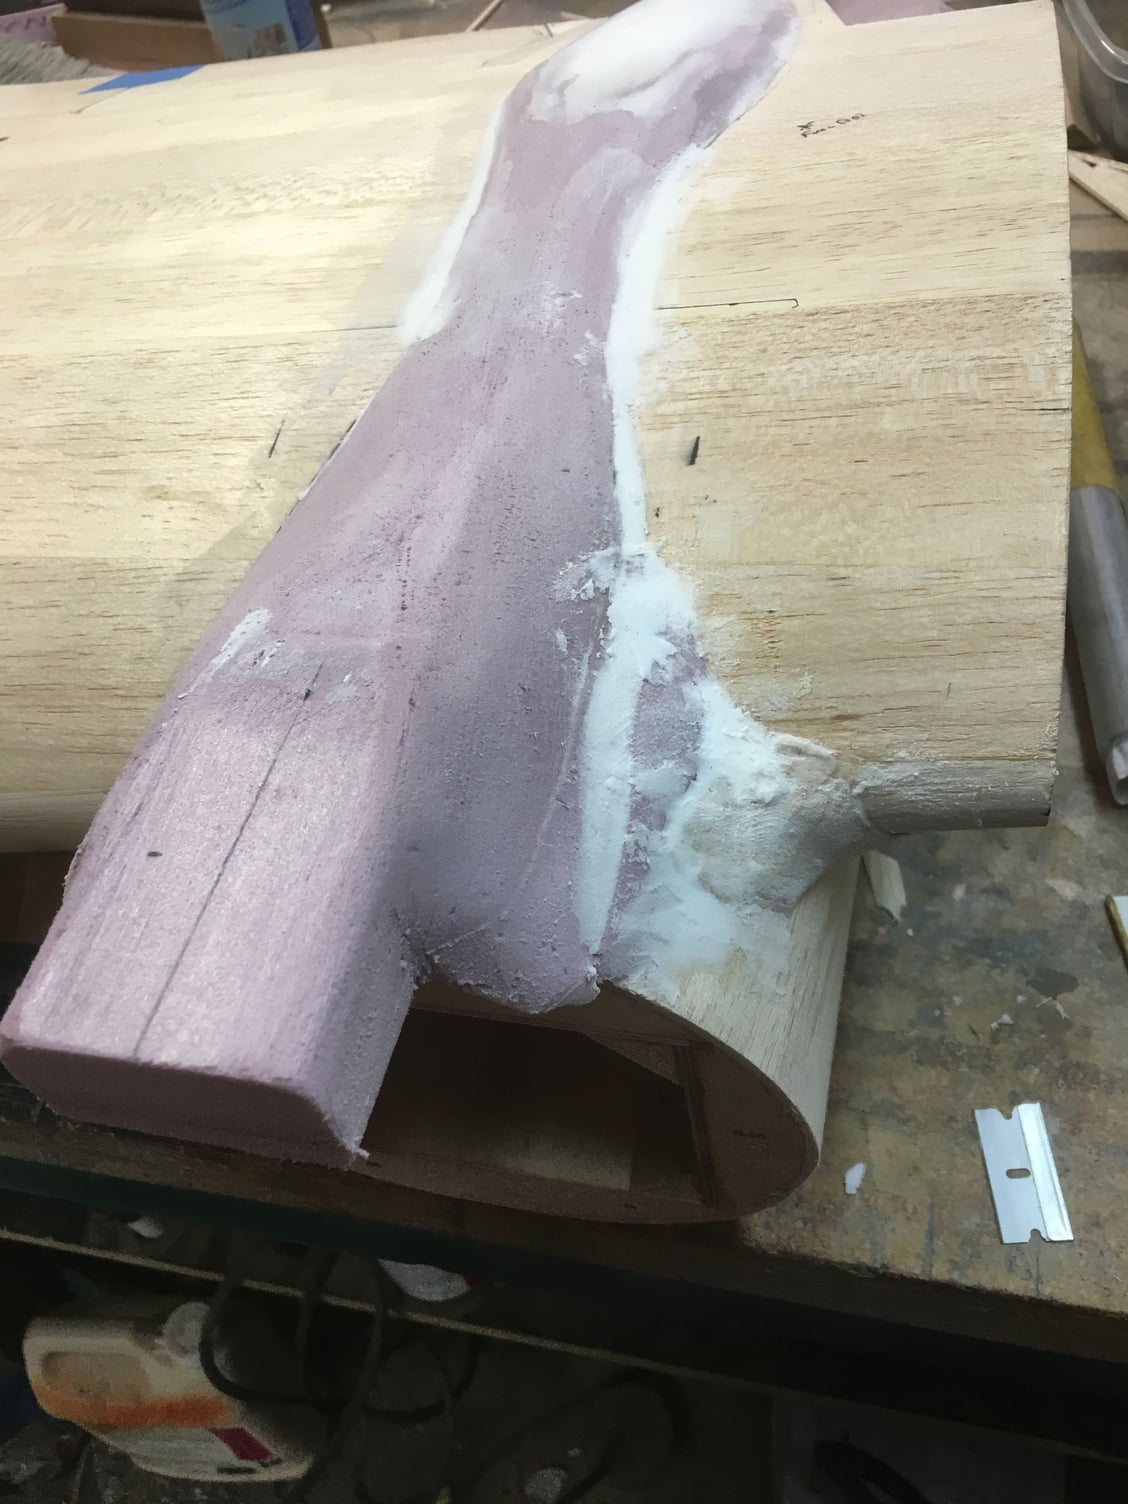
A little of what I got done so far. The top foam part is a PITA to get right, and I am having a hard time trying to find specs on the large oil cooler opening above the cowl that matches the plane I am modeling after.
04-15-2018, 03:00 PM
#69
Thread Starter
Progress.
The scoop I am trying replicate that is on Tootsie is this one
And this is what I have so far. Not easy trying to eyeball it.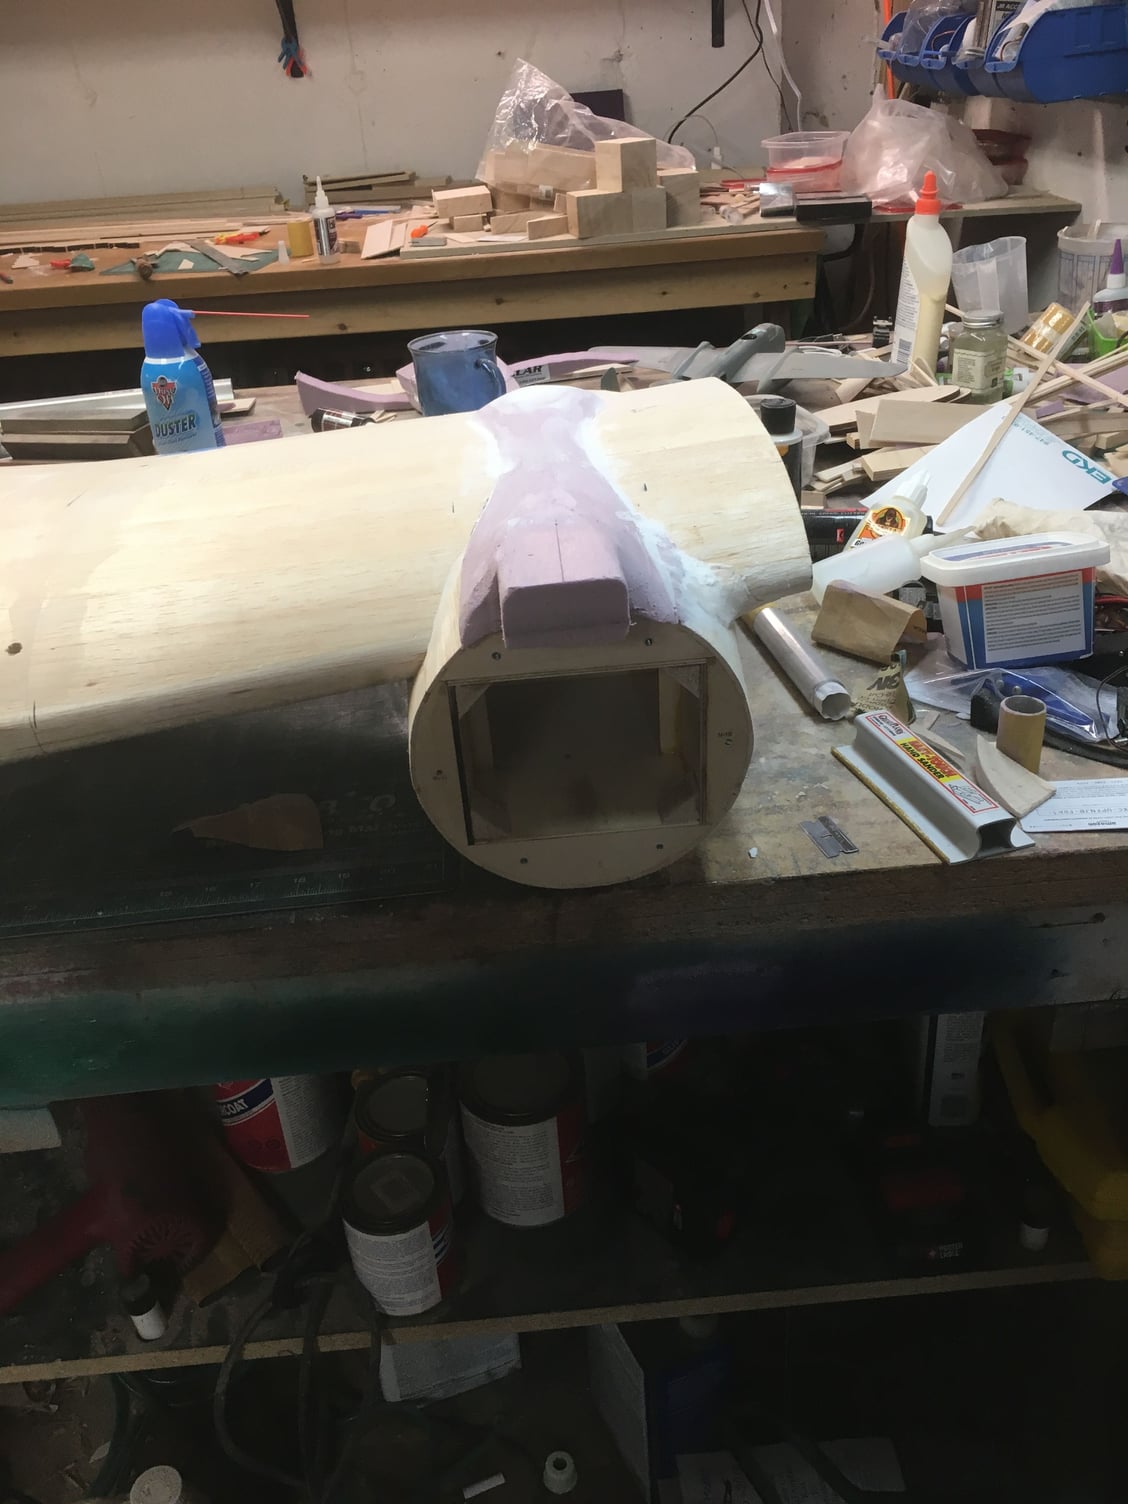
Still a long way to go.
I have the left inner flap done, going to glass it to lock it in so that it doesn't get damaged and set it aside. I plan to make a balsa ring to match the real one for the front of the scoop, then all that is left is the bump out for the wheel in the bottom of the Nacelle and the left side is done, then move to the right and do it all over again. Then move on to the outer panels and fit and finish the flaps and the scoop on the leading edge and think about the exit slots, do them or not. Will decide when I get to that point.