


New Giant Top Flite F6F Hellcat coming soon?
 02-27-2020, 07:27 AM
#401

Hi Chris:
Normally I do a full build or ARF.
It's the first time I will have done a Top Flite RTC. I'm sort of interested to see the build quality and prep time needed before the finishing stages.
( I will post pics)
Finishing the model myself will also give me the option of scaling the model to the next level.
Just want to keep the weight down.
Best regards
Randy
 02-27-2020, 06:33 PM
#402

I’m pretty sure the plane will handle some extra weight. Even with the FG60 the plane feels light and floats in when landing. Compared to the Corsair with the FG84 I feel that it was pushing the limits and at times the landings got too sporty in certain conditions. I think the Hellcat will take on some weight and behave very well especially because the stall characteristics are so good. It should just mush through and recover without dropping a wing. I wish I could ballpark the weight better but let’s just say the additional weight, by comparison, is up-to but not to exceed the weight of the FG84 minus the FG60. I wouldn’t add more than the equivalent weight in other words and then see how it flies.
Hellcat
Wingspan: 86 (2184mm)
Wing Area: 1358 sq in (87.6 sq dm)
Weight: 24.7 - 27lb (11,222 - 12,247g)
Wing Loading: 42 - 46 ozsq ft (128 - 140 gsq dm)
Corsair
Wingspan: 86.5 (2195mm)
Wing Area: 1376 in (88.8 dm)
Weight: 23-25 lb (10.43-11.34 kg)
Wing Loading: 39-42 ozft (119-128 gdm)
I think the Hellcat has a better airfoil than the Corsair even though technically the Corsair has more area and span. When the Corsair is light with a DLE 55RA it performs very well but I can say flying them back to back, with a DLE 61now, I prefer the Hellcat.
Where the Hellcat has an issue is in ground handling. The Corsair is much more stable and less prone to ground loops.
Last edited by Chris Nicastro; 02-27-2020 at 06:46 PM.
02-28-2020, 06:12 AM
#403
Hi Chris:
Thanks for the info and spec comparison re the Hellcat and Corsair.
( Nice you have the two models to compare).
Agreed, re the analysis of airfoil on the Hellcat after reading your flight results. (Post #310)
(You may have already addressed these questions in previous posts, apologies, if so, could you indicate post number)
Questions:
1) Do you recall the all up weight of the model?
2) Did you require nose or tail weight with the FG60R3?
3) Approx. how much "toed out" on the LG would you estimate.....1 degree (ish) or more?
Thanks again.
Best regards
Randy
Last edited by cgcrc; 02-28-2020 at 06:15 AM.
02-28-2020, 04:14 PM
#404
I don’t recall the info for questions 1 and 2 right now but I can check soon. The toe out was basically equal to the play inherent in the struts. I set the wheel/axle to be square or 0 degrees toe in knowing the strut will twist under load when landing. That’s my starting point and then I might add more toe out as needed but understand as they wear it will increase.
02-28-2020, 08:40 PM
#405
I don’t recall the info for questions 1 and 2 right now but I can check soon. The toe out was basically equal to the play inherent in the struts. I set the wheel/axle to be square or 0 degrees toe in knowing the strut will twist under load when landing. That’s my starting point and then I might add more toe out as needed but understand as they wear it will increase.
Thanks for the info.
Talk soon.
Randy
03-07-2020, 11:39 AM
#406

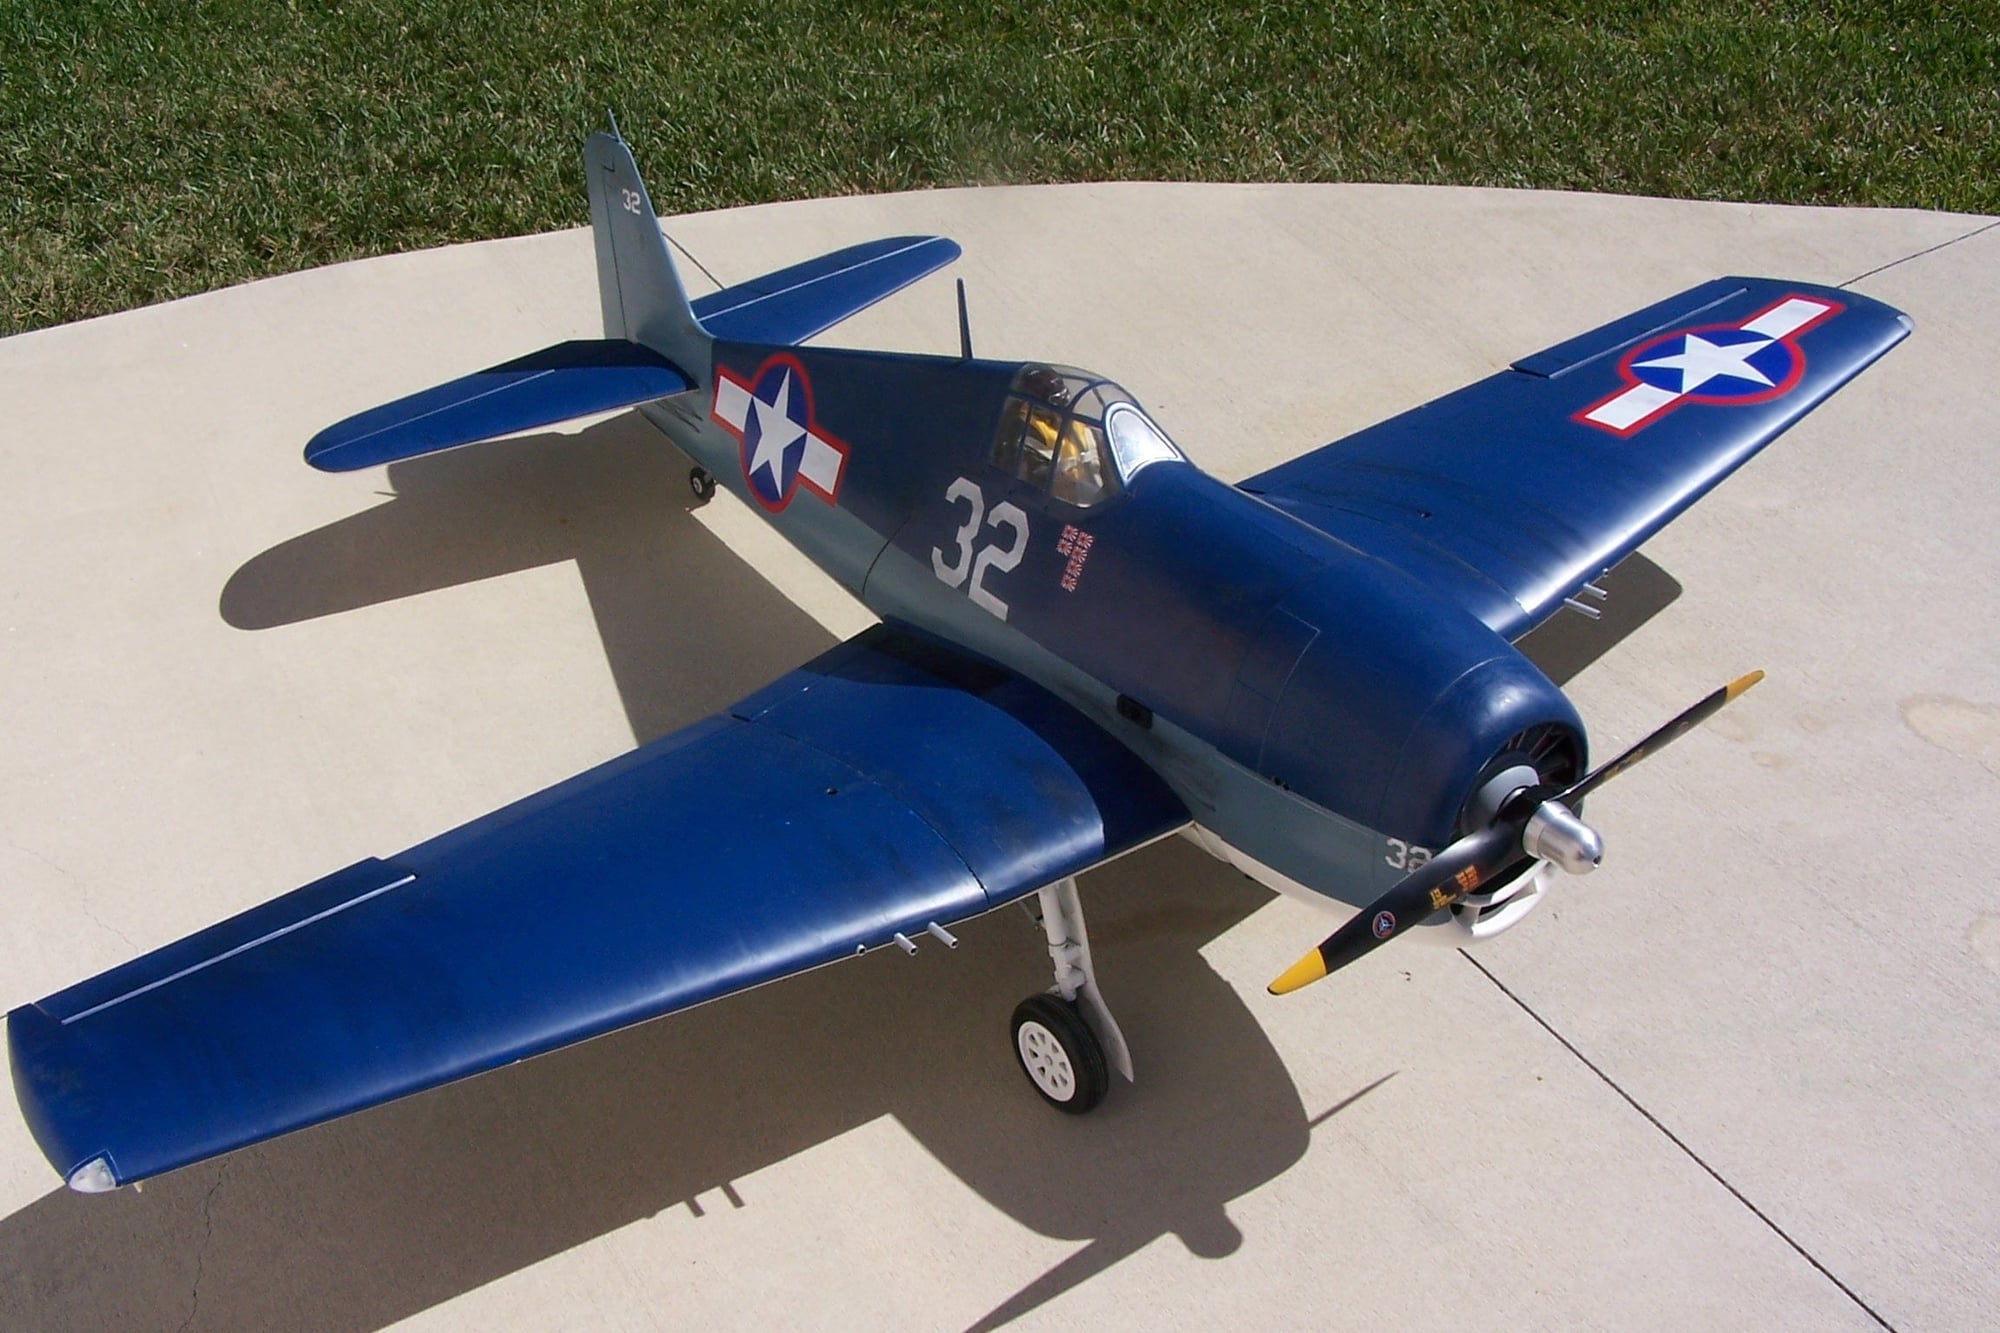
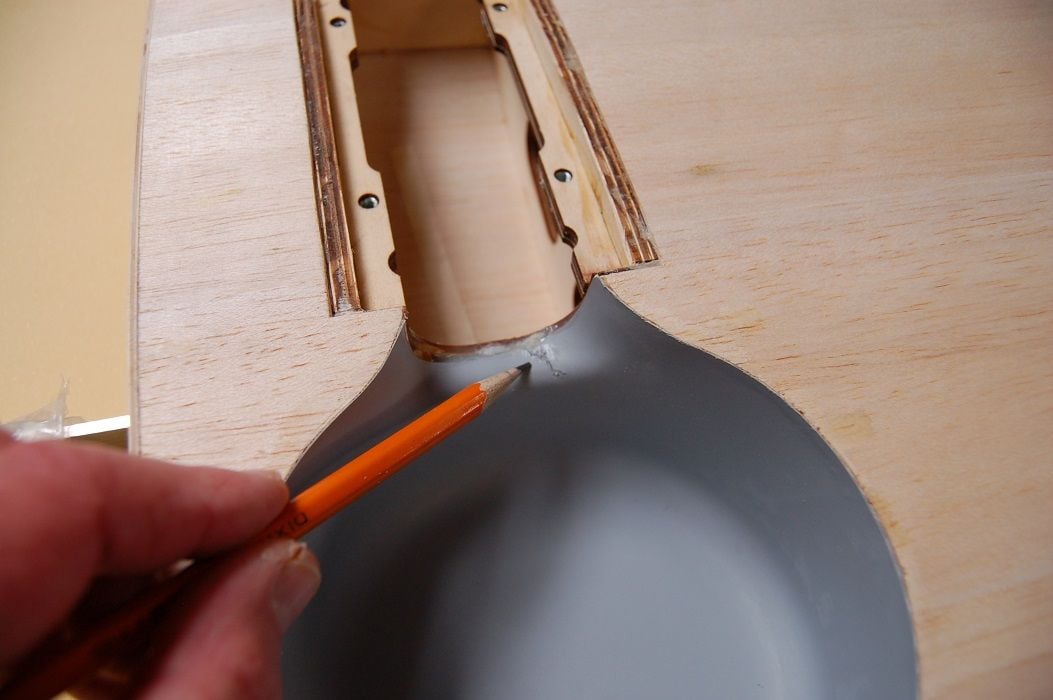
I just got a Top Flite Hellcat. Purchases used, but looks to be in good condition. I rewired and changed control set up for my seven channel radio. Has a DLE 61 that started and ran ok. It has Robart electric retracts that seem to work ok. Had to changed around one flap servo so I could use a Y connection. I don't like using servo reversers as I have had interference with them in the past. I'm using a three battery set up, one for the radio, one for the retracts and one for the ignition. I want to isolate the engine ignition system from the radio and want a separate battery for the gear so in the event of gear problems, the gear won't drain the receiver battery. I had one good Life 04, 3000ma I'll use for the radio. Two other batteries are old nickel metal that won't take much charge. I have ordered two more lifes and won't fly until they are installed. I want to do the cowl flap mod that Chris did. But the cowl ring has already been glued in. Looks like with Hysol, so I'll have to deal with that. Have to leave town for several weeks so I may not get to maiden her for a while. Here are pictures. Looks like all the other Hellcats. I may get a three blade prop, just because they look neat.
03-07-2020, 03:53 PM
#407
My Feedback: (53)
Robart recommends a 3,000 mah lipo (3 cell) with a voltage regulator set at 9 volts, which is what I use. I use 2 Spektrum 3,000 mah LiFe flight batteries on the Spektrum 12 channel power-safe receiver, then a separate 2 or 3,000 mah Spektrum LiFe on ignition. Added up, 4 battery packs used. I also have a DLE 61 with a scale 3-blade Biela 21x10 prop. Flies very well on that combination.
03-07-2020, 06:38 PM
#408
Thanks for the info Planejaw. I have Robart electric gear in an H9 Mustang with a DLE 55. I've been using a Life 2S 6.6 volt battery for the gear. Seems to be working ok. About 20 flights on it. If a Life 6.6v battery runs the gear ok, what is the benefit of more voltage? How about a Lipo 7.4v S2 battery? I have one of those but no voltage regulators in hand.


 03-09-2020, 10:57 AM
#411
Join Date: Dec 2018
Posts: 10
Likes: 0
Received 0 Likes
on
0 Posts
Remember to plan on adjusting the alignment of the 3 cylinders to the 3 cowl screws. When installed in the regular way the bolt pattern and engine match to block access to the screws. So unless you make the cowl screws radial, on the outside of the cowl, you may consider inverting the engine or another option...
I can’t stress enough what a monumental PITA it is when you have the 60R3 installed in this plane and you need to get the cowl off.
I posted photos but no video of ours flying. You won’t be disappointed. You will need to use the tank back pressure line from the engine for more reliable performance.
I can’t stress enough what a monumental PITA it is when you have the 60R3 installed in this plane and you need to get the cowl off.
I posted photos but no video of ours flying. You won’t be disappointed. You will need to use the tank back pressure line from the engine for more reliable performance.
Thank you for you contribution to this thread, tons of good info from you in here, and much appreciated! I have seen in a different thread caution regarding mounting the Fg-60r3 inverted as the drain for the crank case is located between cylinders 2 and 3, and therefor would only function when inverted, therefor I guess I will look into mounting the cowl in a different fashion.
Thanks again for the intel, and hope to hear more from you on future flights as weather improves for us here in the Pacific NW.
Michael
03-09-2020, 11:01 AM
#412
Join Date: Dec 2018
Posts: 10
Likes: 0
Received 0 Likes
on
0 Posts
Hi Michael:
Thank you for your reply.
The only other YouTube I am aware of with the Saito FG 60 R3 is by "Nitro House", however install only...no flight reports.
I suppose just a matter of time depending on what part of the country he lives in and present weather conditions.
Good to hear you are going to pursue with the radial install. I will be interested to see and hear your progress as you move forward on the build.
(Chris is reporting good results with the radial combo, for those who have the engine, I think it will be a great radial engine choice.)
Stay in touch.
Best regards
Randy
I saw NitroHouses install video too, and also was hoping for a flight video from them. You can’t even leave a question on the video as comments are disabled, and no contact info I could find in the “about” tab either. Great quality video, so I’m hoping for more.
I still haven’t started mine as I have several other planes that need small jobs completed on them. I kind of want everything else buttoned up when I start this project. Should hopefully get started in the next few weeks, (with work and all). I look forward to seeing your progress as well. I’ll be sure and post updates when I have them.
Michael
03-10-2020, 08:33 PM
#413
Chris -
Thank you for you contribution to this thread, tons of good info from you in here, and much appreciated! I have seen in a different thread caution regarding mounting the Fg-60r3 inverted as the drain for the crank case is located between cylinders 2 and 3, and therefor would only function when inverted, therefor I guess I will look into mounting the cowl in a different fashion.
Thanks again for the intel, and hope to hear more from you on future flights as weather improves for us here in the Pacific NW.
Michael
That engine suggestion was based on pure frustration, lol, do anything but what the manual suggests!
Im going to fix the wing. I bought some covering I can’t seem to find the matching blue and it’s not the same as the Corsair. The flat white is not available either so it will be a true patch job, sadly. I’ll get started on the wood repair and hold out as long as I can for the covering.
No snow in town so things are looking good early!
03-10-2020, 08:58 PM
#414
Hi RBean:
Your new purchase of the Hellcat looks to be in good shape. Congrats.....
Agreed, take your time and set it up the way you want.
Keep us posted on your progress.
Hi Michael:
I hope it's just a matter of timing until "Nitro House" posts an updated video.
I'll be receiving my RTC version later this week. Interested to see what it looks like.
I'll post pics of the unboxing.
Best regards
Randy
03-10-2020, 09:08 PM
#415
Youre welcome!
That engine suggestion was based on pure frustration, lol, do anything but what the manual suggests!
Im going to fix the wing. I bought some covering I can’t seem to find the matching blue and it’s not the same as the Corsair. The flat white is not available either so it will be a true patch job, sadly. I’ll get started on the wood repair and hold out as long as I can for the covering.
No snow in town so things are looking good early!
Don't know if this helps you out or not.
I just checked Horizon Hobbies web page.
They show the Insignia Blue in stock. TOPQ0507
As you say the white is not available however could a flat clear be lightly sprayed over the white you will be using.
Best regards
Randy
03-14-2020, 07:22 AM
#416
Hi Fellows:
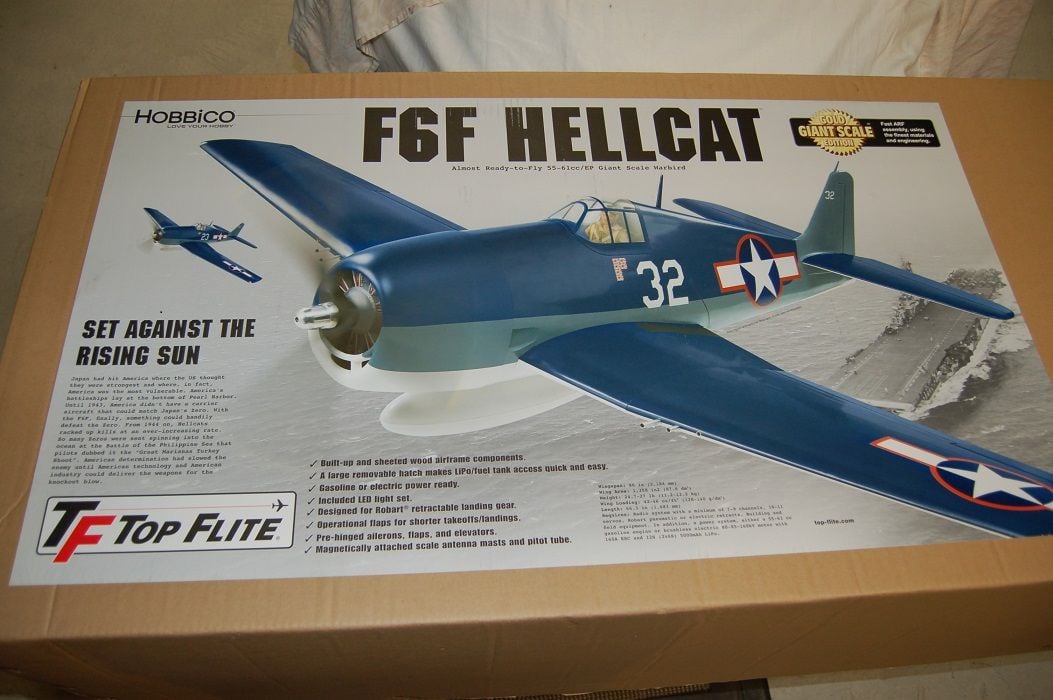
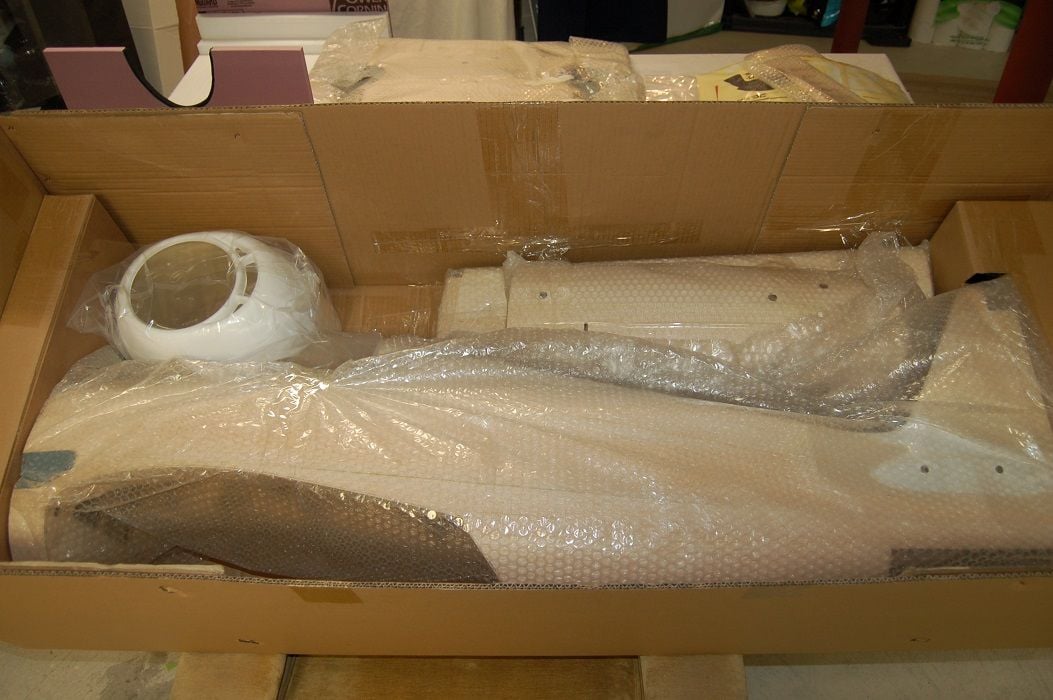
I received my Top Flite Hellcat RTC (Ready to Cover), attached are a few comments and pics of the unboxing.
(I have a build and an assembly on the table right now but the Hellcat will be the next one up. All comes down to timing….)
For those interested in the model and comparing the cost of the ARF vs RTC it is more cost effective to go with the ARF. Keeping in mind that the flat mid blue and white Monokote has been discontinued.
Although the ARF version is a very attractive colour scheme and design I opted to try a RTC version. All the models I have flown over the years have either been full builds or ARF. I have never done a RTC model.
This will give me the opportunity to cover and finish the model of my design along with added detailing of panel lines and rivets etc.
Mylar covering certainly have there advantages however I will go back to my roots and do a light glass cloth and painted finish. ( I will explain more of my process as I move forward on the assembly).
Randy
03-14-2020, 07:27 AM
#417
UNBOXING
Let me start by saying I consider myself a “fussy” builder…..wow….my first unboxing impressions are that Top Flite have done a great job on the craftsmanship and assembly.
(If all RTC and ARF’s are made to the same degree they have certainly done an excellent job.)
I was concentrating on:
Let me start by saying I consider myself a “fussy” builder…..wow….my first unboxing impressions are that Top Flite have done a great job on the craftsmanship and assembly.
(If all RTC and ARF’s are made to the same degree they have certainly done an excellent job.)
I was concentrating on:
- Balsa grade and weight…. Looks to be a select balsa, B grade, light to medium weight.
- Straightness of the flying surfaces…..I’m sure a lot of the components were built in a jig, but an excellent job.
- Joints/seams of the balsa sheeting…….excellent work.
- Sanding of the model……Pretty darn good, a few areas to bring it up to my liking but not much.
- Overall weight…..since I am going to be finishing the model in light glass cloth, thinned out epoxy resin then paint I weigh all my components before and after.
Randy
03-14-2020, 07:35 AM
#418
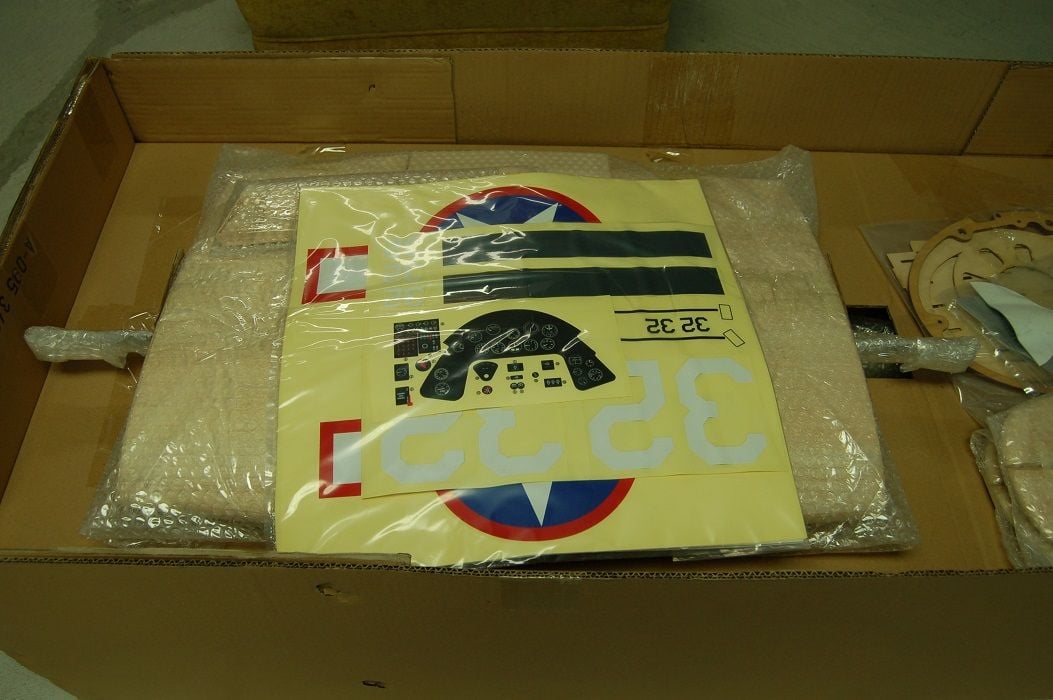
The box arrived with a little blemish on the side but no issue with the model since there was a second layer of cardboard inside the box for added protection.
Top Flite do a nice job bubble wrapping and then taping the pieces to the box to eliminate the parts moving during shipping.
Instruction manual has all the addendum sheets added. (Same manual as the ARF…nothing added for the RTC version.)
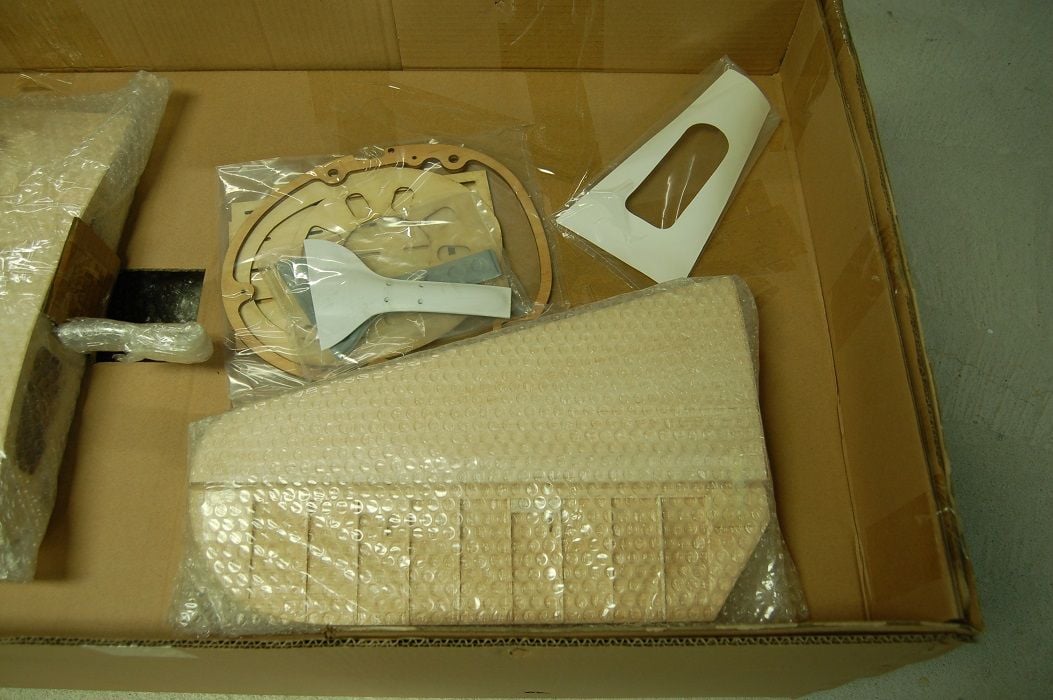
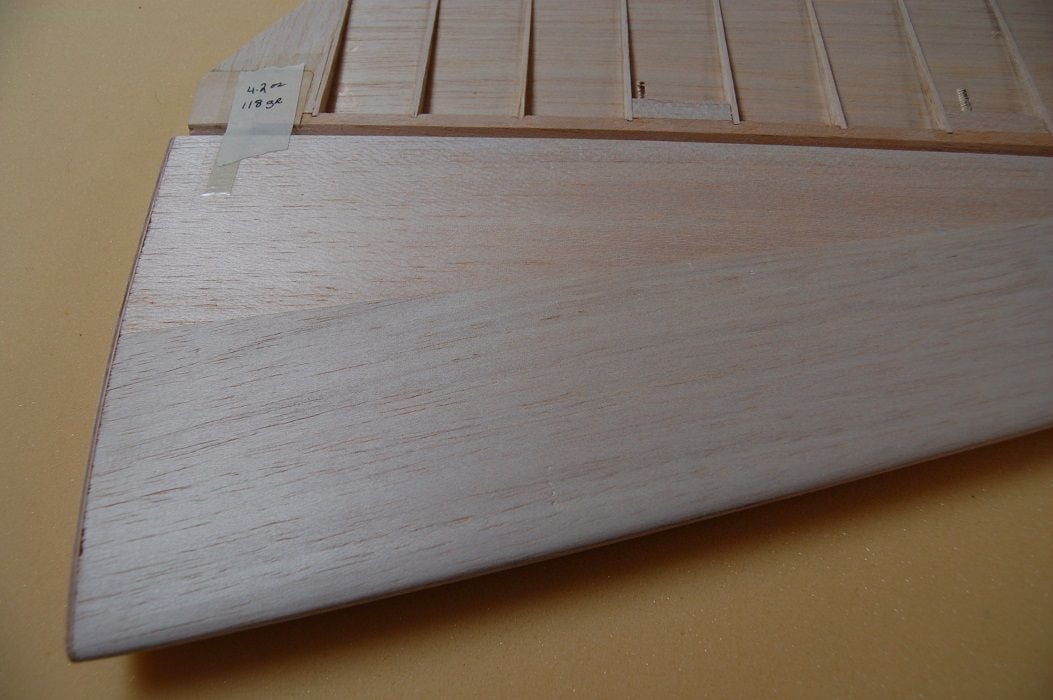
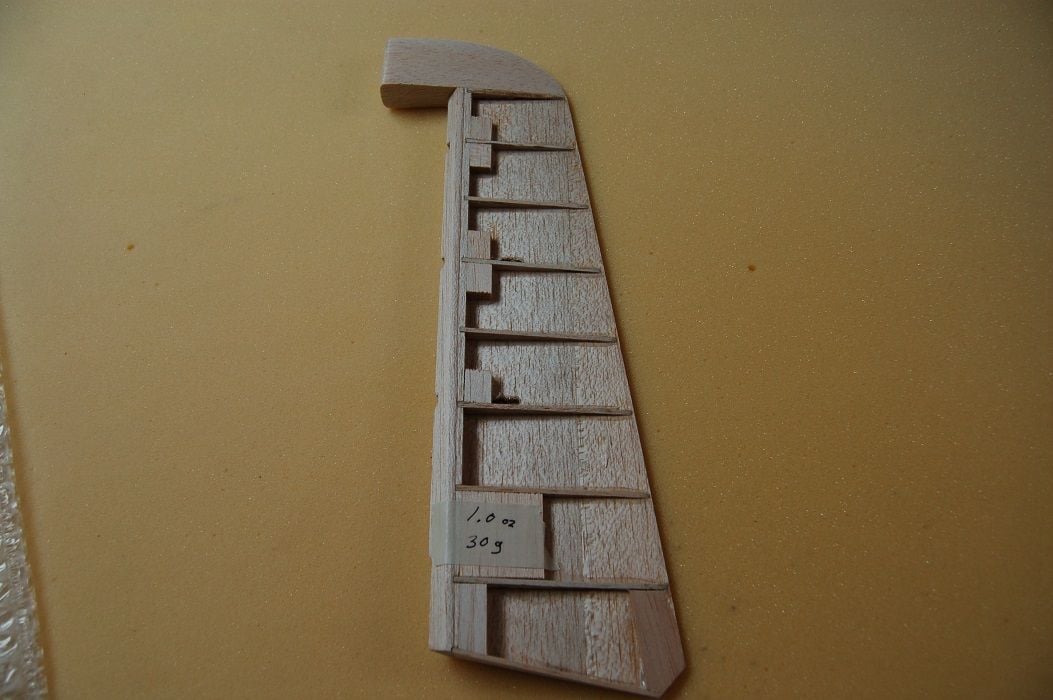
Stab…elevator and fin are straight, nicely sanded on the seams and balsa blocks.
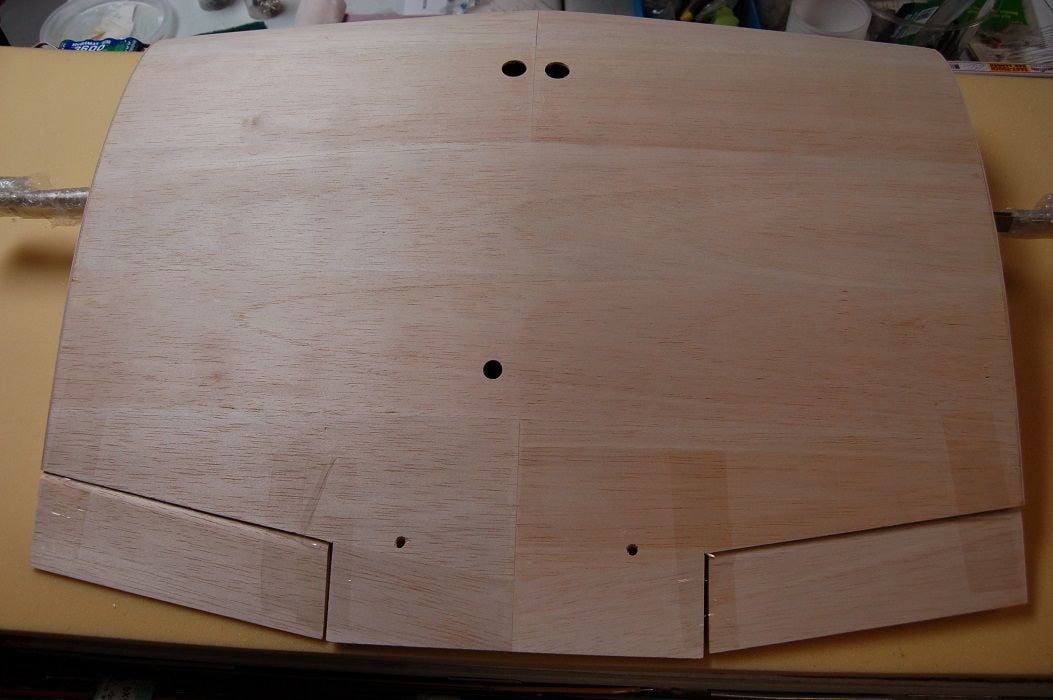
Mid section of the wing is solid, landing gear blocks and wing spar support appear to be robust without being to heavy. A small crack in the plastic wheel bay insert but glued by the factory. Requires light sanding and paint.
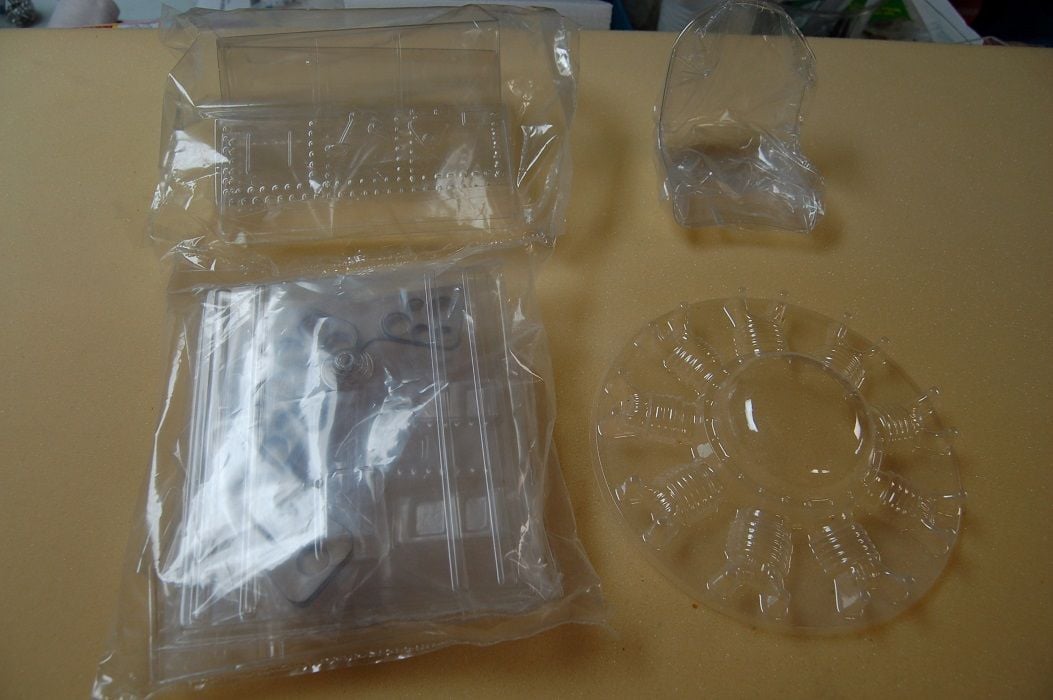
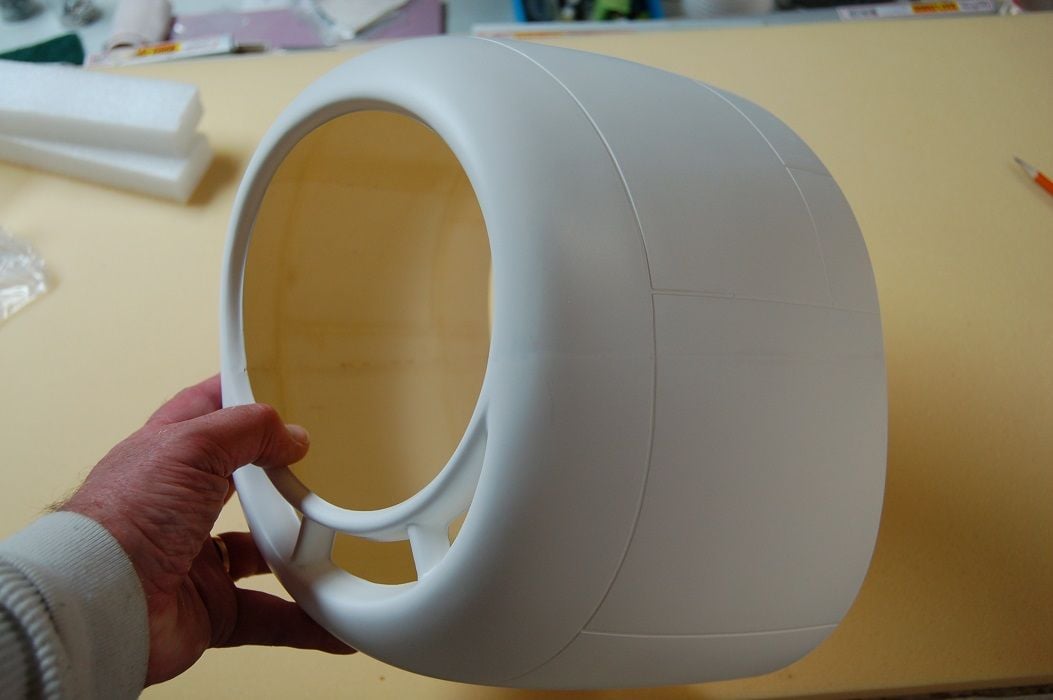
Vacuum formed cockpit detail and dummy engine will require painting.
(Apologies for the pic size....I resized before uploading but they are still large).

Top Flite do a nice job bubble wrapping and then taping the pieces to the box to eliminate the parts moving during shipping.
Instruction manual has all the addendum sheets added. (Same manual as the ARF…nothing added for the RTC version.)
Stab…elevator and fin are straight, nicely sanded on the seams and balsa blocks.
Mid section of the wing is solid, landing gear blocks and wing spar support appear to be robust without being to heavy. A small crack in the plastic wheel bay insert but glued by the factory. Requires light sanding and paint.
Vacuum formed cockpit detail and dummy engine will require painting.
(Apologies for the pic size....I resized before uploading but they are still large).
 03-14-2020, 07:54 AM
#420
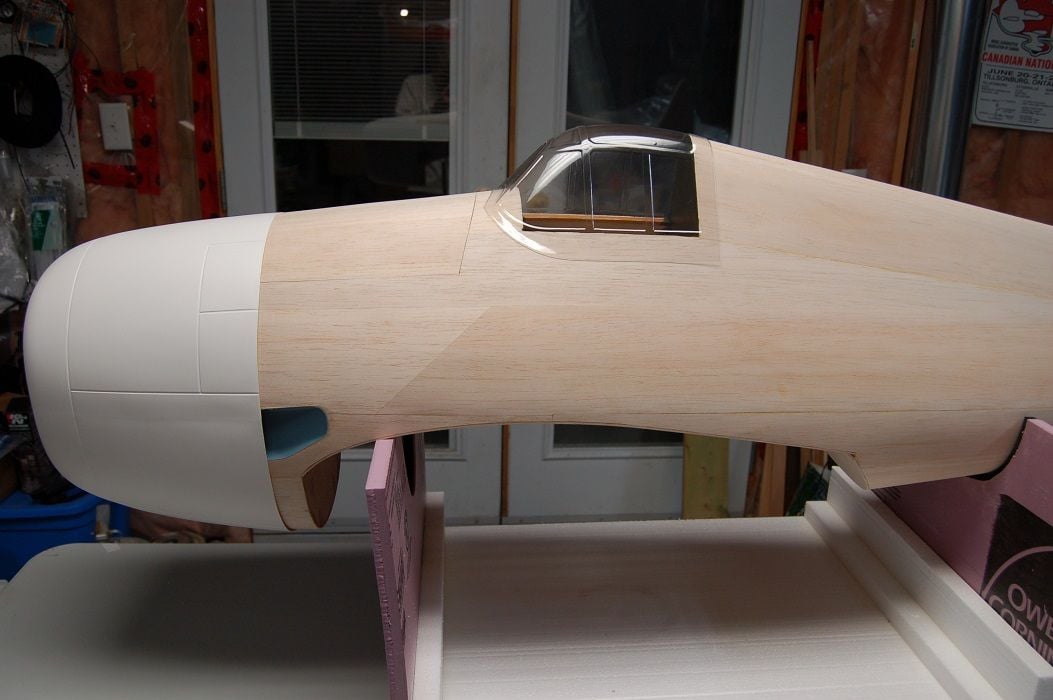
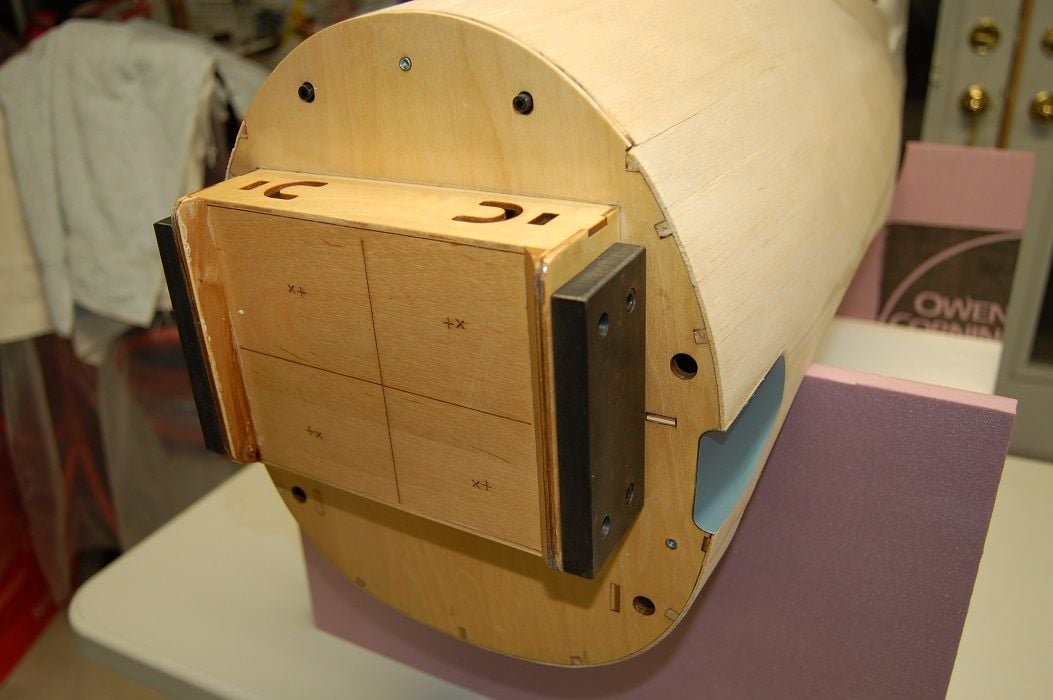
Fuselage has been built in a jig….Nice work. Glue joints inside look good.
Two chunks of steel up front on the motor mount for nose weight. (Makes sense since the Hellcat has a short nose moment but of course will be rechecked after engine selection and install later in the assembly).
Top Flite have cut out a removable top hatch for access to the battery tray for those going electric. (Can be closed in for gas operation if you so elect to.)
Sanding on the fuse is nicely done. A few minor areas I will tend to more from personal preference.
03-14-2020, 07:58 AM
#421
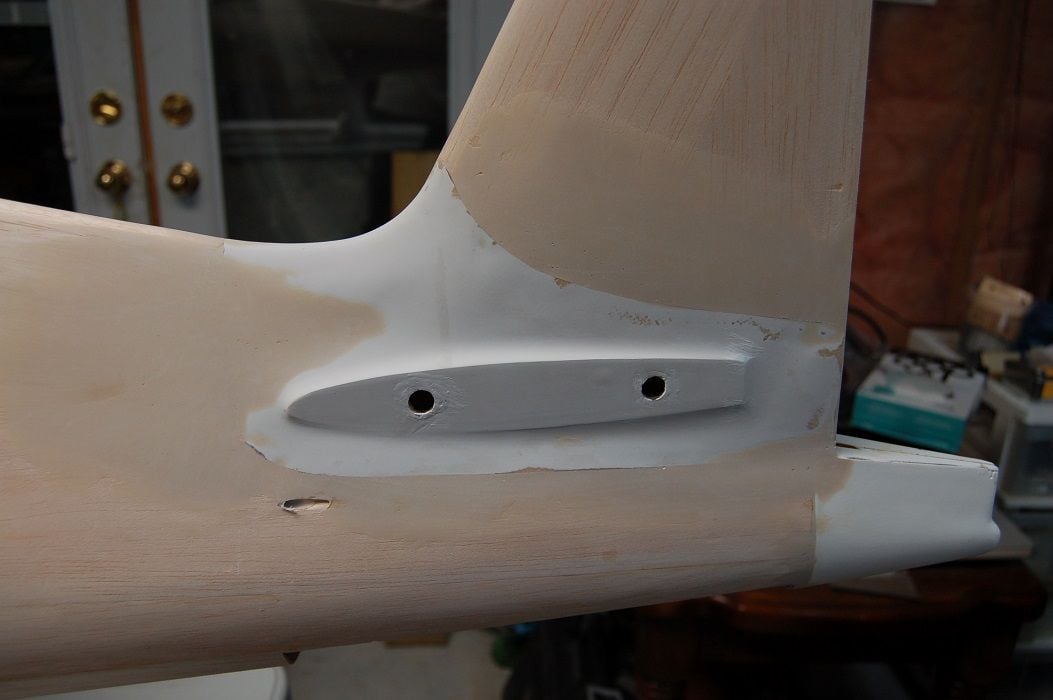
The transition from the base of the fin/fuse is white molded fiberglass. The fin is glued in place into the mold, filler is then used to fill the gap then sanded to a smooth contour. Nice job, I will touch up a few areas but minor work will be required.
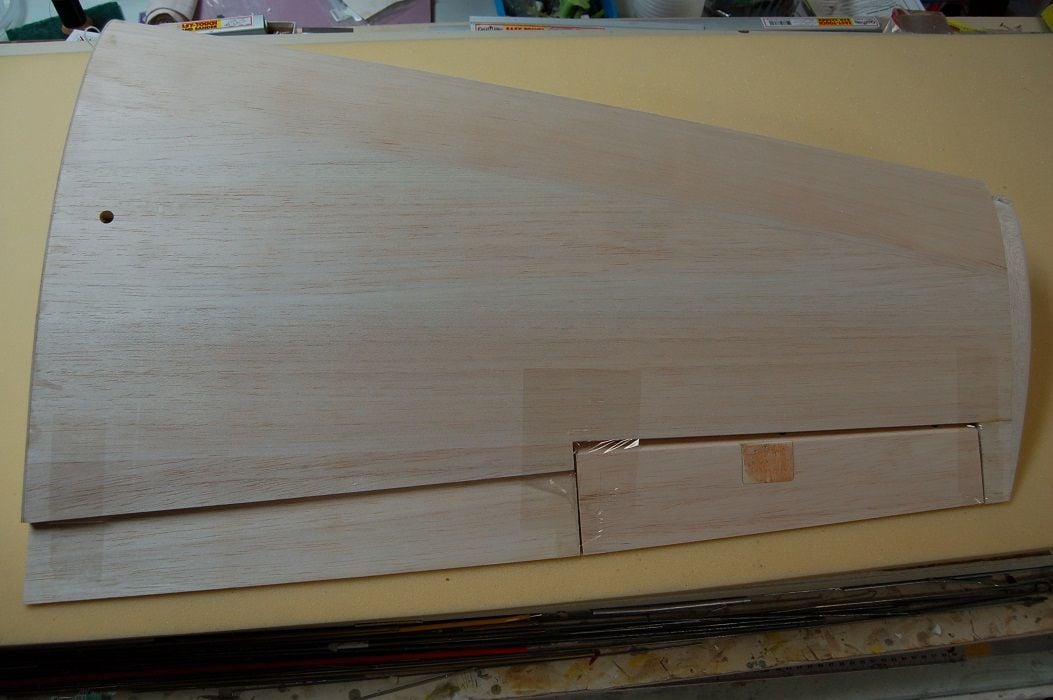
Wings have been built in a jig….nice and straight. Nice joints on the sheeting.
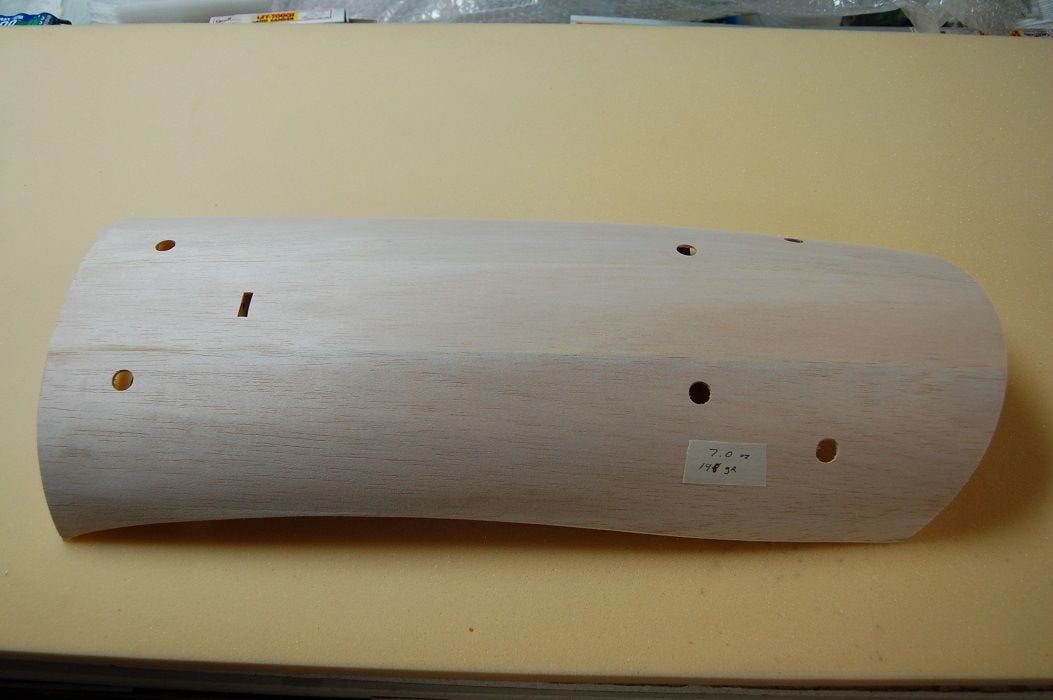
Also included is pic of the belly pan.
Wings have been built in a jig….nice and straight. Nice joints on the sheeting.
Also included is pic of the belly pan.
Last edited by cgcrc; 03-14-2020 at 08:01 AM.
03-14-2020, 08:08 AM
#422
QUESTION:
Have you fellows had any issues with the method outlined in the manual addendum of attaching the wing panels to the wing center section? . Seems the aluminum wing spar is notched then one wing spar screw from the top is screwed through the wing into the notch holding the wing in place.
That’s about it for now, better get finishing the other two projects ahead of the Hellcat…
NOTE: If anyone is interested in specific pics of certain areas on the model just ask, now's the time to do it......
Best regards
Randy
Last edited by cgcrc; 03-14-2020 at 08:19 AM.
03-14-2020, 08:51 AM
#423

I had an issue with the panel bolts coming loose after a flight or two . I thought I hadn't tightened them enough , so I tightened a little more the next time , bad idea , I had a few of the threads strip out in the joiner for the panels . I retapped to next size up and also notched the joiner blade to match the bolt location . The bolt now has to back out a long way before it would disengage the notch . So far they are holding . Just don't turn your gorilla strength loose on the bolts when tightening.
03-14-2020, 02:18 PM
#424
My Feedback: (20)
I had problem with the elevator pushrods on mine. The last little bit of the installed guide tubes did not line up with the horn location and the friction was way too much. I had to cut a slot behind the factory location and release the end of the guide tube. Suggest you check that while it is convenient.
Chuck
Chuck
03-14-2020, 07:48 PM
#425
I had an issue with the panel bolts coming loose after a flight or two . I thought I hadn't tightened them enough , so I tightened a little more the next time , bad idea , I had a few of the threads strip out in the joiner for the panels . I retapped to next size up and also notched the joiner blade to match the bolt location . The bolt now has to back out a long way before it would disengage the notch . So far they are holding . Just don't turn your gorilla strength loose on the bolts when tightening.
Thanks for the reply and info. I looked closer tonight at the aluminum "channel" the wing spar slides in to that has the taped hole.
Agreed, they don't have much threaded material to screw in to.
I may have an added upgrade which will have a small functional hatch on the bottom of the wing giving access for a wing bolt and anchor nut or blind nut install.
Should look OK since I will be detailing the model with panel lines, hatches and rivets. Just this hatch will be removable.
Got some time to think about it, maybe another idea will come to "light"....lol...
Thanks again.
Best regards
Randy