


TopRCModel FW-190
 01-01-2019, 07:08 AM
#301

Join Date: Jan 2007
Location: Tvedestrand, NORWAY
Posts: 56
Likes: 0
Received 0 Likes
on
0 Posts
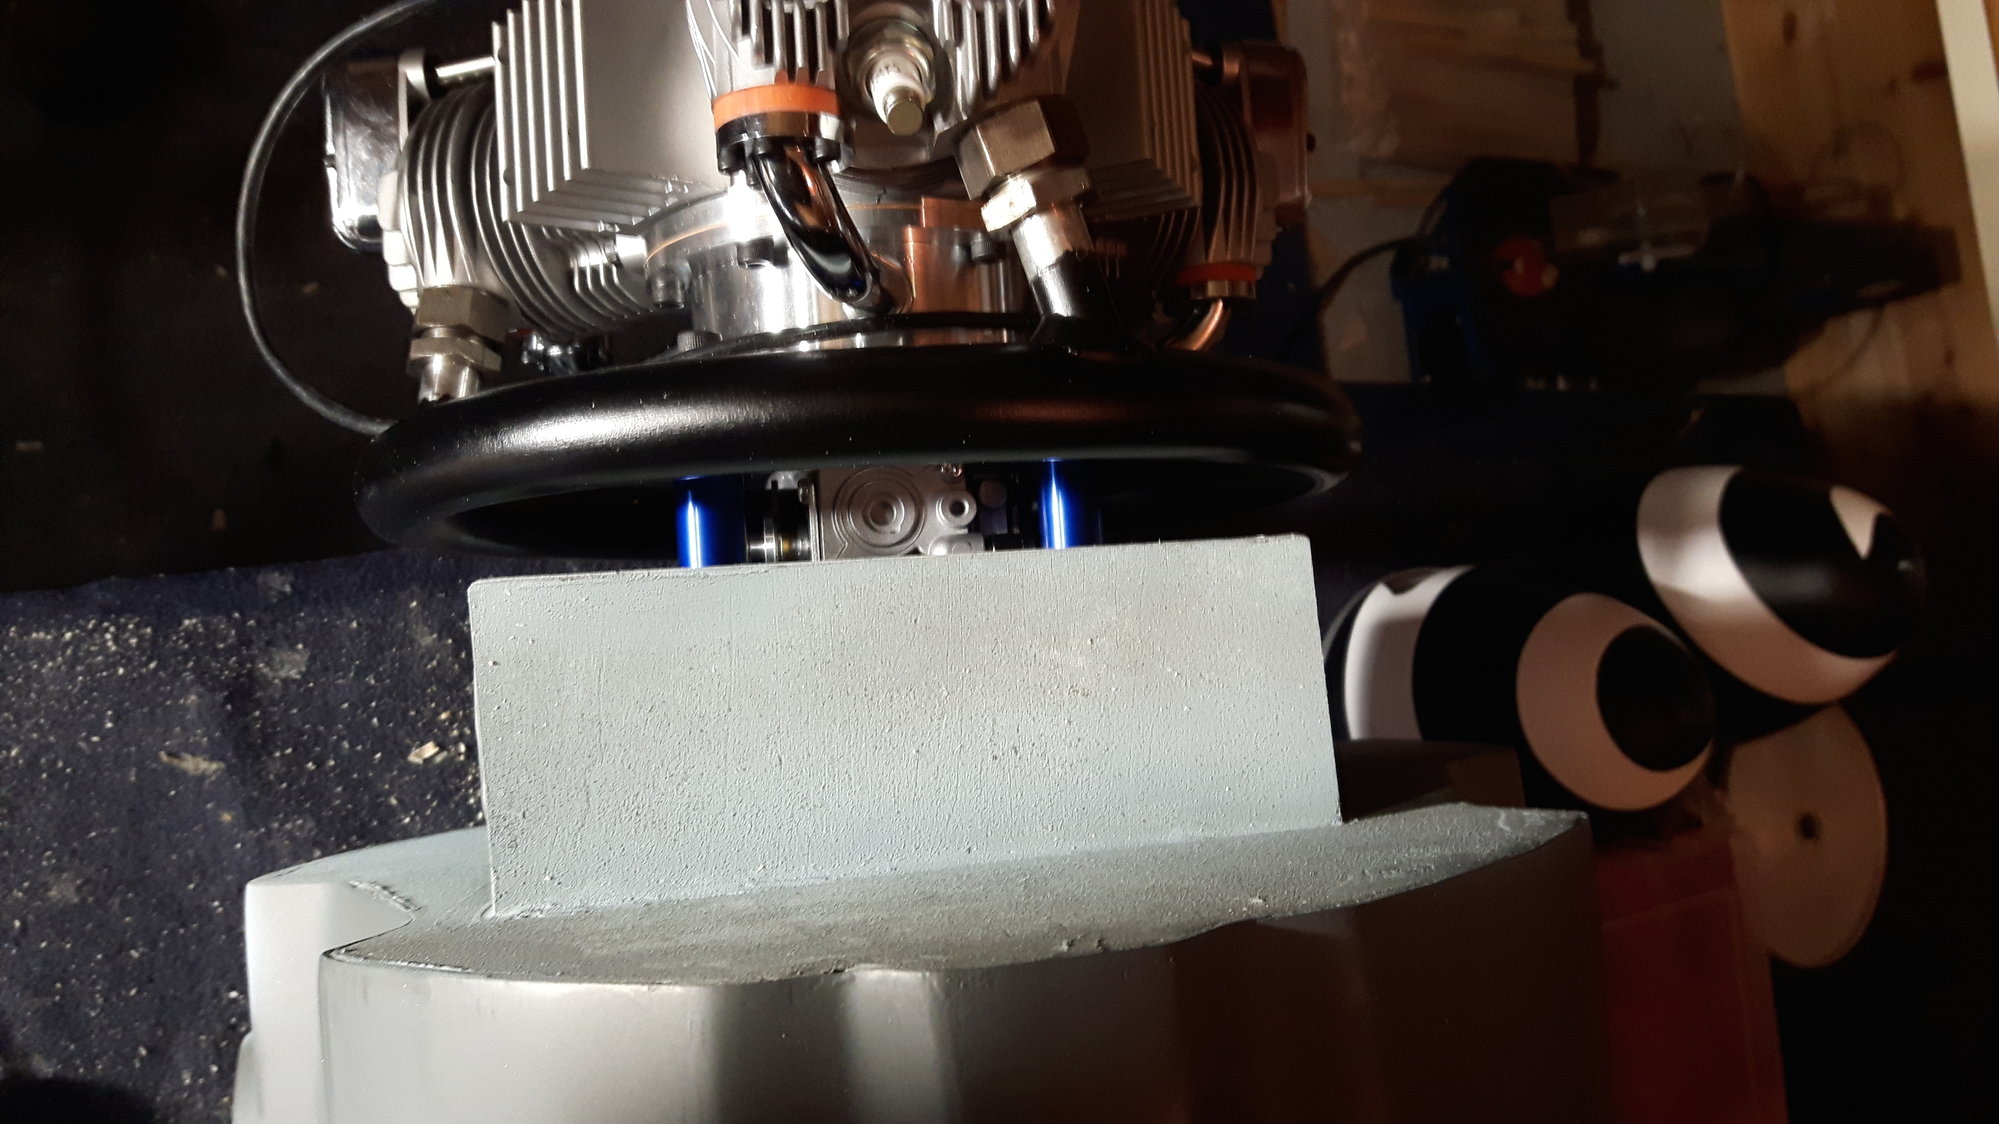
Hello,
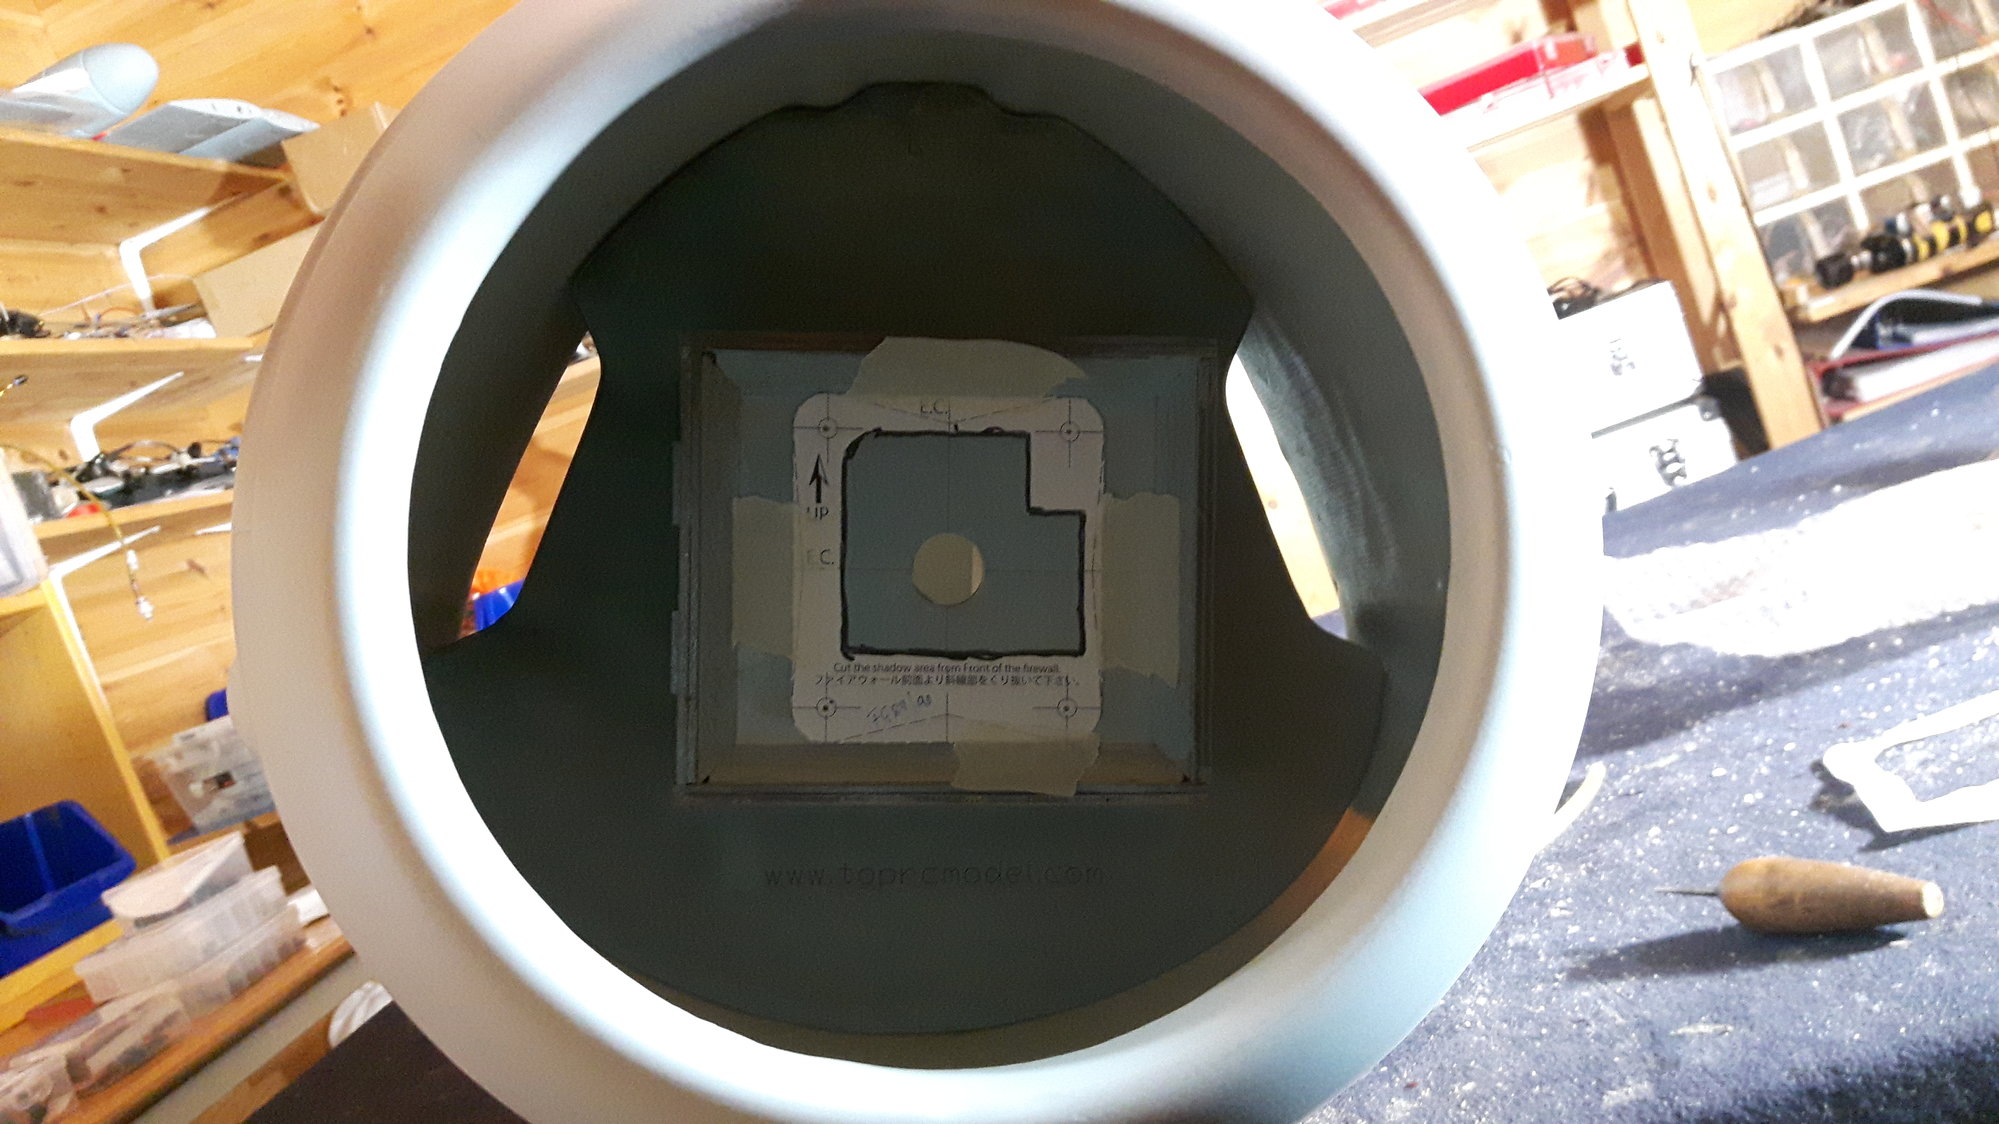
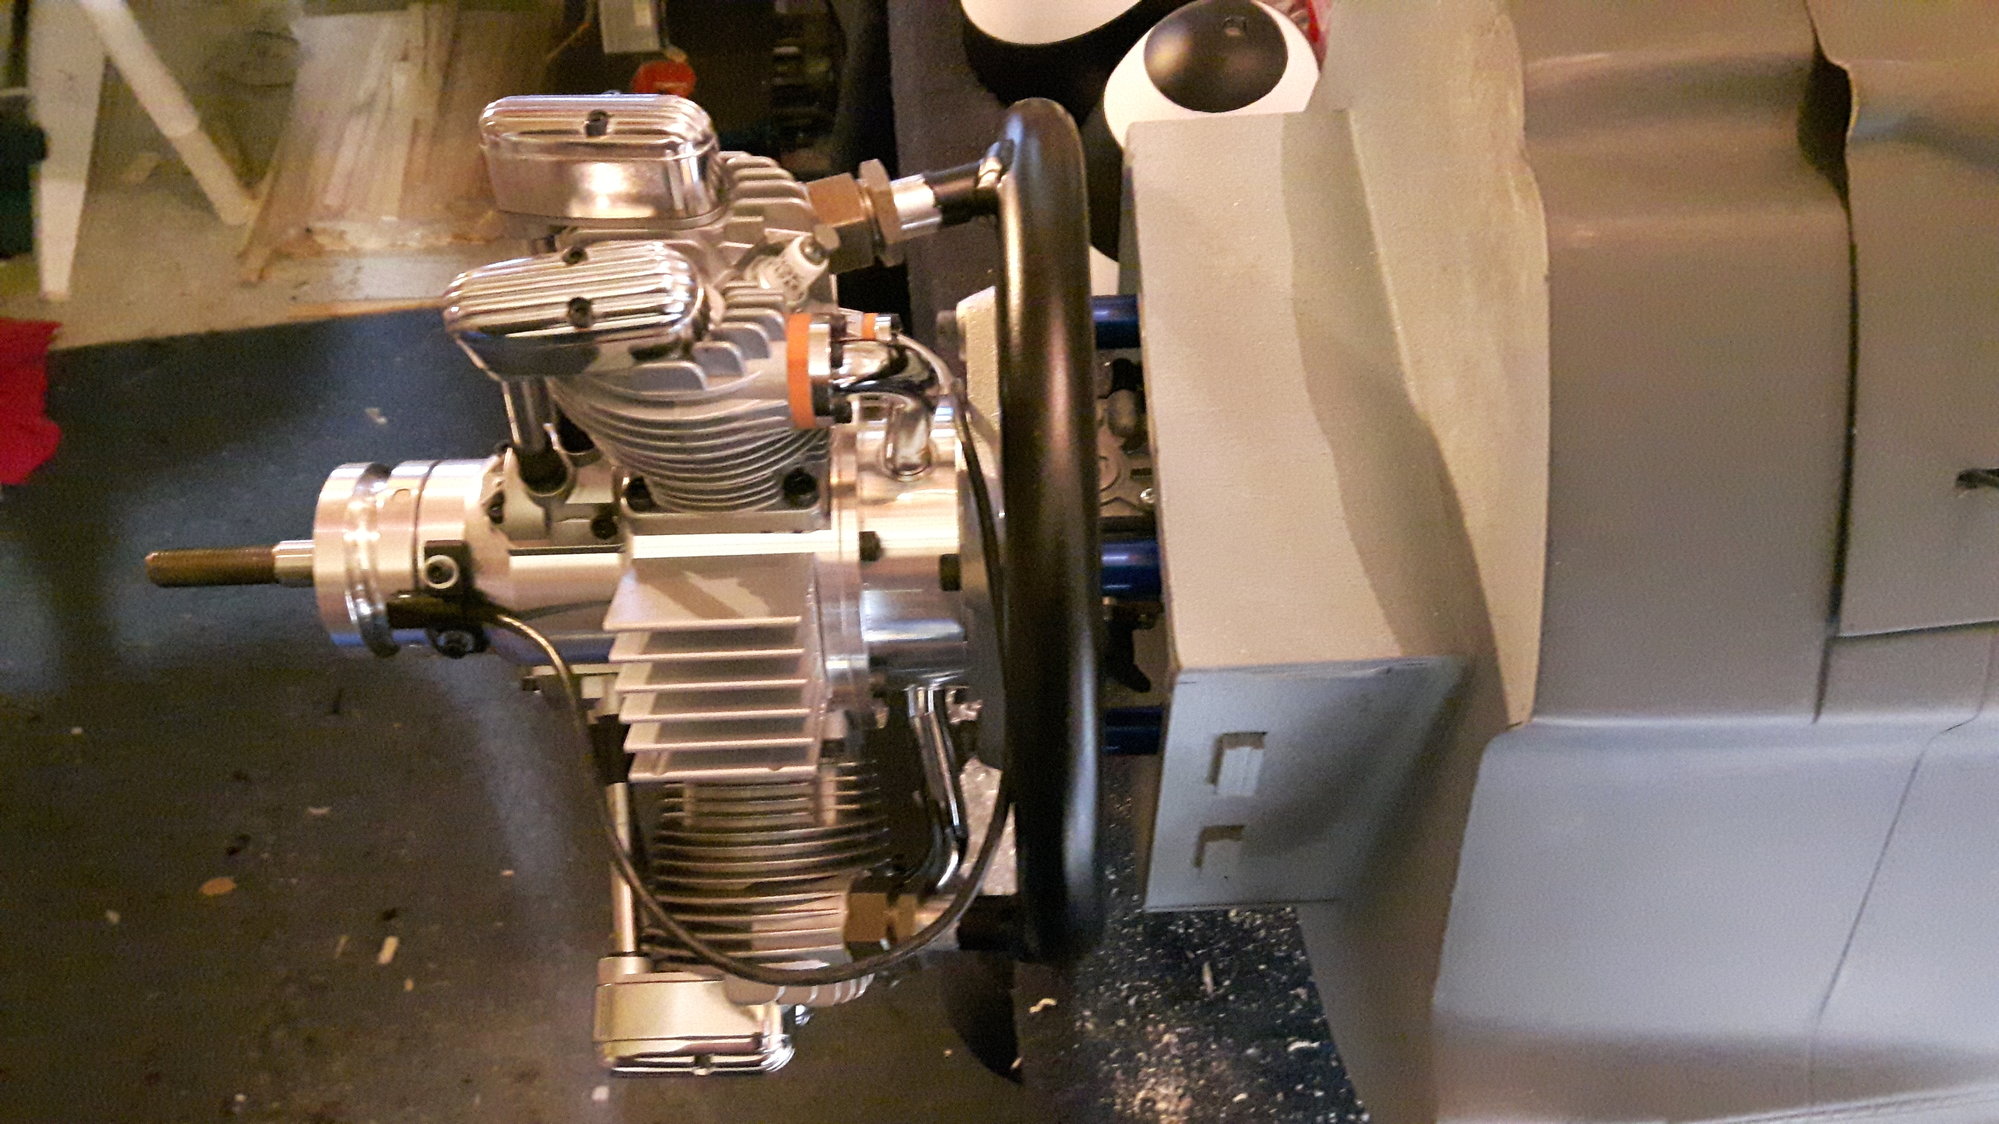
I am building the TopRCmodel FW-190 and here is some pictures reg installing the Satio FG90R3 radial gas engine with Keleo exhaust.
I just marked up the drill holes.
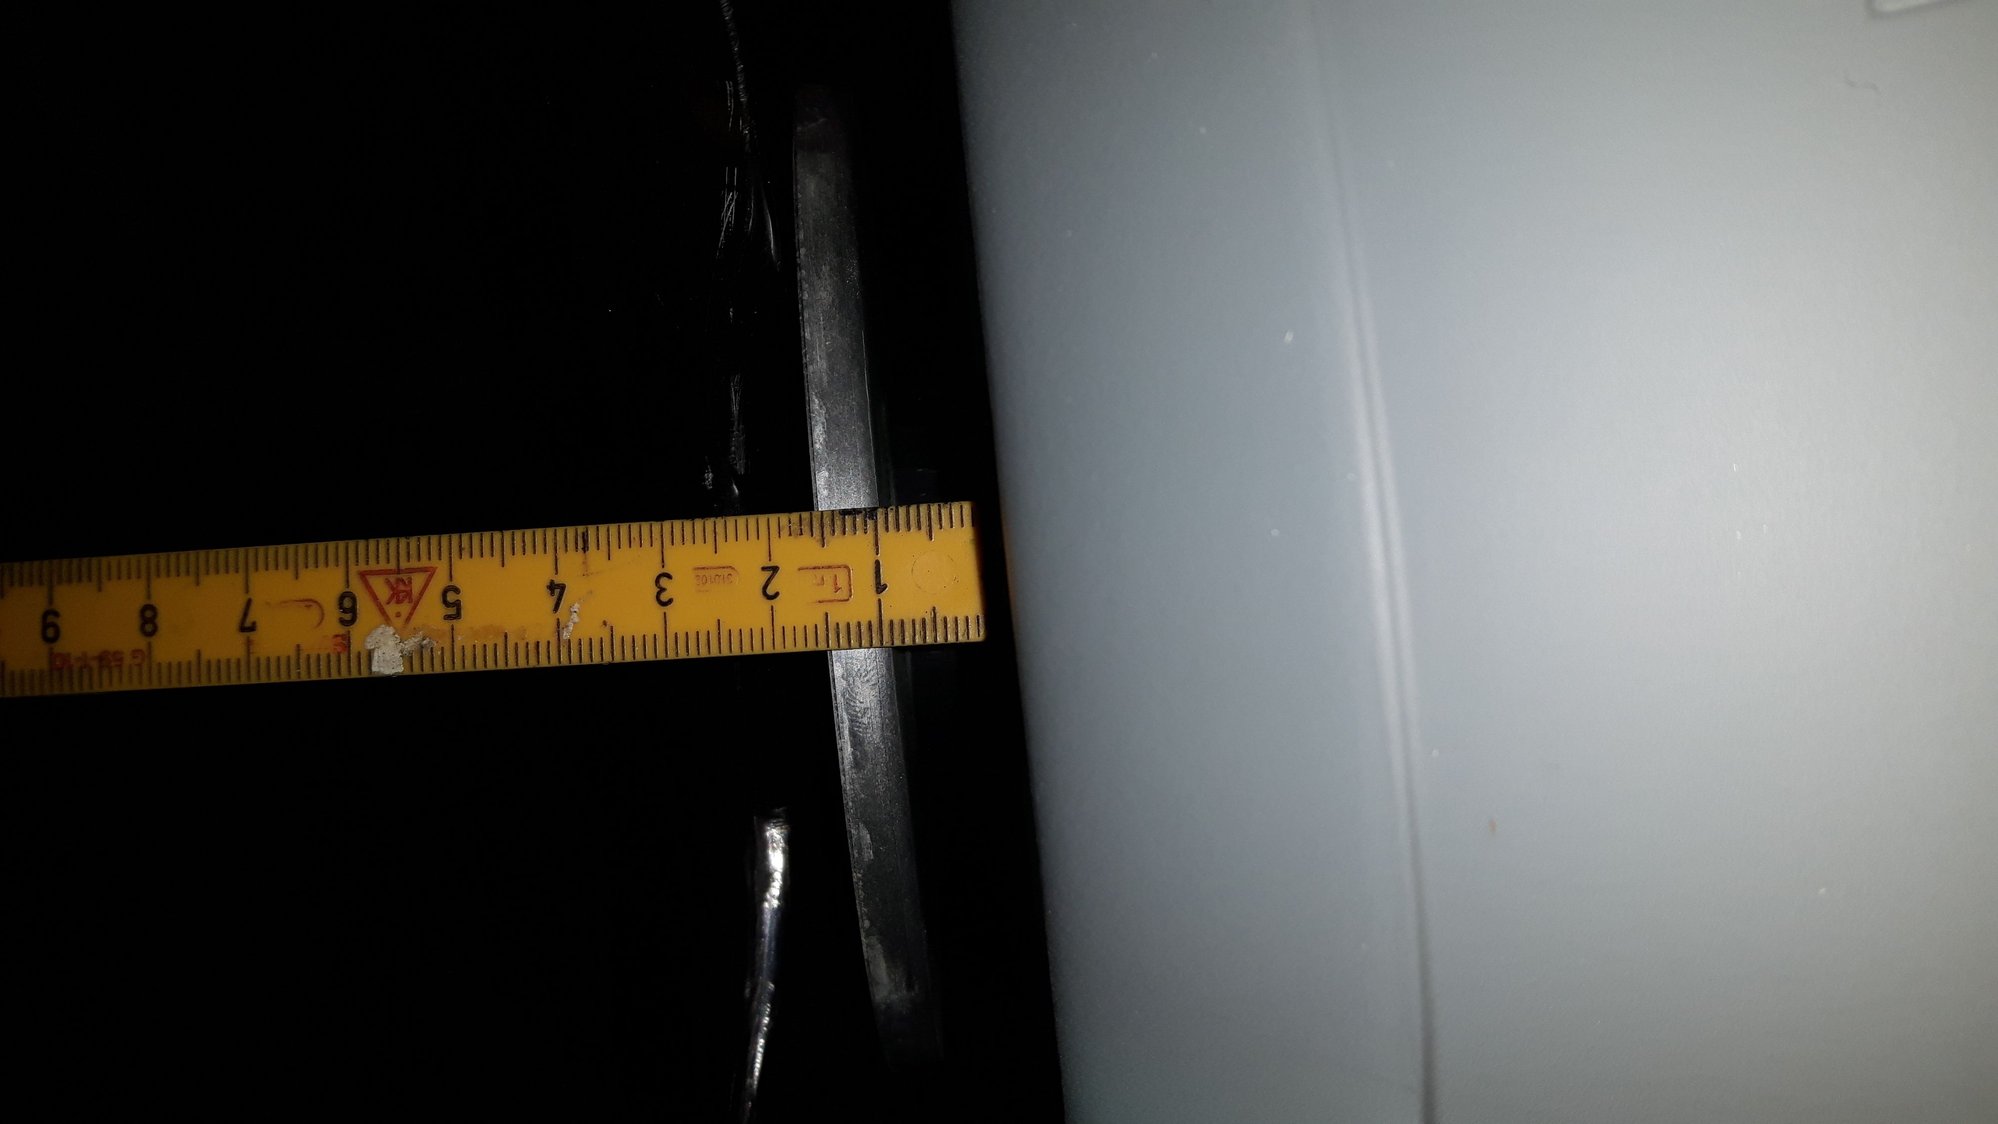
Used 4,5 cm standoff (blue) for a start since it is close fit.
Cutout for the carb/gas lever.
Cut approx 14 cm long under the cowling for sliding in exhaust area. (Later finish work)
I might reduce the standoff with 1 cm then the cowling is flush with engine spinner plate.
A very nice fit without any major modification for engine install.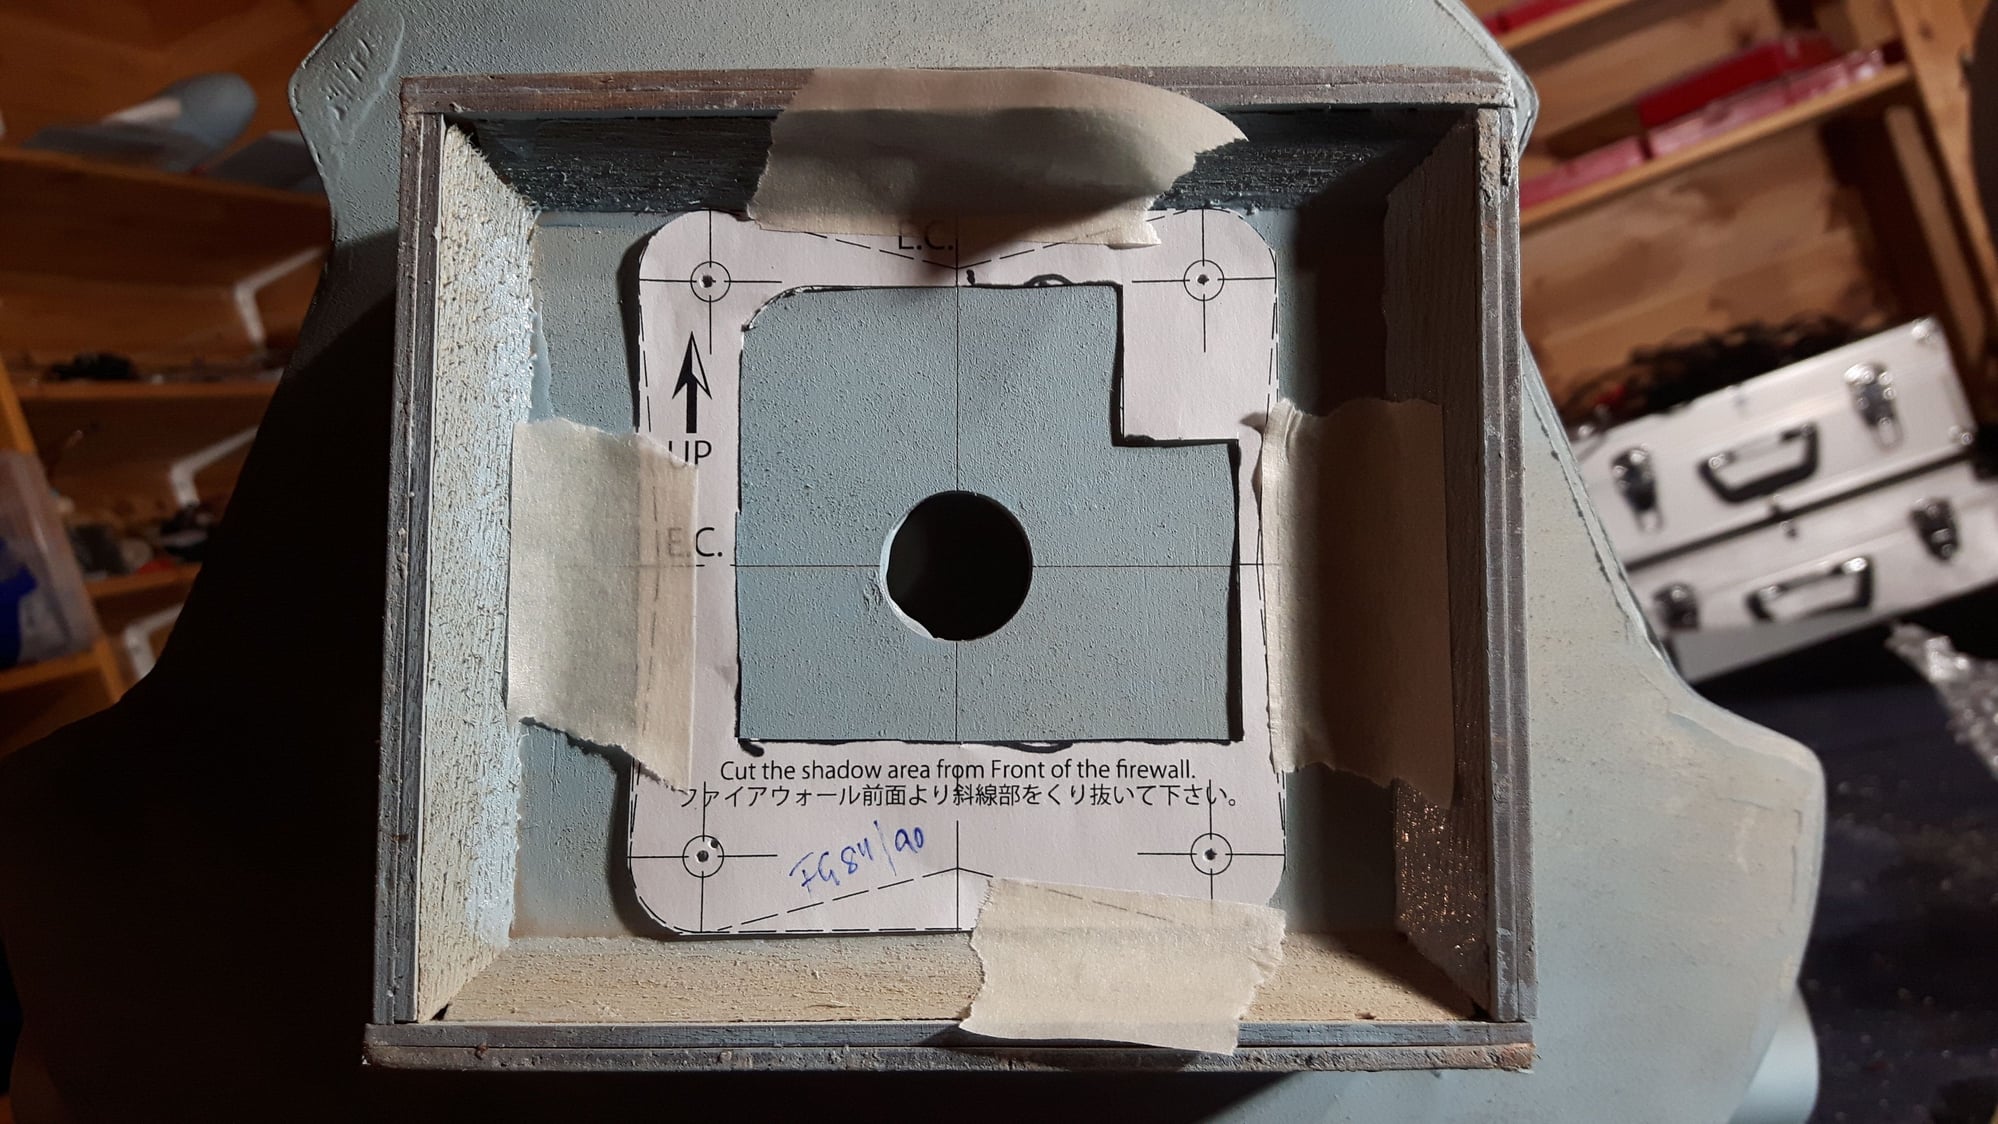


I am building the TopRCmodel FW-190 and here is some pictures reg installing the Satio FG90R3 radial gas engine with Keleo exhaust.
I just marked up the drill holes.
Used 4,5 cm standoff (blue) for a start since it is close fit.
Cutout for the carb/gas lever.
Cut approx 14 cm long under the cowling for sliding in exhaust area. (Later finish work)
I might reduce the standoff with 1 cm then the cowling is flush with engine spinner plate.
A very nice fit without any major modification for engine install.

 01-02-2019, 03:31 PM
#308


@ Totto,
just for your reference, I flew a Hanger 9 Corsair with the Saito FG84 and a 3 blade scale looking prop like you have there on your build. I just wanted to say the engine was not loaded properly and it flew poorly as a result. The top end RPM was high and the plane flew slowly because the pitch was too low. Landing the plane required a high throttle setting, etc..
I’m just saying check the engine is pulling hard like a 24x12 prop would do. I’ve tested the FG90 with a 24x12x2 blade on the ground and the RPM was right on target.
01-02-2019, 10:20 PM
#309
@ Totto,
just for your reference, I flew a Hanger 9 Corsair with the Saito FG84 and a 3 blade scale looking prop like you have there on your build. I just wanted to say the engine was not loaded properly and it flew poorly as a result. The top end RPM was high and the plane flew slowly because the pitch was too low. Landing the plane required a high throttle setting, etc..
I�m just saying check the engine is pulling hard like a 24x12 prop would do. I�ve tested the FG90 with a 24x12x2 blade on the ground and the RPM was right on target.
01-07-2019, 01:26 PM
#312
My Feedback: (3)

Join Date: Aug 2003
Location: near Innsbruck, AUSTRIA
Posts: 615
Likes: 0
Received 13 Likes
on
10 Posts
So a quick question... I have been fooling around with an Idea and it seems to work very well.
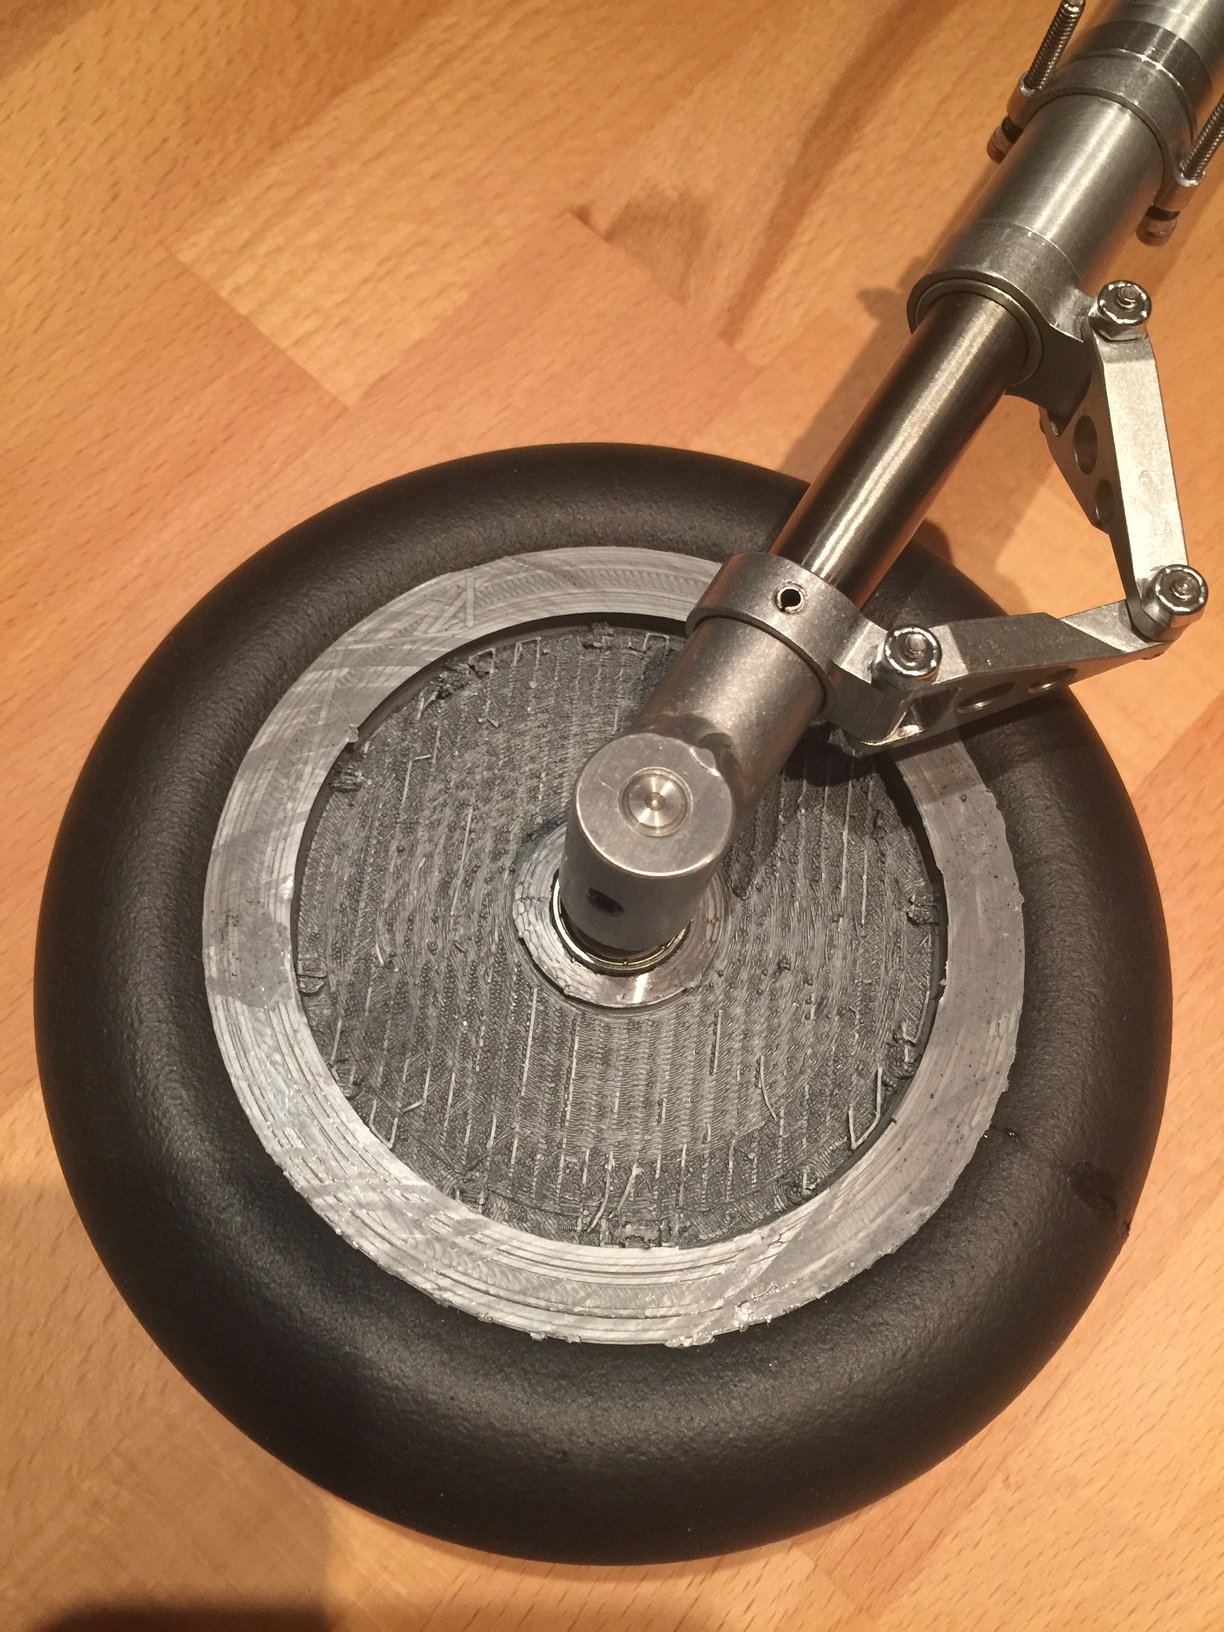
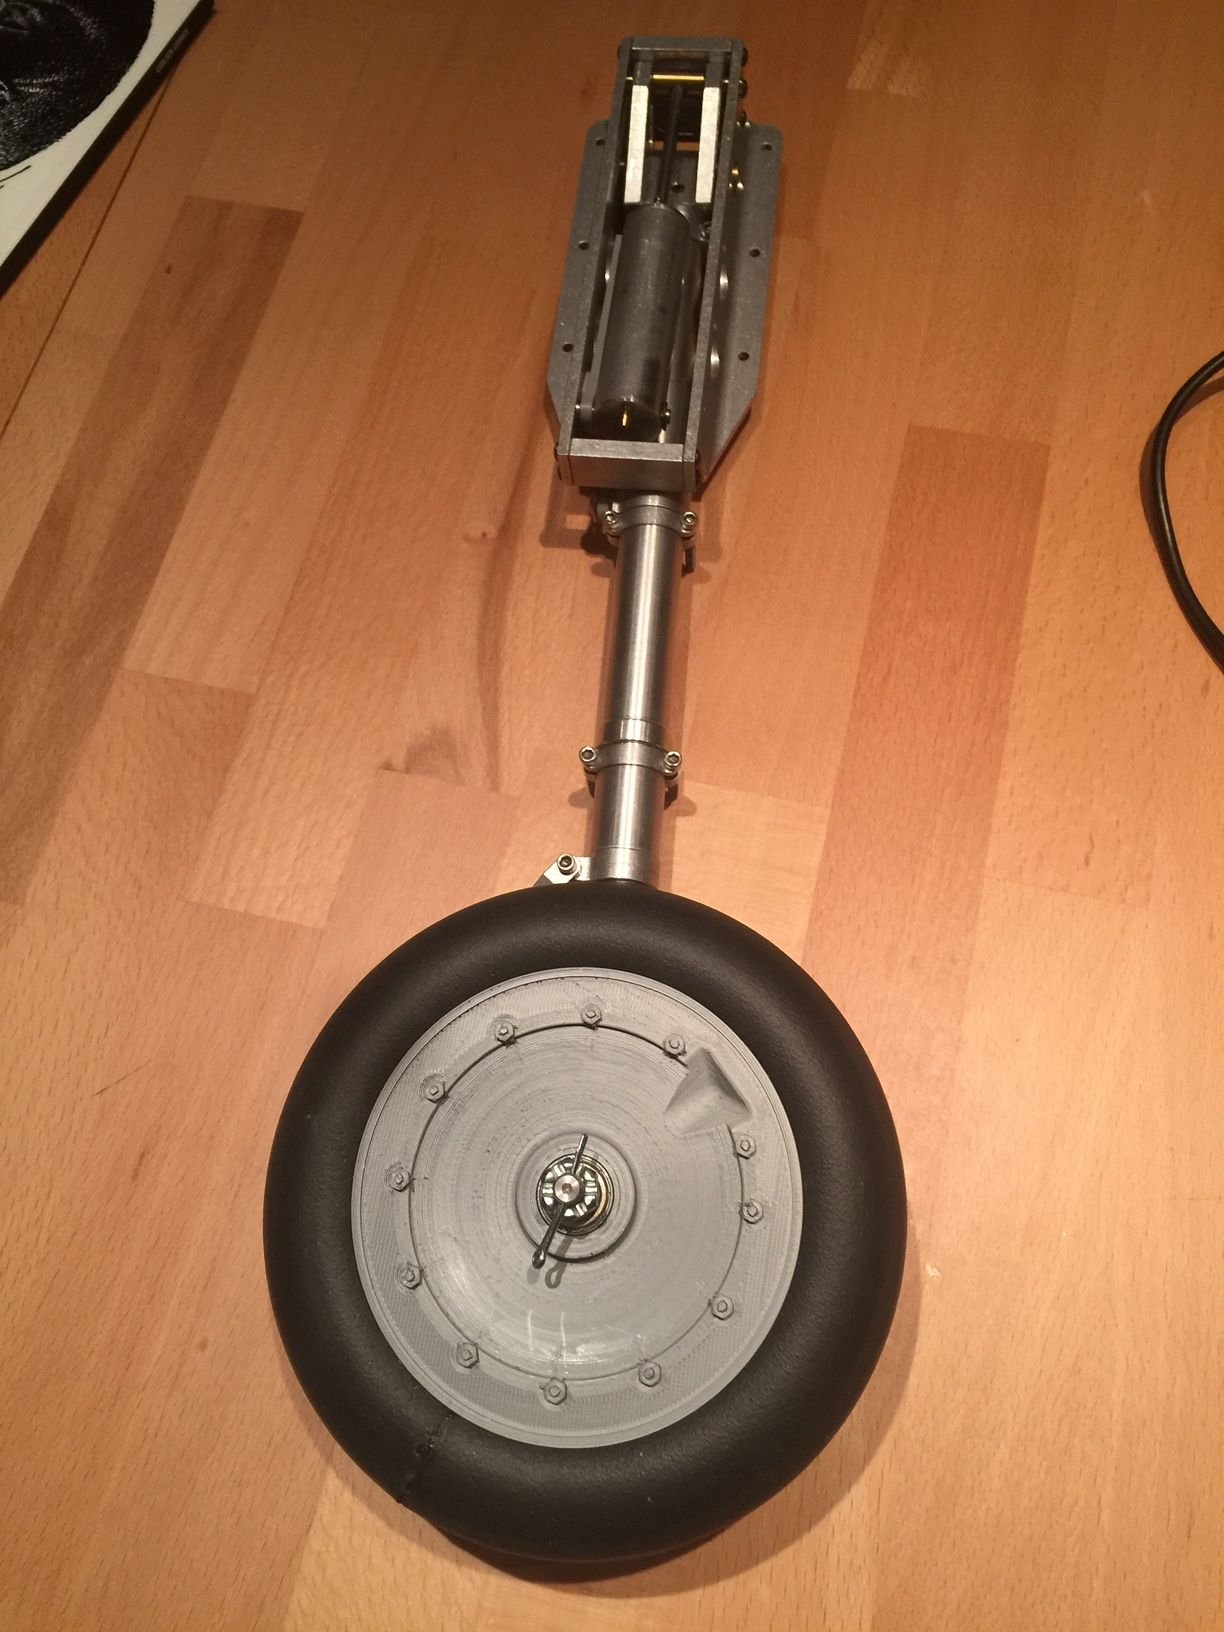
Just curious, is there any requirement for some FW-190 wheels? They are ball raced (for a 1/4in axle), 5,3in in diameter and weigh 6,9oz. Theres still some detail cleaning to do to remove some printing flush (like with plastic model kits).
I can enlarge them to some extent if needed.
I also have an idea on how to get the rear to look a bit nicer but apart from that they are ready to go...
Rev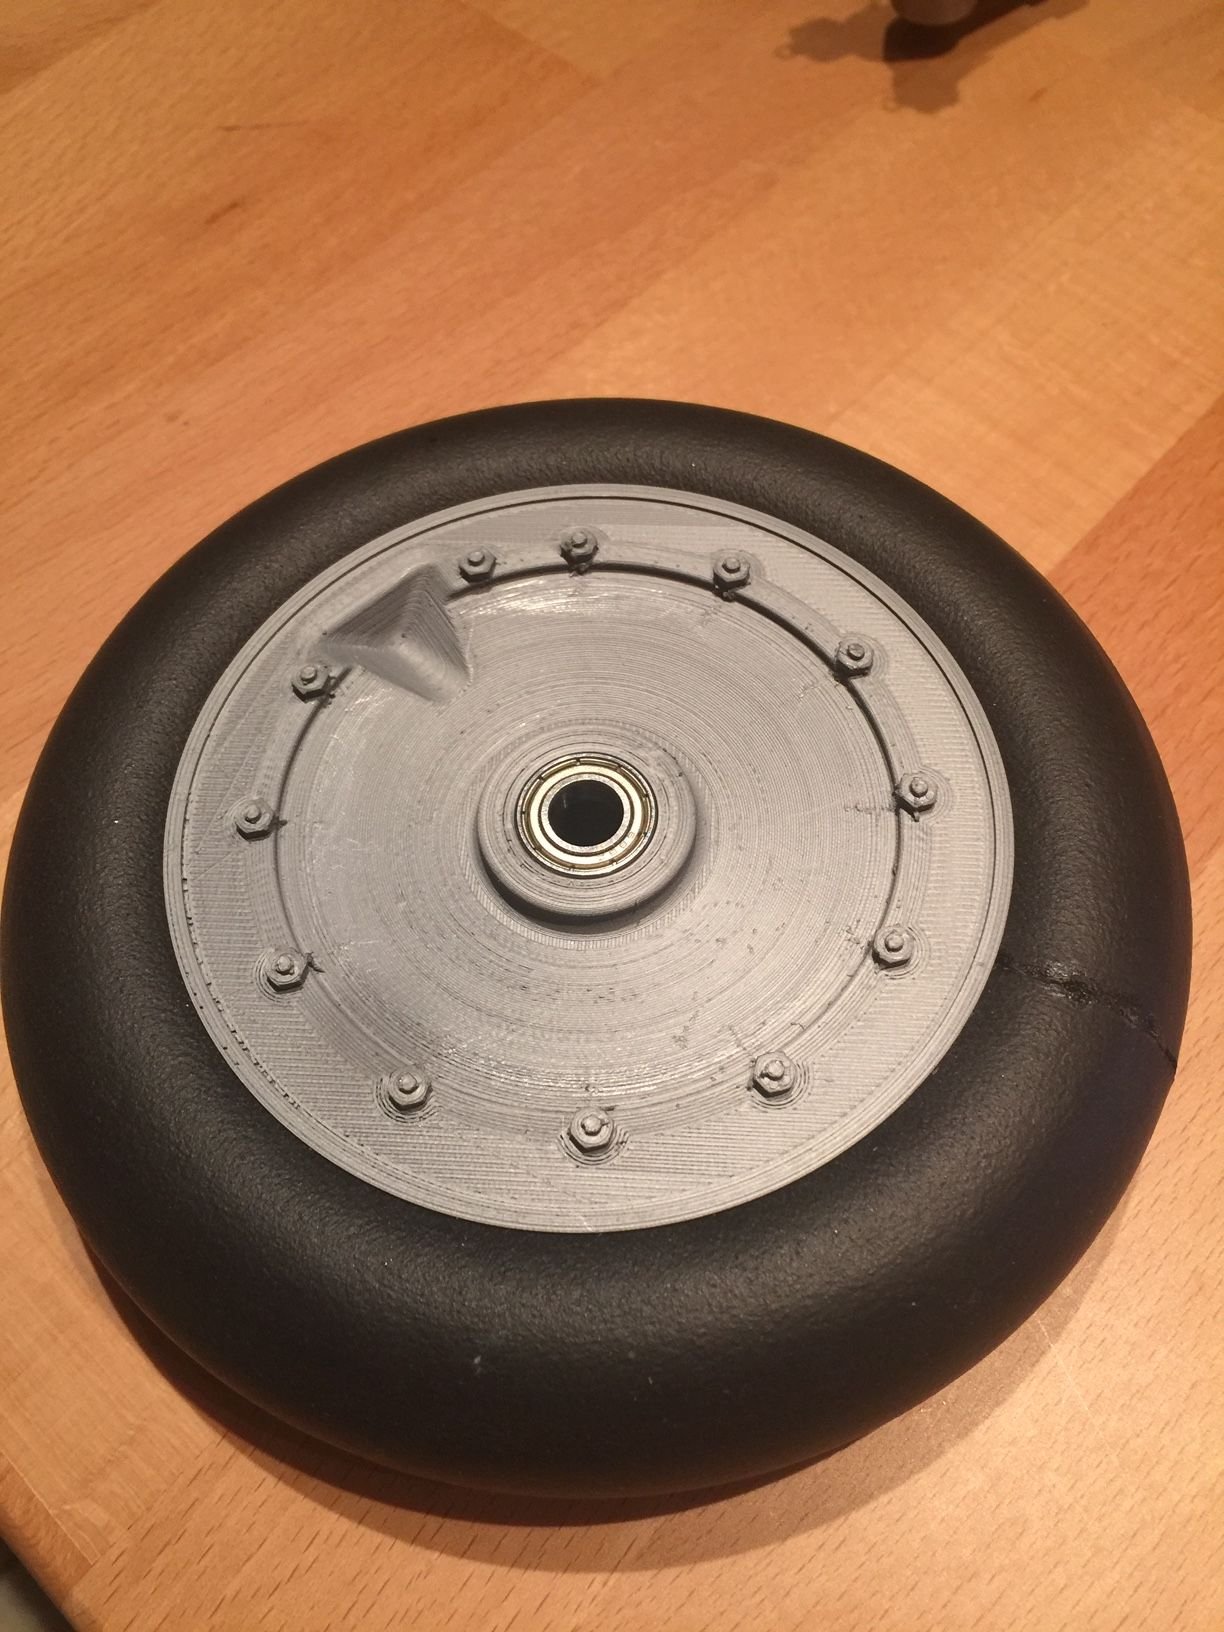
01-11-2019, 08:22 AM
#313
Join Date: Dec 2005
Location: Aarhus, DENMARK
Posts: 37
Likes: 0
Received 0 Likes
on
0 Posts
Hi all,
I have bought the Sierra retracts as I am not satisfied with the standard TopRc gear.
Can anyone of you, who have already installed it, please tell me, how thick plywood you have put under the retract-flanches/mounts (or what you call them)? It seems they have to be raised a bit?
I have bought the Sierra retracts as I am not satisfied with the standard TopRc gear.
Can anyone of you, who have already installed it, please tell me, how thick plywood you have put under the retract-flanches/mounts (or what you call them)? It seems they have to be raised a bit?
 01-11-2019, 12:30 PM
#315
Join Date: Jan 2007
Location: Tvedestrand, NORWAY
Posts: 56
Likes: 0
Received 0 Likes
on
0 Posts
Hi all,
I have bought the Sierra retracts as I am not satisfied with the standard TopRc gear.
Can anyone of you, who have already installed it, please tell me, how thick plywood you have put under the retract-flanches/mounts (or what you call them)? It seems they have to be raised a bit?
I have bought the Sierra retracts as I am not satisfied with the standard TopRc gear.
Can anyone of you, who have already installed it, please tell me, how thick plywood you have put under the retract-flanches/mounts (or what you call them)? It seems they have to be raised a bit?
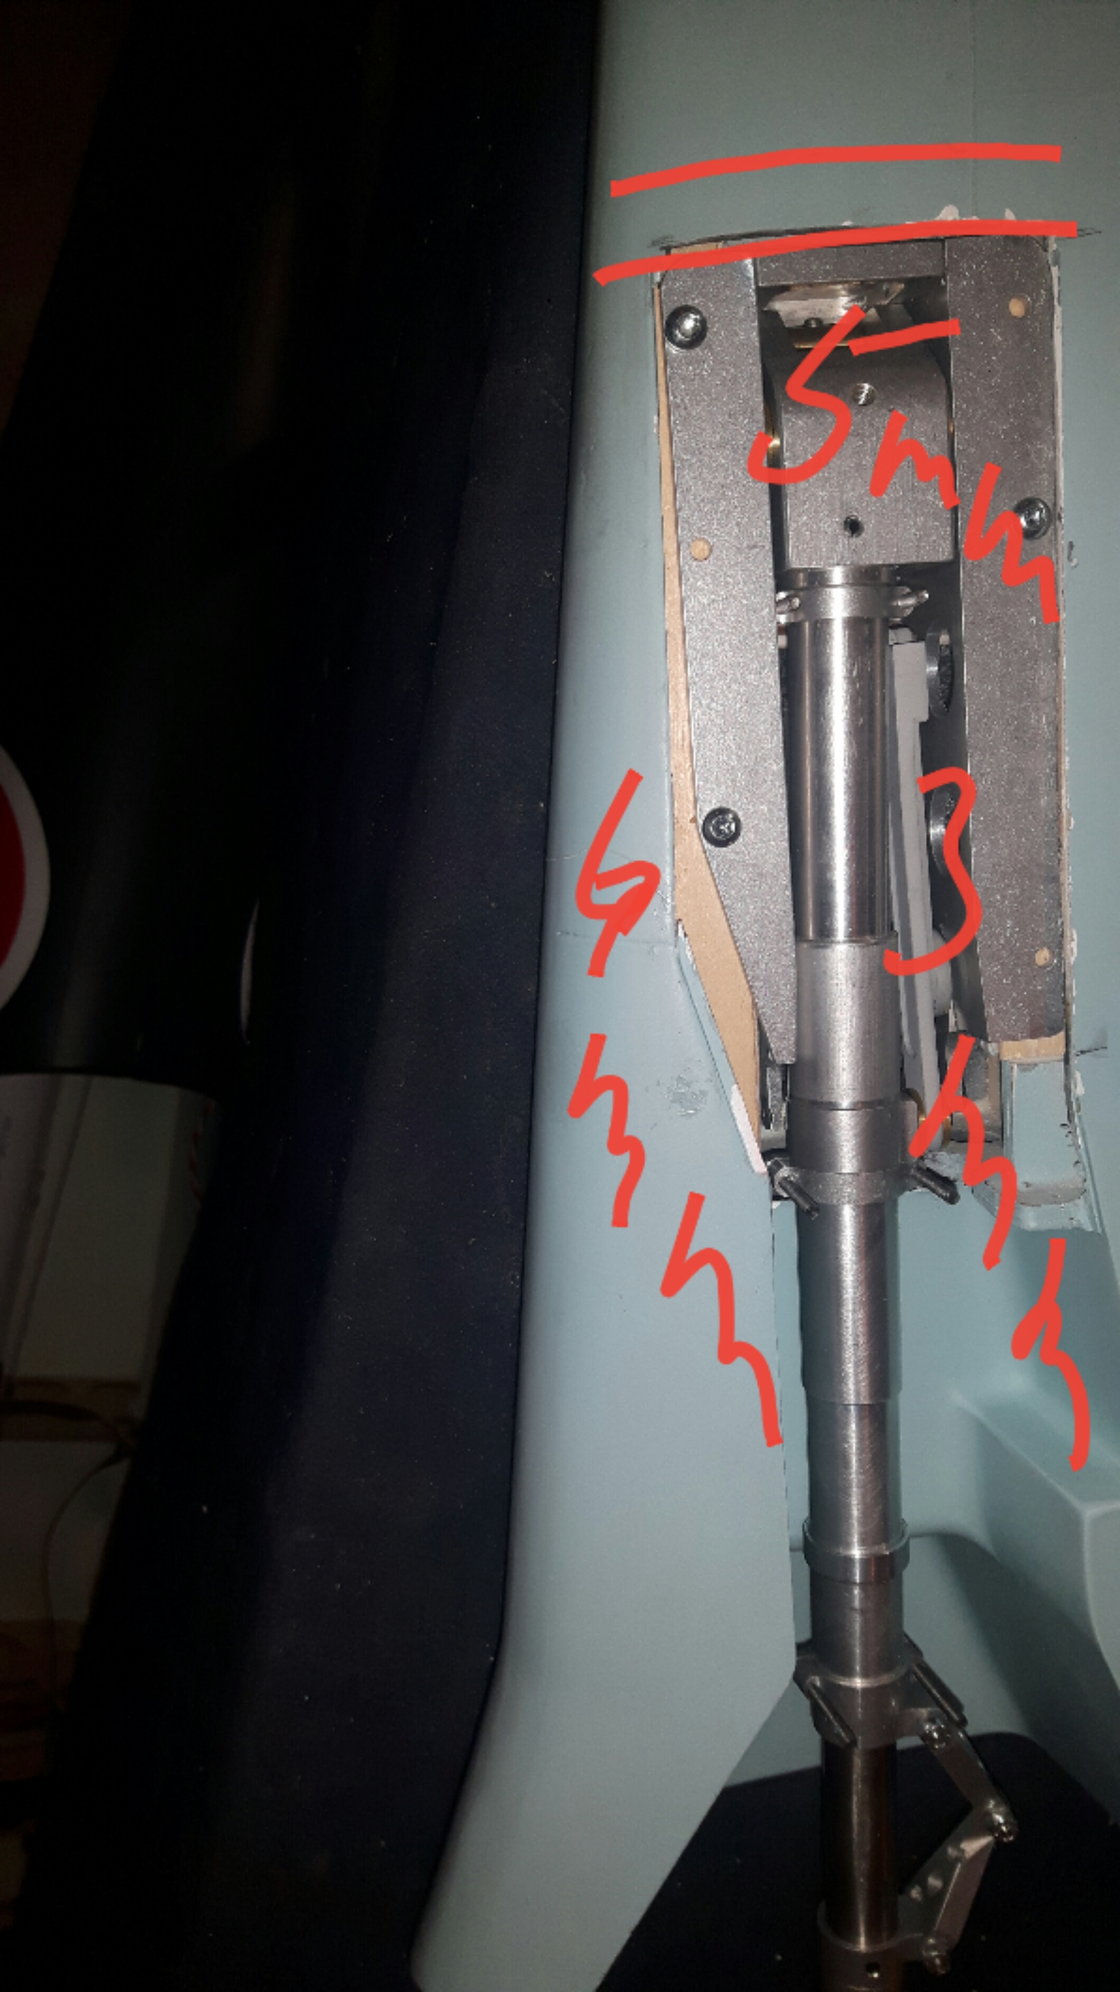
Hello,
This is what i did and seems to be ok on my Sierra gear FW190
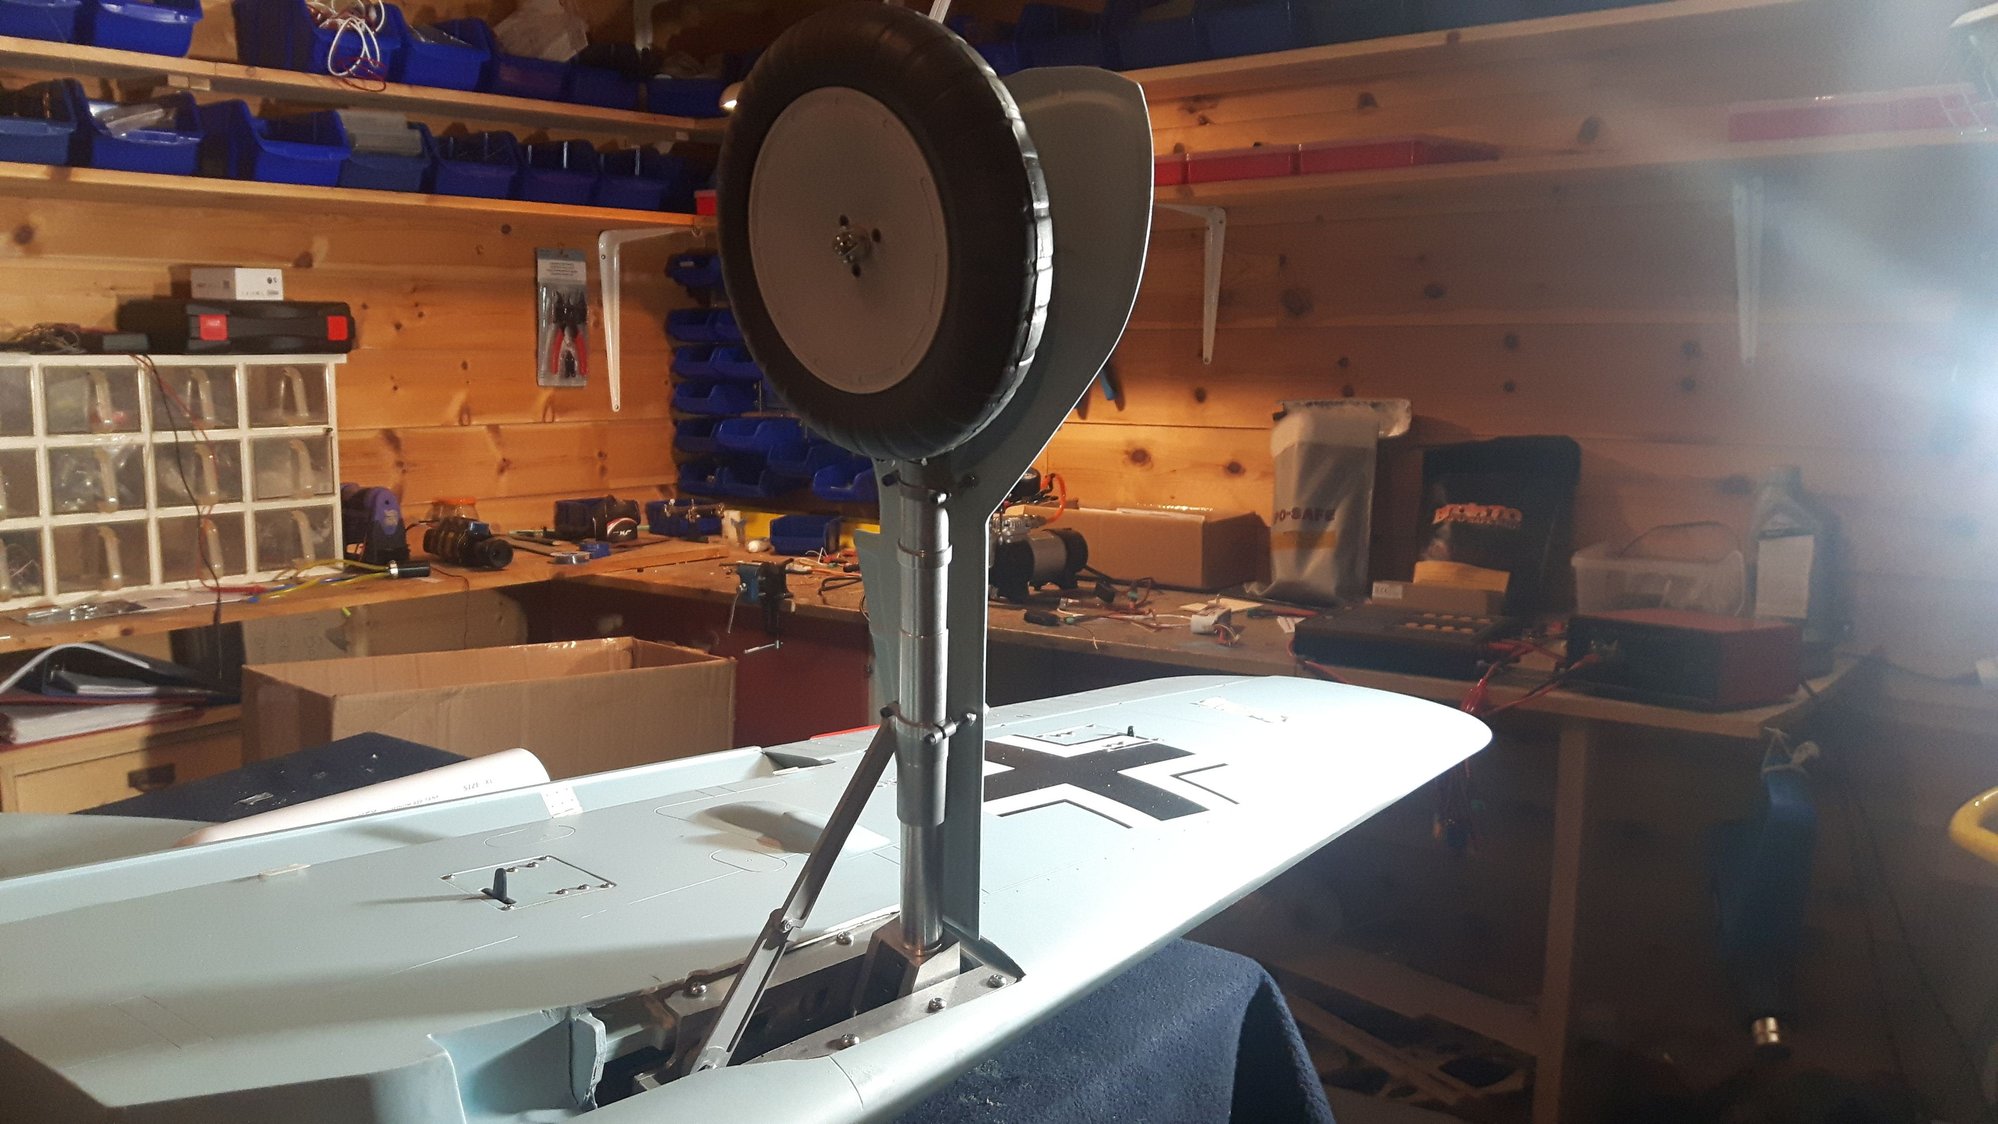
Wing front: Insert raised to 6 mm (original 10 mm so total 16 mm)
Wing back: Insert raised to 3 mm (orginal 10 mm so total 13 mm)
I cut off also about 5 mm in to get the big scale wheels better position in the wheel rest.
 01-12-2019, 06:35 AM
#318
Join Date: Jan 2007
Location: Tvedestrand, NORWAY
Posts: 56
Likes: 0
Received 0 Likes
on
0 Posts
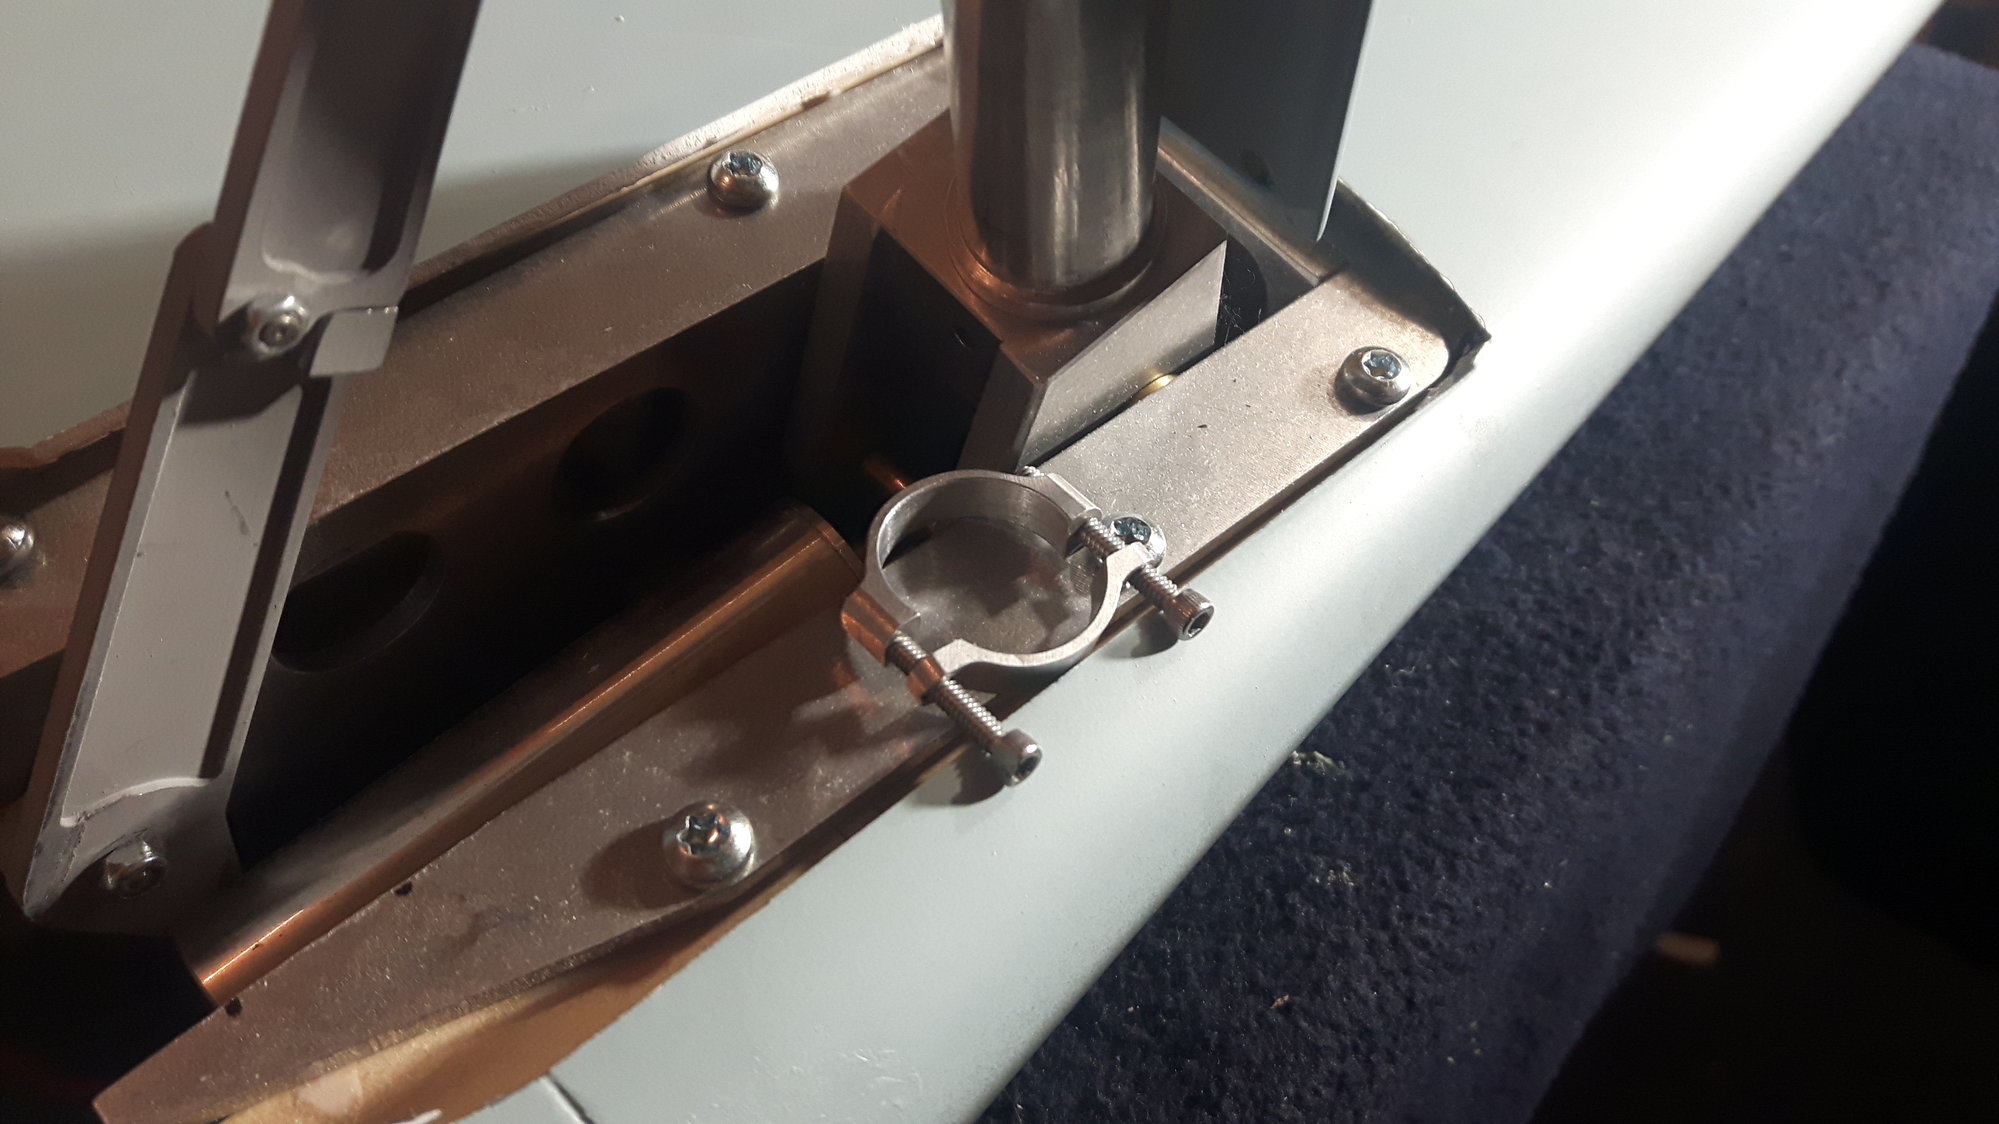
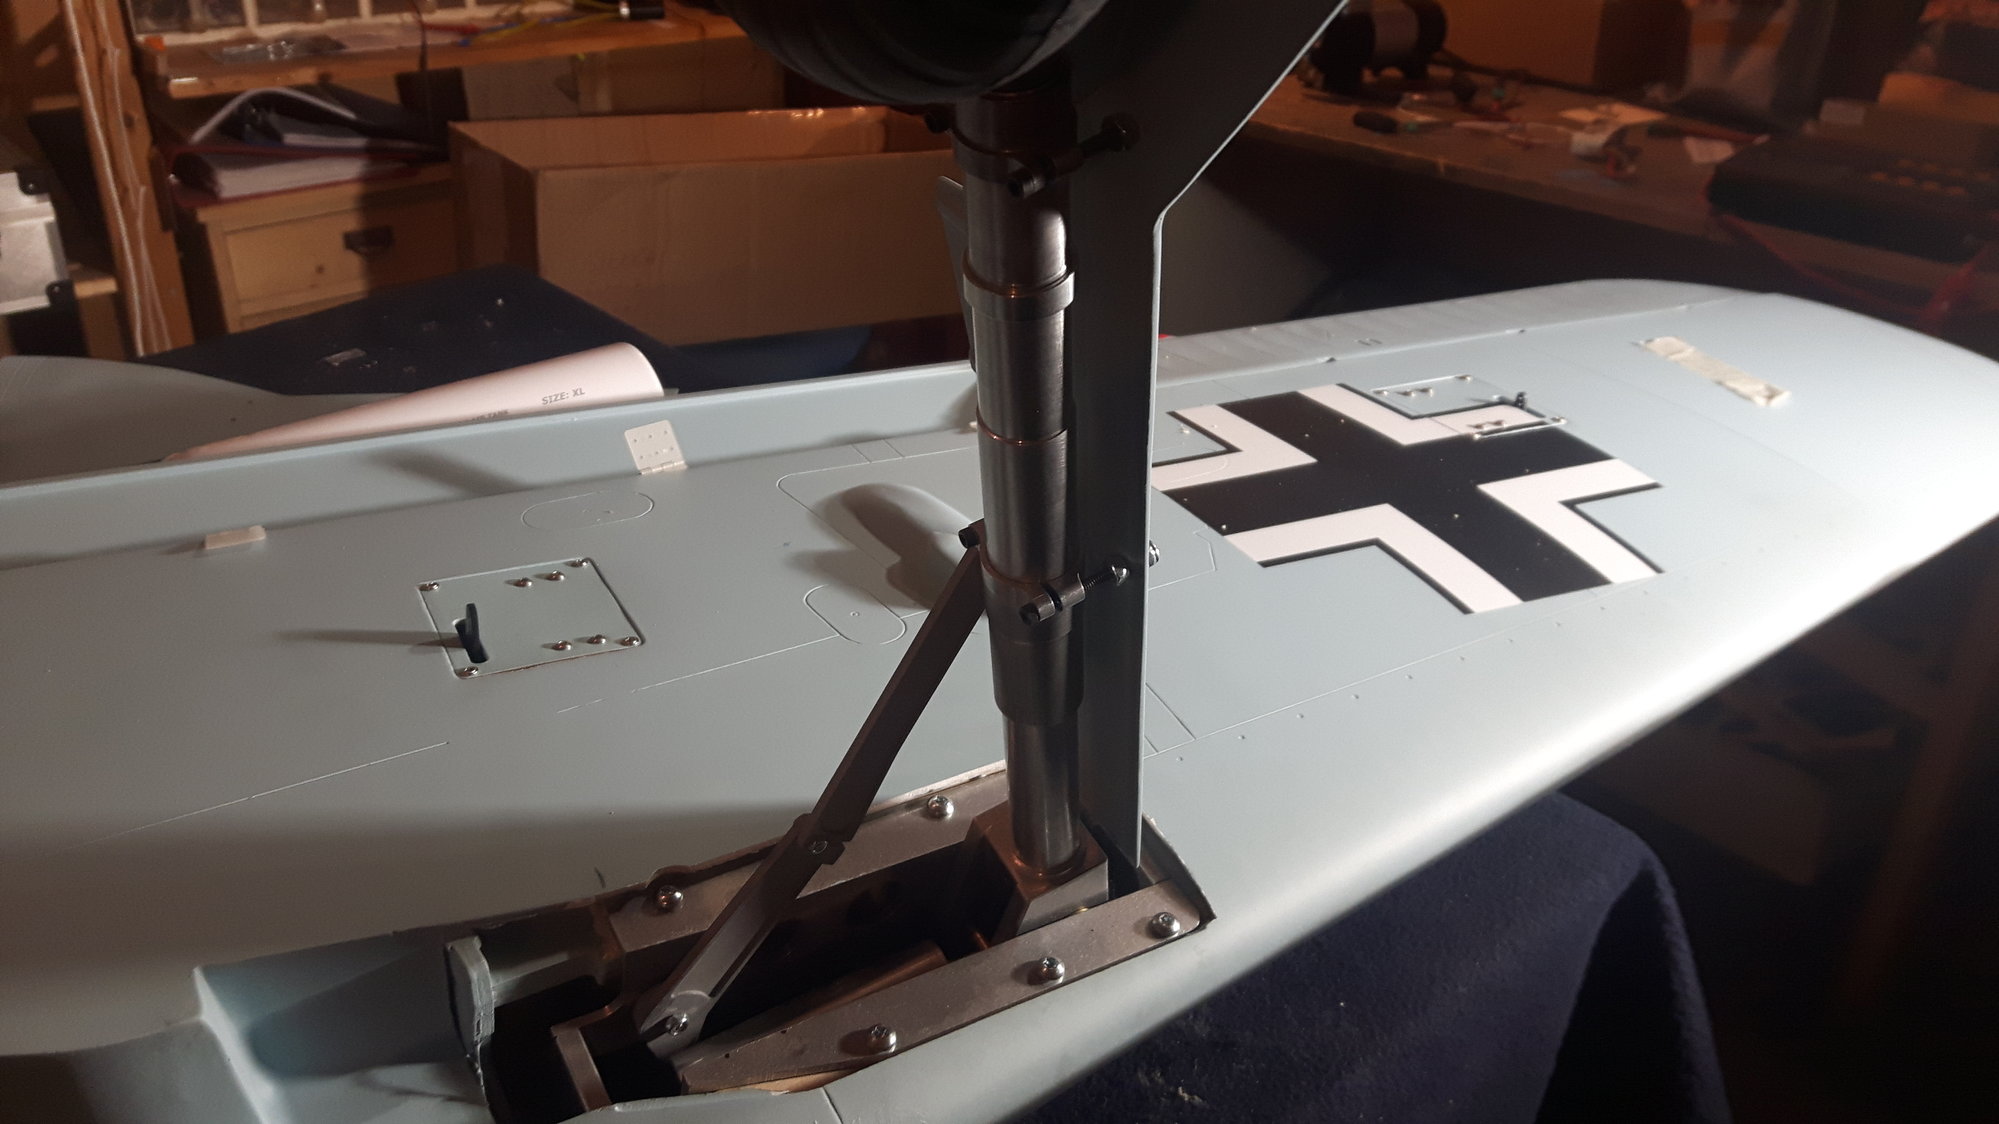
Hello,
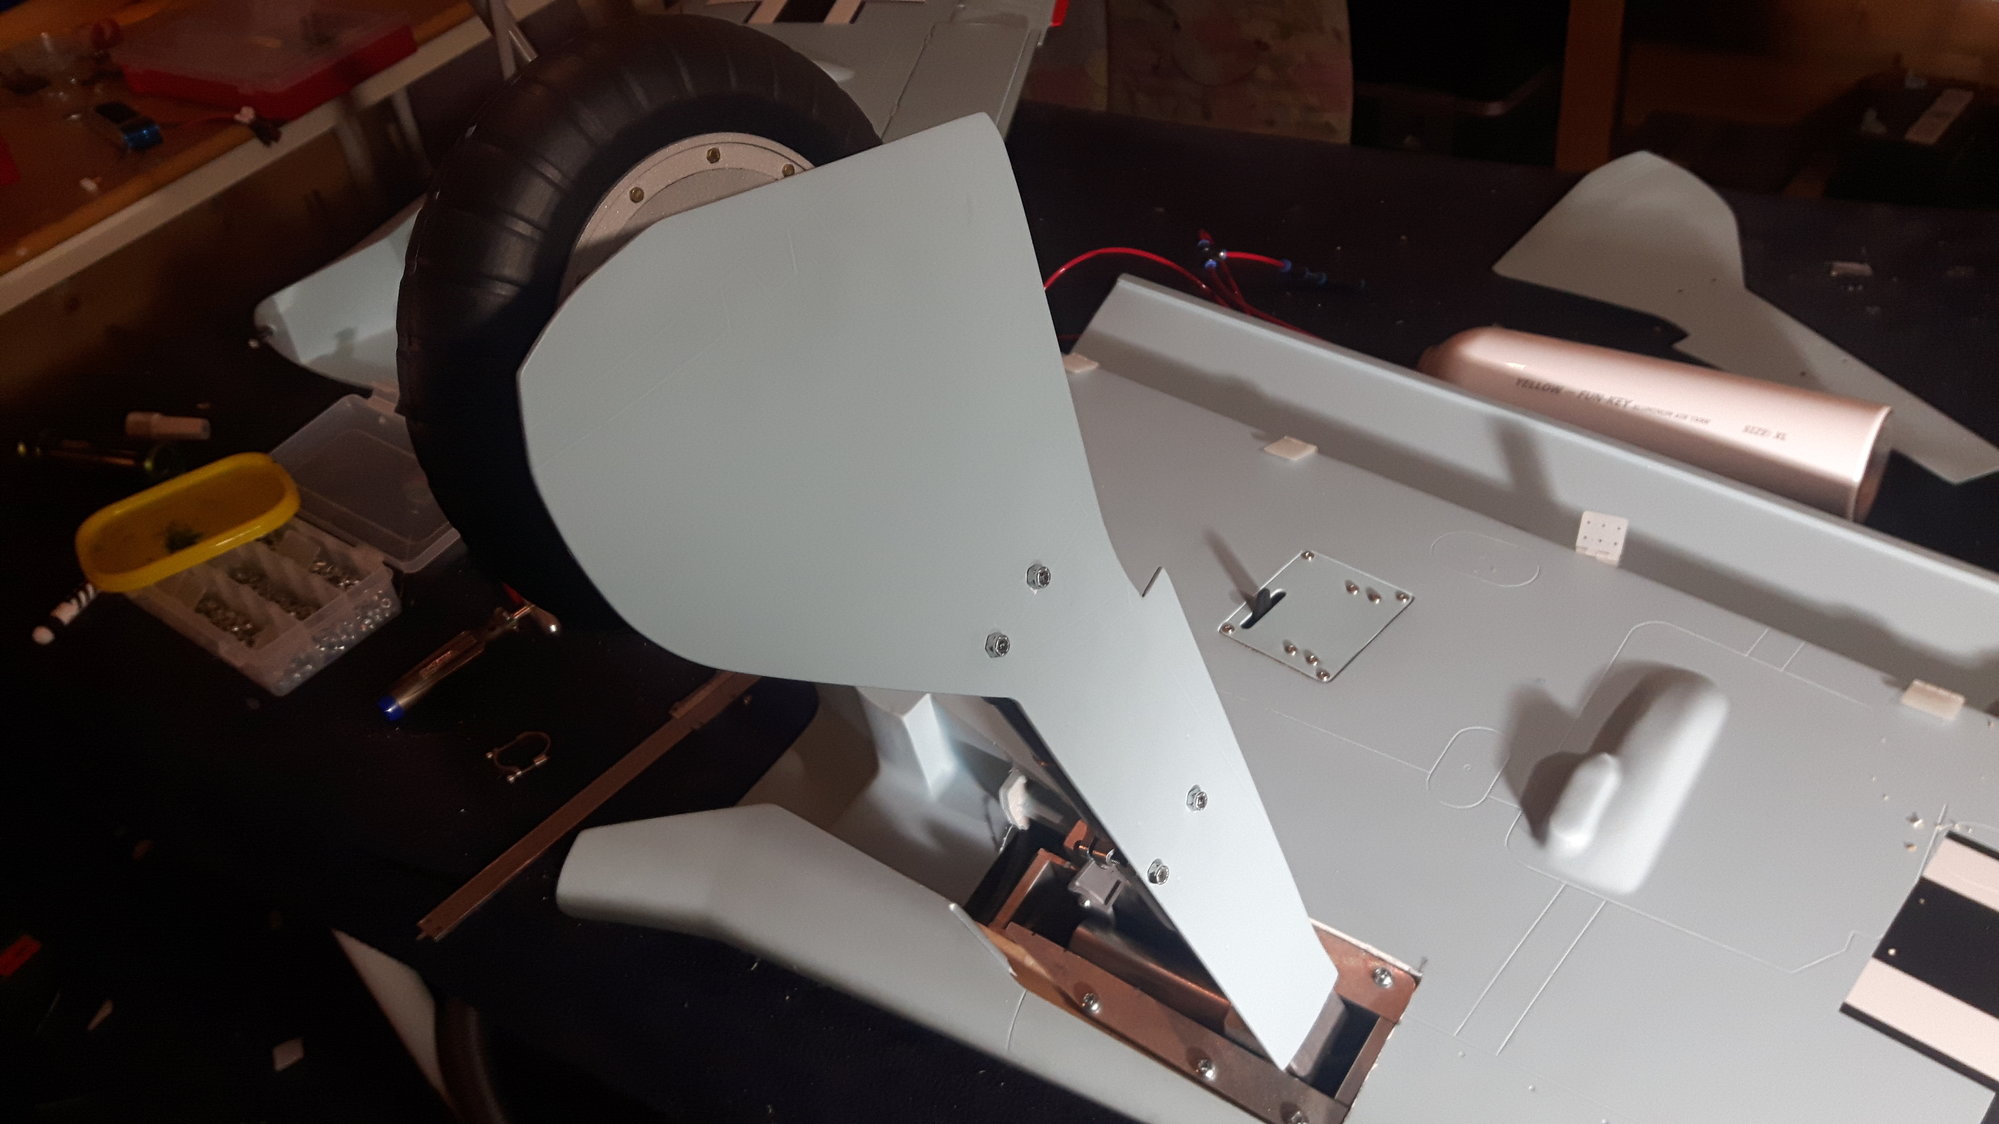
For the retract cover i have done it this way:
Changed out the original screws with longer 3 cm length. (4 pcs)
Insert nuts inside/outside.
Then adjusted accordingly for best fit.
Took off the top fastening so there is no conflict with the legs. Not needed.
The cover will not come in conflict with the spring as it is free from the movement.
I might cut the cover in bottom area since i think its rather long, but will see.
Last edited by totto; 01-12-2019 at 08:21 AM.
01-12-2019, 08:35 AM
#319
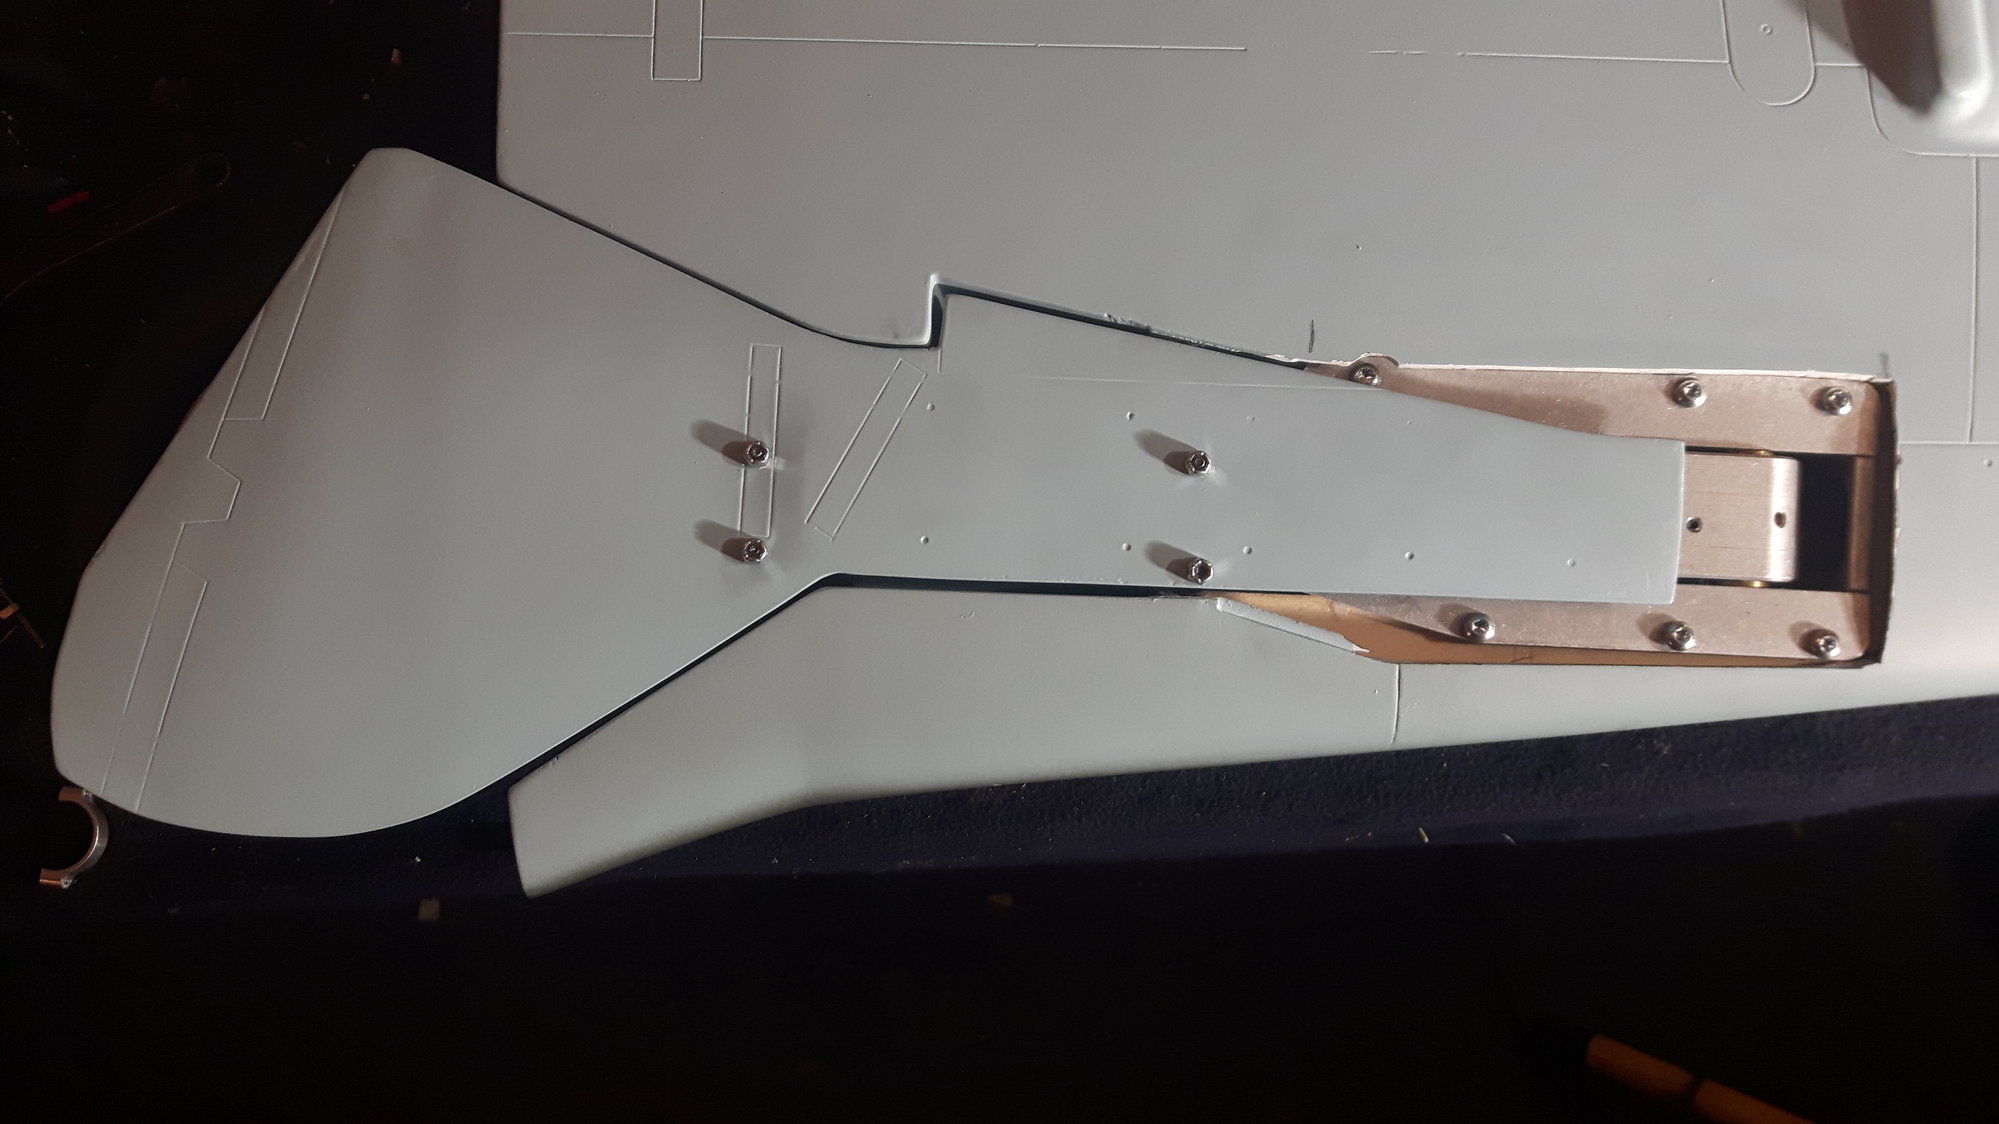
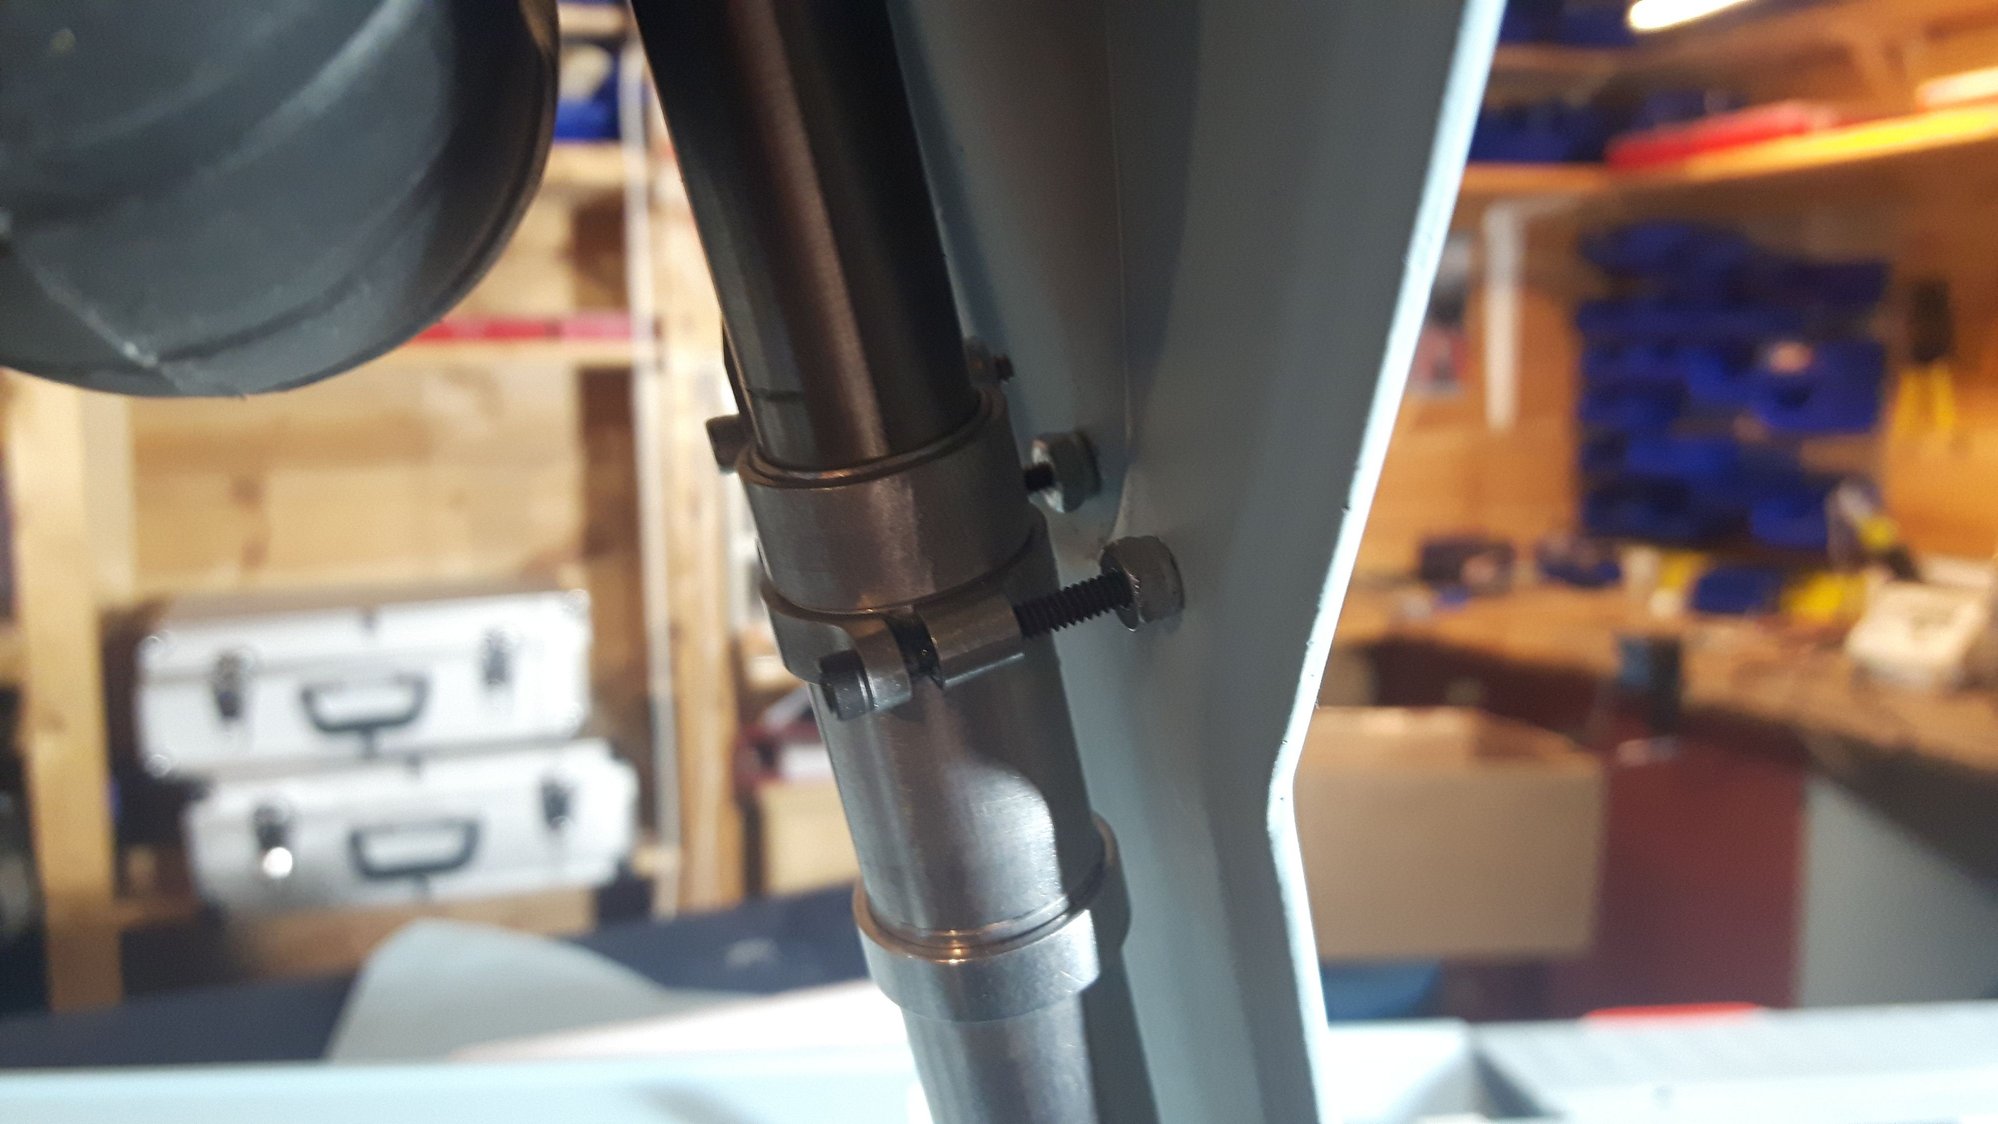
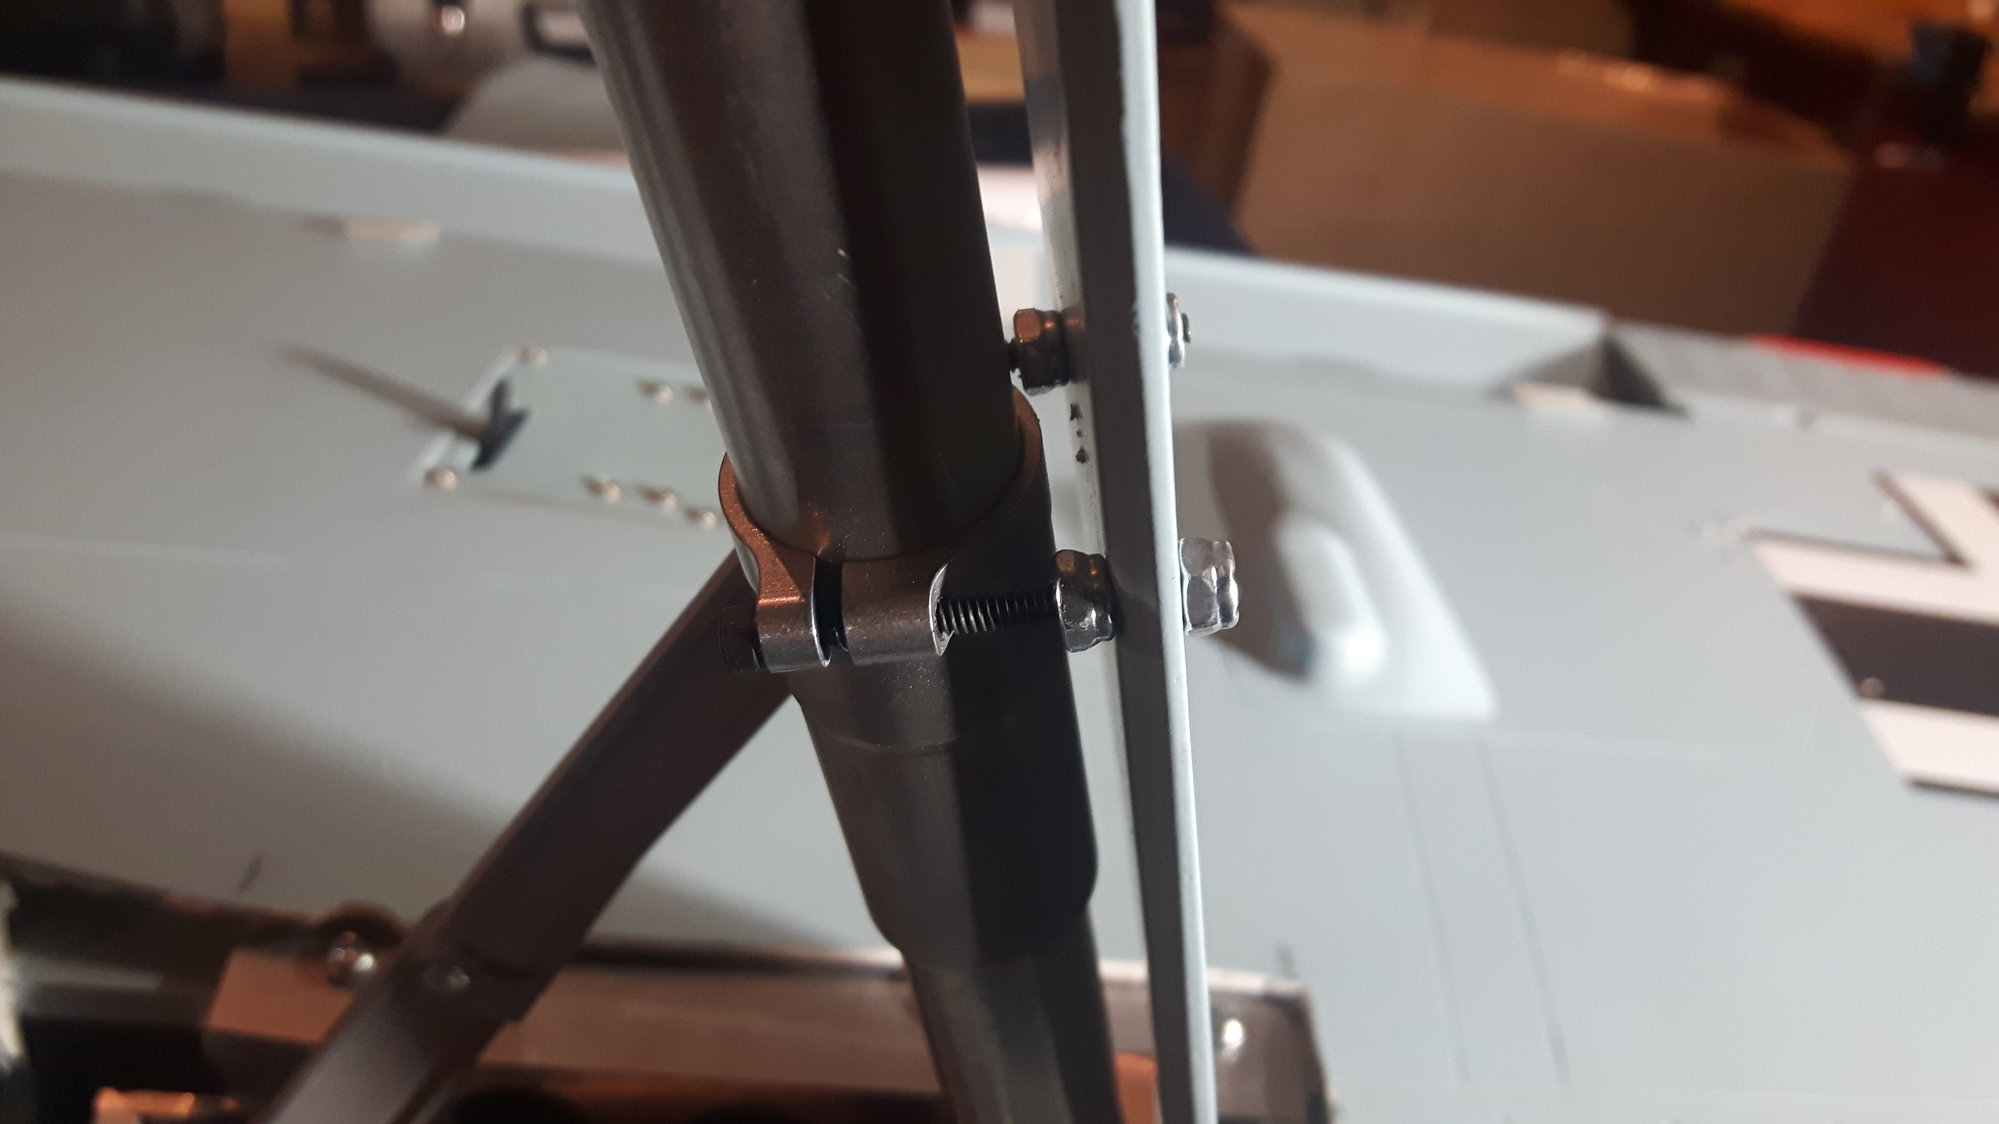
Totto,
take a look at countersink flat head srcrews and install them on the doors for a flush surface finish. Then assemble the last locknut on the strut.
The full scale doors had a tape cover over the nut as seen in the photo below
take a look at countersink flat head srcrews and install them on the doors for a flush surface finish. Then assemble the last locknut on the strut.
The full scale doors had a tape cover over the nut as seen in the photo below
Last edited by Chris Nicastro; 01-12-2019 at 08:40 AM.
 01-12-2019, 09:34 AM
#321
Join Date: Jan 2007
Location: Tvedestrand, NORWAY
Posts: 56
Likes: 0
Received 0 Likes
on
0 Posts
Nice job !
It was the plan to use flat head, but i don't have those at the moment since this is "American" treads, and we use M3 M4 measurements etc. Will be done better at a later stage :-)
01-16-2019, 07:11 PM
#323
Just a suggestion...with about 20 flights on my winter 190 I would suggest a single layer of 1/2 ounce fiberglass on the inside of the gear doors and a second horizontal strip across the bolt holes. the hollow nature of the doors will fatigue in heavy grass like one of the fields I fly at. The fiberglass added all the strength I needed. Both of my gear doors started to fatigue around the bolt holes due to the heavy grass. I've had no problems flying off of paved runways. Check out grass in post # 229.
Last edited by tevans55; 01-16-2019 at 07:22 PM.
01-17-2019, 05:41 AM
#324
Join Date: Jun 2008
Location: Istres, FRANCE
Posts: 3
Likes: 0
Received 0 Likes
on
0 Posts
Hi everybody
In order to make a few finishing touches, do you know the colors of heller or humbrol (code or name) corresponding to the color scheme ?
Especially de light blue
Thanks
In order to make a few finishing touches, do you know the colors of heller or humbrol (code or name) corresponding to the color scheme ?
Especially de light blue
Thanks