


FiberClassics P-51 now Comp-ARF P-51


 08-14-2016, 02:42 AM
#2328

My Feedback: (49)
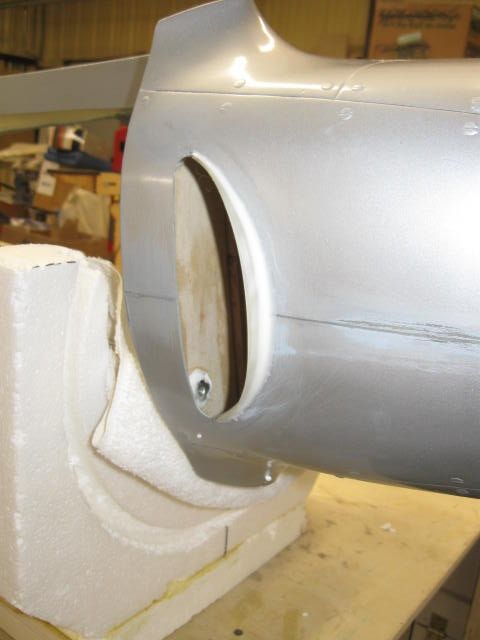
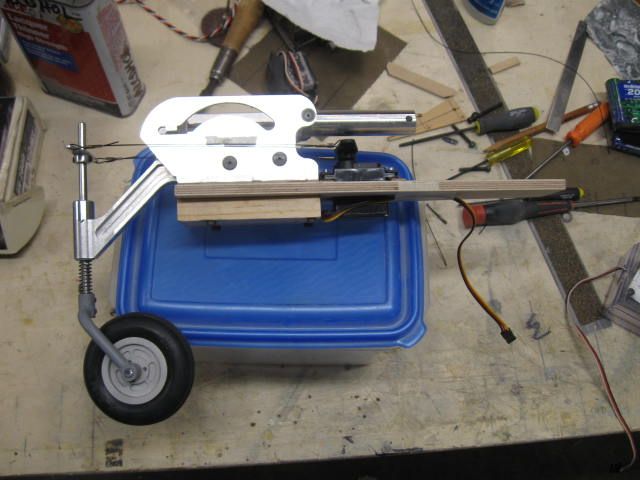
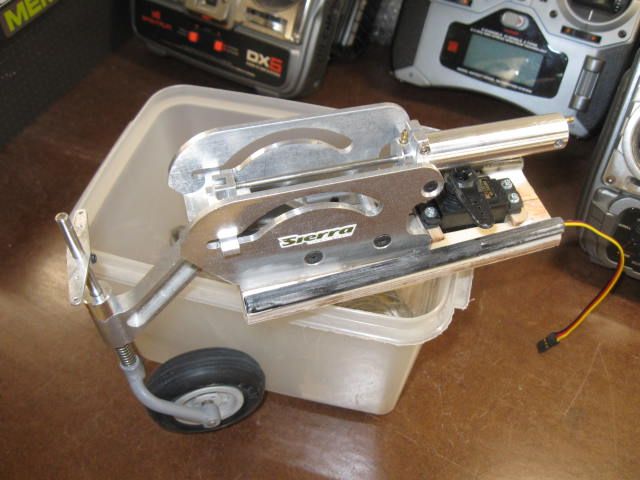
Still trudging thru. Made the tailwheel mount and have a good idea of how it's going to work. Need to add the rudder servo in there too. It mounts aft of the steering servo. The servos may need to be replaced one day, so that whole assembly needs to be removable. Kinda hard to get it all tucked into the fuselage. Not sure I can install the tailwheel doors and still be able to fit it all in and out.
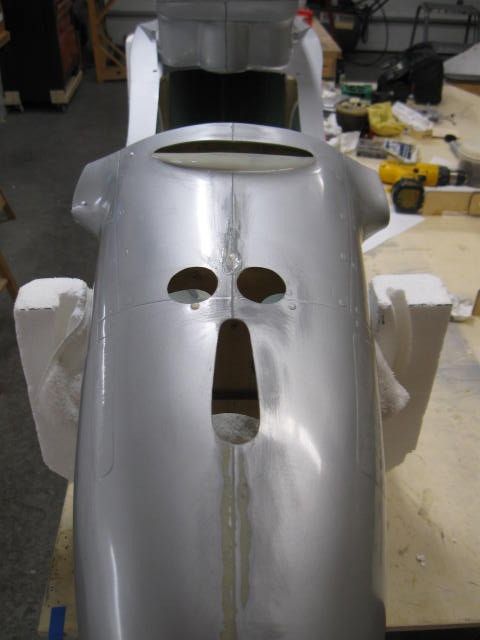
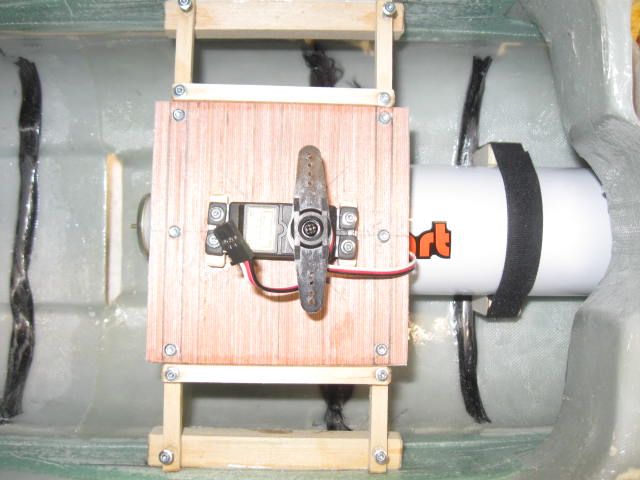
Added a layer of 5 oz cloth to the belly air scoop plus added a hank of Carbon Fibre. Makes it stiffer, but not really overly rigid. Also laid in the Large Robart air tank to be secured somehow. Good ole Velcro most likely.

Added a layer of 5 oz cloth to the belly air scoop plus added a hank of Carbon Fibre. Makes it stiffer, but not really overly rigid. Also laid in the Large Robart air tank to be secured somehow. Good ole Velcro most likely.
 08-16-2016, 03:46 AM
#2330
My Feedback: (49)
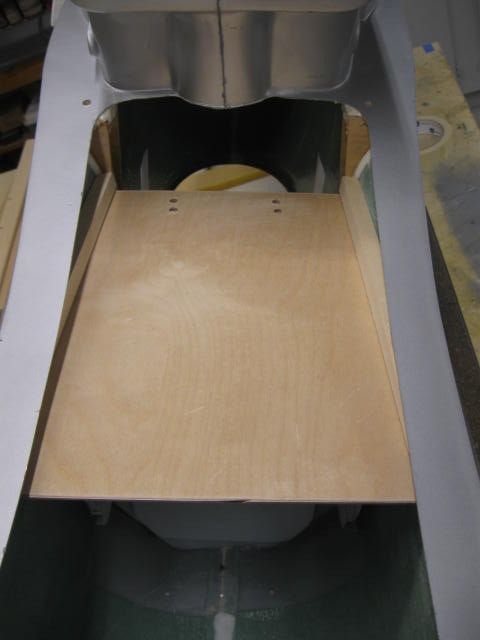
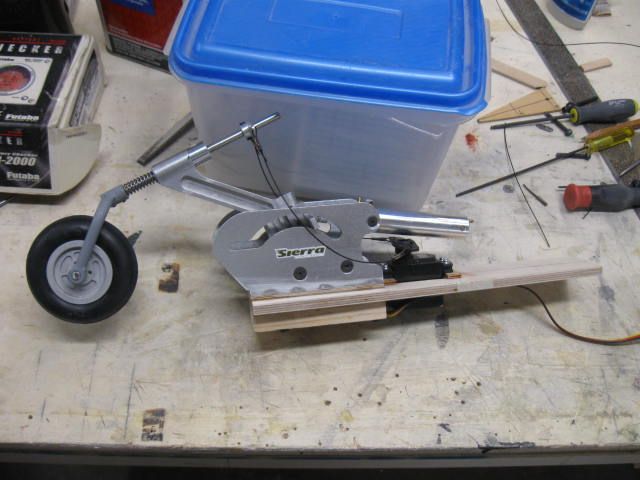
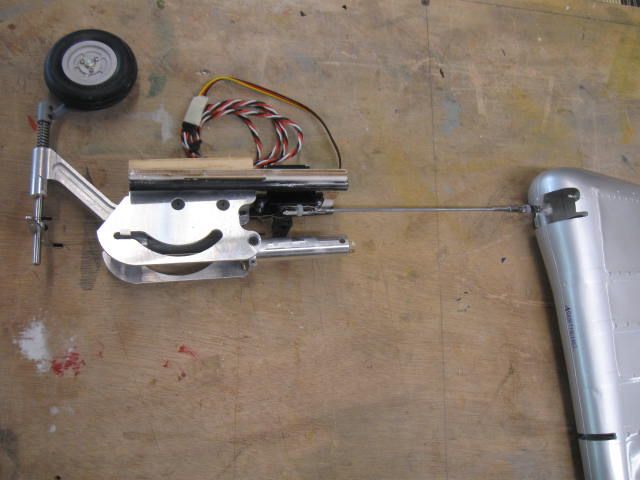
Bob, got the tank mounted with a bit of plywood for bases and velcro. Also pretty much finalized the tailwheel assembly by cutting off the aft end of the plywood where the rudder servo was to go - decided that was impractical and went with the suggested CARF rudder servo setup.
08-17-2016, 05:44 AM
#2332

Will your rudder cables clear your tail wheel when it retracts? I had to modify the Tiller are on the tailwheel so when it retracts it goes between the rudder cables. tailwheel cables go inside the frame now.
Bob, got the tank mounted with a bit of plywood for bases and velcro. Also pretty much finalized the tailwheel assembly by cutting off the aft end of the plywood where the rudder servo was to go - decided that was impractical and went with the suggested CARF rudder servo setup.
08-19-2016, 06:57 PM
#2333
My Feedback: (49)
Bob, well, I work SLOW! Might be a long time. Haha. Still haven't touched the wing.
Quist, yes the rudder pull-pull cables clear the tail wheel with the carbon fiber tubes keeping them out of the way. They will run clear of the tailwheel door as well. I will mount a couple more short carbon fiber tubes midway to the rudder servo to keep them going out of the way of things.s
Wish I knew why I no longer get notifications of new replies to this thread? I'm subscribed.
Over on the other build thread, Matt has replied that he runs a push-pull rudder servo at the rear of his P-51 and has been working fine for 5 years. I might take one last look at doing that off the tailwheel steering servo. I'd have to run a short pushrod off one end of the steering arm to one side of the rudder. It would greatly simplify things.
Last edited by LBJ; 08-19-2016 at 07:01 PM.
 09-10-2016, 06:49 PM
#2336
My Feedback: (49)
Got a few more things done since last post here, for those not following on RCSB.
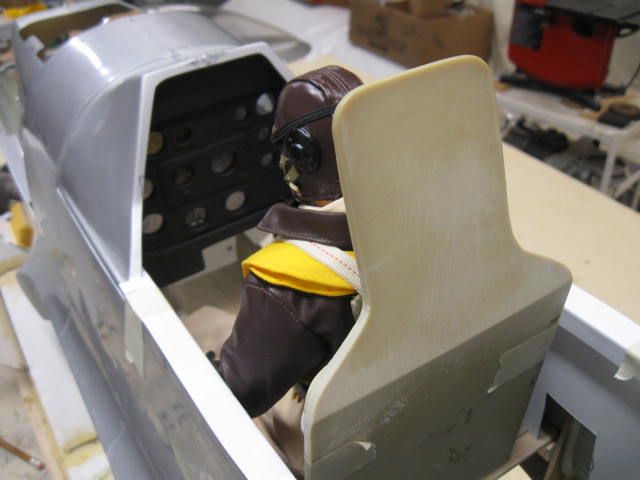
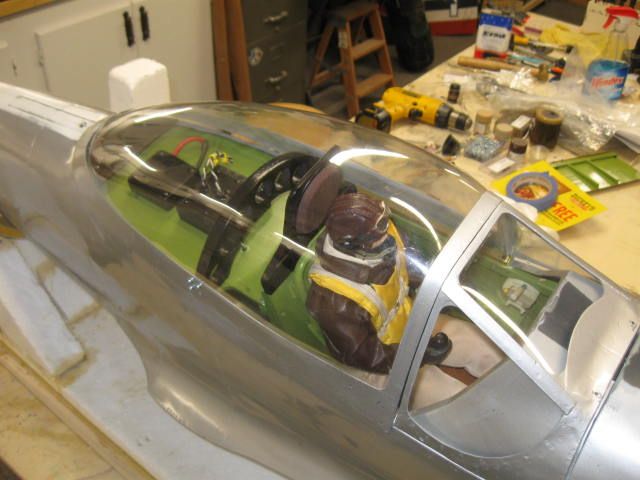
That green on the side panels and seat is JADE satin, by Rustoleum. It's pretty close to zinc chromate.
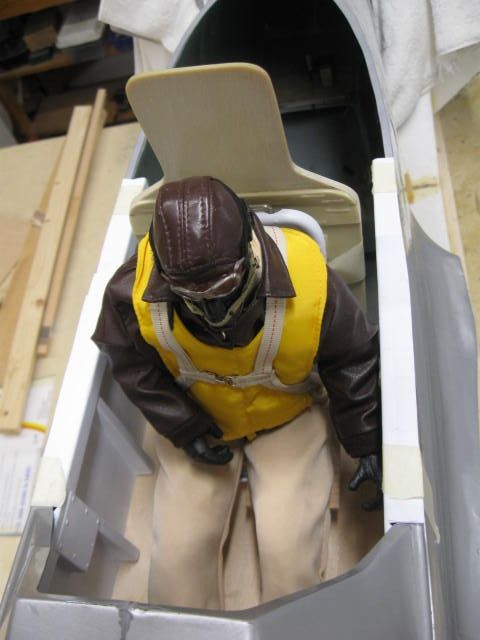
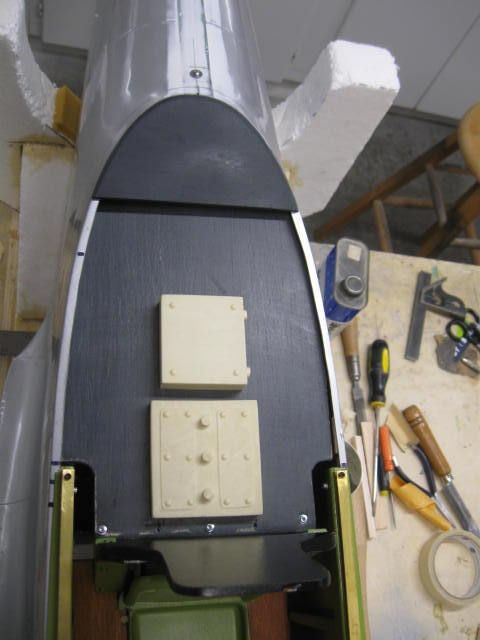
Made, primed, and painted the "bow" behind the seat, made the covering aft of the seat since I am not showing all the details back there, just the radio and battery. Those two resin parts are WAY heavy at 2.15 ounces as they sit, cut more than in-half. Thought I'd save lots of weight, but guess not. I remade them out of balsa at one-half ounce for both!
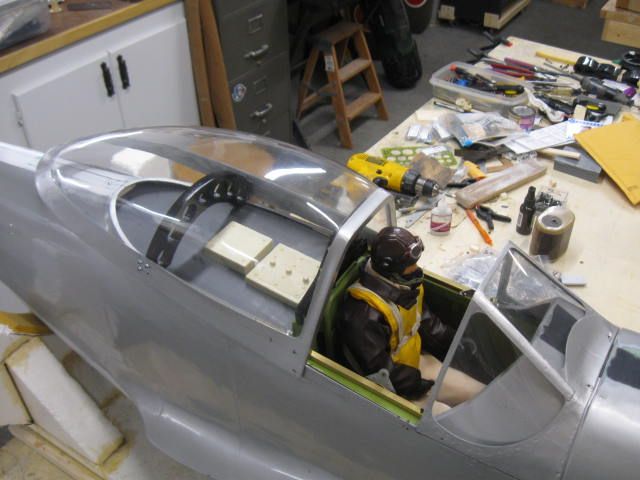
Screwed the seat to the armor after painting them.

One more small part is the cover at the aft end of the cockpit. It's screwed in place as well as the large cover piece so I can get to the Receiver.
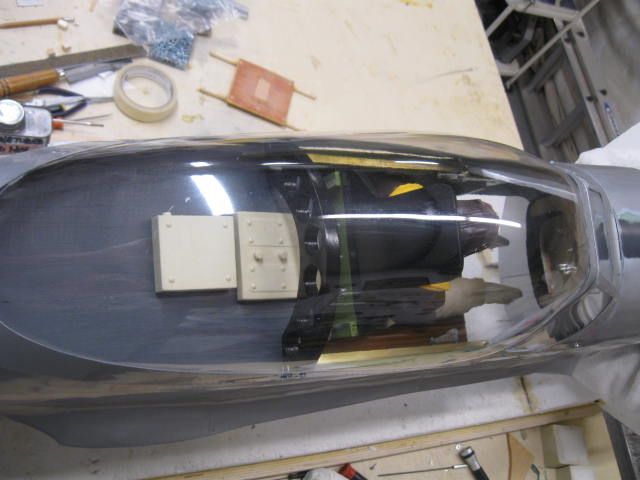
Canopy closed, the bow piece is close to scale but not perfect. I just approximated it by eye. I need it to hold the canopy to width back there. A bunch of small items that need doing, sooner or later. Still have lots of cockpit parts to assemble and paint.
That green on the side panels and seat is JADE satin, by Rustoleum. It's pretty close to zinc chromate.
Made, primed, and painted the "bow" behind the seat, made the covering aft of the seat since I am not showing all the details back there, just the radio and battery. Those two resin parts are WAY heavy at 2.15 ounces as they sit, cut more than in-half. Thought I'd save lots of weight, but guess not. I remade them out of balsa at one-half ounce for both!
Screwed the seat to the armor after painting them.
One more small part is the cover at the aft end of the cockpit. It's screwed in place as well as the large cover piece so I can get to the Receiver.
Canopy closed, the bow piece is close to scale but not perfect. I just approximated it by eye. I need it to hold the canopy to width back there. A bunch of small items that need doing, sooner or later. Still have lots of cockpit parts to assemble and paint.
Last edited by LBJ; 09-10-2016 at 06:51 PM.
09-27-2016, 05:14 AM
#2337
My Feedback: (49)
Showing a bit of progress, still dragging along on the cockpit.
A fellow RC Club member maidened his CARF P-51 plus 3 more flights over the weekend at a meet in Monroe, LA. Said she flew well and landed very slow. He's not happy with his engine cooling so he changed it to be sort of like I built mine with the air exit in front of the wing.
A fellow RC Club member maidened his CARF P-51 plus 3 more flights over the weekend at a meet in Monroe, LA. Said she flew well and landed very slow. He's not happy with his engine cooling so he changed it to be sort of like I built mine with the air exit in front of the wing.
09-27-2016, 11:17 AM
#2338
Senior Member
Join Date: Nov 2005
Location: Frisco,
TX
Posts: 485
Likes: 0
Received 0 Likes
on
0 Posts
LBJ, Are you talking about Jack and Dennis? I was at Monroe this past weekend and maidened my TF P-47. It appears we're going down similar paths. I'm so close to pulling the trigger on ordering the CARF P-51. Will you be at the Great Southwest meet next month?
Thanks,
Nick
Thanks,
Nick
09-27-2016, 03:21 PM
#2339

So LBJ just to confirm, you seem to have the tail retract aft of the doors retracting the scale manner right?
I'm going to do a similar set up but a longer board to help offset the weight of the Kolm engine. I'll have the Rx and batteries, UP2 air valve and servos back there as well.
Can an you take a photo of the clearance between the bottom of the cockpit floor and the top of the wing saddle for me please? How much space is that?
My my next step is ordering the cockpit kit but I'm planning ahead with an air duct.
Thanks!
09-27-2016, 03:38 PM
#2340
Junior Member
Join Date: Jun 2016
Posts: 5
Likes: 0
Received 0 Likes
on
0 Posts
hi guys i recently acquired a 1/4 scale fiberglass mustang with no plans or instructions.the wing and tail section is foam.has anyone assembled such an animal? pics would be helpful too
Last edited by rcmike1972; 09-27-2016 at 03:48 PM.
09-27-2016, 07:58 PM
#2343

Chris, My first go with the Kolm 135 resulted in a ton of lead in the tail. After a crash, I moved things around and ended up with zero added tail weight! Three packs are right in front of the tail wheel well, removed rudder servo from the front and used one 8911 for steering and rudder. I'm going to maiden this weekend.
You mentioned an air duct through the fuse... I'll find out if the Kolm cooling ducts are enough this weekend. I have temp telemetry on both heads and will have someone monitoring while I fly it. I don't think you're going to need anything more than what they suggest. Lots of people in Europe have flown this combo.
You mentioned an air duct through the fuse... I'll find out if the Kolm cooling ducts are enough this weekend. I have temp telemetry on both heads and will have someone monitoring while I fly it. I don't think you're going to need anything more than what they suggest. Lots of people in Europe have flown this combo.
09-28-2016, 02:53 AM
#2344
Chris, My first go with the Kolm 135 resulted in a ton of lead in the tail. After a crash, I moved things around and ended up with zero added tail weight! Three packs are right in front of the tail wheel well, removed rudder servo from the front and used one 8911 for steering and rudder. I'm going to maiden this weekend.
You mentioned an air duct through the fuse... I'll find out if the Kolm cooling ducts are enough this weekend. I have temp telemetry on both heads and will have someone monitoring while I fly it. I don't think you're going to need anything more than what they suggest. Lots of people in Europe have flown this combo.
You mentioned an air duct through the fuse... I'll find out if the Kolm cooling ducts are enough this weekend. I have temp telemetry on both heads and will have someone monitoring while I fly it. I don't think you're going to need anything more than what they suggest. Lots of people in Europe have flown this combo.
thx!
09-28-2016, 05:05 AM
#2345
Pics impossible now because I buttoned everything up. But I can explain. I 3D printed a battery box that holds three A123 packs from duralite. They are the self balancing variety so I just have JR plugs to the scoop and I can charge from there. I glued this right in front of the tail wheel opening. Then I put a bigger servo on the steering and did pull-pull cables to the rudder. I glued the canopy on this time and eliminated the sliding canopy. I just want to get this thing in the air. I can share the STL file if anyone wants it and you can print on shape ways.com for about $35 
I kept the 3S lipo for the starter near the trailing edge of the wing so I could remove to charge.
I kept the 3S lipo for the starter near the trailing edge of the wing so I could remove to charge.
09-28-2016, 12:24 PM
#2346
you can reach in through the bottom of the fuselage with the wing off all the way down there and perform maintenance on the batteries when needed? Is the box opening facing towards the engine so you can directly see each one and reach them through the wing opening?
09-29-2016, 07:25 PM
#2348
I'll post pics of my progress soon. The duct I'm making will isolate the engine compartment and direct the air back to the radiator exit. This way the interior of the plane is not subjected to any heat or fumes.
So I'm pretty sure I'll meet you guys on Sunday!
So I'm pretty sure I'll meet you guys on Sunday!