


Charlie Kellogg's TBM Avenger Build


 03-11-2018, 07:16 PM
#2877

My Feedback: (35)
Thanks. For me i have to make it slide because it has to be forward to remove the aft canopy to get to the reciever ans it had to slide aft To get to the lught switches on tue dash and for if i ever need to remove my fuel tank. I just focusing on finishing everything else then i will come back to it.
carl
carl
03-12-2018, 01:37 PM
#2879
Carl - That is tooooo funny. I was there with my father-in-law. He could not stay long due to his age. But he saw Dino (P-47) and Kwang (jets) fly. I flew IMAC events at that field. Will look into it as to when the 2018 event is scheduled for this year. Will be there as long as it doesn't interfere with the Nats. Chic
03-13-2018, 01:10 PM
#2883
Chic,
That would be great....the wives could do a Nordstrom weekend LOL
Avenger update, air valve throws done, outboard flaps at 30 degrees, inboard at appx 20 degrees????? don't think it will be a problem.
Need to button up all the hatches etc and then rebalance AFTER I make a balancer
Temps in the low 80's today, NO snow, going down into the 60's by Thursday I think
Hope you guys are surviving the snow
Larry
03-14-2018, 04:22 AM
#2885
Chic,
Thanks for the concern about the flaps.
I'm thinking the outboard flaps being twice the size should handle it, we will see.
As soon as I get the gear doors reattached and get the fuselage right side up I will see if I can get some more throw on the inboards.
Will post a pix later
Stay warm
Larry
Thanks for the concern about the flaps.
I'm thinking the outboard flaps being twice the size should handle it, we will see.
As soon as I get the gear doors reattached and get the fuselage right side up I will see if I can get some more throw on the inboards.
Will post a pix later
Stay warm
Larry
03-19-2018, 04:02 AM
#2886

My Feedback: (15)
Join Date: May 2003
Location: Iowa City, Iowa (again!)
Posts: 1,579
Likes: 0
Received 1 Like
on
1 Post
None, unfortunately!
I have been focused on work, travel, teaching, and another ridiculous hobby of mine.... bonsai.
Bonsai requires no formal workshop, and it's easily transported... building will have to wait until we move into our "forever home" here in Iowa City... still in a rental that we took when we first moved back here last year. Hope to find the right place and get moved into a new house by June or July.
Then I can set up an appropriate workshop and get back to building!
Best to all
Noah
03-21-2018, 08:04 AM
#2889
I am going to follow Noah's technique by laying down plastic (MonoKote) to cover the area around and over what would become the gear door and open wheel area on the wing bottom. Then I would begin laying down numerous layers of fiberglass cloth. Can't recall the thickness and number of layers of glass cloth to get the necessary thickness to get firm and not flimsy gear doors. Once you allow the epoxy to harden - peel the hardened glass from the MonoKote on the wing. Remove the monokote from the wing. Now you can position the new fiberglass pieces over the area and then cut out the necessary gear door shape. If not mistaken, I believe Noah, Pete, and Larry used wooden or aluminum brackets around the gear struts to mount the gear door to the strut. If not mistaken again, I believe Sierra Gear has places on the gear strut itself to screw the doors to the gear strut. Not in the shop at the moment so I am going on what I remember. Ha, Ha, Ha. Smile, go back through this thread and give us a Post Number showing us what the guys did. Maybe the guys will chime in and help. I am ready to do the same thing (construct gear doors). Stay safe and Stay well with all this snow. Chic
Last edited by redtail; 03-21-2018 at 08:14 AM.
03-22-2018, 03:35 AM
#2890
My Feedback: (15)
Join Date: May 2003
Location: Iowa City, Iowa (again!)
Posts: 1,579
Likes: 0
Received 1 Like
on
1 Post
No monocle here... I used G-10 material.
post is here: #579
Charlie Kellogg's TBM Avenger Build - Page 24 - RCU Forums
As I detailed in that post, it's not easy to get the entire openings concealed, but you can get it close. I do recommend the G10 (I might have sandwiched two layers together) because it remains somewhat flexible when the gear are lowered, some sections need to slip past one another at the area of the gear mounts.
Noah
03-22-2018, 03:39 AM
#2891
My Feedback: (15)
Join Date: May 2003
Location: Iowa City, Iowa (again!)
Posts: 1,579
Likes: 0
Received 1 Like
on
1 Post
I just looked again at that old post, and it appears I glued small spacers of hardwood to the gear (both the mount and the strut) to serve as attachment points for the G10.
Never in the 6 years of flying my avenger did those hardwood spacers ever come loose or fall away. I cleaned the aluminum with solvent and then used hysol as an adhesive to attached the wood directly to the aluminum.
Worked like a charm. Maybe not very scale, but certainly functional!
Noah
Never in the 6 years of flying my avenger did those hardwood spacers ever come loose or fall away. I cleaned the aluminum with solvent and then used hysol as an adhesive to attached the wood directly to the aluminum.
Worked like a charm. Maybe not very scale, but certainly functional!
Noah
03-22-2018, 03:54 AM
#2892
My Feedback: (15)
Join Date: May 2003
Location: Iowa City, Iowa (again!)
Posts: 1,579
Likes: 0
Received 1 Like
on
1 Post
One final note... the reason I used spacers (instead of the mounting hardware that may have come with the gear from sierra) was because when my gear were retracted into the wing, the struts sat well below (above, depending on whether the model is upright or inverted) the surface of the wing.
If the gear covers would have been mounted flush against the struts, then the covers would have neither aligned with the outer wing surface nor matched the contour of the bottom surface of the wing.
When you start fiddling... you'll start to see how and why it might have to be done this way. My covers stood about 7-10 mm away from the gear strut itself.
Noah
03-22-2018, 05:13 AM
#2893
Hey guys,
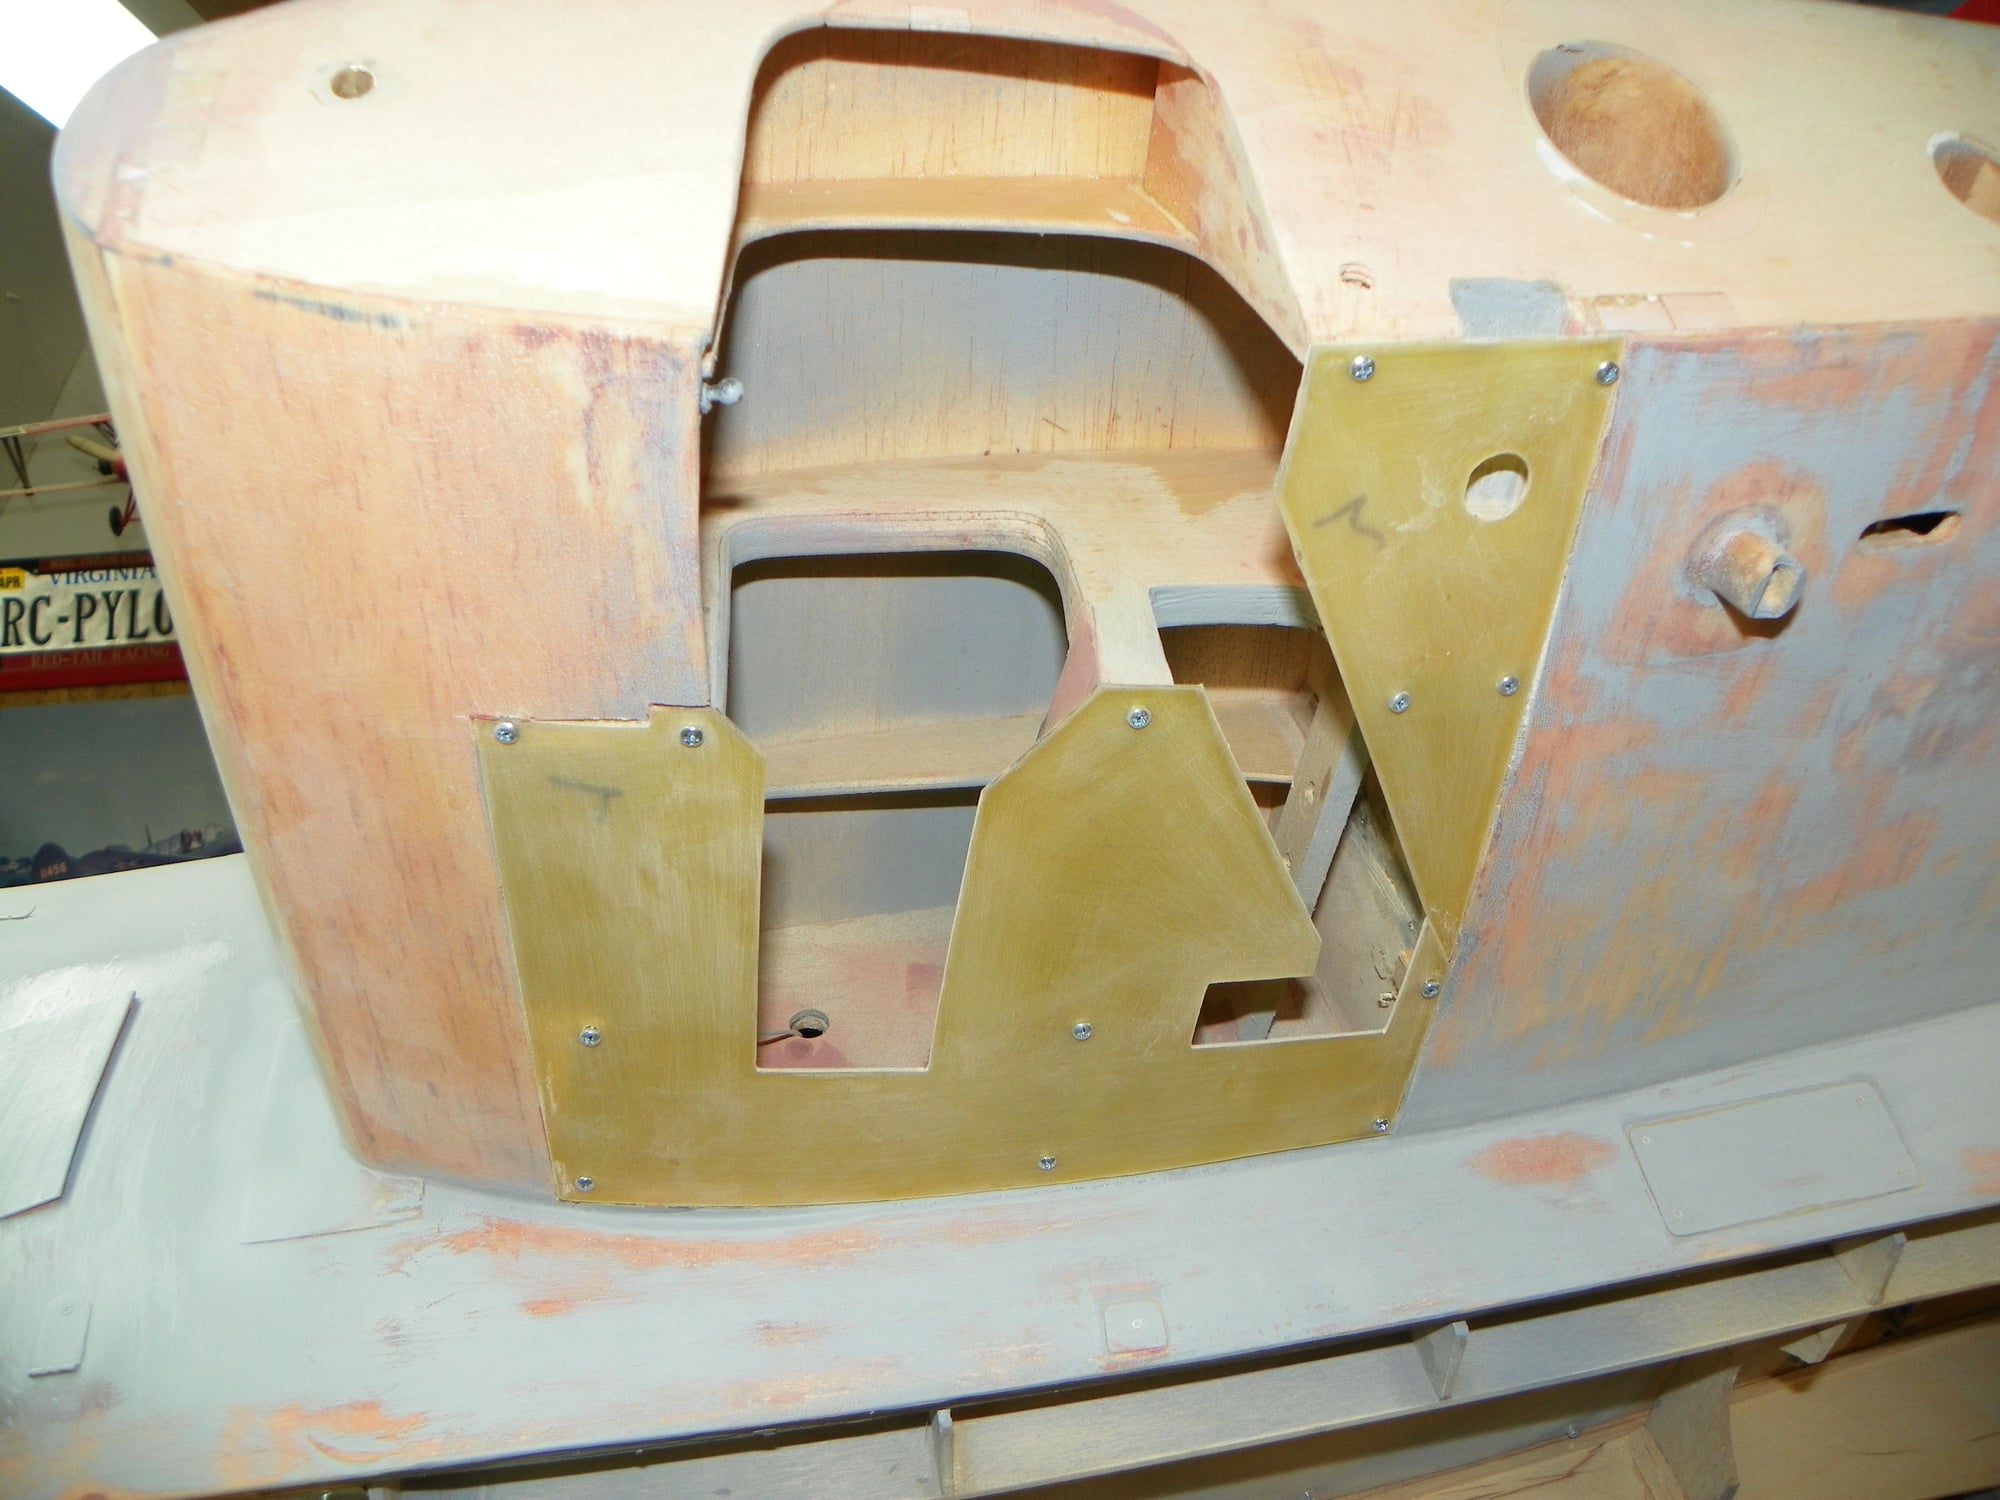
We used 1/8" ply for the doors as I had forgotten about Noah'' idea of the G10 and wooden blocks cut and sanded to thickness to allow the doors to be flush with the wing when retracted. If you do glass do the same as you did for the bomb bay doors
I just had to reattach the doors as they came off during the move to AZ, I used JB Weld and it worked great on the original maiden.
I think I have fixed the inboard flap problem and will double check when I get back from California on Sunday.
Larry
03-22-2018, 06:12 AM
#2894
Have a safe trip Larry. Thanks Noah - We can always count on you holding the "corporate knowledge base". Ran out to the shop and realized I followed your lead to the letter with regards to the use of G10 to cover the retract area. However, I'm not sure about the strut covers. I think I used the monokote method to lay up the strut covers. I have three different versions and they all look like h@#$. May rethink and use Noah's method (two layers of G4 to cover the struts. Still may try to monokote the strut covers - just because I want to try to follow the curve of the wing. Will post photos before noon. Smile. Chic
Last edited by redtail; 03-22-2018 at 06:17 AM.
 03-23-2018, 03:37 PM
#2897
My Feedback: (15)
Join Date: May 2003
Location: Iowa City, Iowa (again!)
Posts: 1,579
Likes: 0
Received 1 Like
on
1 Post
Chic, the (potential) advantage of using two-ply of G10 to make strut covers is that it is easy to lay them on top of one another, apply pressure so they match the contour, and then wick some thin CA to get them to stick together.
As you apply pressure and make them conform to the contour, the two pieces of G10 will slide past (or against) one another, and the CA will "lock" them into this new orientation... effectively "locking in" the molded shape.
Lots faster using this method, as opposed to laying up glass or carbon cloth.
You might give it a try! Worst case scenario... you have three sets of strut covers that look like ^&$%!!!
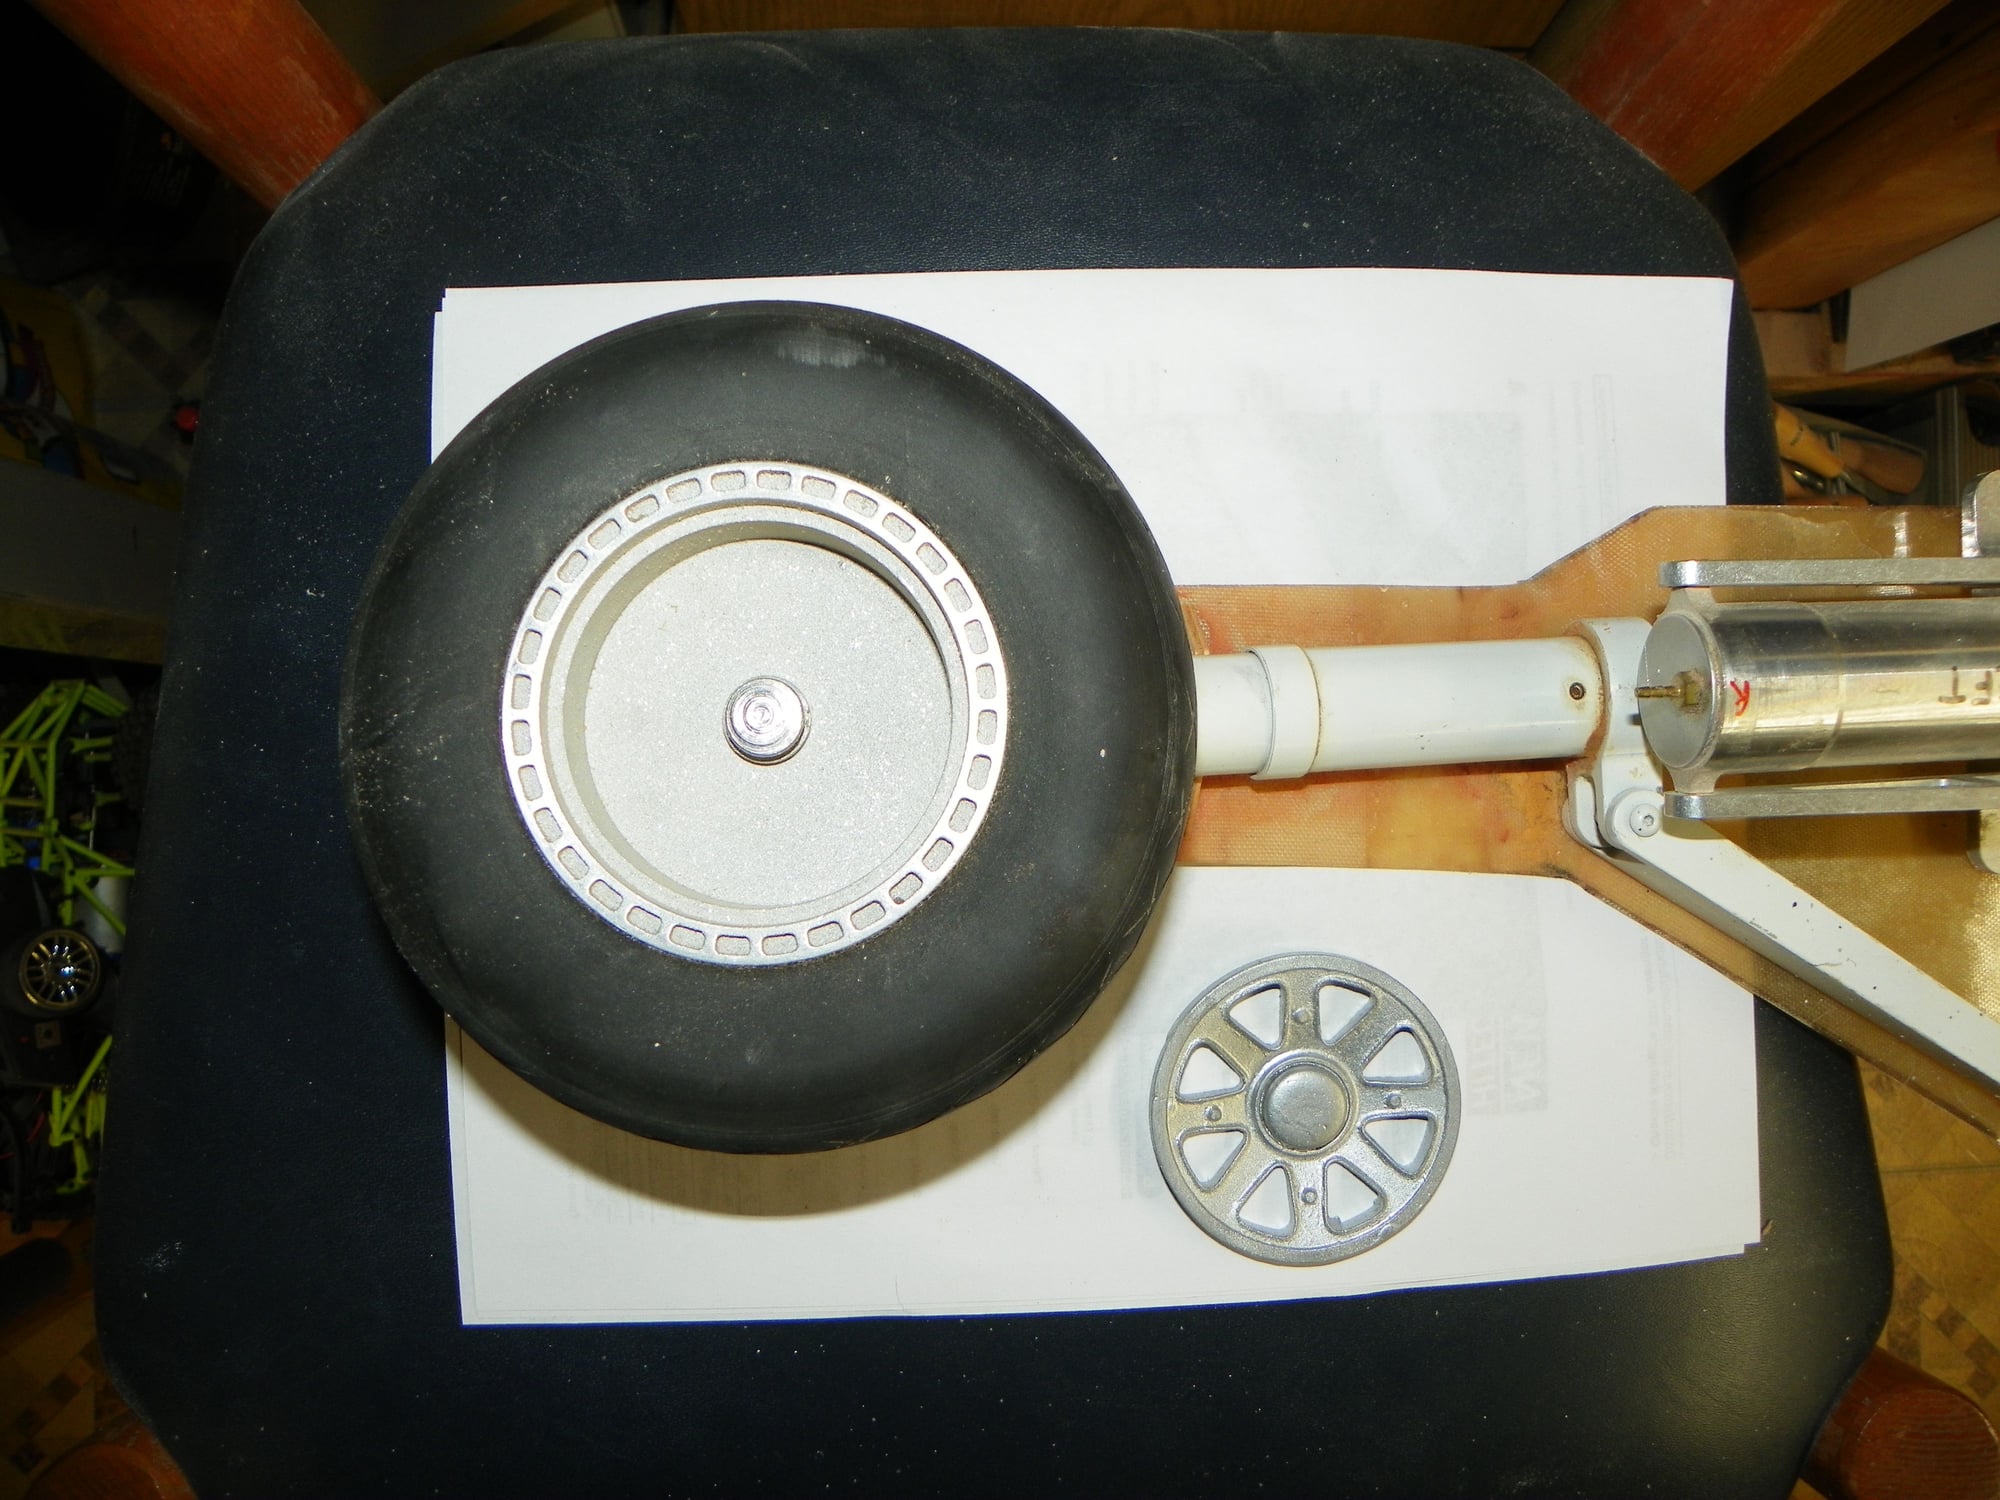
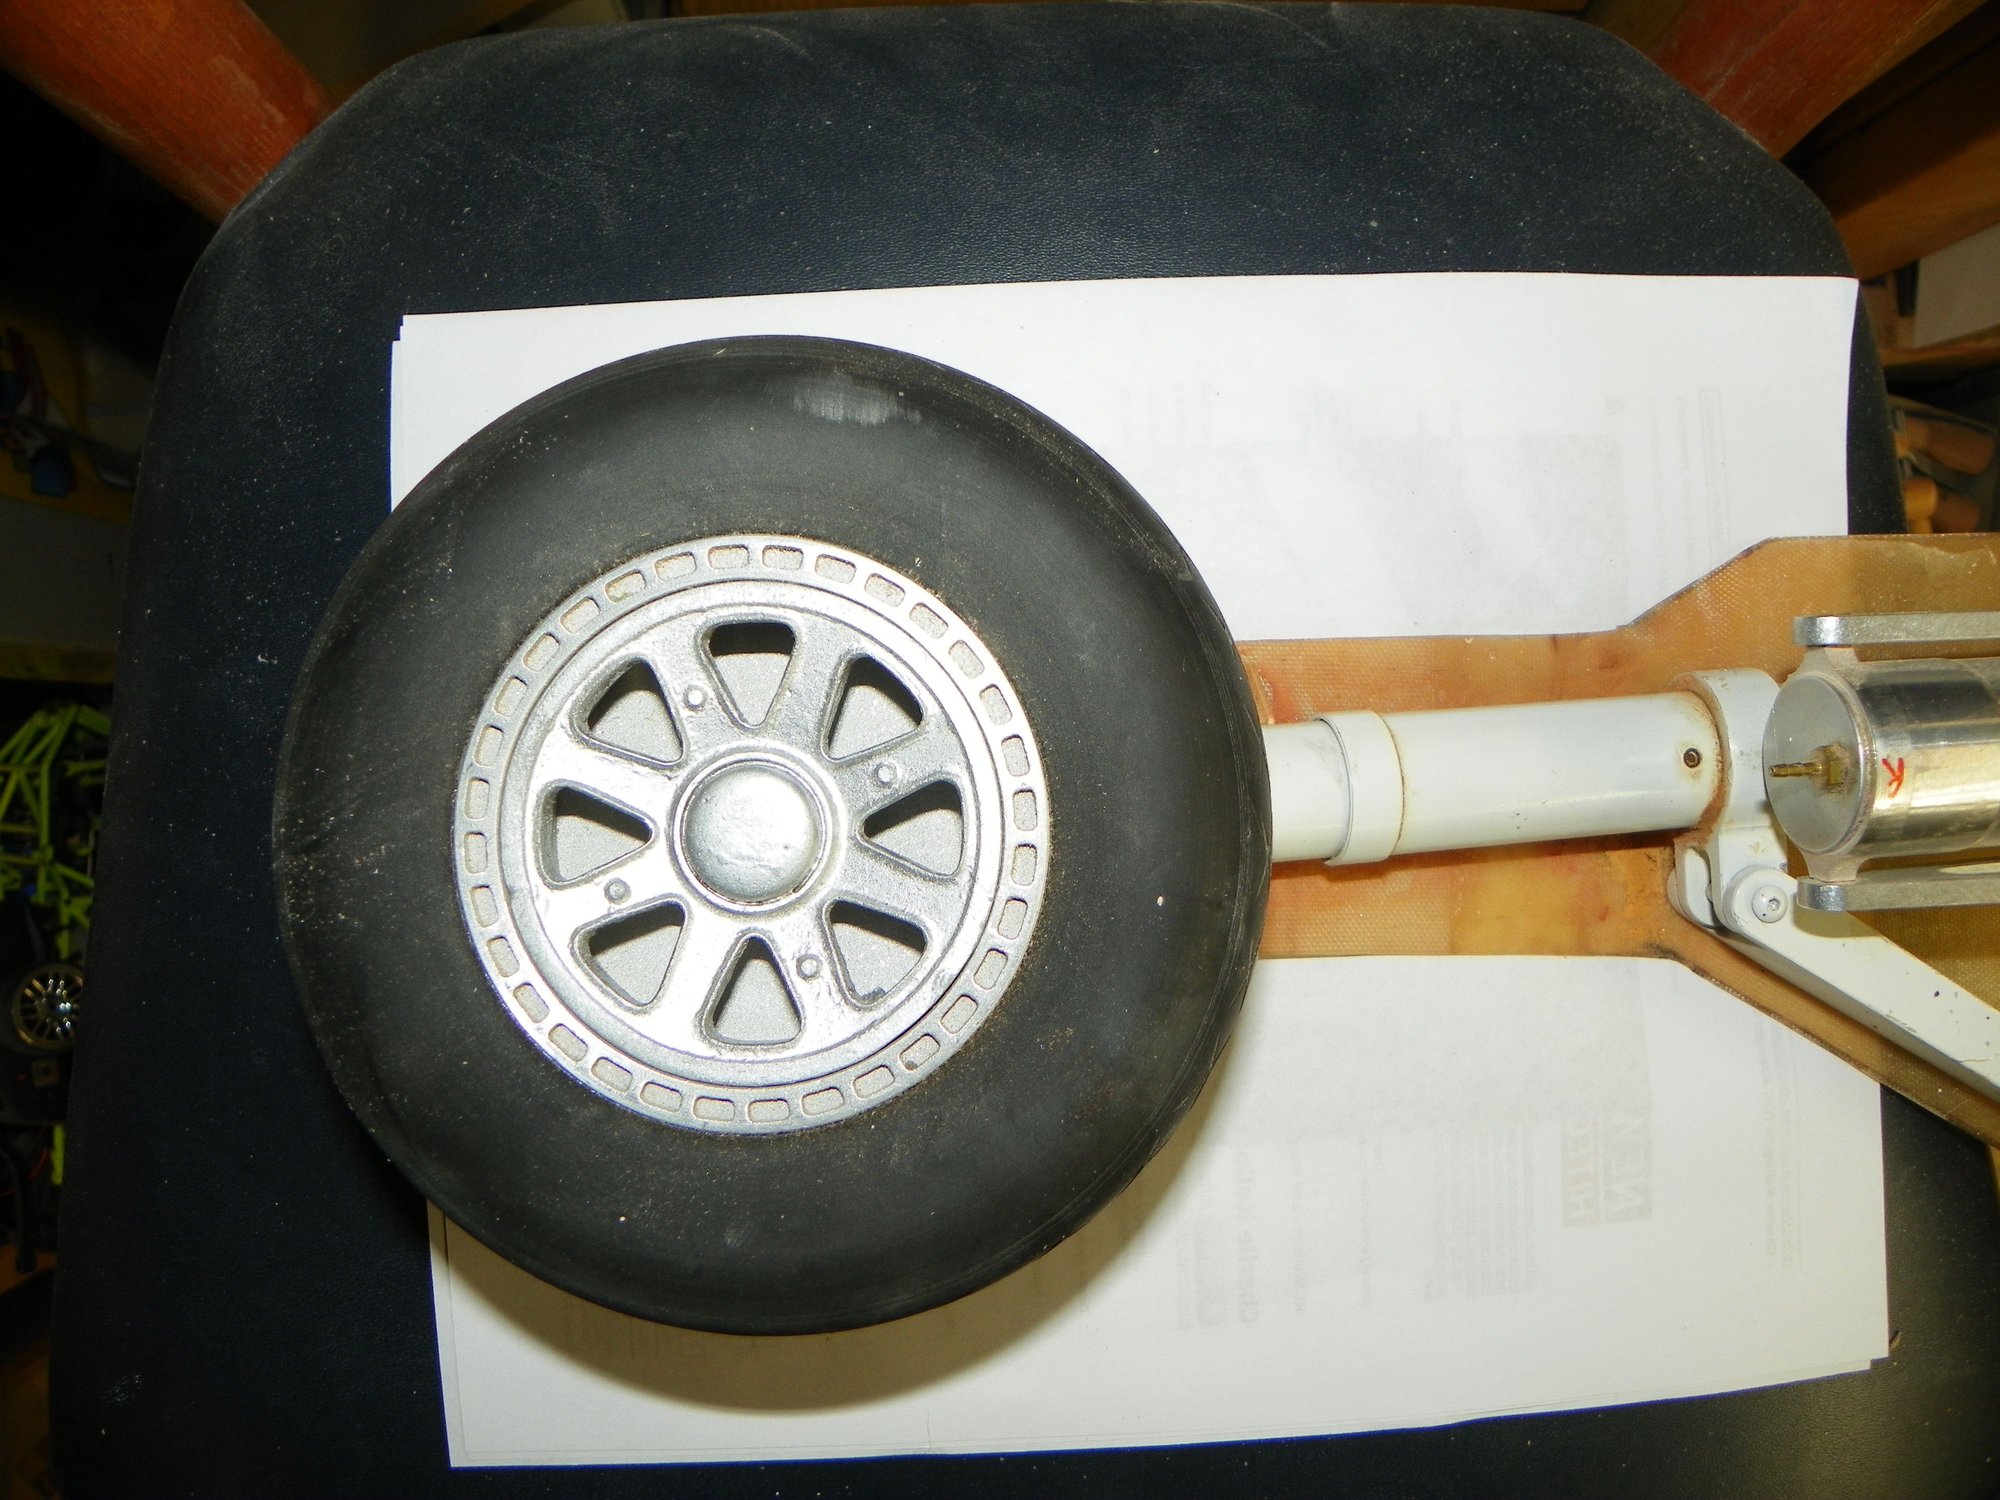
Last, I never used smoothie hub caps.... just used the spoked machined aluminum hubs. Should be visible in many of the old pictures. So, not sure how you attach those pups!
Keep plugging away, guys!
As you apply pressure and make them conform to the contour, the two pieces of G10 will slide past (or against) one another, and the CA will "lock" them into this new orientation... effectively "locking in" the molded shape.
Lots faster using this method, as opposed to laying up glass or carbon cloth.
You might give it a try! Worst case scenario... you have three sets of strut covers that look like ^&$%!!!
Last, I never used smoothie hub caps.... just used the spoked machined aluminum hubs. Should be visible in many of the old pictures. So, not sure how you attach those pups!
Keep plugging away, guys!
 03-23-2018, 05:50 PM
#2900
My Feedback: (15)
Join Date: May 2003
Location: Iowa City, Iowa (again!)
Posts: 1,579
Likes: 0
Received 1 Like
on
1 Post
Yes! Very thin... G10 at 0.010 inches in thickness is what I used.... a single sheet will bend easily. When forming two sheets over a bend (contour), they will slide against one another... you can then "lock" the bend into place by wicking thin CA between the sheets as you hold them against the contour/surface of the wing.
They should hold the shape when glue sets. After initial shape is established, remove the piece and keep flooding it with thin CA (at the seam between the two sheets, so that CA runs in between the two sheets. Then spray "kicker" and they should eventually be permanently held together while the whole of the larger part retains the shape of the contour.
My wheels were machined from a solid billet of aluminum such that the wheel hubs themselves were spoked.... never had a "cap" that mimicked the spoked wheel. Hmmmmm. I might suggest two or three drops of thick CA, spaced 120 degrees from the other drops (if using 3), so that there are limited number of "hold points" keeping the cap attached to the hub. That way, if you need access to the axle to remove the wheel, you can just "pop" off the cap (break the CA bond) without destroying the cap (and without badly marring the hub).