


Charlie Kellogg's TBM Avenger Build
 07-15-2018, 10:05 AM
#3226

Join Date: May 2005
Location: FT. Belvoir,
VA
Posts: 69
Likes: 0
Received 0 Likes
on
0 Posts
Chic, I agree with Larry. Practice the blend on some scrap. I would also practice green covering grey as well as grey covering green to see which color covers the other the best. I would think given the large quantify of grey on the wing that your preference would be to create the desired overlap by expanding the green patterns of the Camo. But then again I�m an Army guy and I like green!
You're very close and I think this is a simple fix.... keep at it buddy!
You're very close and I think this is a simple fix.... keep at it buddy!
 07-15-2018, 10:26 AM
#3227

After some research, I have come to the realization that most RAF camo schemes are somewhat HARD, not soft edged. Not a lot of soft bleeding into the next color. My dumb @#&. I have no idea where I got the notion that the camo edge was to be a soft edge thus the use of the round soft masking tape. Which for me did not stick well or I just poorly applied it. Any Whooooo.
Following Larry, Ranger1-00, and Casor on RCScalebuilders inputs, I will lay down a somewhat hard edge with a paper pattern, suspended a bit above the surface with rolled tape, and airbrush green paint onto the grey areas since it is most abundant within the scheme. May just end up - repainting the whole scheme.
MY 5 P's of Wisdom: Prior - Planning - Prevents - Pisspoor - Performance. Words which I have always followed throughout my whole professional Life, but failed to do so here. Therefore, I asked for and got -The Pisspoor Performance I must have been seeking. Lesson learned, trust me. Chic
Last edited by redtail; 07-15-2018 at 10:39 AM.
07-15-2018, 12:24 PM
#3228
My Feedback: (2)
Chic,
An old trick is to cut come card stock in the shape of what you want. Then take masking tape and make a look so you have the sticky side on the outside all around. Then a few pieces on the back of the card stock. Attach where you want the design to be.
What this will do is to stand off the card stock just a bit above the surface. when you spray around the edge the edge won't be so sharp. So a softer edge.
Try it on scrap first.
Didn't see you at WOD.. I was there from wed thru friday.
FYI the other mistake you made.. ALWAYS put the light color down first.. So Grey and then Green over it.
07-15-2018, 09:00 PM
#3232

Hi Chic.
I have been following this thread with much interest as I plan to do Charlie’s Avenger as my next project. The following is from official WWII British publications and may be of assistance in deciding on how to proceed.
Air Ministry Order A.864/44 to Air Publication A.P.2656A
Camouflage, Colouring and Marking of Aircraft
Chapter 1, Para 8. Boundaries between colours.
“8. The boundary between upper and under surfaces should either be a straight line or else in bold curves. It is not necessary to obtain a precise dividing line between the upper and under surfaces or between camouflage colours on the same surface. The colours may be sprayed, for example, to a chalk line giving an overlap of one or two inches at the boundary.”
Mick
 07-16-2018, 03:59 AM
#3233
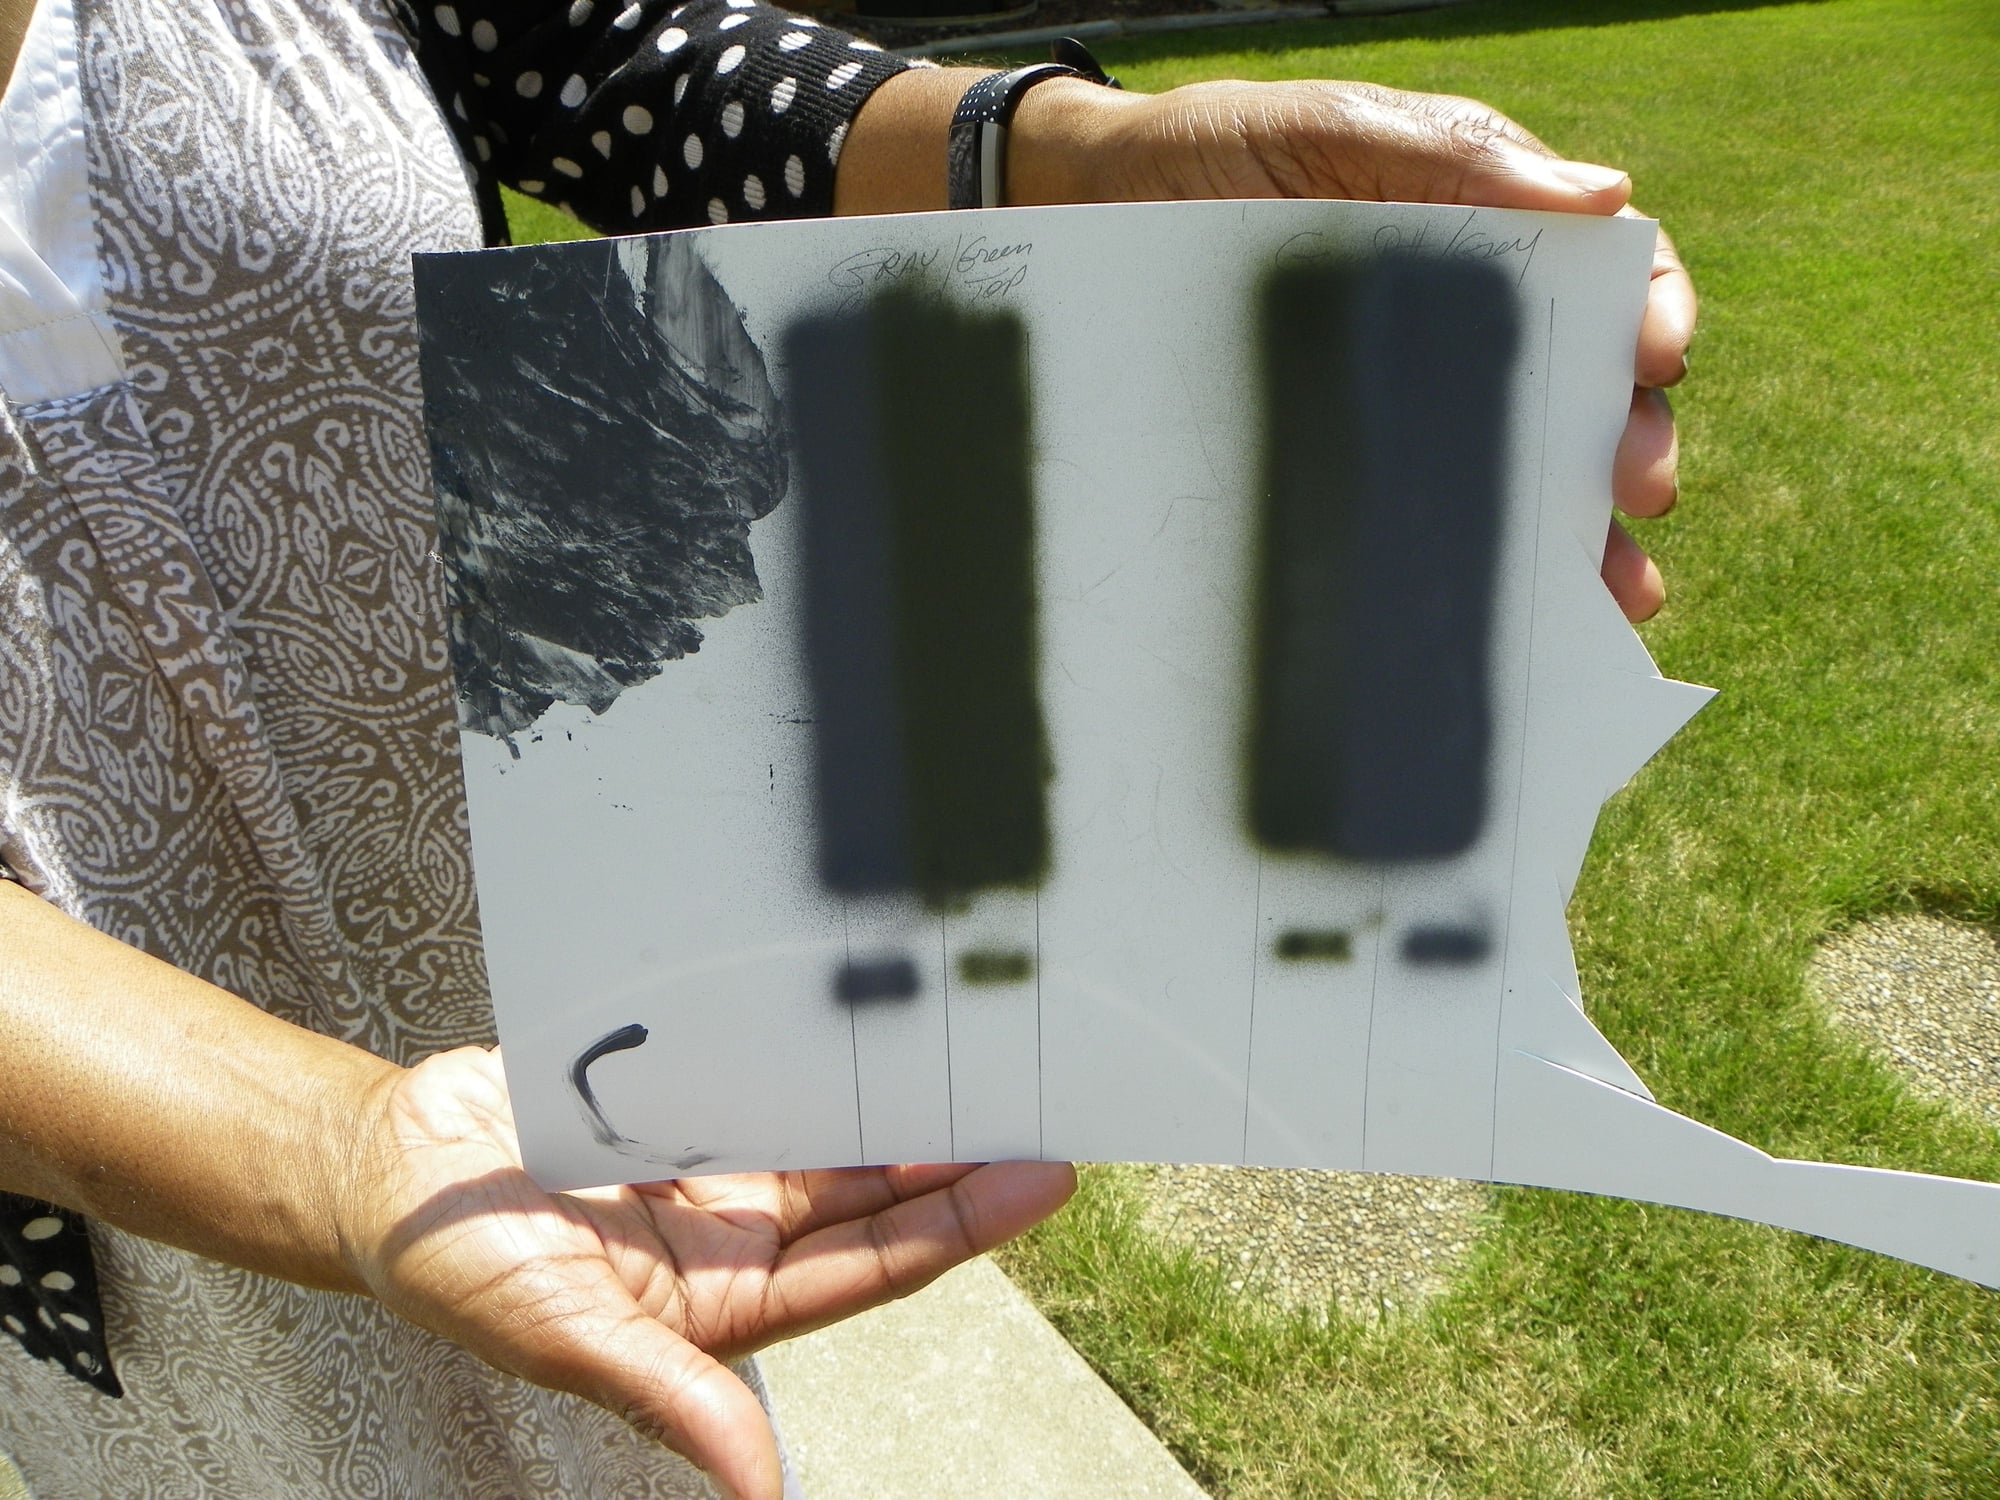
Mick - Appreciate your input. Jump in with that Avenger build at any time. The builders on this thread are the greatest. Reading from that British Tech Data you quoted, (The Air Force call's it Tech Data) allows me to use the procedure offer by BobH, Casor, and Ranger1-00. Will use regular size cardboard tacked to surface to give a hard Bold Curve but "NOT" so hard edge. Will begin working on that as soon as I listen to Joyce Meyers and return from the gym this morning. Larry, looking at a 100 degree day today. Thanks to everyone. I also ran a paint test strip to see which color covered the other color best:
Green over Grey or Grey over Green Will post pictures of the finished test strip this AM. Chic
Green over Grey or Grey over Green Will post pictures of the finished test strip this AM. Chic
Last edited by redtail; 07-16-2018 at 04:03 AM.
 07-17-2018, 04:52 AM
#3236
Chic,
As long as the judges don't get closer than 10 feet when judging you'll be fine LOL
Test looks awesome and I do see a slight fade between the 2 colors so how ever you managed that you're good.
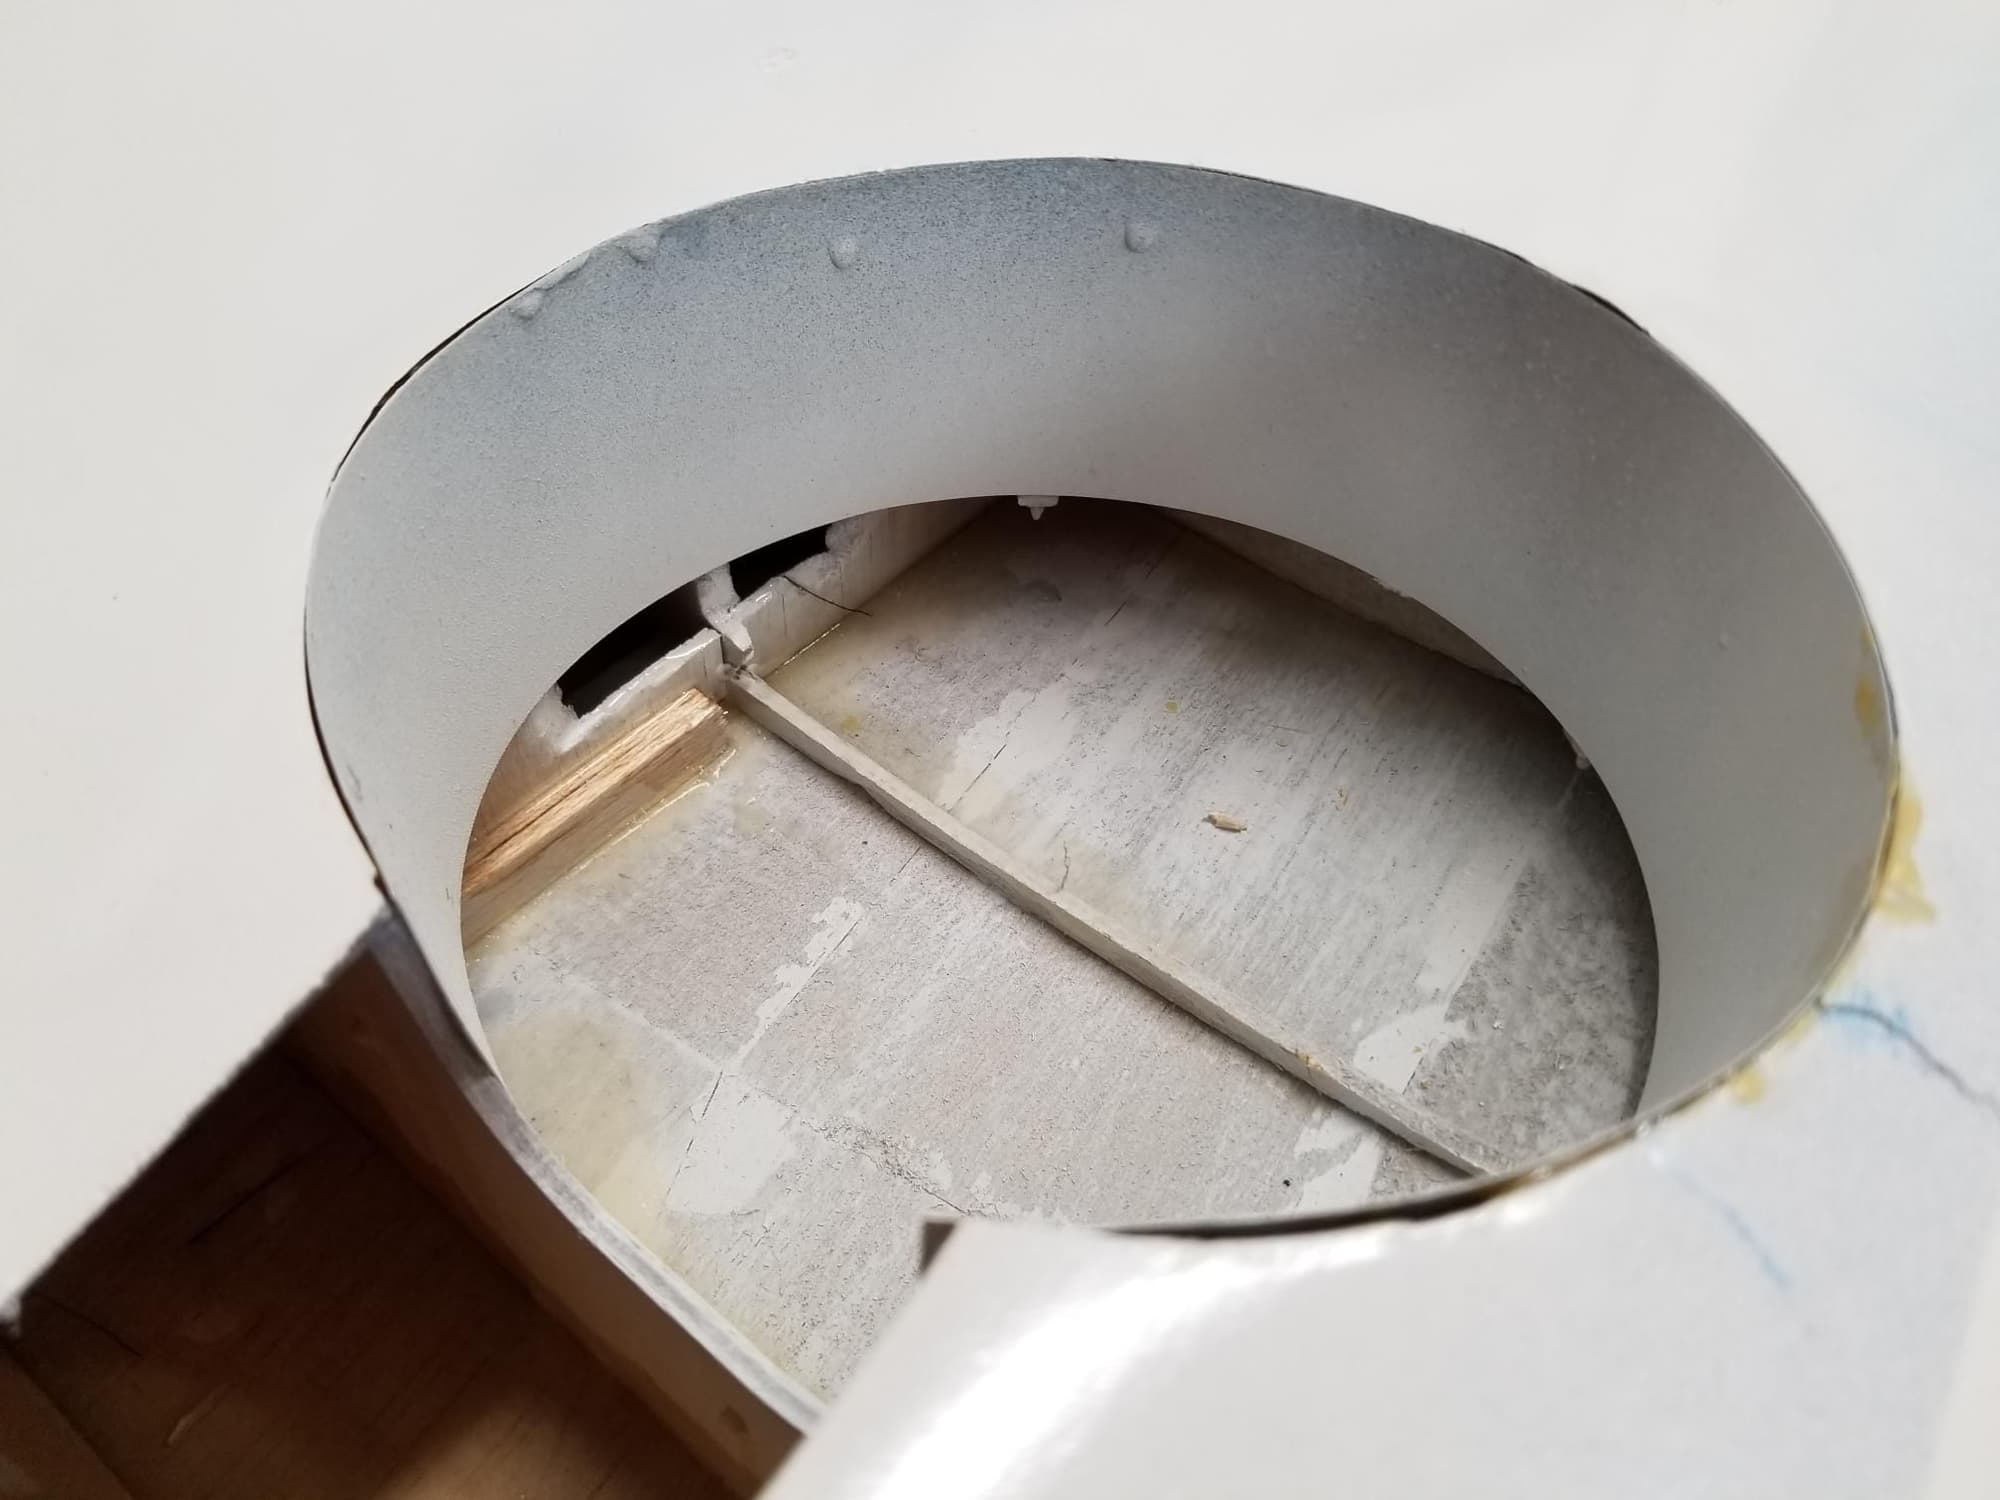
Just have to finish reinstalling aluminum strip into wheel well and I'm ready to attach wings to fuse to see how the repairs came out
Larry
As long as the judges don't get closer than 10 feet when judging you'll be fine LOL
Test looks awesome and I do see a slight fade between the 2 colors so how ever you managed that you're good.
Just have to finish reinstalling aluminum strip into wheel well and I'm ready to attach wings to fuse to see how the repairs came out
Larry
07-17-2018, 05:59 PM
#3238
Chic,
Sorry for the late response, was at work and than the wifey dragged me out to dinner
We took a piece of aluminum printing plate and used some 1/4 x /4 balsa glued to the underside of the sheeting to glue the plate to. See if you can find a print shop that you can ask if they will let you have a used printing plate, I think ours was .008 thousands of an inch thick.
We use thick CA to affix to the balsa strips....Pix attached
07-18-2018, 06:49 AM
#3239
OK, I see it now. I used a lite piece of plastic to do the same thing. Whew, I thought I had left out a step, Ha, Ha. Rascal, you had me worried and gave me a sleepless night. Smile. The heat is incredible, but there is no climate change. Right. Back to the shop to begin repainting. Chic
07-18-2018, 07:58 AM
#3240
Chic,
Glad you didn't have to add anything.
As for heat expected to be around 103 with high humidity today
Another day I can't work on the Trojan, at least I got the wing halves done for the Avenger, garage is a semi comfortable 85 at 5AM local time
Can't wait to see the finished paint job
Larry
Glad you didn't have to add anything.
As for heat expected to be around 103 with high humidity today
Another day I can't work on the Trojan, at least I got the wing halves done for the Avenger, garage is a semi comfortable 85 at 5AM local time
Can't wait to see the finished paint job
Larry
07-20-2018, 11:30 AM
#3242
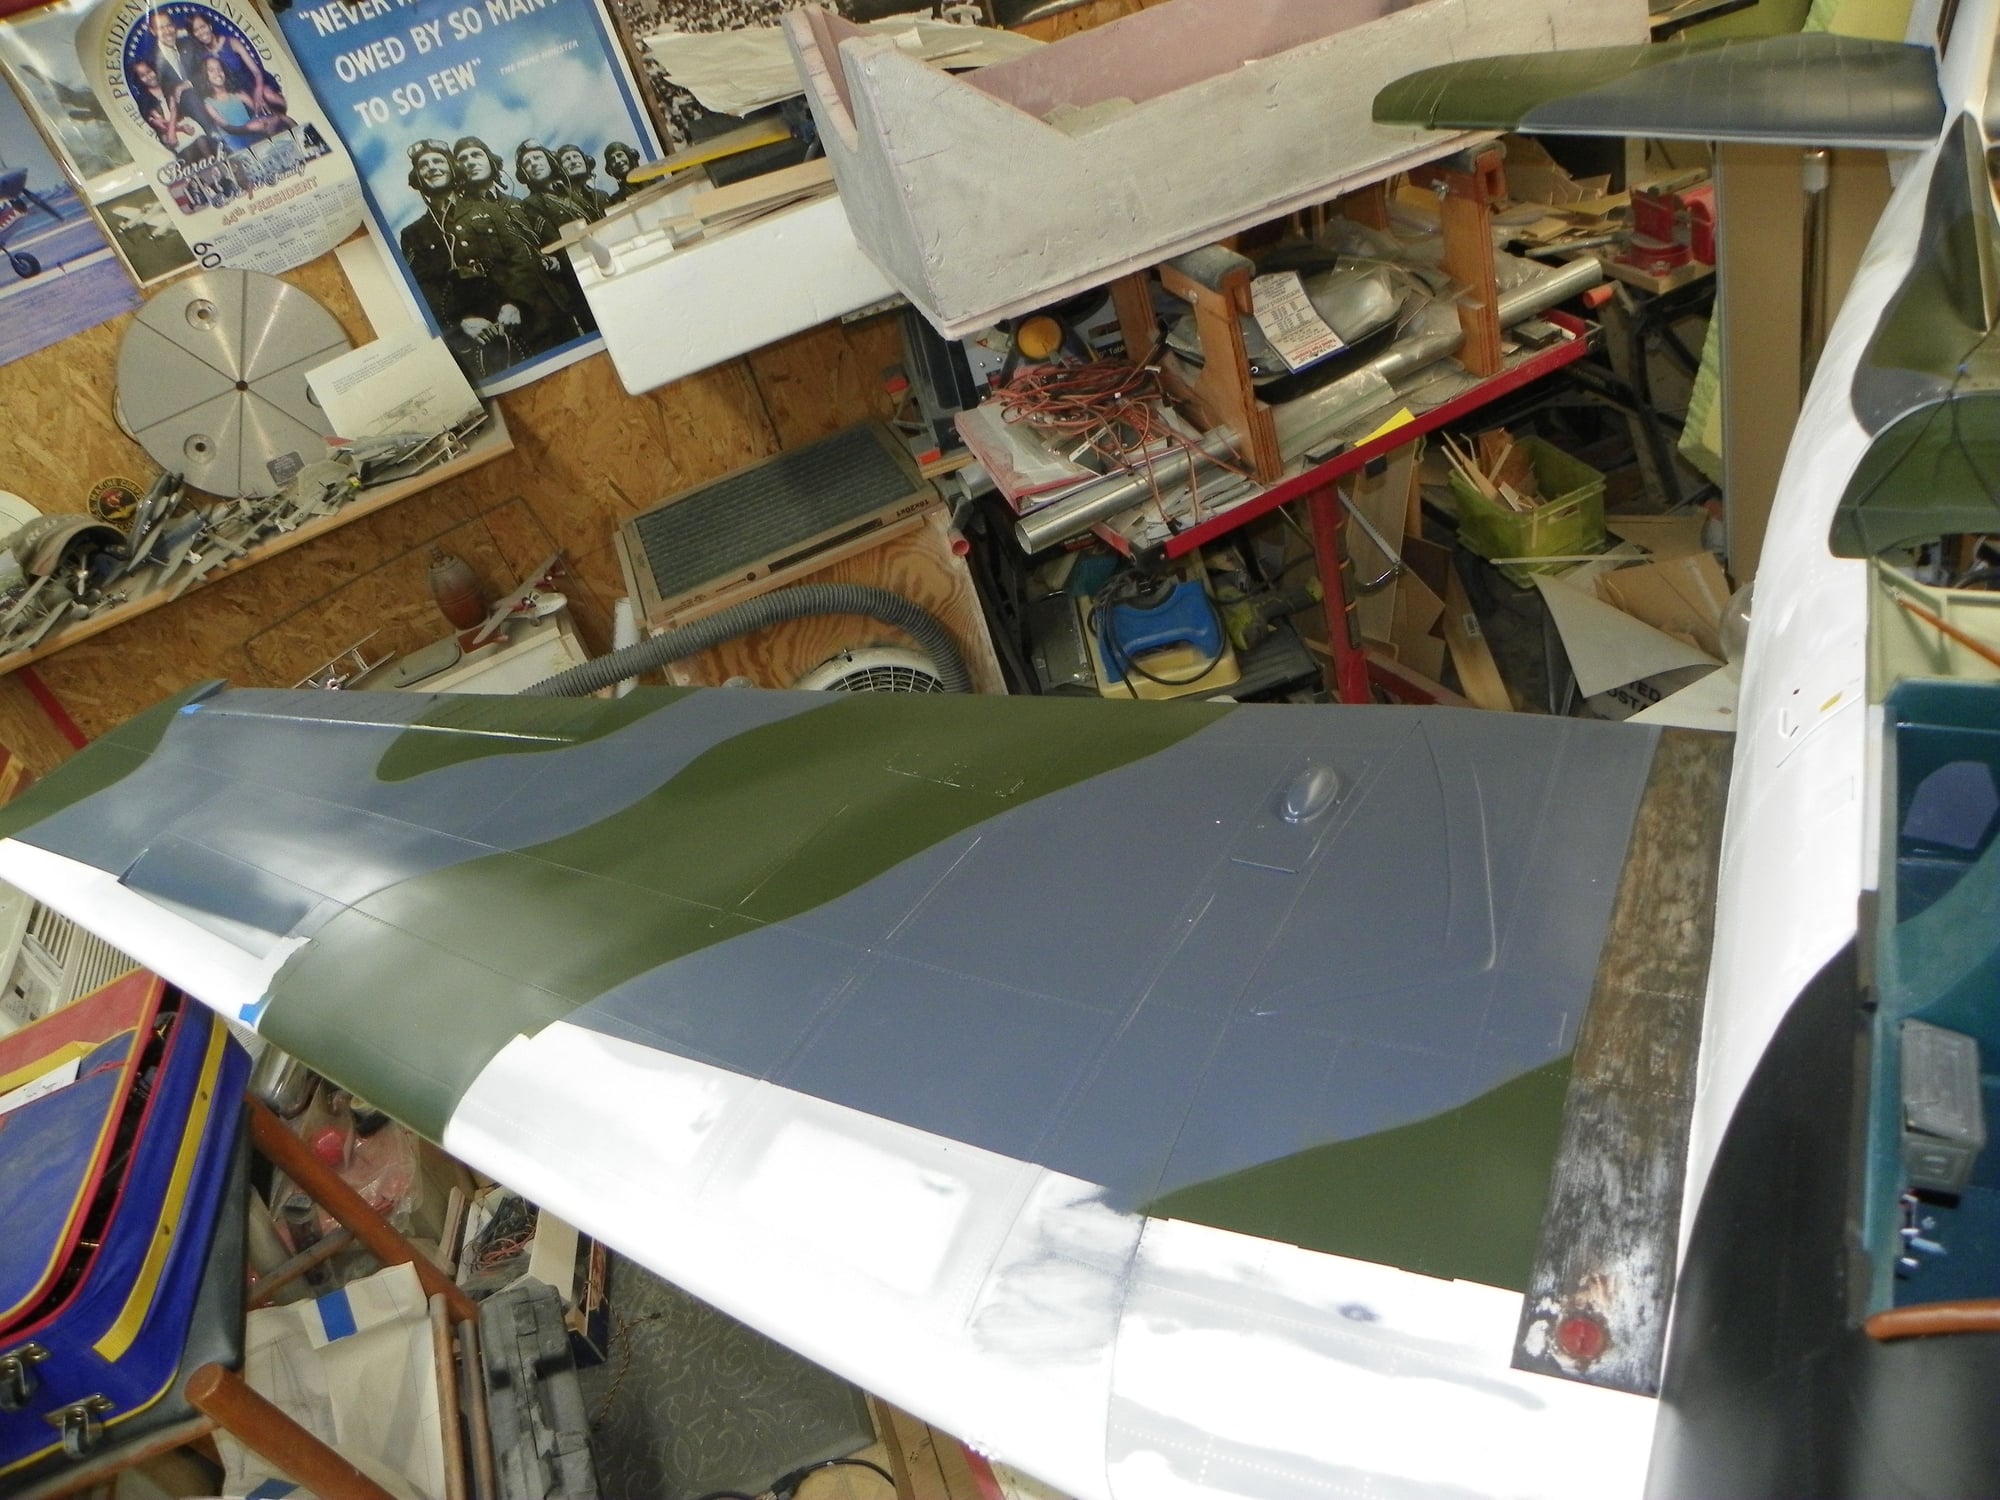
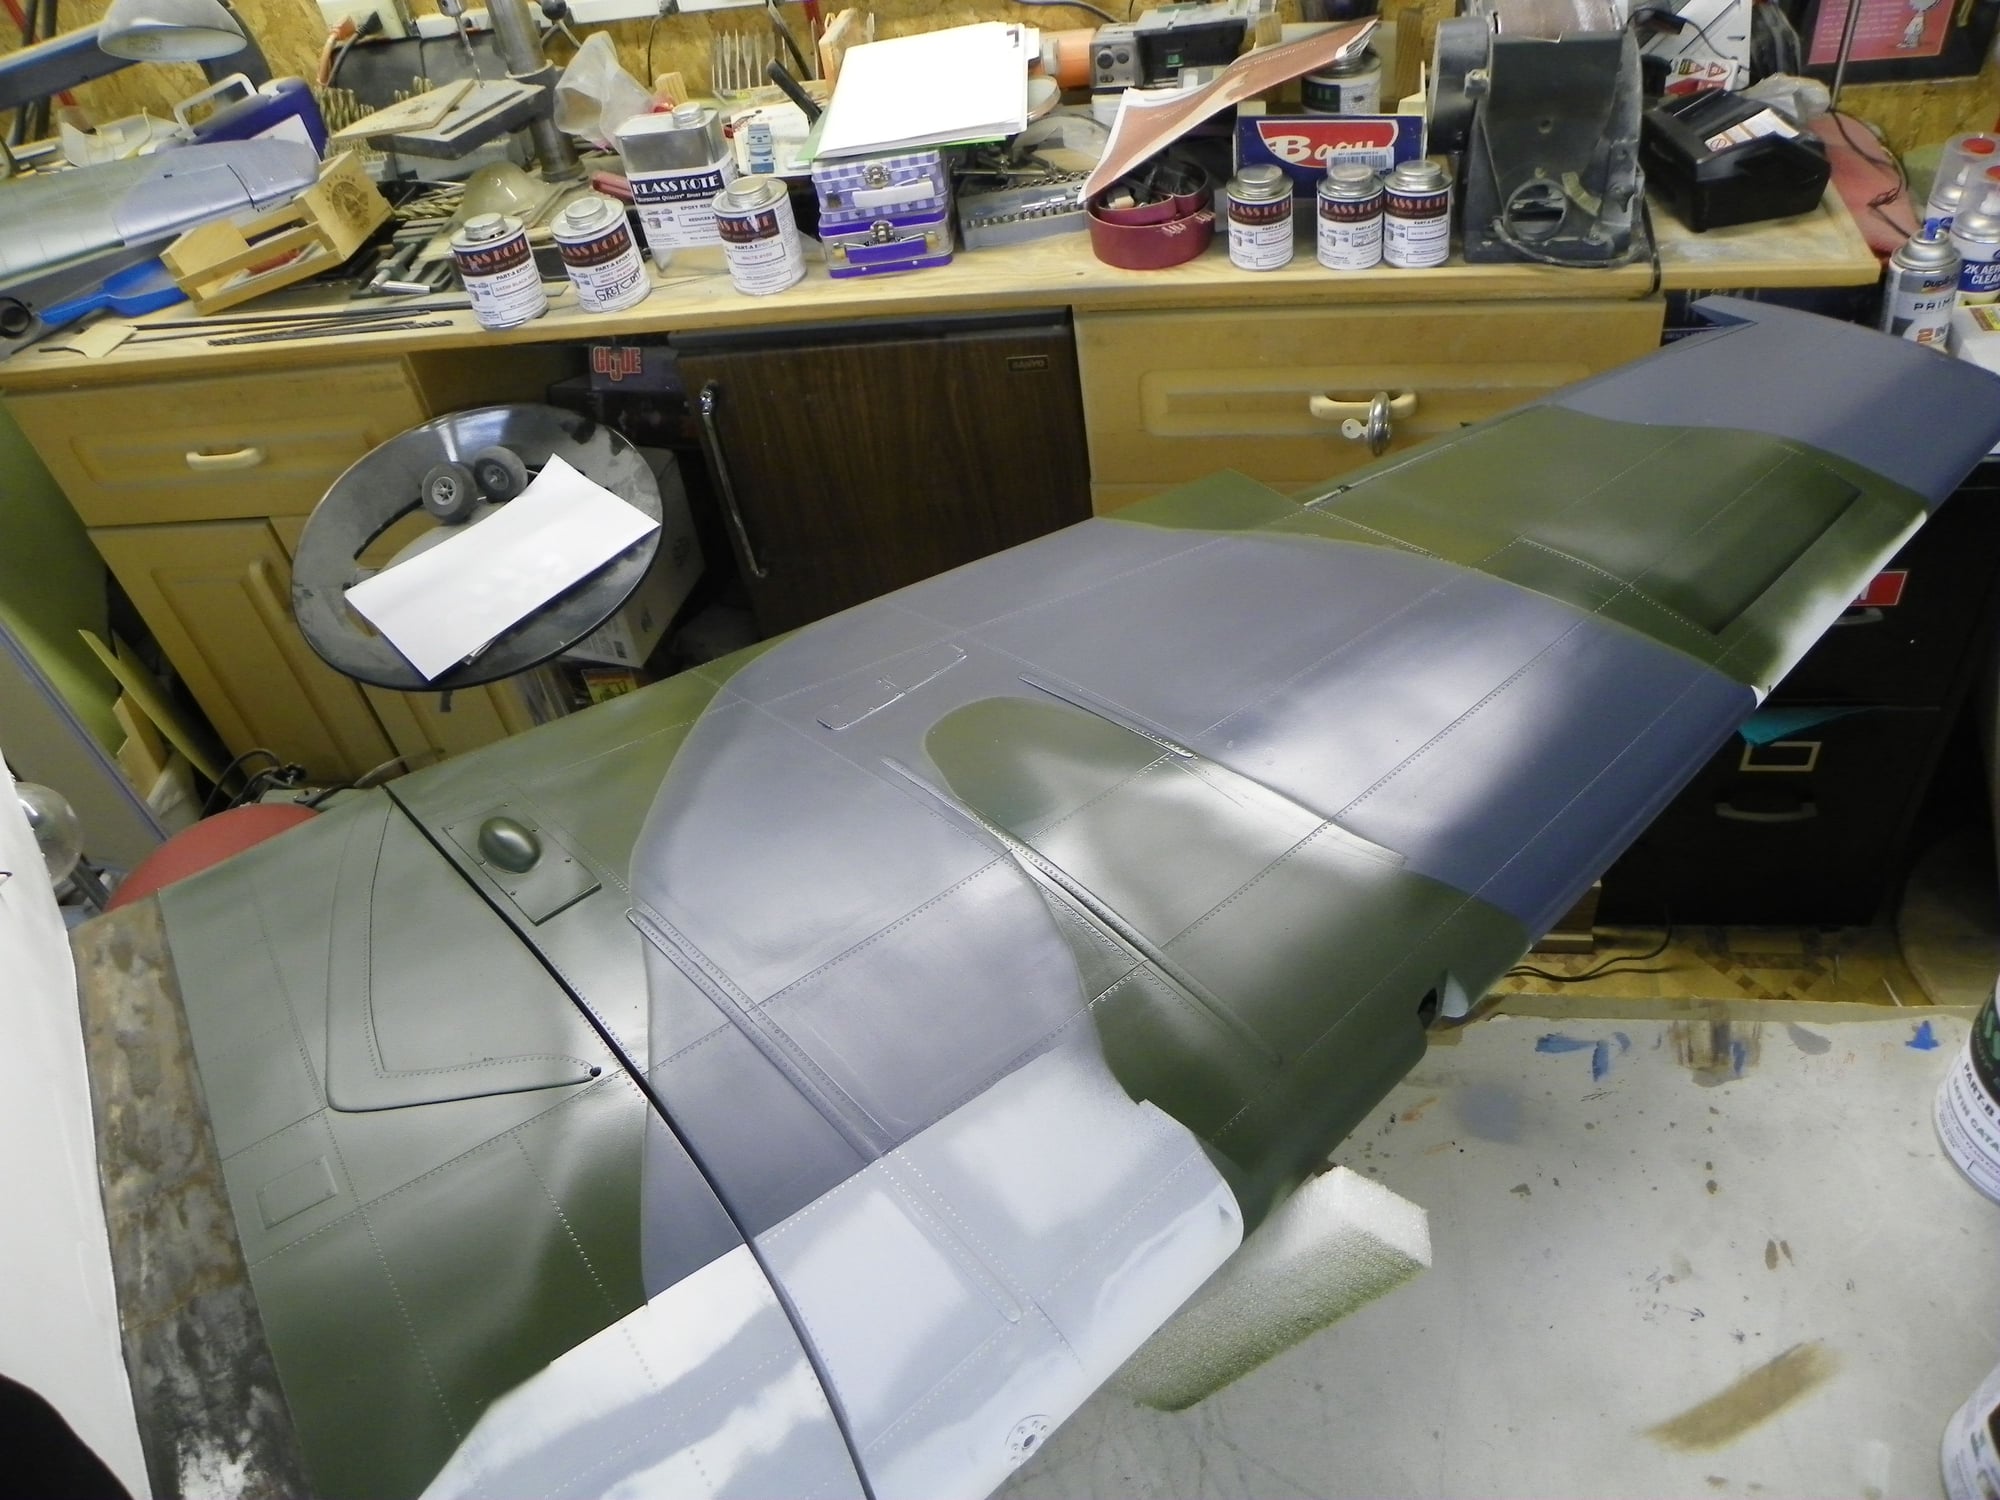
Paint is still wet but it looks sooooooo much better. Thanks for all the advice. Now to lightly airbrush grey, green, and white nooks and crannies across the airframe and shoot the black leading edge on Monday. Several days to dry properly. Chic
07-22-2018, 05:12 AM
#3249
Glad to hear all my fellow Avengers chinning in my progress. Please "KNOW" that I could not have done any of this without all of your help. Carl, I already have the electronics installed except the batteries. I need to install the flaps, gear doors, try realigning the bomb bay doors, engine install, then maybe engine runs in the back yard. Black leading edges to be completed Monday. Will steel wool the camo, apply the decals, then rattle can a clear matt coat over it all. Install the pilots, canopies, retracts, air lines connected, etc. God, I didn't know what all I have left until you asked me Carl. Smile. Again, thanks "GUYS". Chic
07-22-2018, 05:22 AM
#3250
Chic,
It has been great following your excellent work and detail on this.
I can see the cover of Model Airplane News now, USAF vet wins Top Gun with a NAVY plane
Too bad my build buddy didn't have the patience to add the panel lines and rivets, though I tried everything from bribery to extortion LOL
Can't wait for my buddy to get back from the east coast so we can get this balanced and ready to re maiden in early September.
Just saw the 10 day forecast, Mon -113 / Tues-117 / Wed-114 which means the workshop will be hovering around 99, shouldn't surprise me as the pool is a cool 90+
Can't wait to see a video walk around when you get it put together
Larry