


COMP ARF 110" F4U ARF WITH FOLDING WING ASSEMBLY
 07-01-2014, 05:04 AM
#1376
Member
My Feedback: (5)
Join Date: Jan 2005
Location: Fort Worth,
TX
Posts: 99
Likes: 0
Received 0 Likes
on
0 Posts
Here is what I did. The upper wing surface-trailing edge - inhibited the upward movement of the aileron. Thus, I sanded off about 1/8th to maybe 3/16th's of an inch of the wing [ more like 1/8th inch ] and beveled the under surface even more. This allowed the aileron to move up more. The movement went from about 3/4 or an inch to 1 1/4 inch of movement. I agree with putting in more down throw since this defection has to move the wing up against gravity. I can program this into my radio and have done such. This has been an easy fix.
As well, regarding the horn. I placed another 1/16th piece of plywood on this and filled in the pre drilled hole with WEST Systems epoxy. Then moved the clevis pin hole about 2 or 3 millimeters away from the hinge line giving the horn / servo just a little more lever arm movement and creating a stronger throw. Thus in all getting the throw to 1 1/4 inch. Pleased with results.
The tail wheel mount was placed in wrong at the company and this was 7 hours of work on Saturday to get a compromise of function.

 07-15-2014, 09:10 AM
#1379
Member
My Feedback: (5)
Join Date: Jan 2005
Location: Fort Worth,
TX
Posts: 99
Likes: 0
Received 0 Likes
on
0 Posts
Got er flying.
Easy to fly, easy to land. A little bounce on the first landing. Second flight was a greaser.
First flight: https://www.youtube.com/watch?v=ka1C...=youtube_gdata
Second flight had rudder flutter. Landed and went home. This took some time to fix. The 5 or 10 seconds of flutter really "wollard" out and enlarged the carbon rod where the stainless steel rod goes into the bottom of the rudder. That hole in the carbon fiber got enlarged. Had to use some WEST System epoxy and fill in the hole of the carbon fiber and then later, ,,, re-drill the hole. Put all back together.
07-15-2014, 09:47 AM
#1380

DDay...
Would suggest that you look at your linkage geometry on the rudder if you had flutter. Try to get the ball links as far out as possible on the torque rod tiller that drives the rudder, and then get the clevis connections as close to the center of the servo arm as you can and still have adequate rudder travel. This will maximize the power that the servo has over the rudder, and minimize any slop in the servo gear and linkage.
Some folks will tell you that the connection points on the tiller and the servo arm must be equal distance from center, but this isn't necessarily so. You must have the servo arm and tiller arm parallel however, and the pushrod lengths equal.
KennyMac
07-16-2014, 06:32 PM
#1382
Member
My Feedback: (5)
Join Date: Jan 2005
Location: Fort Worth,
TX
Posts: 99
Likes: 0
Received 0 Likes
on
0 Posts
The DA 120 easily fit in the cowling, with about 3 mm on each side. Was mounted with pressure treated 2 x 6, cut into 5 by 5 inch square and then glued the grain at 90 degrees to the other. This made a great motor mount and was super easy. Just epoxied to pieces of wood together. Mounted the DA 120 with NO offset. It is just mounted straight on. I have a Xoar 28 x 12 on the plane and the 120 seems maybe too much. I need to get er to pull some loops and such and see. But gosh it pulled the plane off the ground quicker than I wanted. I like to run that warbird down the runway a good ways and make it look really scale and get maybe one hop and then get into the air. But this 120 just got the plane into the air. I like a roll out about 2.5 to 3 times longer than in the video. I also have a 29 x 10 for the engine. Thus happy with the engine.
There is another video under ddaywarbird on youtube showing the mounting and such.
Here it is. Shot it with my I-phone-3, so not that great of a video:
https://www.youtube.com/watch?v=pf-Nd0Ny820
You can see the mounting. There is 9 pounds of lead up there, and 3 in the cowling that is 12 pounds. And that engine only weighs 4.95 pounds. Yikes. Not much weight in that engine, thus a lot of weight. The balance is a little nose heavy and that is OK. We thought the plane flew quite well. One of the helpers was Lee Rice, he helped with the check up before the flight. All checked out well. And as in the video the plane felt well and flew well. The landing was fine and the second landing was a greaser.
08-04-2014, 02:13 PM
#1383
videos:
Whistling death:
https://www.youtube.com/watch?v=087sF9pfuSE
Low and fast:
https://www.youtube.com/watch?v=PTUBlaVUqnQ
Whistling death:
https://www.youtube.com/watch?v=087sF9pfuSE
Low and fast:
https://www.youtube.com/watch?v=PTUBlaVUqnQ
08-04-2014, 06:09 PM
#1385

Guys, I am totally confused on how the elevators and rudder mount on the CF torque rod. One picture would sure help. Do you drill through the rudder/elevators and place a screw through the cf rod or go all in and glue the rod into the rudder/elevators. Thanks!
DOH....clue light just came on about rudder....but still unsure of elevators
DOH....clue light just came on about rudder....but still unsure of elevators
Last edited by tp777fo; 08-06-2014 at 05:42 PM.
08-23-2014, 02:23 PM
#1386
PM:
Put 8 more flights on her at Owatonna and Fond du lac. Would have been more but I had a dead stick with the P-47 so all moki's got grounded until I got home.
Wing fold:
After one landing, one wing would not fold up. The sheathed wire got pinched between the wings and had enough force to bare the insulation and have both wires touch to short it out. One more thing to now check. I now tape the wires to the frame to keep them in place.
Engine:
Has been running very well at around 3800-3900 rpm's. The chain saw oil used on the rockers and push rods seem to be working well.
Still can't figure out why my choke is not closing all the way. The choke servo linkage seem to be working. She shuts off after landing with no problem. Need to remove the motor to visual check but not enough time with Indiana warbirds next week. The P-47 hand starts with little effort but a starter is needed to prime the F4U.
Gear:
Working well. Put some more axle grease on the axles to insure no wear, as happened last year.
Also put some on the oleos.
Wing air inlets:
finally painted them black.
Last edited by samparfitt; 08-23-2014 at 03:22 PM.
08-23-2014, 02:30 PM
#1387
Tom,
Check the thread starting at #362 at:
http://www.rcuniverse.com/forum/rc-w...sembly-15.html
There's lots of pictures and wording on the tail feathers at that part of the thread (page 15).
Check the thread starting at #362 at:
http://www.rcuniverse.com/forum/rc-w...sembly-15.html
There's lots of pictures and wording on the tail feathers at that part of the thread (page 15).
08-31-2014, 01:37 PM
#1388
PM:
As always, first thing of the day, I cycled the gear and the left gear was not completely retracting. It took a few minutes to notice that the locking folding scissors collar had shifted along the strut (the bare metal against the white gave it away!). The set screw came loose and, after adjusting, the retracts worked fine on the next cycle.
The first flight went fine until I landed. A small bounce caused the left gear to fold. Fortunately, the prop did not get hit as she was going pretty slow but one gear door broke off and the servo arm on one flap broke.
Glad the weak link for the flap was the plastic servo arm versus breaking a hard to repair broken G10 hinge!
While getting the plane out of the trailer, the wheels seem to have more than normal drag (like late last season) so I need to check the alignment, etc.
The door is CF so it didn't break but the G-10 hinges need to be fixed.
After around 55 flights, she has been flying fine until this happened

Last edited by samparfitt; 08-31-2014 at 01:40 PM.
09-02-2014, 01:00 PM
#1389
PM:
Some hysol to repair the one main gear door.
Noticed the tire rubbing the oleo and some slop in the scissors to the oleo and main strut. Emailed Darrell and he called me and said to send them in for a 'tune-up' (heavy planes take a toll on the gear: When traveling, I put the plane on foam to help relieve pressure on the gear but I'm sure traveling in the trailer for all those miles doesn't help them, either!).
09-12-2014, 01:17 PM
#1390
Gear re-conditioned:
Got the gear back from Darrell a few days ago, put them back in the plane and cycled them. All is good again

The 2nd picture shows a thin shim on the oleo's scissors. I don't think that was there before but it appears to be a good way to adjust the wheels to get straight tracking, as the shim would seem to slightly rotate the oleo in relation to the strut.
11-03-2014, 06:11 AM
#1391
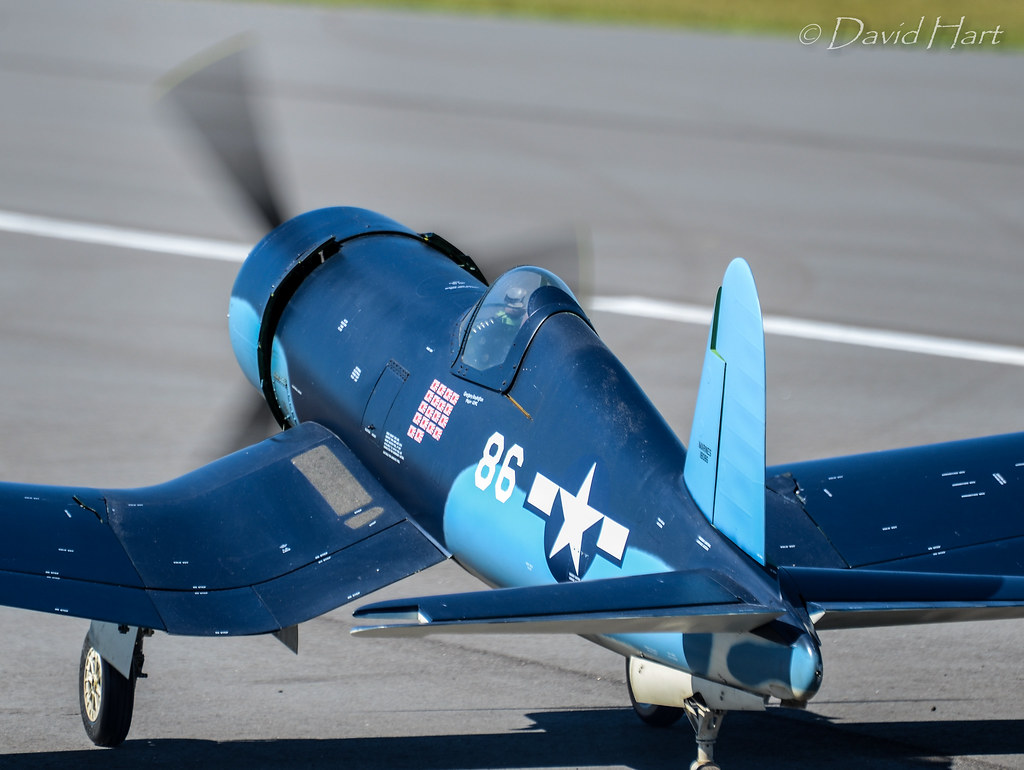
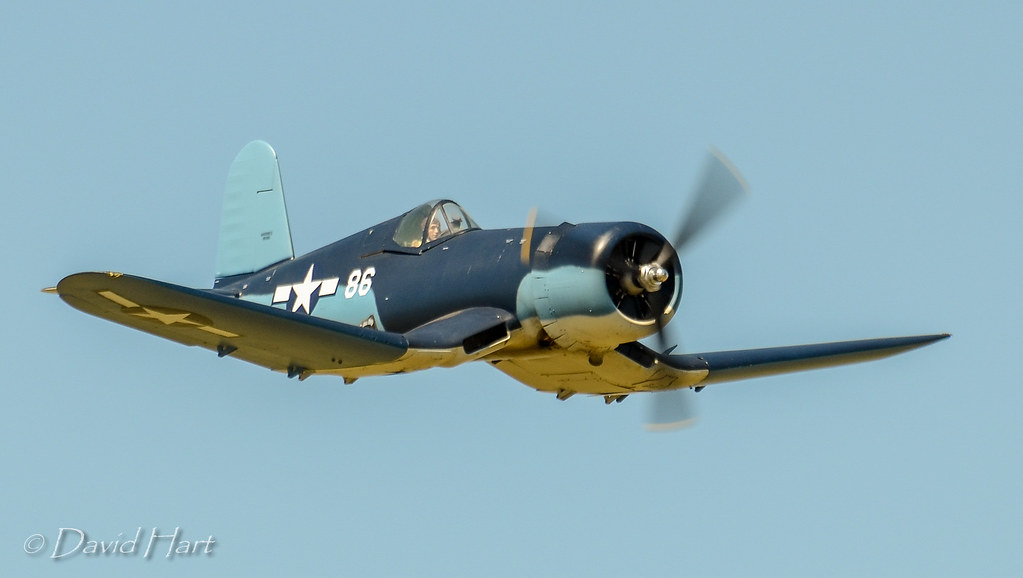
Some nice professional pictures taken by Gary Rosier.
On take off in the first picture, you can see the rudder input needed to keep her straight with a 10-15 MPH cross wind from the left and taking off on an asphalt runway and all that tork from the moki 250.

 11-03-2014, 09:20 PM
#1394

Inspirational videos...
http://youtu.be/rONkeKyBuCo
Im in the back seat in this video...
http://youtu.be/512yhAFDMeg
http://youtu.be/rONkeKyBuCo
Im in the back seat in this video...
http://youtu.be/512yhAFDMeg
Last edited by Chris Nicastro; 11-03-2014 at 09:25 PM.
11-15-2014, 11:22 AM
#1395
Join Date: Sep 2006
Location: London, UNITED KINGDOM
Posts: 65
Likes: 0
Received 0 Likes
on
0 Posts
Hello,
I realise that a number of you have built the Corsair successfully. I was looking for one piece of information that may be easy for some of you to access. I'm trying to find how large is the corsair once the wings are folded (and hight). This is to prepare for future transportation.
Thank you
Frederic
12-02-2014, 03:50 PM
#1396
My Feedback: (27)
Join Date: Dec 2002
Location: Jasper,
GA
Posts: 1,175
Likes: 0
Received 0 Likes
on
0 Posts
I'm getting ready to fly my corsair and wondered if any of you had come up with any neat ways to set the CG? Is the 1/2 inch in front of the wing spar where you all have it who are flying?
Keith
Keith
05-27-2015, 02:32 PM
#1400
PM for the new season:
After cleaning her with some 409, the one main gear door hinge needed repair from last year (fortunately, I found the gear door: all grass at Frank's place made it easier).


Then filled up the air tanks and an airline burst (better now than in the air!). It was just behind the air fill valve.
I had to take the wing off to get to the air lines. New brass T's were used and this plane was built before I started using the 1/16" wide air line for a collar on all connections. Fixed that up and added lots of BVM thin O ring oil to the system.


Cycled the wings: worked the first time but one motor stopped working the 2nd time. Will have to send to Mitch at down and lock for repair. I switched the wires to each motor to insure the controller was OK and also checked the extension wire with a substitute.
He has larger motors and jack shaft but I've been too lazy to send it in for the update (will now!). Got about 85 flights on her so things can't last forever.
Had to epoxy one cowl flap that came loose.

While the wing was off, I could check out the choke as it wouldn't close all the way, last season.
The plastic 90 degree control horn was flexing as well as the L bracket. I replace the control horn with a metal one and made the L bracket into a U bracket. This is an older Moki 250 as my newer moki 250 is more user friendly having an arm on the choke to be able to operate from the back of the fire wall.

Tested the engine and the motor now draws gas when hand prop'ed.

After cleaning her with some 409, the one main gear door hinge needed repair from last year (fortunately, I found the gear door: all grass at Frank's place made it easier).
Then filled up the air tanks and an airline burst (better now than in the air!). It was just behind the air fill valve.
I had to take the wing off to get to the air lines. New brass T's were used and this plane was built before I started using the 1/16" wide air line for a collar on all connections. Fixed that up and added lots of BVM thin O ring oil to the system.
Cycled the wings: worked the first time but one motor stopped working the 2nd time. Will have to send to Mitch at down and lock for repair. I switched the wires to each motor to insure the controller was OK and also checked the extension wire with a substitute.
He has larger motors and jack shaft but I've been too lazy to send it in for the update (will now!). Got about 85 flights on her so things can't last forever.
Had to epoxy one cowl flap that came loose.
While the wing was off, I could check out the choke as it wouldn't close all the way, last season.
The plastic 90 degree control horn was flexing as well as the L bracket. I replace the control horn with a metal one and made the L bracket into a U bracket. This is an older Moki 250 as my newer moki 250 is more user friendly having an arm on the choke to be able to operate from the back of the fire wall.
Tested the engine and the motor now draws gas when hand prop'ed.
Last edited by samparfitt; 05-27-2015 at 02:43 PM.