


T-28 Dave Platt
 04-08-2014, 03:28 PM
#501
Okay guys,
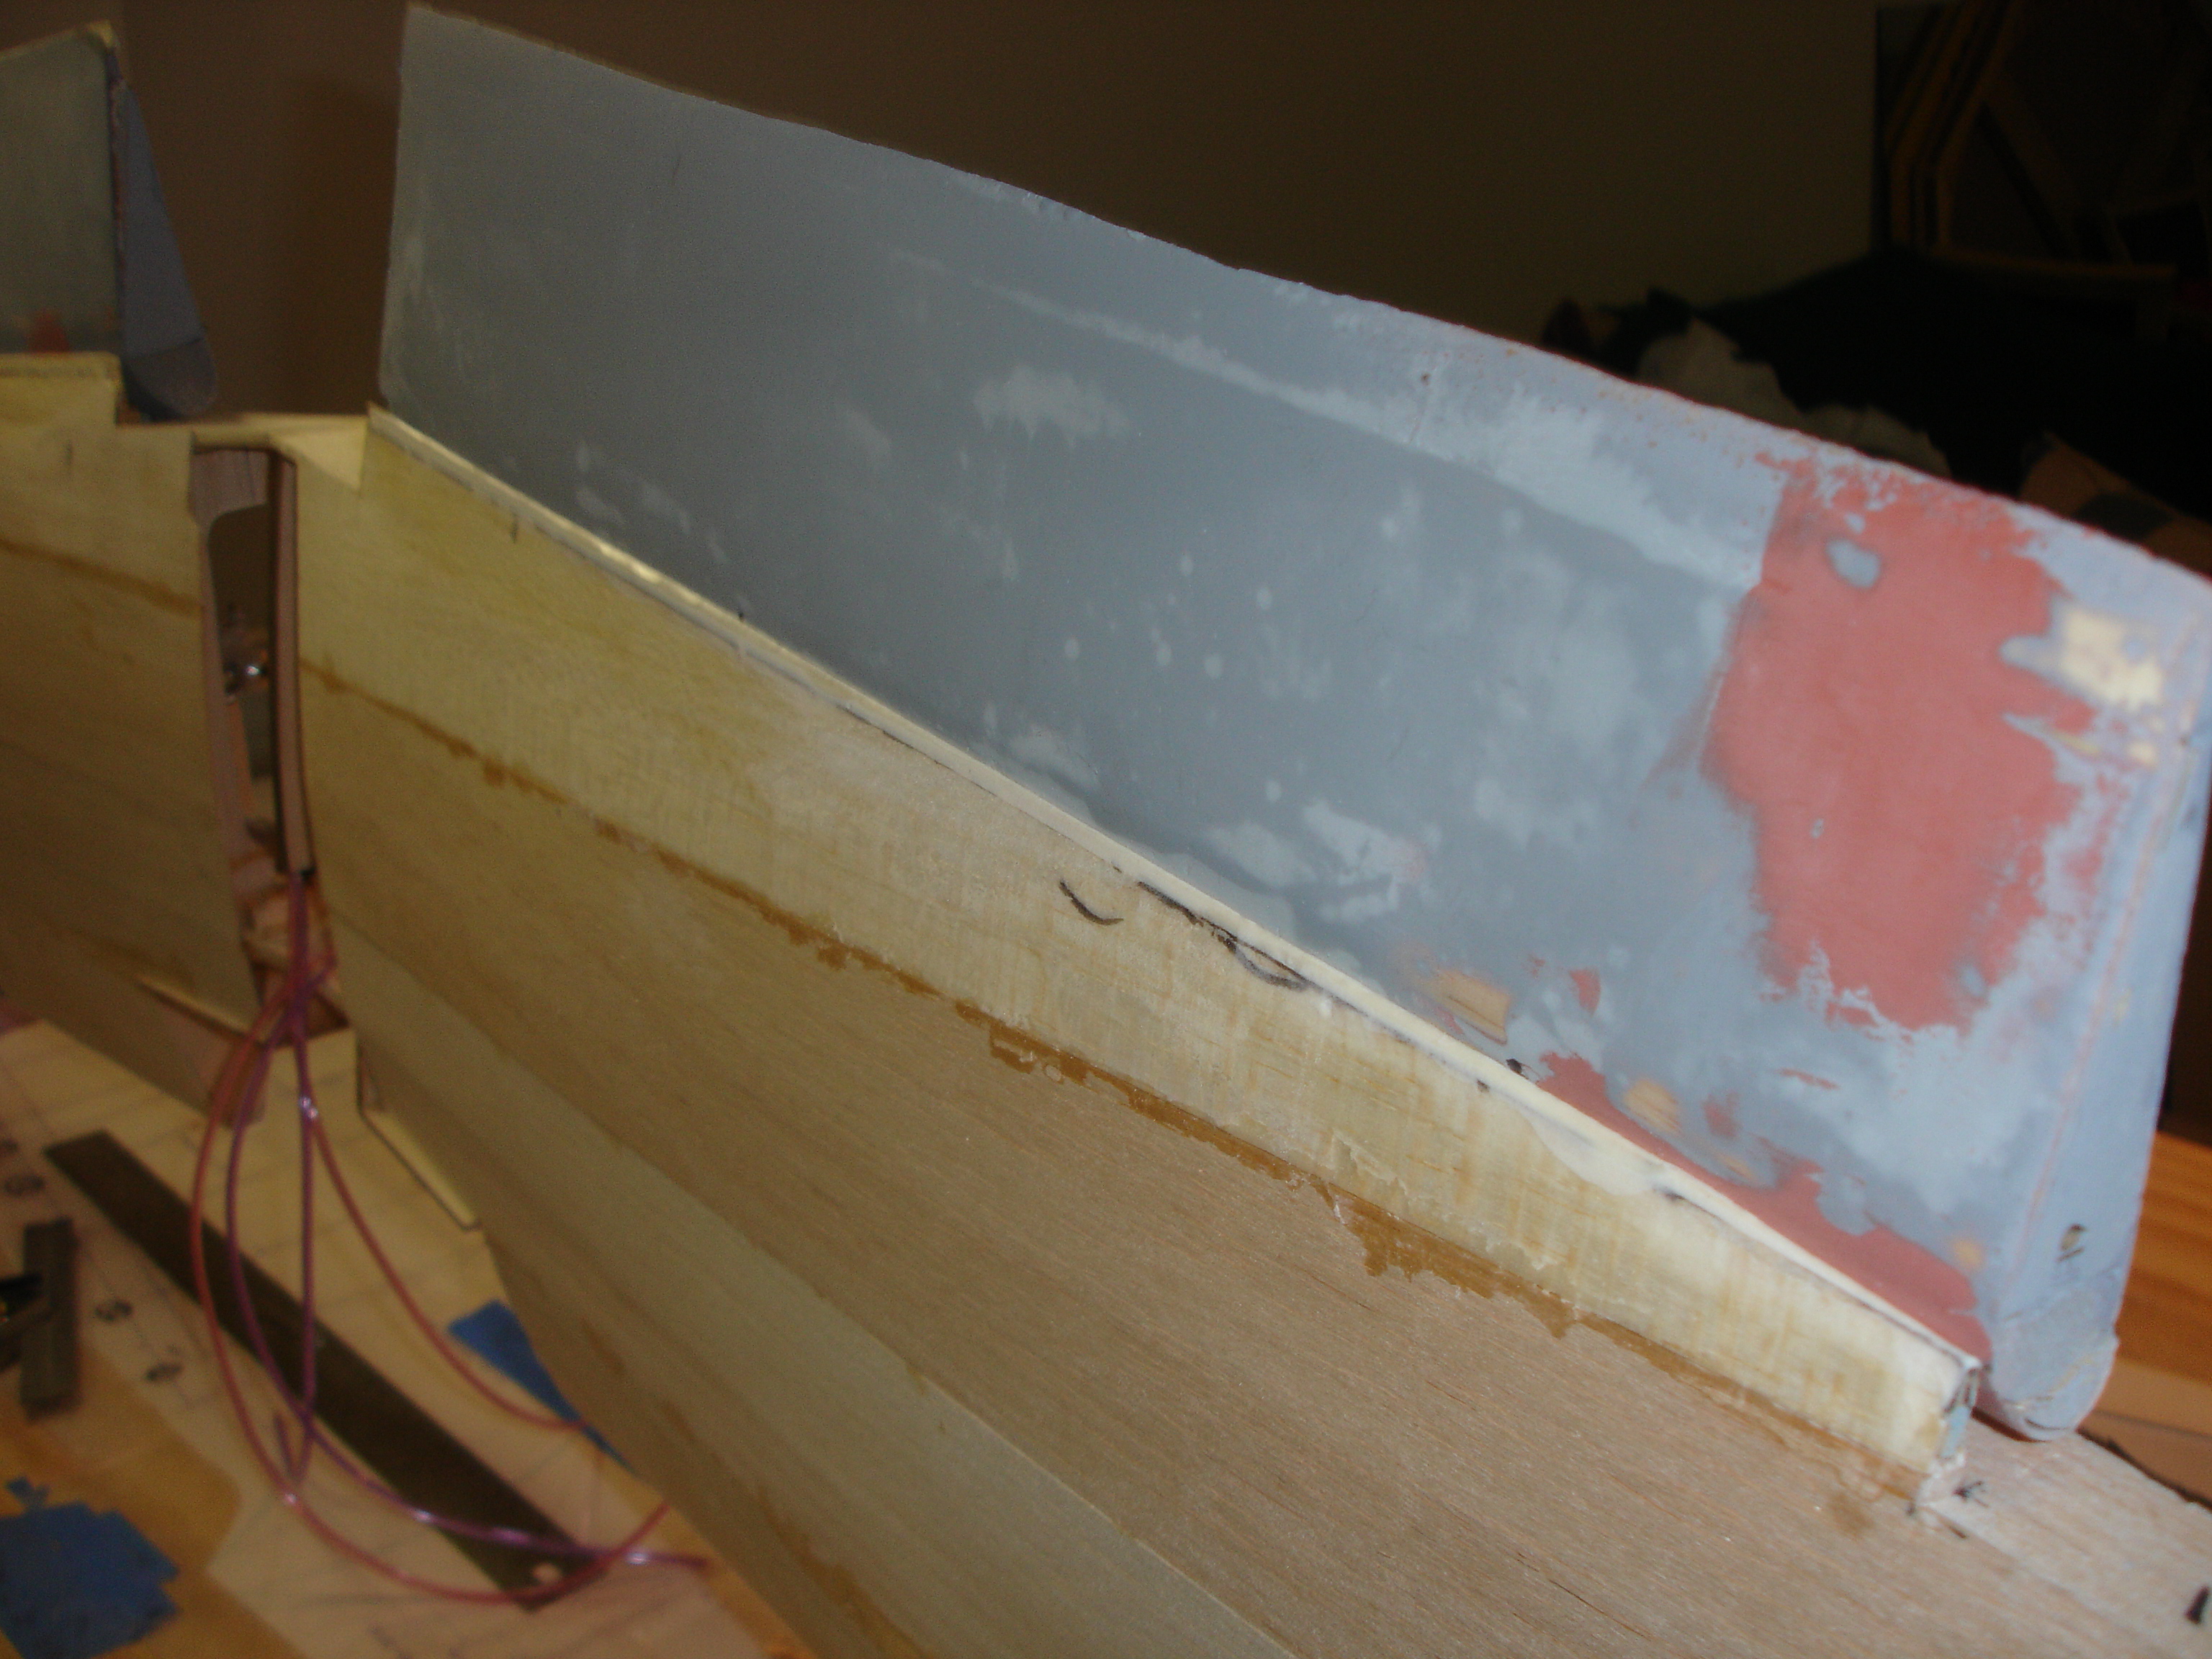
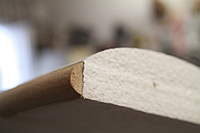
Here's the repaired trailing edge, thanks Boyd for seconding my thought about balsa. I actually cut a strip of 1/16" balsa and glued it under the trailing edge. When I was happy with the fit I mixed some micro balloons and filled the step between the 2 height differences in the balsa. I have a bit of sanding to do but the gap is now 99% - 100% perfect. Will work it a bit more when I glass the wing but for now I think it looks too good to be true.
Chad, I thought about using G10 but the balsa was a better choice for sanding purposes if needed.
 06-22-2014, 04:31 AM
#503
Hey gang,
Finally got some time to get the panel lines drawn in, next step is to laydown the 1/32" chart pak tape to create the panel lines. I have been practicing with the curved syringe but I can't get the rivets to be close to the same size.
Any ideas like glue type etc.
Thanks
Larry


Finally got some time to get the panel lines drawn in, next step is to laydown the 1/32" chart pak tape to create the panel lines. I have been practicing with the curved syringe but I can't get the rivets to be close to the same size.
Any ideas like glue type etc.
Thanks
Larry
06-22-2014, 10:35 AM
#504

My Feedback: (60)
Join Date: Dec 2001
Location: Litchfield Park,
AZ
Posts: 7,677
Likes: 0
Received 25 Likes
on
23 Posts
I too have had issues with keeping glue drops rivets all a consistent size. My solution, which I used on a Midwest T-6, was to lay down laser cut vinyl rivets first and then put the glue drops on top of the vinyl. Capillary action will allow the glue to spread out to the edge of the vinyl and no further which makes for rivets of identical diamter. It's extra work for sure but I have found no better method for simulating button head type rivets. The vinyl rivets are transferred from the carrier sheet to the model using clear Scotch type tape and with some practice you can easily transfer 12 or 15 inches worth of rivets at a time. For glue I use RC56/Formula 56 canopy glue which does not shrink up as much as other white glues.
I can provide the laser cut vinyl if you're interested and I can make the rivets any diameter and with any spacing that you require.
[email protected]

 07-07-2014, 11:06 AM
#507
My Feedback: (60)
Join Date: Dec 2001
Location: Litchfield Park,
AZ
Posts: 7,677
Likes: 0
Received 25 Likes
on
23 Posts
The cost of the rivets is primarily calculated on laser cutting time so it depends somewhat upon the diameter and spacing that you choose. However, the numbers below will get you very close if not right on the money.
$5.00 per 1000 rivets on orders of 15,000 or less
$4.50 per 1000 rivets on orders of 15-50,000
$4.00 per 1000 rivets on orders of more than 50,000
Regarding size and spacing I can make them to your exact specifications. I'm sure the Trojan uses multiple rivet sizes but I imagine the majority are probably around 1/4" which works out to .05" at 1/5 scale. Some research would be in order to figure out what the spacing is on the full size but, again, I'm sure it varies somewhat. Most of my customers are ordering rivets which are a tad larger than scale as well as spaced further apart to reduce the total number required. Many are also only riveting along the panel lines and not doing the intermediate rows of rivets. As you can see much depends upon just how scale you intend to get with the model and how much research you are willing to do to get there! I can tell you that the average rivet order for the single engine types is 15,000 rivets which is no where near the scale amount but is enough to flush out the model to a believable level. Hope that helps and if you want to discuss the details further you can contact me directly at [email protected].
07-13-2014, 02:56 AM
#508
Hey Chad,
Thanks for the info, going back through the thread it turns out Dean made his rivets 5/64" with 1/4" spacing. Can you let me know if that's a problem for cutting the vinyl.
BTW, I have a house in Gilbert, would love to meet you when I get out there next time.
Thanks
Larry
Thanks for the info, going back through the thread it turns out Dean made his rivets 5/64" with 1/4" spacing. Can you let me know if that's a problem for cutting the vinyl.
BTW, I have a house in Gilbert, would love to meet you when I get out there next time.
Thanks
Larry
07-13-2014, 10:50 AM
#509
My Feedback: (60)
Join Date: Dec 2001
Location: Litchfield Park,
AZ
Posts: 7,677
Likes: 0
Received 25 Likes
on
23 Posts
Hey Chad,
Thanks for the info, going back through the thread it turns out Dean made his rivets 5/64" with 1/4" spacing. Can you let me know if that's a problem for cutting the vinyl.
BTW, I have a house in Gilbert, would love to meet you when I get out there next time.
Thanks
Larry
Thanks for the info, going back through the thread it turns out Dean made his rivets 5/64" with 1/4" spacing. Can you let me know if that's a problem for cutting the vinyl.
BTW, I have a house in Gilbert, would love to meet you when I get out there next time.
Thanks
Larry
09-14-2014, 03:14 AM
#511
Guys,
Here are a couple of pix of my flaps using Chads rivet system.
Have to say it was easier than I thought it would be, not to mention I didn't have to do any math to figure out the spacing between lines....
I was hesitant about the canopy glue going all over the place but as Chad pointed out the circumference stops the glue from doing that.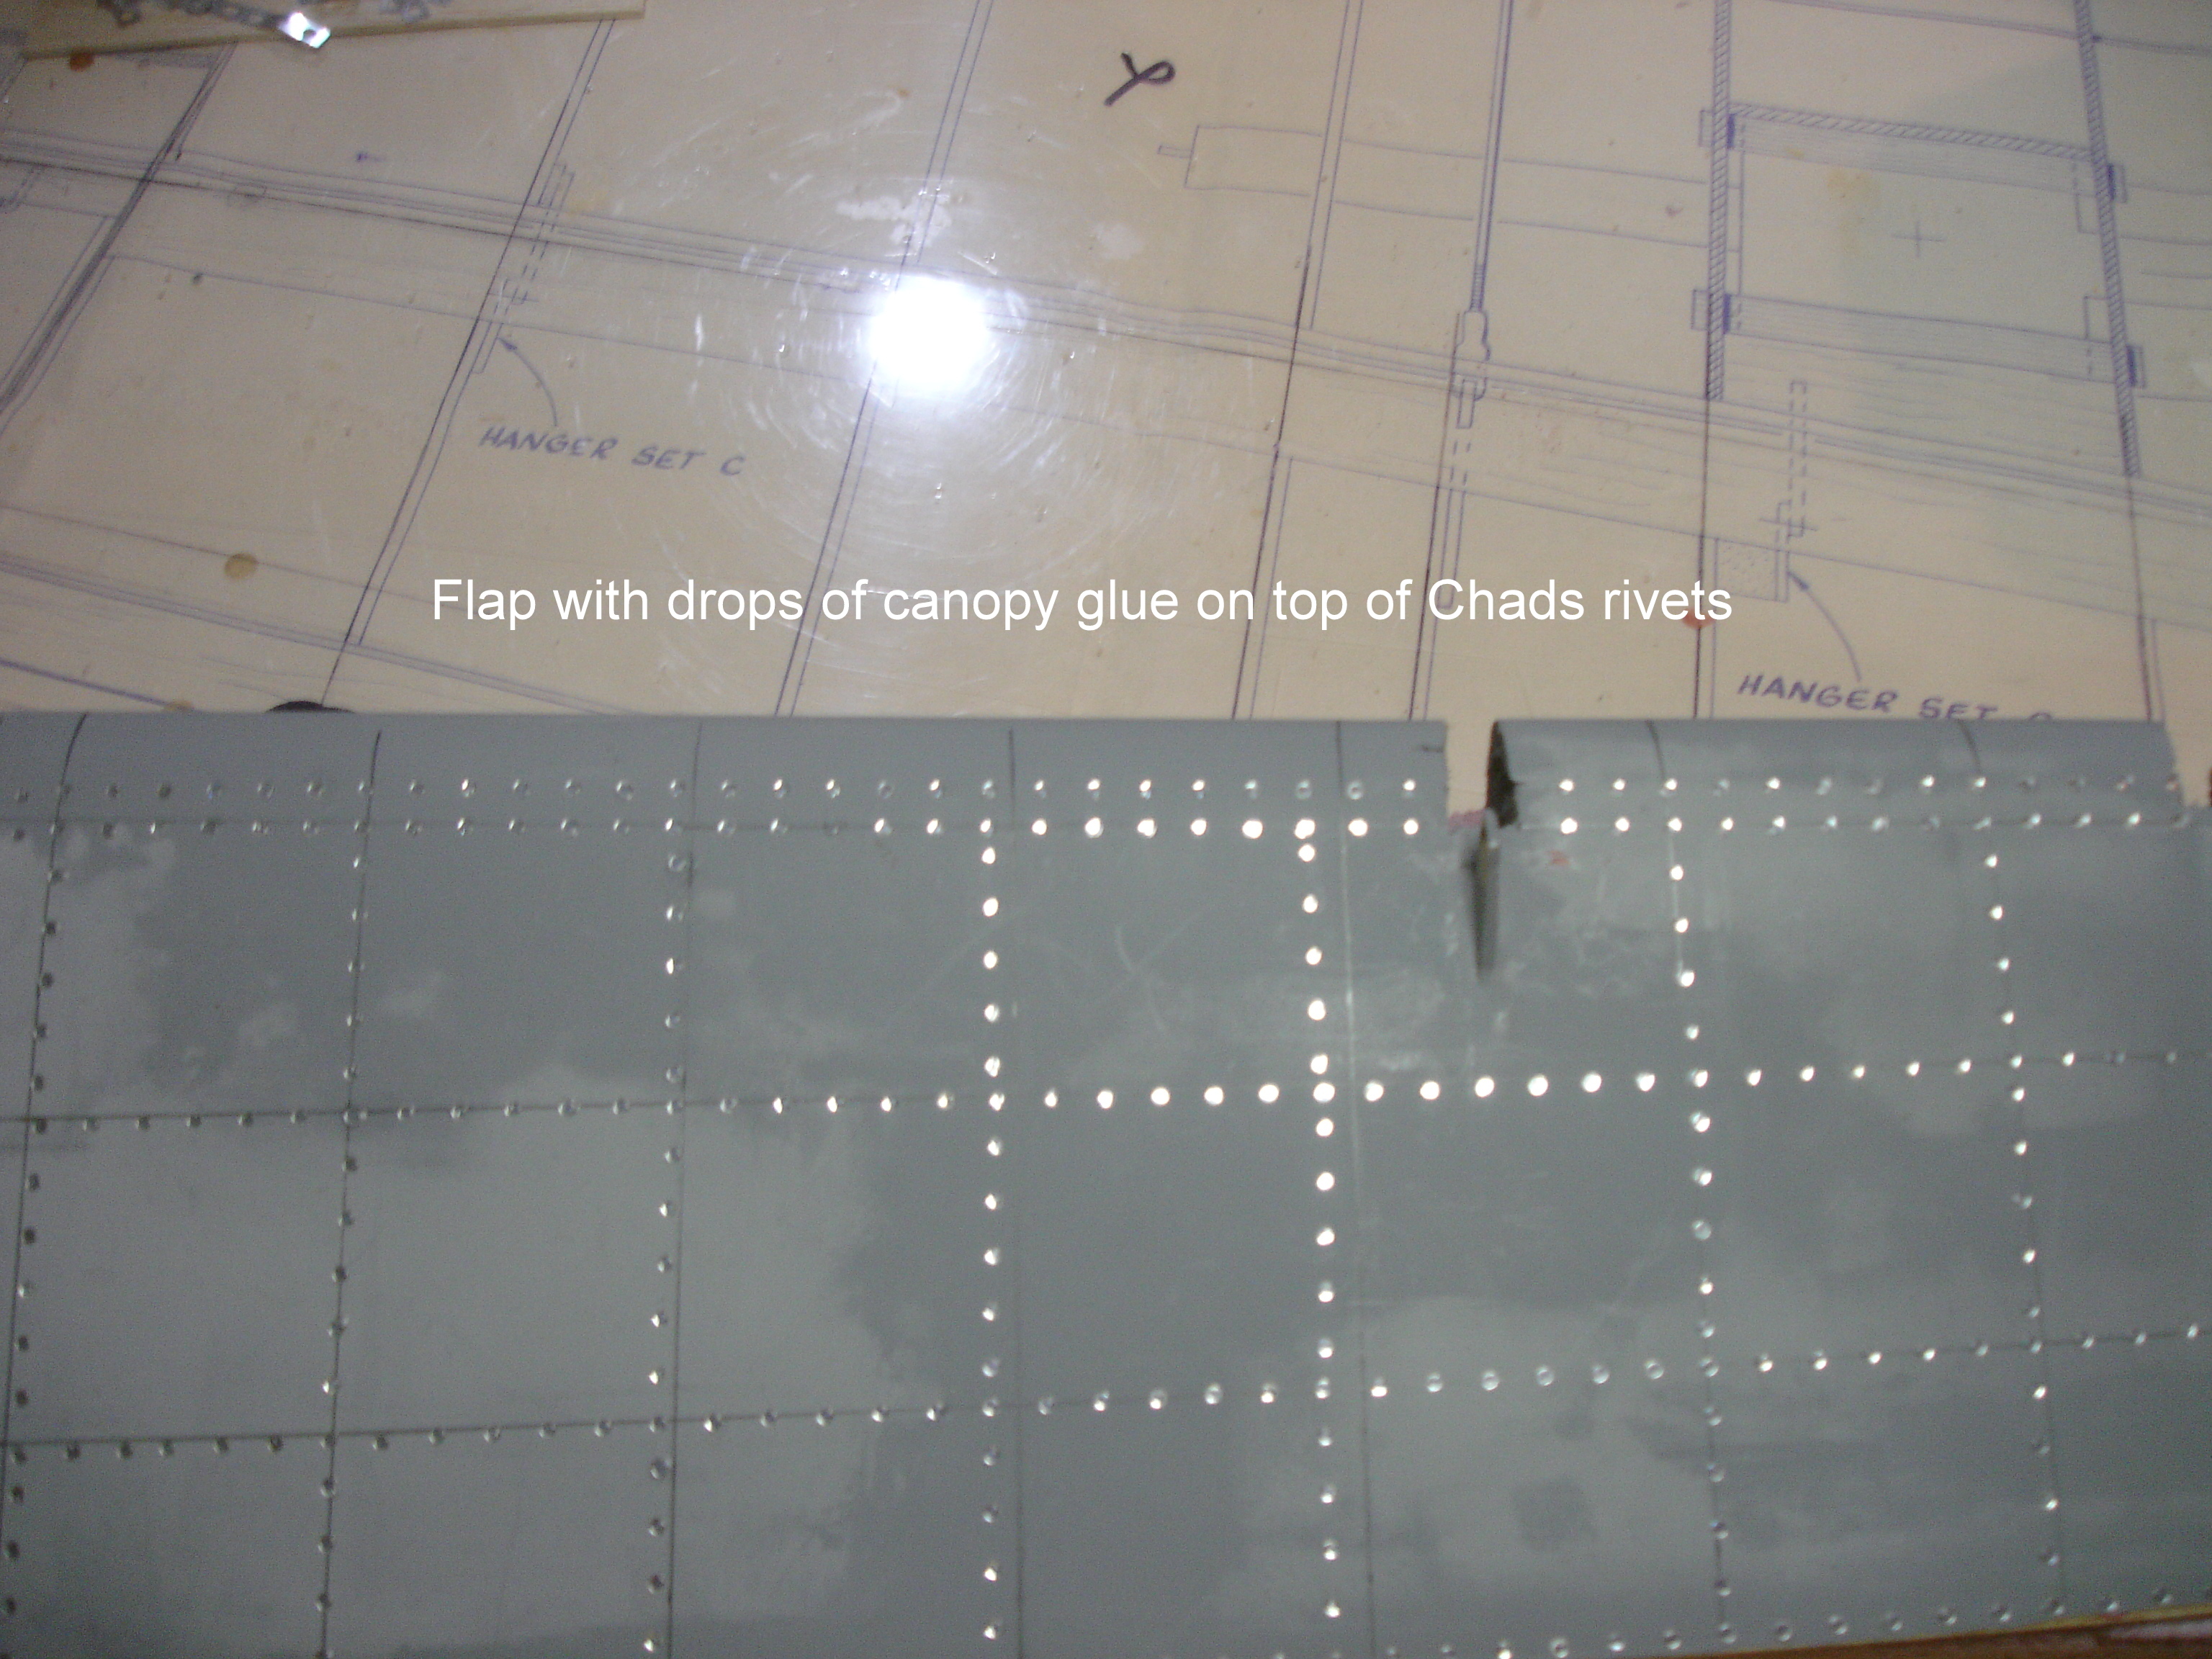
I was shocked when I counted the number on the 1st flap. 1,084 rivets.
Larry
09-15-2014, 04:01 AM
#512

Join Date: Dec 2009
Location: Piedmont,
OK
Posts: 429
Likes: 0
Received 0 Likes
on
0 Posts
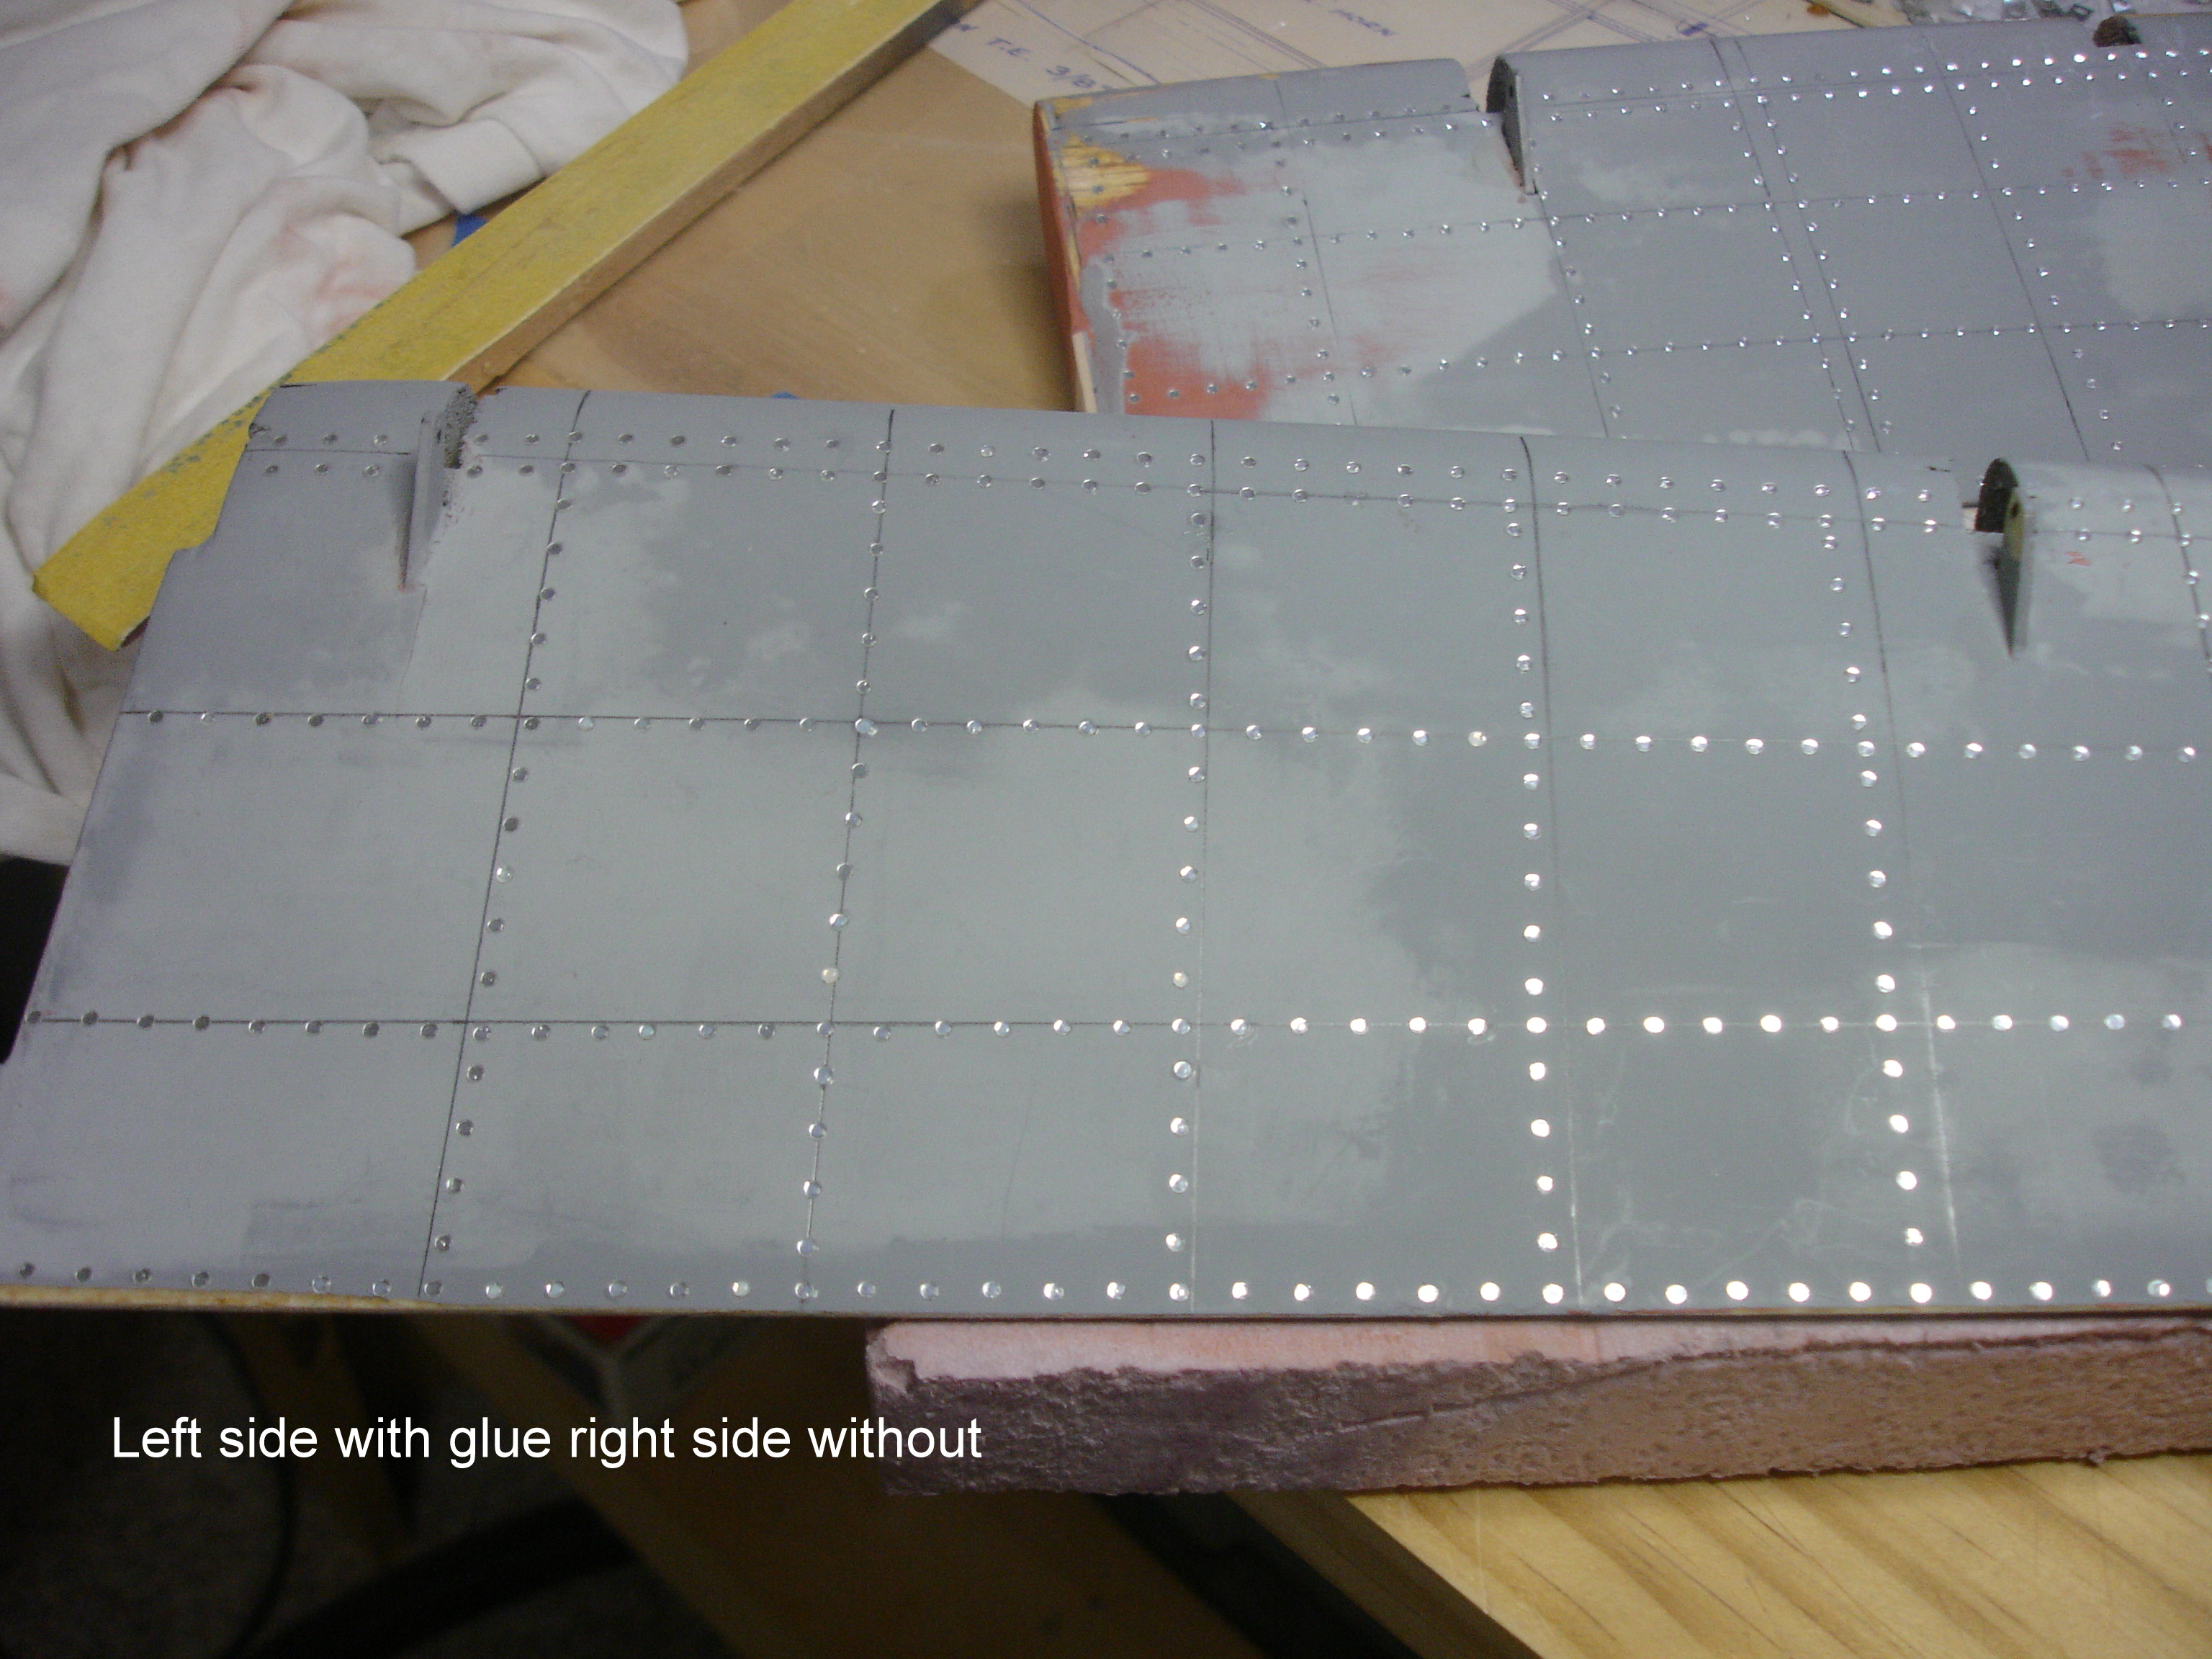
Larry,
They look good. Do you prefer the glue with them or without.
Chad,
I have used them and are very quick putting them on. I like the system. Howt does the priming and painting effect the rivets? Should I use the ones that you put the glue in?
Boyd
They look good. Do you prefer the glue with them or without.
Chad,
I have used them and are very quick putting them on. I like the system. Howt does the priming and painting effect the rivets? Should I use the ones that you put the glue in?
Boyd
09-15-2014, 02:24 PM
#513
Guys,
I thought I added the pix of the primed flap, but alas old age is setting in quicker than my retirement date.
Here is the pix, Chad great product, I prefer with the drop of glue since I'm afraid that by the time you prime and final coat they will barely be visible.
I think the rivets look awesome with the glue and I think their shape will hold up after the final coat of paint

Larry
I thought I added the pix of the primed flap, but alas old age is setting in quicker than my retirement date.
Here is the pix, Chad great product, I prefer with the drop of glue since I'm afraid that by the time you prime and final coat they will barely be visible.
I think the rivets look awesome with the glue and I think their shape will hold up after the final coat of paint
Larry
09-16-2014, 05:52 PM
#514
My Feedback: (60)
Join Date: Dec 2001
Location: Litchfield Park,
AZ
Posts: 7,677
Likes: 0
Received 25 Likes
on
23 Posts
Thank you very much Larry for the kind words. Nothing makes me happier than when a customer is satisfied with the product. I will certainly be looking forward to seeing the finished Trojan as it is one of my favorite types.
09-16-2014, 06:04 PM
#515
My Feedback: (60)
Join Date: Dec 2001
Location: Litchfield Park,
AZ
Posts: 7,677
Likes: 0
Received 25 Likes
on
23 Posts
I have always put my rivets on over the primer and under the paint. That is simply because I use high-build filler type primers which would easily cover up the rivets. As long as the vinyl is scuffed up prior to painting I have not found the need to put any primer on them. Having said that, I don't think there would be any issue with putting primer over the rivets if it is not a filler-primer. There are places on my Hellcat where I have five coats of paint over the rivets (no glue, just vinyl) and they still show up fine. I do always recommend testing your finishing process with the rivets before applying it to the model though. I am happy to provide sample rivets for a few bucks to cover the shipping costs for anyone who would like to expiriment with them before placing an order.
11-21-2014, 04:35 PM
#516
Hey Guys,
So between work & the wife (is that also considered work?) I finally finished applying over 4,000 rivets to the flaps and ailerons... who knew
So now my question is, how do you guys sand the leading edge of the wing. I usually do a shoe shine motion with a large sheet of sandpaper but I was hoping you guys have an easier way.
Flying season almost over here, winds have been 20 + for the last few weekends, though we get a couple of nice dys during the week when I'm slaving over a hot desk
Hope you guys are good
Thanks as always
Larry
11-22-2014, 03:30 AM
#517
Join Date: Dec 2009
Location: Piedmont,
OK
Posts: 429
Likes: 0
Received 0 Likes
on
0 Posts
Larry,
Which size rivets did you use from Chad?
I start by drawing a line down the center of the leading edge. Use that as a guide. I have a couple of rounded sanding blocks, you can get them from the hobby shop or (hardware store-maybe). I start with a flat block and start the curve towards the center line shaping it in a rounded motion. Then use the curved blocks to get the final touch.
Boyd.
11-22-2014, 12:02 PM
#518
My Feedback: (5)
Join Date: Jun 2002
Location: Green Valley, AZ
Posts: 208
Likes: 0
Received 0 Likes
on
0 Posts
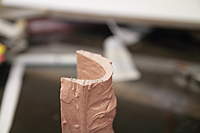
Here's the bondo'd form, I've cut off the over run on the sides already.
I put the block on the wing that needs the LE and mark the location of the front of the wing on each end of the block.
I sanded the outside of the sanding block smooth(er) so that I could make a straight line from one end to the other.
Now cut the block close to the lines I've made and then sand down to the lines making sure I keep the edges flat. This is so that when I just have to sand until the block starts riding on the work table.
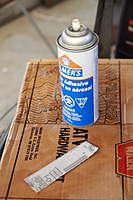
I take a piece of emery cloth that I've fitted to the inside of the block and spray the back with Elmers
Press the emery cloth into the block, making sure it's even on both sides and fully seated.
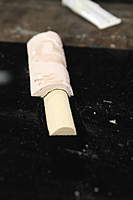
Now the fun begins, I ripped a piece of balsa the width of the sanding block and slightly taller than the blocks inside height.
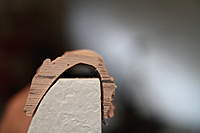
Test fitting the finished edge. Looks good to me, but I'm a rank amateur.
the 2nd step is cover the leading edge with stretch wrap and fasten it on with tape.
then I mixed up about 3-4 golf ball blobs of bondo with the appropriate amount of hardener.
Once this was mixed I applied the gooey mess over the top of the wing that I wanted to copy making sure it was nice and thick trying to get an even amount all around the leading edge.
11-23-2014, 03:21 AM
#520
Guys,
Thanks for the info, Dean, I knew that you would have a unique way to do this and lo and behold you do. As for being an amateur you're along way off from that.
I'm hoping when I get to AZ next year we can meet up and you can tutor me on the finer points of scale modeling as I can use all the help I can get.
Boyd, I went through the thread and found that Dean had made 5/64" rivets spaced 1/4" apart so that's what I ordered from Chad. So I have used almost all of the 5,000 rivets I got from Chad and am very happy with the results so far, the only problem I encountered was that I am off a bit on the vertical rivet lines.
And putting the drop of glue on each rivet was kind of therapeutic after a 10-1/2 hour day at work.
My friend John and I are finishing a kit and then we are fixing a Hanger 9 B25 that a friend of ours crashed, then we are hopefully starting the Grumman E2C before I leave for Arizona.
Take care and hope all is good with you guys.
Larry
02-03-2015, 02:48 PM
#522
Hey guys,
So here's the update...there is none. I finished sanding the leading edges and wing tips and as I now know that I will be moving by summers end I can't go any further without hearing my wife and I quote "Another huge box to ship" so the wing has been packed up and I am slowly starting to pack everything I don't or won't need til after the move.
Here is a pix of the wing box, I hot glued the sides of the out er box to the inner box...hope it survives the move.
So here's the update...there is none. I finished sanding the leading edges and wing tips and as I now know that I will be moving by summers end I can't go any further without hearing my wife and I quote "Another huge box to ship" so the wing has been packed up and I am slowly starting to pack everything I don't or won't need til after the move.
Here is a pix of the wing box, I hot glued the sides of the out
03-08-2015, 07:38 AM
#523
Hey guys,
So even though there has been no progress on the Trojan, I did manage to pick up a landing light and nav lights at the WRAM show.
Starting to pack up my shop except for essentials to finish the flying season here.
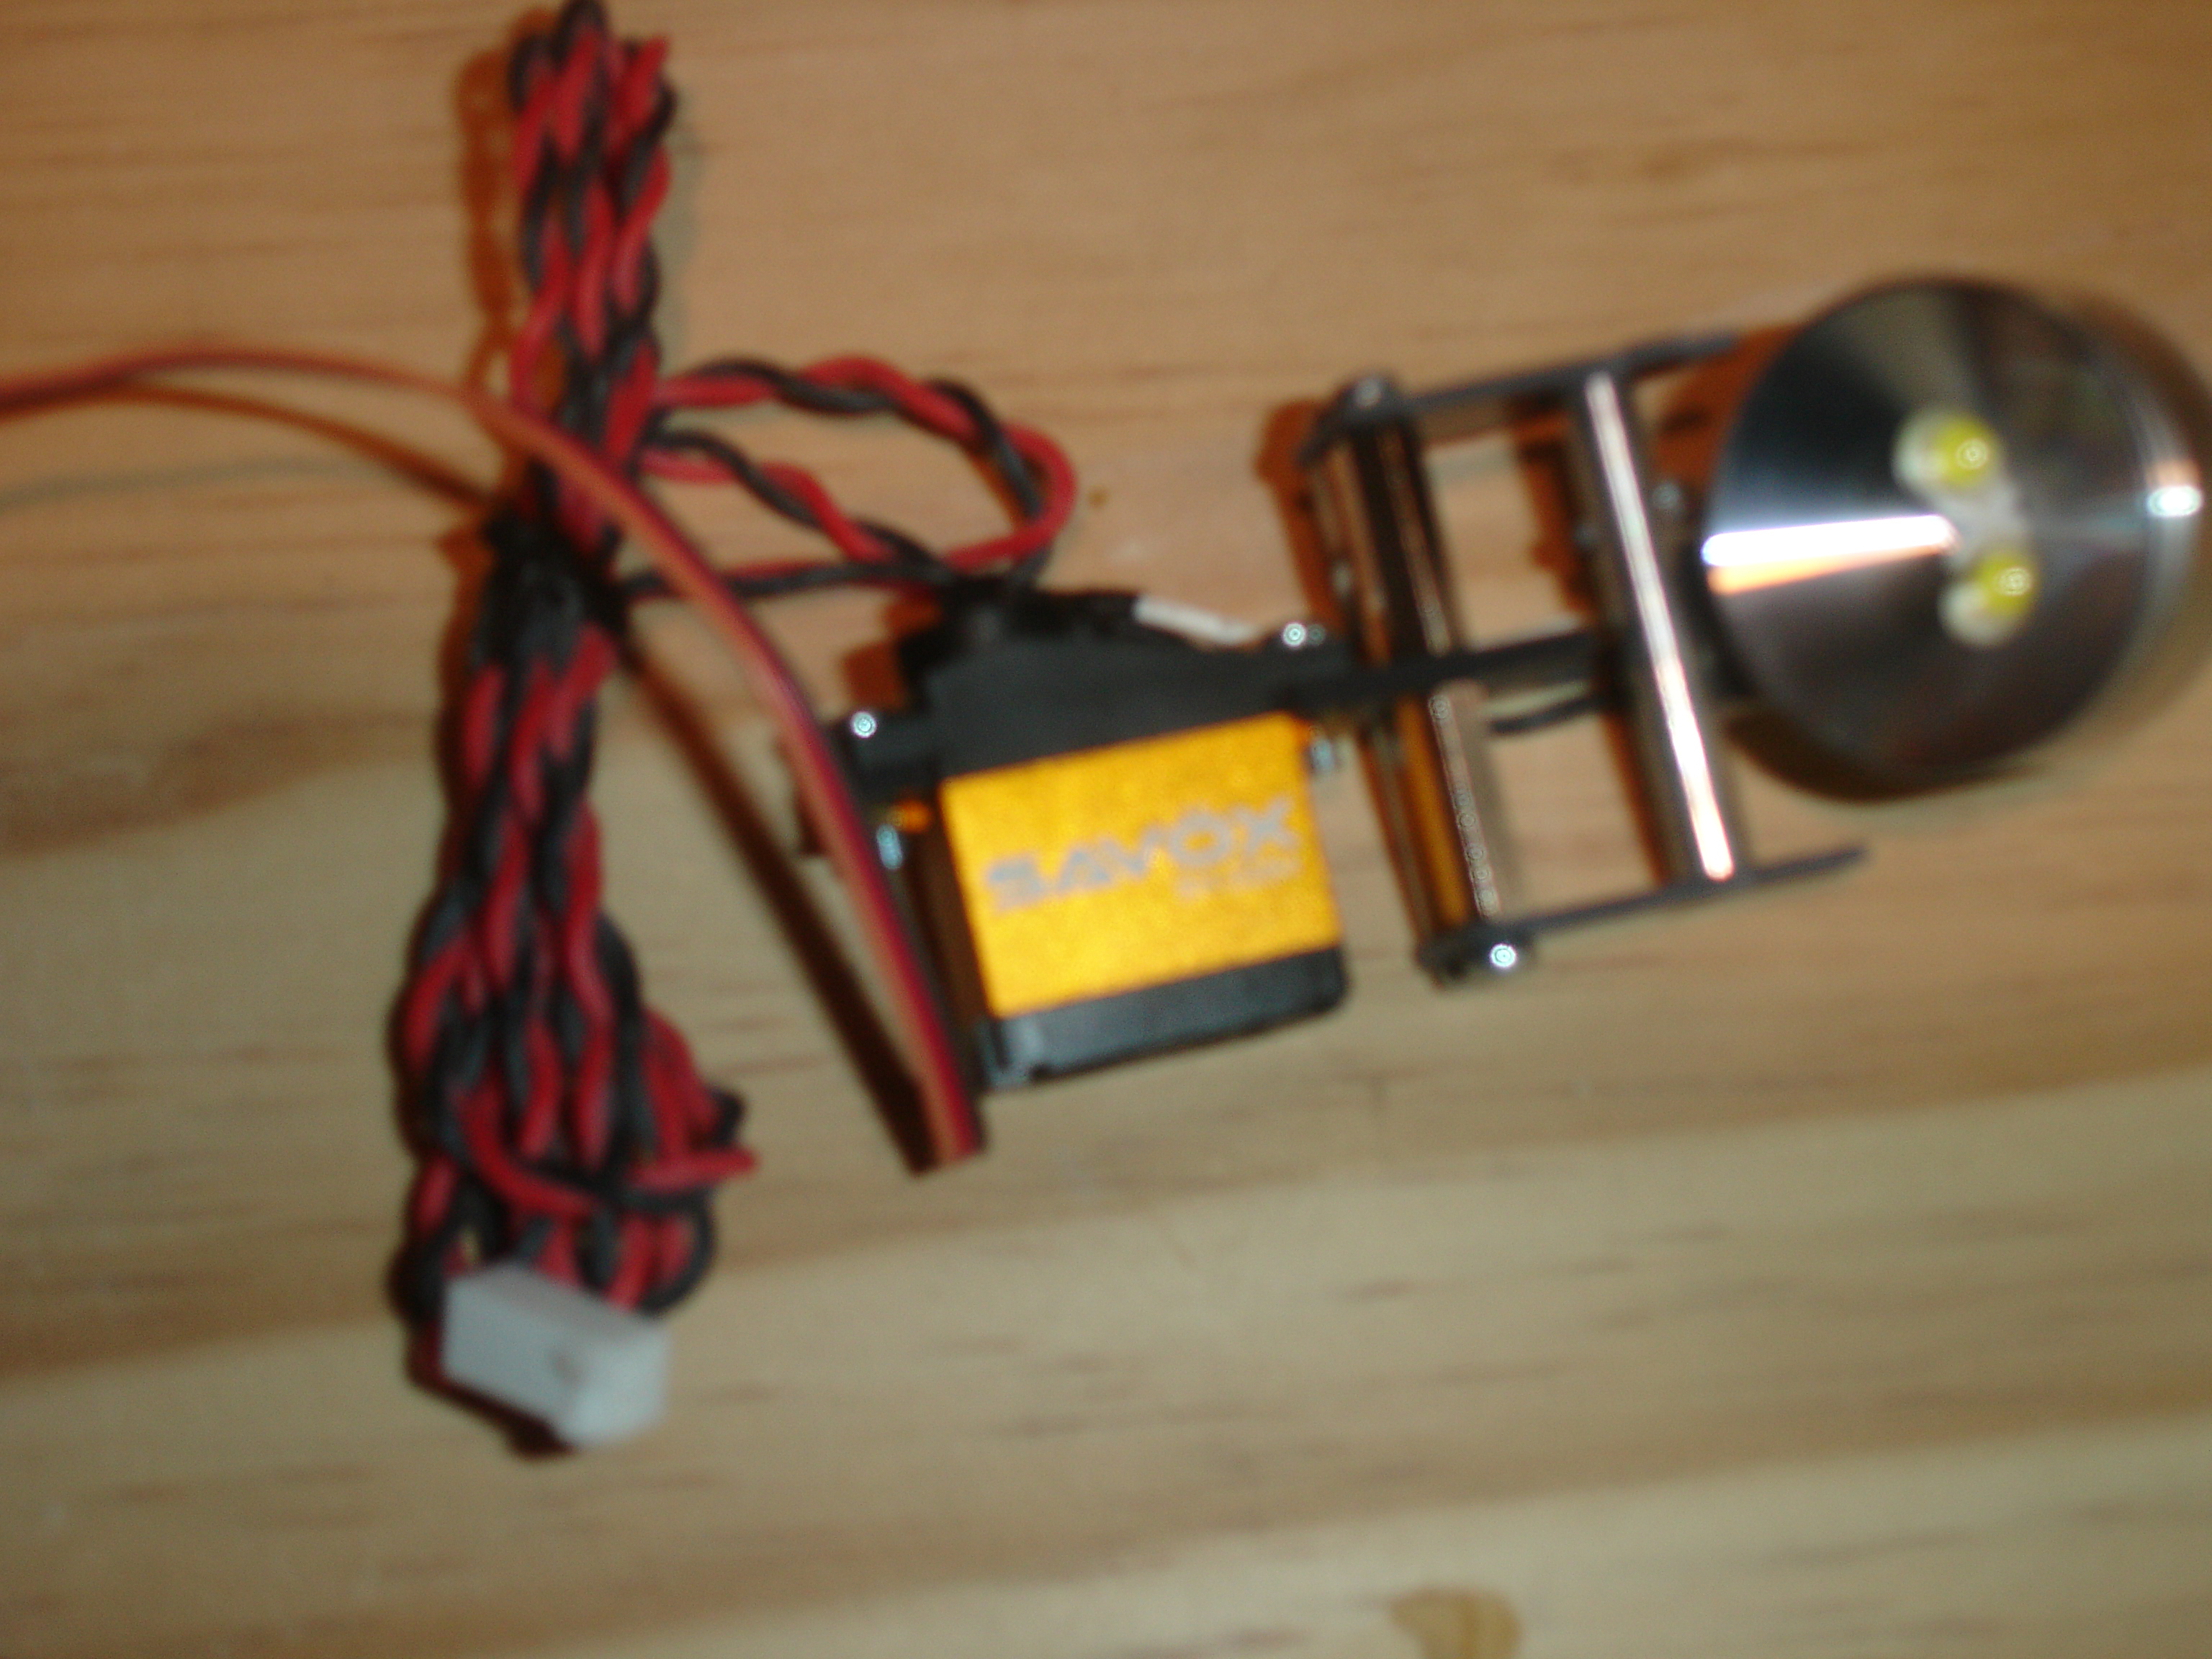
Here are some pix of the light, measures 1-1/8" across the light housing, it's LED and should last forever
Hope you're surviving the weather as I have about 36" of snow on my deck, many storms and not above freezing for weeks, just started to get into the 30's and 40's

Larry
So even though there has been no progress on the Trojan, I did manage to pick up a landing light and nav lights at the WRAM show.
Starting to pack up my shop except for essentials to finish the flying season here.
Here are some pix of the light, measures 1-1/8" across the light housing, it's LED and should last forever
Hope you're surviving the weather as I have about 36" of snow on my deck, many storms and not above freezing for weeks, just started to get into the 30's and 40's
Larry


