


ZIROLI SBD DAUNTLESS BUILD
 06-19-2015, 12:44 PM
#301
Got several flights in at warbirds over Georgia.
I PM'ed her again before leaving: but, first flight, lost one wheel over the runway.
Landed with flaps up: smooth landing but did some hanger rash on those bottom wing stiffeners! I was sure I checked those axle set screws, but, obviously not!
She still does great dive bombing, though! GT-80 doing around 6600 rpm's.
Last edited by samparfitt; 06-19-2015 at 12:48 PM.
 09-15-2015, 08:30 AM
#302
PM.
Have put in a lot of flights on her over the summer.
While at Elkhart, I checked the gear and noticed a lot of slop in the down position. Discovered that both screws holding the pin that goes through the trunnion had snapped off. I've had a couple hard landings over the years and that probably weakened the two screws.
An 'easy out' was used to remove the 'left over' screws in each end and new ones were added. Ace hardware had the needed screws.
Checking the other retract, finding the screws were loose.
Last edited by samparfitt; 09-15-2015 at 08:32 AM.
05-11-2016, 03:15 PM
#303
Spring PM.
Had lots to do.
All servos were secure.
The bottom of the center wing had some center sheeting broken from the bomb and bomb trapeze and the gear doors were ripped off last year due to a belly landing.
Some 1/8" thick balsa fixed up the bomb drop area. Some 'easy sand' was needed on the two large wing stiffeners.
New doors were made with some 1/32" thick aircraft ply.
Being on the bottom, I just used a quality brush and painted the new surfaces.
With the original mufflers (with hole drilled in baffle), I was getting 6800 RPM's on the GT-80 so I added the scale mufflers. They reduced RPM's to 6400 using a Mejzlik 24X10 prop.
I tried to go scale with a 3-blade 22X12 but RPM's was way too low at 5500.
Last year, the bottom of the cowl got cracked when leaning the plane on it's nose: some FG cloth fixed that up.
Last year, I spilled a lot of thin CA on one wing and made it a field repair from flack damage by just painting that one panel.
And, last, added my AMA and FAA number to the inside of the service door.
Last edited by samparfitt; 05-11-2016 at 03:57 PM.
02-20-2017, 03:27 PM
#304

My Feedback: (20)

Join Date: Jan 2002
Location: Raeford,
NC
Posts: 405
Likes: 0
Received 0 Likes
on
0 Posts
Samuel,
Thanks for the very informative build, it took me about 5 hours off and on to review the whole thread! I purchased a NIB Ziroli Dauntless kit last week from RCU and I am looking forward to getting back into the workshop after a 5 year break. The last major kit build I did was the Vailly FW-190 and it went rather nice. With the tutorial type build you did, my mistakes should be at a minimum since I have been idle. I had a Zenoah GT80 in both a Meister Zero and the FW-190 and I may go with that for a third warbird. I am also looking at a radial but the Moki I want is $3200 minimum. Thanks again and I am sure I will revisit your thread often!!
v/r
Ken H
 02-21-2017, 05:50 AM
#307
maddog,
Yep, doing fine: still strong as an ox, and as smart as one, too!
I've got 9 large planes that are flyable and 4 that need building. With 9 flyable planes, I haven't been too motivated to build and also, I've been working on my Great Northern model railroad, this winter.
See web site for pictures and videos:
http://ogrforum.ogaugerr.com/topic/g...rthern-railway
(see last page for videos).
I'll be at the usual 25(or so) flyins again, including most of the big ones.
Am getting lazy in my old age and looking for a Ziroli F4U to fly at smaller fields as the 110" F4U needs 800' for me to fly it (first RTF plane that I'll have bought in at least a decade).
See ya' at Toledo (will be there on Friday).
Nice weather here in Cincinnati, Ohio; late February and it's in the 60's for at least the next week.
Sam
Last edited by samparfitt; 02-21-2017 at 05:52 AM.
02-21-2017, 10:15 AM
#308
Sam,
I am glad to hear you are doing fine; with the passing of Merlyn Graves I find it is tough to get my fix of builds by people I have been following on the boards all these years.
Your train set is amazing it's great to have another hobby or interest to keep the old juices going it can be to easy to get burned out on just one hobby.
I can still remember visiting my grandfather and being amazed by his Lionel set he had built in his basement of his home; great memories.
When I'm not building or flying I get out in my '36 Chevy with the family and relax for the day at the car show; what do you think; I attached a few pictures for you to see.
maddog
02-28-2017, 09:26 AM
#314
My Feedback: (20)
Join Date: Jan 2002
Location: Raeford,
NC
Posts: 405
Likes: 0
Received 0 Likes
on
0 Posts
Hi Sam,
I have a question on the Bomb Trapeze you have on your Dauntless.....I am thinking of building my own and I have followed another thread on how the builder built his. What are you recommendations on the Robart one vice building one from scratch? I am also slowly gathering parts and I have a want ad here on RCU for Dauntless parts someone may have left over/unused/wrecked project and the trapeze is one of them. I am also looking at your thread for the retract install and I am debating drop in Robart or Sierra Precision and do the mods to make them fit better. Somewhere along in either this or another Dauntless thread someone had mentioned there should b an addendum to the plans to show the "other retracts" and the mod needed to make them fit. Any guidance? I am going back through your build thread o that for a third time before I make any purchases. Thank!!
I have a question on the Bomb Trapeze you have on your Dauntless.....I am thinking of building my own and I have followed another thread on how the builder built his. What are you recommendations on the Robart one vice building one from scratch? I am also slowly gathering parts and I have a want ad here on RCU for Dauntless parts someone may have left over/unused/wrecked project and the trapeze is one of them. I am also looking at your thread for the retract install and I am debating drop in Robart or Sierra Precision and do the mods to make them fit better. Somewhere along in either this or another Dauntless thread someone had mentioned there should b an addendum to the plans to show the "other retracts" and the mod needed to make them fit. Any guidance? I am going back through your build thread o that for a third time before I make any purchases. Thank!!
02-28-2017, 09:42 AM
#315

Hi Ken - not to hijack Sam's thread -- but I do have a NIB Robart Trapeze for the Dauntless if you are interested. Decided to make mine non-functional after much arguing back & forth with myself on 'functional versus non-functional'. You can PM or email me if interested.
Oh - and you can't go wrong following Sam's thread. I have several Ziroli Dauntless build-threads bookmarked from this and other sites. Sam's has been the one I come back to the most. Building pretty much done on mine, applying the glass cloth at the moment.... getting there...
Thanks - back to you, Sam!
Last edited by bhall01; 02-28-2017 at 09:46 AM.
02-28-2017, 12:09 PM
#317
Ken's,
The more input the better, especially, since I have no experience on the robart functioning bomb release.
Mine was stationary and a few years ago, I had to belly in and that took care of it
The mod for sierra's gear isn't major; just cutting a hole in the out wing's rib for the air cylinder. I've heard, hearsay, that the robart air cylinder is too small to move the gear with wheel into the wheel well. My sierra gear has a large air cylinder and it only goes up slowly (as well as down slowly). Darrell told me, due to needing a large air cylinder, the air cylinder had to be move out past the frame as there wasn't enough room on the other side.
sam
Last edited by samparfitt; 02-28-2017 at 12:12 PM.
11-02-2018, 02:20 PM
#318
My Feedback: (11)
Join Date: Jul 2008
Location: knox,
IN
Posts: 98
Likes: 0
Received 0 Likes
on
0 Posts
I want to thank you for these posts, I have been building for years and was a little turned around on this, The deck was one problem so I cut it out and lowered it like yours. These pictures you have posted are priceless and have been so helpful to me Thank you again Kenny.
06-23-2019, 02:26 PM
#319
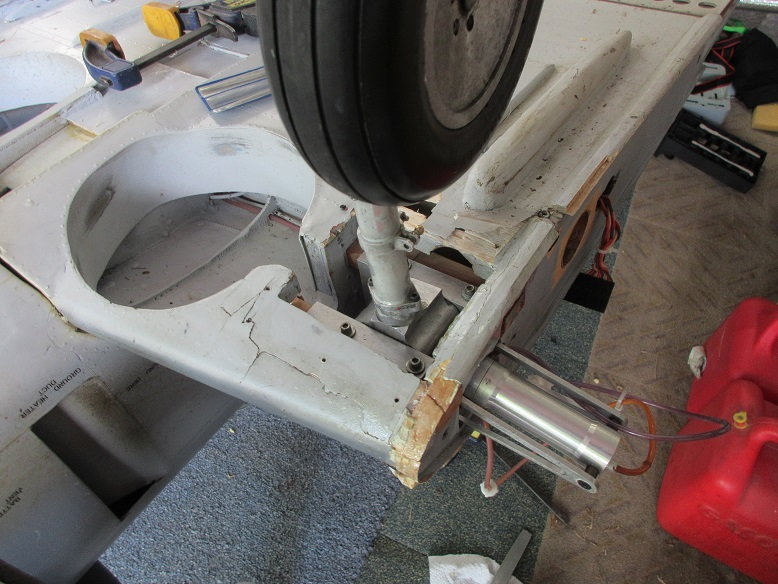
Every once in awhile, you do something stupid!
Pretty strong wind down the runway and I didn't have enough power about 3' over the runway and she dropped ripping out the left gear.
WOW, Looked at when I built this plane and it was 2010. Been flying her for 10 seasons and probably several hundred flights and she goes to just about all my flyins and is usually the first to fly.
I think that's the second mishap that I've had with this plane.
New mounts need to be built.

Also, one side frame of the mount is bent.

Got it pretty straight with a body hammer and the vise.
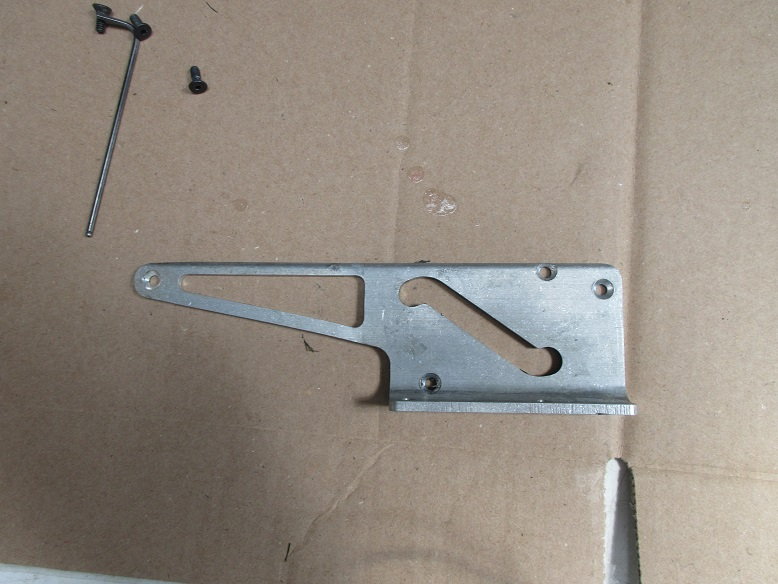
Think I'll order another frame from Darrell.
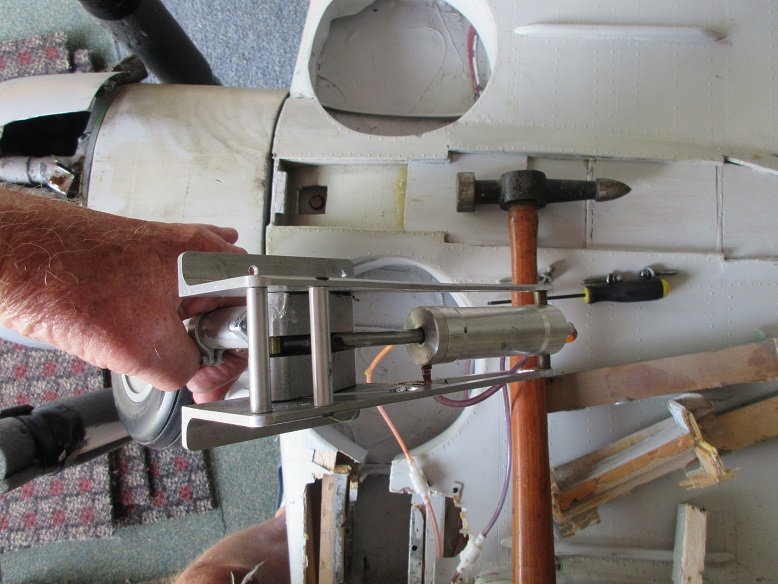
Heat removes anything!
Used heat gun to soften the epoxy to easily remove the old, broken mount.

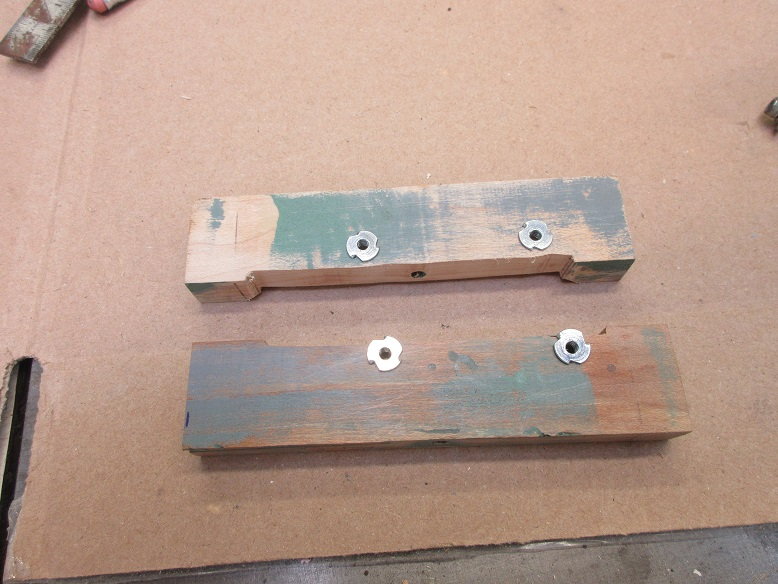
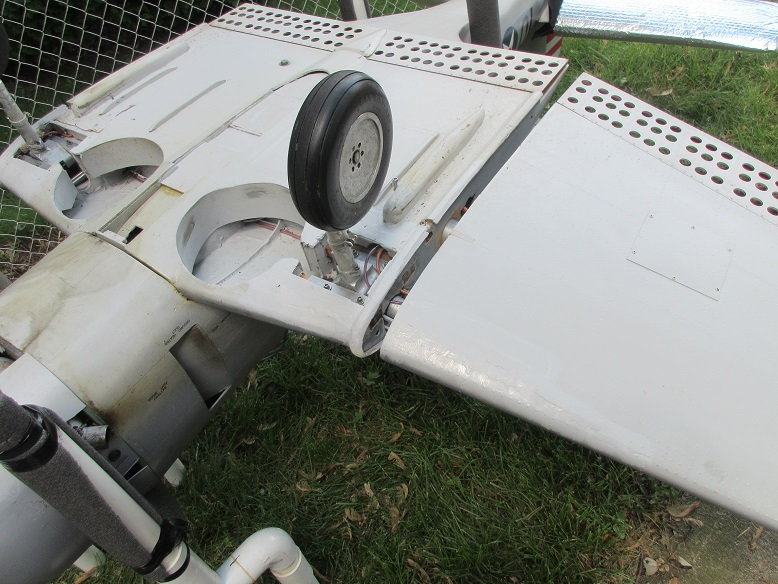
New mounts made from leftovers of my 120" B-25.
The corners had to be rounded over to fit the gear plus some wood removed along the inner edge.

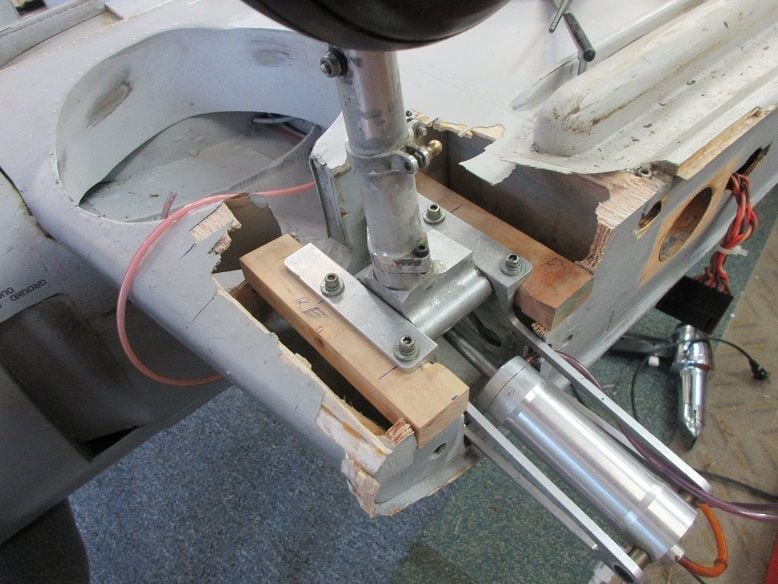
Dry fitted.
A couple hours work and the hard part is now done.
No damage to the top of the wing so sheet repair will never be seen.
Pretty strong wind down the runway and I didn't have enough power about 3' over the runway and she dropped ripping out the left gear.
WOW, Looked at when I built this plane and it was 2010. Been flying her for 10 seasons and probably several hundred flights and she goes to just about all my flyins and is usually the first to fly.
I think that's the second mishap that I've had with this plane.
New mounts need to be built.
Also, one side frame of the mount is bent.
Got it pretty straight with a body hammer and the vise.
Think I'll order another frame from Darrell.
Heat removes anything!
Used heat gun to soften the epoxy to easily remove the old, broken mount.
New mounts made from leftovers of my 120" B-25.
The corners had to be rounded over to fit the gear plus some wood removed along the inner edge.
Dry fitted.
A couple hours work and the hard part is now done.
No damage to the top of the wing so sheet repair will never be seen.
 06-29-2019, 09:07 AM
#321
Final repair.
Some 2 part easy sand used to fill in cracks and the wing 'divider'.
I was wondering where those extra pieces of balsa 'went to' on the center wing: After getting the outer wing out to check alignment, I found the bottom sheeting was damaged!
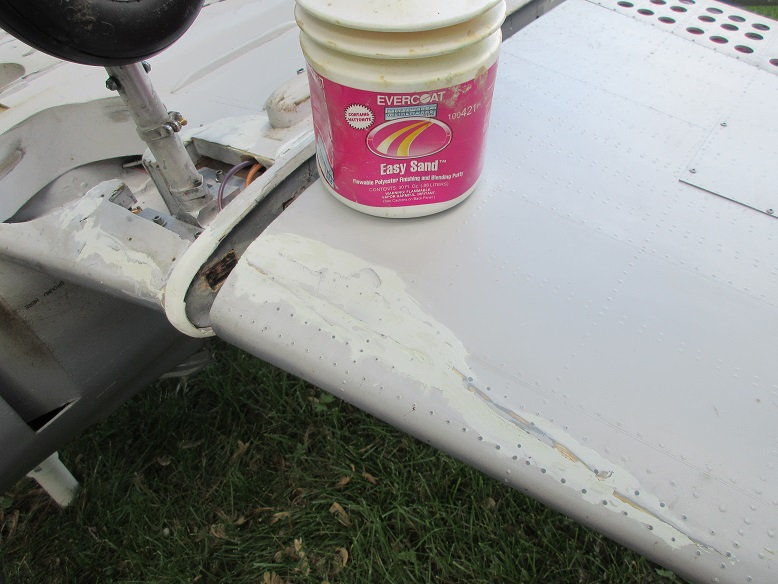
Hand brushed the repaired area with left over paint that was still good.
Some 2 part easy sand used to fill in cracks and the wing 'divider'.
I was wondering where those extra pieces of balsa 'went to' on the center wing: After getting the outer wing out to check alignment, I found the bottom sheeting was damaged!
Hand brushed the repaired area with left over paint that was still good.
08-01-2021, 10:52 AM
#322
Engine not reaching maximum RPM's.
A couple weeks ago, the engine wouldn't start.
Found that the choke servo was 'dead'.
Replaced the servo and no response from the throttle.
Found the 'reverser' to the functioning cowl flaps, also, went 'dead' and prevented signals to the servos.
Replaced the 'reverser' and got a good flight in.
Today, the engine would 'throttle up' and then go to idle.
Usually, in my experience, that means somethings wrong with the engine.
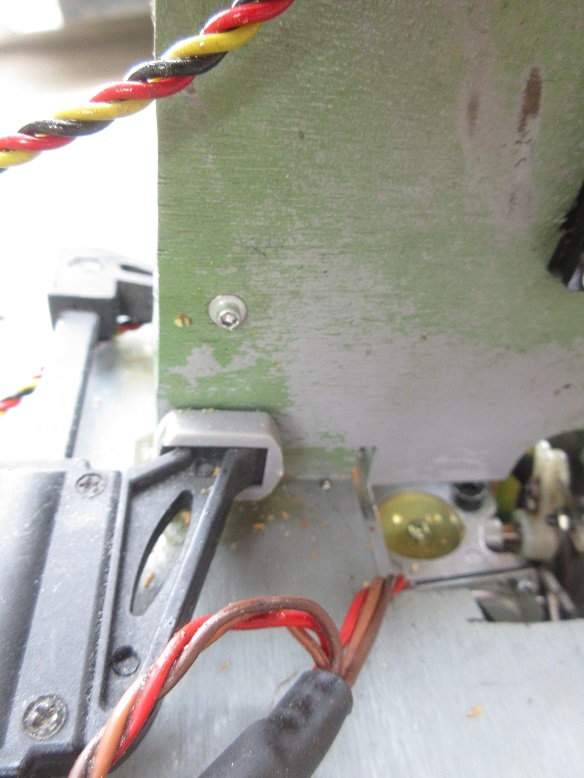
Fortunately, when I removed the 'engine modular' unit from the fuse and tested the servos, on advancing the throttle, the plywood sheet where the servos are attached, came loose.
In idle, the plywood was flush to the firewall but advancing the throttle moved the plywood from the firewall.
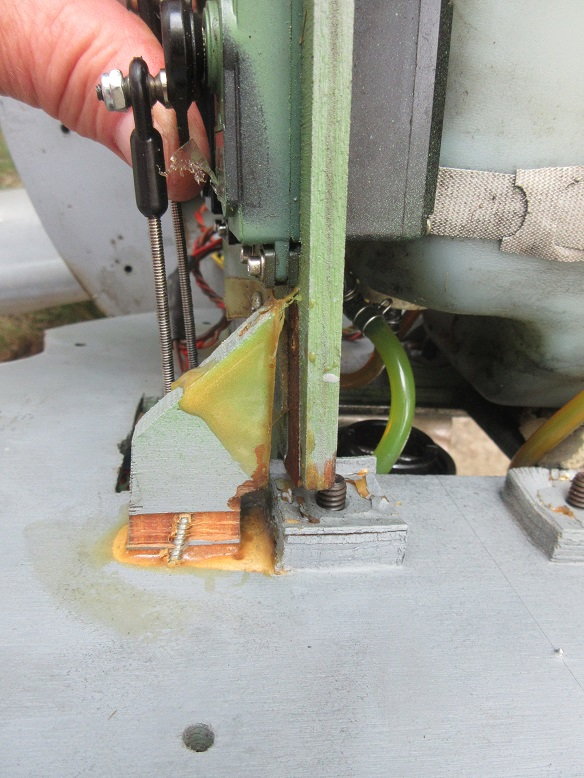
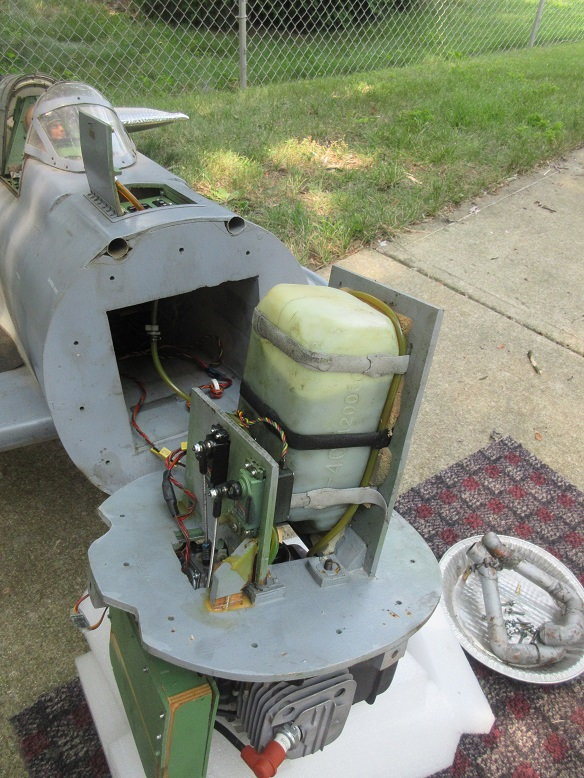
Some epoxy fixed it plus screws. Guess I can't complain since the servos and epoxy lasted 11 seasons!

A couple weeks ago, the engine wouldn't start.
Found that the choke servo was 'dead'.
Replaced the servo and no response from the throttle.
Found the 'reverser' to the functioning cowl flaps, also, went 'dead' and prevented signals to the servos.
Replaced the 'reverser' and got a good flight in.
Today, the engine would 'throttle up' and then go to idle.
Usually, in my experience, that means somethings wrong with the engine.
Fortunately, when I removed the 'engine modular' unit from the fuse and tested the servos, on advancing the throttle, the plywood sheet where the servos are attached, came loose.
In idle, the plywood was flush to the firewall but advancing the throttle moved the plywood from the firewall.
Some epoxy fixed it plus screws. Guess I can't complain since the servos and epoxy lasted 11 seasons!
Last edited by samparfitt; 08-01-2021 at 10:56 AM.
The following users liked this post:
mbaulfinger (08-04-2021)
09-09-2021, 01:19 PM
#323
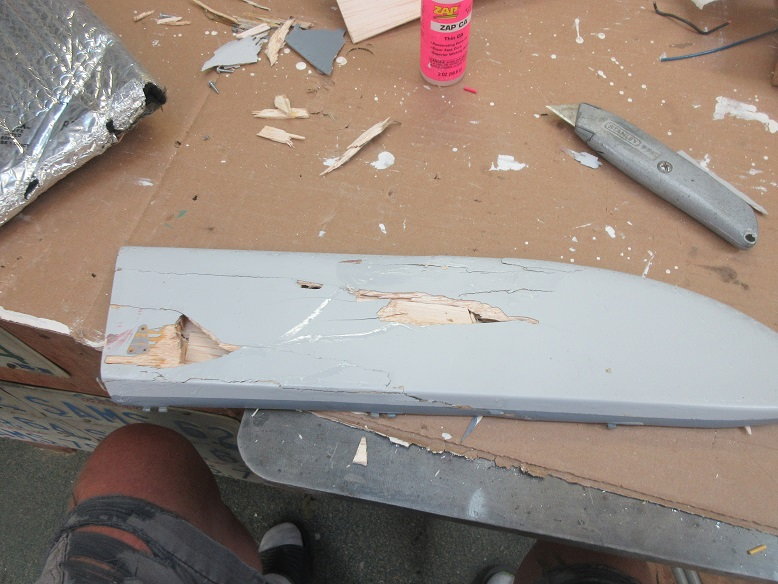
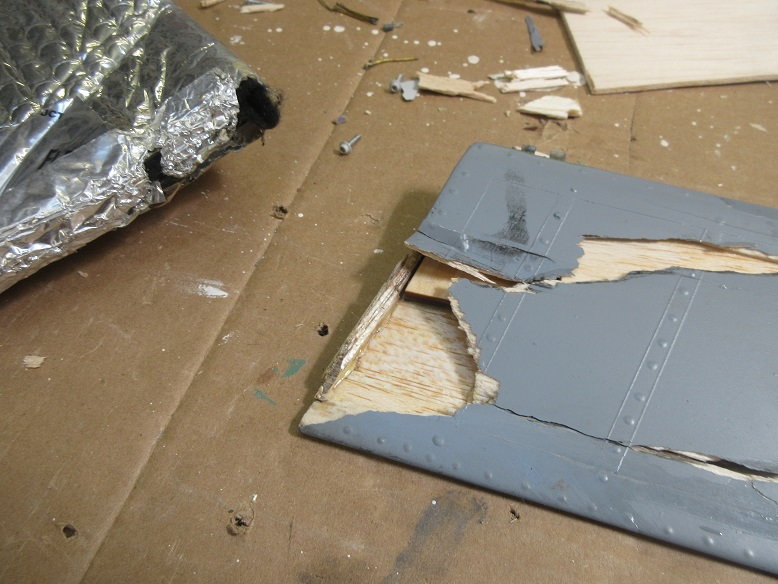
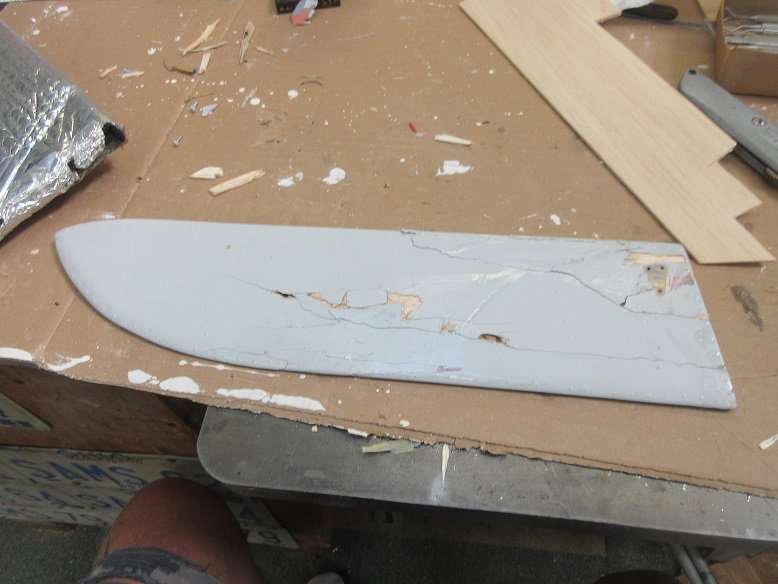
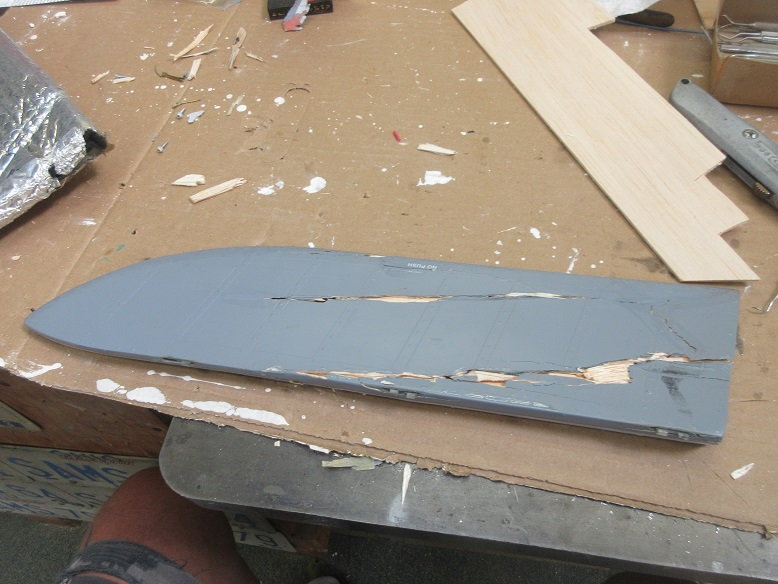
Aileron repair.
While at Muncie for the Indiana wabird flyin, someone ran into my plane and the prop got my aileron.
Brian picked up all the pieces so I thought I'd try re-assembling the aileron. I've got the plans so I can rebuild a new one this winter, if 'need be'.
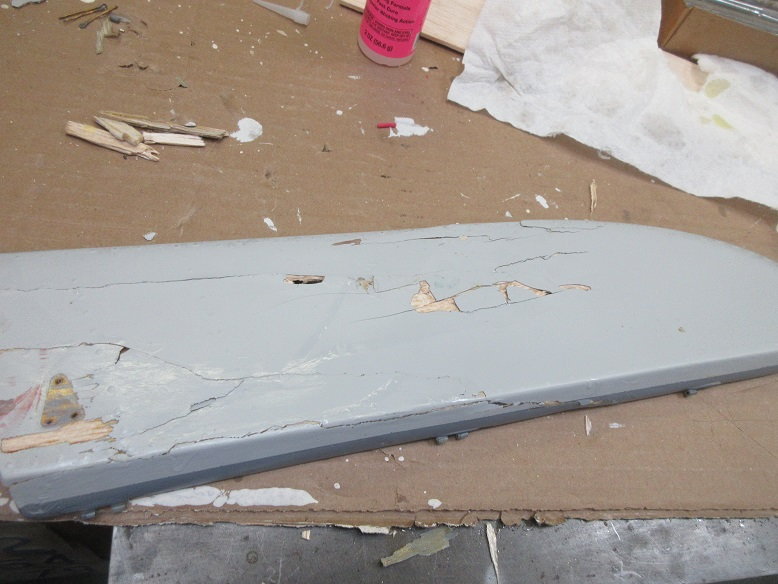
Lots of thin CA.
I glued some balsa sheeting between 'holes' to give the old balsa sheeting a firm foundation.
I've CA'ed the LE and TE parts plus the left side.
More balsa 'sub' sheeting.

Bottom edge CA'ed.
More sub sheeting.
Ditto on the sub sheeting, again.
Last sub sheeting.

End rib CA'ed.
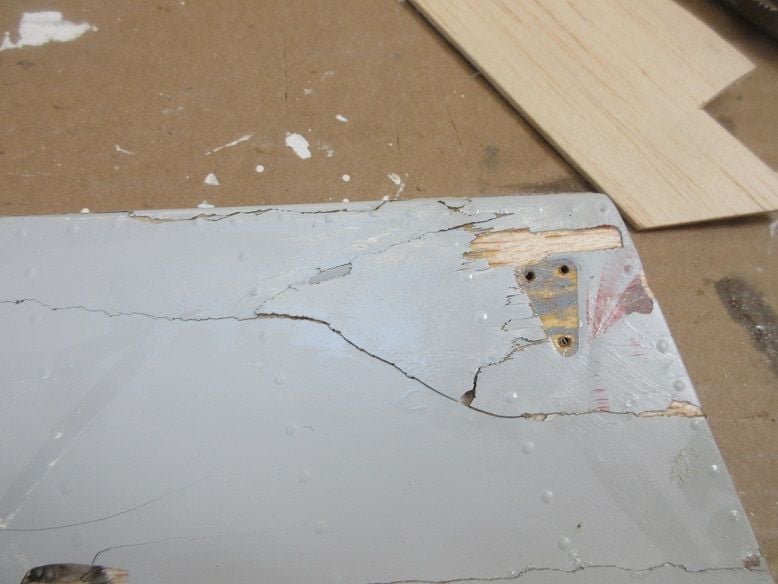
One large previous surface piece CA'ed near the control horn holes plus 3 or 4 pieces in the center.
Close up views.
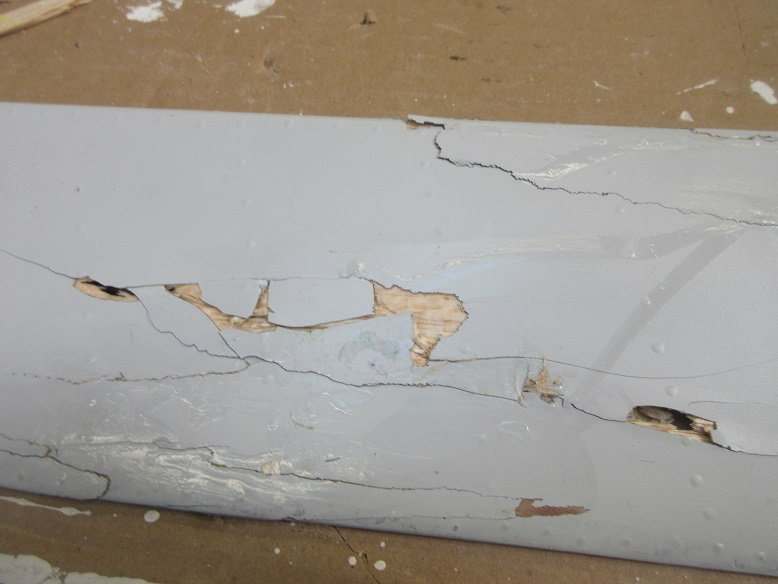
Finished with all parts that could be CA'ed.
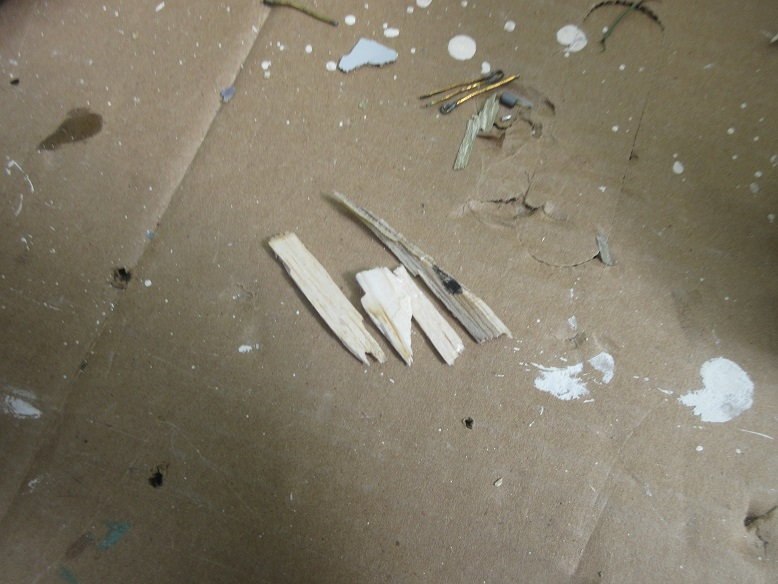
'Left over' parts.
Taped off the area to restrict where the 'easy sand' is applied.

Bondo applicator used.
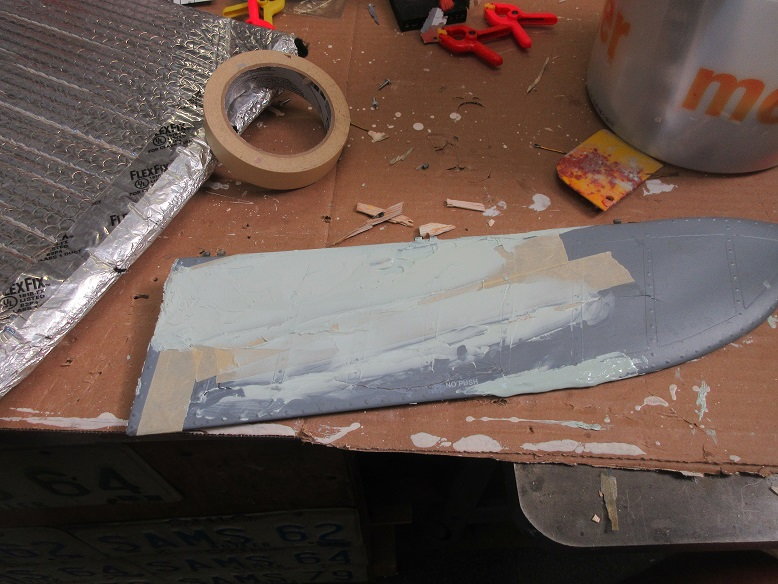
Get this 2 part bondo at my local auto store. Really good stuff: fast drying and easy to sand.

A couple ribs on the flaps and dive brakes got broken.

Again, CA used.
The rib 'tail' also needed to be reattached.
Next, sand smooth.
While at Muncie for the Indiana wabird flyin, someone ran into my plane and the prop got my aileron.
Brian picked up all the pieces so I thought I'd try re-assembling the aileron. I've got the plans so I can rebuild a new one this winter, if 'need be'.
Lots of thin CA.
I glued some balsa sheeting between 'holes' to give the old balsa sheeting a firm foundation.
I've CA'ed the LE and TE parts plus the left side.
More balsa 'sub' sheeting.
Bottom edge CA'ed.
More sub sheeting.
Ditto on the sub sheeting, again.
Last sub sheeting.
End rib CA'ed.
One large previous surface piece CA'ed near the control horn holes plus 3 or 4 pieces in the center.
Close up views.
Finished with all parts that could be CA'ed.
'Left over' parts.
Taped off the area to restrict where the 'easy sand' is applied.
Bondo applicator used.
Get this 2 part bondo at my local auto store. Really good stuff: fast drying and easy to sand.
A couple ribs on the flaps and dive brakes got broken.
Again, CA used.
The rib 'tail' also needed to be reattached.
Next, sand smooth.
09-12-2021, 04:48 AM
#324
Aileron completed.
After sanding, I just used one of those foam brushes to apply the paint versus the 'usual' spray gun. I still had paint from the first 'painting' 11 years ago.
The foam brush did 'surprisingly' well as no 'brush strokes' and, after 11 seasons, surprised the new paint isn't brighter than the old paint.
I didn't prime the part so there are some imperfections but 'good enough for this season' as got another big flyin in a few weeks.
07-16-2022, 04:52 PM
#325
PM the Dauntless.
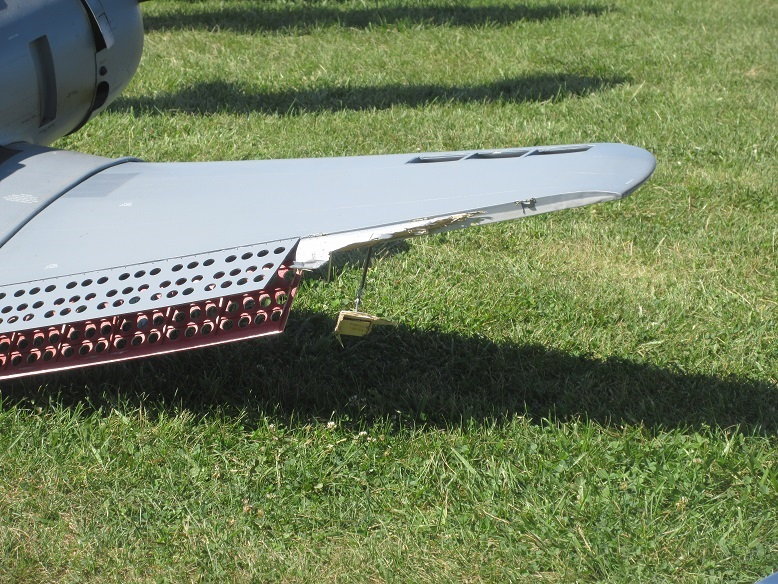
At my last flyin, I ripped out a gear after 13 seasons of no 'problems', at least, by me!
I always land in 'front of me' but I tried landing at the beginning of the 1000' runway and misjudged the speed and the 'landing angle'.
The 'landing angle' wasn't too bad as the plane didn't bounce but I heard the gear oleos 'working'.
About 30' later, one gear was on the 'ground'.
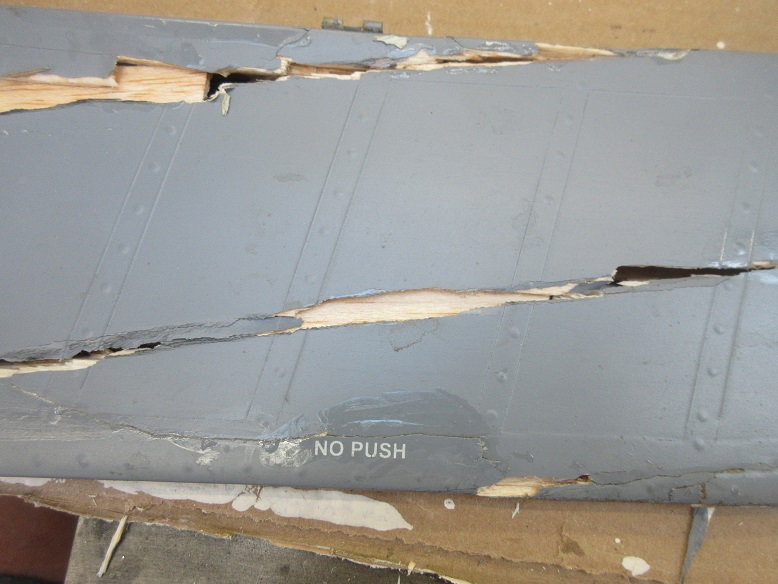
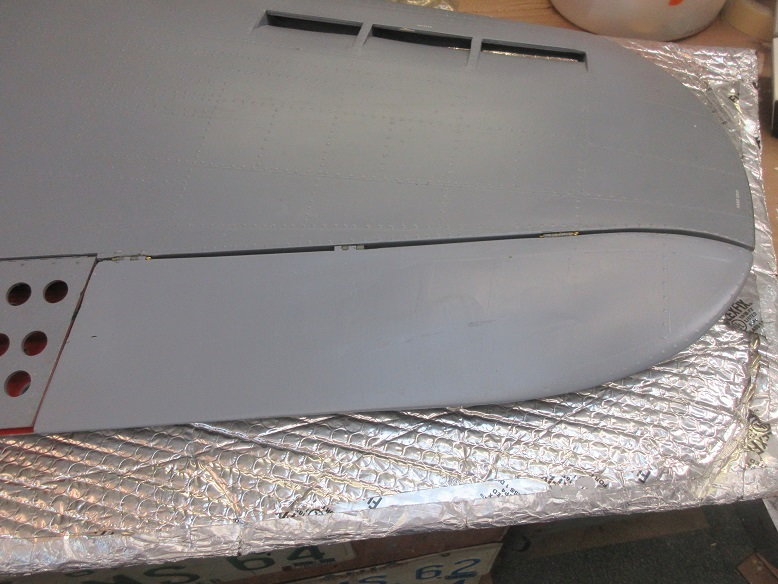
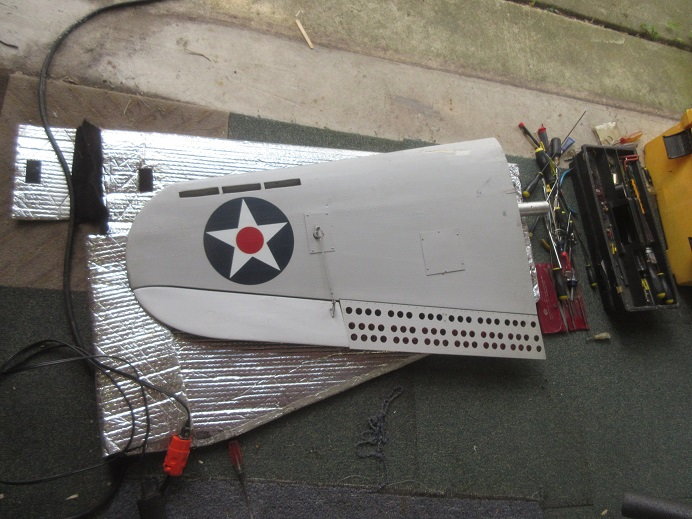
With the flaps down, they also got damaged.
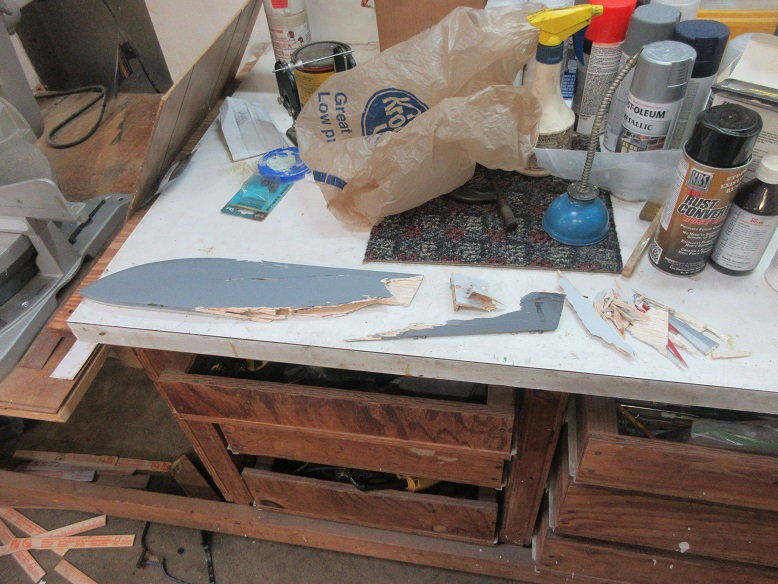
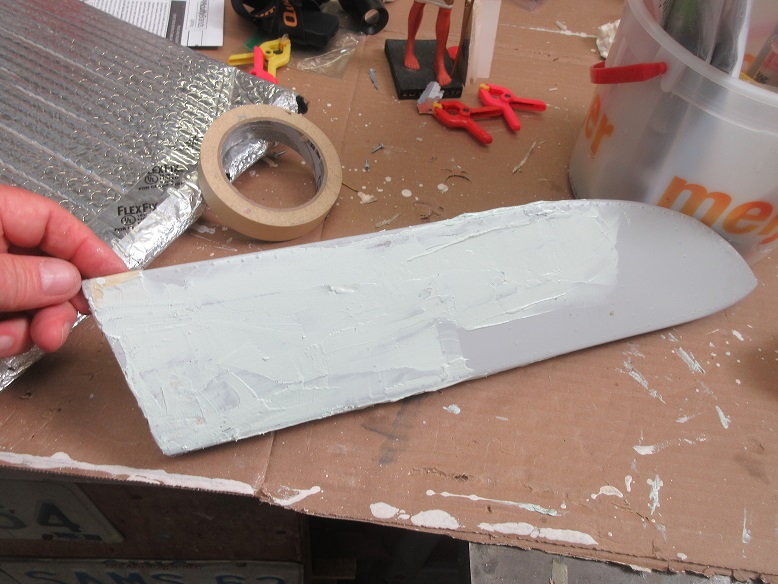
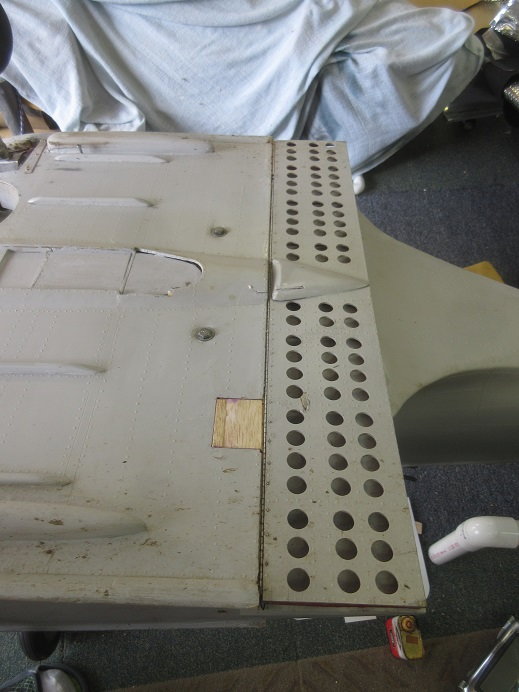
One hole was covered.
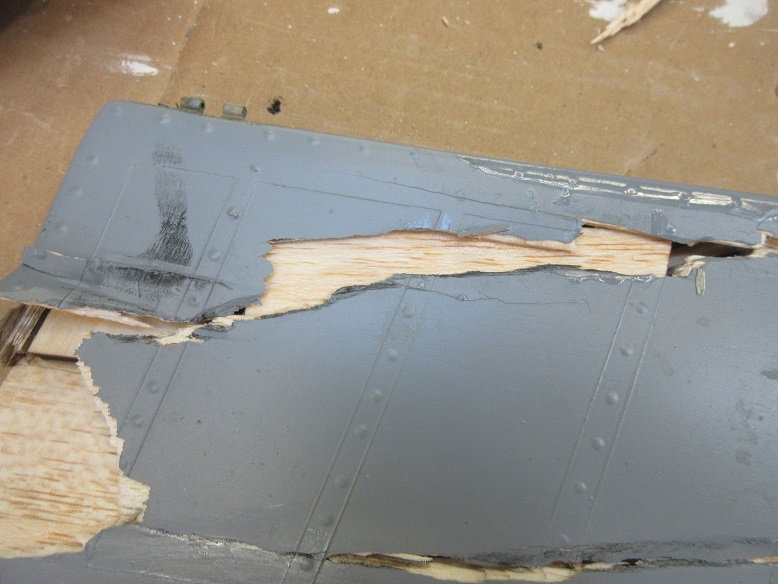
For ease of 'measuring', I cut the 'replacement' piece of balsa, first, and then cut the hole to match the new piece of balsa.
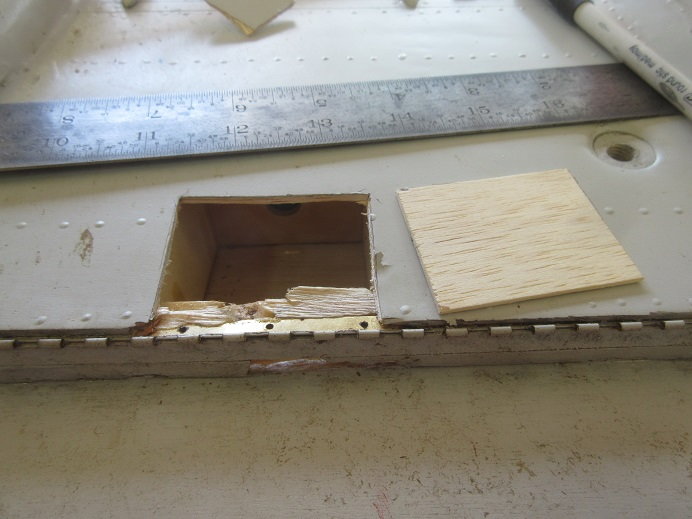
A 'sub' piece of balsa was CA'ed to support the new 'sheeting'.
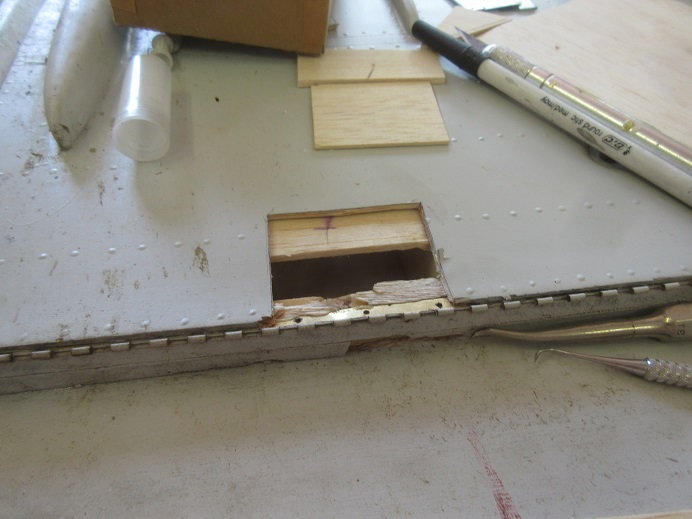
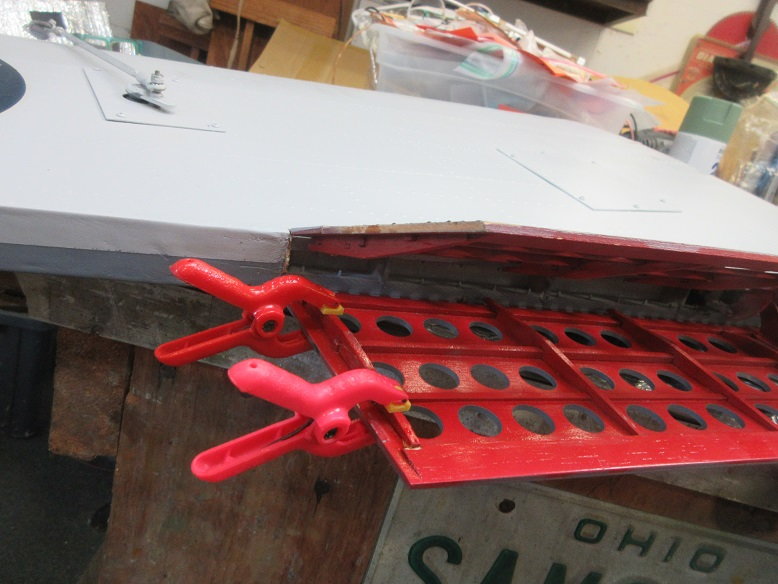
The metal piano hinge, also, pulled out so I CA'ed it.
Some of the supporting 'ribs' were lost so I had to make 4 new ones. Those were epoxied 'in place'.
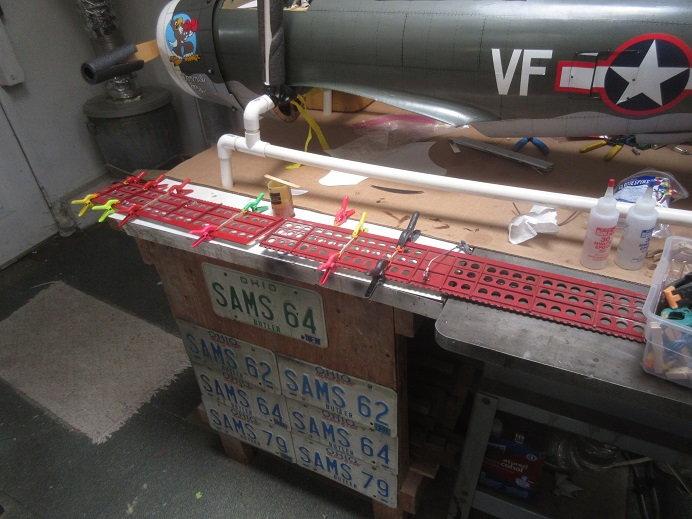
One aileron hinge got 'pulled out'; again, some epoxy fixed it quickly.

Everything is 'modular'; much easier to fix 'things' when they can be removed from the plane!
Some CA got into some of the piano hinge holes so I had to 'drill' it out after sharping one end of a piece of wire.
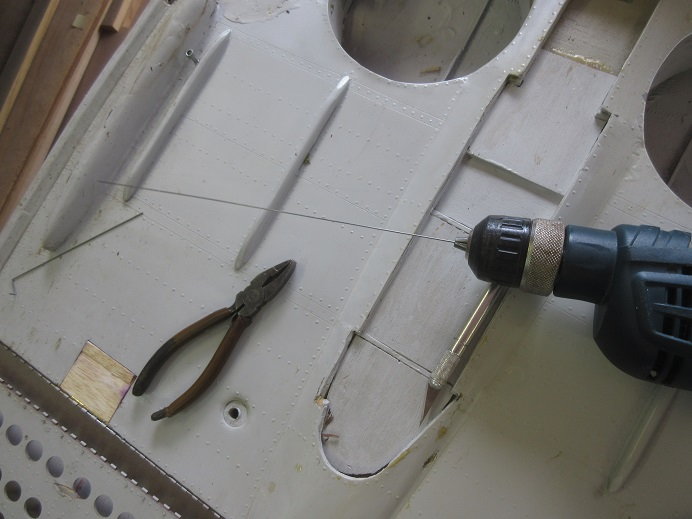
All better!
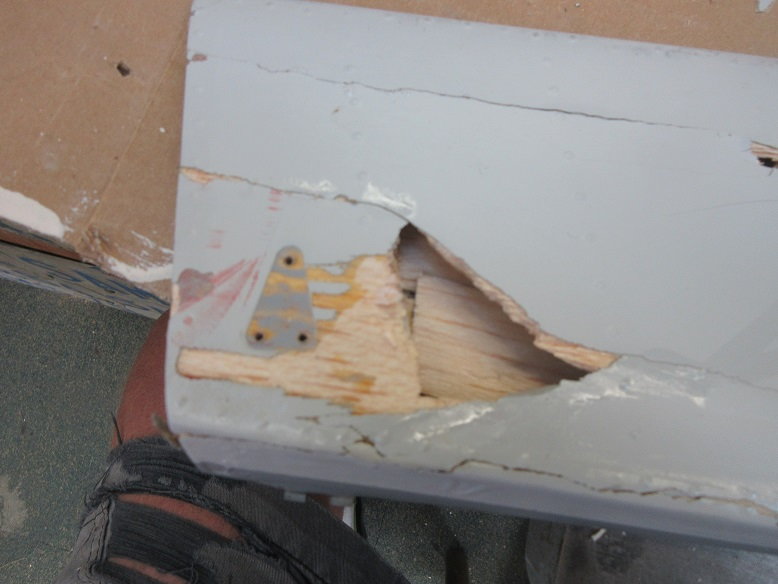
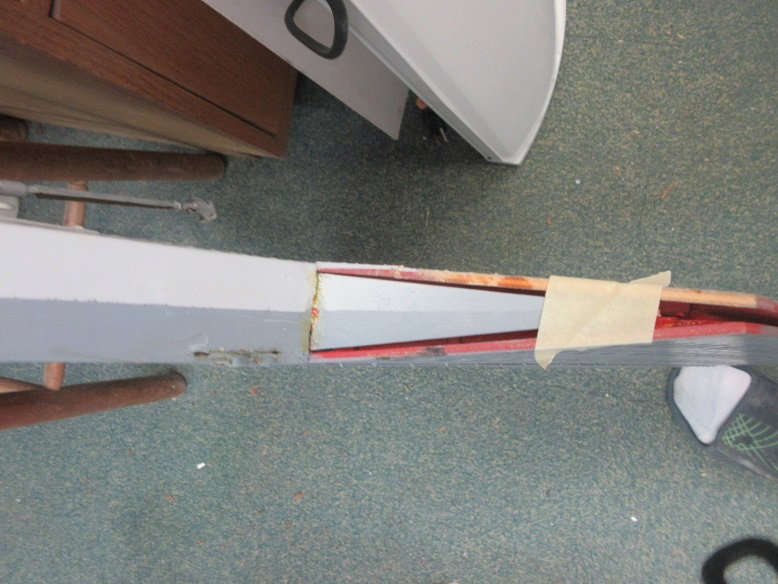
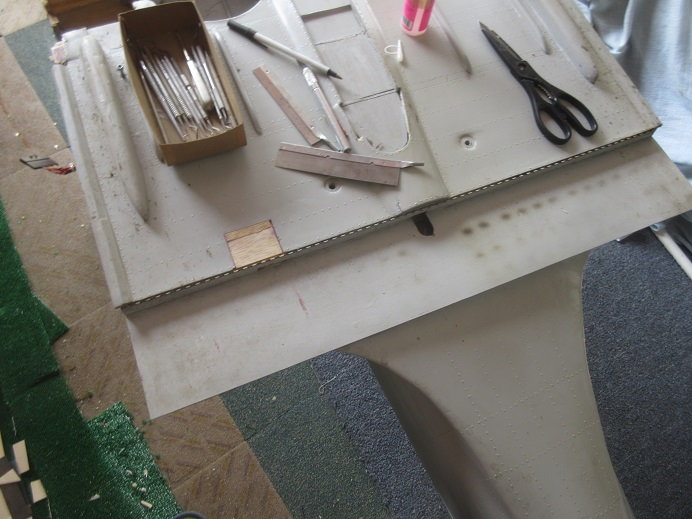
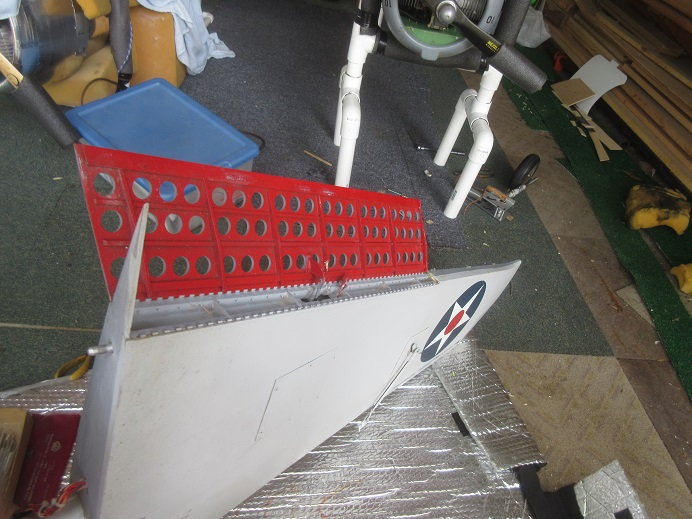
When the gear 'ripped out', it damaged the outer wing rib. Some more epoxy plus a piece of ply was inserted inside the rib for extra support.
Always good to collect every piece after a 'wreck'!

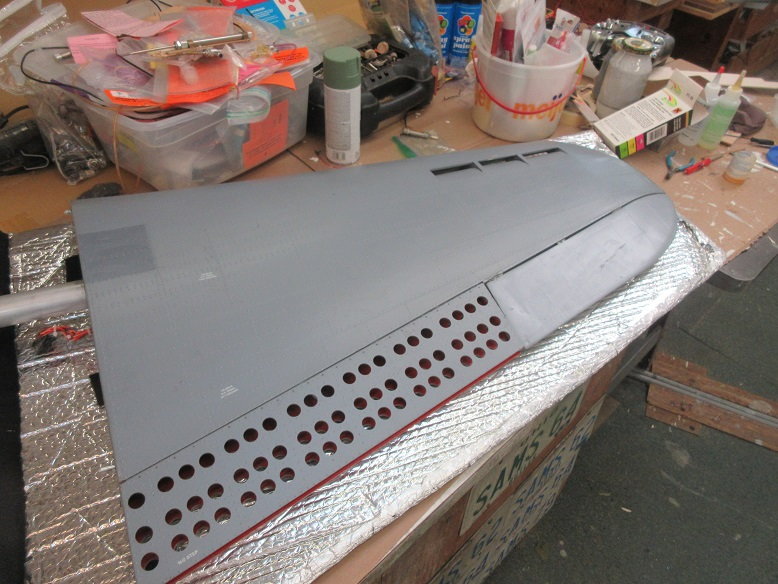
Wing complete.
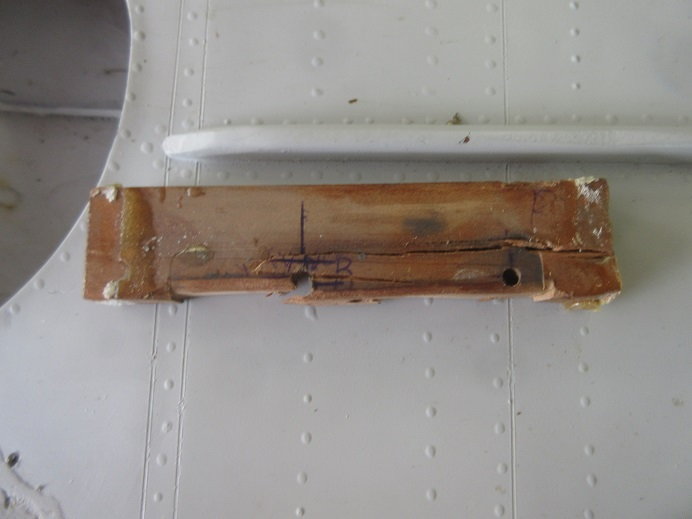
The gear (Darrell's) didn't get damaged but the wood mounts did.
Used a 'heat gun' to make it easier to remove the damaged mounts.

Tomorrow, will work on making new mounts.
Lost the top hatch to the TF P-47. Got the templates made.

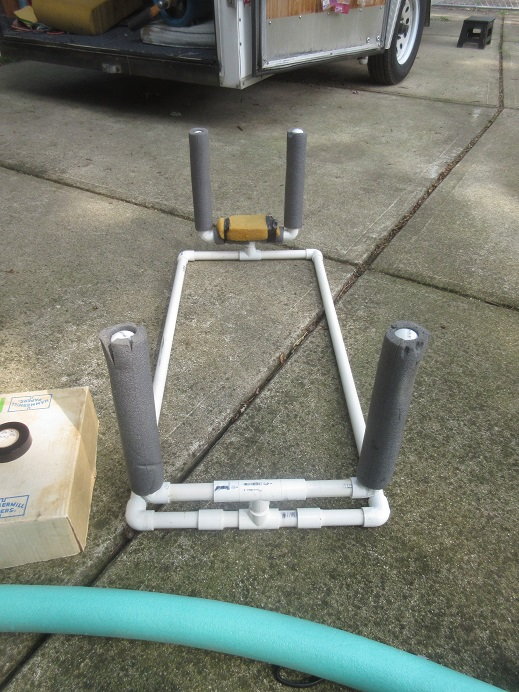
Had to fixed a damaged 'plane stand' with new PVC pipe.
At my last flyin, I ripped out a gear after 13 seasons of no 'problems', at least, by me!
I always land in 'front of me' but I tried landing at the beginning of the 1000' runway and misjudged the speed and the 'landing angle'.
The 'landing angle' wasn't too bad as the plane didn't bounce but I heard the gear oleos 'working'.
About 30' later, one gear was on the 'ground'.
With the flaps down, they also got damaged.
One hole was covered.
For ease of 'measuring', I cut the 'replacement' piece of balsa, first, and then cut the hole to match the new piece of balsa.
A 'sub' piece of balsa was CA'ed to support the new 'sheeting'.
The metal piano hinge, also, pulled out so I CA'ed it.
Some of the supporting 'ribs' were lost so I had to make 4 new ones. Those were epoxied 'in place'.
One aileron hinge got 'pulled out'; again, some epoxy fixed it quickly.
Everything is 'modular'; much easier to fix 'things' when they can be removed from the plane!
Some CA got into some of the piano hinge holes so I had to 'drill' it out after sharping one end of a piece of wire.
All better!
When the gear 'ripped out', it damaged the outer wing rib. Some more epoxy plus a piece of ply was inserted inside the rib for extra support.
Always good to collect every piece after a 'wreck'!
Wing complete.
The gear (Darrell's) didn't get damaged but the wood mounts did.
Used a 'heat gun' to make it easier to remove the damaged mounts.
Tomorrow, will work on making new mounts.
Lost the top hatch to the TF P-47. Got the templates made.
Had to fixed a damaged 'plane stand' with new PVC pipe.