


ESM F4U Build
 05-15-2012, 03:10 PM
#101

My Feedback: (5)
Join Date: May 2010
Location: Klamath Falls,
OR
Posts: 56
Likes: 0
Received 0 Likes
on
0 Posts
The one that comes with the kit is a F4U-1A canopy. A -1D canopy is very similar, but the fore and aft braces at the 1 o'clock and 11 o'clock positions are omitted on the rear bubble. If those braces aren't molded in, one could justomitt painting them. As a suggestion for your canopy, the thicker the material, the better.
 05-15-2012, 08:34 PM
#102

My Feedback: (10)
Join Date: Nov 2004
Location: Bloomington,
IL
Posts: 566
Likes: 0
Received 0 Likes
on
0 Posts
I will build another mold and omit the braces... as far as the plastic goes, I use high quality .040 PETG, which is far superior to the kit plastic. It produces crisp, crystal-clear canopies that are tougher than stock. It isn't break-proof, however. I use a hot knife for trimming, and it works great.
05-16-2012, 01:13 PM
#104
My Feedback: (1)
I am pleased that you are making a canopy that can be used with many versions of the Corsair. I built a Top Flight GS Corsair and modified it to a F4U-4 model. Because Top Flight had the braces on thier canopy, I had to purchase another canopy. I do not understand why they added the frames considering it is so easy to add them if needed.
 05-17-2012, 06:04 PM
#106
My Feedback: (32)
Hey Stoneke , nice work, So walk us threw what you did for your weathering,And saito 170r or the 200? what was the weight and how much weight in the nose. I'm asking cause have the same set up with serria's retract.
Any one have a crashed esm/kmp corsair that is totaled except for the oil coolers . I have the one with the back wards oil cooler and was thinking grind it out and glue one from a crashed one ,if able to get one.
Thanks
Joe
Any one have a crashed esm/kmp corsair that is totaled except for the oil coolers . I have the one with the back wards oil cooler and was thinking grind it out and glue one from a crashed one ,if able to get one.
Thanks
Joe
05-18-2012, 05:07 AM
#108
My Feedback: (5)
Join Date: May 2010
Location: Klamath Falls,
OR
Posts: 56
Likes: 0
Received 0 Likes
on
0 Posts
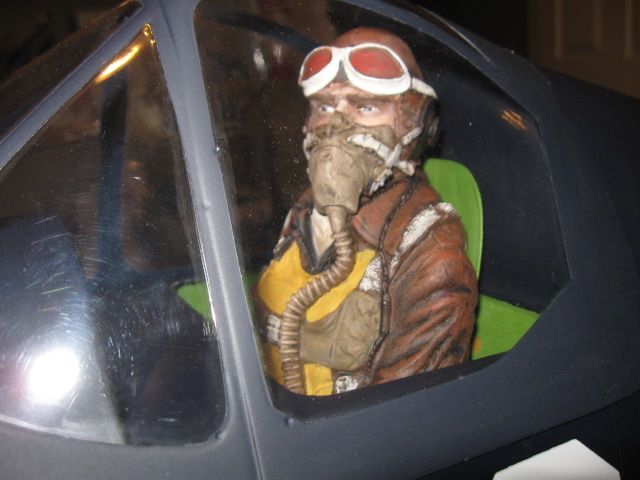
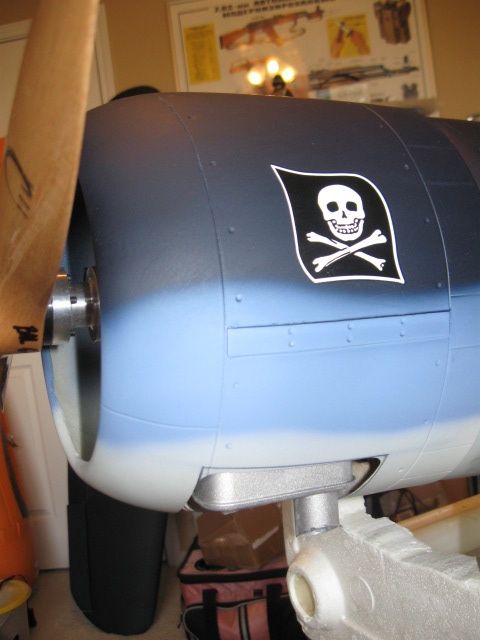
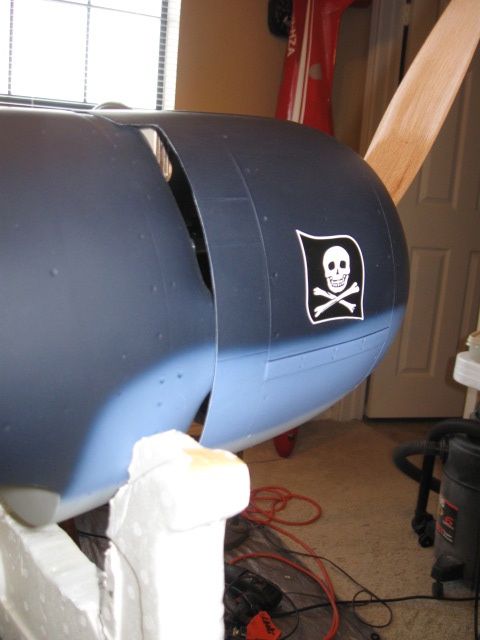
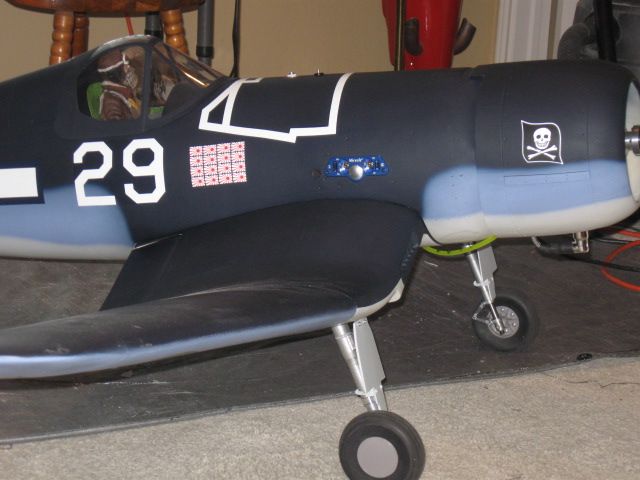
Weathering on wing surfaceswas done with a damp cloth srayed with a dilute off-white latex. Thecloth was thenstroked in the direction of the streaking. The fuse was misted with an air gun with the same paint and then I'm in the process of rubbing this down with a folded burlap pad that helps to blend and burnish the surface. Oil stains are subtle and were air brushed with a dilute black mixture. The engine is a 200 Saito and final weight is not yet known - though likely 18+ pounds. It is nowclose to balance at 125-127 mm cog and will likely balance without additionalnose weight. The glow driver system is yet to be installed and will aid in balance by the install location. Seirra retracts are also used. Small round faucet mesh strainer inserts wereglued into the wingoil cooler area.The pilot turned out to be a good likeness of Ike Kepford when he wore a moustache.
05-20-2012, 07:04 PM
#110
My Feedback: (5)
Join Date: May 2010
Location: Klamath Falls,
OR
Posts: 56
Likes: 0
Received 0 Likes
on
0 Posts
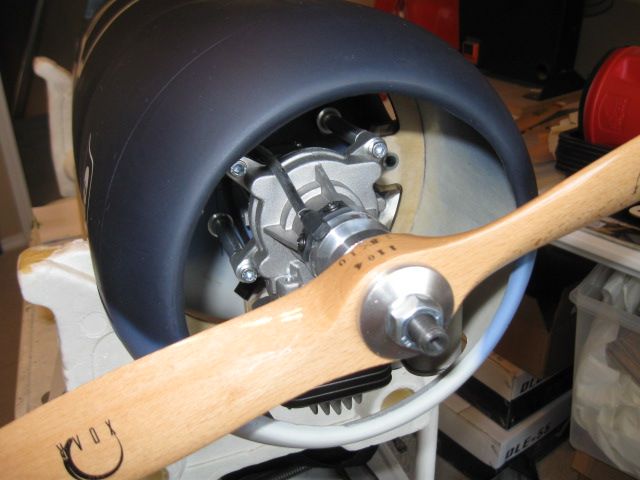
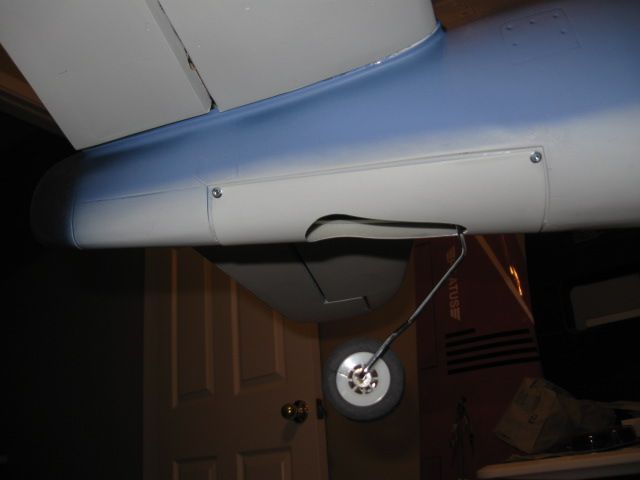
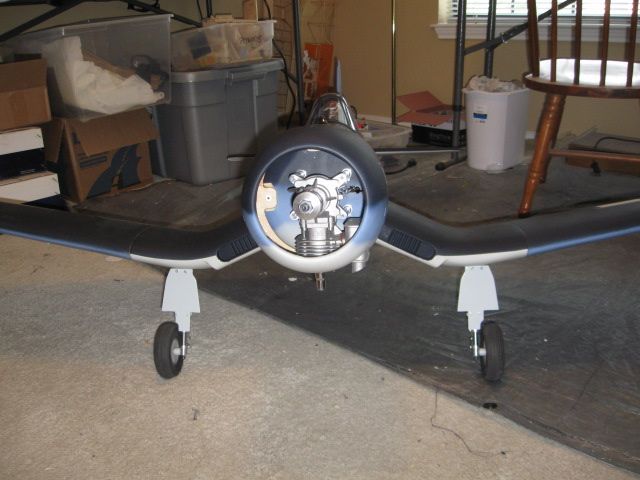
The prop is a static scale 24"prop from Aeroteck in Wisc. The plane hasn't been top coated (fuel proofed) until the weathering is all rubbed out. I will use Nelson"s flat mixed fuel proofing. The coverig wrinkles are yet to be ironed, so that is why you can see the ripples. The tail gear is fixed, but is a modified stock install. I may look to a Robart retract (plastic) after some flight experience to seewhat stresses aredirected tail wise.
06-20-2012, 06:14 PM
#111
My Feedback: (49)
Seems to still be some interest in this one.
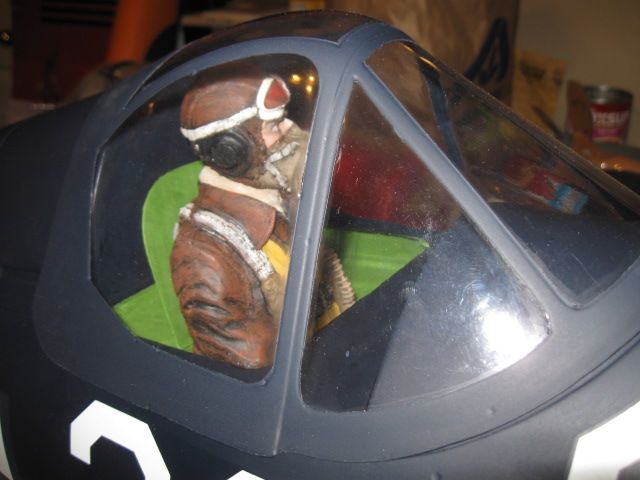
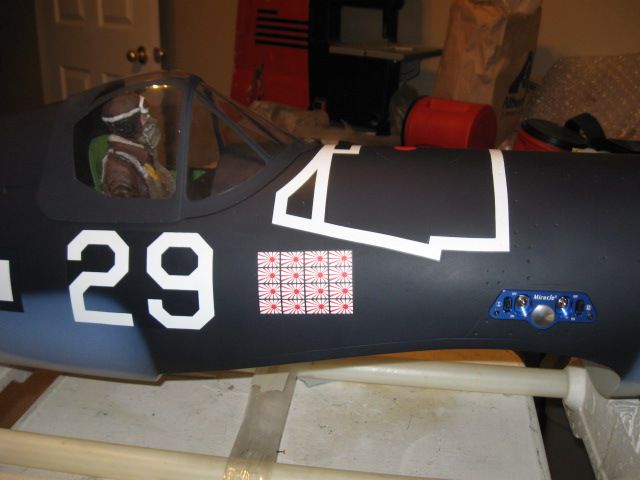
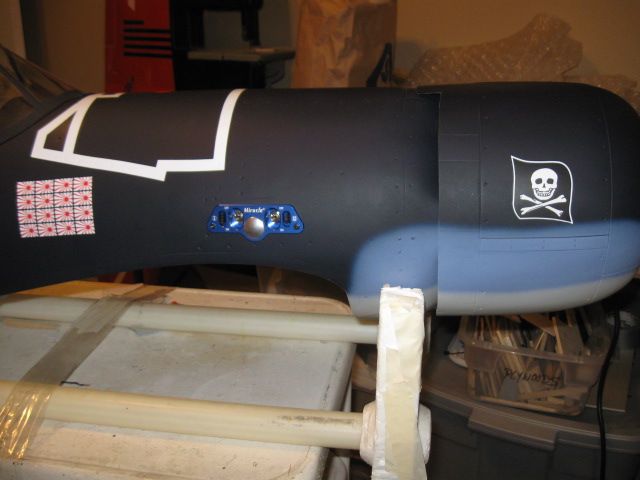
So, always wanted a Crash Corsair. Got one for my Christmas present to myself, but got started about 5 months later. DLE-30 and Sierra retracts. Got the wing pretty well done and turning now to the fuse. Nothing really different here, in fact, a lot less detailing than most F4U lovers. Don't have the wing bolts in yet, so flipped the images over. I like the ESM F4U over most other F4U ARF's as the flaps appear more realistic. In fact, it's a pretty nicely done scale rendition of the Corsair. Should go well with the DEL-30 as another at the field has the ESM Dauntless with the DLE-30 and goes like stink. And, on retracts, Sierras are the only way to go. Aces of Iron pilot. Yes USAAF, but close enough since I had him ready to go. He's a bit large, but I call him HOSS since he'd be about 6'6' in this plane. I guess we had a few big farm-fed boys flying these.
Well, the images were SUPPOSED to flip over, but didn't work out. You get the idea.
This is a pretty quick assembly job so far. I've done one other ESM model, the PC-21, and really like it. It's electric powered and flies quite nice on 12S.
I'll post a few as it goes on. LBJ
Update 6-26-12
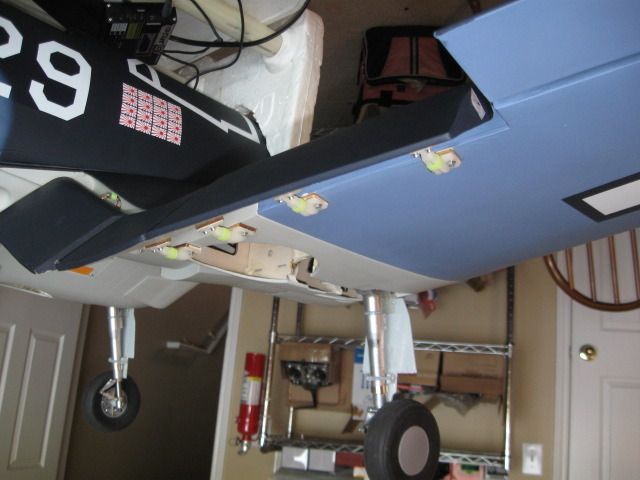
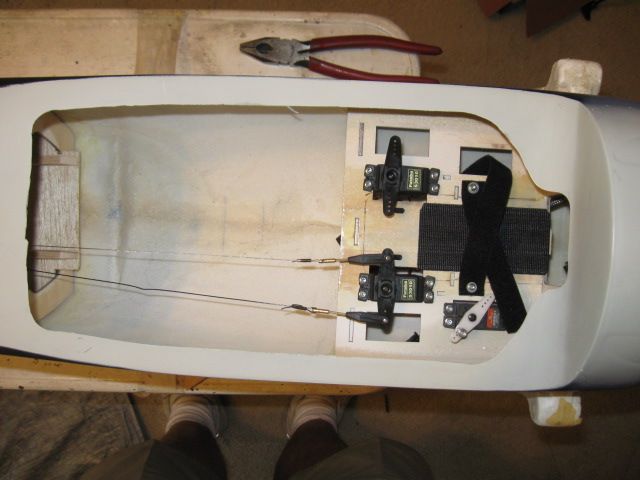
I had a bit of trouble getting the flaps to work without constant buzzing of the servos. They are hi torque 3010's and usually work pretty well for me. But, I decided to go with the 3305's which are heavy duty, hi torque and metal gears. Those did the trick. Might have been the mushy nylon gears on the 3010's not holding in place. Not sure, but the 3305's work buzz free in all positions. I'm measuring about 80mm throw at full deflection on the inside flap. That's a fairly steep setting. Not sure of the degree throw that is, but it's impressive looking. Pics below do not reflect those throws. Also, got the Sierra's hooked up and working. As usual with Sierra's they work fine, last a long time, won't rust, bust, or gather dust.

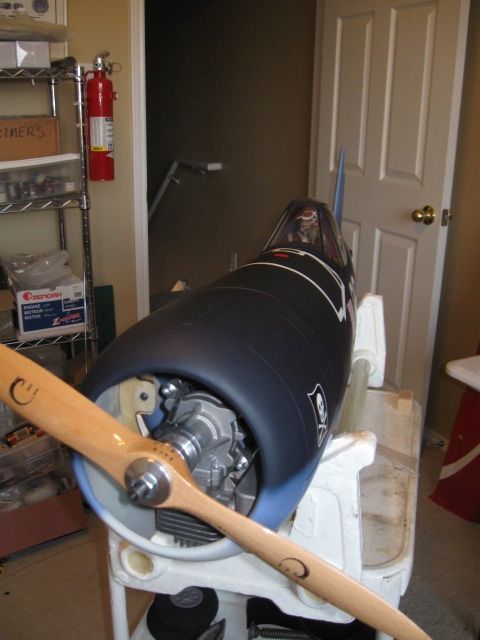
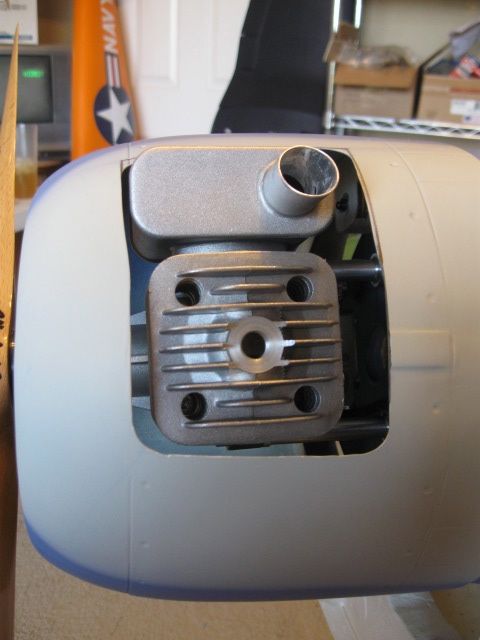
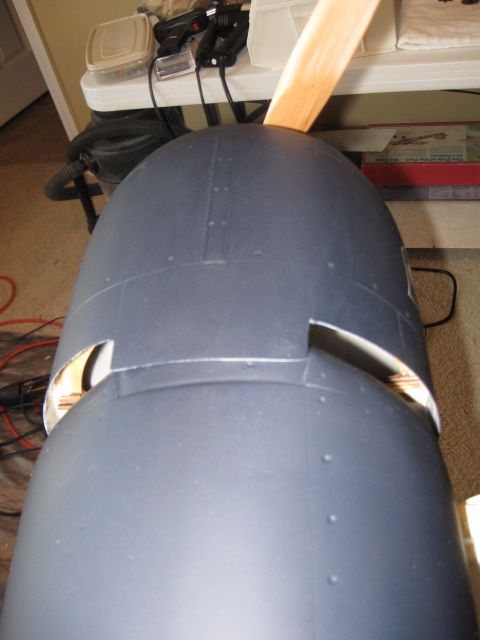
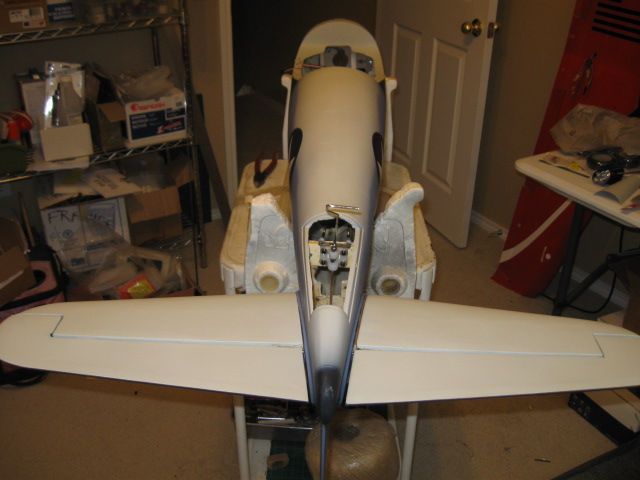
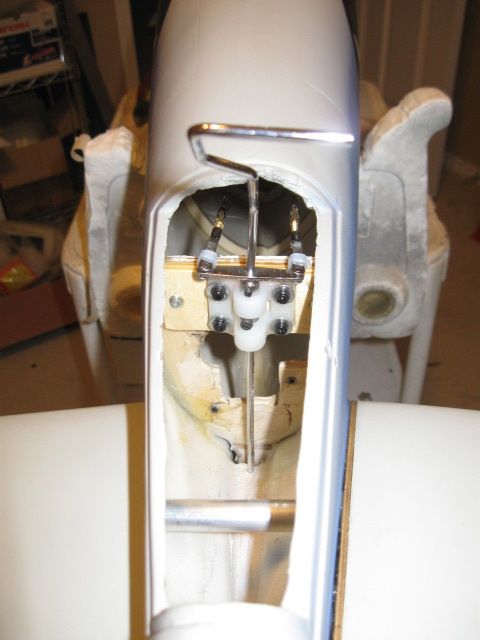
Got some more done today. Hung the engine and installed the cowl. Took a fair amount of time to do this as I had to move the engine up 1/4" from the first try based on the factory marks being too low. Used the DLE muffler. Works OK. Takes quite a cut out of the cowl, but it needs what it needs. Overall, pretty happy so far. Spark will have to go inside somewhere.
So, always wanted a Crash Corsair. Got one for my Christmas present to myself, but got started about 5 months later. DLE-30 and Sierra retracts. Got the wing pretty well done and turning now to the fuse. Nothing really different here, in fact, a lot less detailing than most F4U lovers. Don't have the wing bolts in yet, so flipped the images over. I like the ESM F4U over most other F4U ARF's as the flaps appear more realistic. In fact, it's a pretty nicely done scale rendition of the Corsair. Should go well with the DEL-30 as another at the field has the ESM Dauntless with the DLE-30 and goes like stink. And, on retracts, Sierras are the only way to go. Aces of Iron pilot. Yes USAAF, but close enough since I had him ready to go. He's a bit large, but I call him HOSS since he'd be about 6'6' in this plane. I guess we had a few big farm-fed boys flying these.
Well, the images were SUPPOSED to flip over, but didn't work out. You get the idea.
This is a pretty quick assembly job so far. I've done one other ESM model, the PC-21, and really like it. It's electric powered and flies quite nice on 12S.
I'll post a few as it goes on. LBJ
Update 6-26-12
I had a bit of trouble getting the flaps to work without constant buzzing of the servos. They are hi torque 3010's and usually work pretty well for me. But, I decided to go with the 3305's which are heavy duty, hi torque and metal gears. Those did the trick. Might have been the mushy nylon gears on the 3010's not holding in place. Not sure, but the 3305's work buzz free in all positions. I'm measuring about 80mm throw at full deflection on the inside flap. That's a fairly steep setting. Not sure of the degree throw that is, but it's impressive looking. Pics below do not reflect those throws. Also, got the Sierra's hooked up and working. As usual with Sierra's they work fine, last a long time, won't rust, bust, or gather dust.
Got some more done today. Hung the engine and installed the cowl. Took a fair amount of time to do this as I had to move the engine up 1/4" from the first try based on the factory marks being too low. Used the DLE muffler. Works OK. Takes quite a cut out of the cowl, but it needs what it needs. Overall, pretty happy so far. Spark will have to go inside somewhere.
06-30-2012, 11:38 AM
#112
My Feedback: (49)
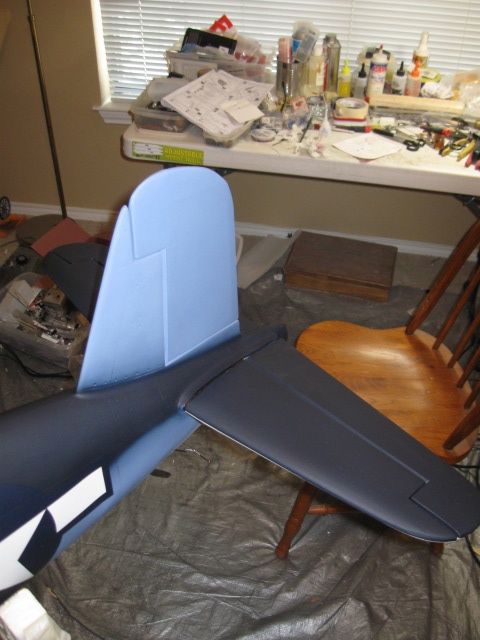
Got the tail feathers done today. Looks good now, but had a delay in making the horizontals fit the fuselage. One side was WAY off the money. Had to slice and dice to make her fit and used that template piece to put back the material I took off one side. It all went together. 30 minute epoxy almost completely got fired off before I could join all the horizontals in. Man, that was close. 45 minute next time, next model, I guess. If I keep pressing, I might get this done in time for our club 4th of July meet. Be cool to do that in 105 degree F heat. Not too much left to do - install the wing, finalize the fuel system, install the Miracle power switch cluster, install retract valve and lines, CG, etc. Might make it.

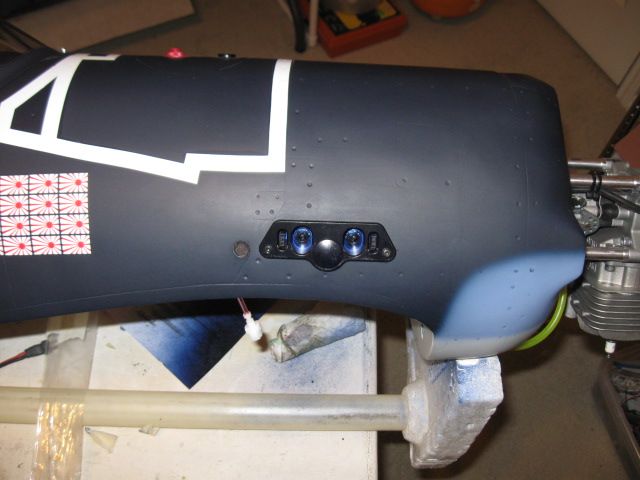
Miracle power switch and fuel dot installed. Elevator rigging done. I changed the elevator servo from a Futaba 3010 to a HiTek 645 metal gear. I've had great luck with the 3010's, but this one may need some extra uuumph! Tailwheel finished. Batteries installed. It's getting there. Power panel may need a coat of Navy blue before I'm all done messing with her. I was hoping for a darker blue, but that's what it came as. Fixed in place tailwheel kind of sucks, but it's going to work fine. The 50cc version would be the one to go all out with, lots more room. I'm about done today. Whew. But beats being in the 103 degree F heat all day at the flying field.
Miracle power switch and fuel dot installed. Elevator rigging done. I changed the elevator servo from a Futaba 3010 to a HiTek 645 metal gear. I've had great luck with the 3010's, but this one may need some extra uuumph! Tailwheel finished. Batteries installed. It's getting there. Power panel may need a coat of Navy blue before I'm all done messing with her. I was hoping for a darker blue, but that's what it came as. Fixed in place tailwheel kind of sucks, but it's going to work fine. The 50cc version would be the one to go all out with, lots more room. I'm about done today. Whew. But beats being in the 103 degree F heat all day at the flying field.
07-01-2012, 03:54 PM
#113
My Feedback: (49)
On the gear today. Put in 9 hours and am done for today. Whew. Still needs the CG finalized. Looks like more than 1 pound lead and perhaps 2 pounds. Inside of cowl needs painting, retracts need minor adjusting on up/down pressure release, other smaller items.
Monday July 2. Got the plane balanced out at the factory CG setting of 130mm behind the LE. Or, roughly 5 inches. Weighs in at 18 lbs even with 2 lb lead in the nose. I use 1 and 2 lb diver's weights and they are pretty handy to have around. I am to the stage of flying on the 4th, possibly. Gotta run it on the stand at the field and get her setup for idle and best new engine RPM.

Monday July 2. Got the plane balanced out at the factory CG setting of 130mm behind the LE. Or, roughly 5 inches. Weighs in at 18 lbs even with 2 lb lead in the nose. I use 1 and 2 lb diver's weights and they are pretty handy to have around. I am to the stage of flying on the 4th, possibly. Gotta run it on the stand at the field and get her setup for idle and best new engine RPM.
07-04-2012, 10:37 AM
#114
My Feedback: (49)
Flew today at the club July 4th celebration. Was a short flight. Takeoff was normal and I let it run long before adding back pressure. Nice lift off but on the climb out it became a bit nose heavy. Ed Couch was spotting for me and added some nose up trim which helped. Next, it wanted to roll to the left pretty heavy, so fixed that with trim. Flew another circuit and decided to keep the gear down and landed without flaps. Smooth wheels-on landing.
I may need to add baffles to the cowl to keep the temps down. On first runs, it ran 230 to 245 degrees F. Of course, it's a new DLE-30 and the run was static, but forgot to temp it after the flight.
I haven't noted any other anomalies so far and all parts looked like they stayed on the model. I did add yet another 5 ounces on the cowl before flight for safe measure on CG. I will fly it with that weight with the gear up and then decide what it needs for good. Plane seemed to not notice any additional weights. That's 2 lb 5 ounces total dead weight.
Had some stomach problems after lunch, so came home without further flights I like the fact that the fuselage fits in the back seat of my Chevy PU and the wing in the front seat. May have some pics to follow as there were several Photogs there. Not sure what may turn up but will post what they have.
Thurs 5th July.
Man, just working on my F4U and discovered something shocking. The Elevator servo arm retaining screw had fallen out of the servo during the flight. Wow, if that arm had come off... THE END. So, even though I know it was on there and tight before flight, I put it back in and EPOXIED it! hahaha. Cheaper to replace a metal gear servo than a $$$ONE LARGE$$$$ Corsair! I hope that was just a strange occurrence since it has never happened in the 27 years I'be been R/C'ing. I've seems guys just forget to install the screws, but not fall out. Glad I only flew her once on July 4th.
07-07-2012, 01:54 PM
#116
My Feedback: (49)
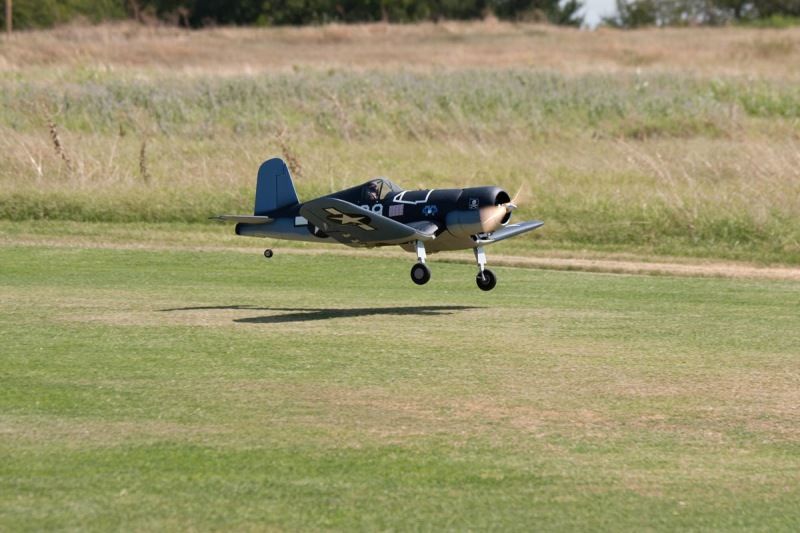
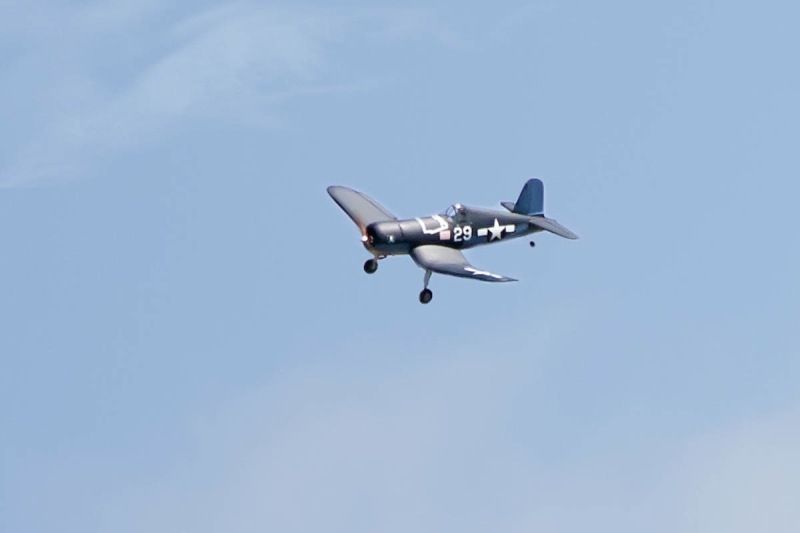
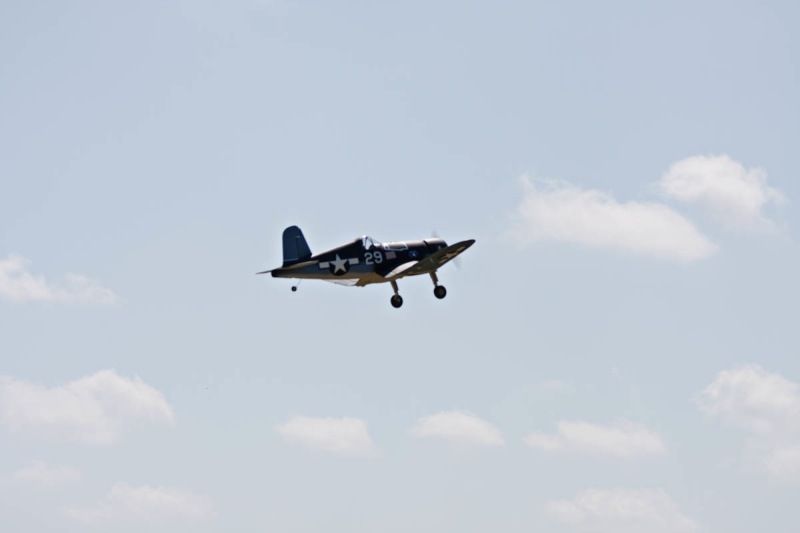
Here's the pics I promised. Short flight didn't give Nancy Abby much time to get some pics, but she grabbed these 2 just barely off the deck and two more on the ground. She's always very good with the pics. Fuel line was hanging out after the flight. Needs a better o-riing in the fuel dot. I painted the fuel/power panel after the flight to a dark blue. Looks a lot less glaringly obvious.
I also flew her today and got the gear up and landed with full flaps. Very nice indeed. I built a baffle system for the engine to keep temps down and air flowing over just the cooling fins - it kept the engine at 205 degrees F inside the cowl and 165 outside the cowl around the spark plug.
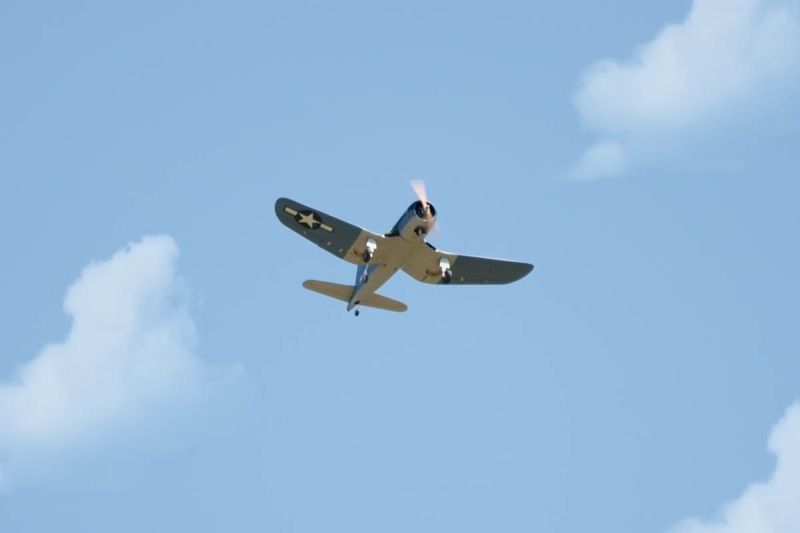
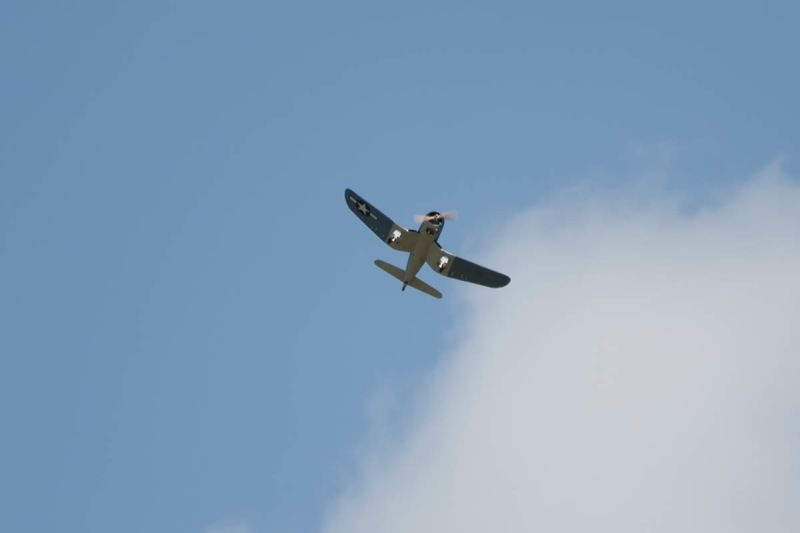
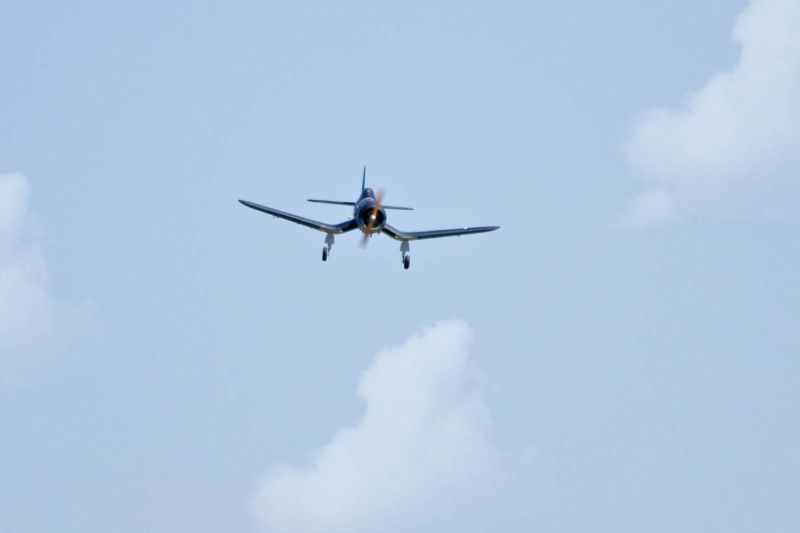
Nancy found some more pics. Glad she was on the ball! I like the last "high" pic coming straight into the camera with the classic gull wings in perfect outline. Pic with flaps full down would have been nicer, but, maybe next big outing.

I also flew her today and got the gear up and landed with full flaps. Very nice indeed. I built a baffle system for the engine to keep temps down and air flowing over just the cooling fins - it kept the engine at 205 degrees F inside the cowl and 165 outside the cowl around the spark plug.
Nancy found some more pics. Glad she was on the ball! I like the last "high" pic coming straight into the camera with the classic gull wings in perfect outline. Pic with flaps full down would have been nicer, but, maybe next big outing.
08-04-2012, 07:56 AM
#118
My Feedback: (10)
Join Date: Nov 2004
Location: Bloomington,
IL
Posts: 566
Likes: 0
Received 0 Likes
on
0 Posts
I have just pulled the first 1D canopy without the braces, and it looks good! Here is a picture... it looks alot better in person, as it is hard to get a good picture of a clear canopy. I am happy and I will be going with the 1D canopy when I build one of these (some day). Bad health has been slowing me down lately, but better days might lie ahead.
08-05-2012, 10:30 AM
#119
My Feedback: (27)

Join Date: May 2011
Location: Corona, CA
Posts: 160
Likes: 0
Received 0 Likes
on
0 Posts
LBJ... I was a lil curious as to why you had to move the engine from the original position. Did it cause your cowl to sit further forward? I only askied because I stuffed a DLE 55 into my corsair and I had to cut the cowl a bit and modify how the cowl ring fit....
ORIGINAL: LBJ
On the gear today. Put in 9 hours and am done for today. Whew. Still needs the CG finalized. Looks like more than 1 pound lead and perhaps 2 pounds. Inside of cowl needs painting, retracts need minor adjusting on up/down pressure release, other smaller items.
Monday July 2. Got the plane balanced out at the factory CG setting of 130mm behind the LE. Or, roughly 5 inches. Weighs in at 18 lbs even with 2 lb lead in the nose. I use 1 and 2 lb diver's weights and they are pretty handy to have around. I am to the stage of flying on the 4th, possibly. Gotta run it on the stand at the field and get her setup for idle and best new engine RPM.
01-05-2013, 07:08 AM
#122
Member
Join Date: Apr 2010
Location: eaton rapids, MI
Posts: 63
Likes: 0
Received 0 Likes
on
0 Posts
Hey Fella's, I just ordered my ESM 74" F4U Corsair and now I am eagerly awaiting its delivery. I plan on installing my American Made Syssa 30cc Gasser for power , and I have a set of Century Jet 90 degree rotating retracts. I really like the scale'ish flap web idea, and I plan to replicate it in my flap installation. Any way I just wanted to say hi and thank you for all this valeuble information. has anyone witnessed the 30cc Syssa in action?
01-06-2013, 07:30 AM
#125

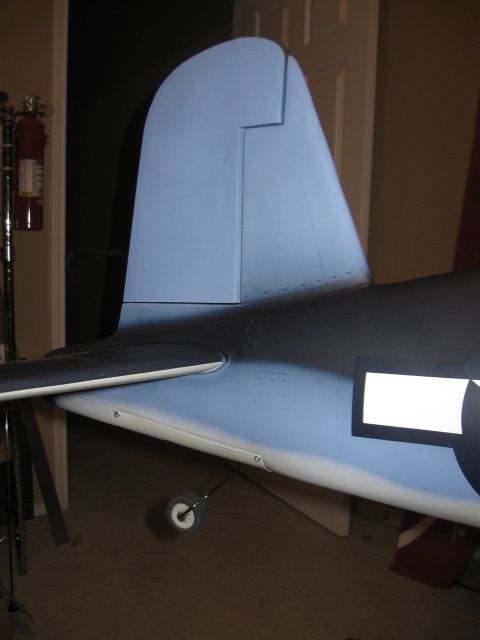
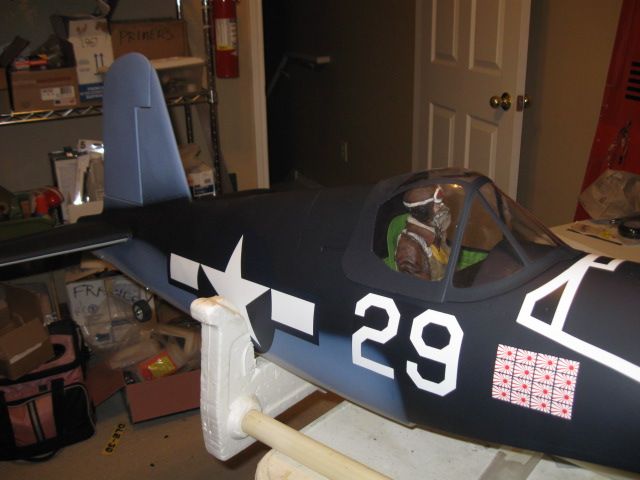
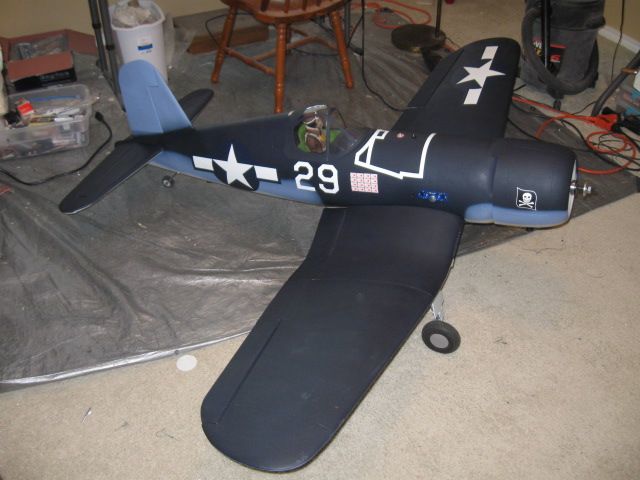
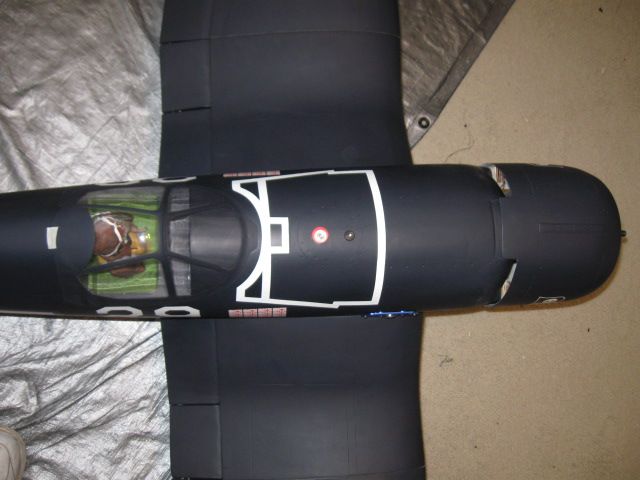
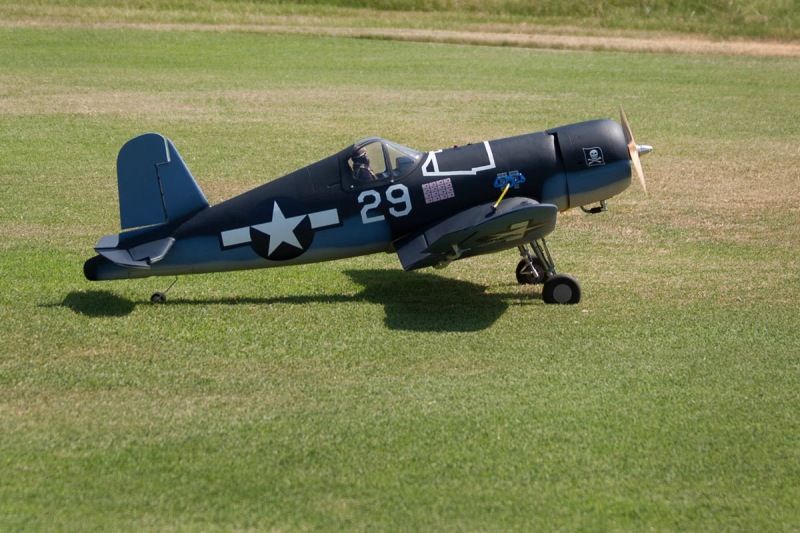
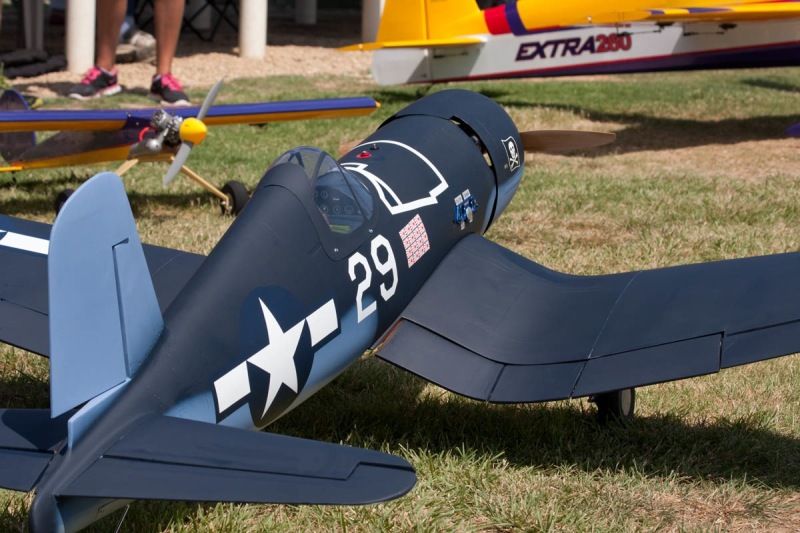
Here are a few shots of my small ESM corsair. Significant mods and refinish.
Also some flight video: http://www.youtube.com/watch?v=vxzGRSGy_jU&sns=em
Sound check video: http://www.youtube.com/watch?v=3dwM6D4N4KQ&sns=em
Sliding canopy video: http://www.youtube.com/watch?v=vxzGRSGy_jU&sns=em
Also some flight video: http://www.youtube.com/watch?v=vxzGRSGy_jU&sns=em
Sound check video: http://www.youtube.com/watch?v=3dwM6D4N4KQ&sns=em
Sliding canopy video: http://www.youtube.com/watch?v=vxzGRSGy_jU&sns=em