Super Sporster 40 sort of
 02-22-2020, 10:08 PM
#1

Thread Starter

I have been working on a Pacific Ace 74" (here) the last two months. It is getting close finish , but I still need some more materials to finish it. Need wheels, control stuff, and covering. And more super glue. Always more super glue. Plus I need order some West Systems epoxy and mini pumps. I so much prefer to fiber glass with West Systems than hobby epoxy. But all of this has to wait till after pay day.
In the meantime I have some wood stock to start a fuse for a Super Sporster. I no longer need the wood stock for the P.A.
So I decided to use the materials on hand to start on my next plane. A close to Super Sporster .40. I say a close to as I'm making it a bit wider so as a 10 ounce tank I have will fit inside of F2.
I have a wing with only minor damage to it already on hand. I think it salvage from some one else's crash. Looks like it might be a stick 40 or some thing close. It is a high wing. I will be replacing the ailerons and converting the wing to a low wing and 4 40 nylon bolt and dowels hold down instead of the rubber band method the wing was built for. I do not have a canopy for it so will just make it an open cockpit with a windshield. I don't think I am up to pulling my own canopy. Maybe I teach myself how at some future time.
I found an old Os .46 in my junk parts that has good compression. I found (after much hunting around town) all of the need screws. The muffler and carb screws. The engine looks kind of poor with all of the baked on crud, but I think it is OK even if not in it's prime. I will put it on a test mount and check it out.
I have limited supplies on hand for the S.S. I am using thinner balsa and laminating pieces together with the grains at 90 degrees in place of 1/4" stock for upper formers. I actually think I prefer this balsa ply to 1/4" stock. Seems stronger and does not chip out when notching for for stringers. Tedious though.
I will also be departing from the original fuse construction some, substituting some materials.
After payday and I can get more material for the P.A. I will set the S.S. aside till I finish the P.A. But at least I will have a head start on the S.S. And then I will resume work on the S.S.
Ken
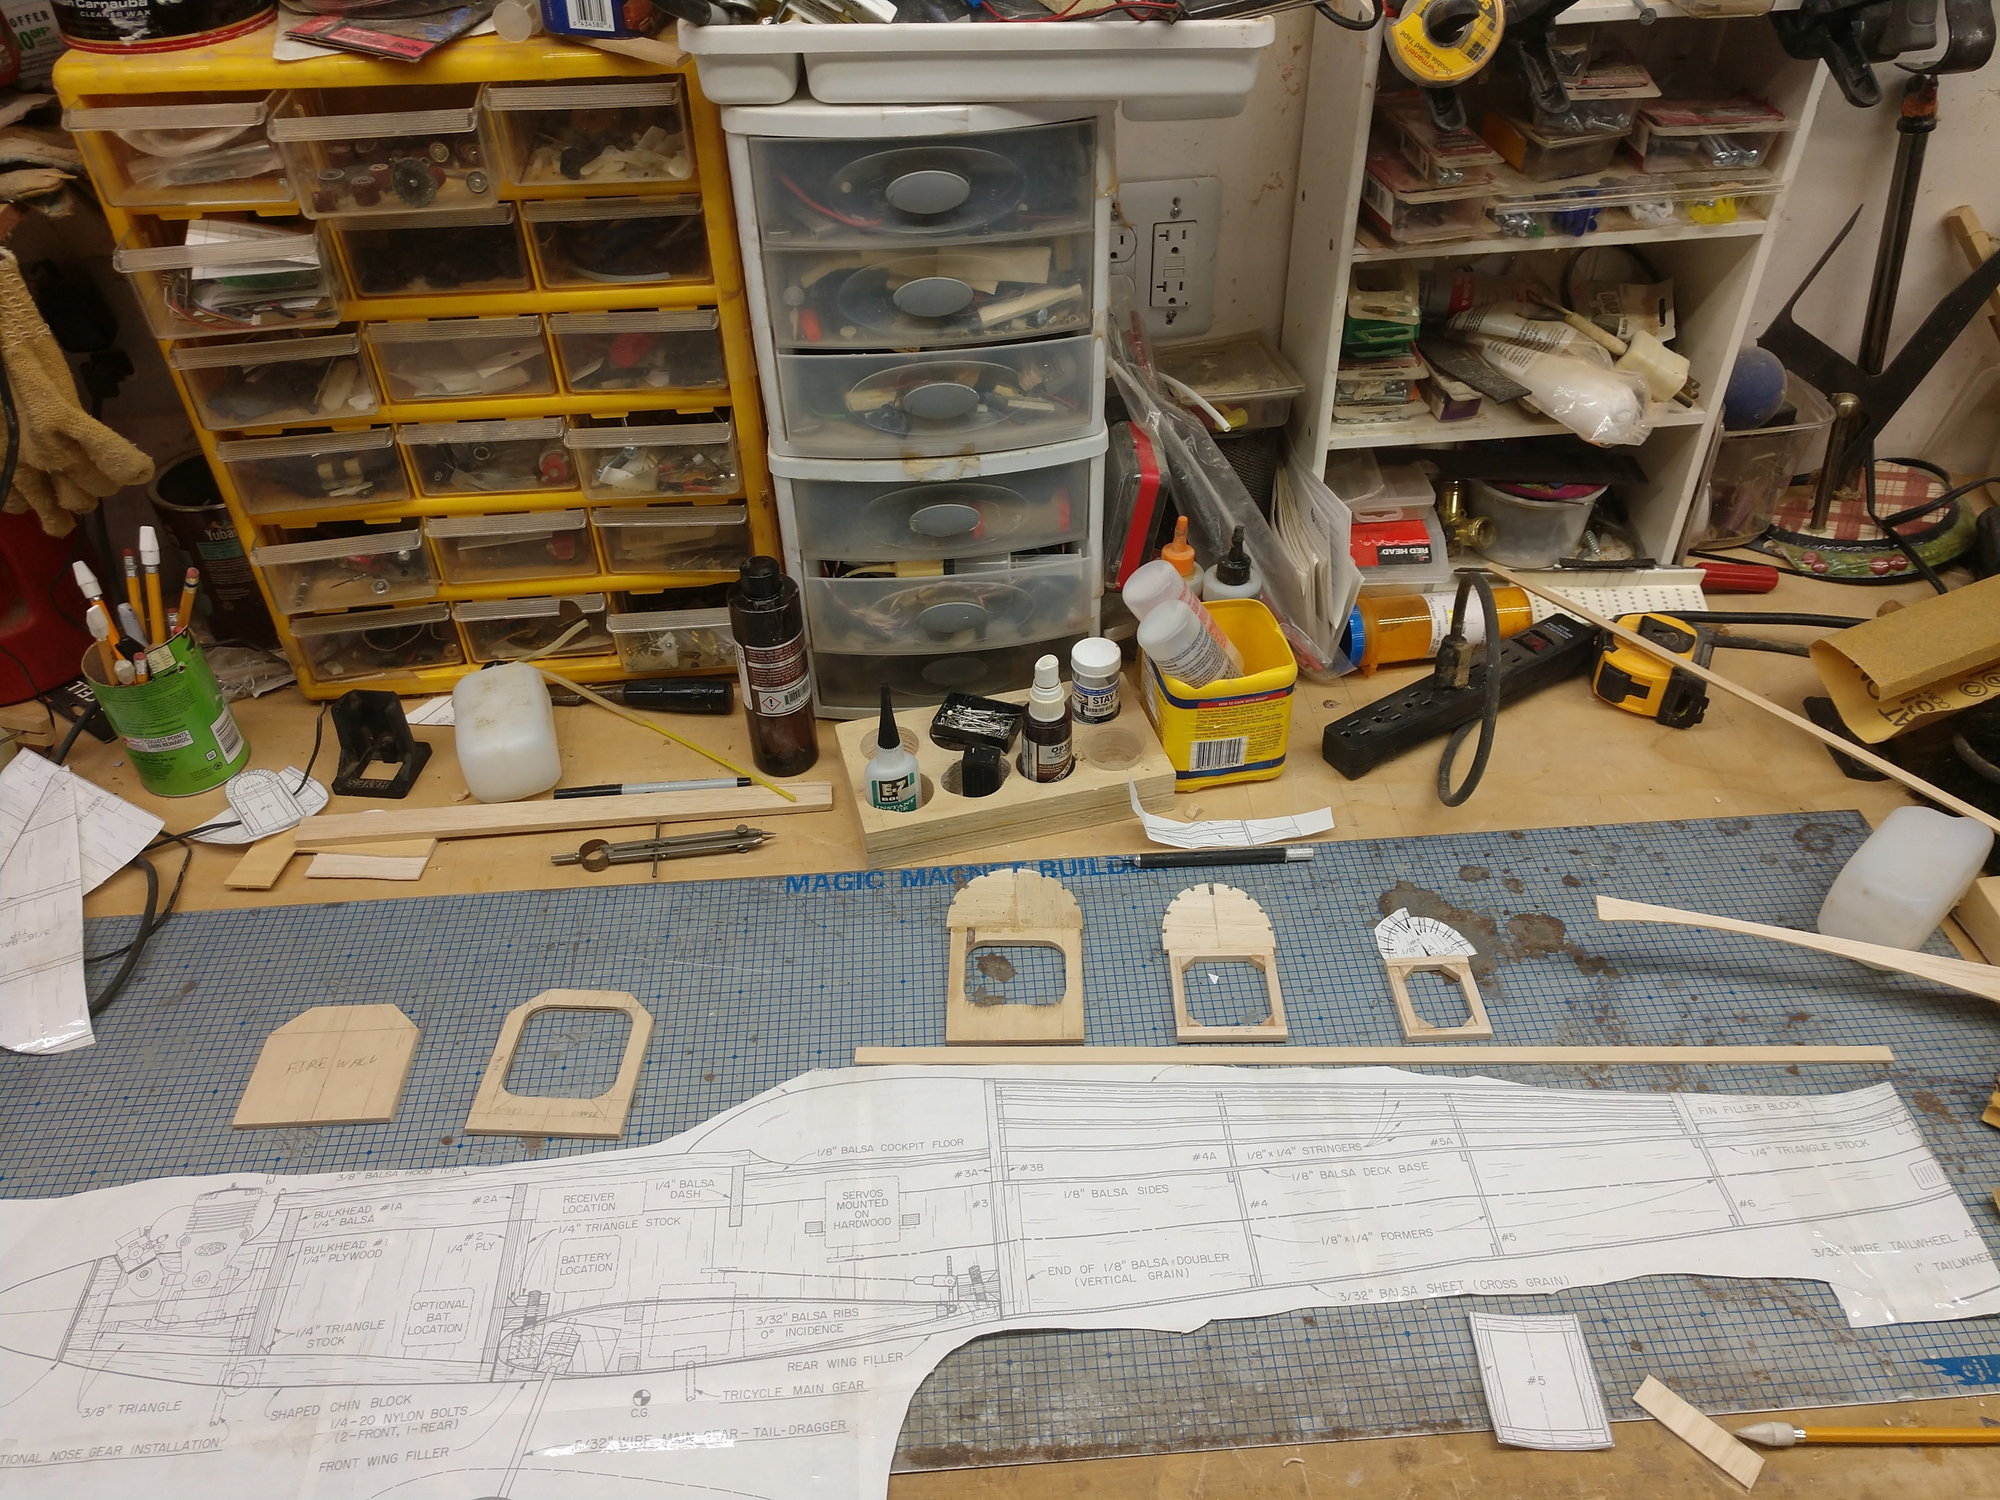
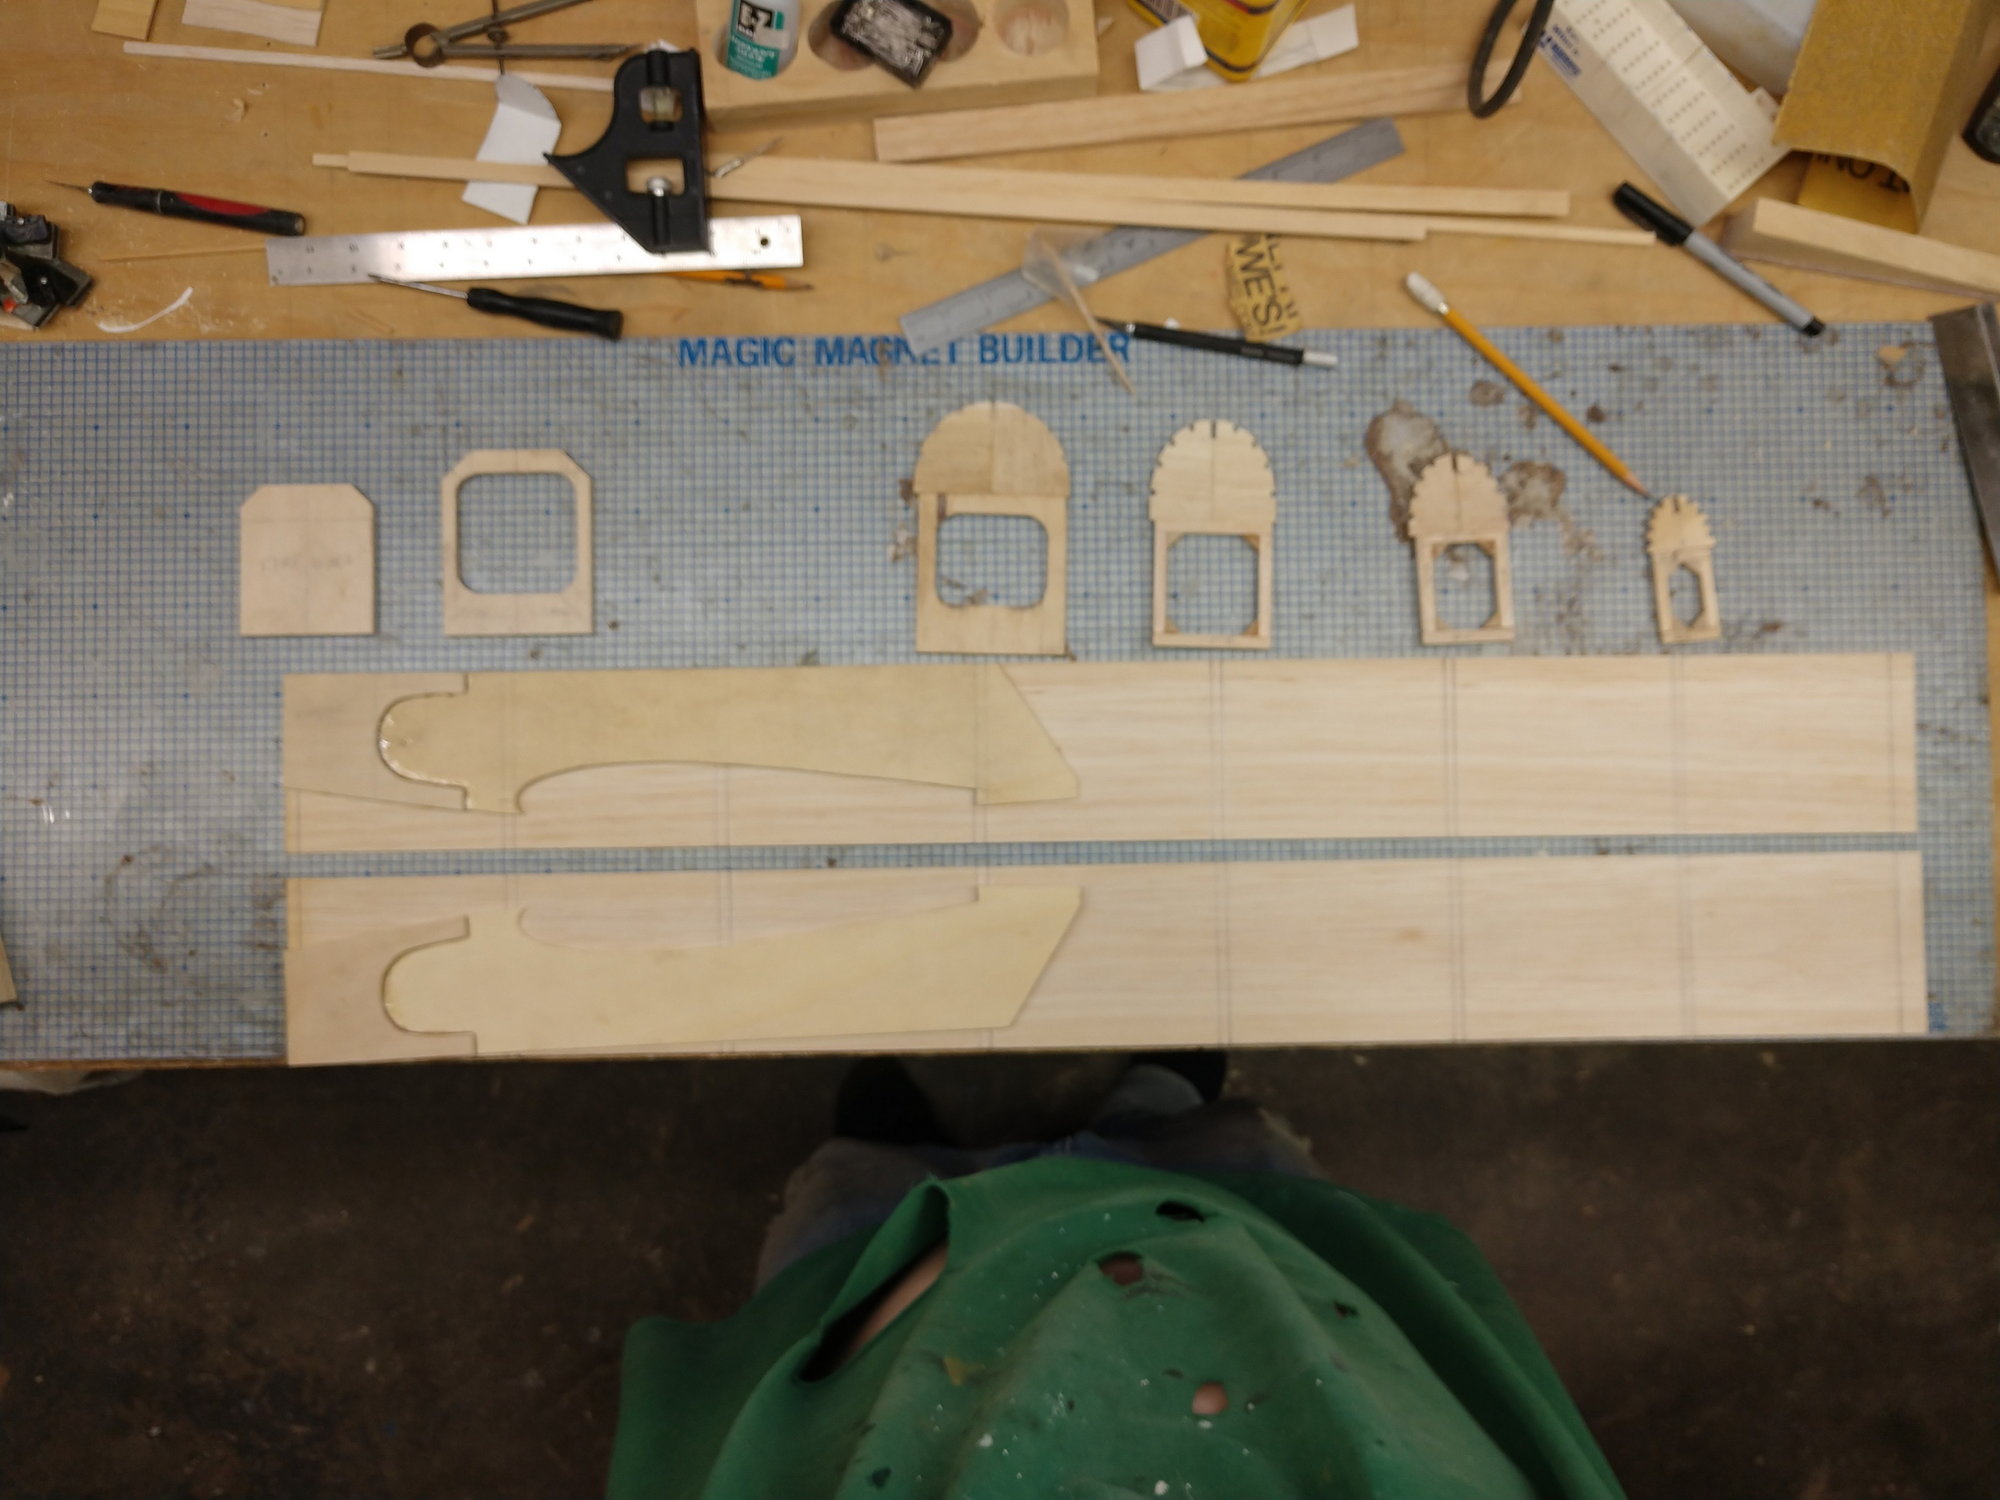
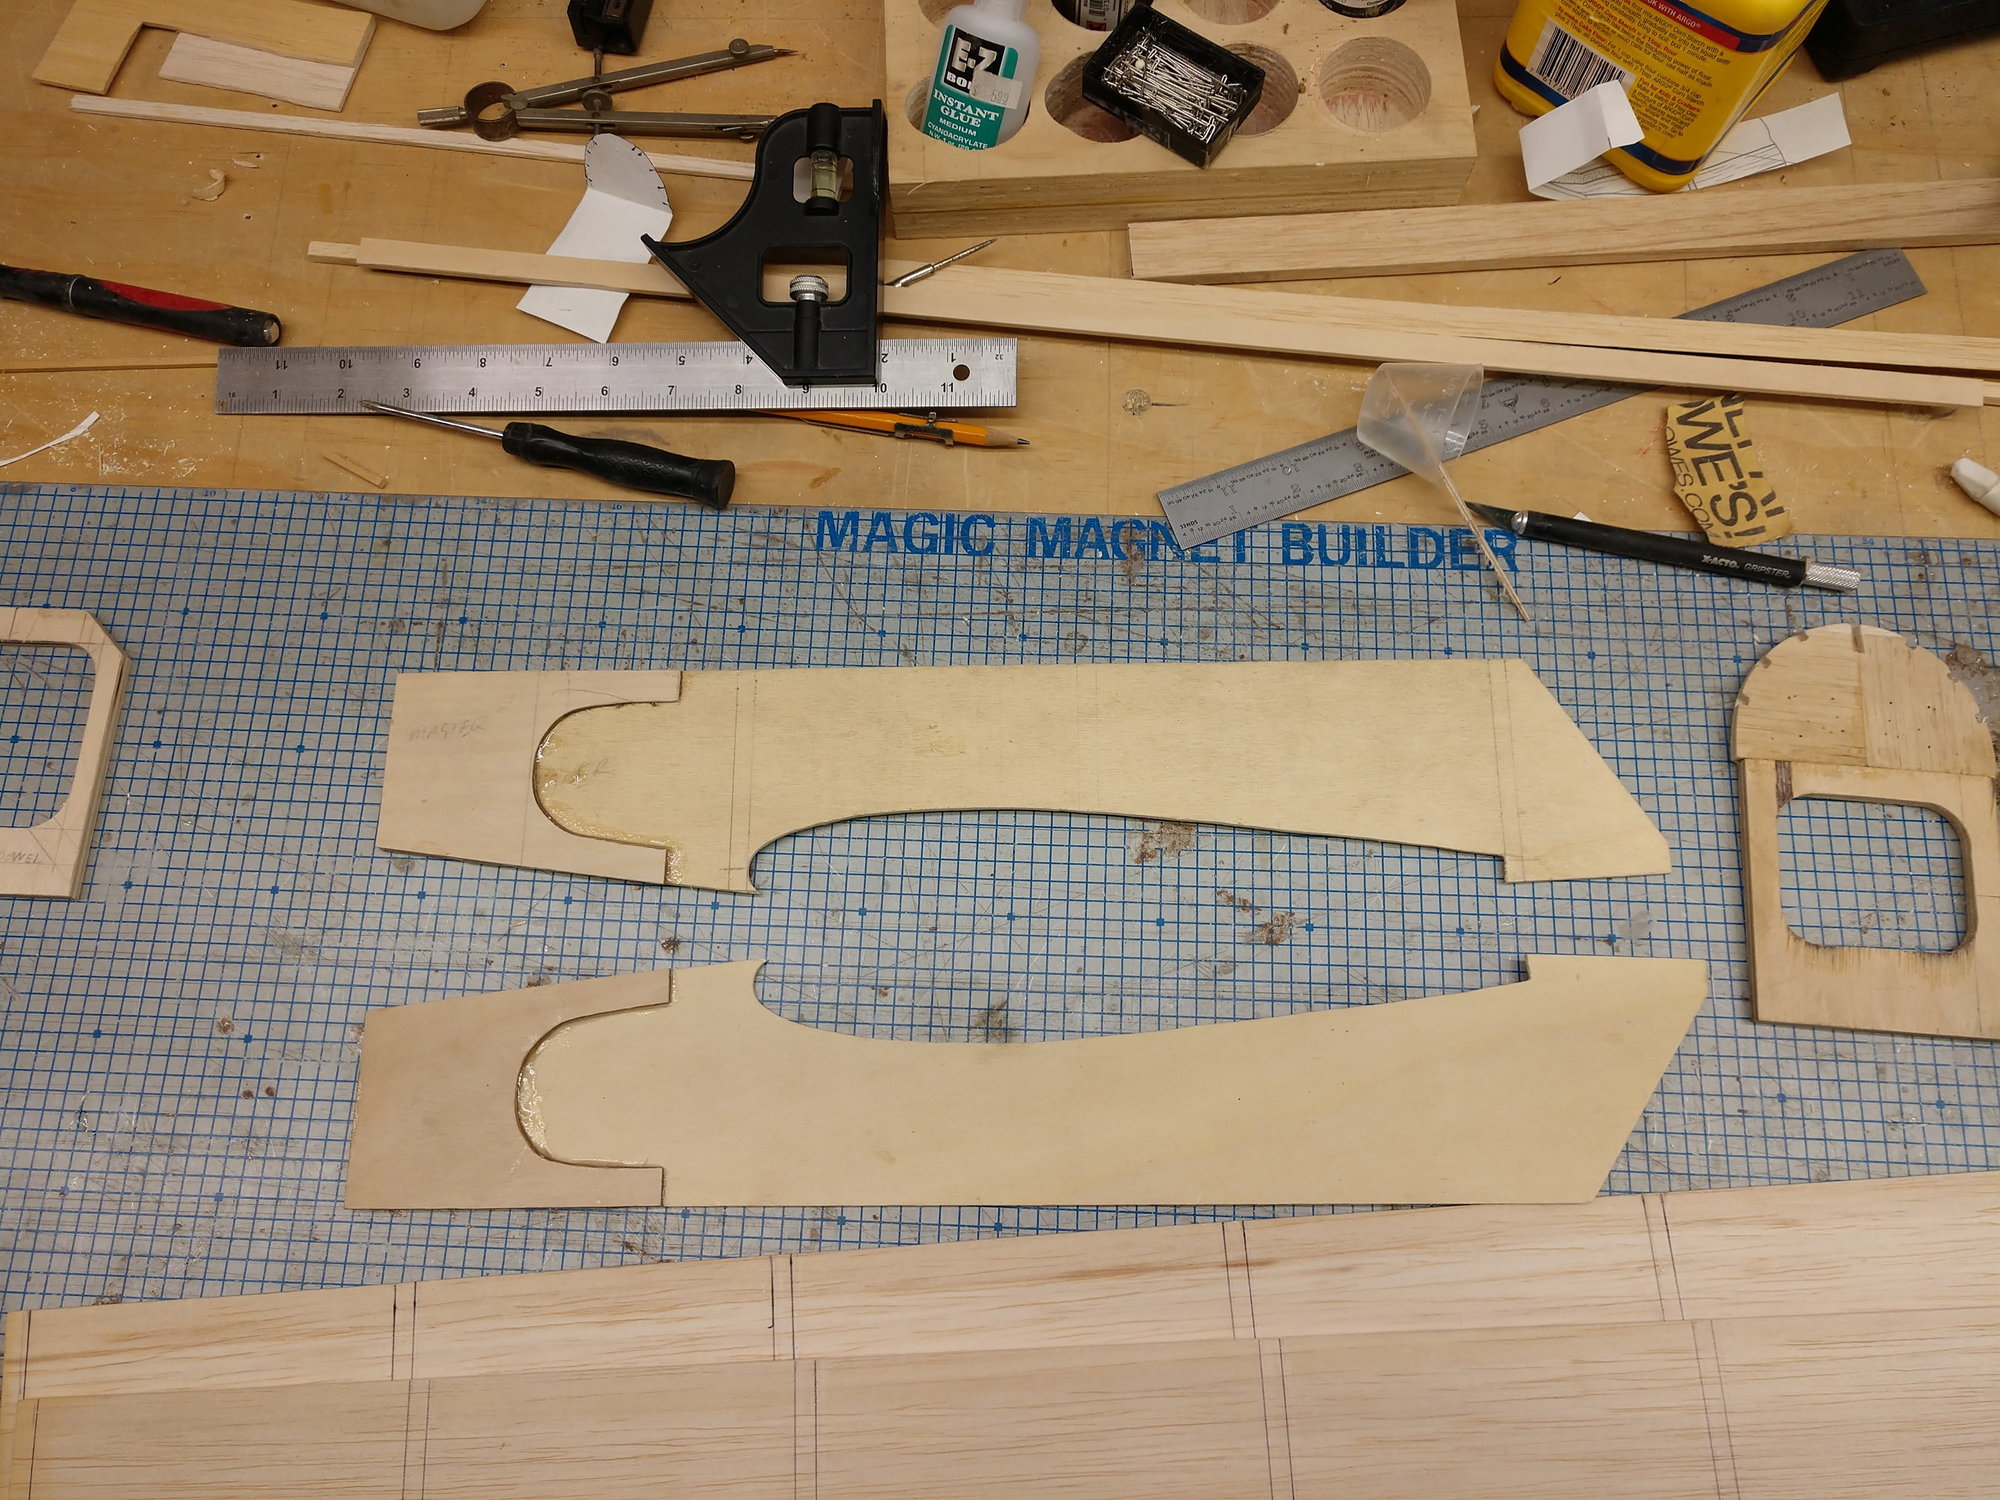
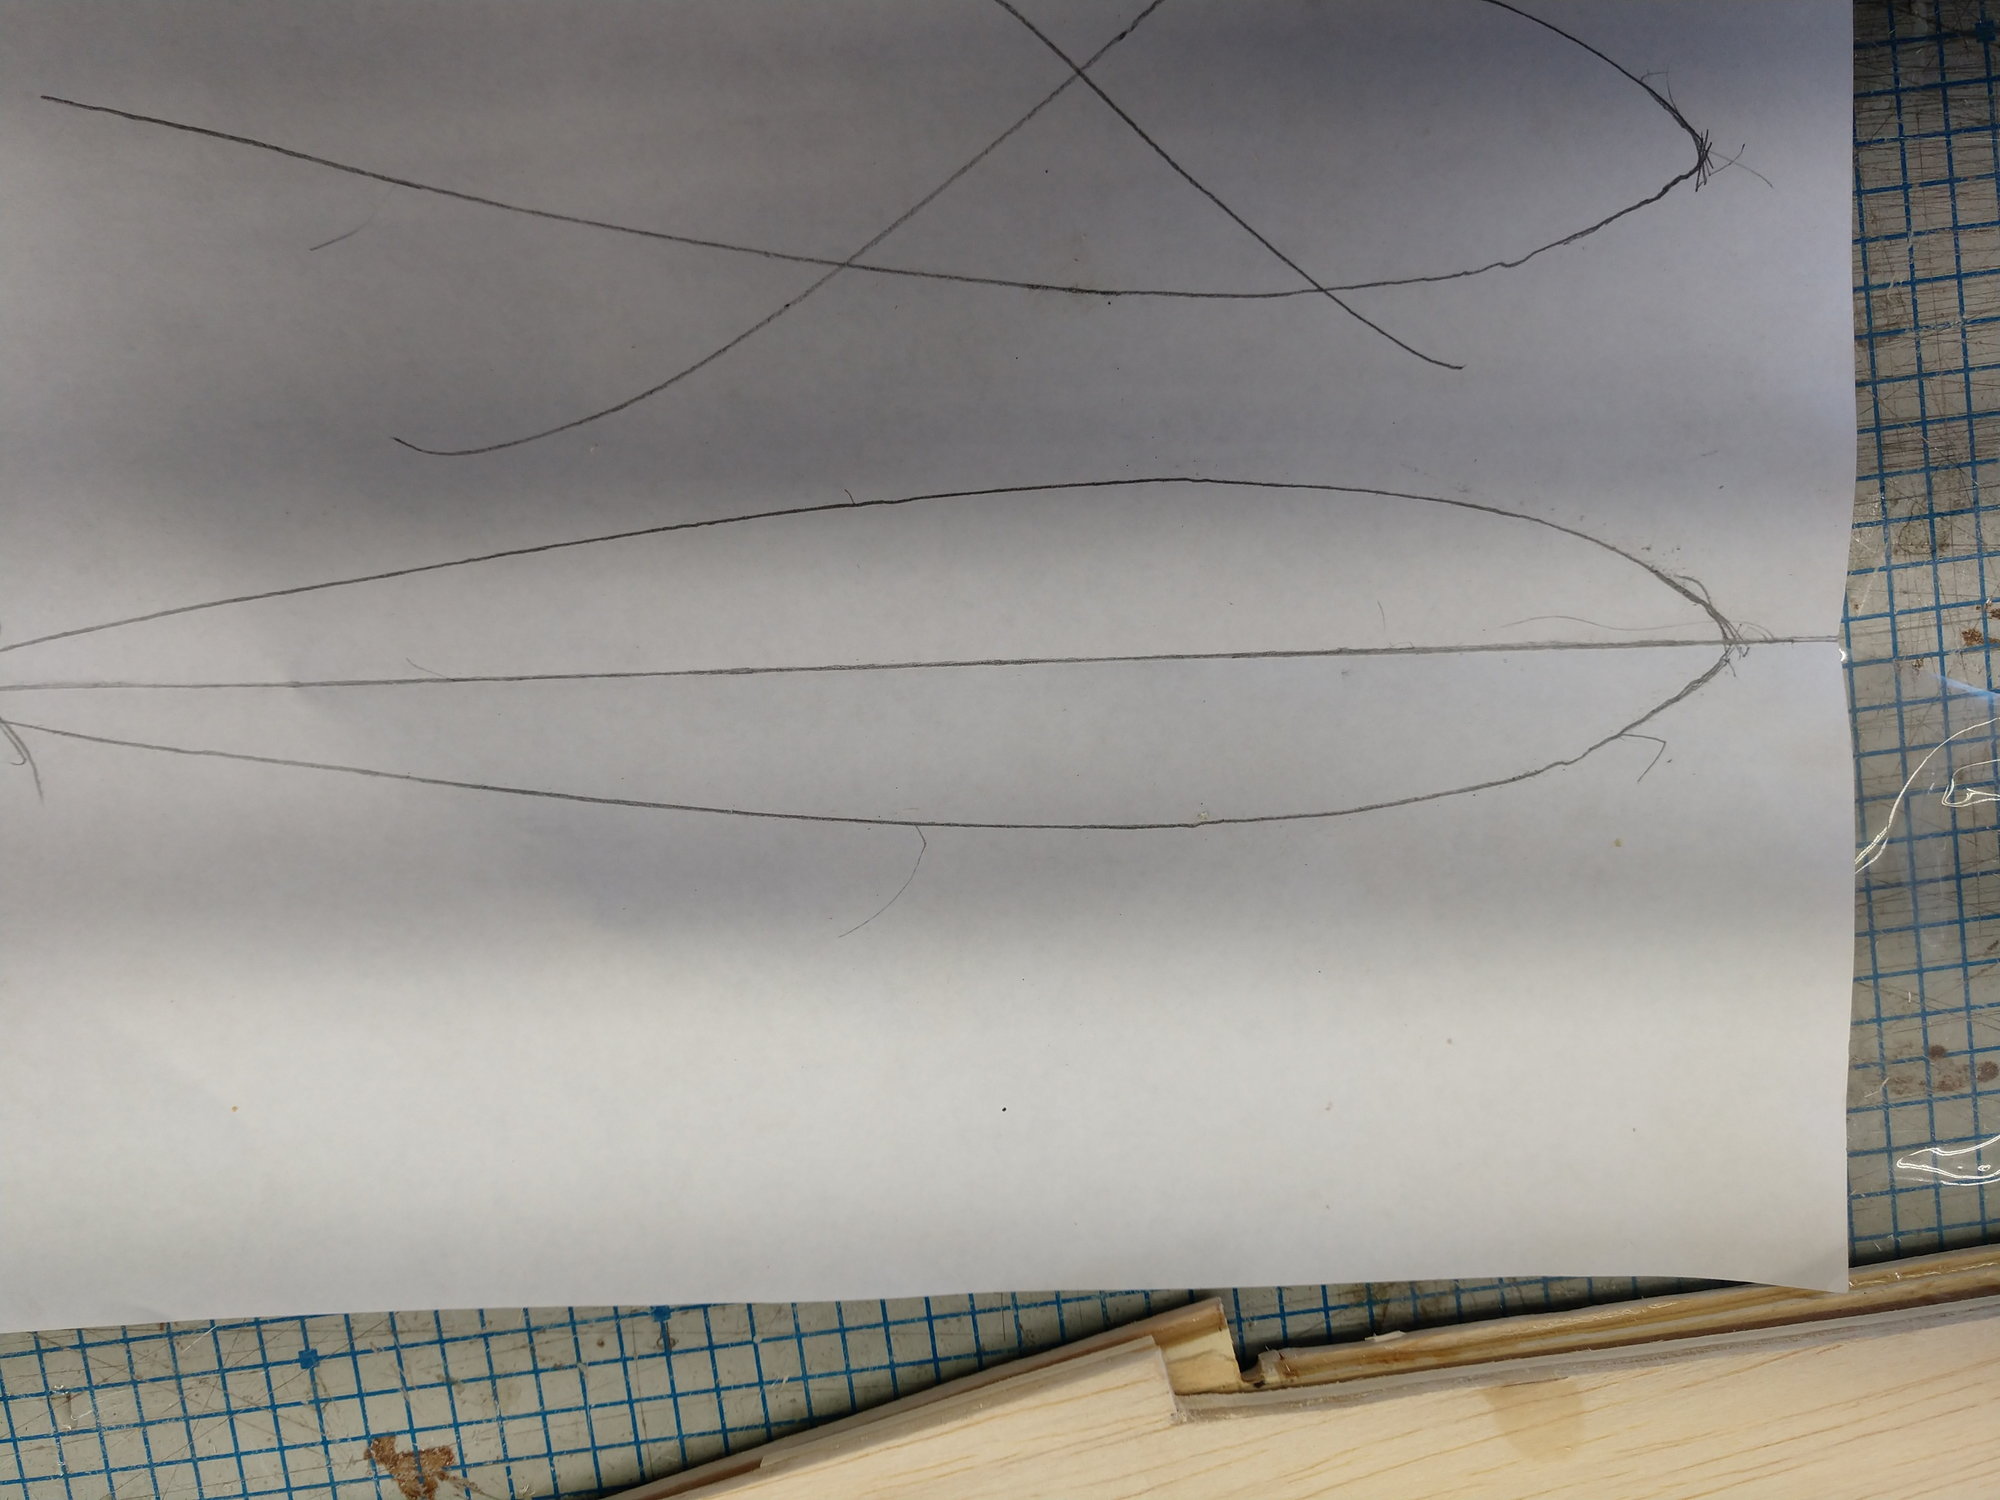
I printed the plans out and the taped the individual sheets together
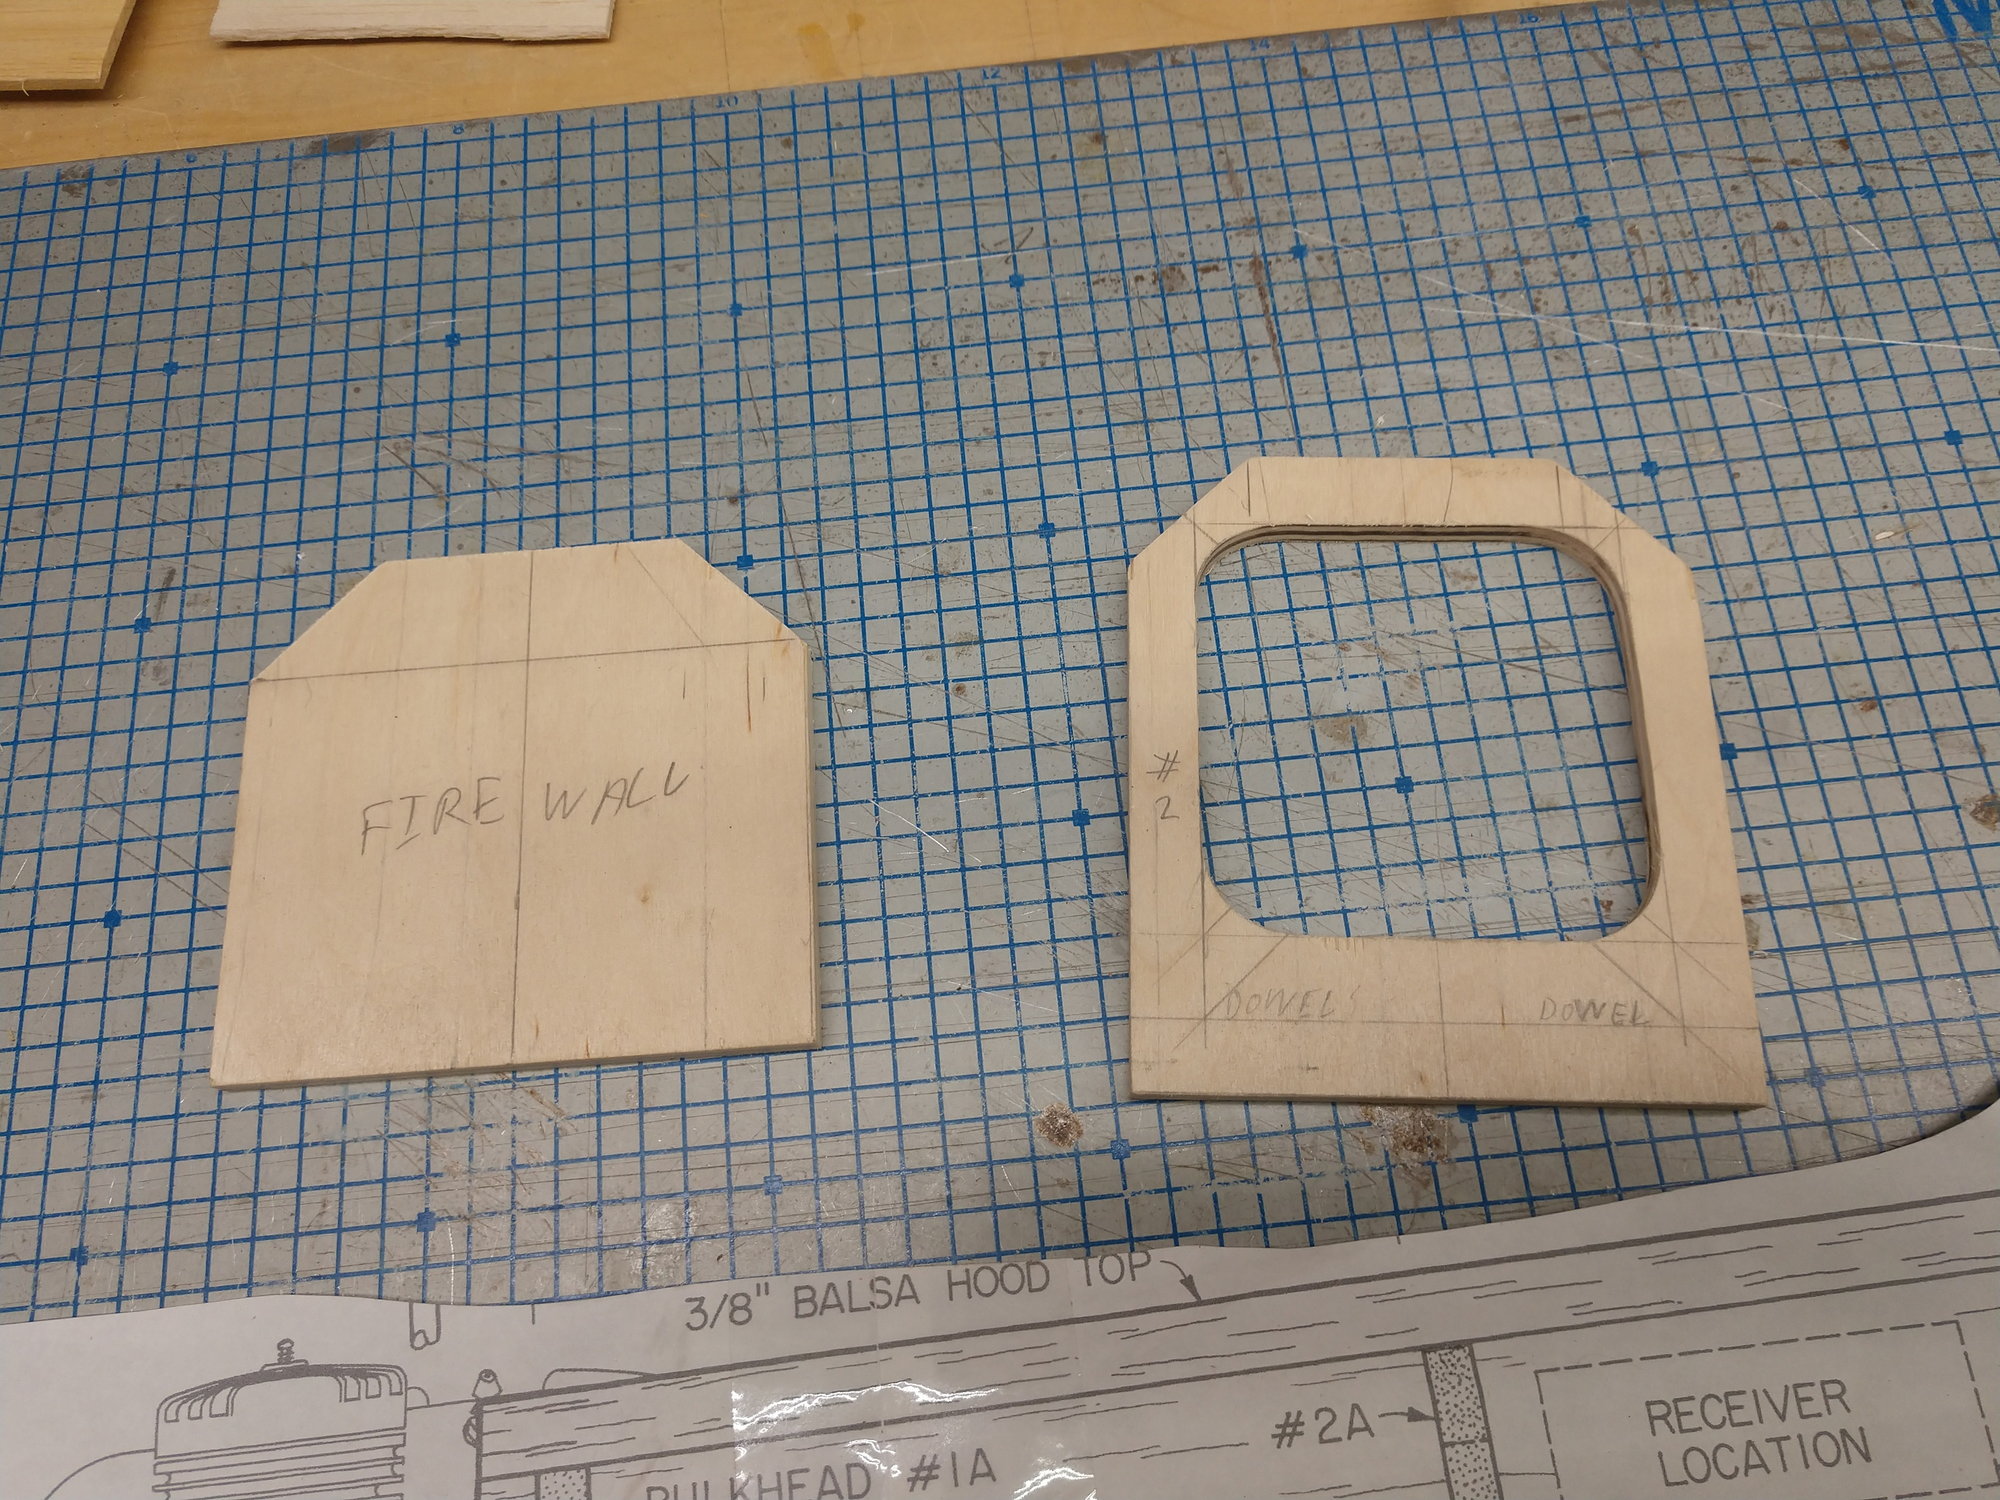
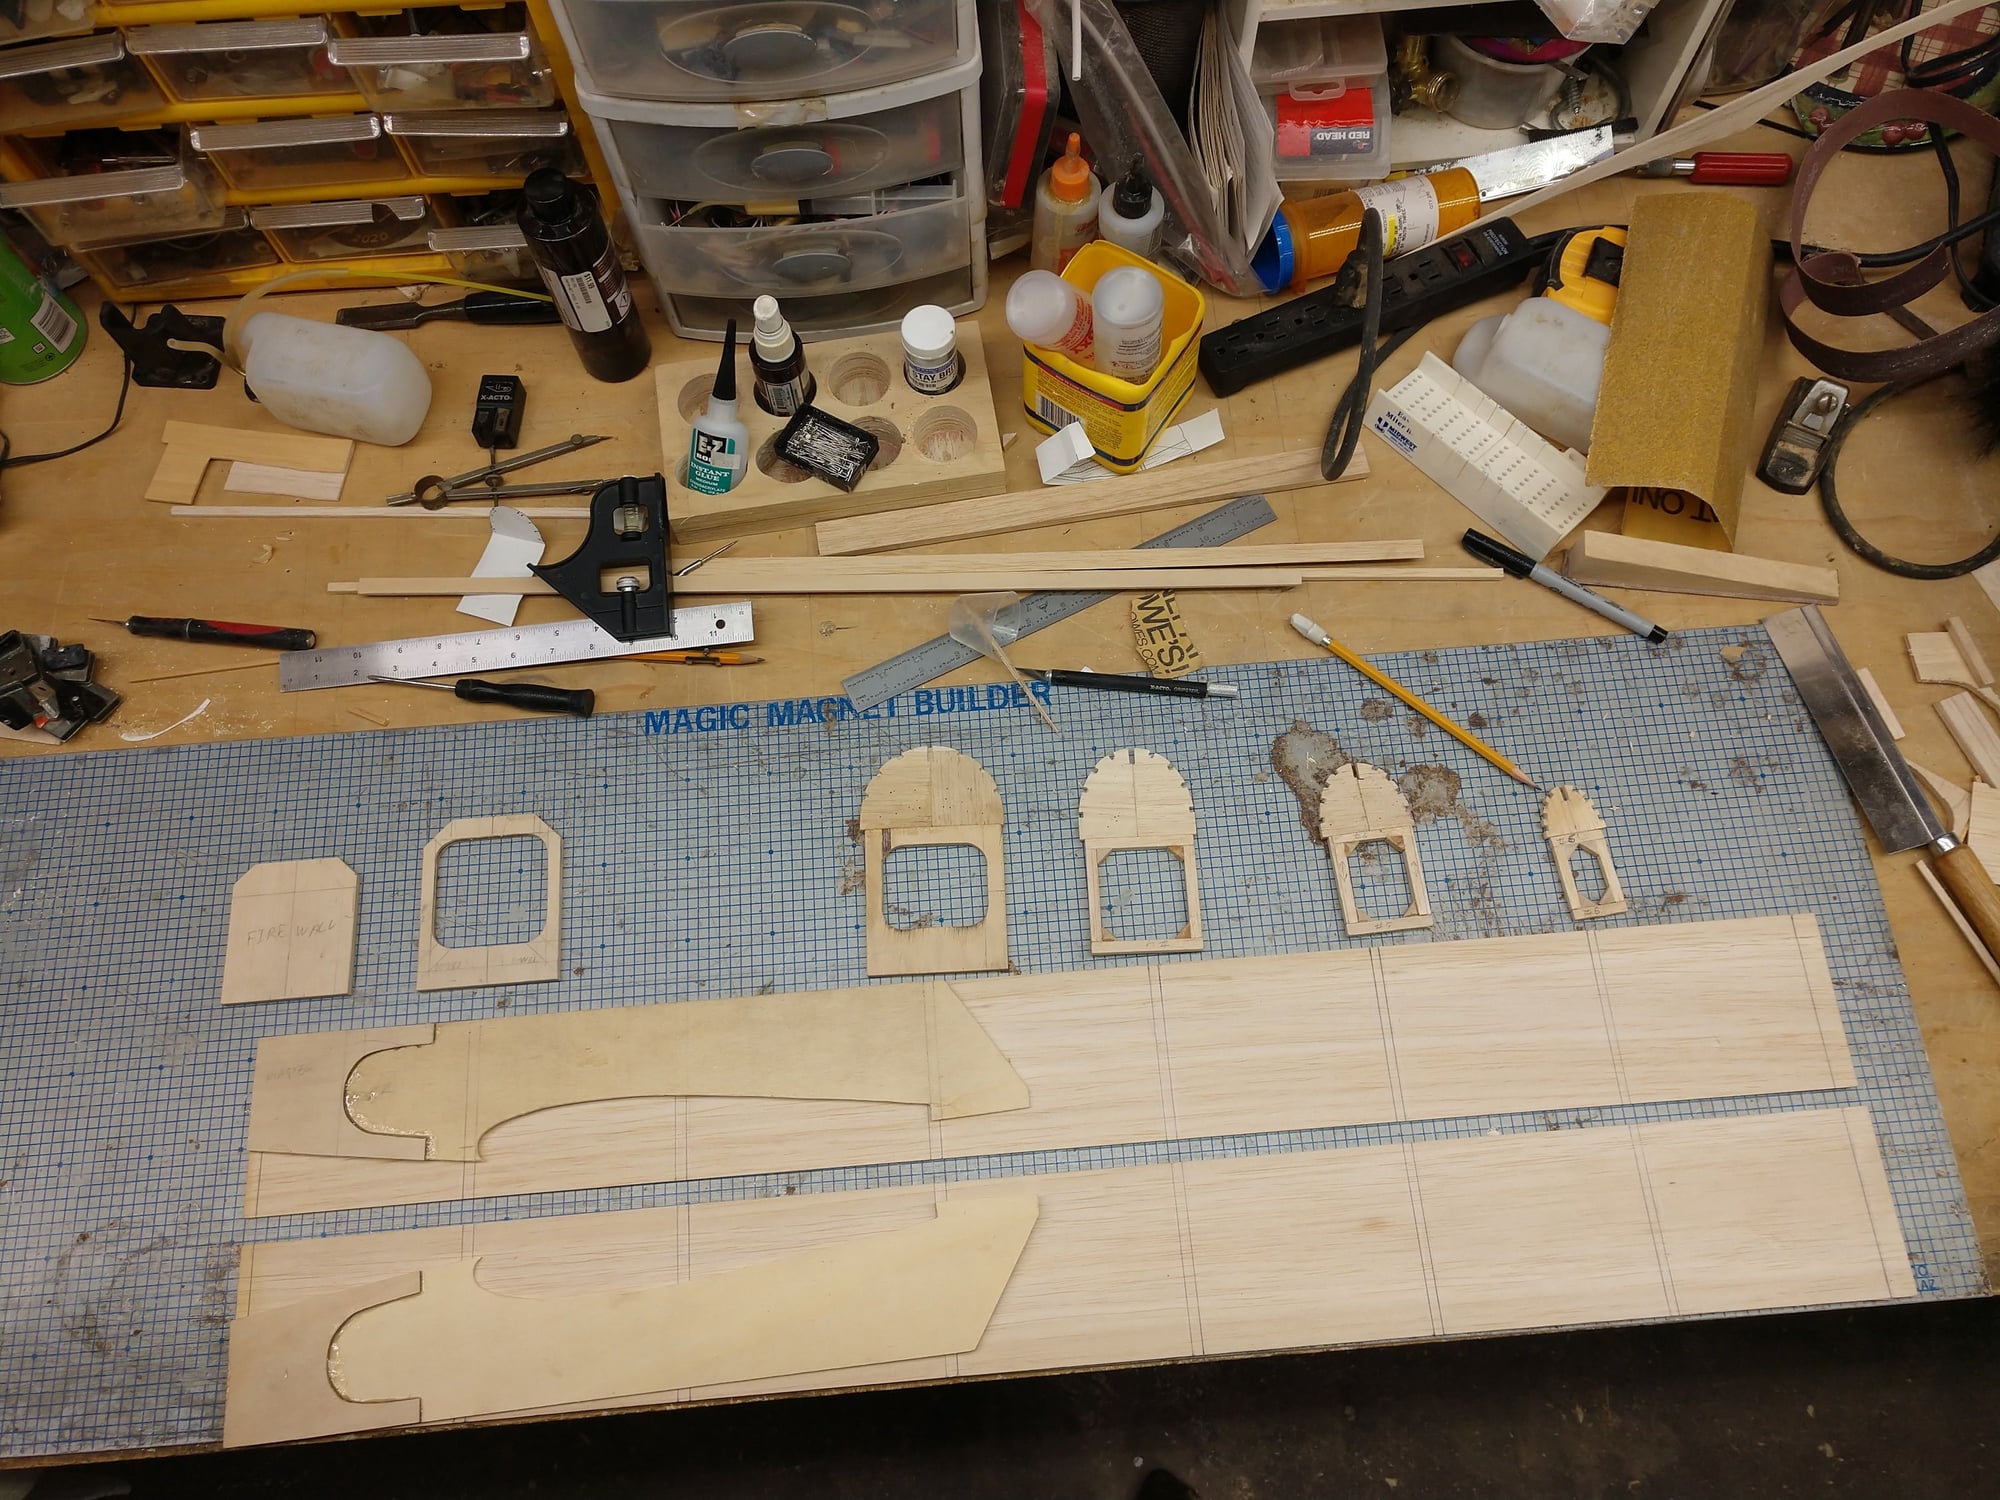
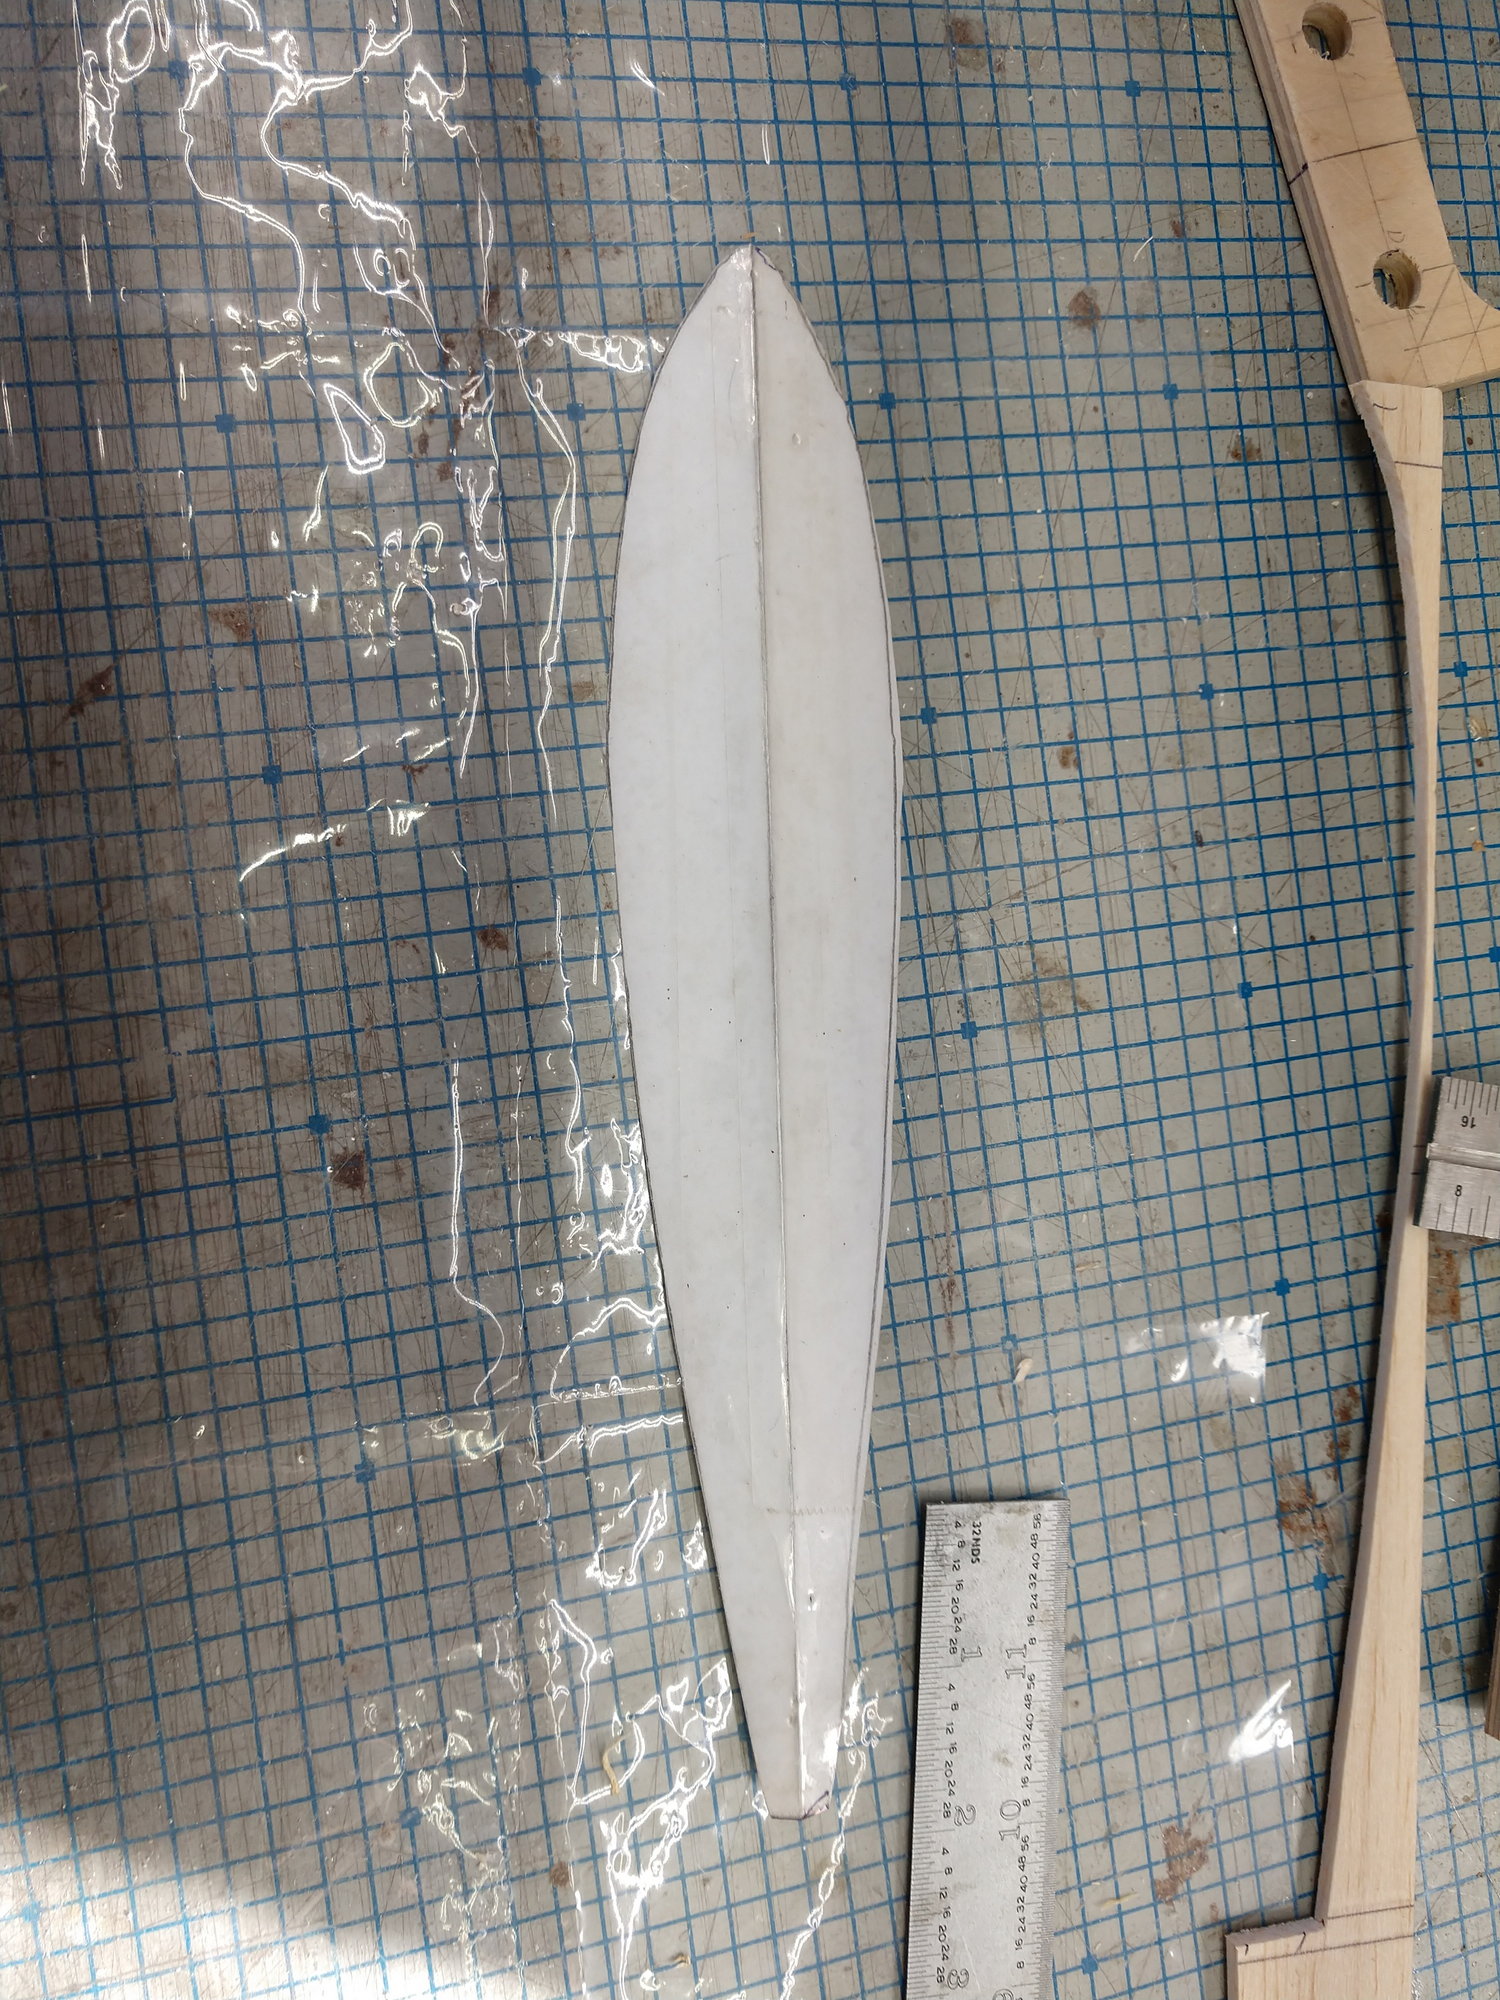
Fire wall and former at the wing leading edge
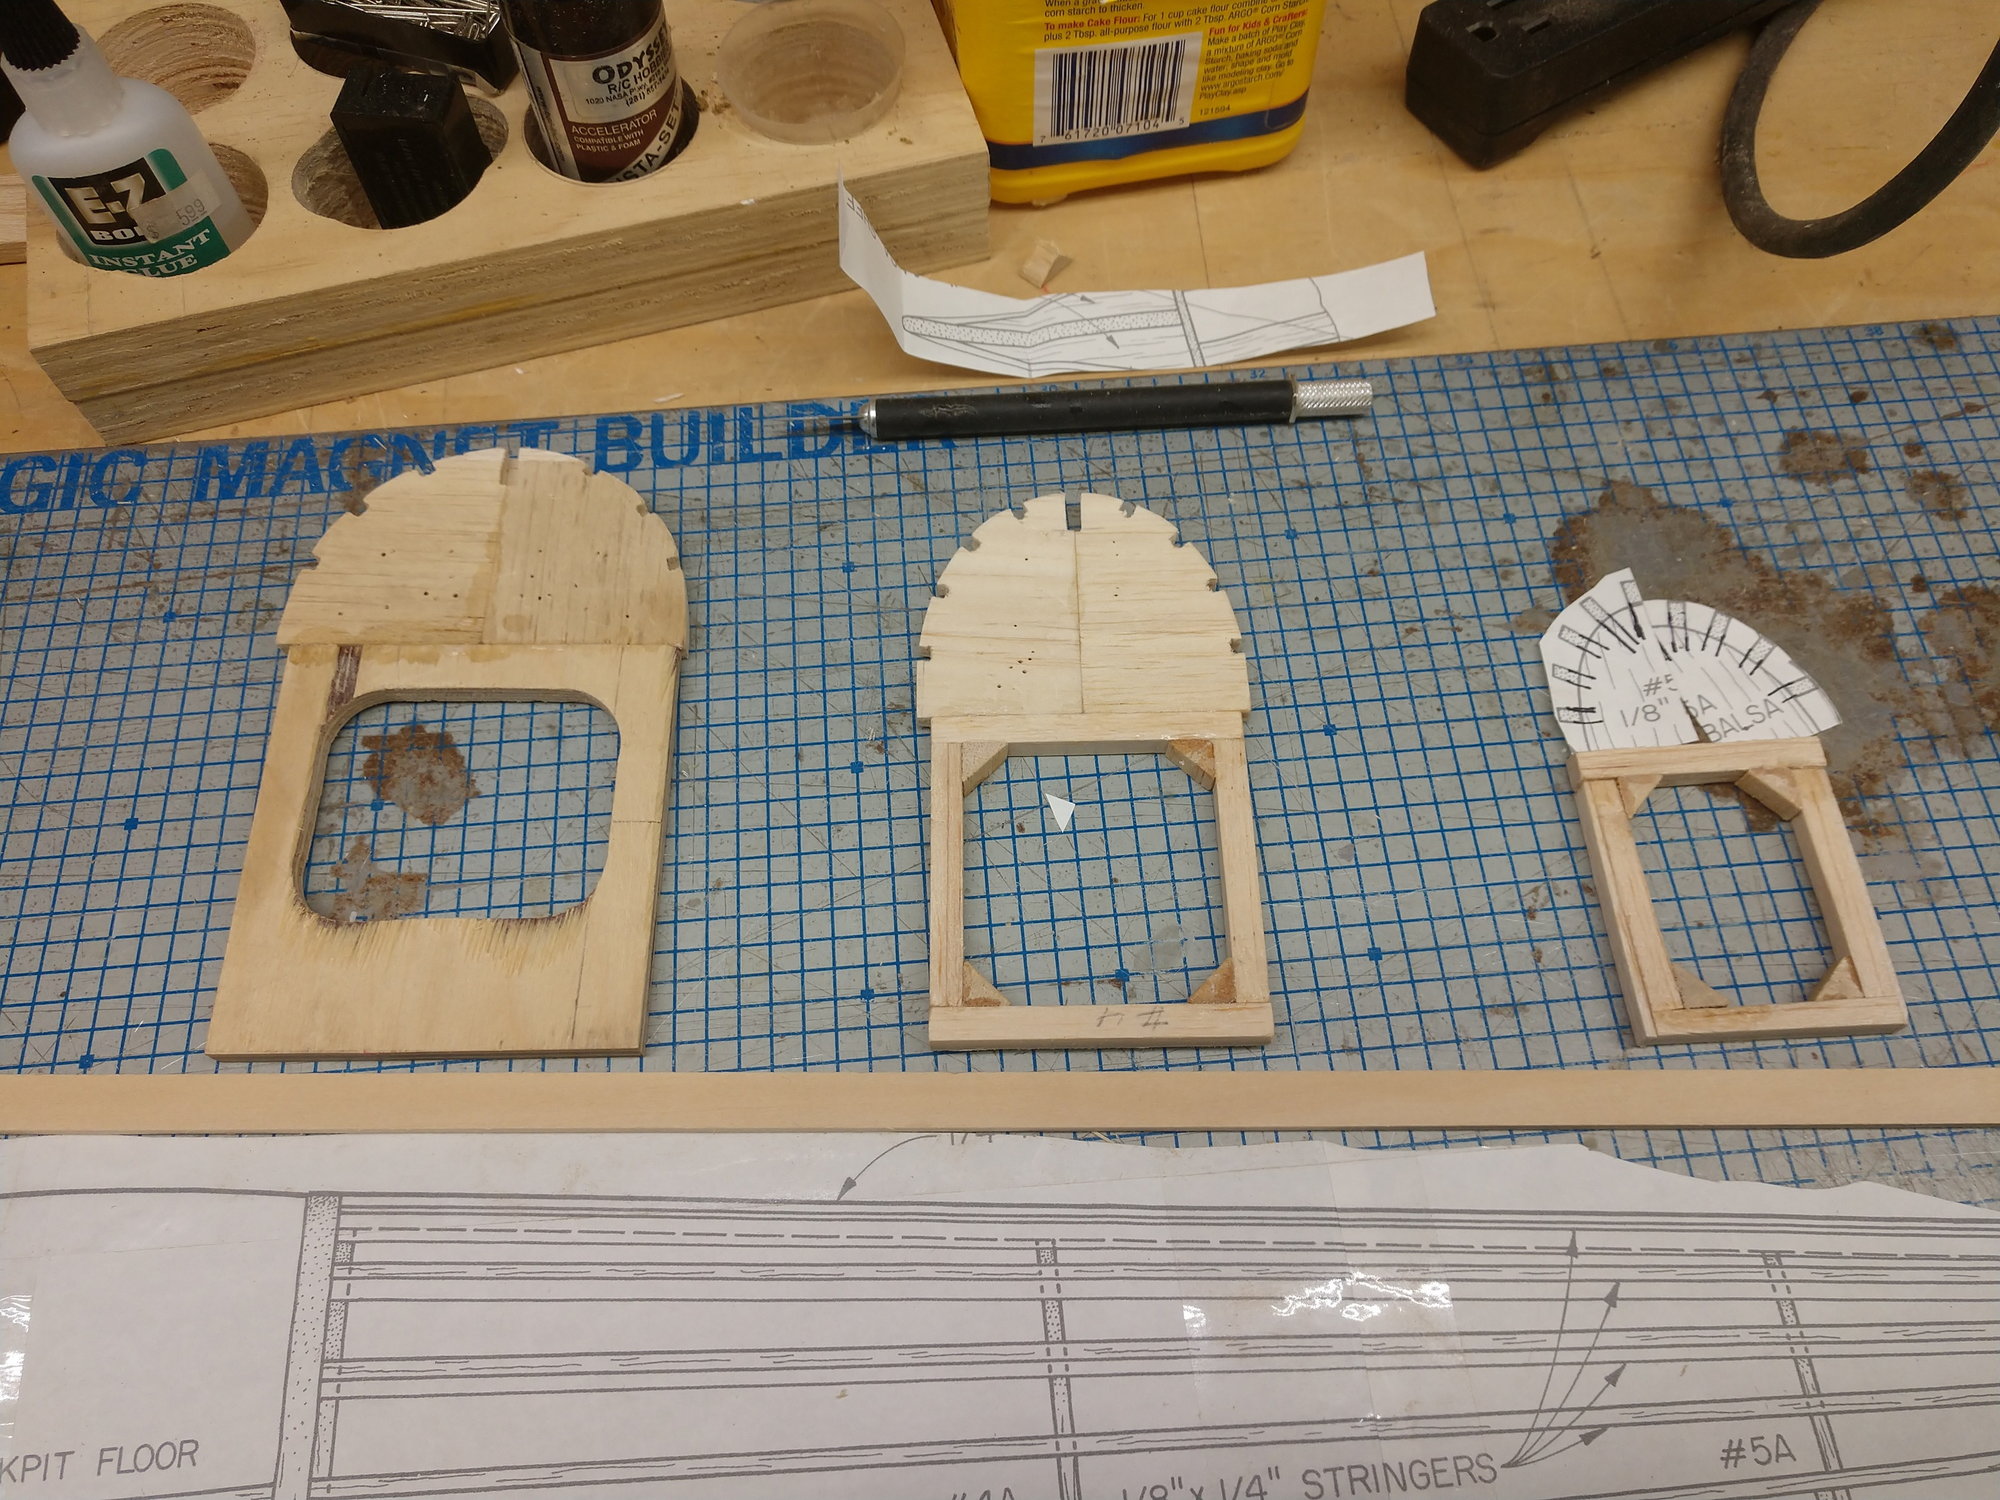
More formers but more to go
The covering goes by by and new wing tips to match the S.S
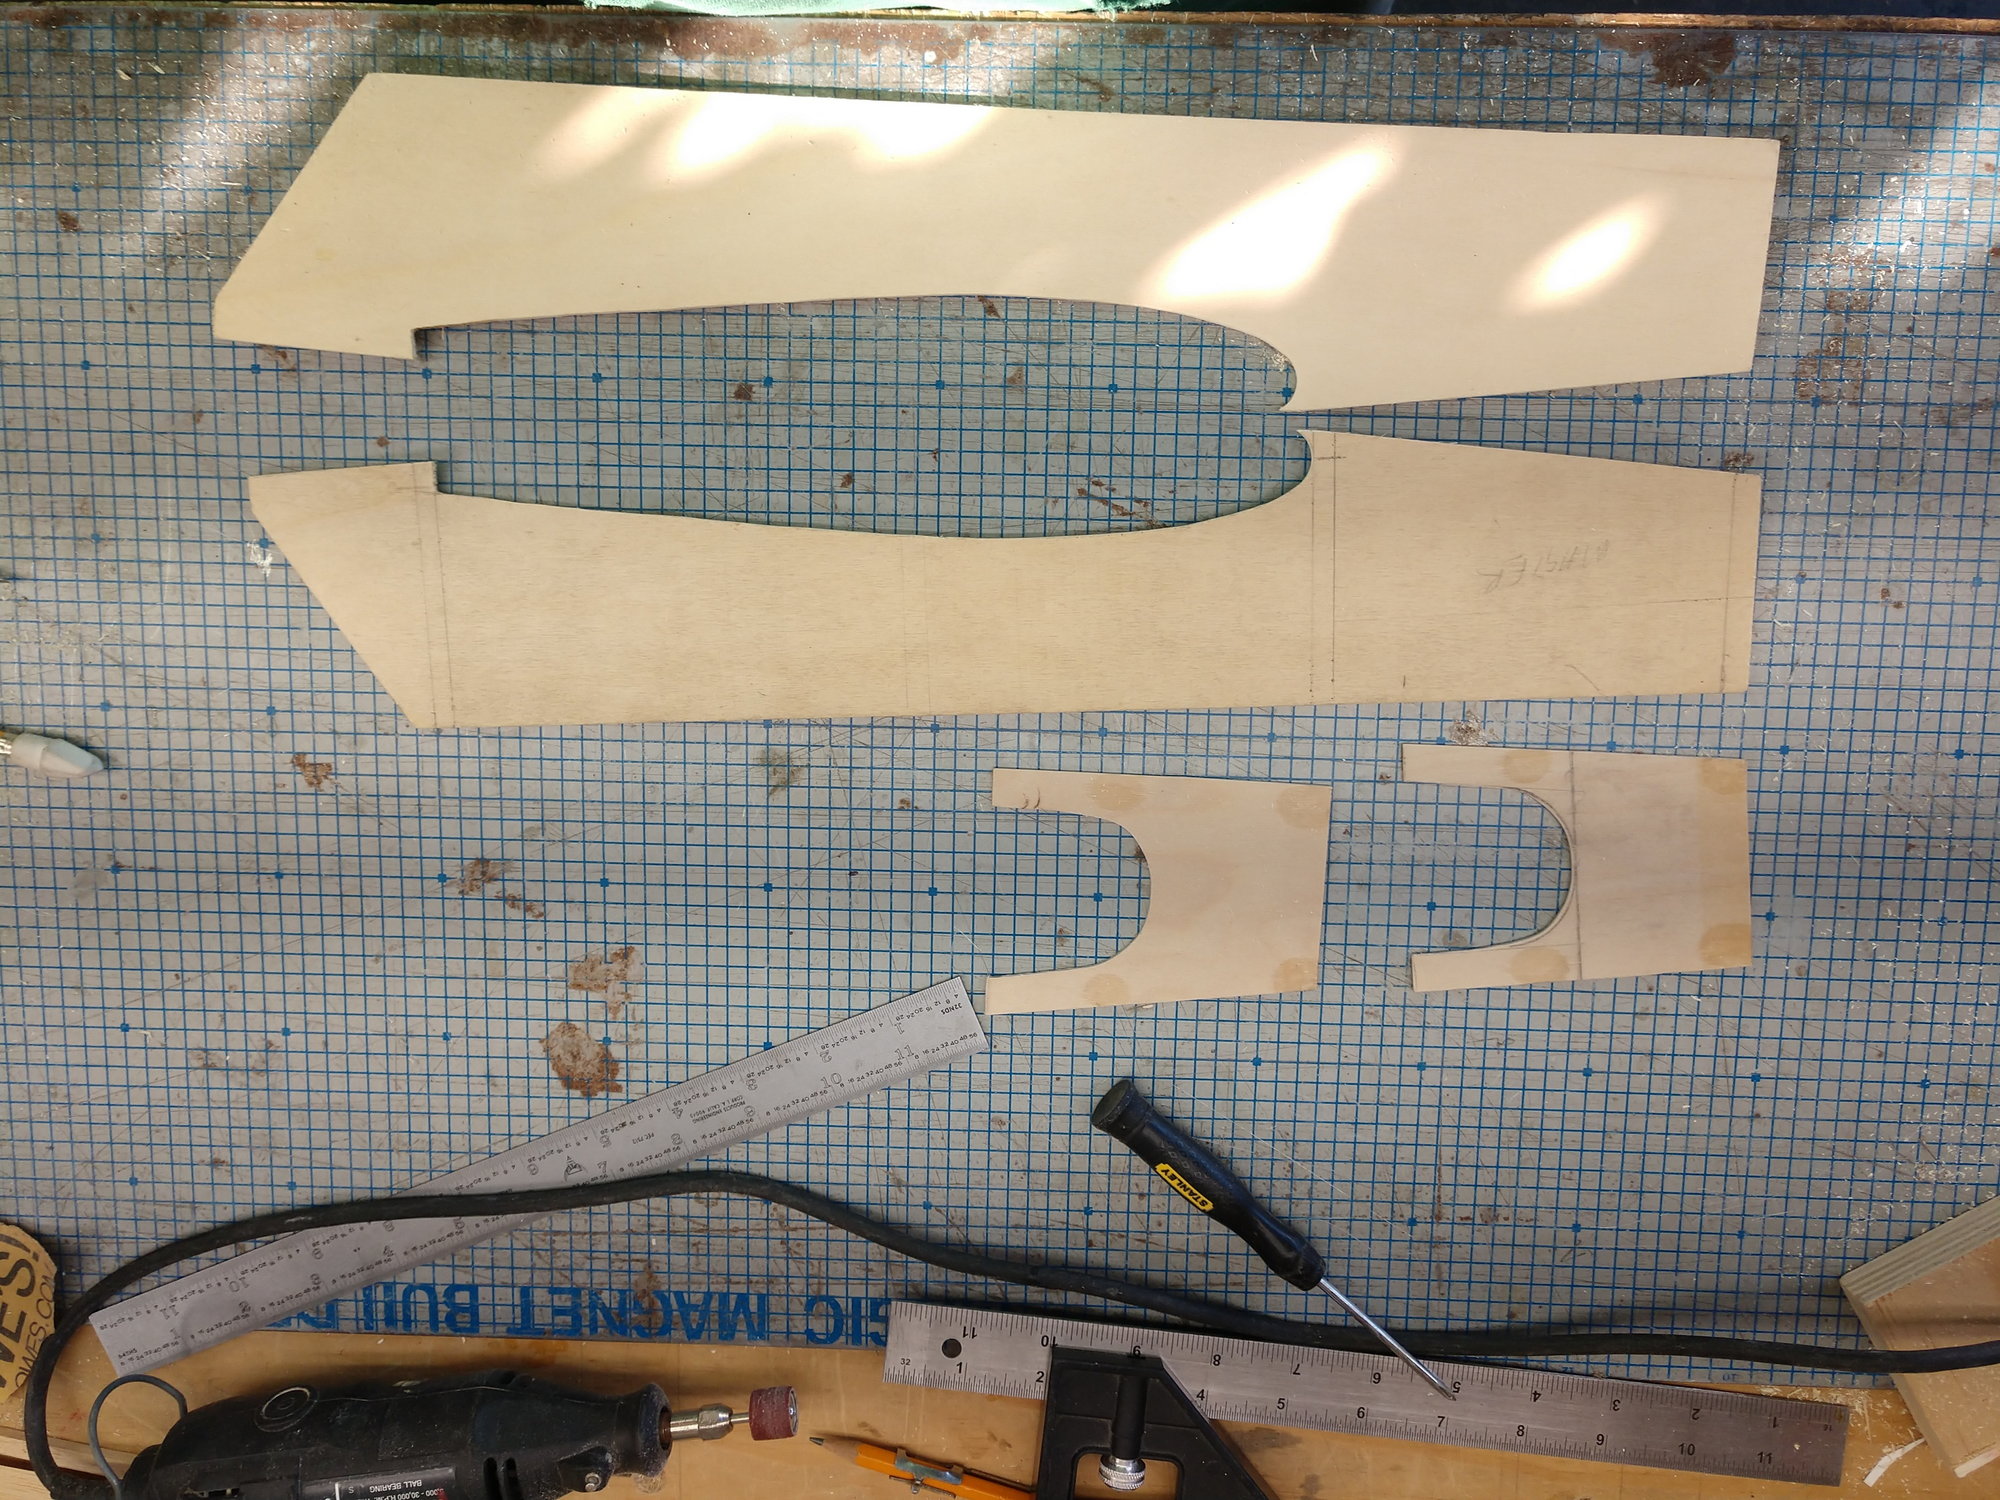
The hole is an easy fix
In the meantime I have some wood stock to start a fuse for a Super Sporster. I no longer need the wood stock for the P.A.
So I decided to use the materials on hand to start on my next plane. A close to Super Sporster .40. I say a close to as I'm making it a bit wider so as a 10 ounce tank I have will fit inside of F2.
I have a wing with only minor damage to it already on hand. I think it salvage from some one else's crash. Looks like it might be a stick 40 or some thing close. It is a high wing. I will be replacing the ailerons and converting the wing to a low wing and 4 40 nylon bolt and dowels hold down instead of the rubber band method the wing was built for. I do not have a canopy for it so will just make it an open cockpit with a windshield. I don't think I am up to pulling my own canopy. Maybe I teach myself how at some future time.
I found an old Os .46 in my junk parts that has good compression. I found (after much hunting around town) all of the need screws. The muffler and carb screws. The engine looks kind of poor with all of the baked on crud, but I think it is OK even if not in it's prime. I will put it on a test mount and check it out.
I have limited supplies on hand for the S.S. I am using thinner balsa and laminating pieces together with the grains at 90 degrees in place of 1/4" stock for upper formers. I actually think I prefer this balsa ply to 1/4" stock. Seems stronger and does not chip out when notching for for stringers. Tedious though.
I will also be departing from the original fuse construction some, substituting some materials.
After payday and I can get more material for the P.A. I will set the S.S. aside till I finish the P.A. But at least I will have a head start on the S.S. And then I will resume work on the S.S.
Ken
I printed the plans out and the taped the individual sheets together
Fire wall and former at the wing leading edge
More formers but more to go
The covering goes by by and new wing tips to match the S.S
The hole is an easy fix
 02-23-2020, 08:32 AM
#2

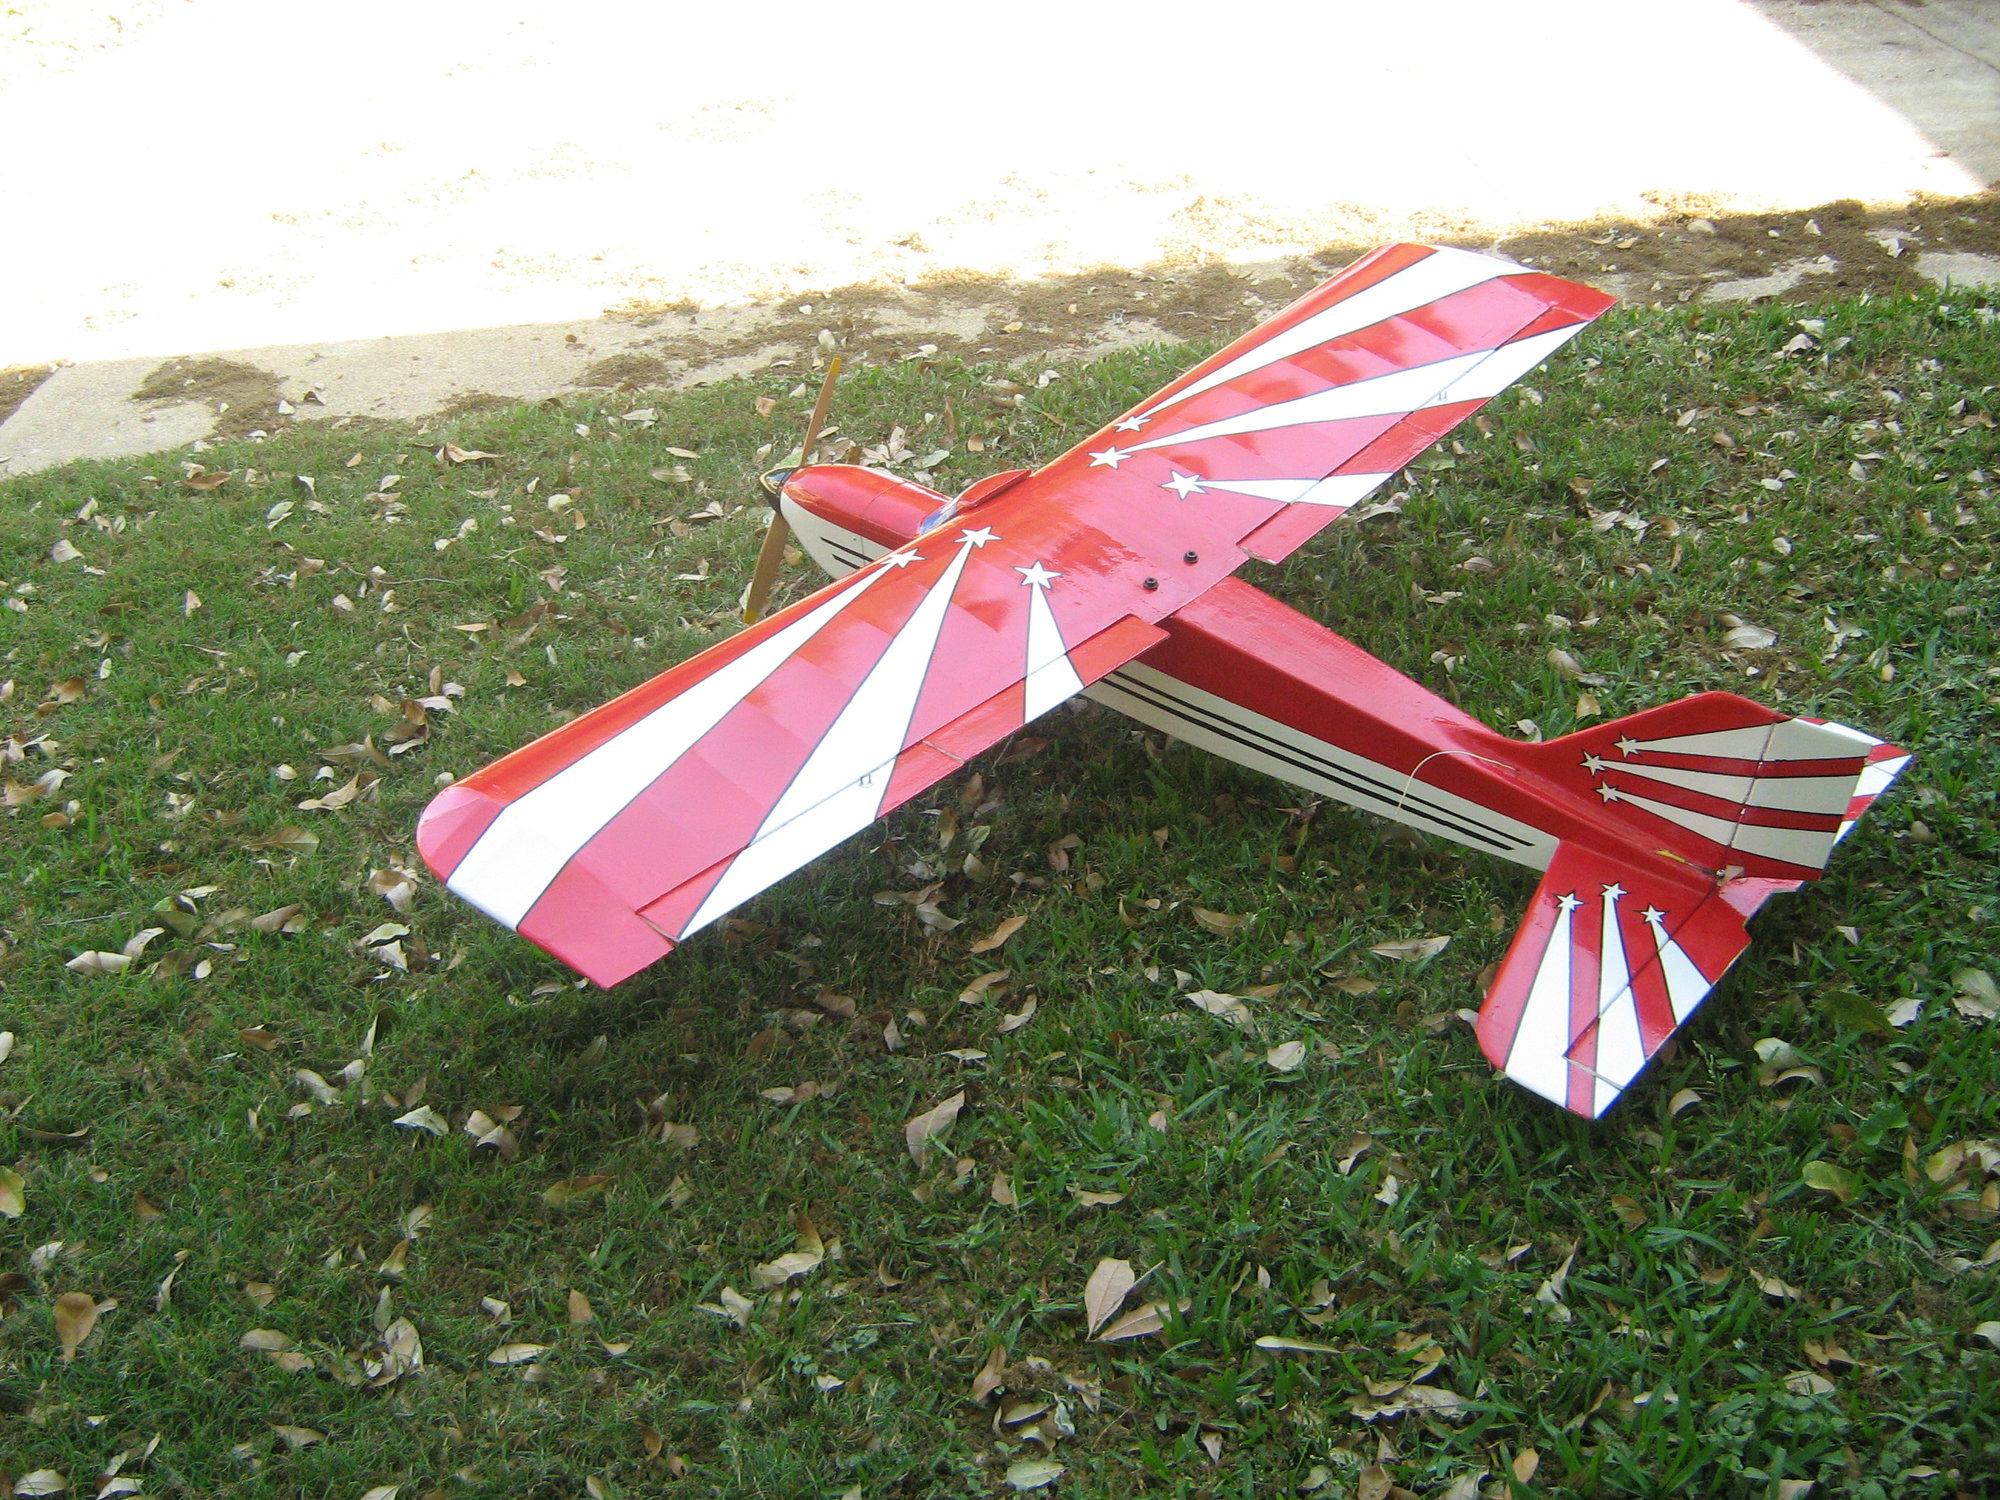
I can relate to the Super Sportster 40. I have a 40 sized Sportster from a balsa kit that I bought new in 1982. It was in an accident and was subjected to some damage. I am now (many years later) doing the repair work. I am a come-back R/C modeler from way back in time. Here are some photos you might enjoy given that you are attracted to the Sportster design.
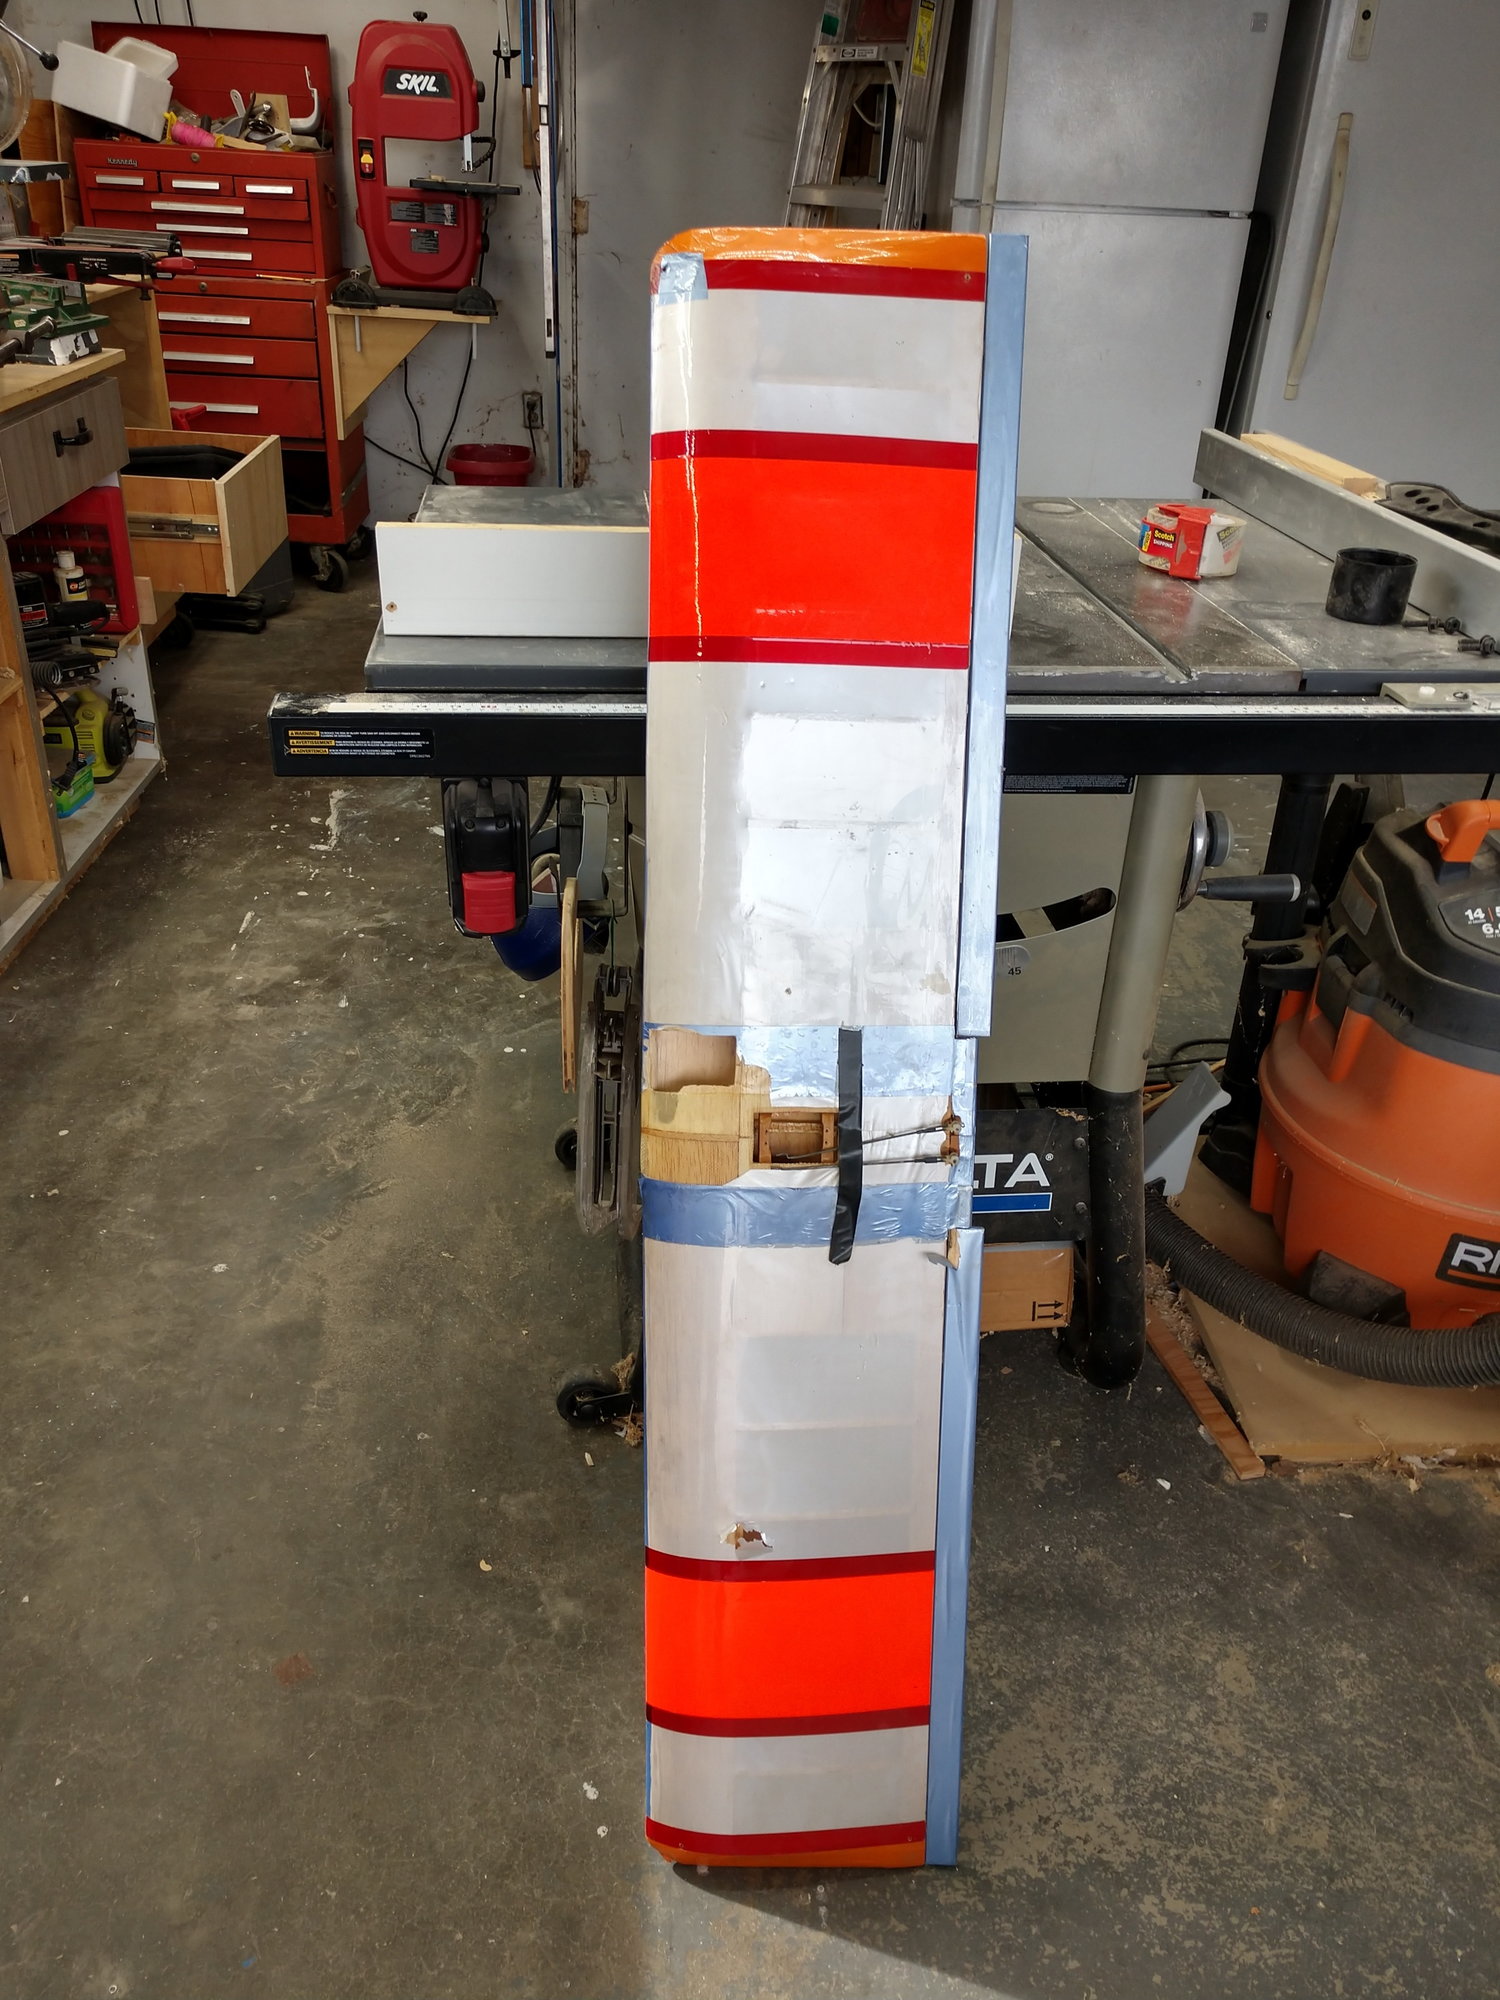
Bottom view showing wing mounting bolts. Wing mounted landing gear. Engine compartment drain hole. Wing damage
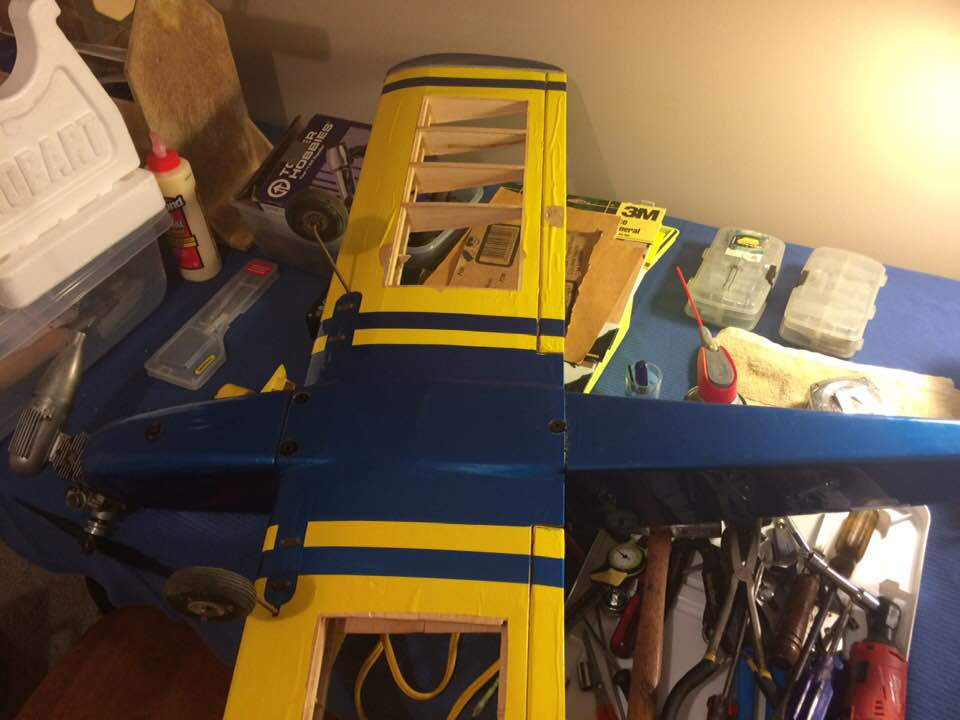
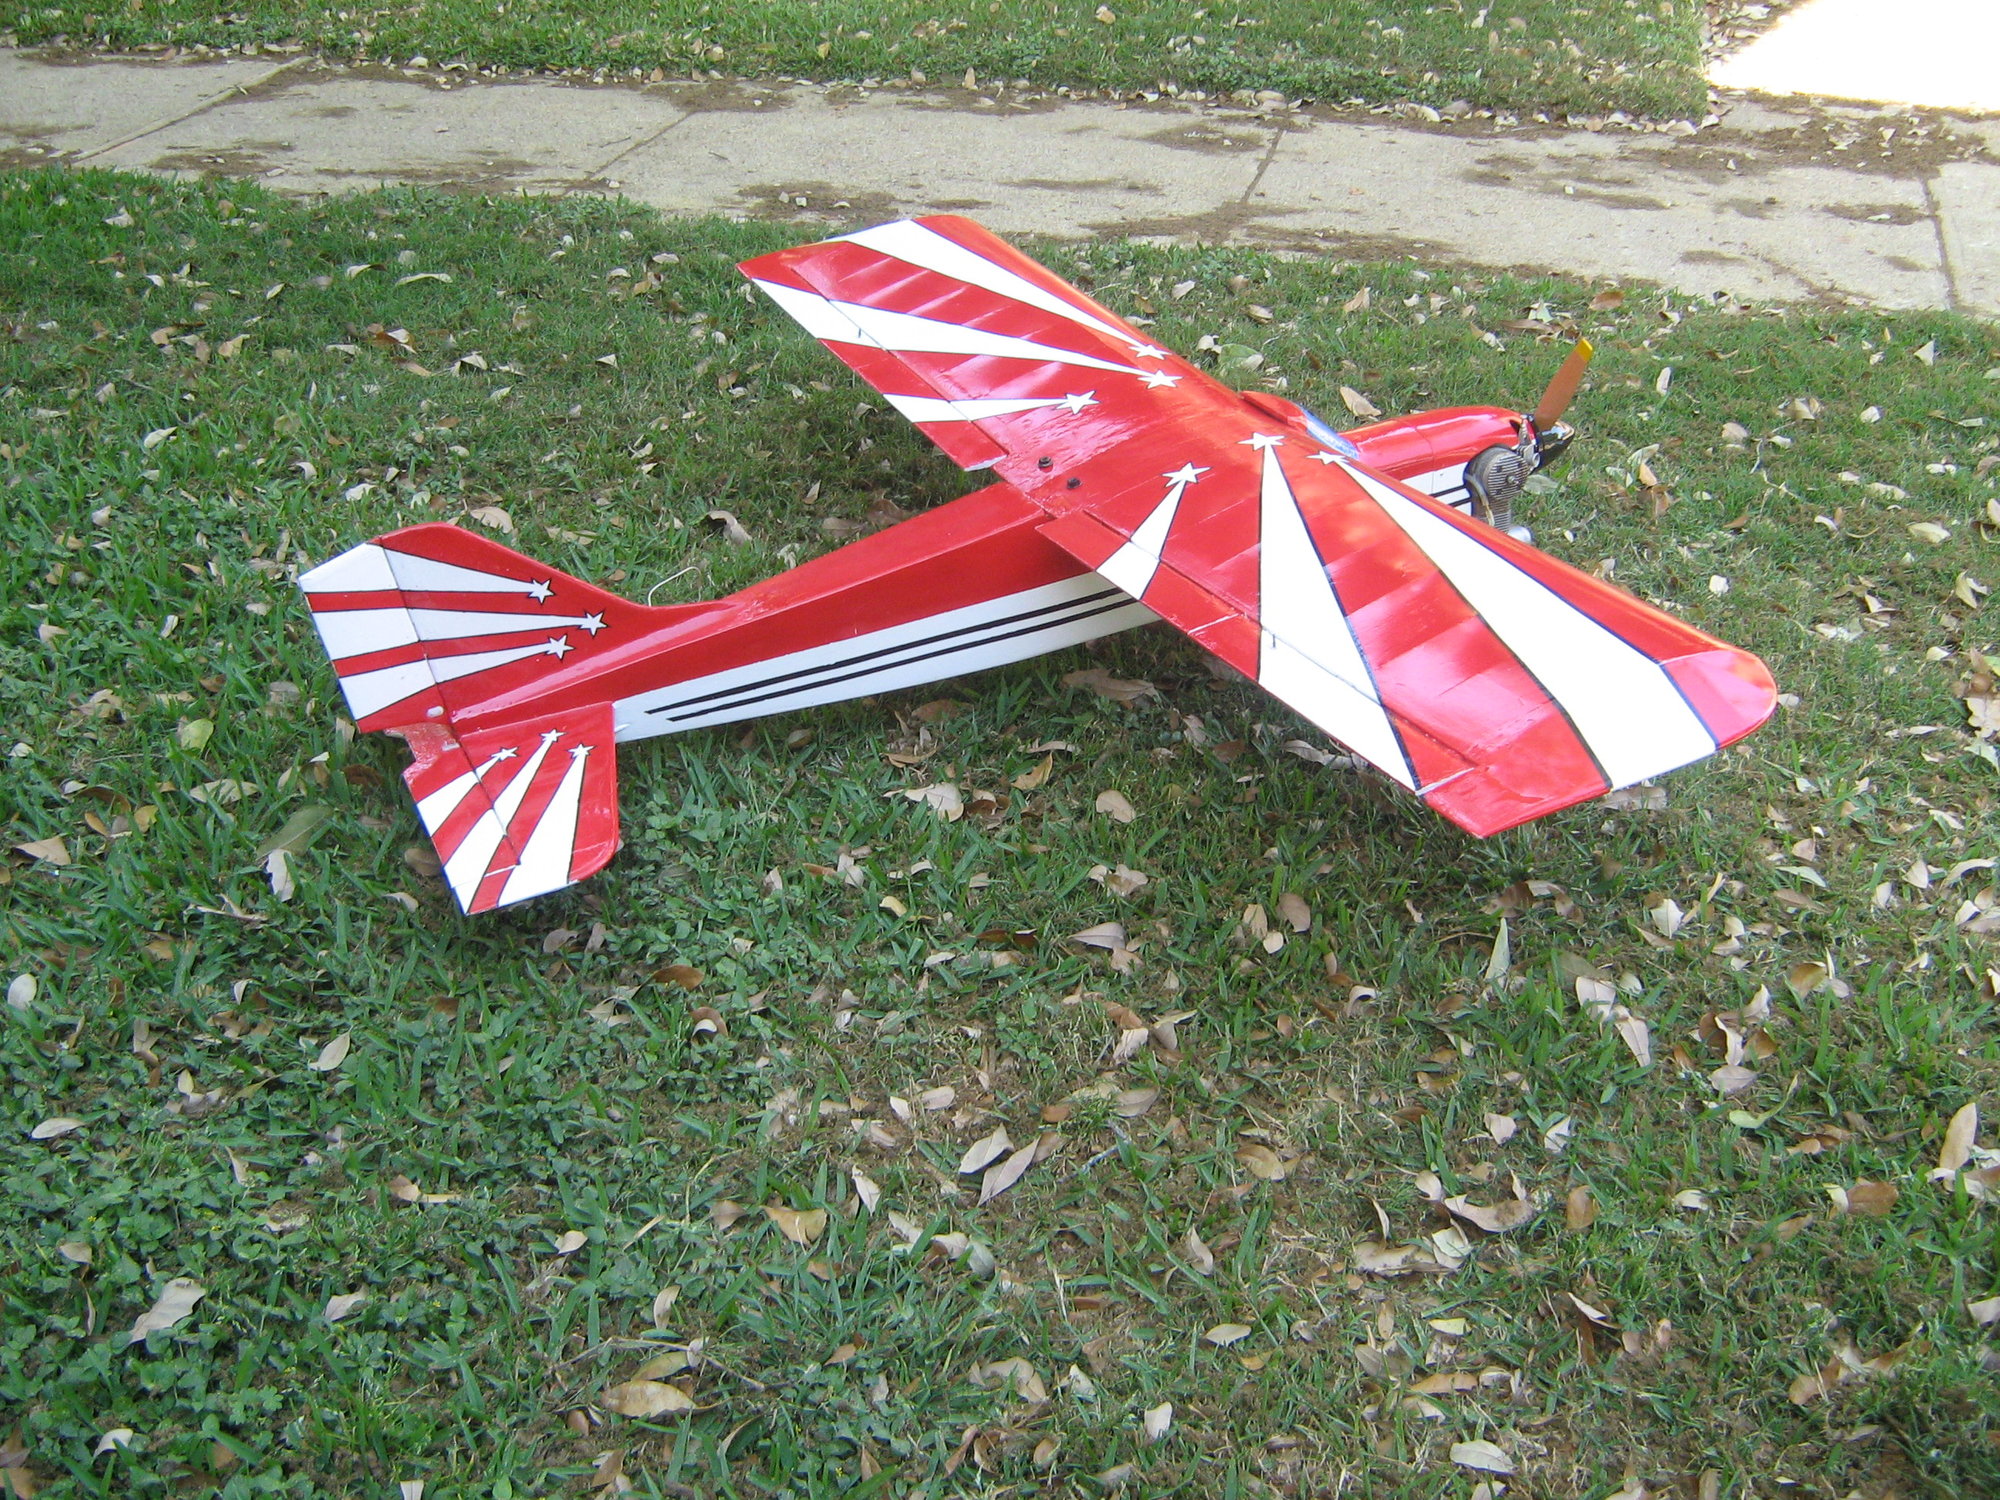
Top view showing canopy attachment area. Wing damage

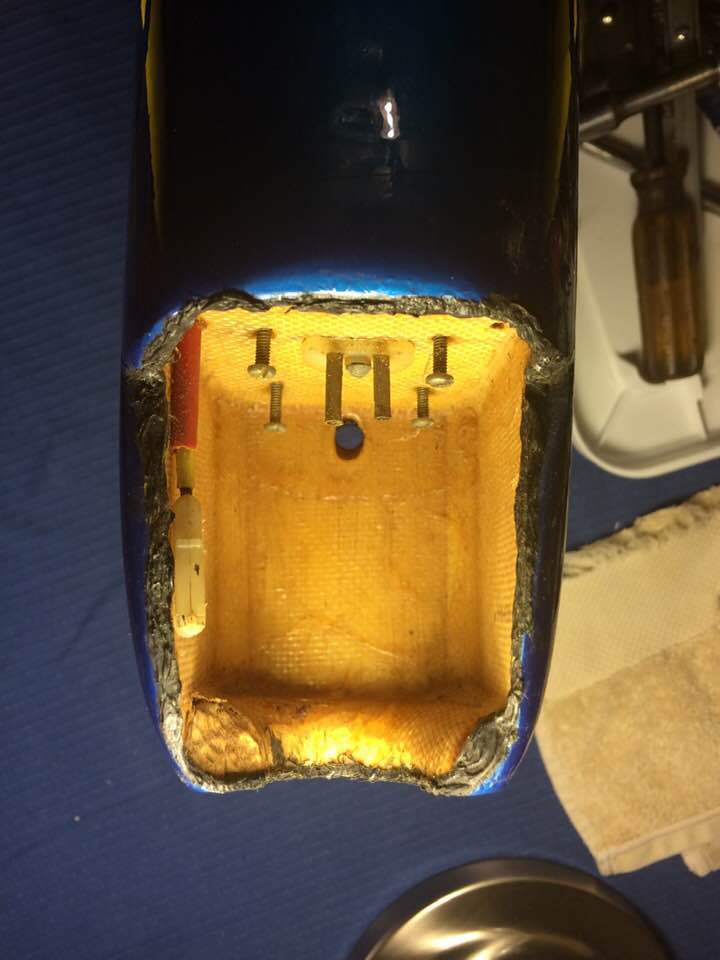
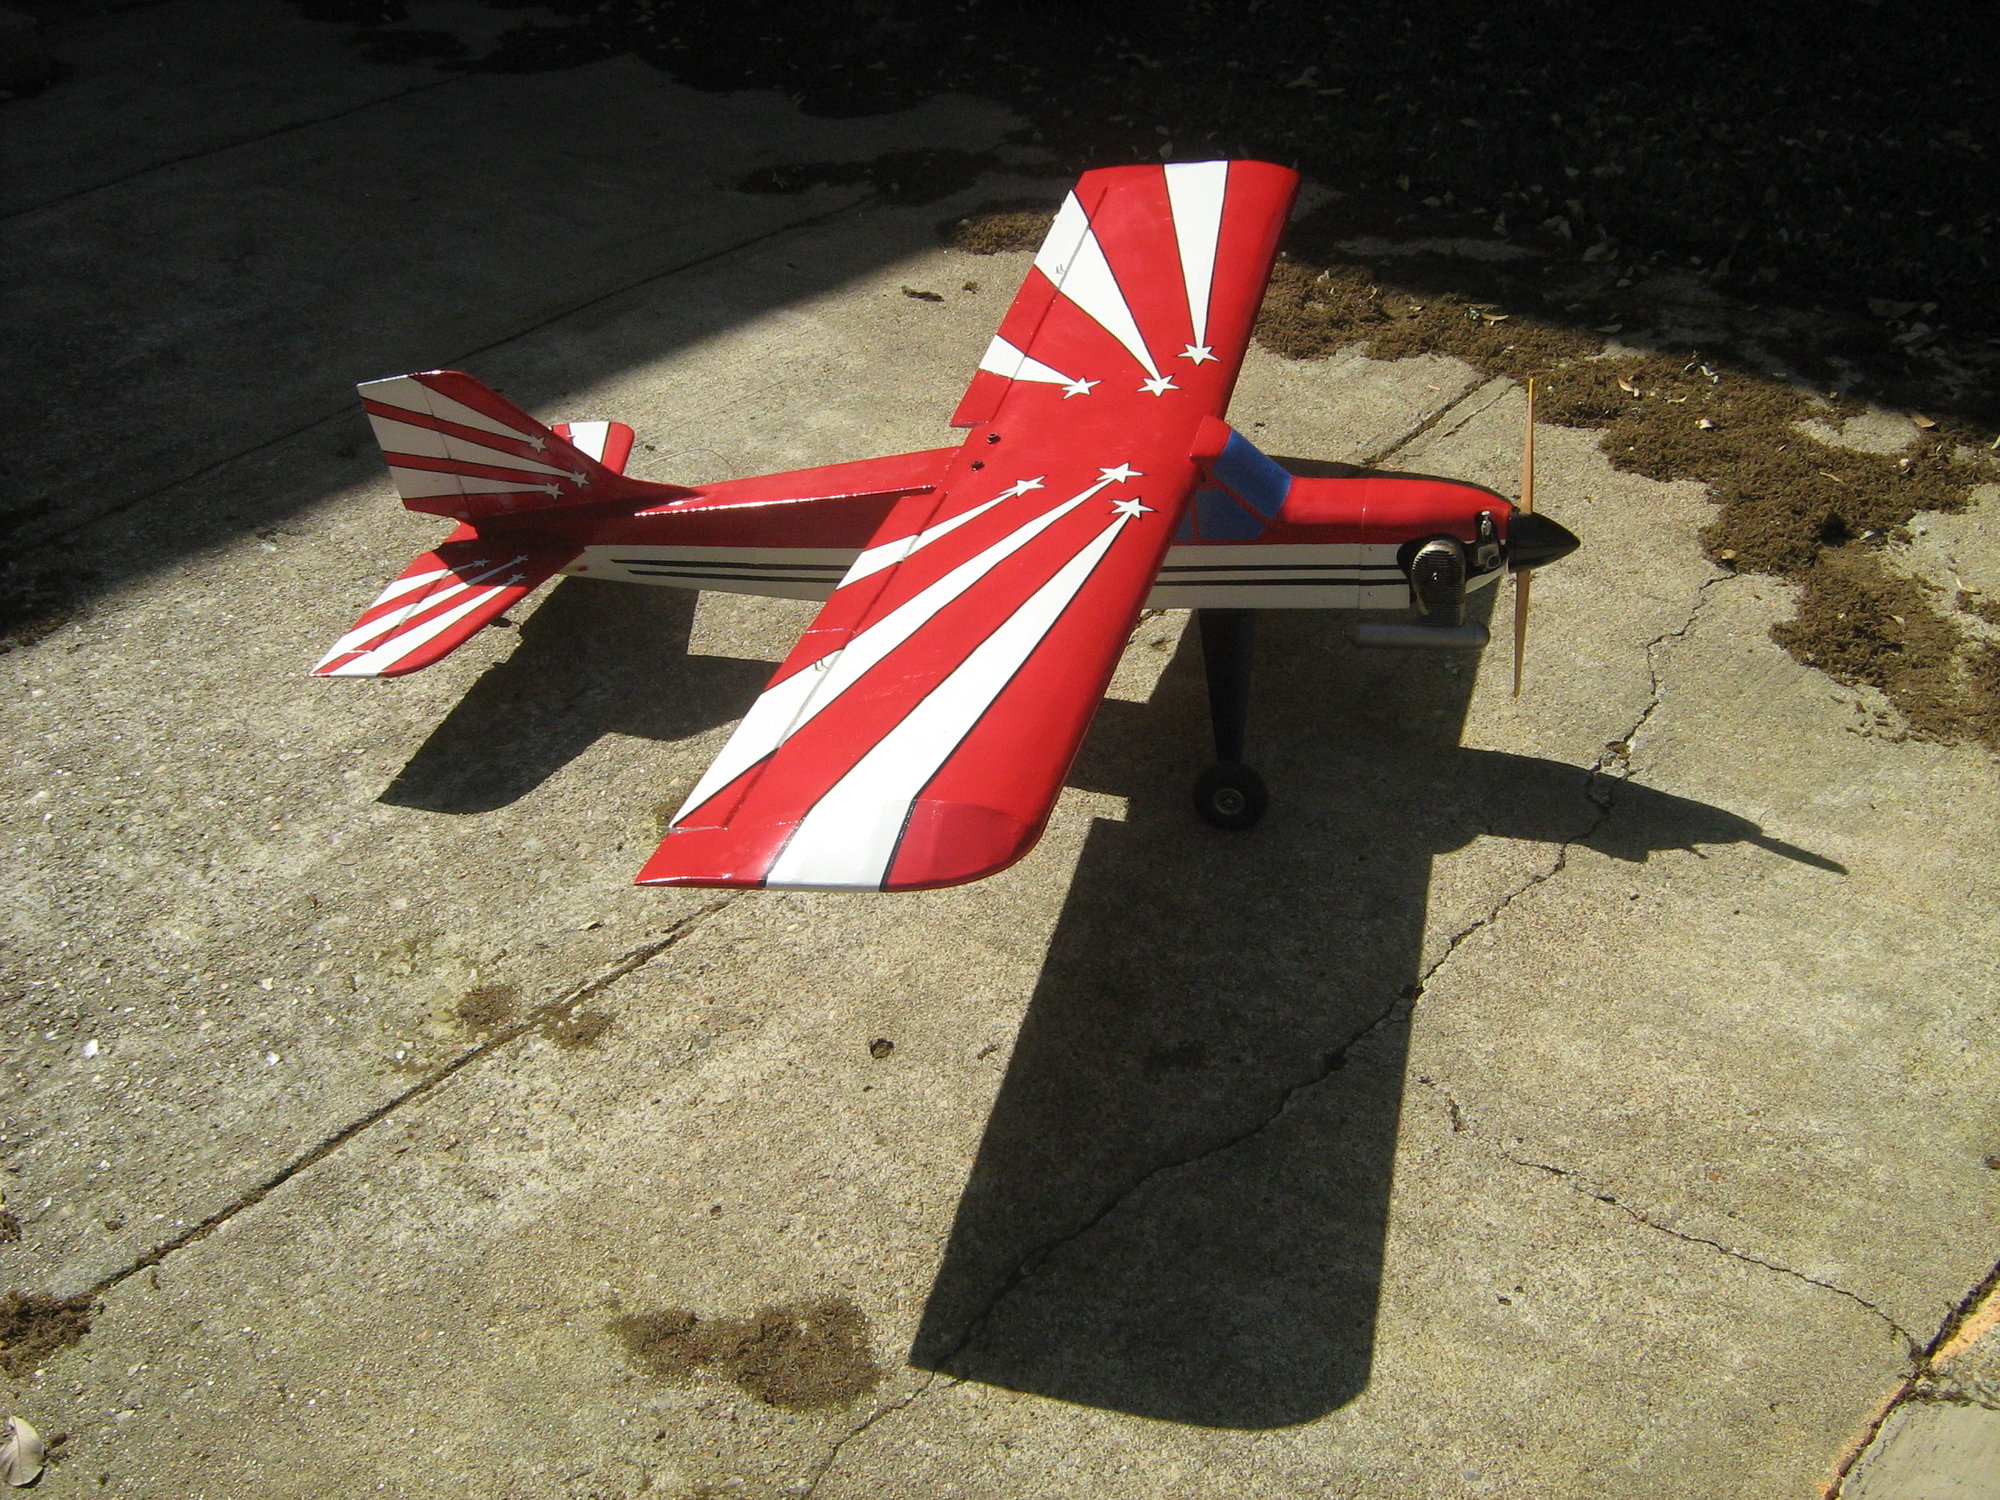
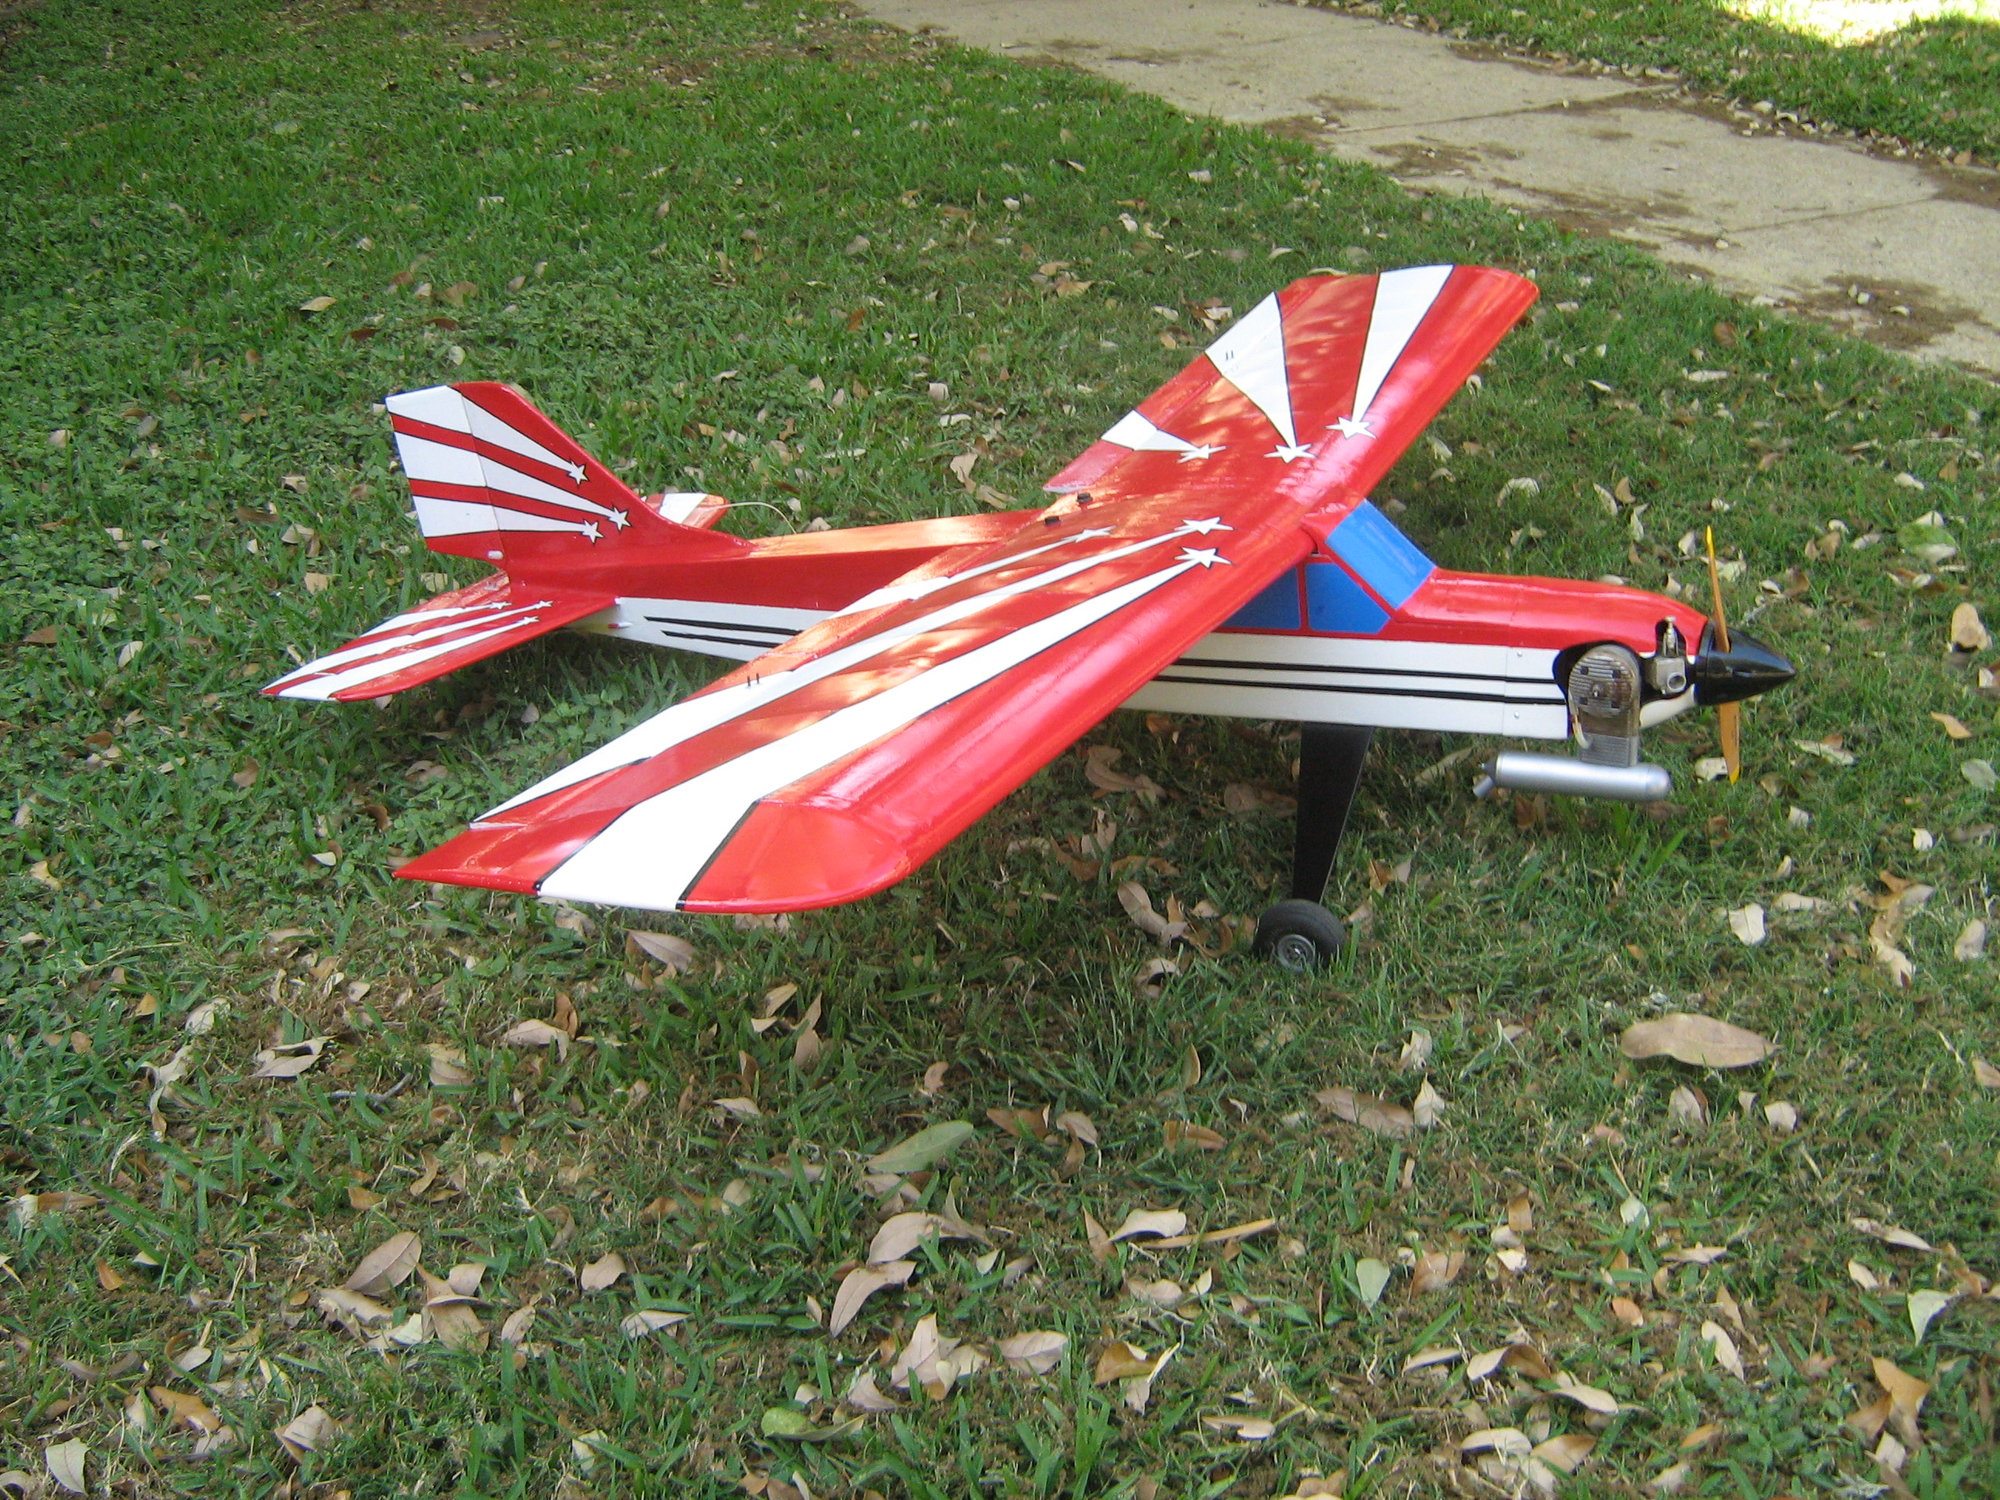
Top view showing engine compartment with heavy fiberglass cloth and epoxy resin. Throttle control rod. Tank tubes (2). 4-40 screws in-place for attaching engine mount.
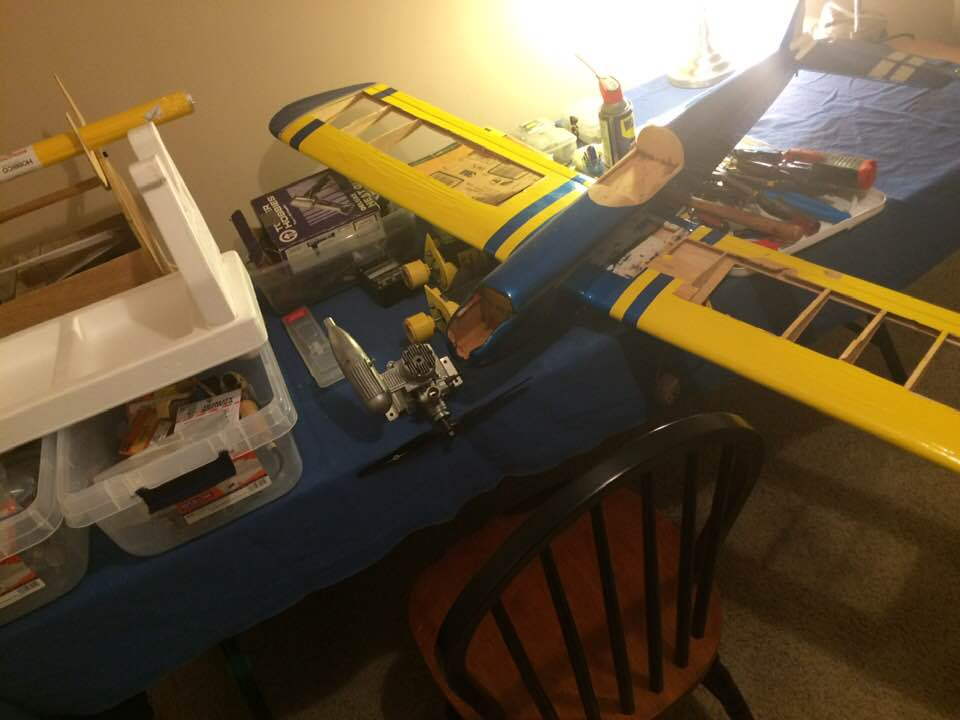
Top view showing wing damage
Bottom view showing wing mounting bolts. Wing mounted landing gear. Engine compartment drain hole. Wing damage
Top view showing canopy attachment area. Wing damage
Top view showing engine compartment with heavy fiberglass cloth and epoxy resin. Throttle control rod. Tank tubes (2). 4-40 screws in-place for attaching engine mount.
Top view showing wing damage
Last edited by Lee Taylor; 02-23-2020 at 09:03 AM.
02-23-2020, 11:17 AM
#4
Thread Starter
Hi Lee
Since iI think the wing is originally a stick 40 wing I dug out my plans for the 60 stick. Loved flying that plane. I was going to down size the proportions to make a stick like bird with the wing. But I wanted it to be a low wing even though that adds a lot more work to make the mods. But the lines of a stick just don't float my boat. So pulled down plans for a S.S. 40. It has good looking lines, and more side area for knife edge.
So a S.S. 40 it is.
I started out in control line myself.
Ken
02-23-2020, 03:58 PM
#6
Happy to share photos. No problem in that area. Will be taking more as time passes.
Been practicing low and close aileron turns on an RF8 sim. I am really impressed with this sim. First one I have owned. Great tool in my opinion
Been practicing low and close aileron turns on an RF8 sim. I am really impressed with this sim. First one I have owned. Great tool in my opinion
02-23-2020, 04:56 PM
#8
Well I gave the Sportster a whirl on the simulator. No bad characteristics (in my opinion) on the simulator. It is VERY fast and VERY sensitive. Of course you can slow it down and desensitize the quickness by reducing the deflections. It fly's well. I am happy with it. Will take some time to dial-in the sensitivity that suits.
02-23-2020, 05:03 PM
#9
I am happy with the sim purchase. I actually saw the comment "I would rather fly on a sim" the other day. There is something to be said about that. No rebuilding. No fixing. The sim has helped me improve significantly. I know it is not for everyone but it works for me. It is better than I expected
02-23-2020, 05:13 PM
#10
Thread Starter
I understand the sims are pretty good these days.
Would be fun on our living room TV, 65". I built a media server for it that could easily run the software.
Would be fun on our living room TV, 65". I built a media server for it that could easily run the software.
02-23-2020, 05:18 PM
#11
Thread Starter
Spent a few hours working on the S.S
Finished the last two bulkheads. Used more of the balsa ply I made. I think I will be using more of it on future projects.
I made a pair of lite ply doublers, and to carry the fire wall loads I made a pair of aircraft ply doublers from 1/16". This is not how the original was made. But I think it should be stronger and it really is not very heavy. I only have 2 sheets of 1/8" stock on hand so by using ply doublers vice balsa I can complete the sides and basic fuse frame out.
I thought about cutting lightning hols in the lite ply doublers but decided as small as they are that it just would not make a reasonable deference
Ken.
Having trouble uploading pics. This is the third try. I loose the post, every thing. Fortunately I have all the text saved so that is just a paste operation.
Nope first pic hits 90% and then hangs.
Made the pics smaller yet and it still hangs the first pic at 90%
Last edited by flyingagin; 02-23-2020 at 05:47 PM. Reason: forgot the pics this time
 02-24-2020, 08:16 AM
#14
Thread Starter
It's a film on the wing. What kind? Beats the heck out of me. I've wondered what it is myself a few tims. I may figure out more when I strip the wing.
The last time I used silk was in the '70's. I liked using silk then, but found Monocoat easier. I used Sig Koveral back in the mid '90's a time or two.
The plane in my avatar was covered with 100% polyester dress lining. I did that around 2014. I used Rust-o-lium to paint it with. I shrank the cloth first with Nitrate dope. I won't use dress linning again. Just to hard and not a lot cheaper than Koveral.
I don't know if I will use silk again, I might. I have a source for it Here.
After this plane I will be using Sig Koveral for several of the next planes. One of those a brand new build from scratch (a 1/3 scale Pitts S1), and 2 or three planes that are partial builds like this S.S. is.
I need the practice of fabric and dope before starting the Pitts. I already have a substantial investment of money in the Pitts, even though I have yet to cut one piece of wood. I have already bought the engine and the molded parts. The engine is a DLE 60cc twin. The molded parts are the engine cowl, the wheel pants, and the canopy. I still have to start buying the wood for it. It is going to be my best effort build of my life. So I feel I need more current practice with Koveral and spraying dope. I need to practice pin striping more also. So the next few build are targeted for there skill building for me.
The Pacific Ace I'm also building now (temp paused for funds) Is also a skill building exorcise. It is getting covered in transparent red so all of my framing and joiner will show. Thus I have to do an exceptionally good job on the frame work. Good skill building.
I am posting a few pics of the plane in my avatar.
Ken
02-25-2020, 07:47 AM
#16
Thread Starter
Thanks
When I built the plane above I was stil using my 72 mhz system. I now have a 2.4 ghz radio. And yes there still is an antenna . @ actually. Short,just a few inches long. The first part is covered just like a coax cable and only about 2" or so of the inner conductor expose. That is the actual antenna. The 2 antennas are installed at 90 degrees to each other.
The tubes I used to run the 72 mhz antenna in the above plane is still there, but no longer used.
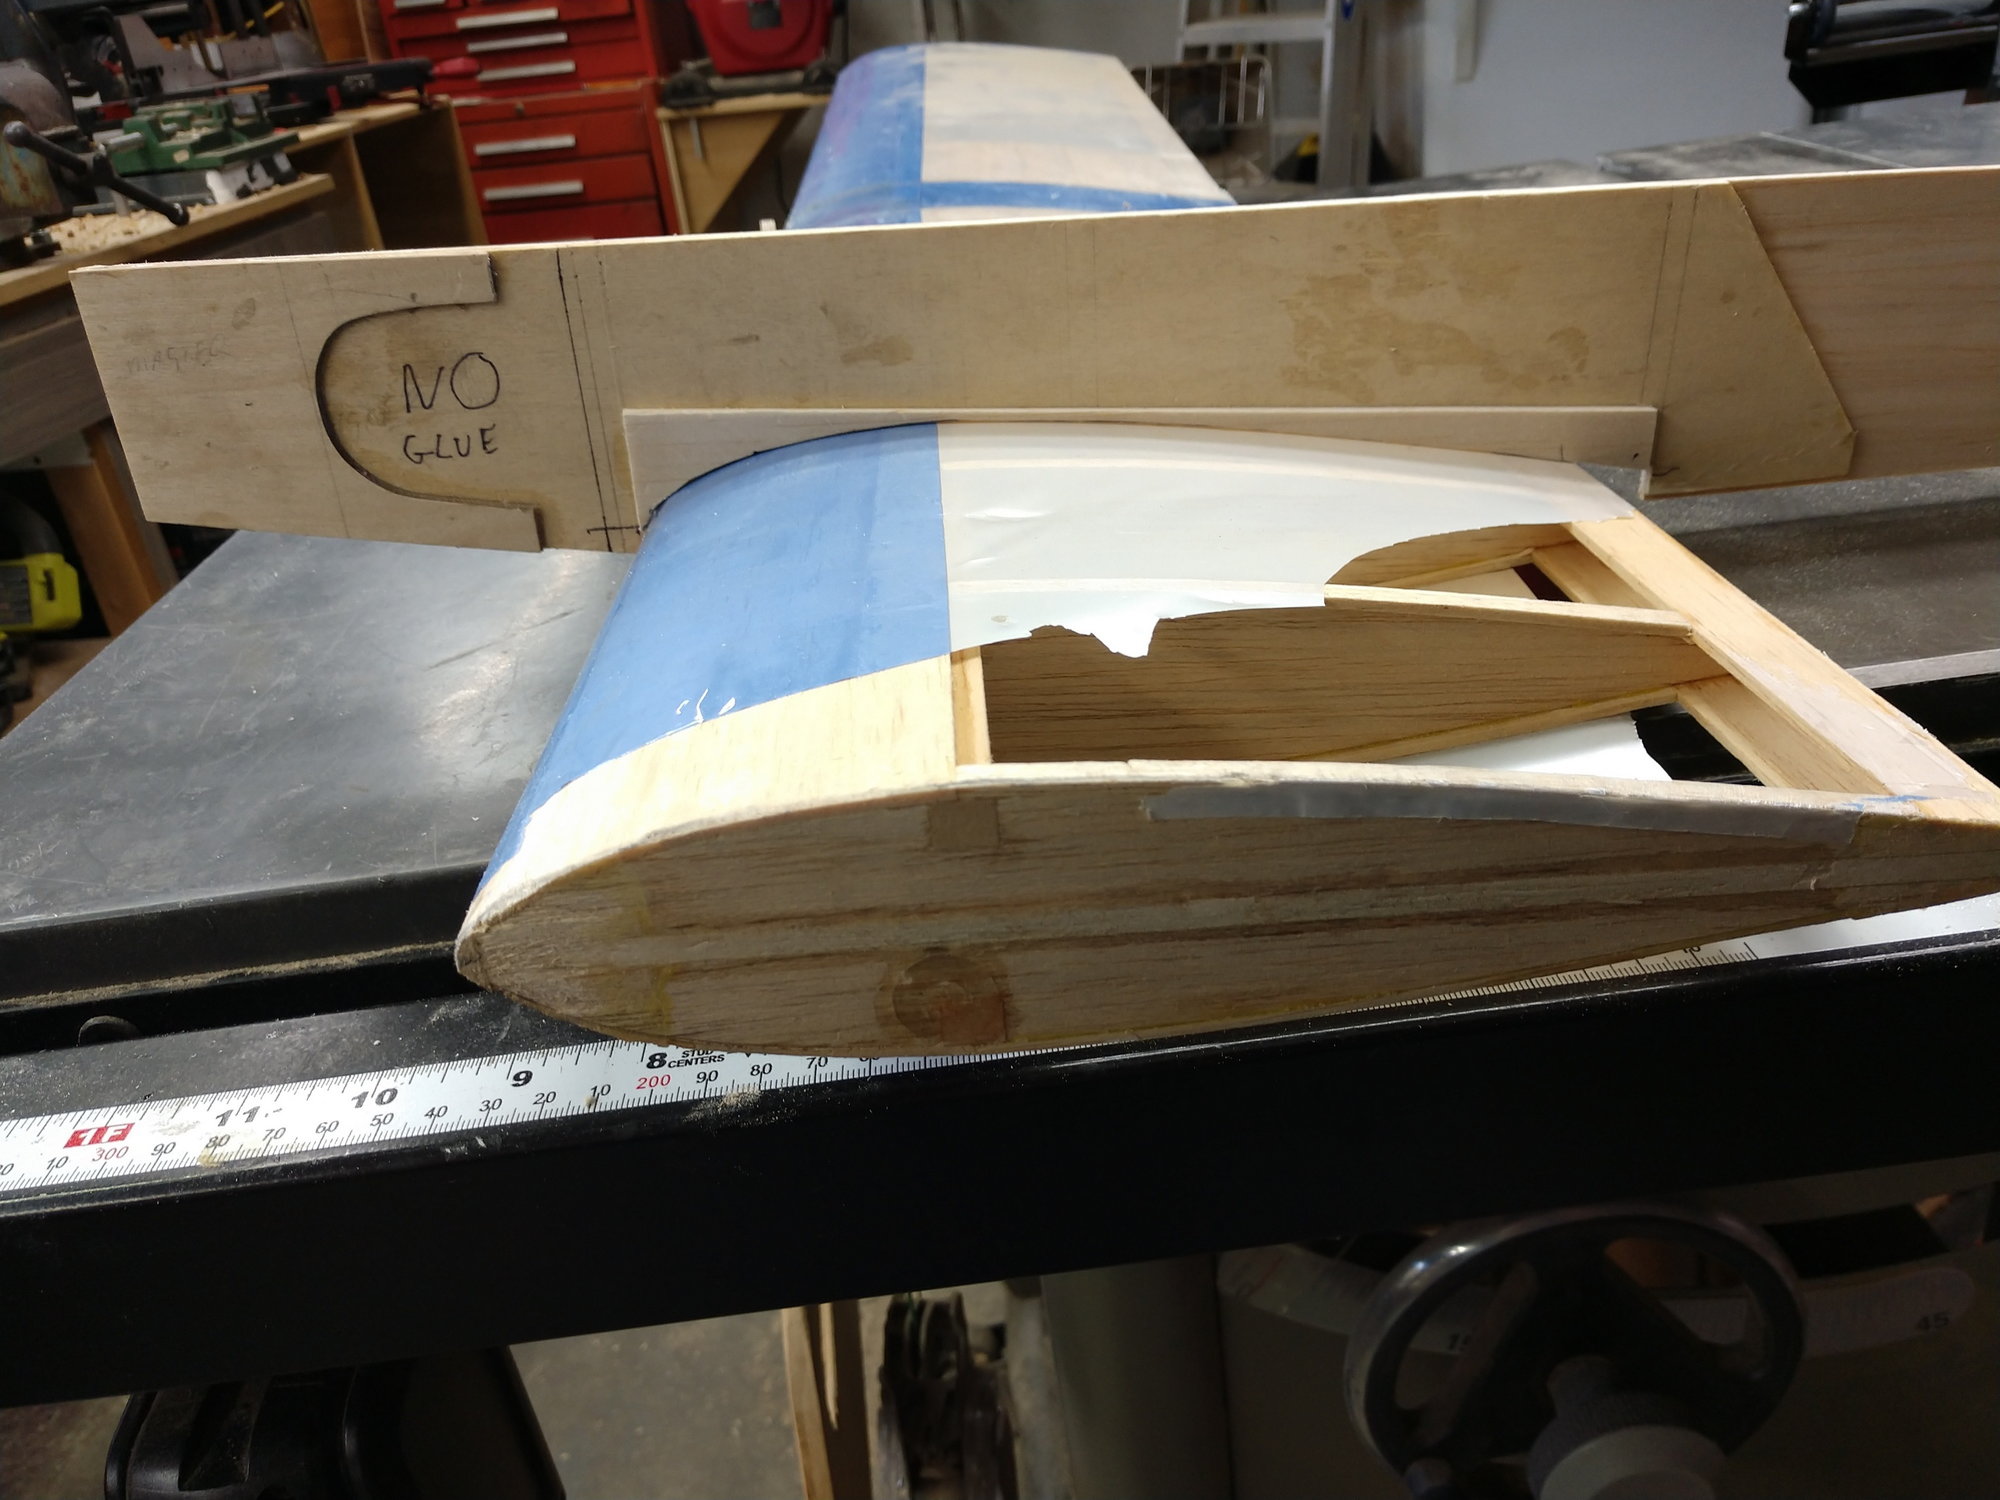
This is what I got done yesterday.
And I found the wings airfoil does not match up with the wing saddle in the fuse. I will have to get an accurate copy of the wings airfoil and transfer that to the fuse wing saddle. Not that big a deal, but that's what I get for assuming.
Ken
02-25-2020, 04:04 PM
#19
Thread Starter
I have done that before believe it or not. Ya can get a nice fit that way.
What I actually just did was to remove a wing tip down to the last rib. I( marked exact center of the trailing and leading edges and then sat that end firmly down on a piece of paper that had a center line drawn it, while centering the wing rib. I got lucky that a shop lite was kind enough to let me rest the the other wing tip against it and keep the wing secure while I traced around it. Sounds like a pain but it really wasn't. I need the wing tips remove any way so I can attach proper Super Sporster wing tips to the wing.
I then put some wide scotch tape over the pattern I had just drawn of the wing airfoil. folded the paper on it's center line and cut out the pattern, both sides at once, even though I really only needed the upper side. The reason I applied scotch tape to my airfoil pattern was to make it thicker and stiffer for tracing it onto a fuse side. that side then became my pattern for the other fuse sides.
I had to add some fill stock (2 pieces of 1/8" balsa) to the original wing cut out. So I actually added one extra piece to give a little more meat to the wing saddles.
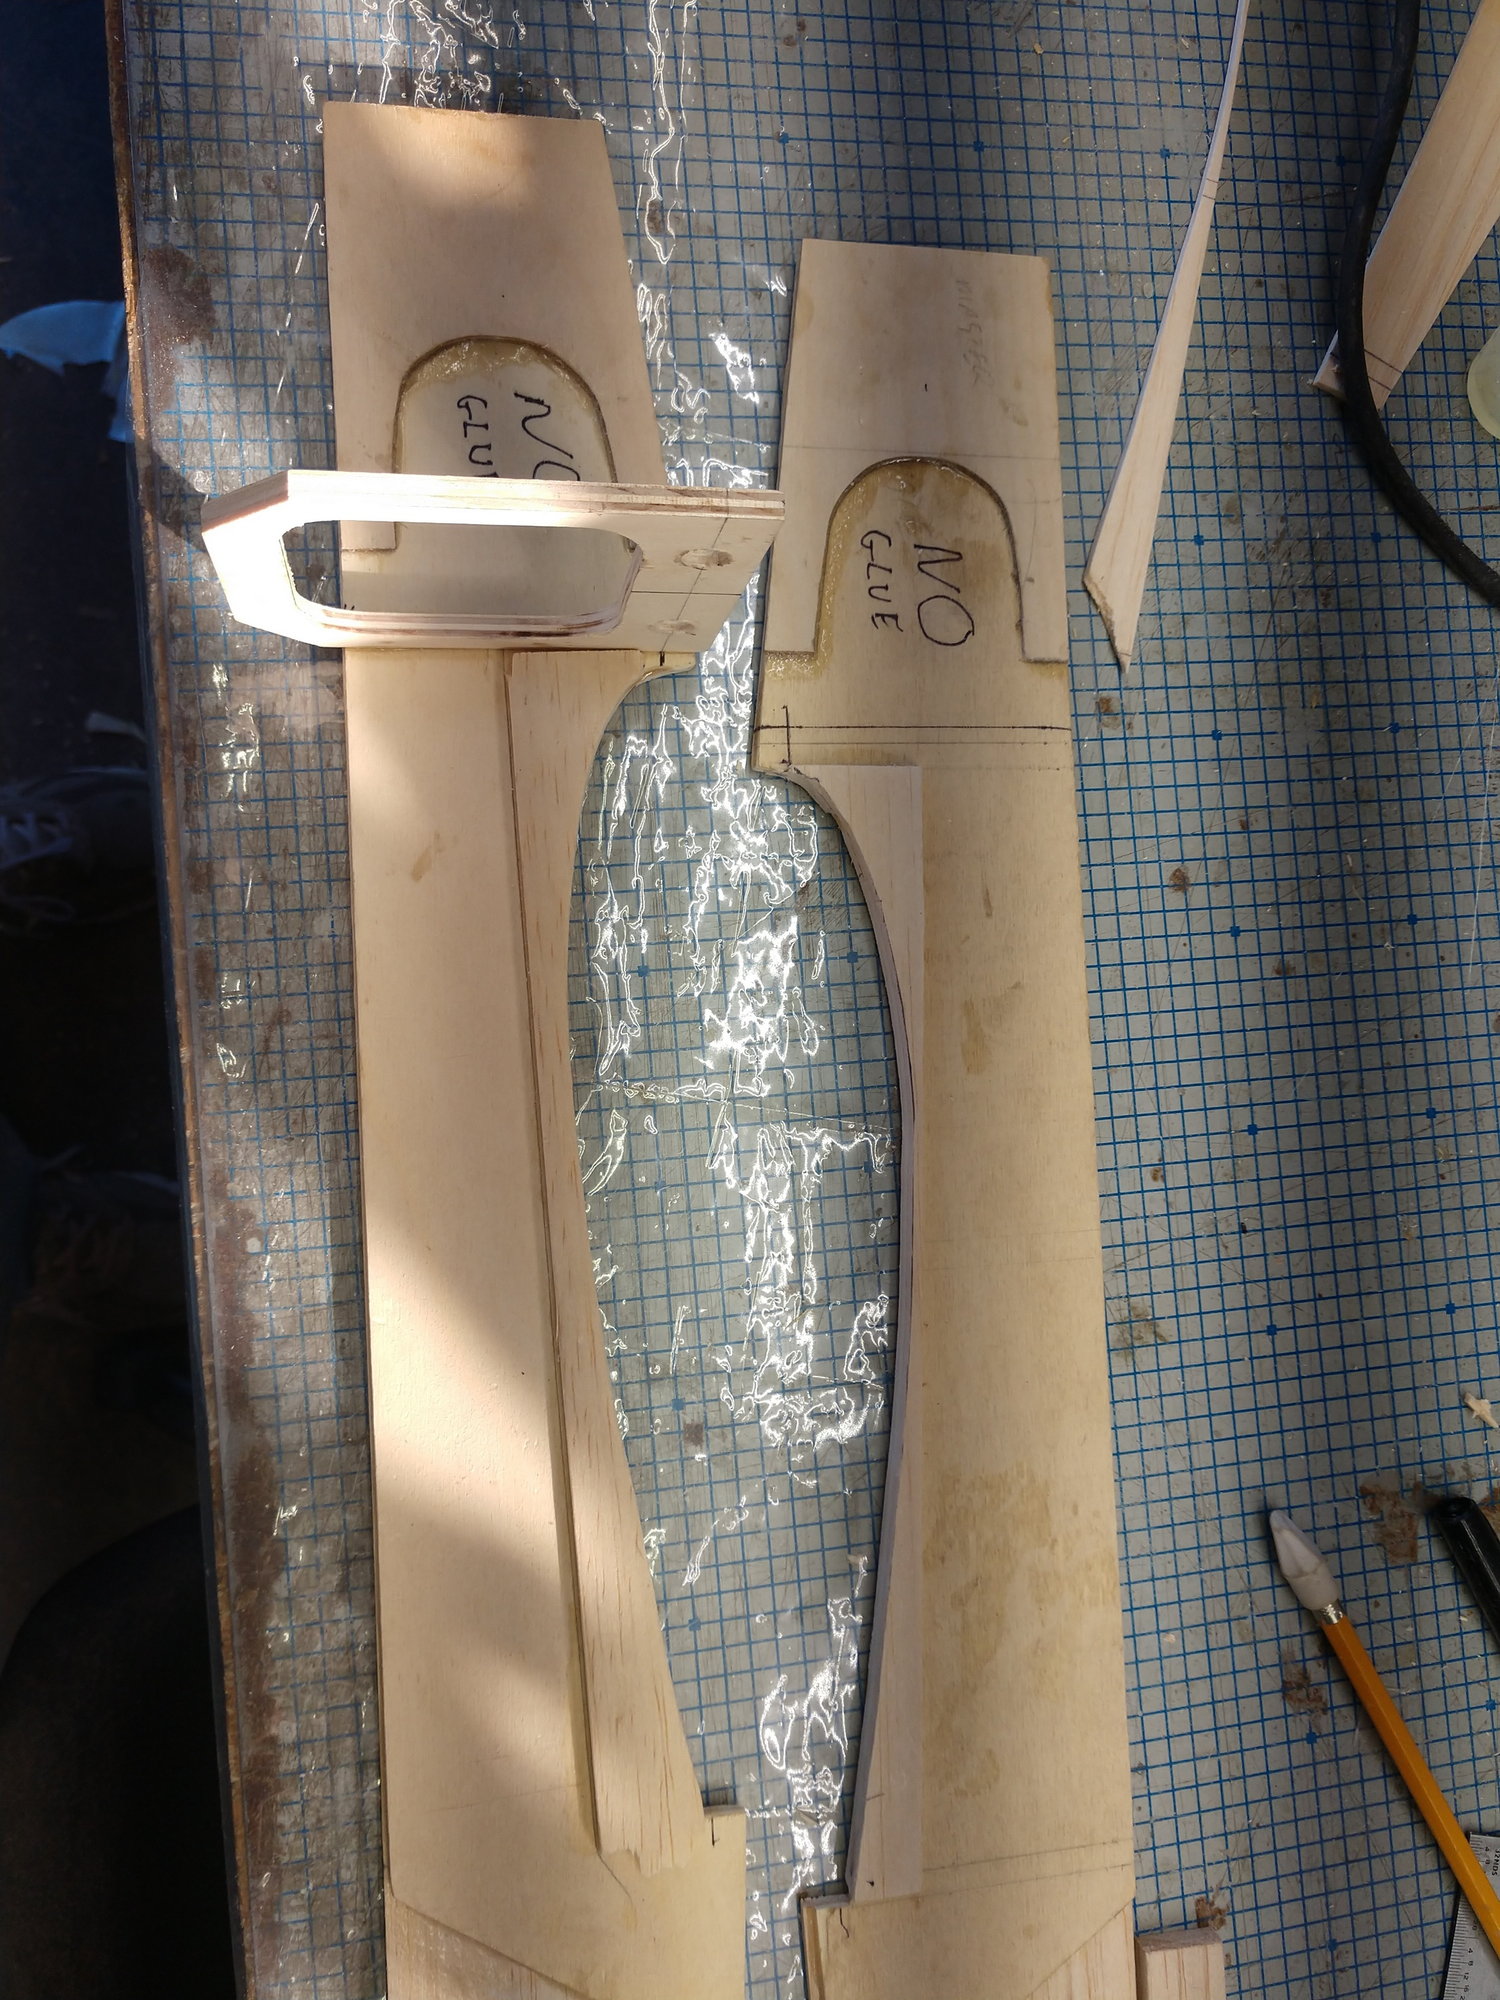
Now all of this nonsense could easily been avoided if I had made DARN SURE the wings actual airfoil matched the S.S plans. I could easily have adjust at that time. Oh well, it ain't nothing but time, is it. I do find that at 67 I do sometimes forget a little step that can bite me in the butt. If you noticed that the fuse side have written on them glue, They also have no glue wrote on them. Just trying to avoid to of the same side fuse sides. Done that, been there, ain't fun.
Ken
Look what I found in the wing tip. Now that is 2 washers I can take off of my shopping list
Nearly perfect fit I had to remove the original wing tip so I could use the last rib as my pattern. Was going to have it to do any way so I could replace with proper Super Sporster wing tips. So I am just a bit ahead on this one wing tip.
I have sat this bulk head a 1/4" forward to allow for the two 1/4" ply wing dowel receivers that will be added later. for alignment purposes.
Last edited by flyingagin; 02-25-2020 at 04:28 PM.
02-25-2020, 04:28 PM
#20
I do not depend on memory for anything. I am 67 also. Class of 70! Yee-hi. "I don't know and I don't give a damn, next stop is Viet Nam - Country Joe and the Fish". Yes I am a child of the 60's
I did notice the different form and shape on the wingtips but then its your model and you can do as you like with it.
Do you have a canopy for the Sportster? They are hard to find. Might as well start looking now.
Another odd thing about the Sportster is that I enclosed my tank thinking I will never ever need to get my hands on it. Well I was wrong
Next time on the sim I want to check out how it rolls. My suspicion is that it corkscrews as opposed to rolling on an axis. I may be wrong and if not wrong it may just be the sim. Will let you know. My thought process is that the tapered wings are the ones that do axial rolls well. I will play that one out
02-25-2020, 06:23 PM
#21
Thread Starter
Yeah I depend on Evernote for my shopping list.
Can't live with those wing tips, gota be S.S. tips, period.
No I don't have a canopy for it. I guess I could make a mold and pull one. But that is a whole new learning appearance that I'm not anxious to do now. I could also just make a balsa canopy and paint it. But I'm not fond of painted canopies. That leaves one choice. Just make a windshield and go with an open cockpit. I will search and see if I can find a canopy to purchase.
I just googled "who manufactured the Super Sporster rc airplane" and 2nd listing was Great Planes. And dang it all to heck, the parts list shows EVERY THING unavailable. Well I will search some more.
I noticed when examining the plans and laying parts on them that getting access to the fuel tank was likely impossible. NOT ACCEPTABLE. I have had to get at most tanks Iv'e installed in the past. Something always comes up. My scratch built Sig Kadet Jr. almost has the tank locked in . The top cover is held with a key tap at the front and two bolts at the 2nd former, and just the covering goes is one piece over it. I would have to cut the covering at the seam is all. That is why I widened the fuse slightly. Now the tank fits thru the 2nd former with a little bit of spare room, so I can place foam around the opening in the former.
Ken
02-26-2020, 08:08 AM
#24
Thread Starter
I have an old Os .46 that I found in a junk parts box. It seems to have good compression. I hunted for 2 months trying to find screws for the muffler and the carb. Found both within a few days of each other. I still need to put the engine on a test stand and test it out. But I fairly sure it will run fine.
The engine has a lot of baked on oil on it. But that is only cosmetic
I also have Super Tiger .40 that have I only ran enough to break in. So I know it is good. I was reserving it for a control line. Got the ribs made for it, but no farther. I wasn't sure I could stand long enough to fly out a tank of fuel. Hips and back have been really limiting for me. But I now am pretty sure I can fly out a tank. I have been riding 30 miles a day 5 days a week on our exorcise bike and my endurance standing and walking has dramatically improved. I managed to stand for an entire flight with a rc plane last week with out much pain.
Ken
Ken,
02-26-2020, 03:11 PM
#25