


Looking for construction article.
 09-29-2013, 02:36 AM
#1

Thread Starter
Join Date: Mar 2013
Location: Winnipeg,
MB, CANADA
Posts: 751
Likes: 0
Received 0 Likes
on
0 Posts
Hi all,
I was starting up the boiler in our basement yesterday and found some RCM plans for an aircraft called a C.A.T.(canard assisted tailless) I thought I had lost all my plans long ago due to water damage.
Does anyone happen to have RCM 8-90 that they could scan the construction article for me, or is there any other way a person could obtain a copy of the article?
Calvi

 10-07-2013, 01:59 PM
#3
Junior Member
My Feedback: (11)
Join Date: Feb 2005
Location: Anton,
CO
Posts: 2
Likes: 0
Received 0 Likes
on
0 Posts
Calvi are you still looking for the construction article for the C.A.T. ?
I found the article on the CAT. It is about ten pages, so if you can send me a private message with your email, I will scan it and email it to you.
Joe
I found the article on the CAT. It is about ten pages, so if you can send me a private message with your email, I will scan it and email it to you.
Joe
10-08-2013, 08:47 AM
#4
Thread Starter
Join Date: Mar 2013
Location: Winnipeg,
MB, CANADA
Posts: 751
Likes: 0
Received 0 Likes
on
0 Posts
Thanks Av8rJo,
That would be great, I have been searching the house and cannot find it, must have been with the water damaged plans I threw out. I have been wanting to build this one for many years, and this winter it is going to happen thanks to your generous offer!
Calvi
That would be great, I have been searching the house and cannot find it, must have been with the water damaged plans I threw out. I have been wanting to build this one for many years, and this winter it is going to happen thanks to your generous offer!
Calvi
10-09-2013, 01:14 PM
#6
Thread Starter
Join Date: Mar 2013
Location: Winnipeg,
MB, CANADA
Posts: 751
Likes: 0
Received 0 Likes
on
0 Posts
Thank you ser00 and Av8rJo, this will keep me out of trouble for part of the long winter ahead I'm sure, will post some pics once she starts to go together.
Calvi
Calvi
11-22-2013, 07:34 AM
#7
Thread Starter
Join Date: Mar 2013
Location: Winnipeg,
MB, CANADA
Posts: 751
Likes: 0
Received 0 Likes
on
0 Posts
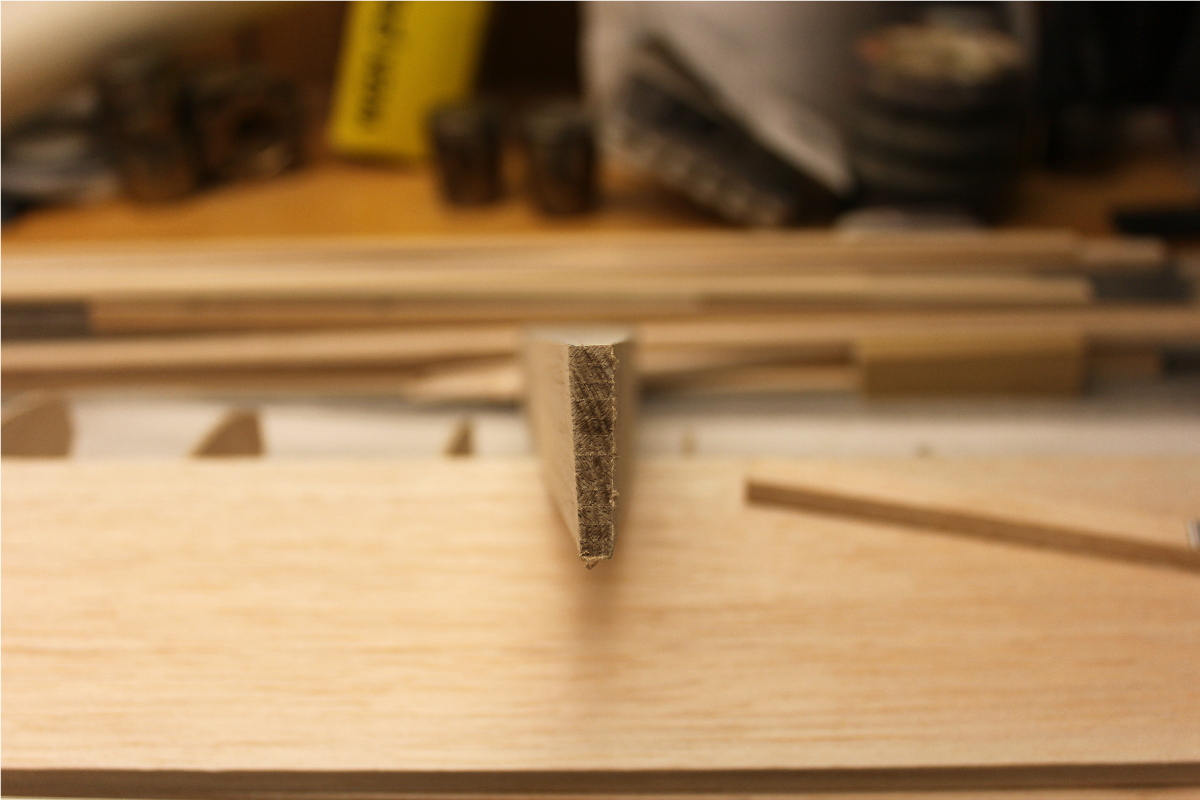
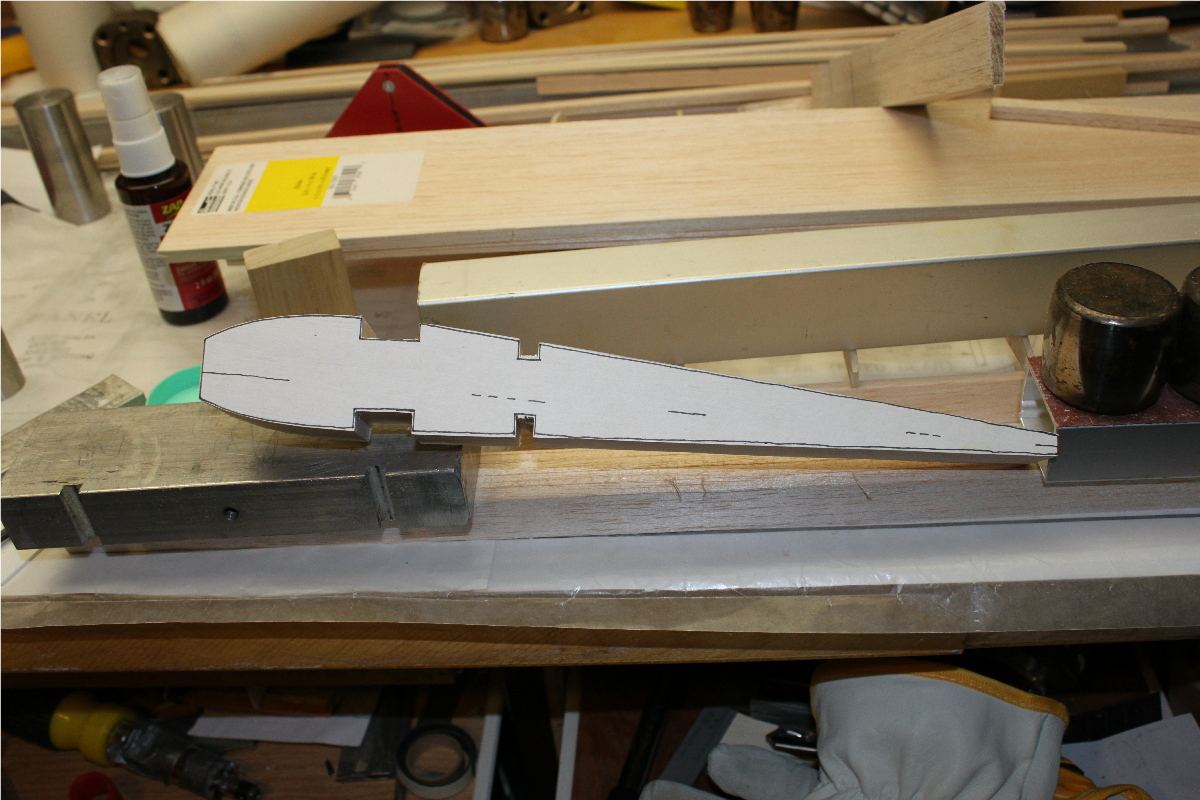
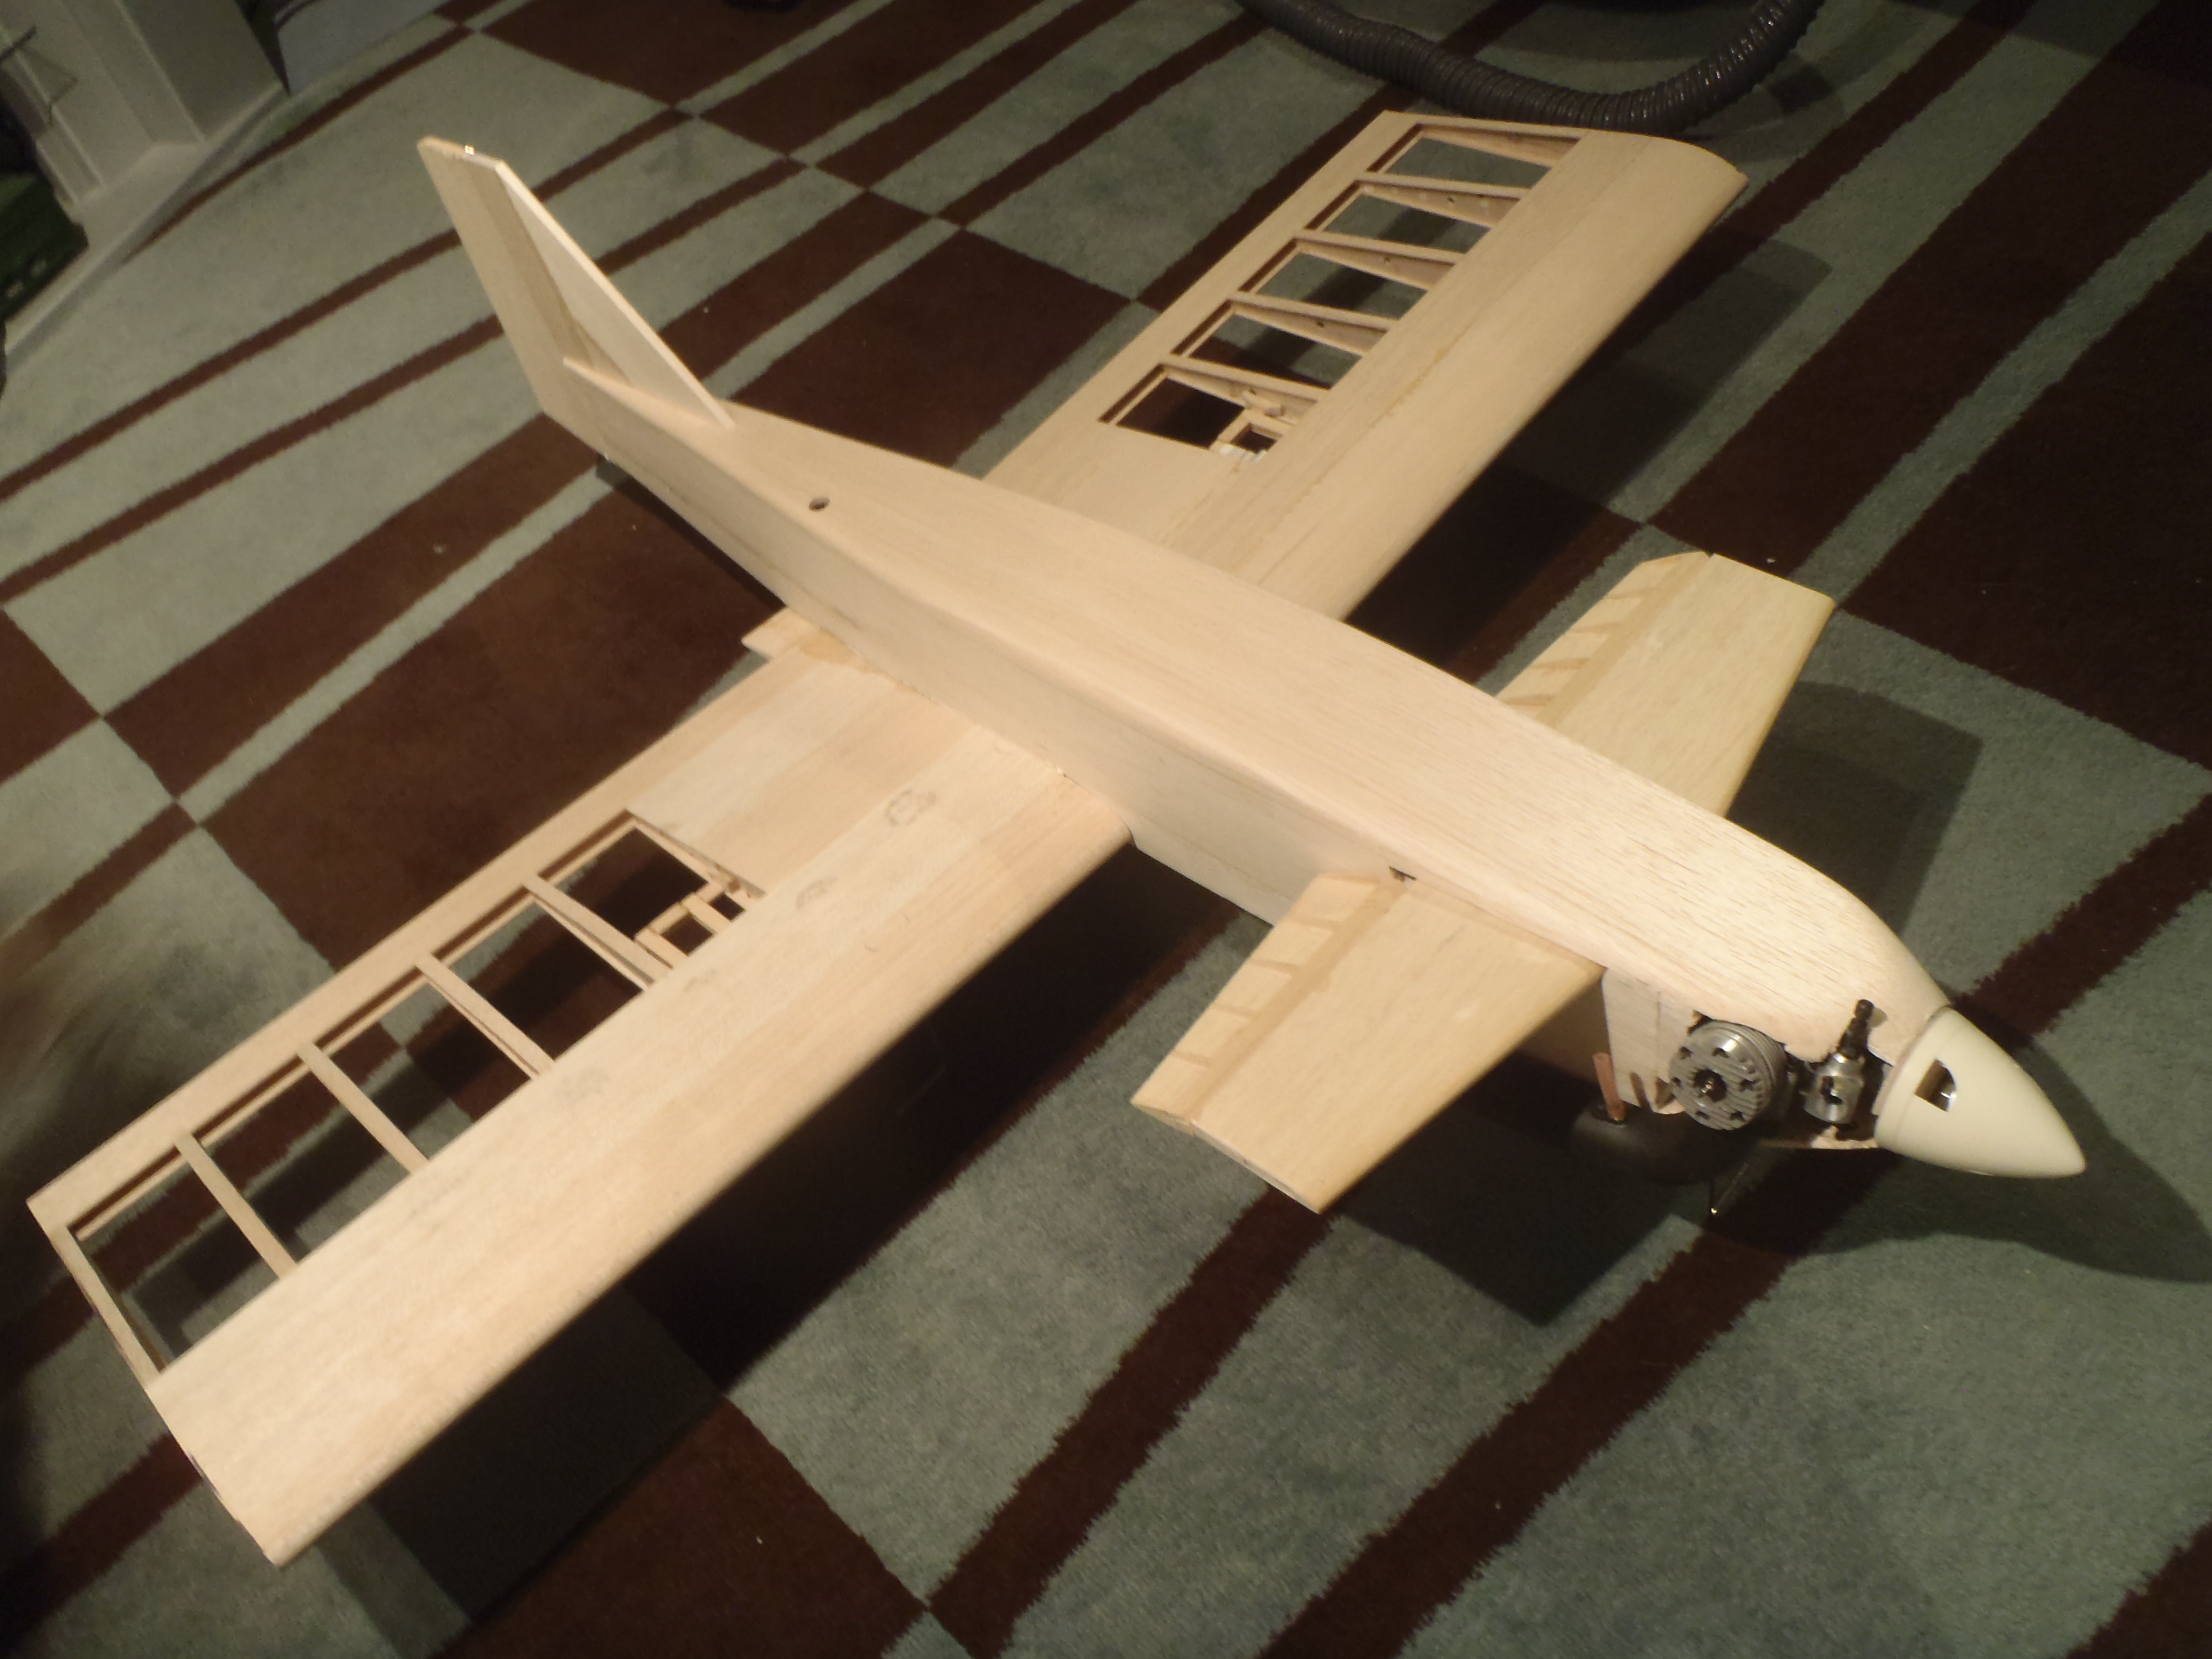
Getting Started,
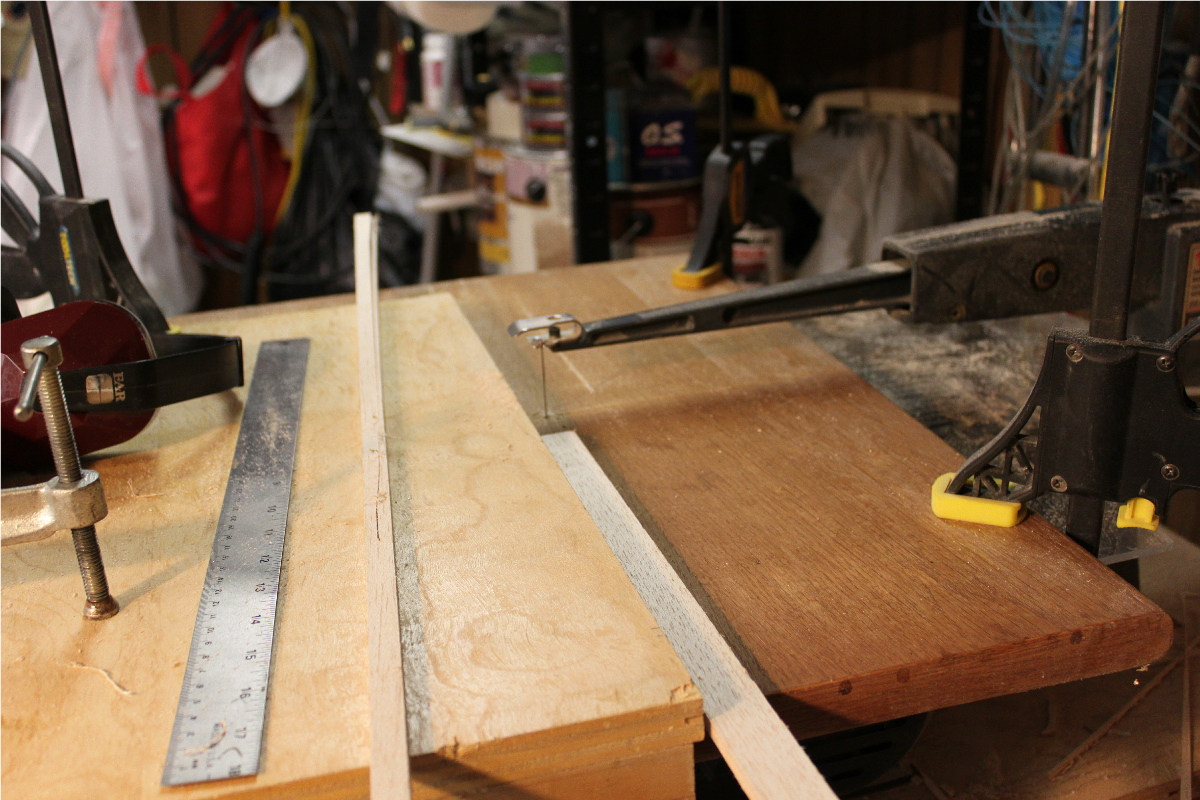
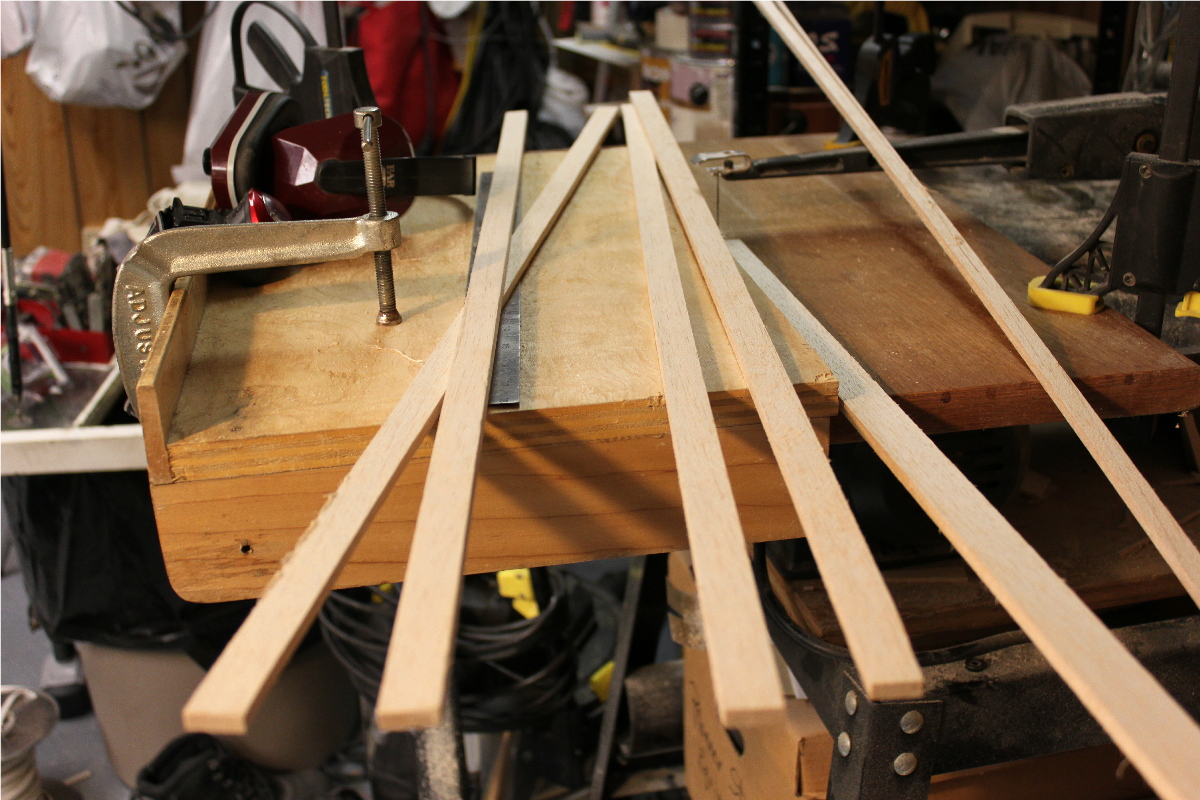
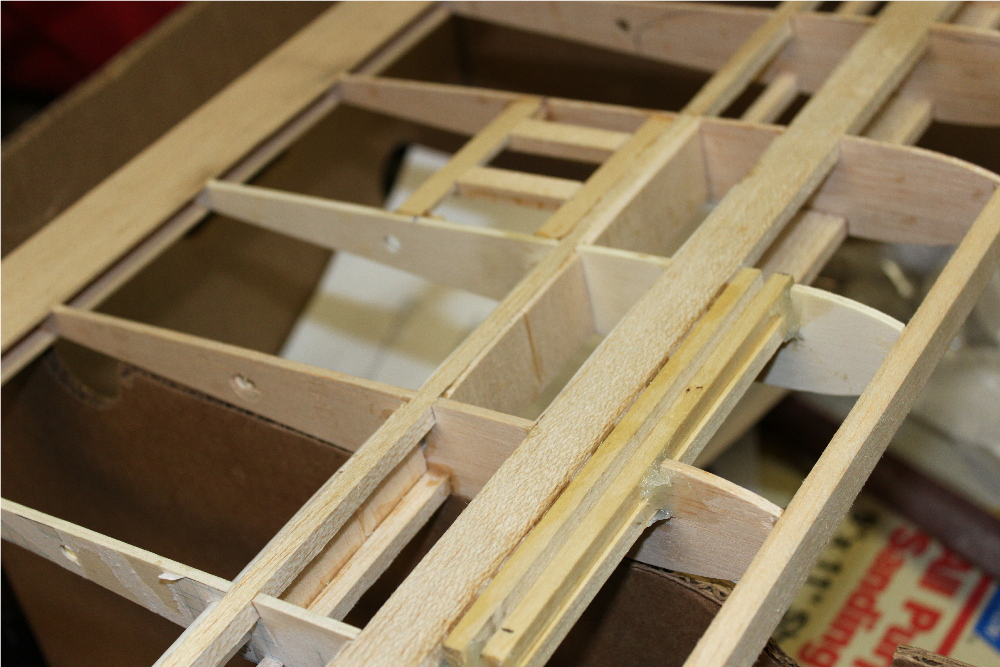
I cut a stack of the outer ribs, and thought I could hold them freehand at 90 degrees to the belt sander Doh! Second attempt is going better, should have them sanded to final shape this weekend. I cut the front spars(3/4 x 1/4") using my scroll saw, they turned out good after a few false starts(more clamps are better!).")
Calvi
I cut a stack of the outer ribs, and thought I could hold them freehand at 90 degrees to the belt sander Doh! Second attempt is going better, should have them sanded to final shape this weekend. I cut the front spars(3/4 x 1/4") using my scroll saw, they turned out good after a few false starts(more clamps are better!).
Calvi
12-13-2013, 09:29 AM
#10
Thread Starter
Join Date: Mar 2013
Location: Winnipeg,
MB, CANADA
Posts: 751
Likes: 0
Received 0 Likes
on
0 Posts
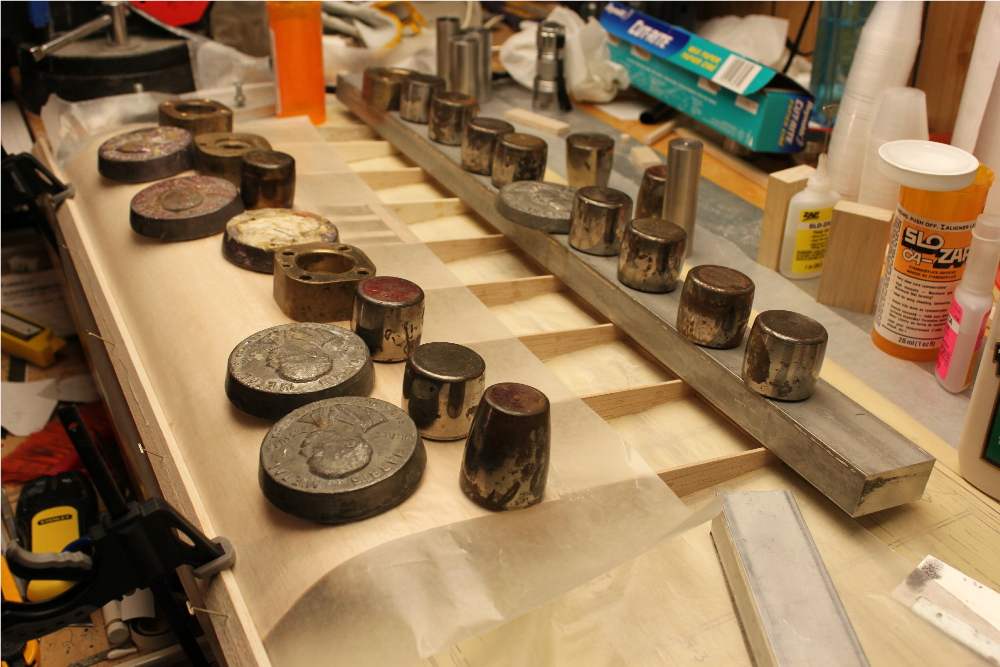
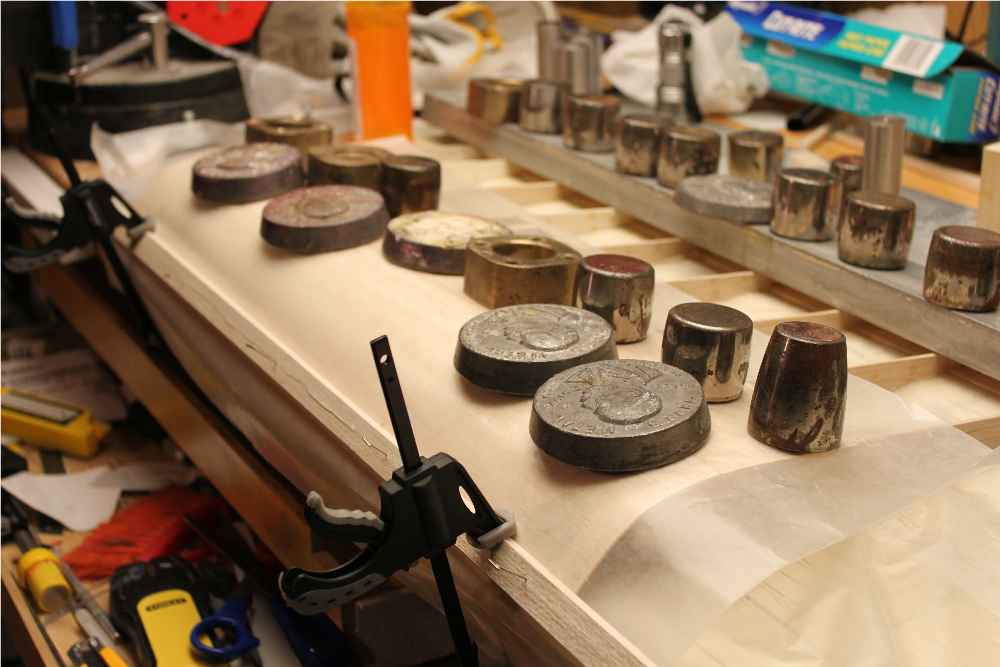
Got a little more work done, I had to make up my own landing gear blocks as the LHS did not have any. I had some 2" x 1/4" poplar that used to be available at our local Rhona hardware store, they claim that the supplier stopped sending them stock when I asked why they did not have any anymore. Too bad that is the last of it. Anyway here are a few pics.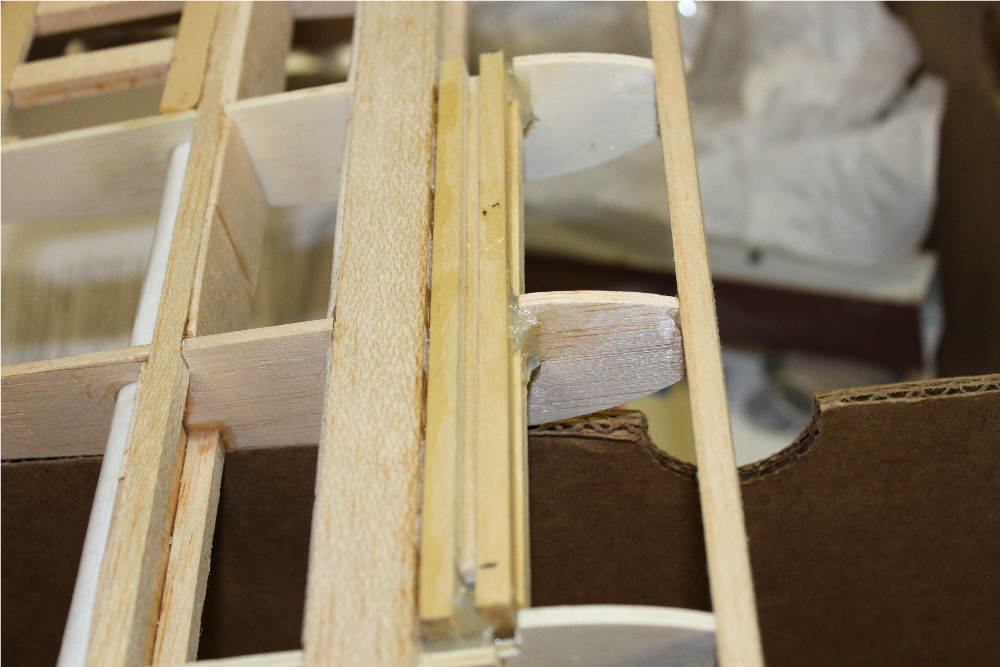
12-15-2013, 07:50 AM
#11
Thread Starter
Join Date: Mar 2013
Location: Winnipeg,
MB, CANADA
Posts: 751
Likes: 0
Received 0 Likes
on
0 Posts
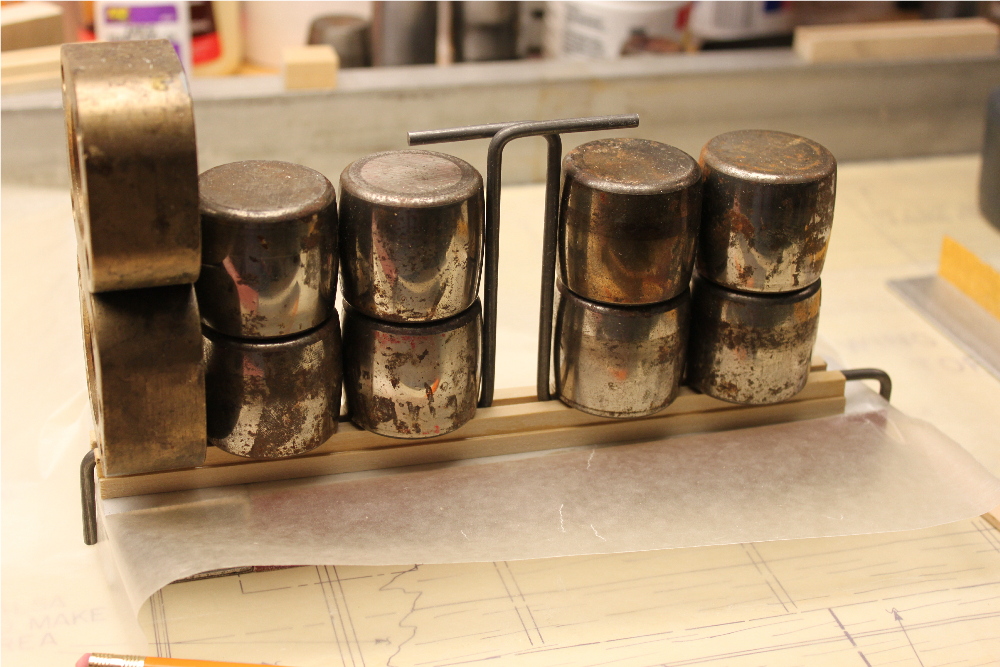
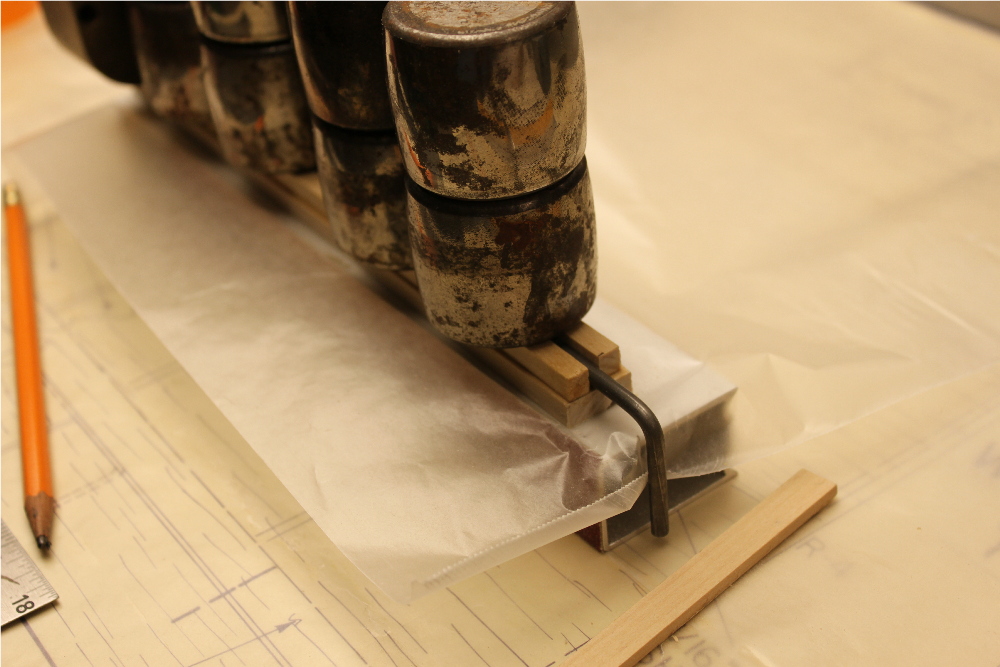
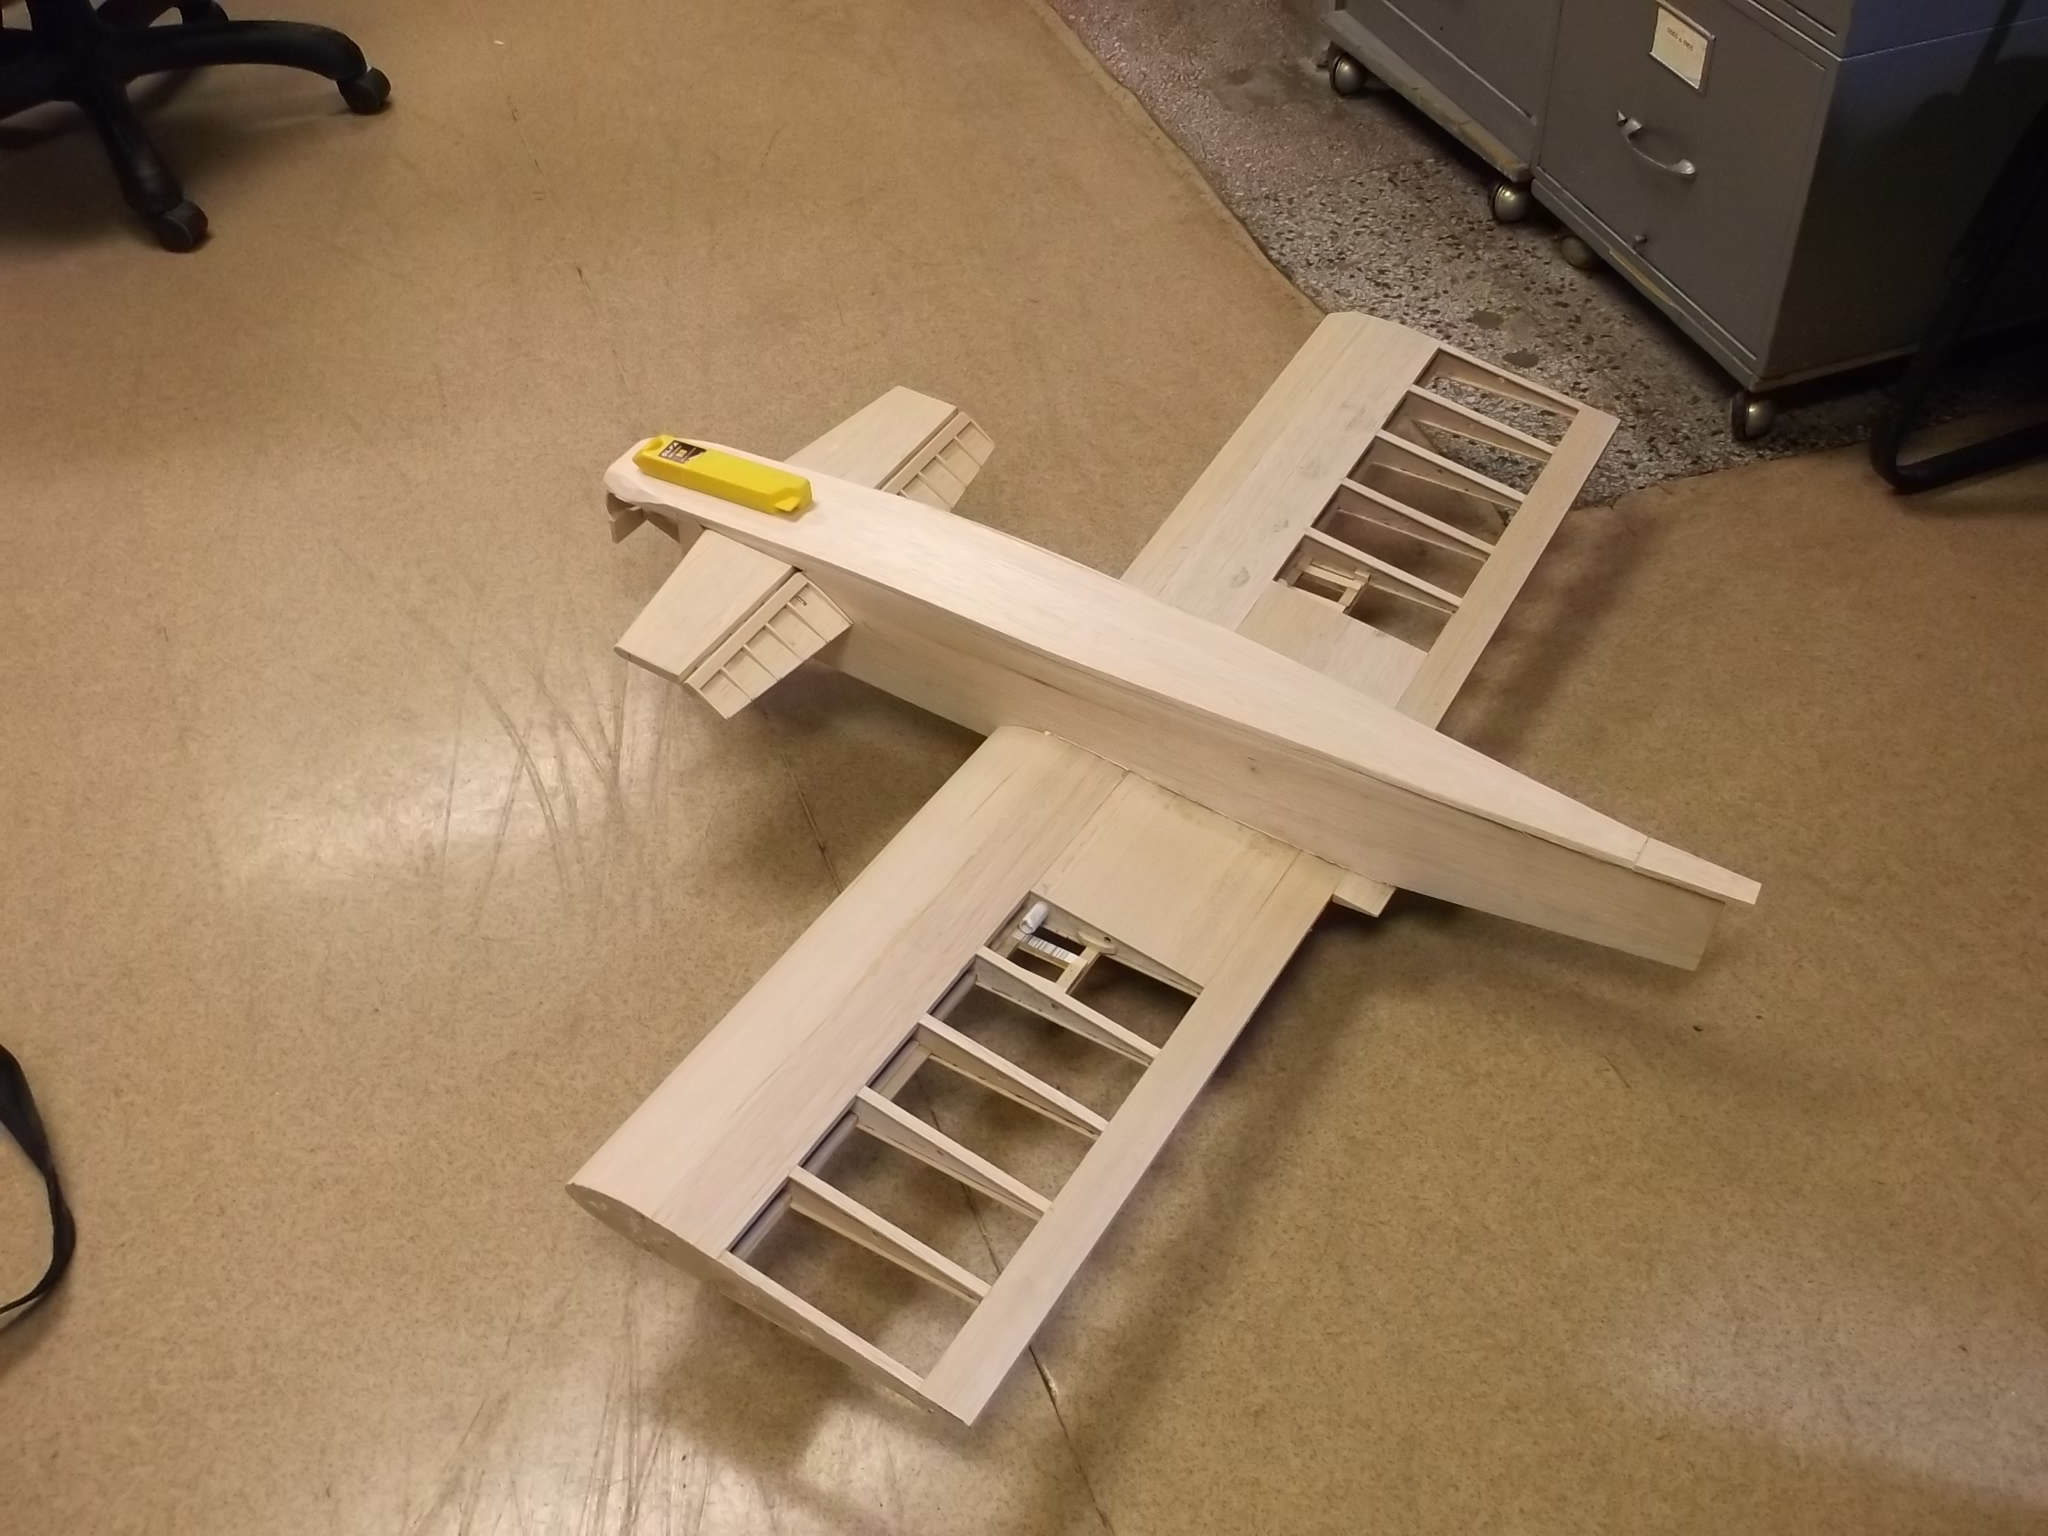
Ok, all shear webbing in and landing gear blocks in place, I can put some sheeting on the wing panels. This is fairly easy with the short(24") constant cord panels.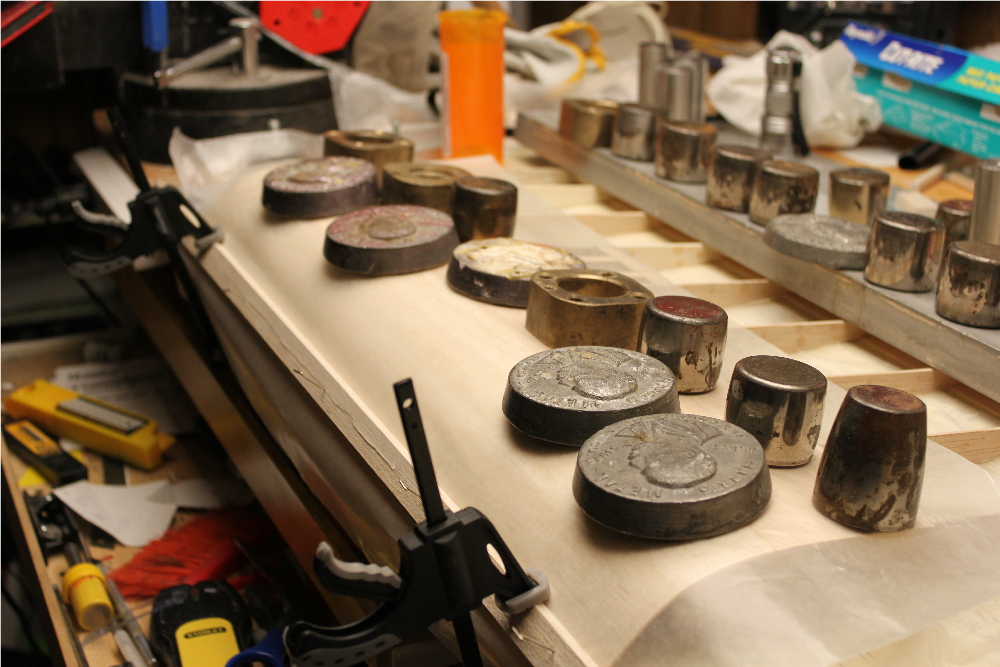
12-15-2013, 01:13 PM
#13
Thread Starter
Join Date: Mar 2013
Location: Winnipeg,
MB, CANADA
Posts: 751
Likes: 0
Received 0 Likes
on
0 Posts
That is the part that is scaring me about this build Joel, I may just use some mixing in the radio it will be easyer in two ways, I will not have to hook up the linkage to the canard everytime I put the wing on, and I won't have to build a sliding tray. I see that dubro sells a mechanical mixer for this purpose and I may use one of these when I build a crusader(RCM).
Calvi
it will be easyer in two ways, I will not have to hook up the linkage to the canard everytime I put the wing on, and I won't have to build a sliding tray. I see that dubro sells a mechanical mixer for this purpose and I may use one of these when I build a crusader(RCM).Calvi
12-15-2013, 06:21 PM
#14
Senior Member
Join Date: Apr 2007
Location: Brisbane, AUSTRALIA
Posts: 235
Likes: 0
Received 0 Likes
on
0 Posts
Hi Calvinman,
A computer radio would definitely be the way to go. It's interesting that, back in the 1970's and 80's, someone was so keen to have a plane with those surface movements that they put together this solution. It makes me thankful for modern computer radios!
I see your in the 'Peg, hope you're keeping warm. I have relations from Portage and an old flatmate from Winnipeg.
Joel
12-15-2013, 06:58 PM
#15
Thread Starter
Join Date: Mar 2013
Location: Winnipeg,
MB, CANADA
Posts: 751
Likes: 0
Received 0 Likes
on
0 Posts
Thanks Joel, it is supposed to warm up to -4 C tomorrow, we have been in an unseasonal cold snap for 2 weeks now with the temps dipping to almost -30 overnight! Brrrr. I have worked with a few people from Portage and they are fine people, myself I haled from Brandon and made a connection with the Portagers right away as we were small town folks living in the big city.
I remember when the CAT construction article came out in RCM and it taking me quite a while to get my head around what the designer was even talking about with the sliding tray, I am glad I don't have to use one but I may just have to build one so I can say I did
Calvi
Calvi
I remember when the CAT construction article came out in RCM and it taking me quite a while to get my head around what the designer was even talking about with the sliding tray, I am glad I don't have to use one but I may just have to build one so I can say I did
Calvi
Calvi
04-17-2014, 09:34 PM
#17
Thread Starter
Join Date: Mar 2013
Location: Winnipeg,
MB, CANADA
Posts: 751
Likes: 0
Received 0 Likes
on
0 Posts
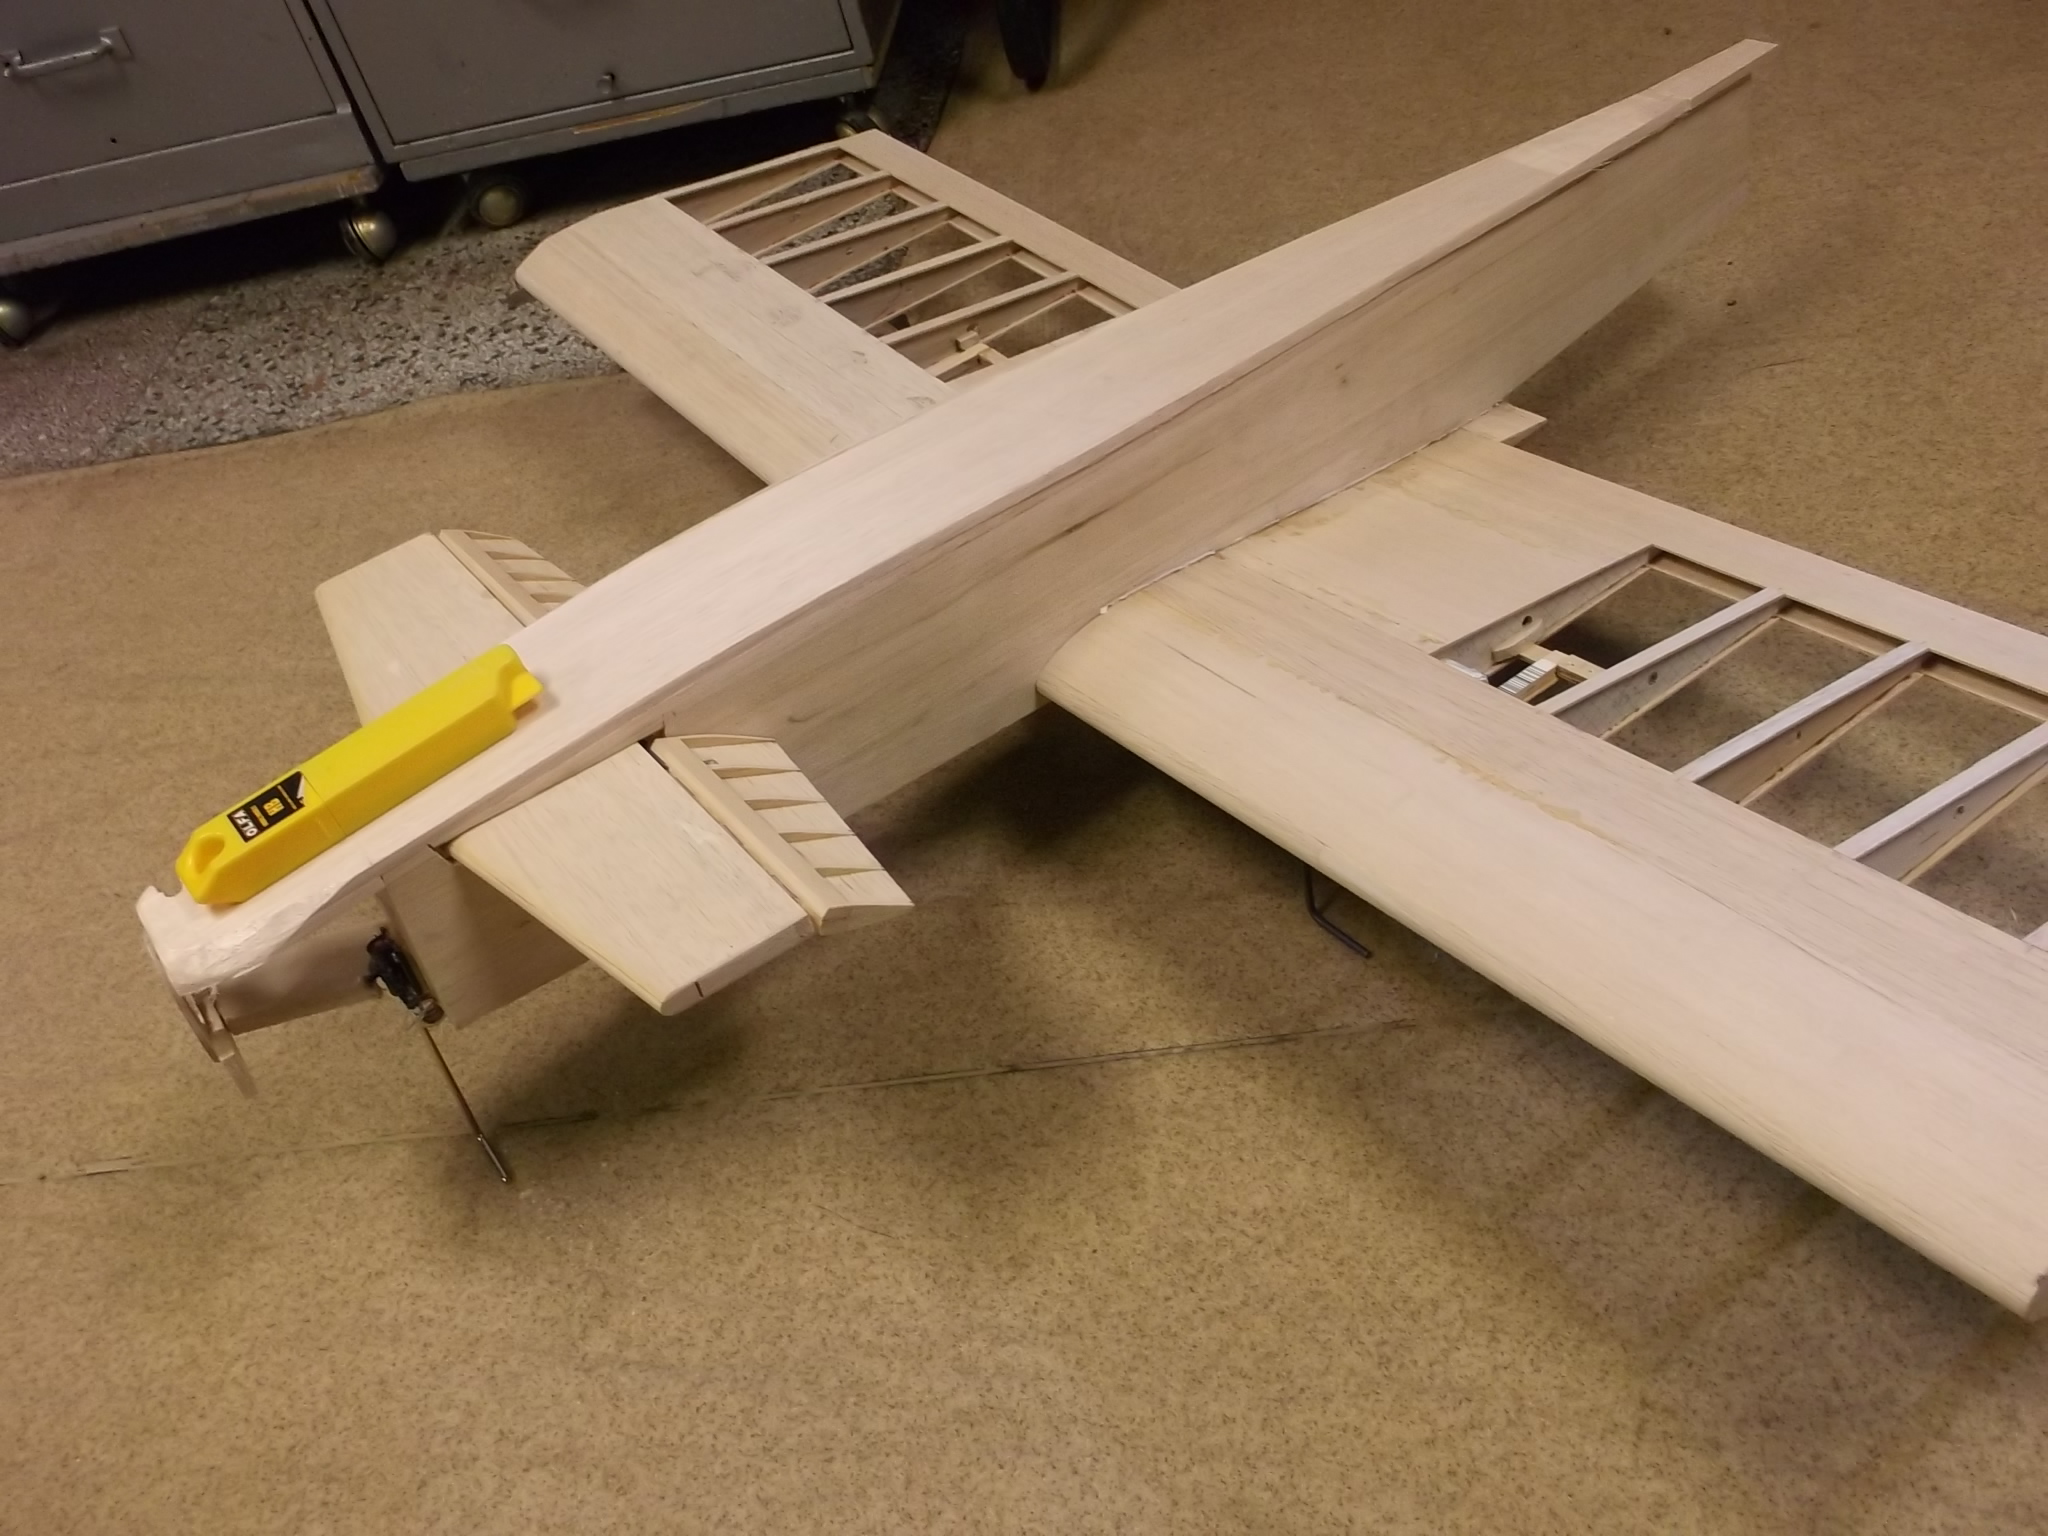
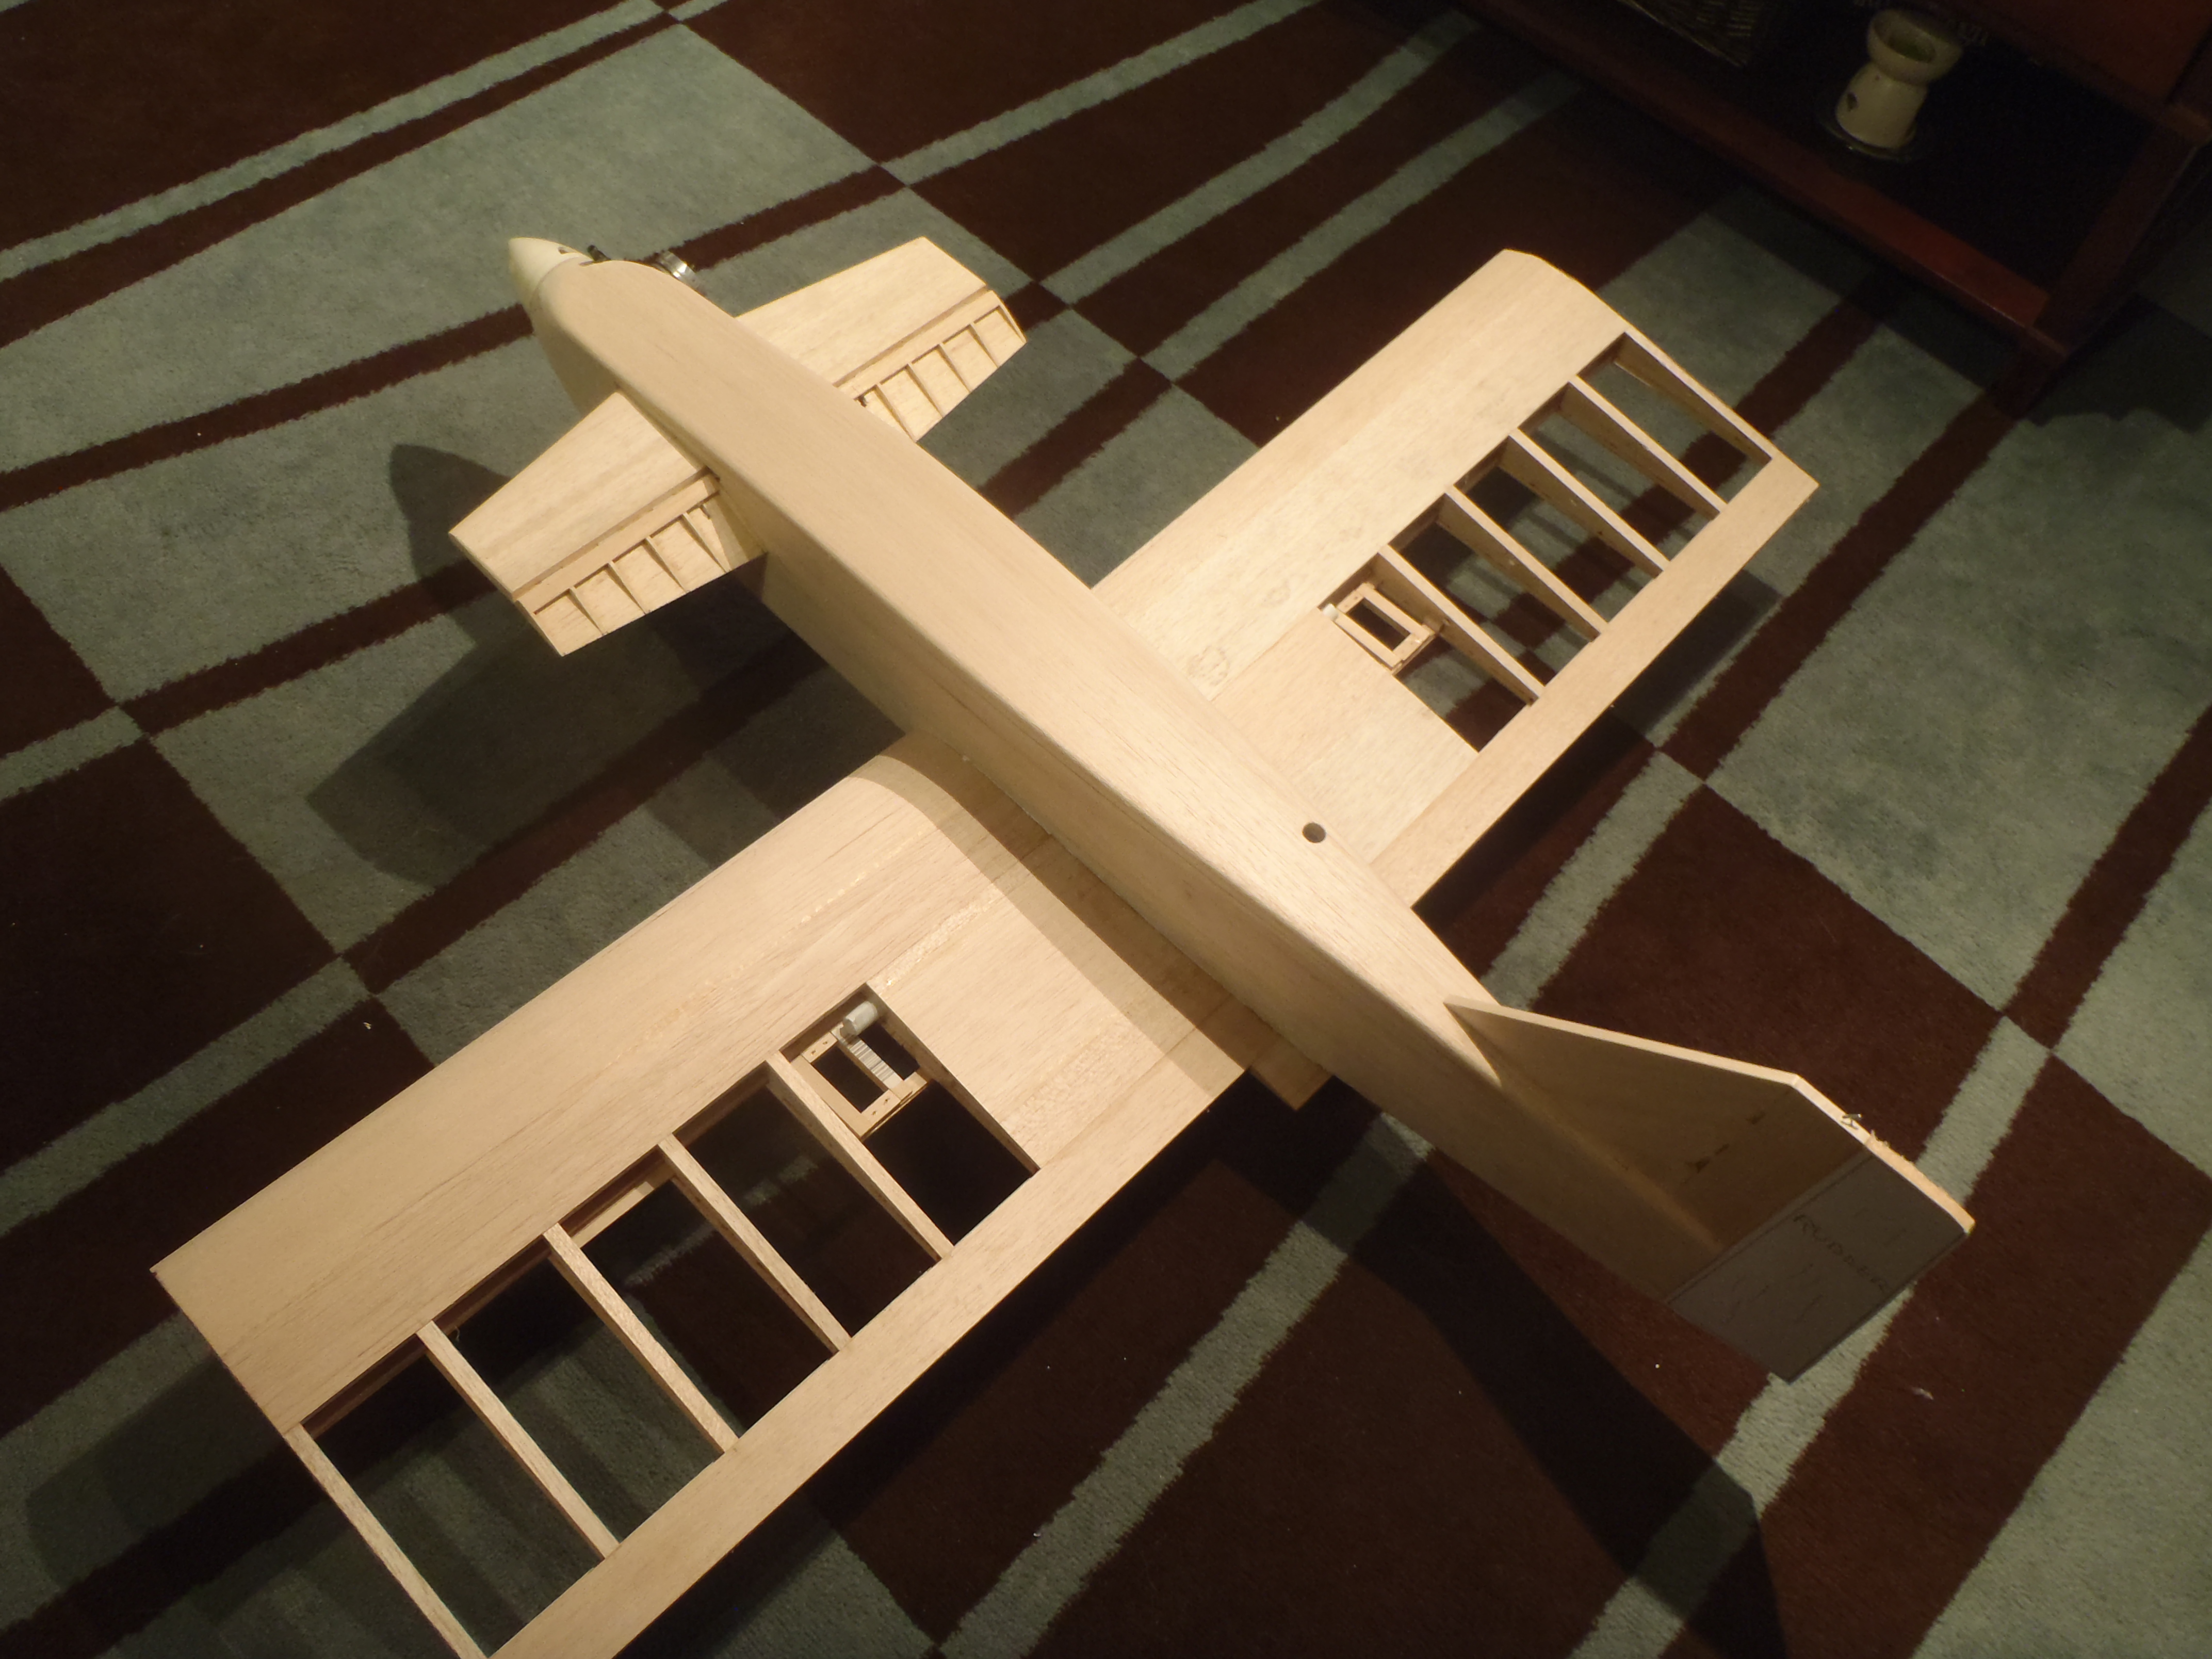
Well I have made a little progress. I am building two planes at once, an Ultra Sport 40 and the CAT. The canard is a cut down stab from a 40 size corsair. 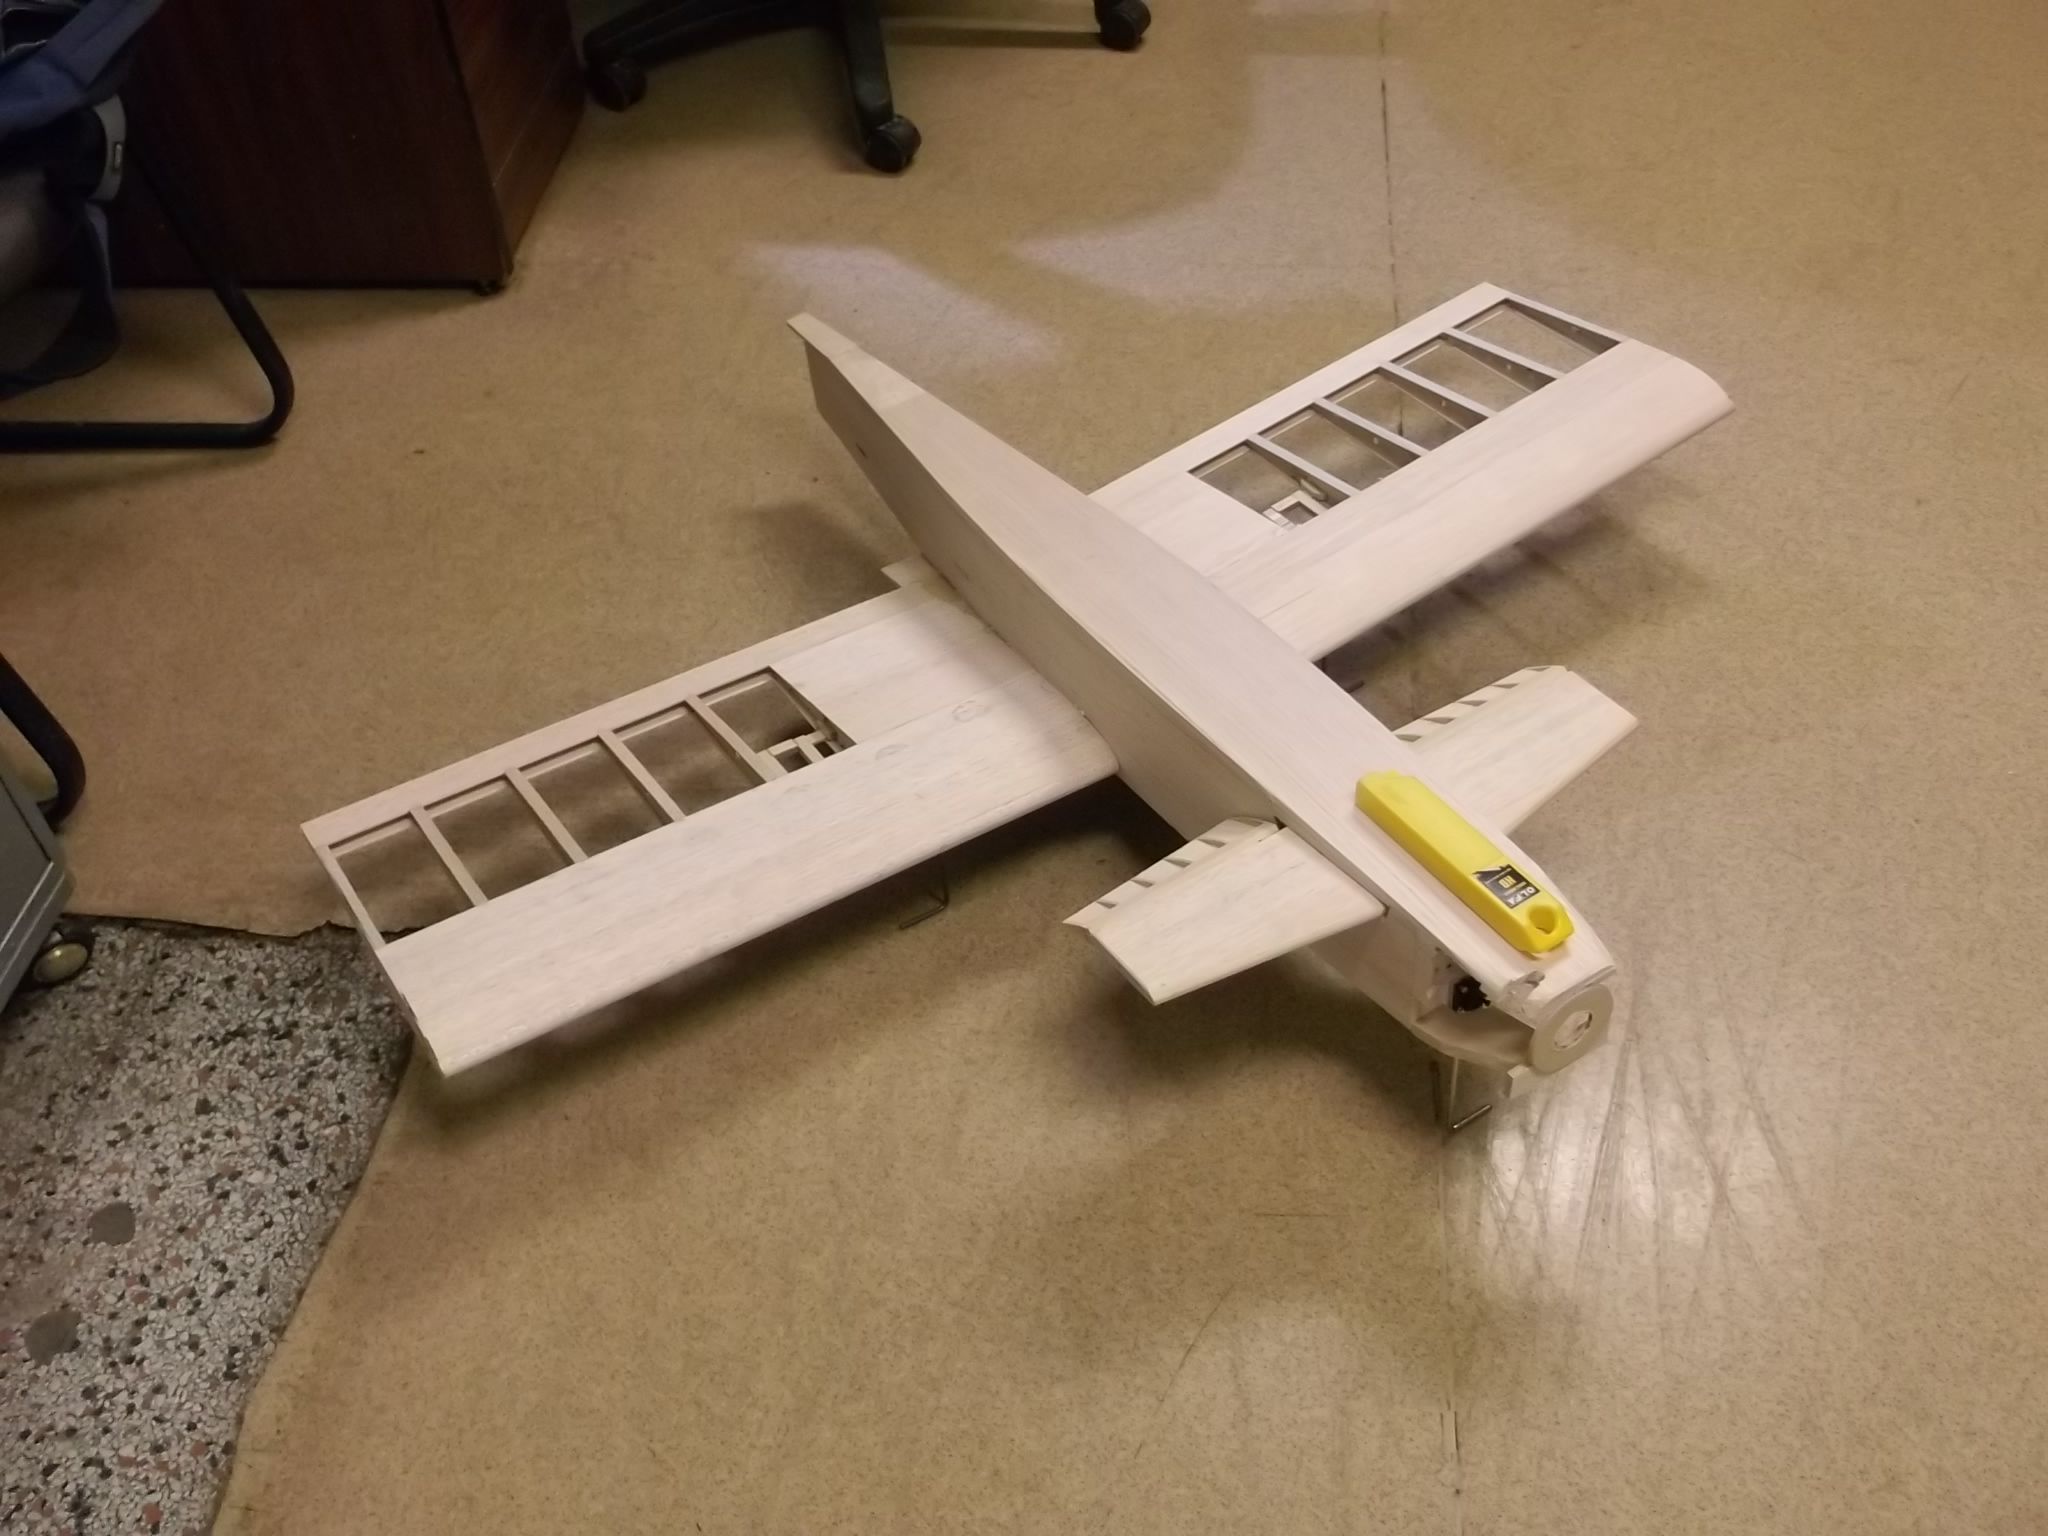
04-23-2014, 06:10 AM
#18
Thread Starter
Join Date: Mar 2013
Location: Winnipeg,
MB, CANADA
Posts: 751
Likes: 0
Received 0 Likes
on
0 Posts
A little more progress.
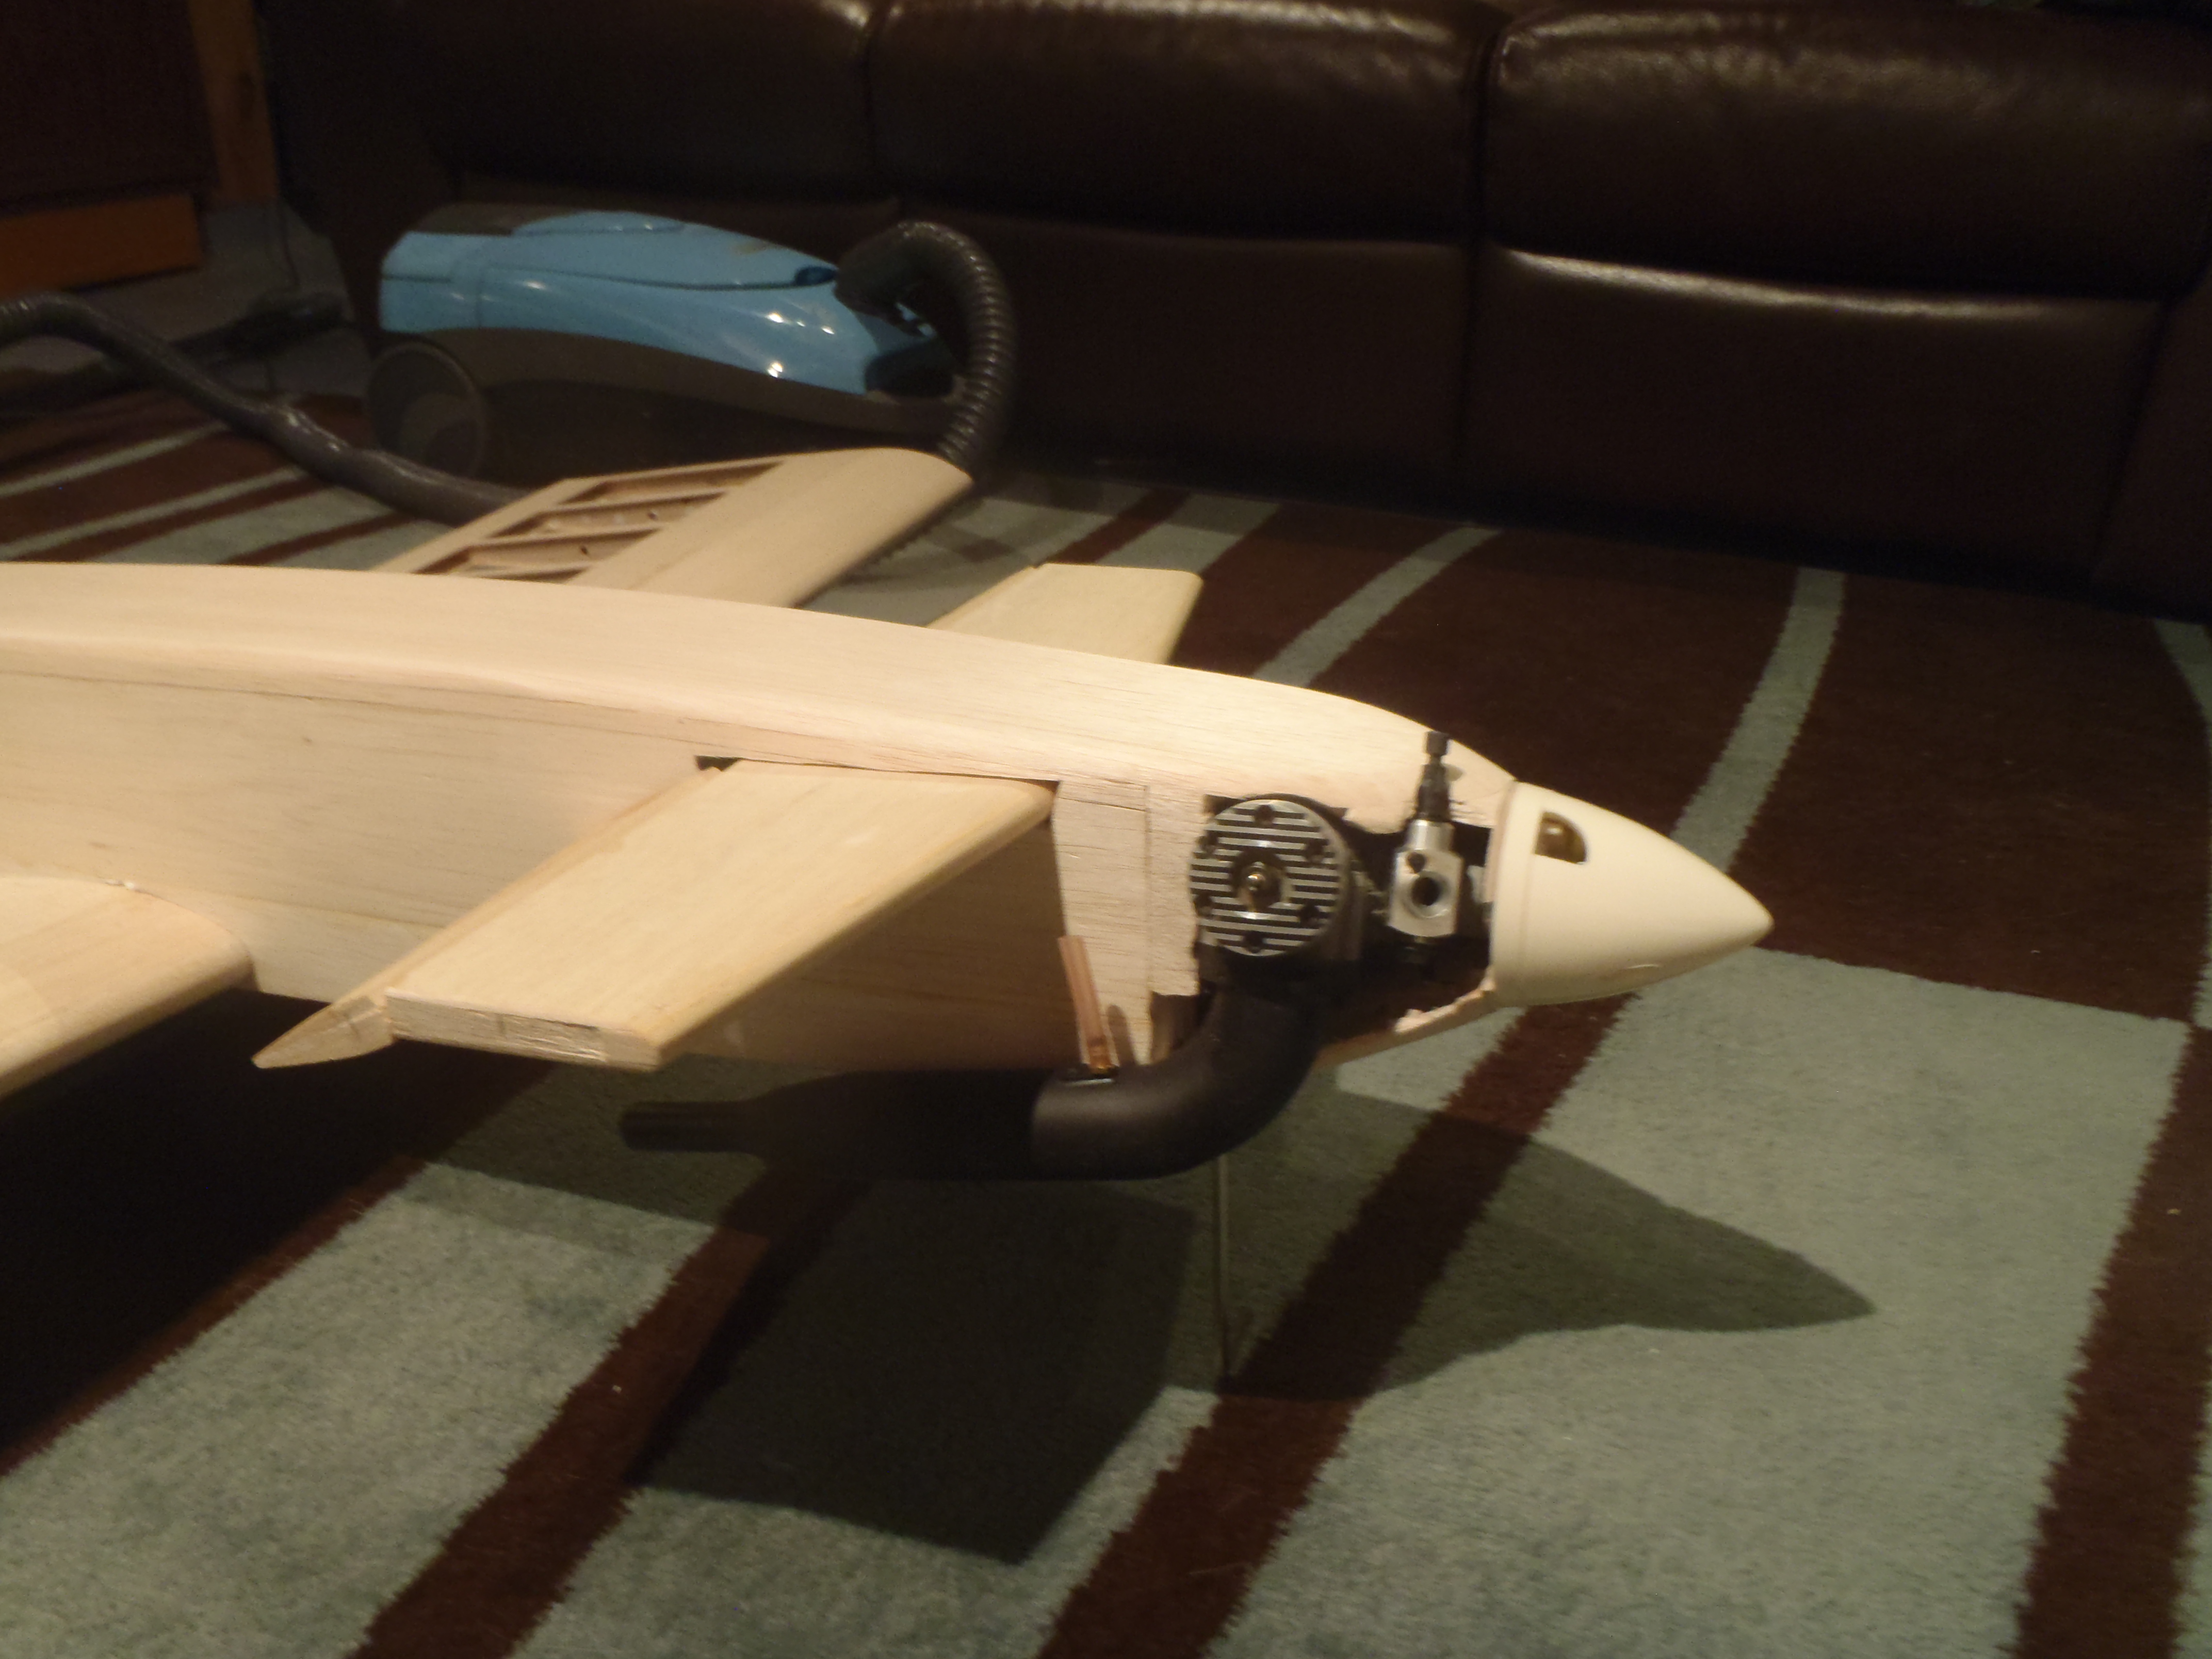

Too bad I forgot about any right thrust until after I Mounted the engine and shaped the cowl
Calvi
Too bad I forgot about any right thrust until after I Mounted the engine and shaped the cowl
Calvi
Last edited by Calvinman; 04-23-2014 at 06:15 AM.
05-05-2014, 07:22 AM
#19
Thread Starter
Join Date: Mar 2013
Location: Winnipeg,
MB, CANADA
Posts: 751
Likes: 0
Received 0 Likes
on
0 Posts
LOL I started covering the CAT and was using some offcuts from a previous job. I did not notice until I started using some fresh covering from the roll that the offcuts felt a lot thicker, I managed to cover one half of my rudder with covering with the backing still on it! No wonder I had to turn up the heat on my trim tool. DOH! 
05-15-2014, 03:42 AM
#22
Thread Starter
Join Date: Mar 2013
Location: Winnipeg,
MB, CANADA
Posts: 751
Likes: 0
Received 0 Likes
on
0 Posts
Hi Bogbeagle,
Another week or two and I should be able to report on its flying ability. It is ideal for hand launching with the CG in front of the wing, but the fuse is just a little on the large side to grip well, but we will see. A handle on top of the fuse would be handy too.
Another week or two and I should be able to report on its flying ability. It is ideal for hand launching with the CG in front of the wing, but the fuse is just a little on the large side to grip well, but we will see. A handle on top of the fuse would be handy too.
06-19-2014, 01:38 PM
#23
Thread Starter
Join Date: Mar 2013
Location: Winnipeg,
MB, CANADA
Posts: 751
Likes: 0
Received 0 Likes
on
0 Posts
Maiden flight short but sweet I was suffering with bad fuel and we tried and tried to set the engine up not knowing it was sour fuel. I managed to get it airbourne, climb maybe 40 feet, then the engine died it landed straight ahead with only a minor bend to the front gear.
I have not had a chance to get it out again but was pleased with it's seemingly docile handling. I am hoping to be able to get the plans copied but I have cut them up a bit for ease of building so I hope this does not make it impossible to copy them. I would also like to wait and see if the plane is going to be a keeper before doing so.
Calvi
I was suffering with bad fuel and we tried and tried to set the engine up not knowing it was sour fuel. I managed to get it airbourne, climb maybe 40 feet, then the engine died it landed straight ahead with only a minor bend to the front gear.I have not had a chance to get it out again but was pleased with it's seemingly docile handling. I am hoping to be able to get the plans copied but I have cut them up a bit for ease of building so I hope this does not make it impossible to copy them. I would also like to wait and see if the plane is going to be a keeper before doing so.
Calvi
07-24-2014, 12:57 PM
#24
Thread Starter
Join Date: Mar 2013
Location: Winnipeg,
MB, CANADA
Posts: 751
Likes: 0
Received 0 Likes
on
0 Posts
I am happy to report that I got another flight it on the CAT. I am still having trouble with the motor and will have to try it on 5% nitro. I was only able to get the MDS to stay running if I kept the throttle under 50% open. After a long roll out to build speed she lifted off very gracfully and climbed out with with no problems. Once up to cruising speed it wanted to climb so I had to put in a considerable amount of down trim. I flew it for five or six minutes and after getting over seeing the tail flying in front of the wing found it to be quite relaxing to fly.
When I came in on final the engine quit and it glided in for a very smooth landing with a nice roll out! I found out from some of my fellow club members there is a copy place very close to where I live so I will be checking in with them to see if they can make a digital copy of the plans for me I may have to build another this winter myself.
Calvi
When I came in on final the engine quit and it glided in for a very smooth landing with a nice roll out! I found out from some of my fellow club members there is a copy place very close to where I live so I will be checking in with them to see if they can make a digital copy of the plans for me
I may have to build another this winter myself.Calvi
07-31-2014, 12:39 PM
#25
Thread Starter
Join Date: Mar 2013
Location: Winnipeg,
MB, CANADA
Posts: 751
Likes: 0
Received 0 Likes
on
0 Posts
Two more flights with the CAT, still can't get that MDS48 to run with the throttle over 50% open. I pulled the motor yet again, sealed up the carb as best I could, reset the needles to factory. I found the low speed needle to be open only one turn, it should be 2 I hope this makes the difference. If that MDS still gives me grief I am going to slap in an OS46FX or an OS50 I have kicking around here so I can fly this thing with some power to get me out of trouble.
The flights were fun I have a little too much down trim in it which works nice it dives in on the flybys and as the speed picks up it starts to climb out to a nice altitude to turn. I find I have to use a but more rudder in turns than I am used to. On high rates it does a nice roll, not very axial, but it does it in a hurry. I tried a loop, but with only half throttle it was lacking and at the top did more of a flop making the loop look more like an apostrophe Landings are very easy unless you try to do a high alpha without throttling up. I stalled it in on my last flight about 3 feet off the deck, the only damage was my prop and it bent the nose gear.
I dropped by a local printing shop that was recommended by a fellow club member and they say they can copy the plans even though I have cut them up into four pieces. I am going to get them copied sooner or later so anyone interested in building a CAT can download the plans once I get that done.
Calvi
The flights were fun I have a little too much down trim in it which works nice it dives in on the flybys and as the speed picks up it starts to climb out to a nice altitude to turn. I find I have to use a but more rudder in turns than I am used to. On high rates it does a nice roll, not very axial, but it does it in a hurry. I tried a loop, but with only half throttle it was lacking and at the top did more of a flop making the loop look more like an apostrophe
Landings are very easy unless you try to do a high alpha without throttling up. I stalled it in on my last flight about 3 feet off the deck, the only damage was my prop and it bent the nose gear.I dropped by a local printing shop that was recommended by a fellow club member and they say they can copy the plans even though I have cut them up into four pieces. I am going to get them copied sooner or later so anyone interested in building a CAT can download the plans once I get that done.
Calvi

