


Ski / wheel combination for Hobbistar 60
 12-04-2013, 09:14 AM
#1
Senior Member
Thread Starter

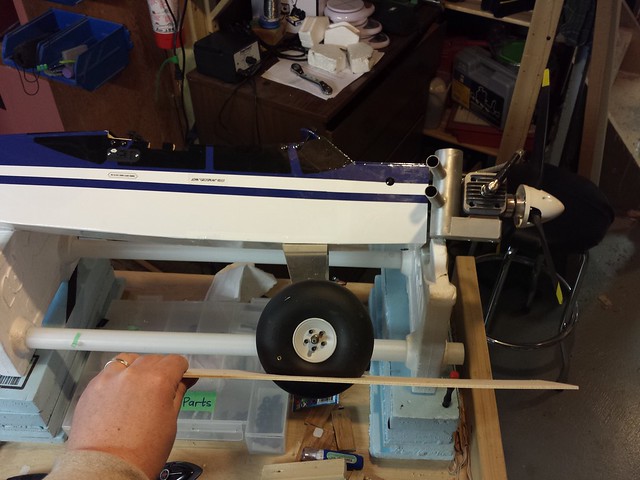
I thought I'd try a hand at designing a ski / wheel combination for my Hobbistar 60. Thanks to the guys at my LHS and to the information at http://www.modelairplanenews.com/blo...eady-for-snow/. If I have time after my other winter projects for this plane I'll give it a shot.
Clicking the image will enlarge it.

Clicking the image will enlarge it.
 01-13-2014, 09:24 AM
#2
Senior Member
Thread Starter
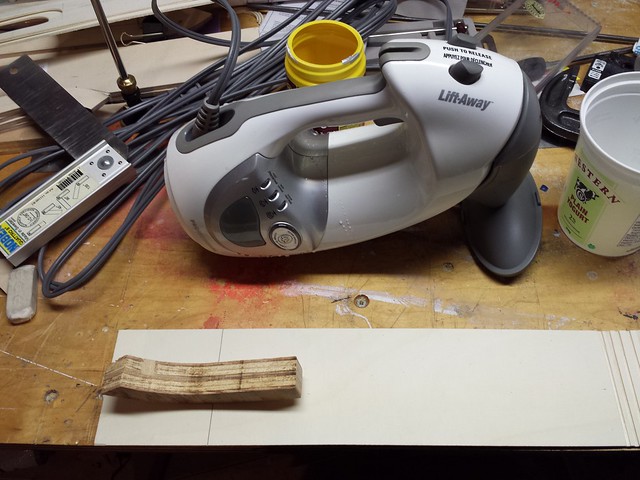
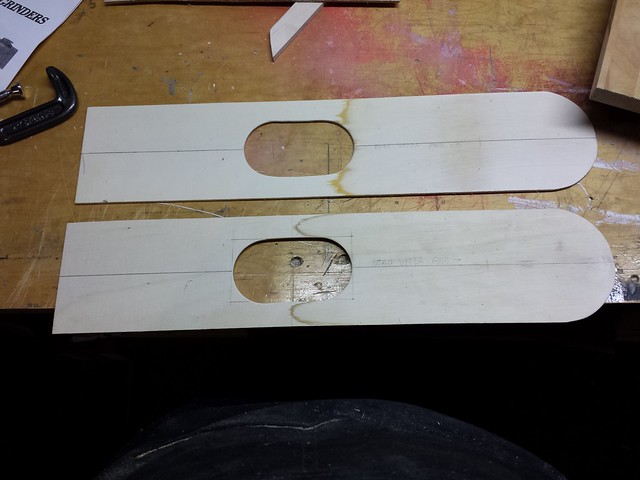
I finally got going on the skis yesterday. Off to a great start, I misread my plans, which stated a length of 2' 0". I cut them to 20". As it happens I had to lop another inch or so off the front for prop clearance - no biggie.
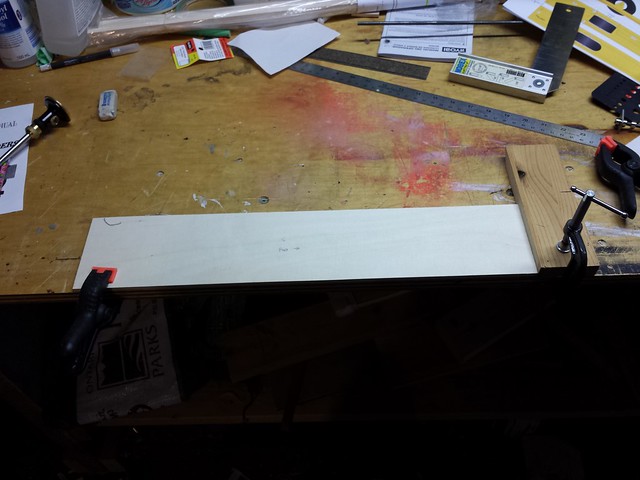
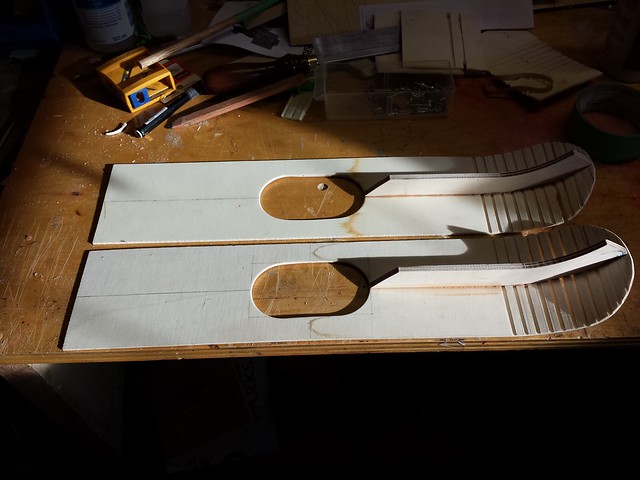
Here are the two blanks - 20" x 4".

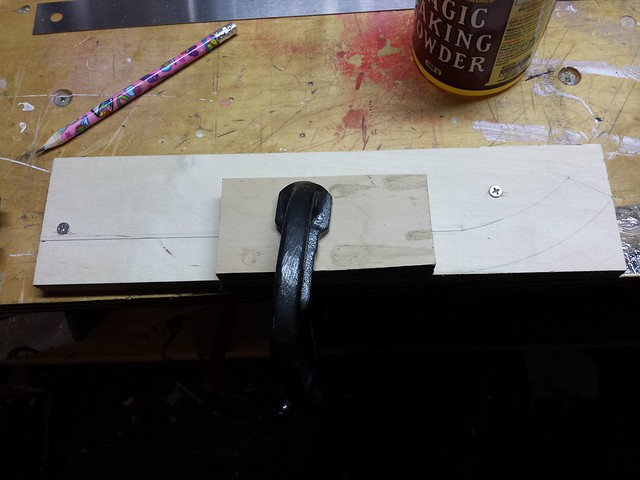
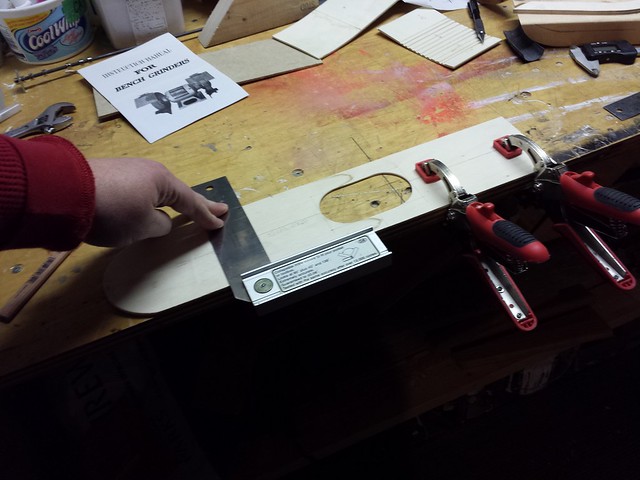
Next step was to cut the wheel holes. To start, I squared up a stop block on the bench.
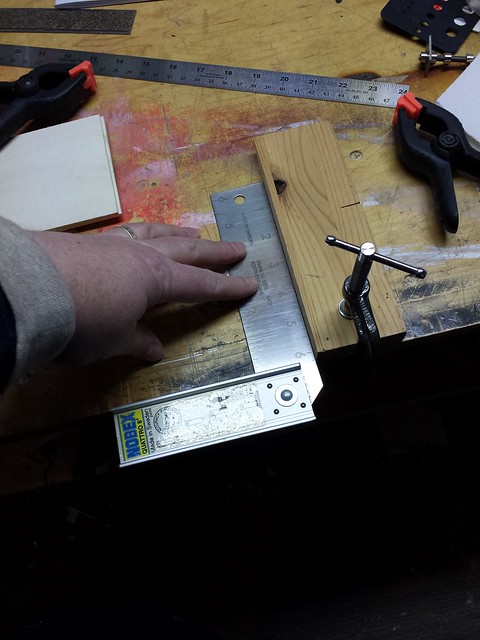
Both skis clamped against stop block.
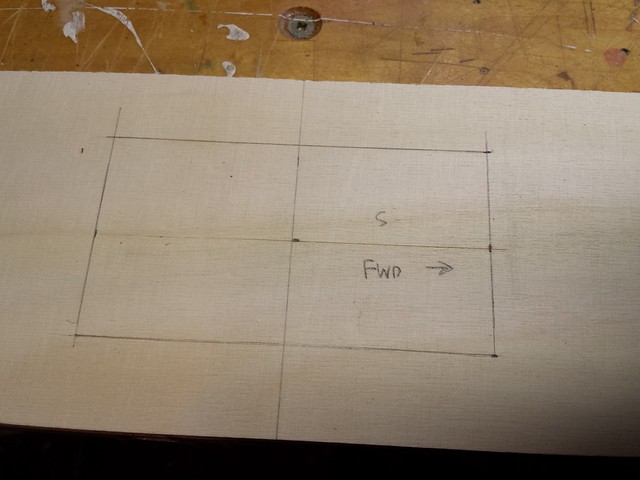
Square outline of wheel hole.
Here are the two blanks - 20" x 4".
Next step was to cut the wheel holes. To start, I squared up a stop block on the bench.
Both skis clamped against stop block.
Square outline of wheel hole.
01-13-2014, 09:32 AM
#3
Senior Member
Thread Starter
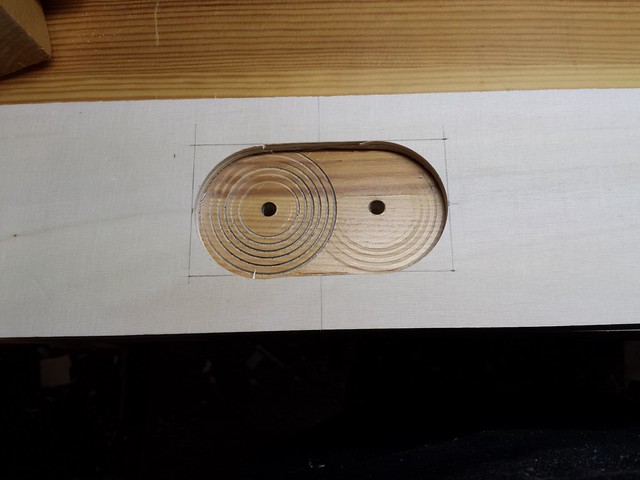
I planned to use a hole saw to round off the inner corners, so I drilled 15/64" pilot holes to guide the hole saw's 1/4" pilot bit.
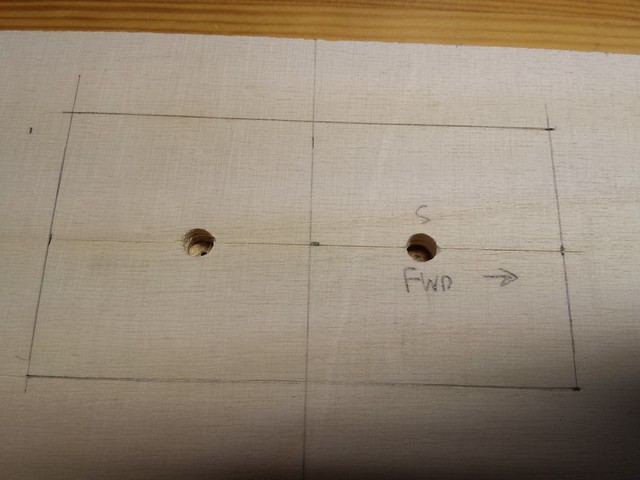
That done, I set the hole saw for 2-1/4" and chucked it in the drill.
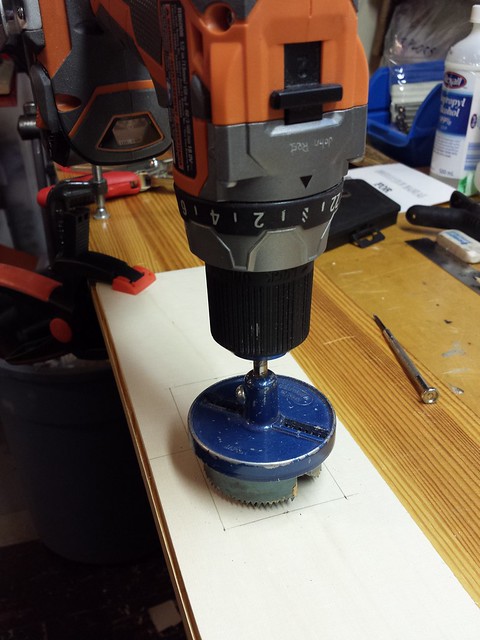
First hole done... beforehand I had put a piece of scrap wood under the skis to keep from drilling into the bench top.
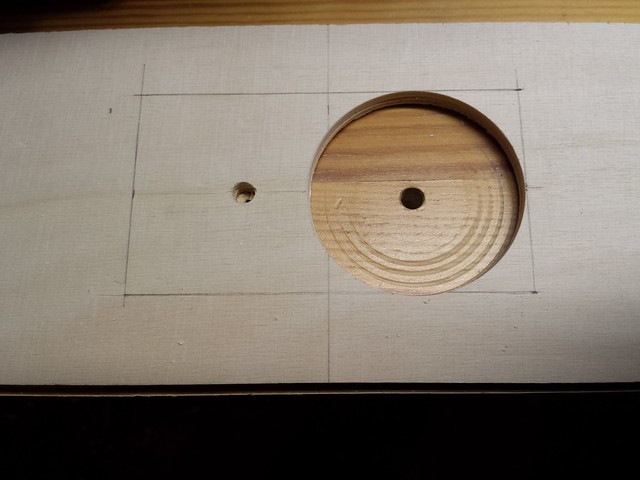
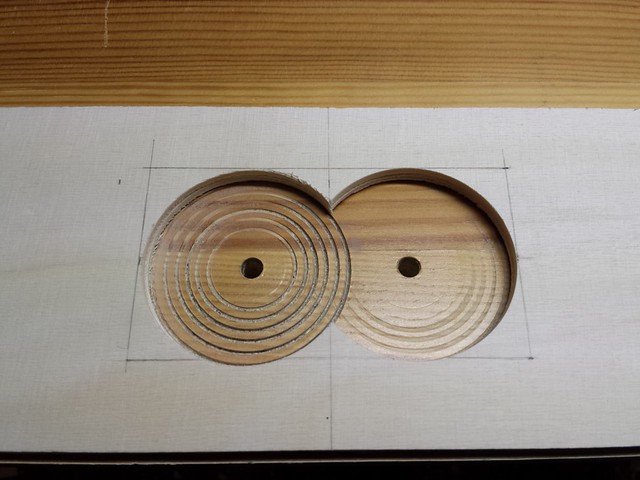
Both holes done. The alignment is off a hair on the second hole, but not enough to worry about.
That done, I set the hole saw for 2-1/4" and chucked it in the drill.
First hole done... beforehand I had put a piece of scrap wood under the skis to keep from drilling into the bench top.
Both holes done. The alignment is off a hair on the second hole, but not enough to worry about.
 01-13-2014, 09:50 AM
#5
Senior Member
Thread Starter
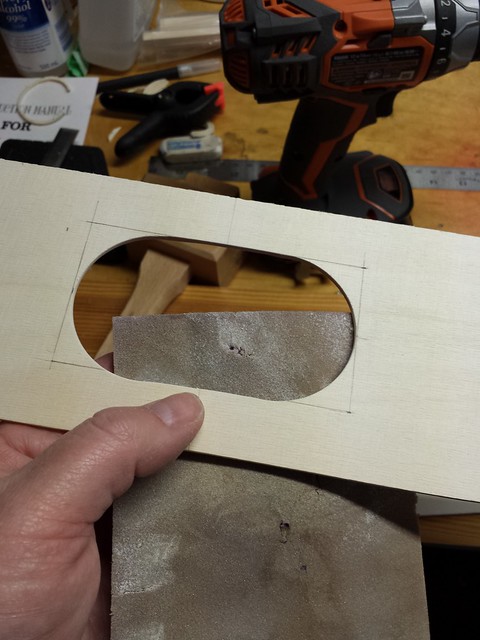
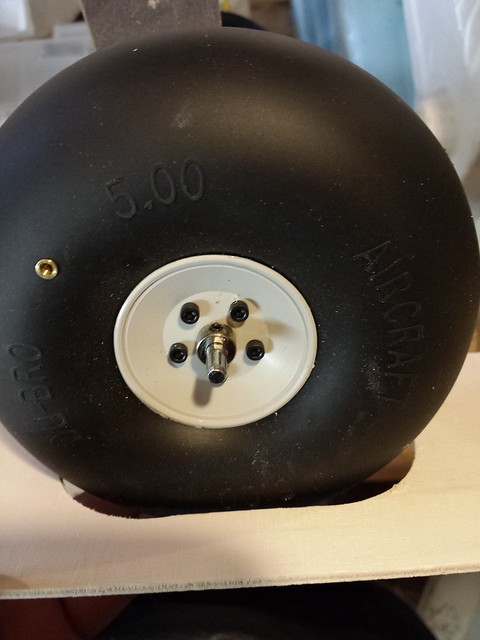
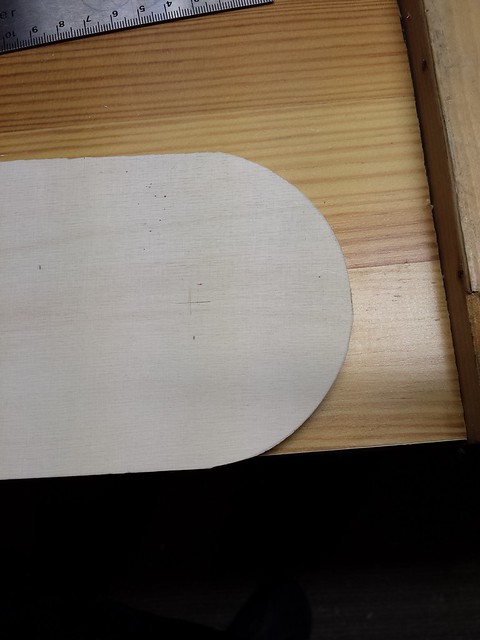
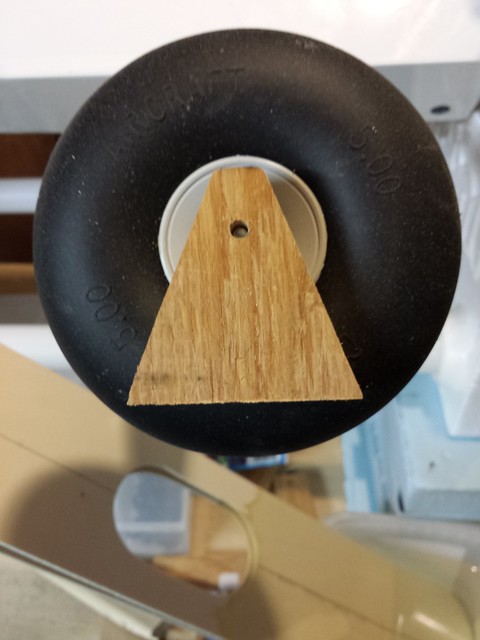
Time for a test fit. Looking good so far.
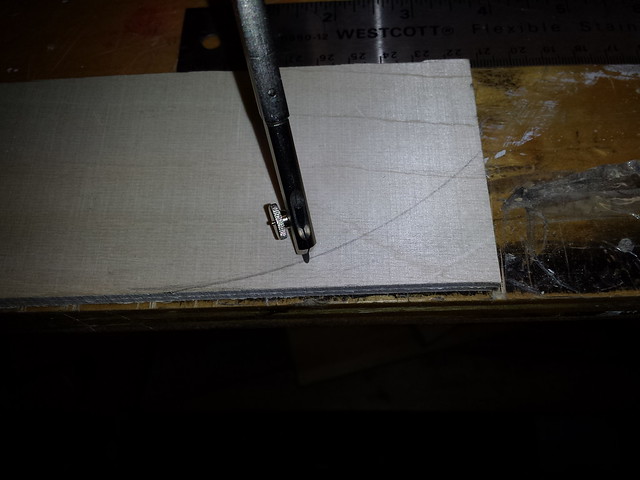
I used a compass set to a 2" radius on the centre line 2" back from the leading edge to trace the tip profile.
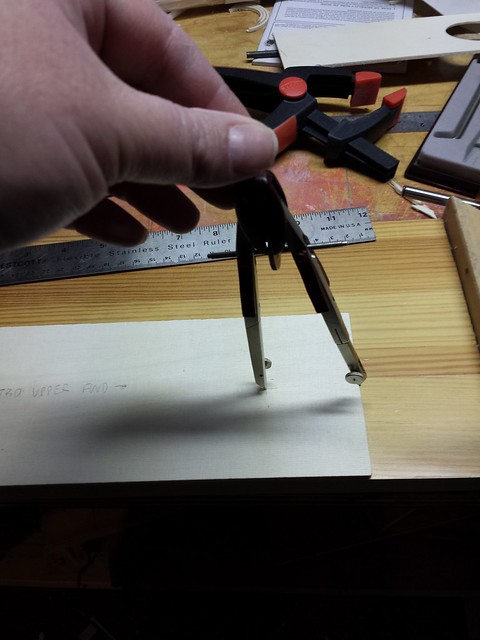
Skis clamped together, I cut out the tips on the band saw.
I used a compass set to a 2" radius on the centre line 2" back from the leading edge to trace the tip profile.
Skis clamped together, I cut out the tips on the band saw.
 01-13-2014, 06:06 PM
#7
Senior Member
Thread Starter
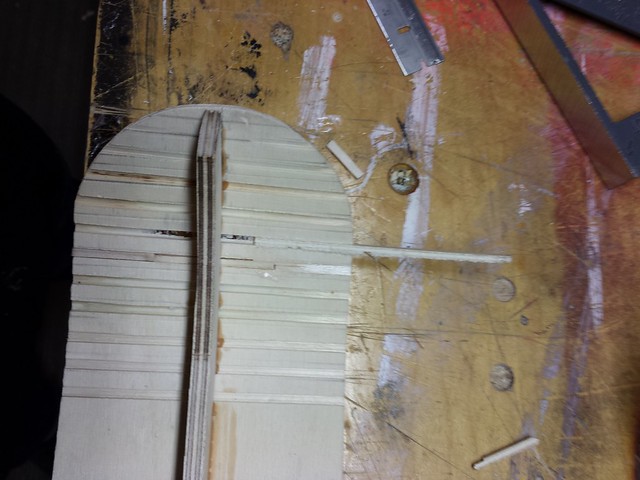
Got the spines drawn - Before cutting I clamped the blanks and screwed them together. You may notice there are two where the drawings show four - I have decided to simplify and go with a single spline per ski. Well, one in front of the wheel and one behind - but both on the centre line. I am very much on the fly now and will make changes to the drawings later.
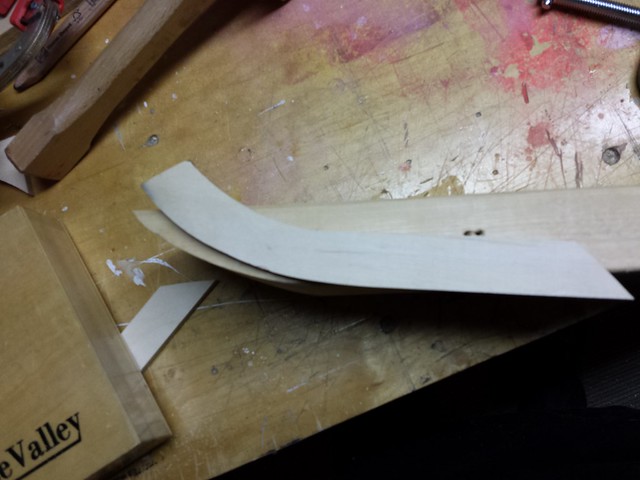
Here they are, fresh from the band saw. They still need to be cut to their final length - see the bottom photo.
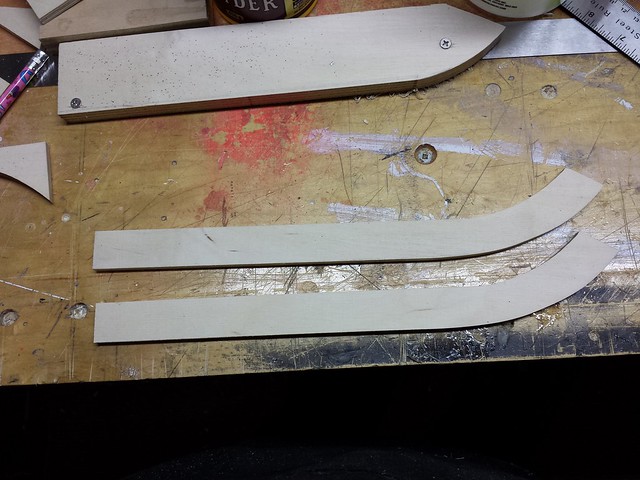
Here are the aft spines.
Here's how they'll go on the skis.
Here they are, fresh from the band saw. They still need to be cut to their final length - see the bottom photo.
Here are the aft spines.
Here's how they'll go on the skis.
01-13-2014, 06:11 PM
#8
Senior Member
Thread Starter
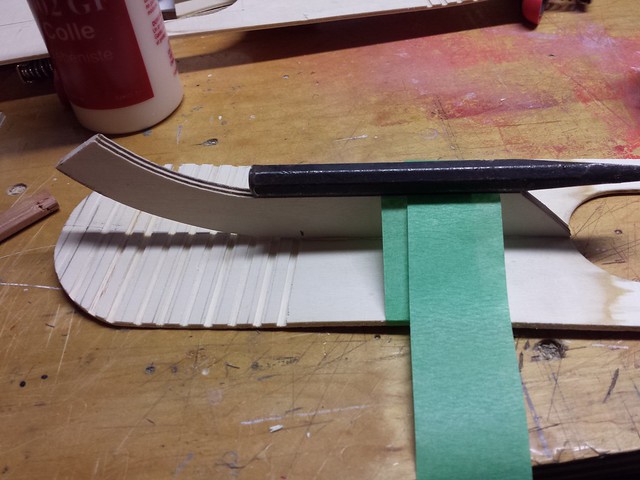
Marking the point on the ski where the curve begins.
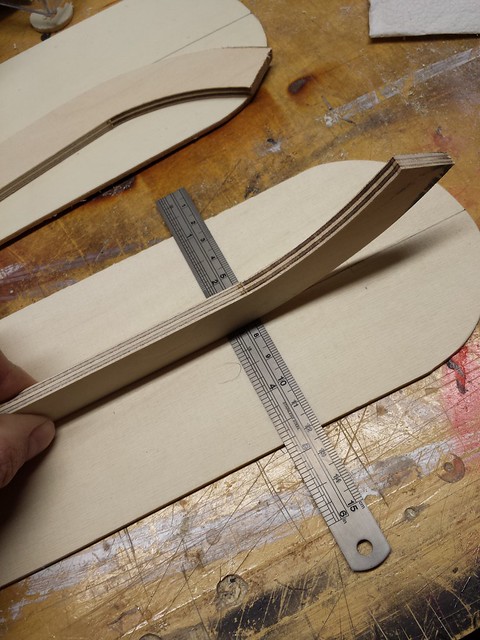
I grabbed an offcut of the same 1/16" plywood made some passes with the mitre saw as a test.
The test piece was very bendy and clamped well. Not sure I like those huge kerfs, though.
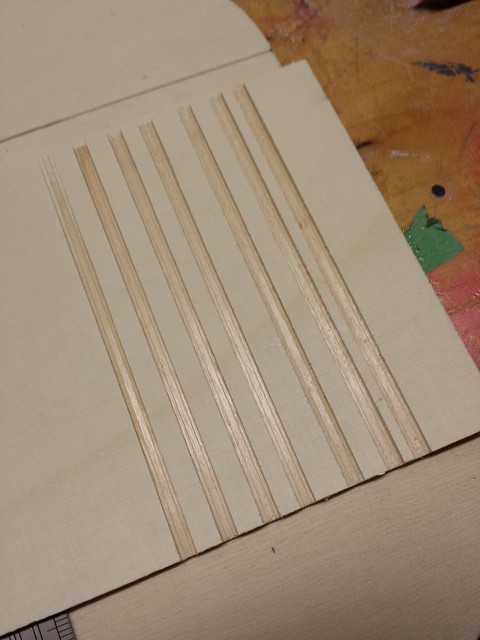
I tried smaller kerfs with a fine back saw but the depth is very hard to control.
I grabbed an offcut of the same 1/16" plywood made some passes with the mitre saw as a test.
The test piece was very bendy and clamped well. Not sure I like those huge kerfs, though.
I tried smaller kerfs with a fine back saw but the depth is very hard to control.
01-13-2014, 06:19 PM
#9
Senior Member
Thread Starter
The next thing I tried - still on the test piece - was steam. I cut out a bigger block for better clamping.
After a few minutes of steaming each side I was able to clamp it. Not as bendy, but at least not breaky.
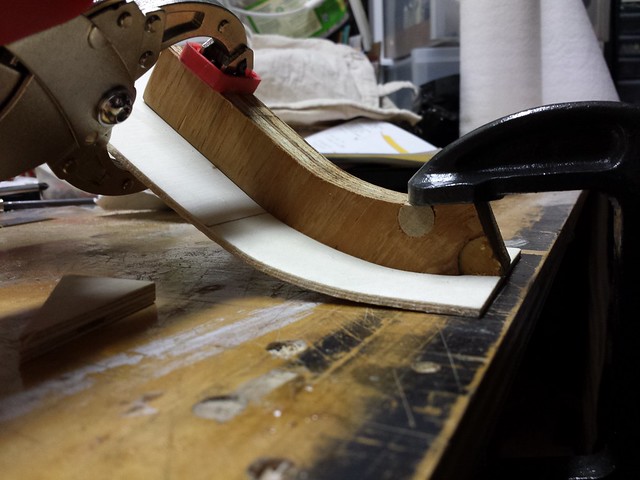
Unfortunately, the clamping force combined with the softening of the wood after steaming dented the wood.
At this point I'm asking for advice on the best way to bend this 1/16" ply. Perhaps I should be soaking it in water (did I hear Windex somewhere?)... if either, for how long? Perhaps more steam, or maybe the relief cuts with the mitre saw are the best option. Your opinions?
After a few minutes of steaming each side I was able to clamp it. Not as bendy, but at least not breaky.
Unfortunately, the clamping force combined with the softening of the wood after steaming dented the wood.
At this point I'm asking for advice on the best way to bend this 1/16" ply. Perhaps I should be soaking it in water (did I hear Windex somewhere?)... if either, for how long? Perhaps more steam, or maybe the relief cuts with the mitre saw are the best option. Your opinions?
01-14-2014, 02:18 PM
#10

My Feedback: (1)
Join Date: Jan 2002
Location: Crystal,
MN
Posts: 1,294
Likes: 0
Received 0 Likes
on
0 Posts
You are one the right track with the last photo in post #8, just cut across the inner veneer with a knife, no need to saw.
Wet the outside and it will bend an amazing amount. I planked the stern of a scale 44' USCG motor lifeboat with one piece
of 3/16" ply this way.
Dave
Wet the outside and it will bend an amazing amount. I planked the stern of a scale 44' USCG motor lifeboat with one piece
of 3/16" ply this way.
Dave
01-14-2014, 06:35 PM
#11
Senior Member
Thread Starter
You are one the right track with the last photo in post #8, just cut across the inner veneer with a knife, no need to saw.
Wet the outside and it will bend an amazing amount. I planked the stern of a scale 44' USCG motor lifeboat with one piece
of 3/16" ply this way.
Dave
Wet the outside and it will bend an amazing amount. I planked the stern of a scale 44' USCG motor lifeboat with one piece
of 3/16" ply this way.
Dave
01-14-2014, 06:35 PM
#12
Senior Member
Thread Starter
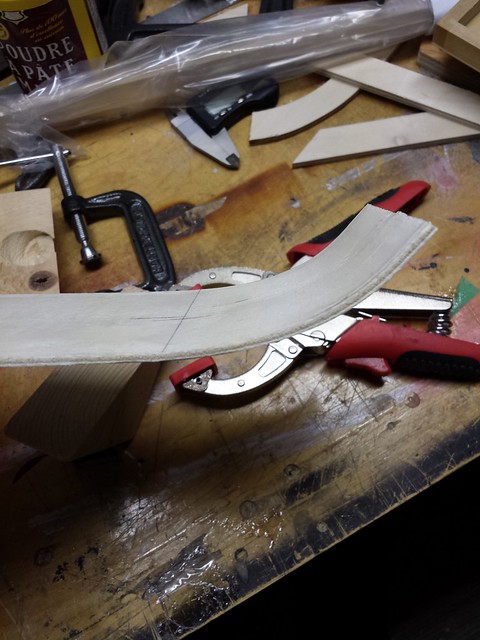
After letting the bending problem turn over in my head for the day it occurred to me that I could make bigger forms to spread the load so as not to dent the plywood. Voila.
I let another sample piece soak for a few hours and now it's clamped in one of the new forms for a test.
The first bend I did (see the post above) relaxed a little so I will probably want to tighten the curve on the forms to compensate. Luckily I have a new tool in the shop that will be a big help.
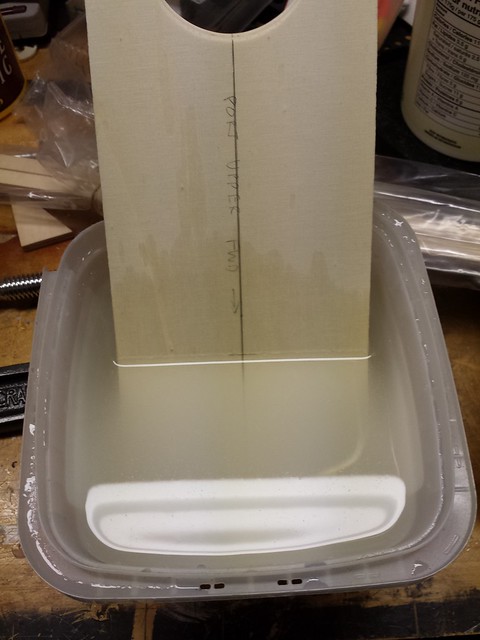
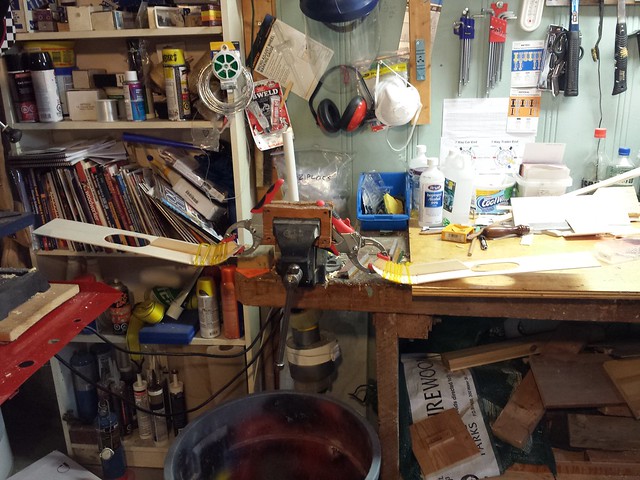
The skis are nose down in the soaking tub now and will get good and wet.
I let another sample piece soak for a few hours and now it's clamped in one of the new forms for a test.
The first bend I did (see the post above) relaxed a little so I will probably want to tighten the curve on the forms to compensate. Luckily I have a new tool in the shop that will be a big help.
The skis are nose down in the soaking tub now and will get good and wet.
01-14-2014, 06:42 PM
#13
Senior Member
Thread Starter
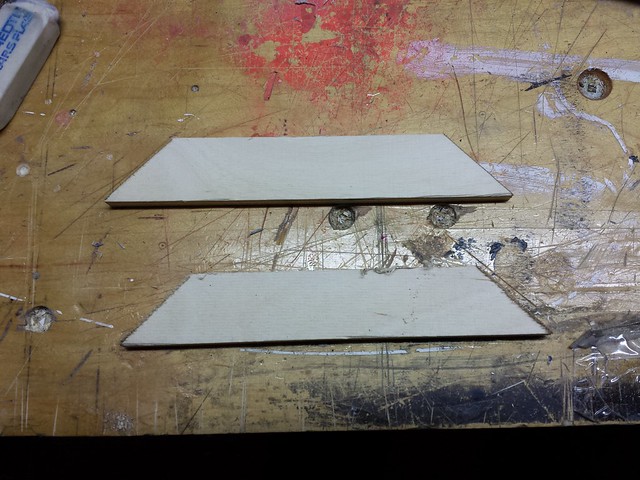
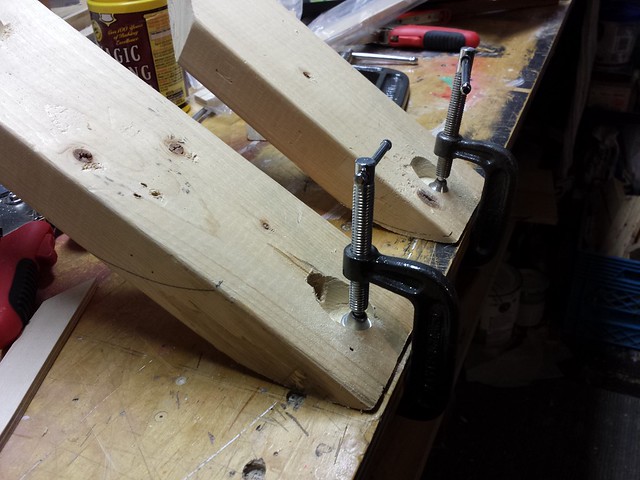
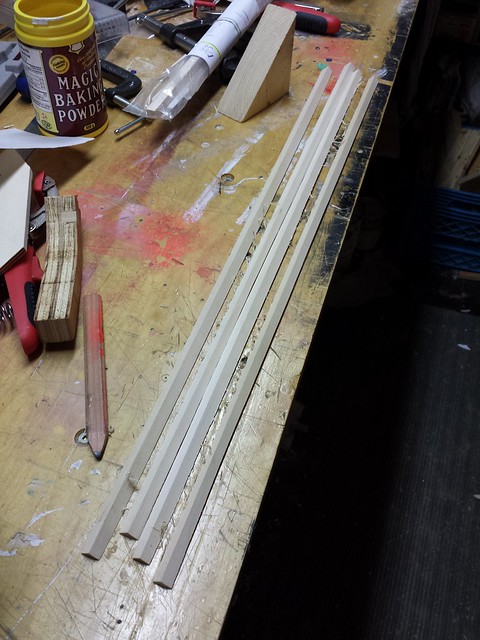
In the meantime, I cut the stock for the runners that will go on the bottom of the skis. I am going to use a single runner - I think the three in the design are overkill.
I started with square stock which I needed to cut on the diagonal. My band saw table tilts, so I grabbed my adjustable square and set it up.
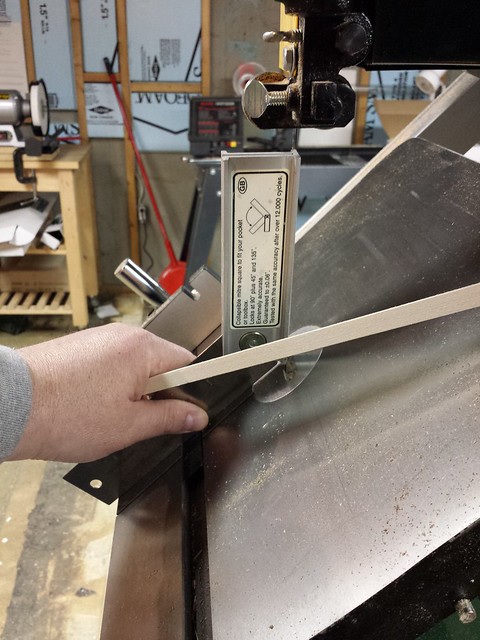
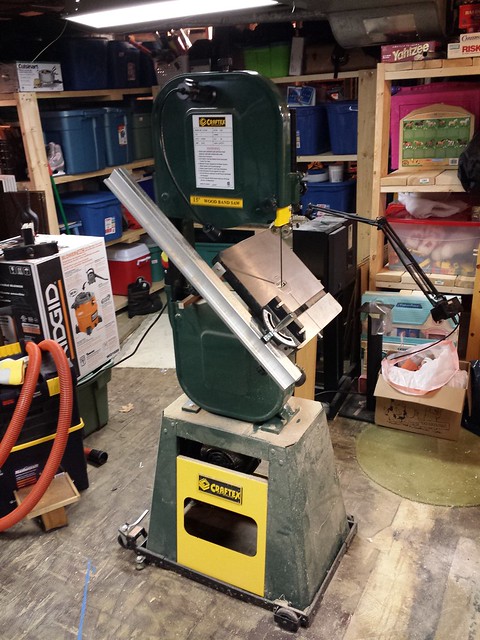
A little adjustment of the fence and it was ready to go.
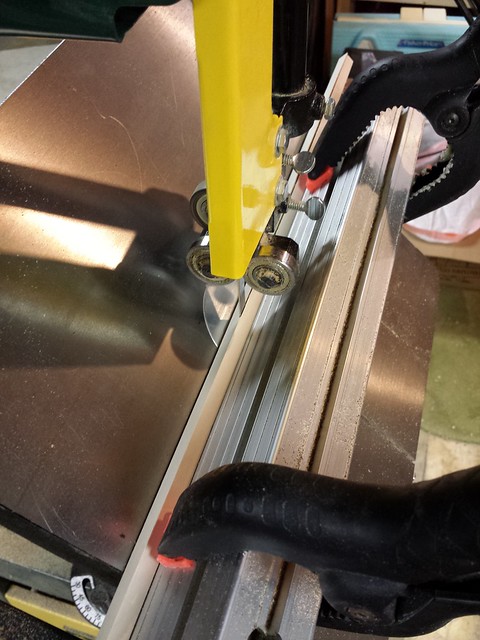
Here's the result.
I started with square stock which I needed to cut on the diagonal. My band saw table tilts, so I grabbed my adjustable square and set it up.
A little adjustment of the fence and it was ready to go.
Here's the result.
01-15-2014, 05:52 AM
#14
Senior Member
Thread Starter
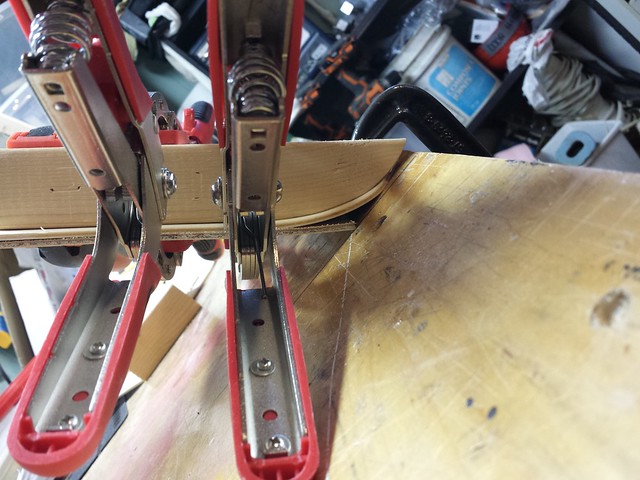
Another test bend with the wider form was better - less crushing of the ply - just a little where there was a ridge on the form from the rough cut on the band saw. That won't be a problem anymore - read on.
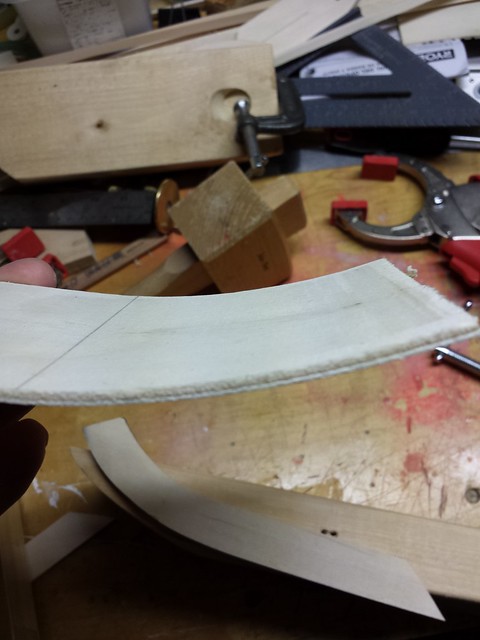
To make the sharper curve for the form I placed the spine against the side and marked it.

To make the sharper curve for the form I placed the spine against the side and marked it.
01-15-2014, 05:56 AM
#15
Senior Member
Thread Starter
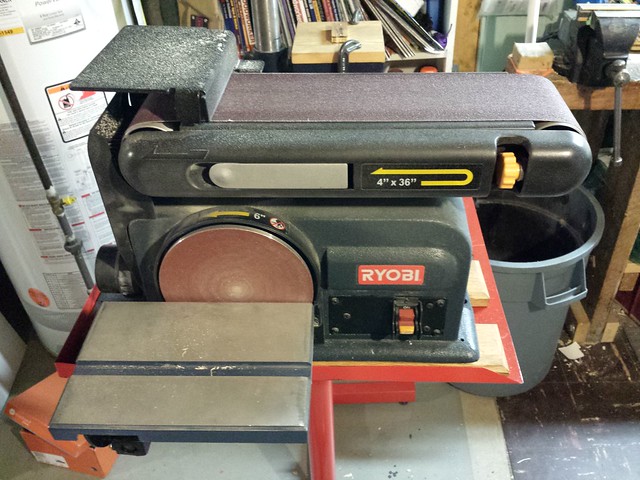
On to the belt sander - getting there.

Never having used a stationary belt sander before, I was very pleased with the smoothness of the sanded surface. All roughness from the band saw cut have been removed.
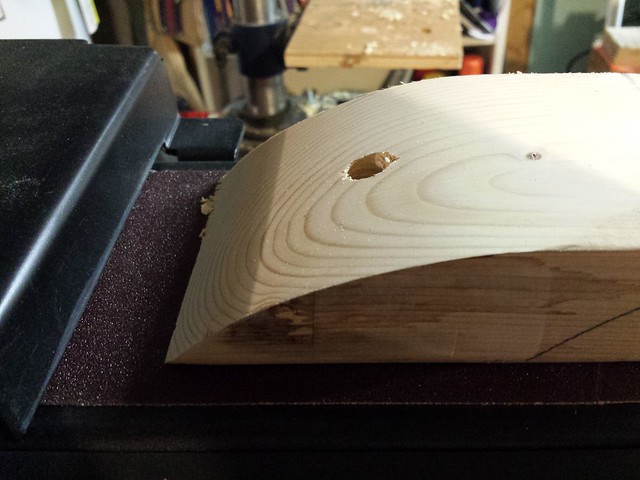
Never having used a stationary belt sander before, I was very pleased with the smoothness of the sanded surface. All roughness from the band saw cut have been removed.
01-15-2014, 05:57 PM
#16
Senior Member
Thread Starter
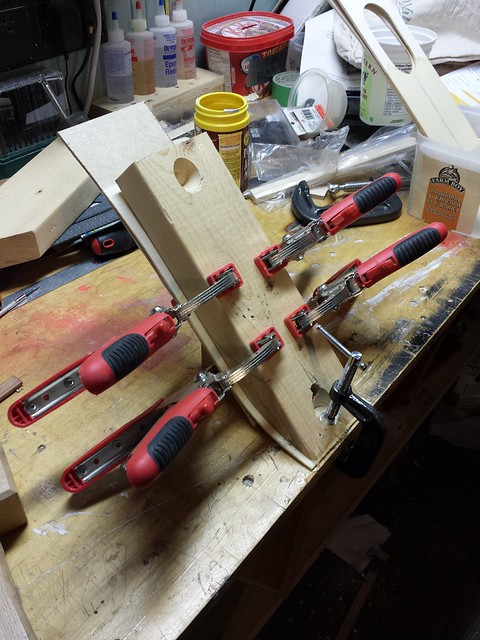
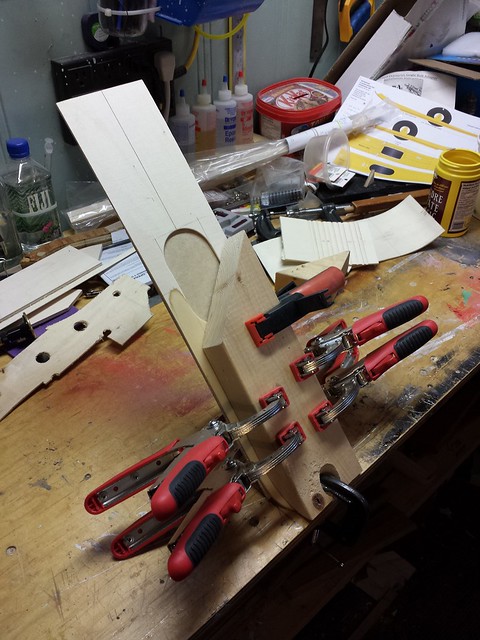
New form in its final shape with the test piece clamped in place.
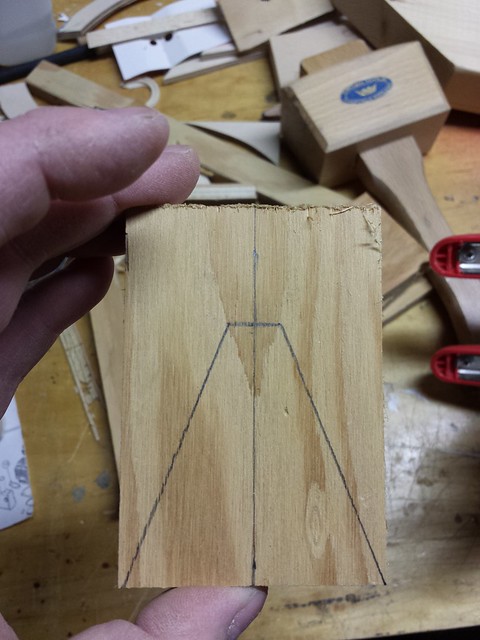
While the test piece is clamped up and drying I decide to make the axle blocks. I cut out 4 blanks about 2-1/2" wide and 3-1/2" tall and traced the block outline onto one of them.
I squared them up as best I could and clamped them in the vise to add some screws to hold them together.
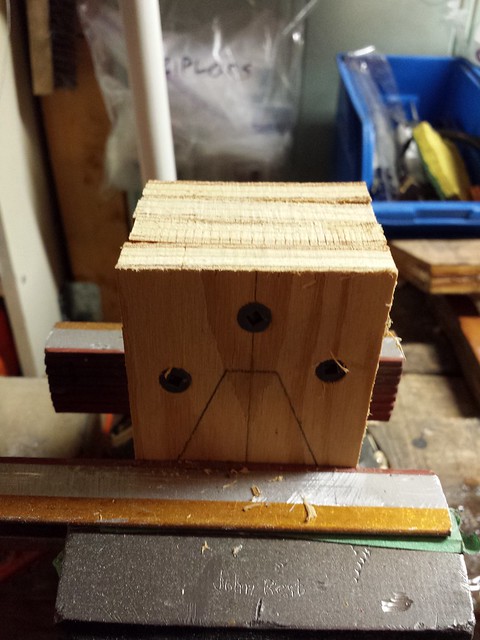
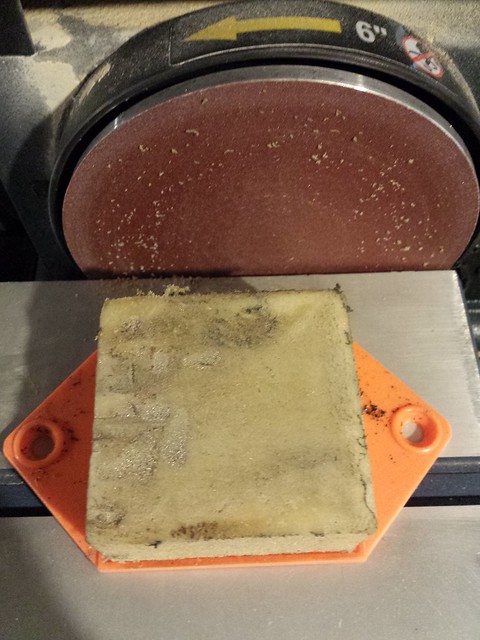
Off to the disc sander to smooth the bottom.
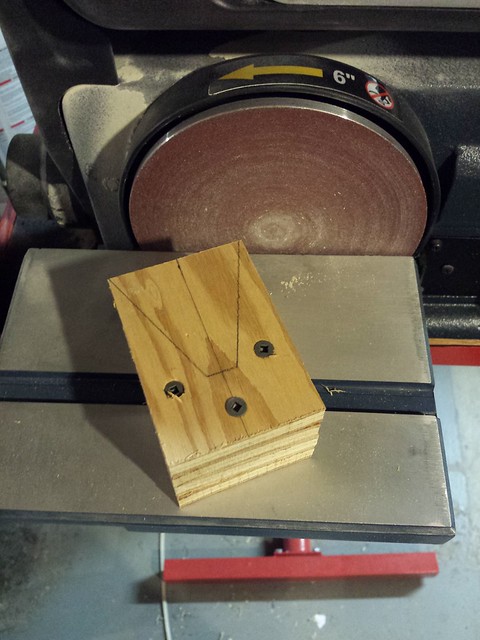
There we go.

While the test piece is clamped up and drying I decide to make the axle blocks. I cut out 4 blanks about 2-1/2" wide and 3-1/2" tall and traced the block outline onto one of them.
I squared them up as best I could and clamped them in the vise to add some screws to hold them together.
Off to the disc sander to smooth the bottom.
There we go.
01-15-2014, 06:04 PM
#17
Senior Member
Thread Starter
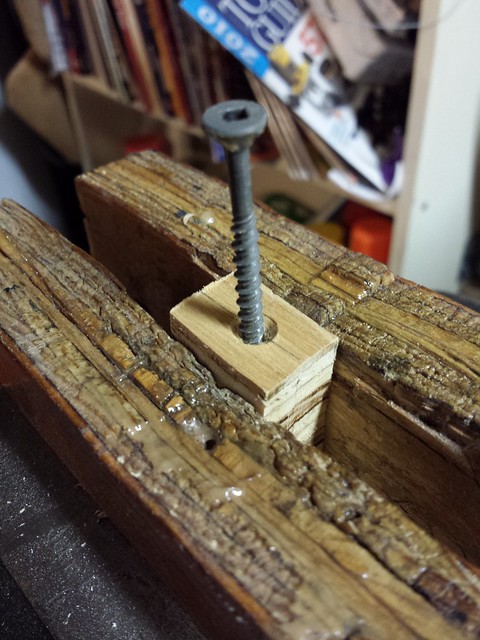
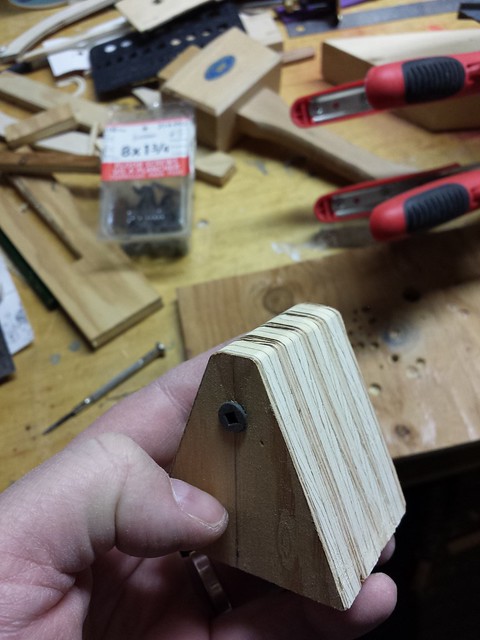
Rough cut on the band saw. Note the mark - that's where the axle will go. I'll drill a pilot hole for a screw to hold it together while I refine the outside shape.
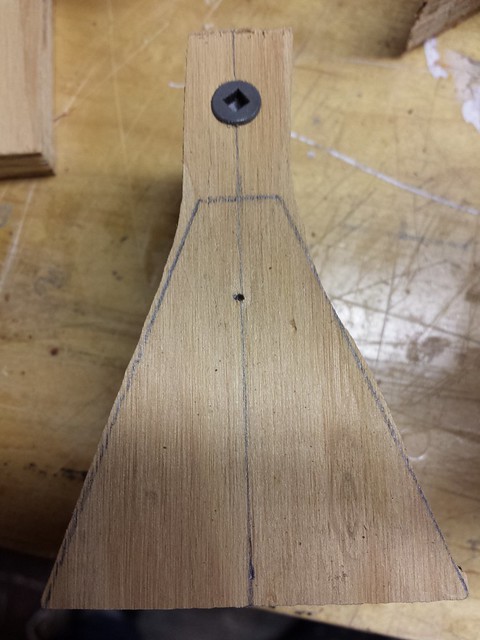
Hole drilled, screw in, top lopped.
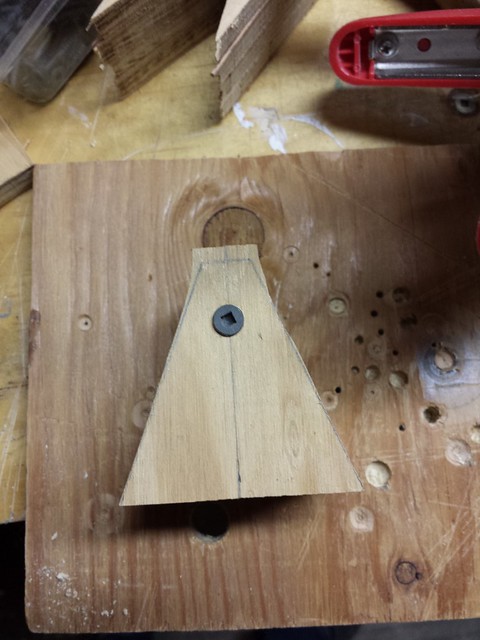
Note -if the sanding disc gets too loaded for a compressor to blow the particles out, a crepe block will clean it up nicely.
Waste not, want not... out came the screws from the offcuts to be used another day.
Hole drilled, screw in, top lopped.
Note -if the sanding disc gets too loaded for a compressor to blow the particles out, a crepe block will clean it up nicely.
Waste not, want not... out came the screws from the offcuts to be used another day.
 01-18-2014, 01:56 PM
#20
Senior Member
Thread Starter
I've asked questions in a separate thread about how to finish the skis. Here's the plan:
1. Glass them with fibreglass and epoxy resin (both are on order)
2. Sand
3. Prime with automotive primer
4. Paint with Rustoleum (gloss white)
Still a bit of construction to go before we get there, though.
1. Glass them with fibreglass and epoxy resin (both are on order)
2. Sand
3. Prime with automotive primer
4. Paint with Rustoleum (gloss white)
Still a bit of construction to go before we get there, though.
01-19-2014, 05:18 PM
#21
Senior Member
Thread Starter
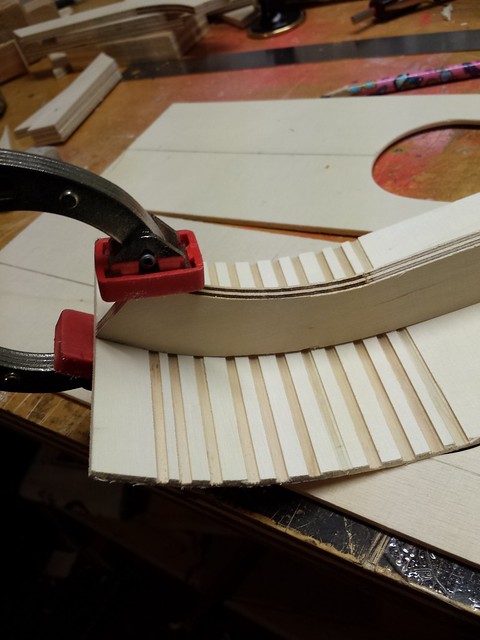
For some reason the bends that worked so well with a square-tipped blank didn't bend the round-nosed ski nearly as much as I wanted so I've decided to go with grooves cut on the mitre saw. My original objection - aesthetics - is no longer a concern because once the skis are assembled I'll fill the mitred slots with putty. Once the skis are glassed, sanded, primed and painted there should be no hint of the slots.
I've heard that you can make thin slots with a hobby knife - the problem is that I have no way to control the depth of such cuts. The mitre saw is infinitely adjustable in that regard. And to my way of thinking there must be at least a small kerf to allow the skis to curve upwards.
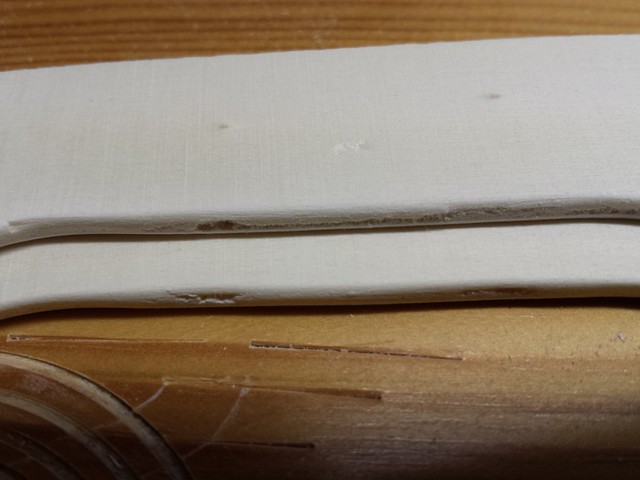
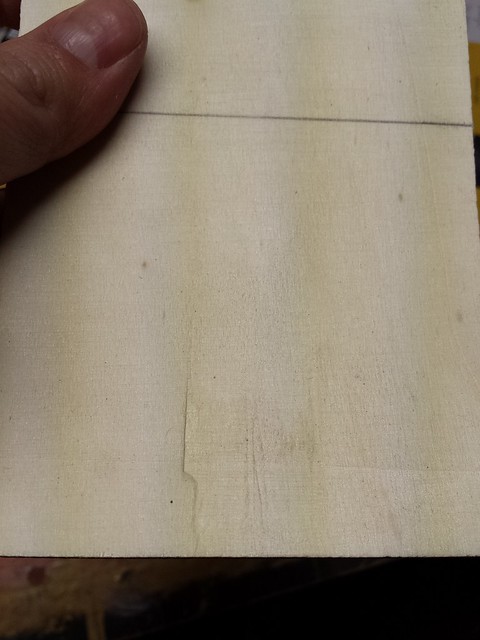
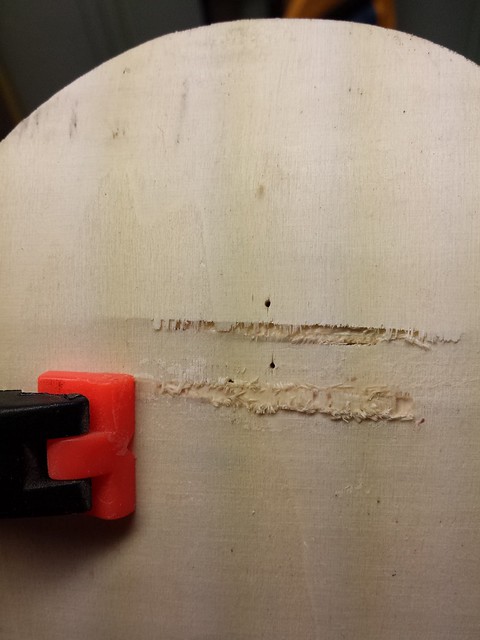
Pressing the barely-bent ski flat again.
Two flat, if slightly water-stained, skis.
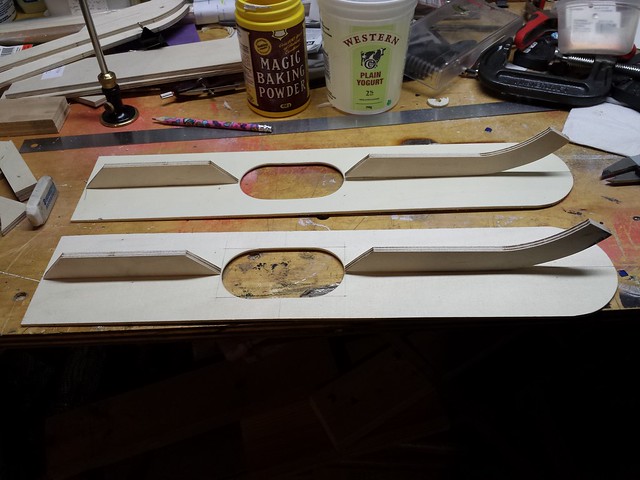
Clamping square to the bench edge to mark the slot locations.
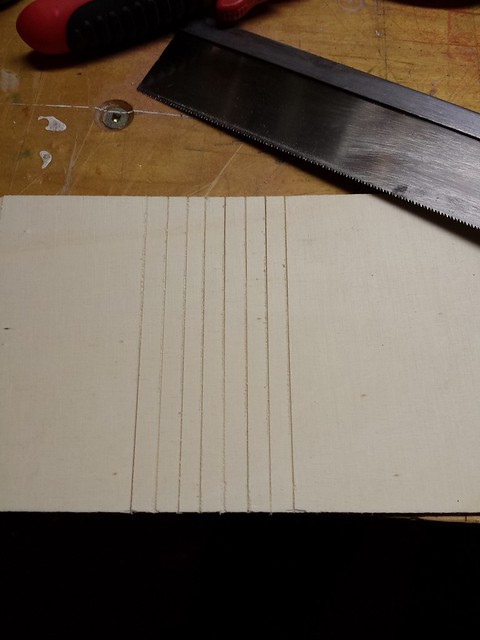
Mitre slots marked. The saw blade kerf is 1/8", so I'm spacing the cuts 1/4" apart. Note the test piece for reference - those slots were not a measured distance apart.

I hit the skis with the heat gun for several minutes to remove moisture - I'll let them air out for a day or two before cutting the slots.
I've heard that you can make thin slots with a hobby knife - the problem is that I have no way to control the depth of such cuts. The mitre saw is infinitely adjustable in that regard. And to my way of thinking there must be at least a small kerf to allow the skis to curve upwards.
Pressing the barely-bent ski flat again.
Two flat, if slightly water-stained, skis.
Clamping square to the bench edge to mark the slot locations.
Mitre slots marked. The saw blade kerf is 1/8", so I'm spacing the cuts 1/4" apart. Note the test piece for reference - those slots were not a measured distance apart.
I hit the skis with the heat gun for several minutes to remove moisture - I'll let them air out for a day or two before cutting the slots.
01-20-2014, 06:16 PM
#22
Senior Member
Thread Starter
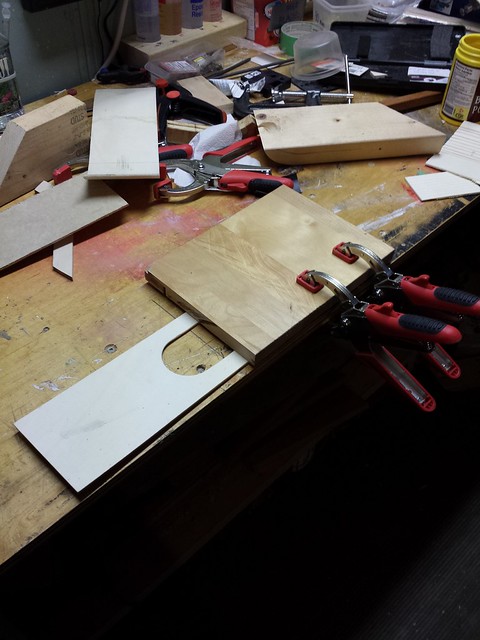
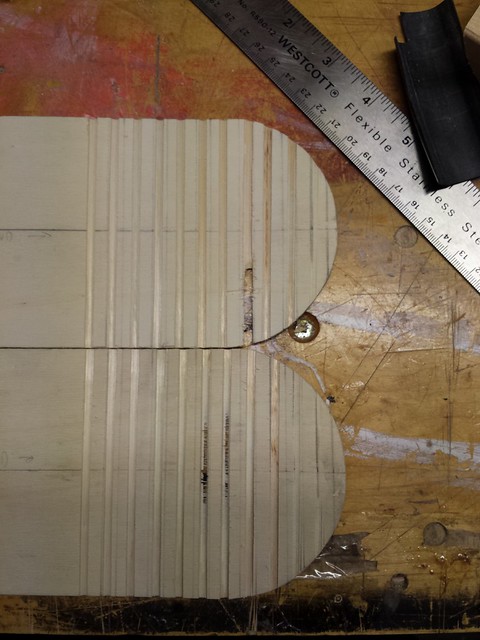
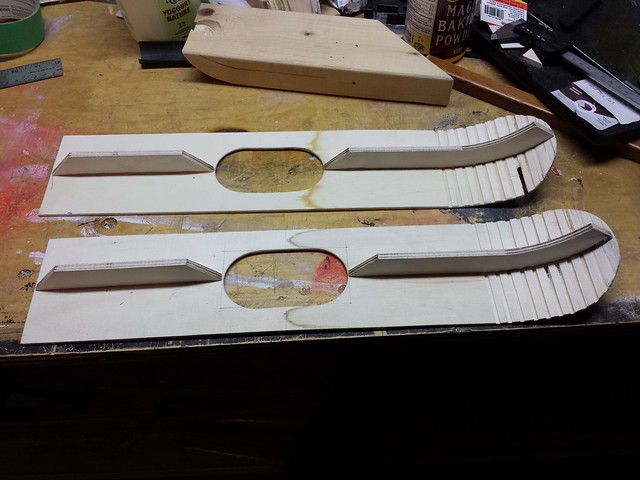
Slight change in plan - I decided to space the groove lines every 3/8" instead of every 1/4" for a little more glue surface.
Lesson learned - wood that has been soaked, bent and re-flattened may not be perfectly flat, so some grooves go a little too deep. No worries - it's all fixable.

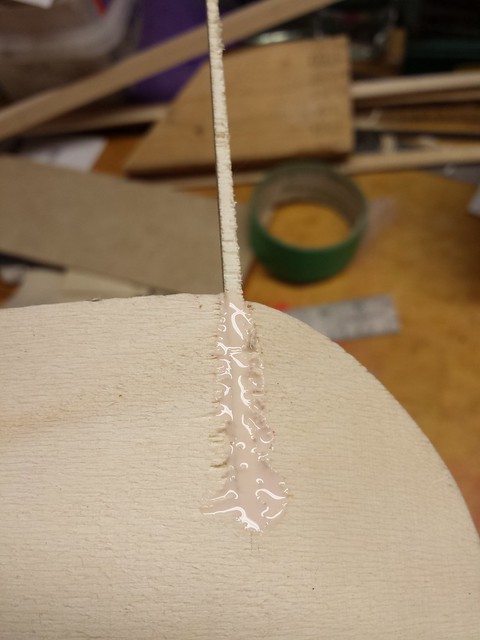
Preparing the first forward spine for gluing and clamping.
Glued, clamped and weighted.
Lesson learned - wood that has been soaked, bent and re-flattened may not be perfectly flat, so some grooves go a little too deep. No worries - it's all fixable.
Preparing the first forward spine for gluing and clamping.
Glued, clamped and weighted.
01-20-2014, 06:20 PM
#23
Senior Member
Thread Starter
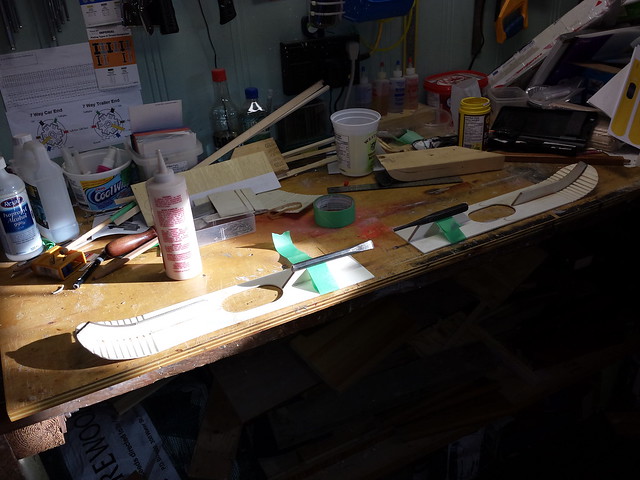
Here are both of the skis with front spines glued, clamped and weighted.
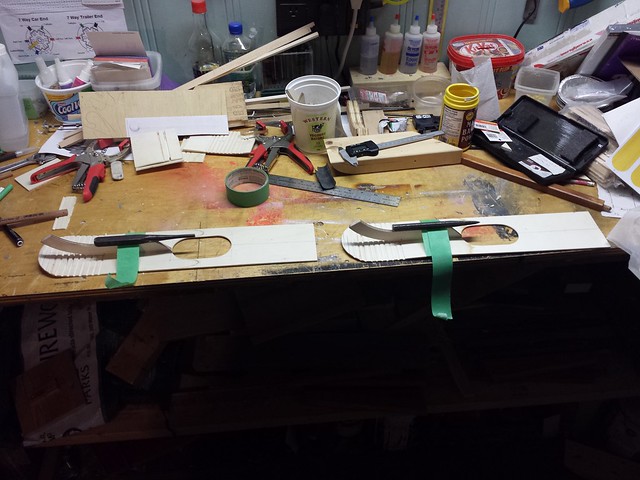
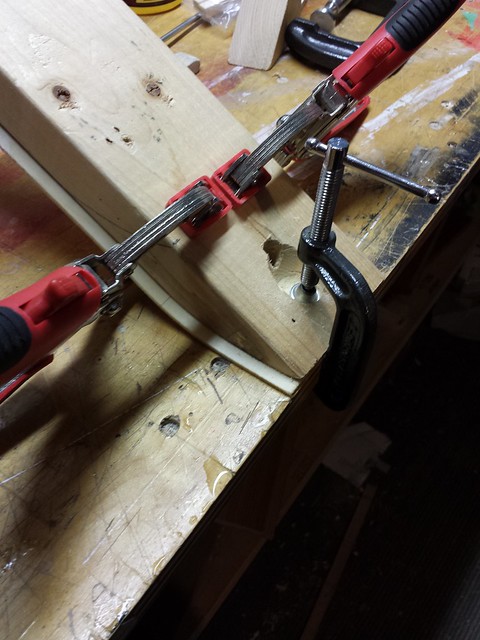
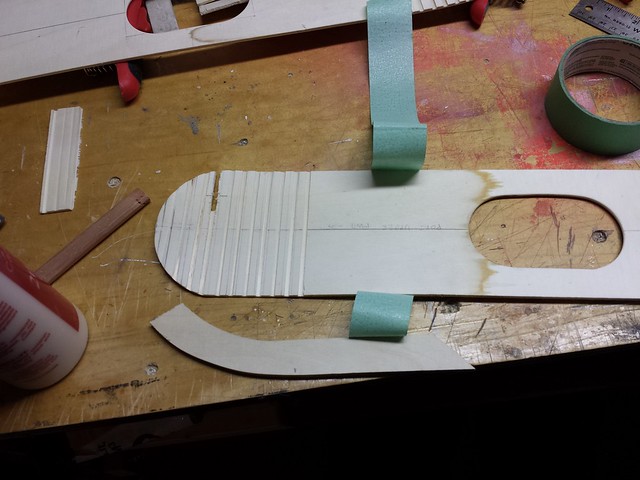
Once the first glue-up had cured it was time to glue the curve. Nitro fuel tubing makes a great clamp. One ski...
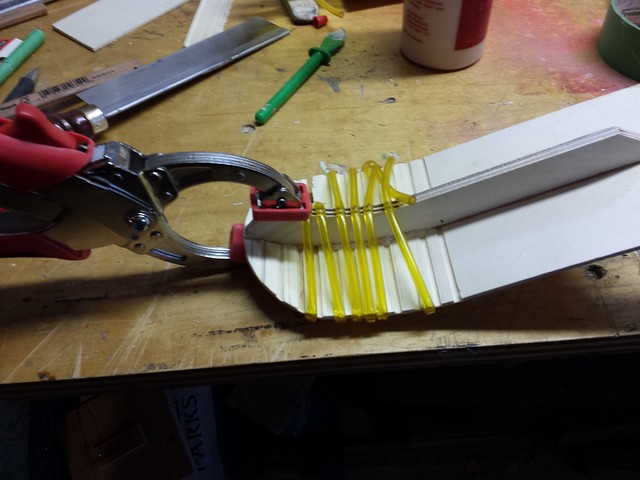
... both skis.
Both front spines fully glued.
Once the first glue-up had cured it was time to glue the curve. Nitro fuel tubing makes a great clamp. One ski...
... both skis.
Both front spines fully glued.
 01-20-2014, 06:28 PM
#25
Senior Member
Thread Starter
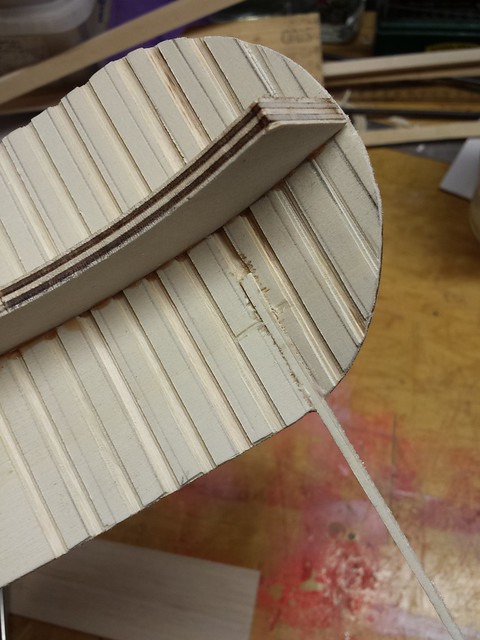
Starboard side patching.
I wanted to fill the grooves after the curves were bent and glued. I don't have a balsa stripper but with thin balsa this marking gauge works very well.
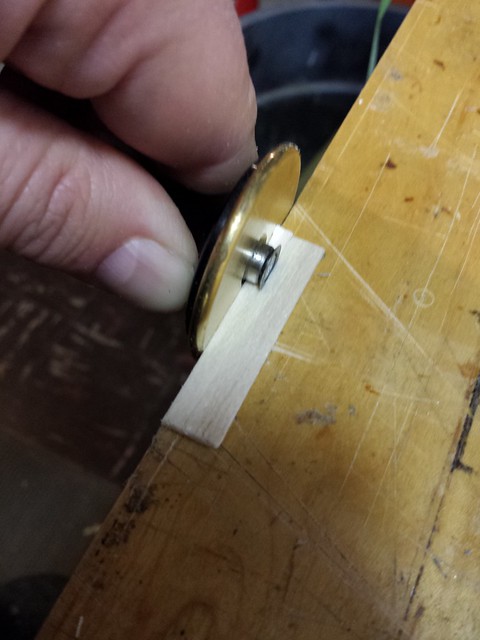

I wanted to fill the grooves after the curves were bent and glued. I don't have a balsa stripper but with thin balsa this marking gauge works very well.