


Building Light but strong
 01-24-2015, 06:38 AM
#1

Thread Starter
Join Date: Jan 2015
Location: 'Straya
Posts: 32
Likes: 0
Received 0 Likes
on
0 Posts
Hi guys,
I have just started building my third scratch built model (Cloud Dancer 120 96") and have a few questions .
.
After looking at the plans, reading the articles, looking at forums and posting on forums (with no response) i have decided to run a petrol engine in the model.
I have several questions as my other 2 builds were straight forward for .40 glow engines.
With the petrol there is a need to have some form of strength to cope with the vibration produced.
I want to keep the model weight between 10 ~ 13lbs.
I am using quality balsa and ply to the thicknesses recommended on the plan.
I am going to be using quality glues [Epoxy / wood glues / CA] any specific recommendations for the tasks?
I am looking at covering it in either SIG Koverall or fibreglass (some experience from a previous project)
I was wondering if any of the more experienced modelers had any tips and tricks to keeping the air frame light (within the weight range) but strong (so the vibration won't cause it to shake its self apart).The models wing area is ~1350 in^2... I would like to keep the wing loading as low as possible so that the model can do what it was originally designed to do.
Any Tips / Tricks / Help / Recommendations / Advise.... to point me in the right direction (or one to make the model light but strong) would be greatly appreciated.
Cheers
FlyBoy
I have just started building my third scratch built model (Cloud Dancer 120 96") and have a few questions
. After looking at the plans, reading the articles, looking at forums and posting on forums (with no response) i have decided to run a petrol engine in the model.
I have several questions as my other 2 builds were straight forward for .40 glow engines.
With the petrol there is a need to have some form of strength to cope with the vibration produced.
I want to keep the model weight between 10 ~ 13lbs.
I am using quality balsa and ply to the thicknesses recommended on the plan.
I am going to be using quality glues [Epoxy / wood glues / CA] any specific recommendations for the tasks?
I am looking at covering it in either SIG Koverall or fibreglass (some experience from a previous project)
I was wondering if any of the more experienced modelers had any tips and tricks to keeping the air frame light (within the weight range) but strong (so the vibration won't cause it to shake its self apart).The models wing area is ~1350 in^2... I would like to keep the wing loading as low as possible so that the model can do what it was originally designed to do.
Any Tips / Tricks / Help / Recommendations / Advise.... to point me in the right direction (or one to make the model light but strong) would be greatly appreciated.
Cheers
FlyBoy
 01-24-2015, 08:35 AM
#2

Light strong is an oxymoron that can’t be done so don’t be disappointed if your plane comes out heavier than you expected. This Tony has a wing area of 1300 square inches, weighs 21 pounds and is powered by a 50cc engine. It flies great and has survived multiple hard landings. Gas engines do not vibrate any more than any other type of engine. If they do, you have a bad engine or a weak structure. I’ll paste in a description of how I finished the plane. It is taken out of content from something I wrote for another plane.
With so many paints disappearing from the store shelves, it’s hard to find substitutes that will perform the same way. Use what you have available in your area and what you are familiar with. Here is how I finished the prototype. It is a finishing technique I have achieved good results with on other models. Brush on a full strength coat of Valspar Lacquer Sanding Sealer NAS1420. A well-stocked paint store that caters to the professionals will carry this. It is usually used for furniture finishing. One of those two-inch inexpensive disposable brushes is ideal for this application. Sand lightly with 220-grit sandpaper. Apply � fiberglass cloth over the surfaces brushing through it with the sealer thinned 100% with lacquer thinner. Sand lightly with 220-grit sandpaper. Brush on another thinned coat of the sealer. Sand with 220-grit sandpaper being careful not to cut into the cloth. Brush on two more coats of the thinned sealer. Try to fill the weave of the cloth as much as possible. Sand with 150-grit sandpaper to keep the surface flat and smooth.
Spray on three coats of Pacific Coast Lacquer’s PCL 913 lacquer based primer thinned 125% with medium lacquer thinner. Sand the first coat with 100-grit sandpaper, the second coat with 150-grit sandpaper and the last coat with 320-grit sandpaper. You should now have a pretty good surface for your color coats.
Apply a coat of Kilz that is thinned to two parts Kilz to one part naphtha. This will improve the adhesion of the final color coats.
The prototype model was painted with Benjamin Moore’s oil based paints. It took two coats of paint, each thinned to a mixture of two parts paint and one part naphtha. The model was painted in a two color scheme, not necessarily representing any particular plane. All of the insignia and rudder stripes were painted with Rust-oleum. The letters on the wing were four inch vinyl letters available at a stationery store. The overall result was just what I was looking for.
Dan.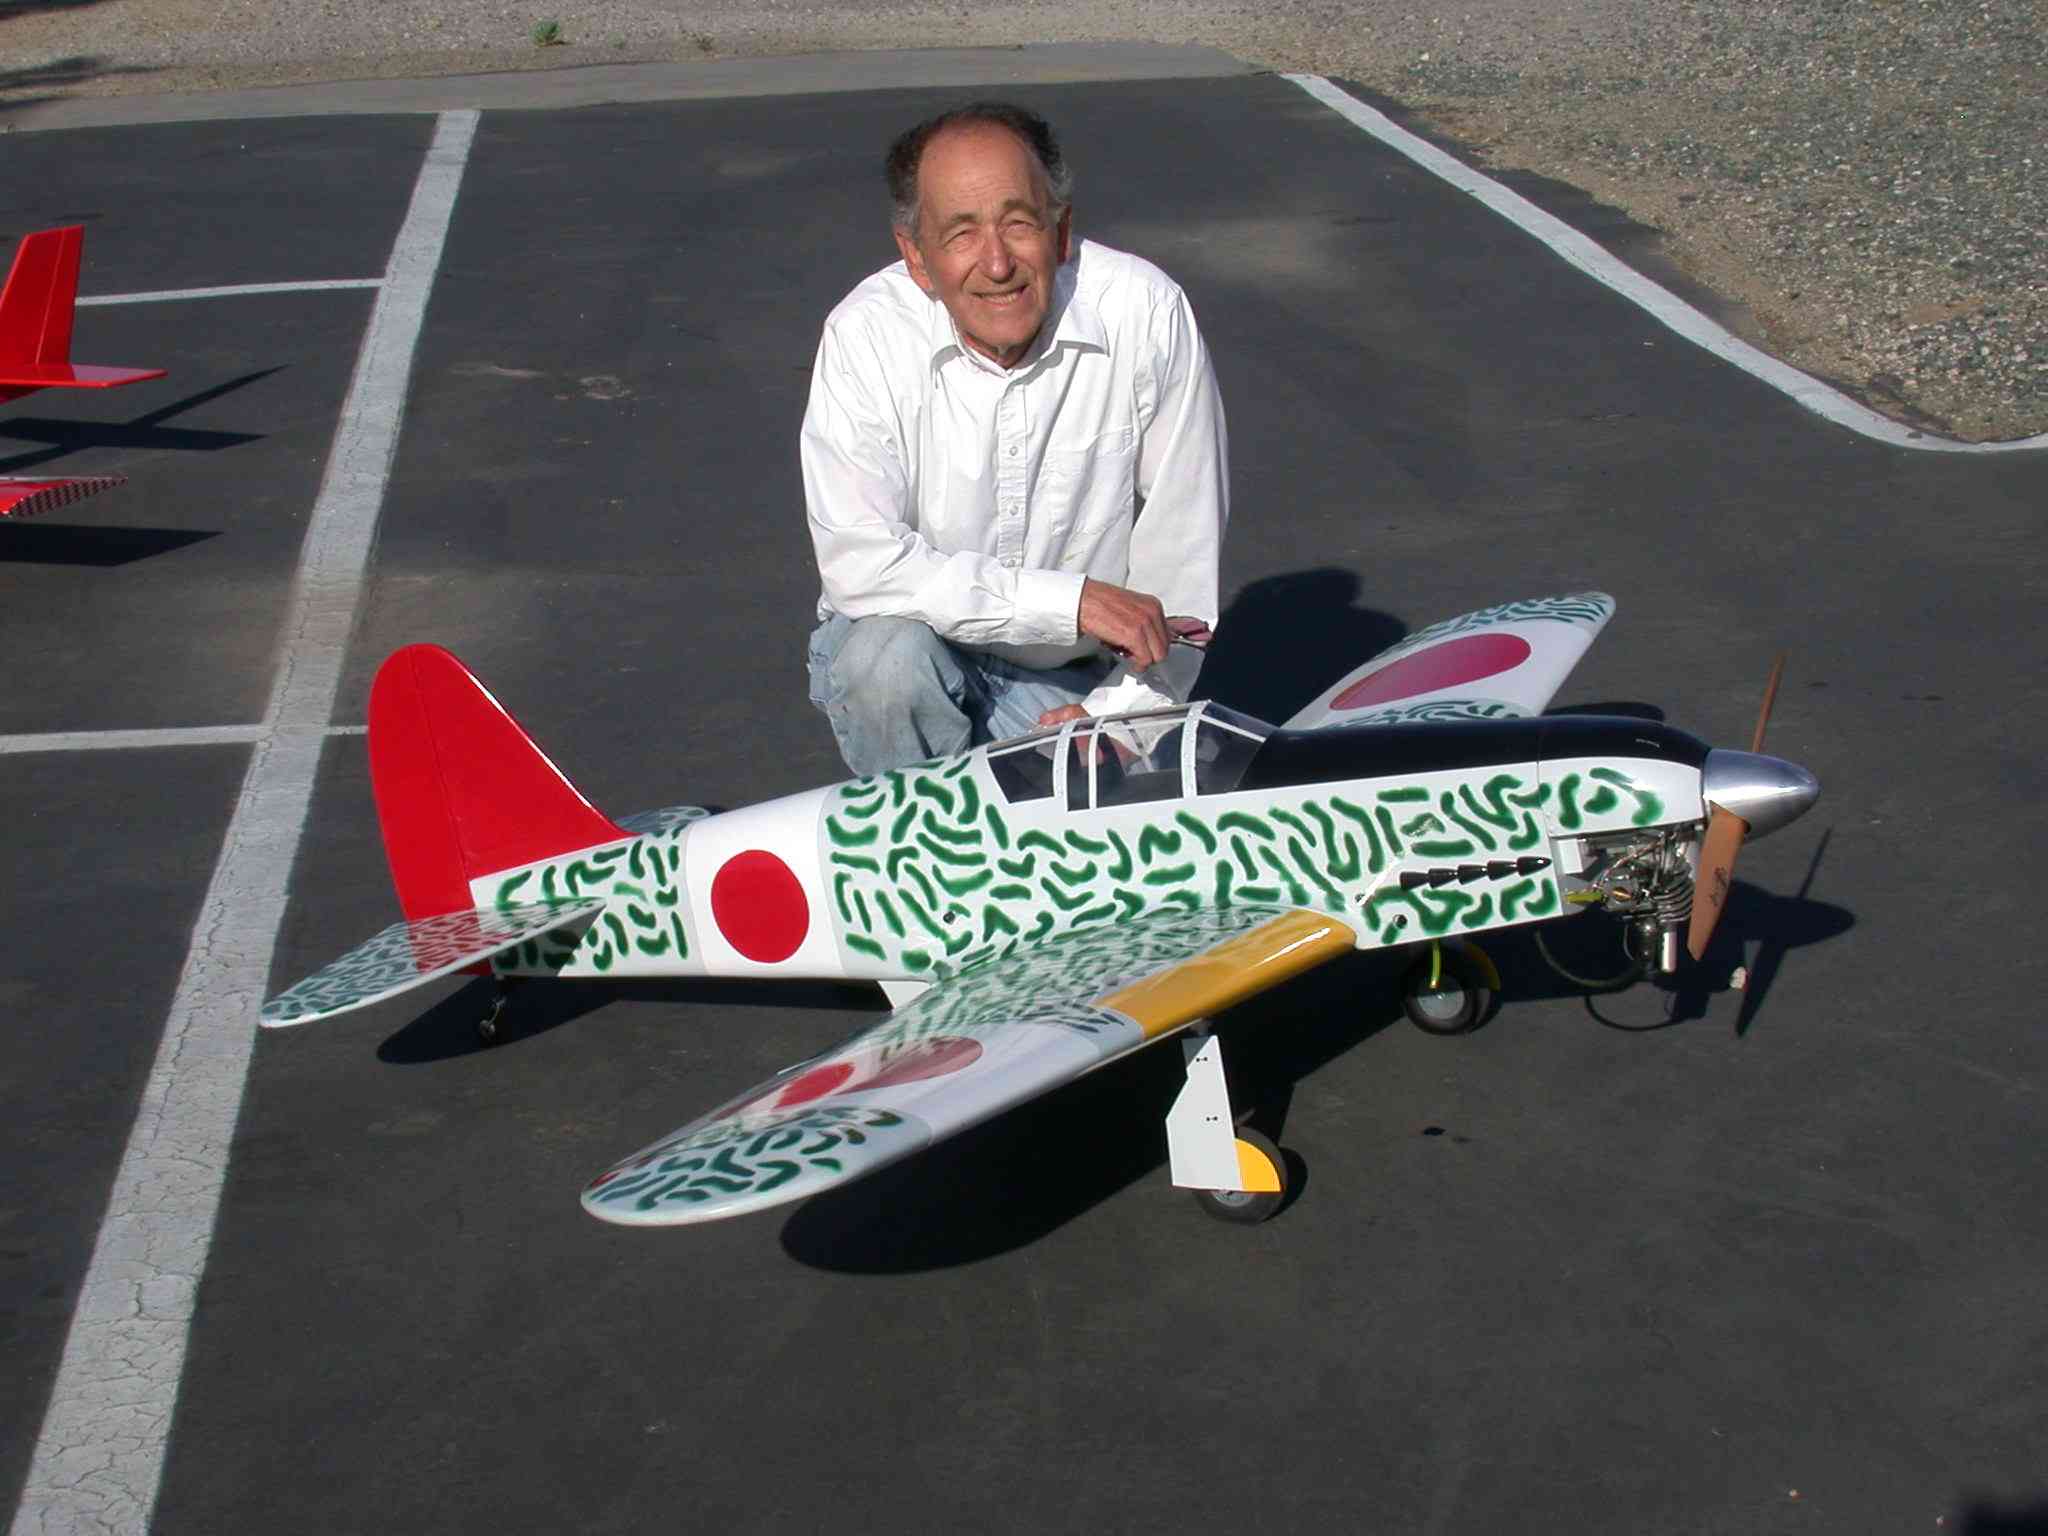
01-24-2015, 09:16 AM
#3
Welcome to the pastime of building. A lengthy treatise is required to answer what most of us learn over many years. Simply, way too much to absorb in one reading.
A great tip was given to me several years ago by a free flight builder. When using alphatic resin glue, don't apply from a bottle, use a brush. Keep the brush in a water jar and draw a bit of water to the glue that is placed into a glue pot and thin 15% or so. Thinly coat the two parts. Let dry till the sheen disappears and then coat again and join. The glue soaks into the grain better and when joined allows enough movement to align but is nearly like contact adhesive and the light buildup will dry fairly quickly . Glue is heavy, don't overuse it.
A great tip was given to me several years ago by a free flight builder. When using alphatic resin glue, don't apply from a bottle, use a brush. Keep the brush in a water jar and draw a bit of water to the glue that is placed into a glue pot and thin 15% or so. Thinly coat the two parts. Let dry till the sheen disappears and then coat again and join. The glue soaks into the grain better and when joined allows enough movement to align but is nearly like contact adhesive and the light buildup will dry fairly quickly . Glue is heavy, don't overuse it.
01-24-2015, 06:33 PM
#4
Thread Starter
Join Date: Jan 2015
Location: 'Straya
Posts: 32
Likes: 0
Received 0 Likes
on
0 Posts
Dan, thanks for the recommendations ill be keeping them in mind when i come to the later stages of the build!!
I thought it was a bit of an oxymoron but you know you don't get an answer to a question if you don't ask it.
I've heard of guys using light wood glue and running a bead of CA along the joint.
The Tony looks great, my next kit after the CD will be Topflite F4u Corsair Giant scale, I want a little more experience building bigger aircraft before I attempt this.
AA5BY thanks for the tip with the alphatic glue, ill give that a go with the other wing for one of my smaller models and see how it turns put.
If i have any more questions I will ask here.
Thanks again for the advice
Flyboy
Last edited by FlyBoy95; 01-24-2015 at 06:36 PM.
01-29-2015, 07:56 PM
#6
Senior Member

Join Date: Apr 2014
Location: Near Deming, NM.
Posts: 100
Likes: 0
Received 0 Likes
on
0 Posts
Hi guys,
I have several questions as my other 2 builds were straight forward for .40 glow engines.
With the petrol there is a need to have some form of strength to cope with the vibration produced.
I want to keep the model weight between 10 ~ 13lbs.
I am using quality balsa and ply to the thicknesses recommended on the plan.
I am going to be using quality glues [Epoxy / wood glues / CA] any specific recommendations for the tasks?
I am looking at covering it in either SIG Koverall or fibreglass (some experience from a previous project)
I was wondering if any of the more experienced modelers had any tips and tricks to keeping the air frame light (within the weight range) but strong (so the vibration won't cause it to shake its self apart).The models wing area is ~1350 in^2... I would like to keep the wing loading as low as possible so that the model can do what it was originally designed to do.
Any Tips / Tricks / Help / Recommendations / Advise.... to point me in the right direction (or one to make the model light but strong) would be greatly appreciated.
Cheers
FlyBoy
01-30-2015, 03:48 AM
#7

Light strong is an oxymoron that can’t be done so don’t be disappointed if your plane comes out heavier than you expected. This Tony has a wing area of 1300 square inches, weighs 21 pounds and is powered by a 50cc engine. It flies great and has survived multiple hard landings. Gas engines do not vibrate any more than any other type of engine. If they do, you have a bad engine or a weak structure. I’ll paste in a description of how I finished the plane. It is taken out of content from something I wrote for another plane.
With so many paints disappearing from the store shelves, it’s hard to find substitutes that will perform the same way. Use what you have available in your area and what you are familiar with. Here is how I finished the prototype. It is a finishing technique I have achieved good results with on other models. Brush on a full strength coat of Valspar Lacquer Sanding Sealer NAS1420. A well-stocked paint store that caters to the professionals will carry this. It is usually used for furniture finishing. One of those two-inch inexpensive disposable brushes is ideal for this application. Sand lightly with 220-grit sandpaper. Apply � fiberglass cloth over the surfaces brushing through it with the sealer thinned 100% with lacquer thinner. Sand lightly with 220-grit sandpaper. Brush on another thinned coat of the sealer. Sand with 220-grit sandpaper being careful not to cut into the cloth. Brush on two more coats of the thinned sealer. Try to fill the weave of the cloth as much as possible. Sand with 150-grit sandpaper to keep the surface flat and smooth.
Spray on three coats of Pacific Coast Lacquer’s PCL 913 lacquer based primer thinned 125% with medium lacquer thinner. Sand the first coat with 100-grit sandpaper, the second coat with 150-grit sandpaper and the last coat with 320-grit sandpaper. You should now have a pretty good surface for your color coats.
Apply a coat of Kilz that is thinned to two parts Kilz to one part naphtha. This will improve the adhesion of the final color coats.
The prototype model was painted with Benjamin Moore’s oil based paints. It took two coats of paint, each thinned to a mixture of two parts paint and one part naphtha. The model was painted in a two color scheme, not necessarily representing any particular plane. All of the insignia and rudder stripes were painted with Rust-oleum. The letters on the wing were four inch vinyl letters available at a stationery store. The overall result was just what I was looking for.
Dan.
With so many paints disappearing from the store shelves, it’s hard to find substitutes that will perform the same way. Use what you have available in your area and what you are familiar with. Here is how I finished the prototype. It is a finishing technique I have achieved good results with on other models. Brush on a full strength coat of Valspar Lacquer Sanding Sealer NAS1420. A well-stocked paint store that caters to the professionals will carry this. It is usually used for furniture finishing. One of those two-inch inexpensive disposable brushes is ideal for this application. Sand lightly with 220-grit sandpaper. Apply � fiberglass cloth over the surfaces brushing through it with the sealer thinned 100% with lacquer thinner. Sand lightly with 220-grit sandpaper. Brush on another thinned coat of the sealer. Sand with 220-grit sandpaper being careful not to cut into the cloth. Brush on two more coats of the thinned sealer. Try to fill the weave of the cloth as much as possible. Sand with 150-grit sandpaper to keep the surface flat and smooth.
Spray on three coats of Pacific Coast Lacquer’s PCL 913 lacquer based primer thinned 125% with medium lacquer thinner. Sand the first coat with 100-grit sandpaper, the second coat with 150-grit sandpaper and the last coat with 320-grit sandpaper. You should now have a pretty good surface for your color coats.
Apply a coat of Kilz that is thinned to two parts Kilz to one part naphtha. This will improve the adhesion of the final color coats.
The prototype model was painted with Benjamin Moore’s oil based paints. It took two coats of paint, each thinned to a mixture of two parts paint and one part naphtha. The model was painted in a two color scheme, not necessarily representing any particular plane. All of the insignia and rudder stripes were painted with Rust-oleum. The letters on the wing were four inch vinyl letters available at a stationery store. The overall result was just what I was looking for.
Dan.
Not true.
01-30-2015, 08:29 AM
#8
Thread Starter
Join Date: Jan 2015
Location: 'Straya
Posts: 32
Likes: 0
Received 0 Likes
on
0 Posts
Wow thanks guys,
tomclark those weights are awesome. I have this very ambitious plan of building the 96" (1350 area) Cloud Dancer to below the 11lb mark (plans state between 10 and 14) and running around a 20cc gasser in it. I still have a few questions about the engine but all in good time I guess. I will definately read through those i have another month of holidays before im back onto the studies.. i should be able to get some of not most of the model built.
Thanks again guys all information is greatly appreciated :-)
FlyBoy
01-30-2015, 09:08 AM
#9
I think Tom powered with glow, so gas will be slightly heavier. I just finished a build similar to yours in length (98") and it came out at 14 lbs but the Zenoah G-26 is a heavy engine but it had mounting lugs on its front to mount the cowl and dummy engine so suited the build well. Other extra features were plug in stabs, an adjustable horizontal stab and a drop bay with doors and mechanism. It also was a scale build so had a good bit of music wire undercarriage and wing struts.
You should have no problem building a gas plane the size you want under twelve lbs unless it involves specialty stuff or its design requires adding weight to balance.
You should have no problem building a gas plane the size you want under twelve lbs unless it involves specialty stuff or its design requires adding weight to balance.
01-30-2015, 06:47 PM
#10
Thread Starter
Join Date: Jan 2015
Location: 'Straya
Posts: 32
Likes: 0
Received 0 Likes
on
0 Posts
I just finished a build similar to yours in length (98") and it came out at 14 lbs but the Zenoah G-26 is a heavy engine but it had mounting lugs on its front to mount the cowl and dummy engine so suited the build well. Other extra features were plug in stabs, an adjustable horizontal stab and a drop bay with doors and mechanism. It also was a scale build so had a good bit of music wire undercarriage and wing struts.
You should have no problem building a gas plane the size you want under twelve lbs unless it involves specialty stuff or its design requires adding weight to balance.
Thanks AA5BY. i know that gassers are generally heavier than glow. I am looking at something around DLE 20 RA, the Cloud dancers going to be nothing special.
tomclark have you had any issues with the aircraft being too light? (such as weakness or instability in wind)
Thanks again
FlyBoy
Last edited by FlyBoy95; 01-30-2015 at 07:04 PM.
02-03-2015, 05:07 AM
#11
I enjoy building very light but strong aerobatic aircraft myself, then proceed to fly them as hard as I can. Remember this: The heavier an airframe is, the heavier it needs to be to support the extra weight added in the first place, It is a vicious cycle and when building an airframe everything is a trade off. Back in the late 70s through most of the 80s I worked at NASA's Dryden Flight Research Center in Edwards AFB California. The guys in engineering department had a saying back then that I had explained to me, and that saying has stayed with me all these years. The saying was this: Make the fitting strong, but engineer the hell out of the upholstery. so things like firewalls, landing gear and support structures, spars, longerons and so on must be strong, but there is allot of things on an airframe that can be lightened up, like secondary structure and fairing, so keep those areas light as possible. I built this 40% aerobatic airplane from a kit that that was yielding 42 to 46 lb ready to fly competition airplanes back in the mid 90s, mine came in at 28 lbs. ready to fly. I did this by leaving over 6 lbs. of wood in the box that the airframe just did not need, removing almost 1 lb. of foam, utilizing carbon fiber Landing gear, wheel pants, Spinner and Kavan wheels that saved almost 2 lbs. and finally because I saved all that extra weight and much of it behind the C/G I was able to mount a 100cc engine on the nose instead of the 150cc to 200cc engine recommended by the kit manufacturer saving another nearly 6 lbs. and $$$. Enough about weight, instability in wind, that really depends on who is on the sticks, windy days are just good old fun with an airplane in the sky like pictured below but that is not the case with everyone, burning lots of gas is the cure for that, at least IMO.


Bob
Bob
02-03-2015, 05:43 AM
#12
Thread Starter
Join Date: Jan 2015
Location: 'Straya
Posts: 32
Likes: 0
Received 0 Likes
on
0 Posts
Bob,
That is a really great explanation!! I'll look at carbon parts as an option. I have read through Tomclarks forums and they appear to be very similar with the way the cloud dancer is meant to be built. I will keep that in mind with respect to the strength of the areas that require it! I am currently in the process of cutting formers and ribs. I'm not to bad with fabricating parts (I have been making surfboards / car parts for a while) and I have a lot of material spare.
It is a very nice looking aircraft!
Where I live we do get days where the wind can be very fun with constant changes. I only asked because i have seen some lightened aircraft (3D / aerobatic models) come unstuck with the wind.
Thanks again for the information I have notes that i am adding to and i'm practicing some of the methods on a smaller model that i had sidelined.
I look forward to more methods and ideas!
FlyBoy
Last edited by FlyBoy95; 02-03-2015 at 05:53 AM.
02-24-2015, 06:56 AM
#13
Junior Member
Join Date: Oct 2014
Posts: 24
Likes: 0
Received 0 Likes
on
0 Posts
Yes you can build light and strong, but, yes there is always a "but", you first must understand materials, adhesives, and design of stress bearing structures.
After many years of design experience, with all the failures and successes that come with it, I have developed a set of basic rules for managing weight and strength. First weight. Get a box and in that box place the engine and all the things that go with it, i.e. electronic ignition, battery, switch, fuel tank, fuel tubing, etc. Next put all the servo's, control horns, linkages, clevis or ball links, mounting screws, etc. Then put in the main and tail landing gears, don't forget the mounting hardware, axles, wheels and collars. Finally, put in the aircraft battery or batteries, receiver, switch and anything else you can think of that will be installed in the airframe including hinges. If you have them, put in the cowl and canopy, pilot bust, instrument panel, etc. Put this box on a scale and weigh it, taking away the weight of the box. This is the fixed weight factor of your aircraft. If you have established a weight requirement goal for you aircraft subtract the fixed weight factor from the goal weight and this is what you have to work with to develop your structure. The realistic airframe weight for a 96" airframe, without all the above installed, is going to be around 6 to 10 pounds, possibly more, depending on the type of aircraft and its purpose, i.e. scale, sport aerobatic, etc.
Another word about weight. All airframes have a weight region that achieves optimum aerodynamic balance. Too light, the aerodynamic performance become skittish and unpredictable, to heavy and the performance becomes sluggish. This optimum weight is based on many factors and may possibly be heavier than you think. To simply say lighter is better is not correct. For example, I design my own airplanes and they are weight managed, very aerobatic but are also stable and predictable in their performance. I was flying with one of our better pilots one day who had one of the very light 3D IMAC style electric airframes and was trying to do knife edges. This airplane would not hold a steady knife edge and he was constantly fighting it. So I took my airplane up, handed him the box and told him to fly it knife edge. He put it in a knife edge and then proceeded to make knife edge circles with his fingers barely moving on the sticks. He gave me this mystified look and I told him that it is all in the design and proper weight management. Then we put about 4 oz of weight on the center of gravity on his airplane which really tamed most of its skittish behavior. So the moral to the story is that lighter is not necessarily better.
Strength is achieved by using the proper materials for the proper purposes and then integrating those materials into the airframe structure to achieve the desired strength and integrity. I could go on forever talking about this, but it is worth spending some time investigating materials and adhesives and learning how to utilize and integrate them. I currently have a posting for my build of my ElliptoSport 500 design and I would suggest taking a look at what I have done so far which may give you some ideas.
02-24-2015, 05:27 PM
#14
Thread Starter
Join Date: Jan 2015
Location: 'Straya
Posts: 32
Likes: 0
Received 0 Likes
on
0 Posts
Genslro, Thanks for the response your build thread for the ElliptoSport is very informative.
I have been doing the weighing of stuff to go into the air frame for a few builds and it has helped to get an understanding of airframe weight.
I will take into account the overall weight of the model for flying. The cloud dancer is a low winged plane with a semi symmetrical aerofoil. It can do nearly all aerobatics (I doubt 3D but im not looking at doing that anyway). I have started the build (With University going back this could be a very interesting time balancing act). I decided to do this model as I want some larger model building experience for when i start my TF Giant Corsair.
As i have said before thanks for the tips they are very useful.
02-26-2015, 06:17 PM
#15
Yes you can build light and strong, but, yes there is always a "but", you first must understand materials, adhesives, and design of stress bearing structures.
After many years of design experience, with all the failures and successes that come with it, I have developed a set of basic rules for managing weight and strength. First weight. Get a box and in that box place the engine and all the things that go with it, i.e. electronic ignition, battery, switch, fuel tank, fuel tubing, etc. Next put all the servo's, control horns, linkages, clevis or ball links, mounting screws, etc. Then put in the main and tail landing gears, don't forget the mounting hardware, axles, wheels and collars. Finally, put in the aircraft battery or batteries, receiver, switch and anything else you can think of that will be installed in the airframe including hinges. If you have them, put in the cowl and canopy, pilot bust, instrument panel, etc. Put this box on a scale and weigh it, taking away the weight of the box. This is the fixed weight factor of your aircraft. If you have established a weight requirement goal for you aircraft subtract the fixed weight factor from the goal weight and this is what you have to work with to develop your structure. The realistic airframe weight for a 96" airframe, without all the above installed, is going to be around 6 to 10 pounds, possibly more, depending on the type of aircraft and its purpose, i.e. scale, sport aerobatic, etc.
Another word about weight. All airframes have a weight region that achieves optimum aerodynamic balance. Too light, the aerodynamic performance become skittish and unpredictable, to heavy and the performance becomes sluggish. This optimum weight is based on many factors and may possibly be heavier than you think. To simply say lighter is better is not correct. For example, I design my own airplanes and they are weight managed, very aerobatic but are also stable and predictable in their performance. I was flying with one of our better pilots one day who had one of the very light 3D IMAC style electric airframes and was trying to do knife edges. This airplane would not hold a steady knife edge and he was constantly fighting it. So I took my airplane up, handed him the box and told him to fly it knife edge. He put it in a knife edge and then proceeded to make knife edge circles with his fingers barely moving on the sticks. He gave me this mystified look and I told him that it is all in the design and proper weight management. Then we put about 4 oz of weight on the center of gravity on his airplane which really tamed most of its skittish behavior. So the moral to the story is that lighter is not necessarily better.
Strength is achieved by using the proper materials for the proper purposes and then integrating those materials into the airframe structure to achieve the desired strength and integrity. I could go on forever talking about this, but it is worth spending some time investigating materials and adhesives and learning how to utilize and integrate them. I currently have a posting for my build of my ElliptoSport 500 design and I would suggest taking a look at what I have done so far which may give you some ideas.
After many years of design experience, with all the failures and successes that come with it, I have developed a set of basic rules for managing weight and strength. First weight. Get a box and in that box place the engine and all the things that go with it, i.e. electronic ignition, battery, switch, fuel tank, fuel tubing, etc. Next put all the servo's, control horns, linkages, clevis or ball links, mounting screws, etc. Then put in the main and tail landing gears, don't forget the mounting hardware, axles, wheels and collars. Finally, put in the aircraft battery or batteries, receiver, switch and anything else you can think of that will be installed in the airframe including hinges. If you have them, put in the cowl and canopy, pilot bust, instrument panel, etc. Put this box on a scale and weigh it, taking away the weight of the box. This is the fixed weight factor of your aircraft. If you have established a weight requirement goal for you aircraft subtract the fixed weight factor from the goal weight and this is what you have to work with to develop your structure. The realistic airframe weight for a 96" airframe, without all the above installed, is going to be around 6 to 10 pounds, possibly more, depending on the type of aircraft and its purpose, i.e. scale, sport aerobatic, etc.
Another word about weight. All airframes have a weight region that achieves optimum aerodynamic balance. Too light, the aerodynamic performance become skittish and unpredictable, to heavy and the performance becomes sluggish. This optimum weight is based on many factors and may possibly be heavier than you think. To simply say lighter is better is not correct. For example, I design my own airplanes and they are weight managed, very aerobatic but are also stable and predictable in their performance. I was flying with one of our better pilots one day who had one of the very light 3D IMAC style electric airframes and was trying to do knife edges. This airplane would not hold a steady knife edge and he was constantly fighting it. So I took my airplane up, handed him the box and told him to fly it knife edge. He put it in a knife edge and then proceeded to make knife edge circles with his fingers barely moving on the sticks. He gave me this mystified look and I told him that it is all in the design and proper weight management. Then we put about 4 oz of weight on the center of gravity on his airplane which really tamed most of its skittish behavior. So the moral to the story is that lighter is not necessarily better.
Strength is achieved by using the proper materials for the proper purposes and then integrating those materials into the airframe structure to achieve the desired strength and integrity. I could go on forever talking about this, but it is worth spending some time investigating materials and adhesives and learning how to utilize and integrate them. I currently have a posting for my build of my ElliptoSport 500 design and I would suggest taking a look at what I have done so far which may give you some ideas.
Bob
02-26-2015, 07:34 PM
#16
Junior Member
Join Date: Oct 2014
Posts: 24
Likes: 0
Received 0 Likes
on
0 Posts
Proper aerodynamic weight depends on many factors, most related to the main wing and some regarding the empennage. By definition, the purpose of a wing is to provide lift and depending on its plan form and airfoil it will do so optimally at a certain load factor. The empennage is inherently tied to the main wing to provide the necessary pitch and yaw forces and also work best when the wing is properly loaded. A properly loaded wing will remain stable throughout a wide range of speeds. If the load factor is too low the wing will want to provide lift but not have the necessary weight to counteract the lift and therefore will become unstable. Likewise, the empennage will want to provide counteracting pitch and yaw forces but with the wing not properly loaded will do so erratically. This is an extremely simplistic explanation, but it works.
I have talked to a lot of IMAC pilots who fly both IMAC and 3D. Almost invariably they will configure their IMAC airplanes to be heavier to achieve proper wing loading and aerodynamic stability. Inversely they will configure their 3D airplanes to be as light as possible.
So the question is what weight would be too light for a 40% aerobatic airplane. My first question would be its purpose, i.e. precision aerobatics or 3D. My second question would be what is the plan form and airfoil utilized in the wing and at what weight is it properly loaded and by what analysis that was determined. Because I have no idea of the answers to either question I am going out on a limb and provide a rough estimate. The optimal load range for aerodynamics will most likely be between 1.5 to 2.0 lbs per square foot. For 3D it will most likely be between 1.25 to 1.5 lbs per square foot. The average wing area for a 40 percent airplane is 2,750 square inches or 19 square feet. Therefore the optimal aerodynamic weight will be between 28.5 and 38 pounds. The optimal 3D weight will be somewhere around 23.75 to 28.5 pounds. I would venture to guess that if you have a 40% aerodynamic airplane that weighs less than 23 pounds it would be too light.
02-27-2015, 04:50 AM
#17
Proper aerodynamic weight depends on many factors, most related to the main wing and some regarding the empennage. By definition, the purpose of a wing is to provide lift and depending on its plan form and airfoil it will do so optimally at a certain load factor. The empennage is inherently tied to the main wing to provide the necessary pitch and yaw forces and also work best when the wing is properly loaded. A properly loaded wing will remain stable throughout a wide range of speeds. If the load factor is too low the wing will want to provide lift but not have the necessary weight to counteract the lift and therefore will become unstable. Likewise, the empennage will want to provide counteracting pitch and yaw forces but with the wing not properly loaded will do so erratically. This is an extremely simplistic explanation, but it works.
I have talked to a lot of IMAC pilots who fly both IMAC and 3D. Almost invariably they will configure their IMAC airplanes to be heavier to achieve proper wing loading and aerodynamic stability. Inversely they will configure their 3D airplanes to be as light as possible.
So the question is what weight would be too light for a 40% aerobatic airplane. My first question would be its purpose, i.e. precision aerobatics or 3D. My second question would be what is the plan form and airfoil utilized in the wing and at what weight is it properly loaded and by what analysis that was determined. Because I have no idea of the answers to either question I am going out on a limb and provide a rough estimate. The optimal load range for aerodynamics will most likely be between 1.5 to 2.0 lbs per square foot. For 3D it will most likely be between 1.25 to 1.5 lbs per square foot. The average wing area for a 40 percent airplane is 2,750 square inches or 19 square feet. Therefore the optimal aerodynamic weight will be between 28.5 and 38 pounds. The optimal 3D weight will be somewhere around 23.75 to 28.5 pounds. I would venture to guess that if you have a 40% aerodynamic airplane that weighs less than 23 pounds it would be too light.
I have talked to a lot of IMAC pilots who fly both IMAC and 3D. Almost invariably they will configure their IMAC airplanes to be heavier to achieve proper wing loading and aerodynamic stability. Inversely they will configure their 3D airplanes to be as light as possible.
So the question is what weight would be too light for a 40% aerobatic airplane. My first question would be its purpose, i.e. precision aerobatics or 3D. My second question would be what is the plan form and airfoil utilized in the wing and at what weight is it properly loaded and by what analysis that was determined. Because I have no idea of the answers to either question I am going out on a limb and provide a rough estimate. The optimal load range for aerodynamics will most likely be between 1.5 to 2.0 lbs per square foot. For 3D it will most likely be between 1.25 to 1.5 lbs per square foot. The average wing area for a 40 percent airplane is 2,750 square inches or 19 square feet. Therefore the optimal aerodynamic weight will be between 28.5 and 38 pounds. The optimal 3D weight will be somewhere around 23.75 to 28.5 pounds. I would venture to guess that if you have a 40% aerodynamic airplane that weighs less than 23 pounds it would be too light.
Bob
02-27-2015, 05:59 AM
#18
Junior Member
Join Date: Oct 2014
Posts: 24
Likes: 0
Received 0 Likes
on
0 Posts
I have to apologize, but my numbers were a little off for a 40% airplane. I was in a hurry and the wing load numbers I used were for 30-33%. The numbers I should have used are 2.0 to 2.5 for aerodynamic (38 to 47.5 lb) and 1.5 to 2.0 for 3D (28.5 to 38). I think that anything less than 26 pounds is going to be just a little squirrely. My guess is that most IMAC planes are set up around 2.2 to 2.3 pounds per square inch and the same planes used for 3D are set up at around 1.75 to 2.0 pounds per square inch. But you are right, 26 to 28 pounds is attainable if you are able to control the design and construction weight and from the sound of it, your airplane flies just fine.
We have a guy from West Virginia that comes to our field every so often and he exclusively flies 3D with 40% IMAC birds and I think his wing loading ranges from 1.8 to 2.0 depending on the airplane. All of his planes are Pilot ARFs that he has modified, but even then he does not have that much control over the basic airframe weight. His planes fly very well.
Like I said before, proper weight is dependent on many factors, not just wing area. The plan form of the wing and the airfoil are very important factors and should be analyzed together to determine proper loading. I primarily use a 15% symmetrical airfoil that I developed on my aerodynamic designs and it generates more lift than the 12 to 13% airfoils used on many ARFs. Therefore my wing loading can be slightly higher with similar performance.
03-03-2015, 04:59 AM
#19
I agree that proper weight is dependent on many factors, not just wing area. The plan form as you already stated of the wing and the airfoil are very important factors and should be analyzed together to determine proper loading.
There are several other factors to consider when talking about squirrely flight behavior. Moment arms, airfoil and plan form consideration used on the tail feathers, proper balance, the overall setup of the control system, proper travel volumes, and expos setup on all rates and on all control surfaces, finally that the airframe/control system has been finally tuned for neutral coupling in yaw, pitch, and roll. These are all thing that have huge effects on an airframes flight behavior, and it is exaggerated on an extremely light airframe and even more so in windy, gusty conditions.
I use a 9% symmetrical airfoil when designing allowing for less lift, less drag, better penetration and a better top end speed I do this because of my low wing loadings usually in the range of 22 ozs. Per sf. to 26 ozs. Per sf.
Bob
Last edited by sensei; 03-03-2015 at 06:44 AM.
03-03-2015, 07:34 AM
#20
Member
Just a little tidbit I thought I would throw out.[h=3]Water ballast use in gliders[/h]Modern gliders often use water ballast carried in the wings to increase wing loading when soaring conditions are strong. By increasing the wing loading the average speed achieved across country can be increased to take advantage of strong thermals. With a higher wing loading, a given lift-to-drag ratio is achieved at a higher airspeed than with a lower wing loading, and this allows a faster average speed across country. The ballast can be ejected overboard when conditions weaken.[SUP][11][/SUP] (See Gliding competitions)
Leo
Leo
10-21-2015, 11:32 PM
#22
Member
My Feedback: (70)
Join Date: Oct 2004
Location: Port Isabel,
TX
Posts: 98
Likes: 0
Received 0 Likes
on
0 Posts
I don't know what world of aeronautical engineering you live in but...
Strong and light is not an oxymoron. Carbon fiber, foam and Mylar has made this a falsehood. And, NEVER in the history of "real" airplane engineering has weight been added to make a design fly better other than gliders which is another realm completely from powered flight.
If you begin the design process by making light weight your priority then everything about the aircraft canl be engineered lighter. 30 years ago I built a 72" ws C-130 with retracts, flaps and operating cargo doors that weighed 3 lbs., (No carbon fiber then). It flew wonderfully but I used an airfoil that was suited to the reynolds numbers the model was flying in. It was powered by two Enya CX-11's with feathered 4 blade props outboard on ball bearing shafts.
If you're replicating an airplane research how it was engineered/built. Thousands of expensive man hours went into the design by engineers a lot smarter than most of us will ever be so don't reinvent the wheel. Simply scale down their engineering.
Most RC models are grossly overbuilt/overweight and overpowered to compensate for the basic bad engineering. As a result they've got to fly fast to stay in the air. Even a brick can fly if you put enough power in it and fly it fast enough. A good real world example of this is the F-4 Phantom.
The tensile/compressive strength of carbon fiber is astonomical. An 1/8" CF rod can support in excess of 2000 lbs.! And Mylar has a tensile/compressive strength that's quite near 6062 T6 aluminum. For modeling aluminum aircraft, mylar is already glossy smooth and far cheaper than balsa/glass/resin/filler/primer, yada, yada. The lighter the airframe, the lower power/wing loading, period. Lower power/wing loading equals tremendous weight savings throughout the whole airframe from the motor mounts to the landing gear.
To start the design process with old technologies/building techniques is to commit to a heavy, overbuilt, overpowered airframe because "we've always been built them that way". The assertion it will fly better, heavier is ludicrous. The Gossamer Condor (First man powered crossing of the English channel had a wingspan of 96' and weighed less than 50 lbs! Carbon fiber, foam ribs and mylar, not balsa and plywood. Progress only happens when you step out, way out, of the box of conventional thinking/engineering.
I suggest anyone designing RC aircraft do some researching of airfoils/reynolds nos. at UCIC Airfoil Data site. Find out what reynolds nos. your planned aircraft will fly in, use the appropriate airfoil and add lightness wherever possible with 21st century materials.
Never let anyone tell you an RC airplane will fly better, heavier. Lighter equals less kinetic energy which requires less force to control. (Read: smaller engines, servos, batteries, etc.) Whether an airplane is heavier or lighter won't compensate for inadequate piloting skills. Also, an aircraft that's not balanced correctly about all axis won't fly correctly.
My 2 cents and I'm sorry if I offended anyone but facts are facts.
10-22-2015, 04:50 AM
#23
Thread Starter
Join Date: Jan 2015
Location: 'Straya
Posts: 32
Likes: 0
Received 0 Likes
on
0 Posts
Good morning madmax,
I have finished the construction of the cloud dancer, overall weight coming in at ~10lbs. I followed most of the instructions from the plans but made some slight changes to the plane as I built. I am running a 26cc RCGF in the plane, I made my own firewall (using a style I created and tested at the University I attend). The firewall was a layered 5mm and 3mm AA ply, each piece was lightly coated with thinned epoxy, sanded and then repeated. To glue them together I used a high strength rubberised silicon. This turned out to be the most dense part of the model (expected). I used 1mm balsa skinning the empennage, and rienforced sections with 1oz carbon cloth. The model was skinned with 1/4oz fiberglass cloth. The RCGF engine had been converted from a spark ignition to a glow ignition using the OS G5 gas glow plug and a 14mm to 1/4 - 32 reducer reduced weight!!!!!
I chose to have a 2 piece wing instead of the 1 piece so I used a carbon/cardboard wing tube, as guide rods I used smaller carbon rods.
I used several 2500mah 6v eneloop packs going into a powerbox system. The radio gear is the Futaba FAAST-est rx pack with the S-bus system.
Performance wise the model flew like a dream. Almost all aerobatics is a breeze and it will do nearly everything that I needed it to do.
Landings were a breeze, stable flying and the ability flying at high speed and low speed.
I don't have any pics of the model, but I have sold the model and the person who bought it loves it and flies it like its stolen.
10-22-2015, 08:30 AM
#24
Member
My Feedback: (70)
Join Date: Oct 2004
Location: Port Isabel,
TX
Posts: 98
Likes: 0
Received 0 Likes
on
0 Posts
Flyboy,
Sweet! Tell me more about the rubberized silicone as I can envision many uses for such an adhesive. I like to see someone kit bash, so to speak, to make an airplane lighter and stronger simultaneously. Good one!
I'm in the process of building a 40" ws Bird Dog I designed from scratch. I'm a scale nut and I found virtually every 3 view of this aircraft is wrong in too many ways. As I've advocated, I researched exactly how Clyde Cessna designed/built the full scale A/C and drew my plans accordingly. The interior is anal-accurate down to the seat construction, trim wheels, power quadrant and fuel lines. All RC equip. will be hidden under the floor and the rear seat. My goal is to accurately replicate the AC to museum standards inside and out while still being a scale flying, (READ: slow) electric RC aircraft. The bulkheads/ribs etc. are cut from 1.5 mm foam obtained from dollar general in the form of 6" x 9" serving trays purchased 20 for a buck. The two main bulkheads are of .004" mylar/foam/mylar sandwich construction which are lighter than balsa. (I know because I first built them of balsa, found the proportions to be inaccurate and threw them away but not before weighing them...4 times heavier!) I'm following full scale engineering as most of the AC is monocoque with almost no substructure, (Read: light but strong). I cheated forward of the main wing/landing gear bulkhead and built a 1//8" balsa truss motor mount in addition to the monocoque forward structure as I expect some nose impacts. All 4 windows and the door will open for connecting the ail/flap controls and the seats/floor will be removeable for battery/RX and wiring access. The ESC/BEC will live in the engine cowling area. (All cowling removeable per the full scale A/C.
My goal is to end up with a flying weight around 8-10 oz. for a wing loading of around 6-7 oz./sq. ft. The airfoil is one of Wortman's low re airfoils that looks very close to scale but with much better L/D specs. I'm using 4 micro servos, (4.4-5.4 gr.) for elev./rud./ail./flaps. Power is a 2812-12 motor, (38gr.) on a 7.4v 2s 800 mah lipo, (42gr.). The wings/struts are attached per full scale with a servo in each wing root forward of the aft spar. The only concession I'm having to make, visually, is a .032" wire running overhead forward of the aft spar compression carry through for flaps. Elev./Rudder/Ail. are all micro cable operated. There's no balsa in the wings or empennage as I'm relying on the monocoque mylar skinning over foam webs/ribs to provide all the strength, per the full scale A/C. My power/control systems total around 5 oz. so airframe has to come in about 3-5 oz. which I believe is possible...we'll see. For scale corrugated control surfaces I've found 2 layers of heavy duty alum. foil laminated with wood glue provides an extremely light material which, once corrugated, can stand up to the occassional finger pressure necessary during the building process. I'm corrugating it the same way the full scale corrugations are made to assure the upper and lower corrugations meet correctly at the trailing edges. Anal, yes but I'm retired and nothing better to do. Getting all the bulkhead profiles correct and building the fuse jig has been a painstaking process to get right. Now that I have I'm tempted to upscale to ultralight size and put a DA 170 on for power. Same construction only with some carbon fiber for added design insurance. Airframe failure on an RC aircraft is a shame but a with a man-carrying A/C, it's unacceptable.
Later
10-22-2015, 02:29 PM
#25
Thread Starter
Join Date: Jan 2015
Location: 'Straya
Posts: 32
Likes: 0
Received 0 Likes
on
0 Posts
Wow madmax,
I don't think its overly anal, you're building something that will be of "museum quality" which is something I hope to do one day (unfortunately I'm a student and there isn't much time).
My dream is to build a Lancaster and a Mosquito with museum scale attributes that will fly.
The rubberised silicon is similar to the adhesive used in the aeronautical and car racing industries (I don't have the name but its an Australian made product).
Its vibration resistant, and in the firewall (bonded with it) I have several pieces of dowel that run through, for some added strength.
It took several attempts to find a suitable adhesive, thins included waterproof silicoln, general application silicon, water-based silicon, 2 part vibration resistant aircraft epoxy (works well as well), Liquid nails (clear)..... and many many many more.....
Most of these worked well, they all had the same number of sheets, were left for 2 weeks to dry and cure (excessive but just to be sure), and they all had the same engine placed on to test them as well as being force tested with some failure tests. The method of testing vibration reduction was basically how much vibration i could feel through the bench when holding on (not accurate but worked). I went with the product that was very similar to the aircraft grade adhesives ( due to cost i went with the rubberised silicon).
One of my issues is I hardly ever take pictures of what im doing so I dont have anything to post on here. I doubt I am the first to use silicon as an adhesive on the firewalls to try reduce the vibration. there is alot of trial and error with the process but there is a happy medium reached.
I would love to see pictures of the Bird dog, detail like that is hardy ever seen. The last detail I saw which is similar to what you described was with a tiger moth my grandad built many many years ago.