


Scratch Built Kwik Fli III


 01-10-2018, 08:19 PM
#104

Thread Starter
FlyerInOKC - I hope it will make justice to the original.
The most difficult section was the fuselage sides, which had a curved section. I used half section template and flipped it on the center line to have symmetrical shape. Once marked I cut the Monokote.
The vertical fin was also quite challenging, but I think it came out OK.
Eran
The most difficult section was the fuselage sides, which had a curved section. I used half section template and flipped it on the center line to have symmetrical shape. Once marked I cut the Monokote.
The vertical fin was also quite challenging, but I think it came out OK.
Eran
01-11-2018, 05:59 PM
#106
Thread Starter
Preparing the tail group assembly, the removal of covering wais done with soldering iron to expose the wood. 30 minutes epoxy was used.
Alignment of the horizontal stabiliser was checked and re checked to the wing as reference. The vertical fin was checked to be perfect 90 degree to the horizontal stabiliser and in alignment to the fuselage centre line.
I cut CA hinges for the elevator and rudder, another departure from traditional hinging for both convenience and durability.
Eran
01-16-2018, 12:51 AM
#111
Thread Starter
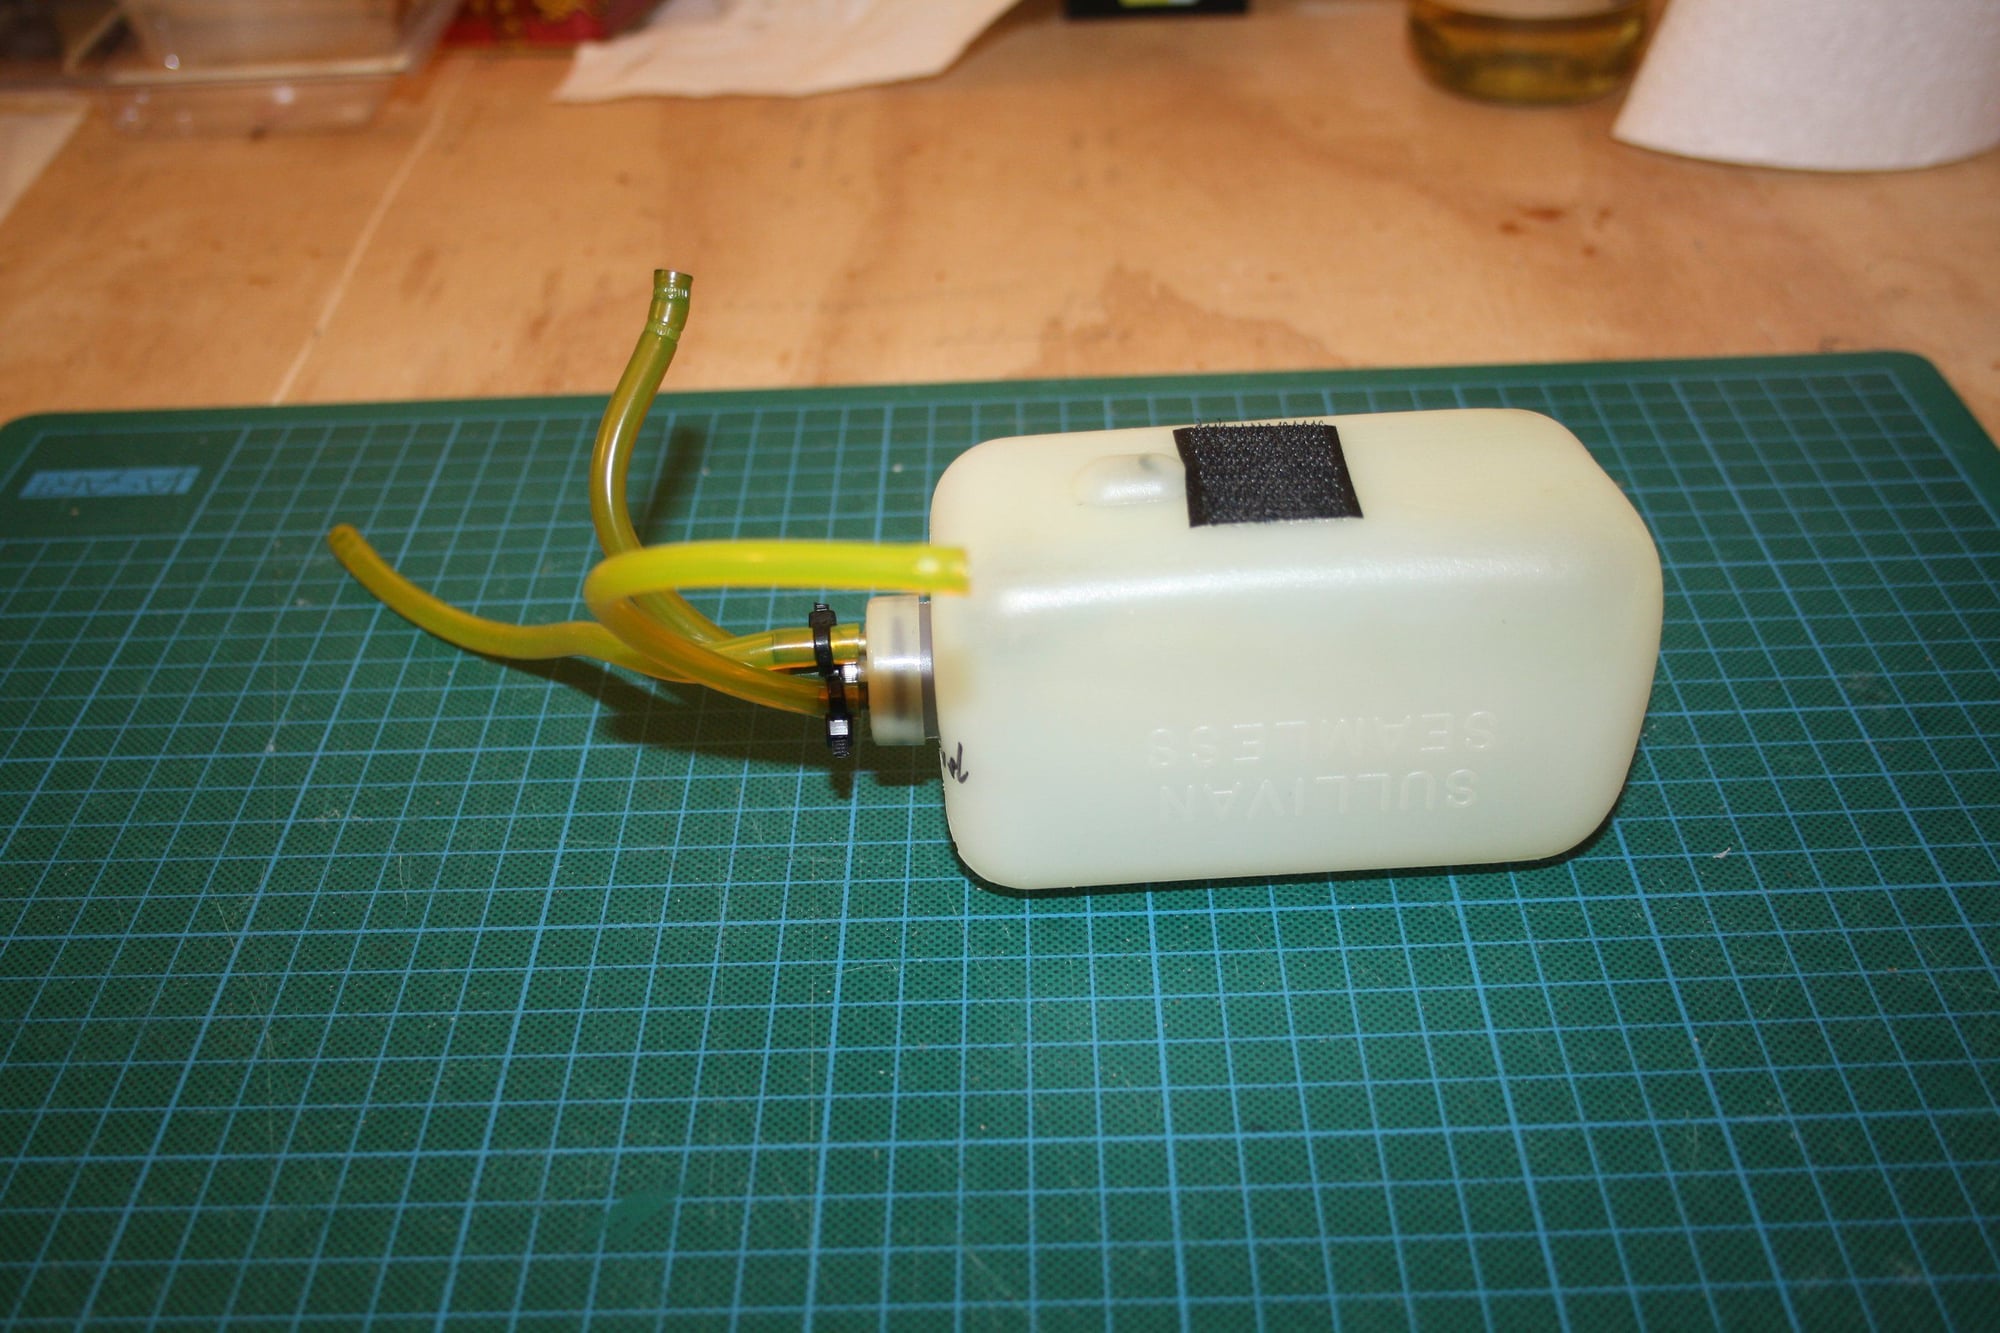
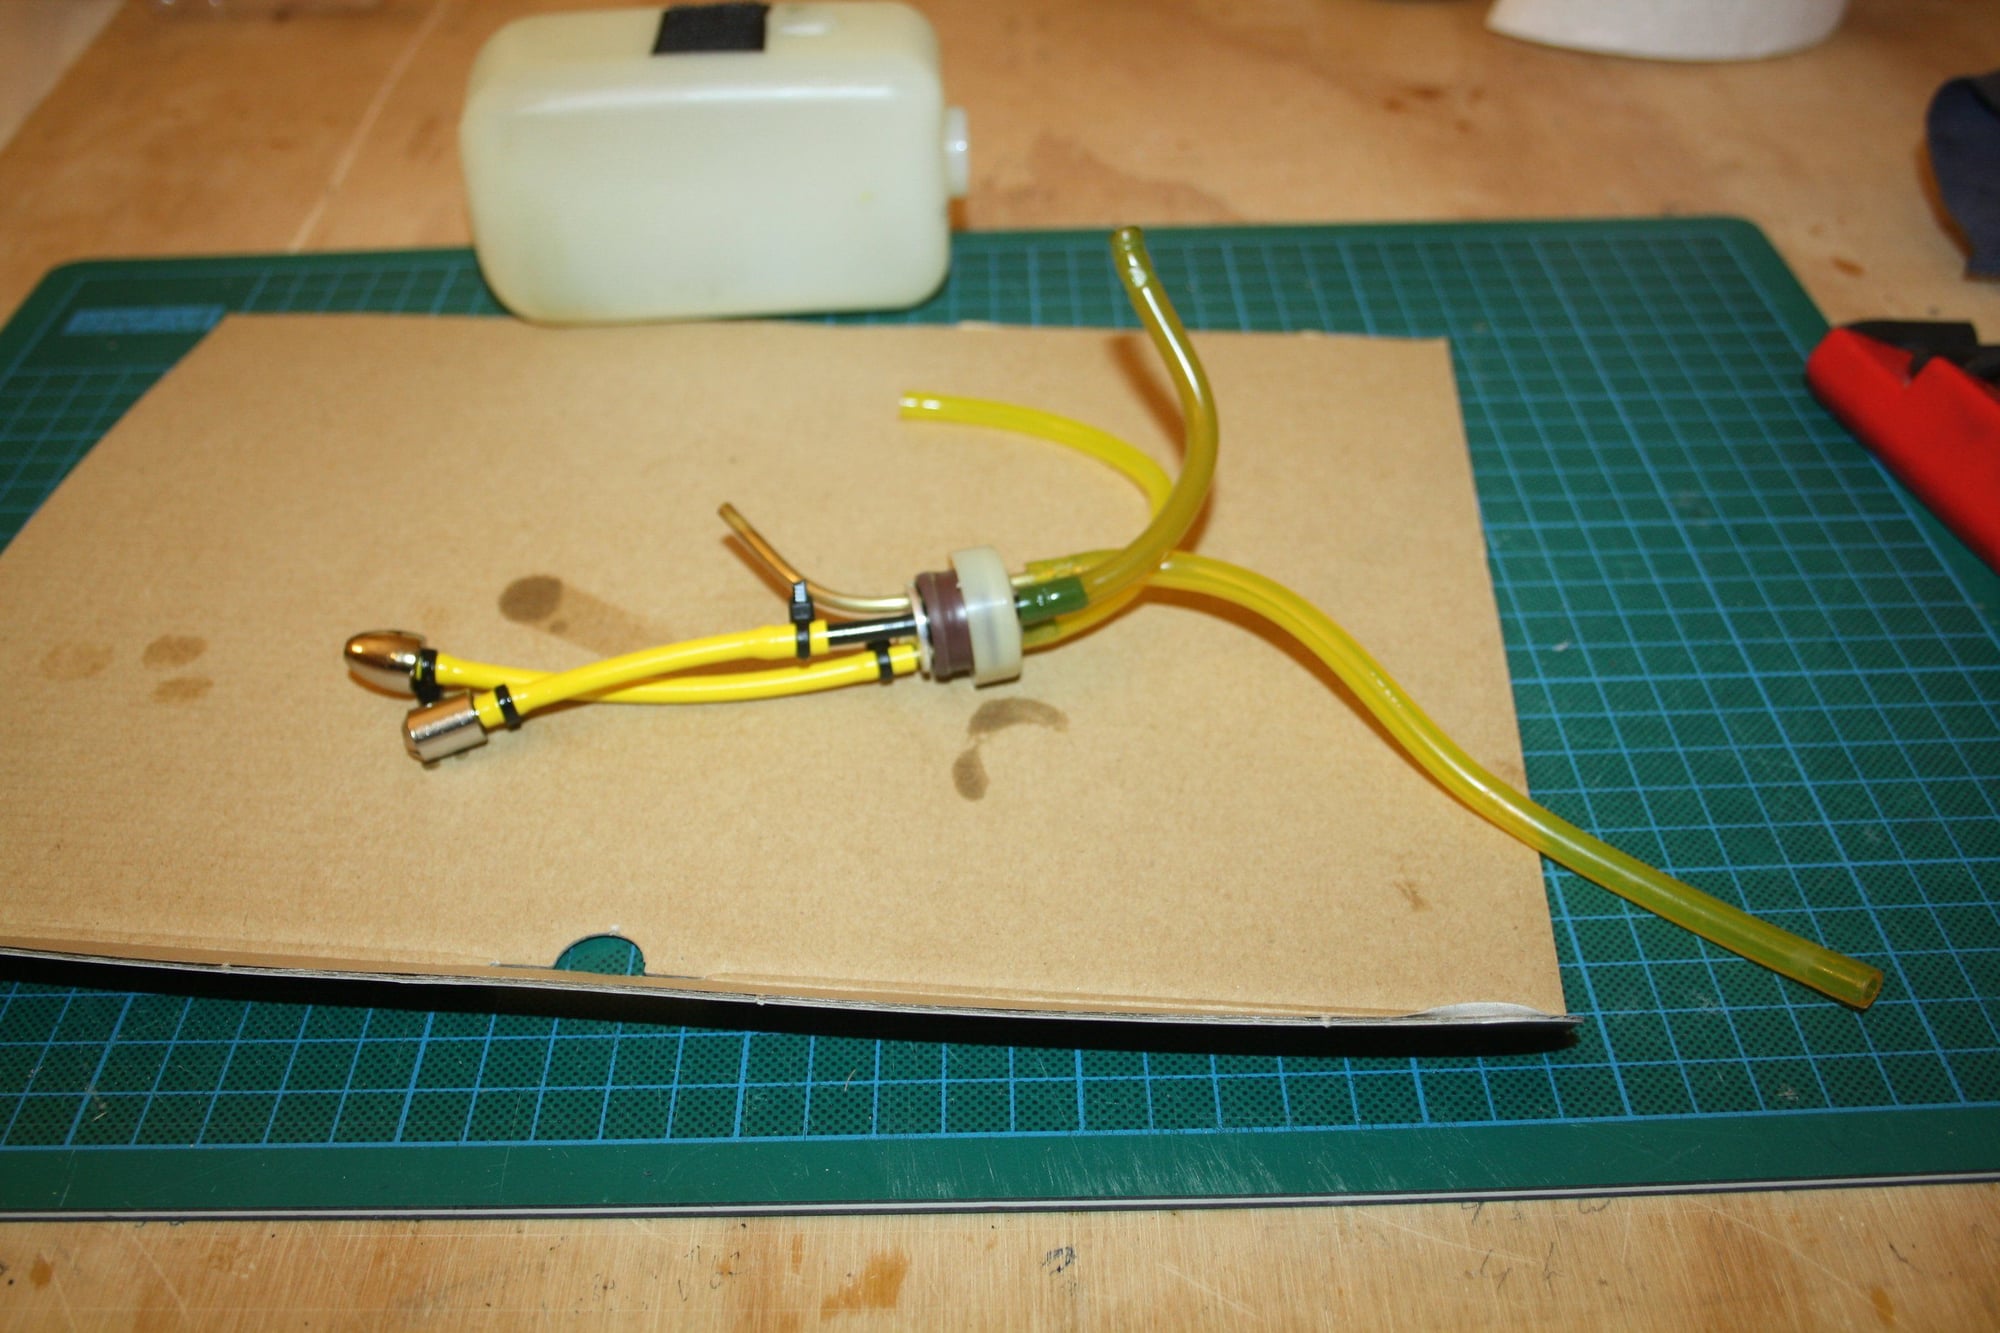
FlyerInOKC - The O.S. GGT10 is a pumped petrol engine. The second line with the clunk is used to fill and empty the tank using the Dubro kwik fill. I never use the line going to the engine from the Kwik Fill. The main fuel line go to the pump, then through a filter into the carburettor. The tank cannot be emptied through this line. The air line is not pressurised and is venting out at the bottom of the aeroplane, which also indicates (by spilling fuel) that the tank is full.
I made the rails and tray for the removable fuel tank shelf, and mounted the throttle servo.
Eran
I made the rails and tray for the removable fuel tank shelf, and mounted the throttle servo.
Eran
01-17-2018, 03:30 AM
#113
Thread Starter
FlyerInOKC - I had two Dubro Large Scale Kwik Fill Fueling Valve (Item #611 - gas) that were leaking air into the fuel line. Since then, I keep my fuel feed as simple as possible, with only a filter between the clunk and the entry to the carburettor.
I completed the removable "shelve" from scrap wood for the fuel tank, mounted the pump and got the fuel system connected.
Eran
I completed the removable "shelve" from scrap wood for the fuel tank, mounted the pump and got the fuel system connected.
Eran
01-19-2018, 05:17 AM
#114
Thread Starter
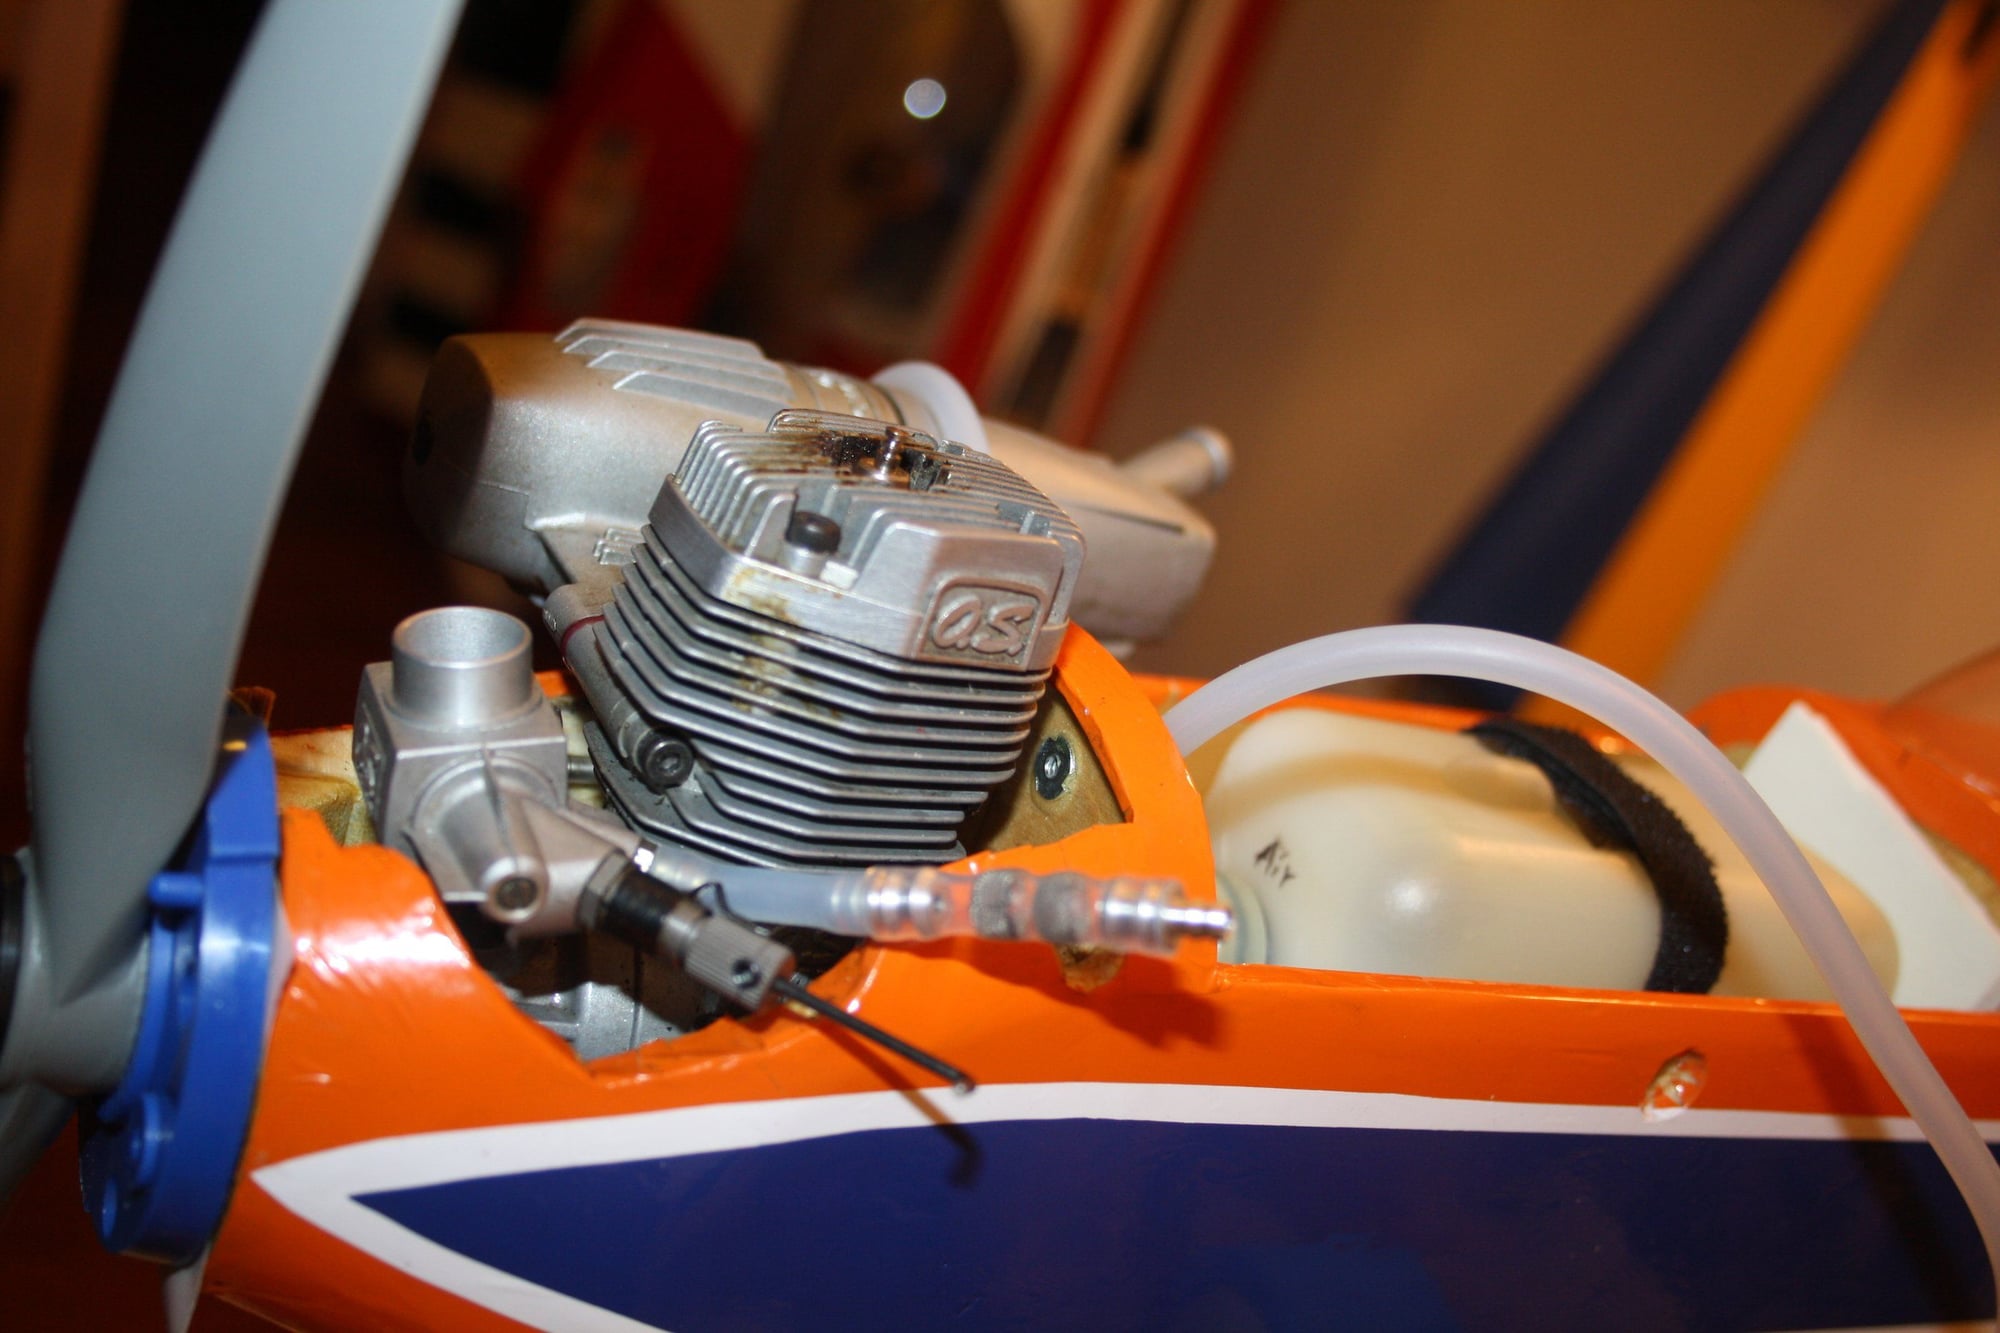
I got the throttle arm, Muffler and Spinner sorted. The throttle arm required me to remove some balsa to allow free movement for the ball link. The spinner required a thick backplate to properly clear the front due to my miscalculation when mounting the engine.
I then glued the canopy into place.
Eran
I then glued the canopy into place.
Eran
01-20-2018, 12:24 AM
#116
Thread Starter
With the Canopy in place and looking good, it is time for the last push.
Lending gear in place, first photos on its own legs. Ready for CG check.
Eran
Lending gear in place, first photos on its own legs. Ready for CG check.
Eran
01-20-2018, 04:33 AM
#117

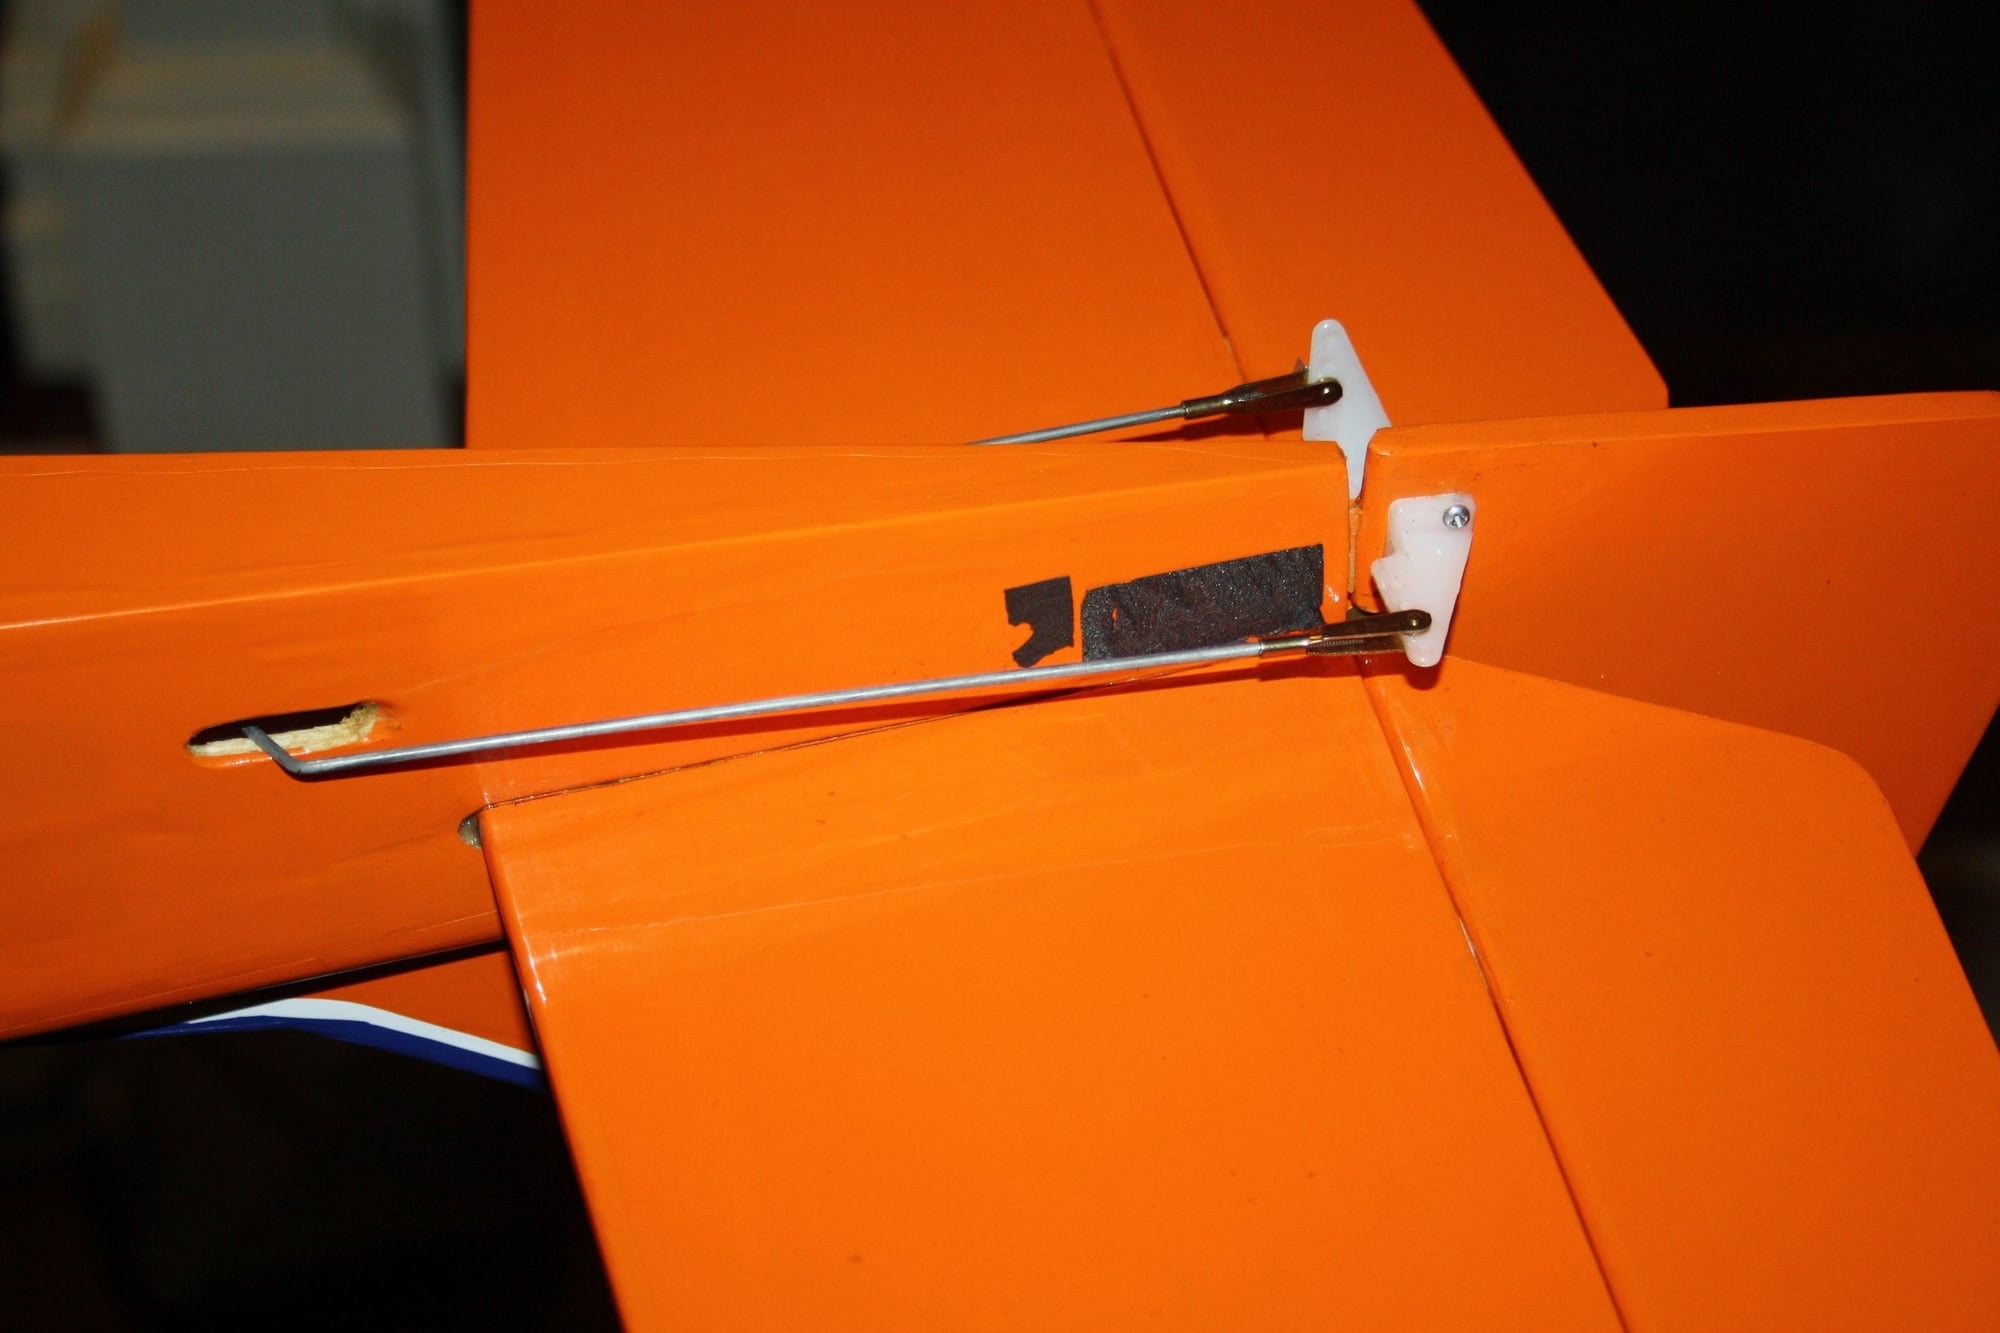
Just an observation, I would check that elevator control horn-clevis connection. The clevis is not fully closed. Not sure about the metal clip you have securing the clevis. From the picture, there appears to be an angle between the horn and the clevis causing the clevis to remain slightly open. You sure don't want a problem in this area. A piece of fuel tubing added would certainly help. Just my observation.
Nice build. Looking really good. I like scratch building.
Nice build. Looking really good. I like scratch building.
01-20-2018, 11:50 PM
#118
Thread Starter
ETpilot - Thank you for the comment. The Sullivan 2-56 "Gold 'N' Clevises" have the metal clips for securing the clevis, and it has never failed me (going back to the late 1980's...). It has been a while since I used them as most of my aeroplanes are much bigger, but my confident in the product didn't change. It is difficult to remove the metal clip even with tip pliers, not to mention having it removed with your fingers.
I had some time to complete the pre flight stuff in the afternoon. I performed a provisional balance check using the battery, it is obvious that weight will be required at the tail.
This determined the final placement for components with the battery as far back as possible on its newly made tray. The receiver is also reasonably back with the satellite placed away for diversity. The power switch completed the assembly.
Re check of balance and some weight at the tail and wing tip completed the aeroplane, it was ready for test flight.
Eran
01-21-2018, 12:03 AM
#119
Thread Starter
After the obligatory photo session, two successful flights were made. The aeroplane fly well, as expected.
The O.S. GGT10 engine has history of issues (it was bought second hand almost new from a friend) and could not reliably idle, so I called it a day.
This engine was tested on a stand prior to being placed in this aeroplane and worked OK then. So back to a test stand it goes for further evaluation.
The main goal for the project was to produce a classic aerobatic aeroplane which I wanted to have for many years, and this has now been achieved.
Second goal was to build it as close as reasonably possible to the original flown by Phil Kraft (but with modern gear), and I think the photo is a proof that this goal has been achieved.
Cheers,
Eran
01-23-2018, 04:24 AM
#121
Thread Starter
FlyerInOKC - Thank you, appreciated.
I got the O.S. GGT10 engine back on my engine stand today. After much fiddling, I got it to work much better then I managed at the airfield.
The main breakthrough seems to be the re-introduction of the crankcase "pulse spacer" (a restrictor inside the crankcase line to the pump), against the instructions recommendations.
Once it was back in, the tuning of the mixture control became somewhat effective. Now I can idle the engine quite reliably. Transition is still not great, as I cannot "slam" the throttle after a long idle. However, it won't die if advanced with caution and I cannot find a tuning that works any better, so it is what it is.
I will not have much time to attend to this aeroplane in the coming week or two, so I will update when I have news.
Eran
01-23-2018, 06:31 AM
#122

My Feedback: (7)

Join Date: Oct 2003
Location: Edmonton,
AB, CANADA
Posts: 138
Likes: 0
Received 0 Likes
on
0 Posts
Really enjoyed your KwikFli build. Built a number of these in the late 60s early 70s both from kits and plans for myself and others. Great flying model. Brought back a lot of good memories and might just inspire me to another.
01-23-2018, 03:57 PM
#124
Thread Starter
youngguy - This was a fun build. If the limited flying I had is an indication, then it is a great flying aeroplane. My build already inspired a friend of mine to build one (he is 50% through). like you, he built one or two of them in the early 70's.
FlyerInOKC - Anxious is the correct terminology to describe how I feel... I have very limited faith in this O.S. GGT10... However, I didn't use glow engines for so many year now and I do not want to get back to them, also they will probably be more suitable for this aeroplane.
Eran
FlyerInOKC - Anxious is the correct terminology to describe how I feel... I have very limited faith in this O.S. GGT10... However, I didn't use glow engines for so many year now and I do not want to get back to them, also they will probably be more suitable for this aeroplane.
Eran
05-03-2018, 01:20 AM
#125
Thread Starter
The O.S. GGT10 prevented me from enjoying the Kwik Fli III. To date I have only 6 flights on it.
A friend offered me a used O.S. 55AX for free and I decided to give it a go as I could not see a 10cc Petrol solution becoming available to me anytime soon.
The good news is that the 55AX has identical dimensions to the GGT10 including mounting holes. It is also lighter by ~55g.
I re-fitted the fuel tank with silicone tubes and re balanced the aeroplane, removing 20g from the tail to achieve the same CG.
First opportunity to fly this new combination should be Sunday week (unfortunately our airfield host a competition in the coming Sunday). I will keep this thread posted once I flew it.
Cheers,
Eran