


Skymaster F18D Hornet twin build
 02-14-2017, 06:13 AM
#1


Received my F18 from Drik at https://www.pacificrcjet.com/
It came over with a container so I saved a bunch on shipping. Very impressed with it so far. My goal has been to have it ready for Florida jets. That only gives me 4 weeks to have it airworthy. I will try and just do a basic build to get her flying then will add all the scale details after FLjets before I take her to TopGun. Should be a very scale flying plane.
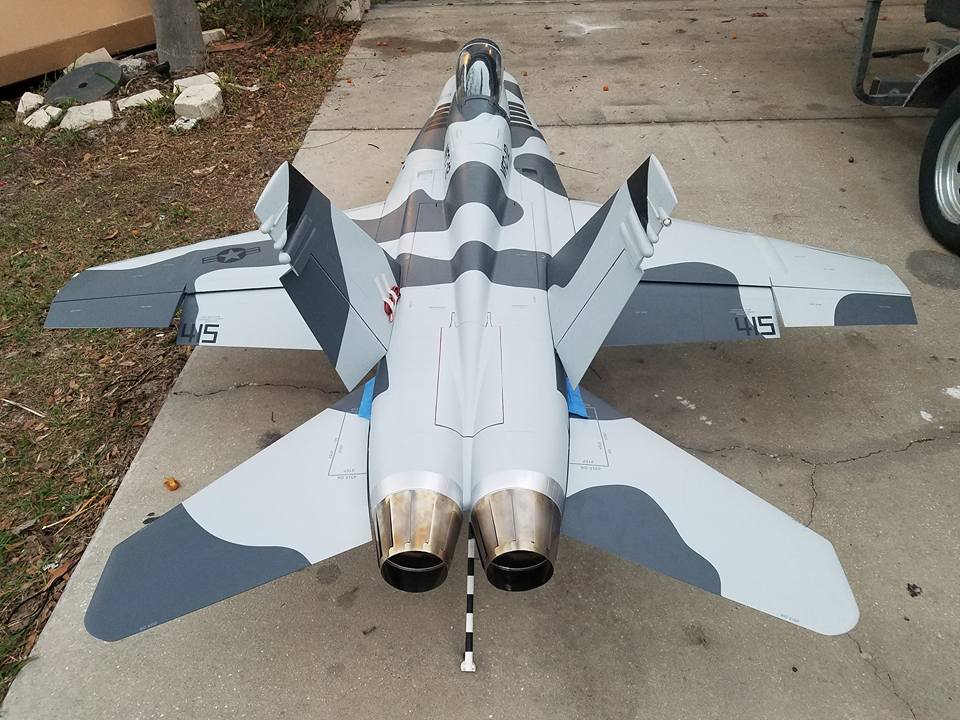
This one will be powered by 2 Kingtech K180s. I already installed one on some custom mounts I made and while its tight it fits. I also ran it with the rear of the plane staying nice and cool with the rear mounted engines. I have Tams very nice nozzles on the back.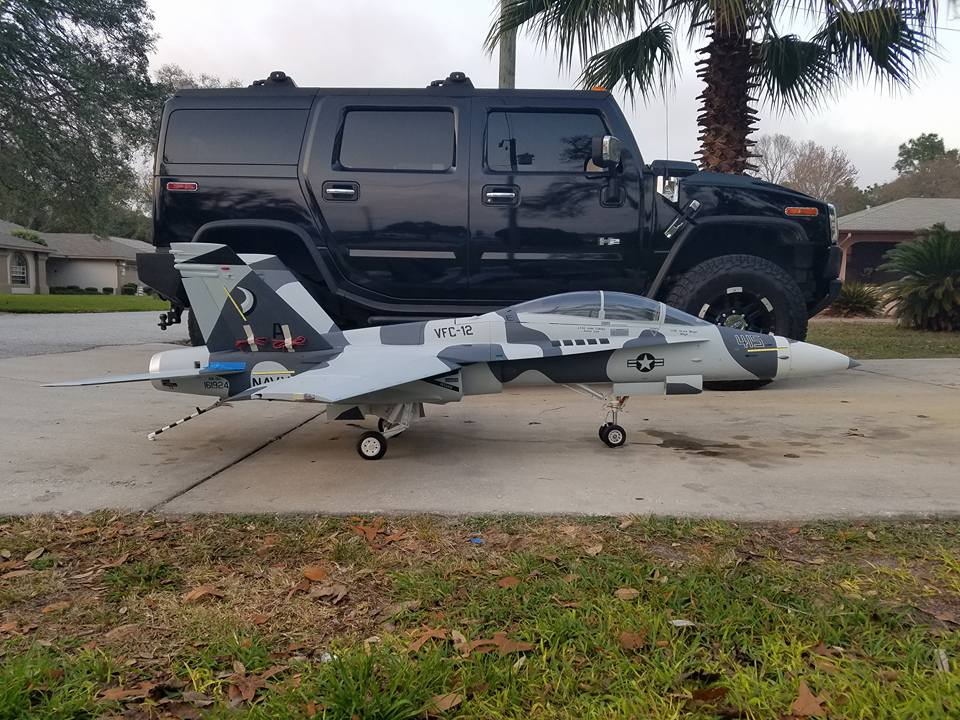
It came over with a container so I saved a bunch on shipping. Very impressed with it so far. My goal has been to have it ready for Florida jets. That only gives me 4 weeks to have it airworthy. I will try and just do a basic build to get her flying then will add all the scale details after FLjets before I take her to TopGun. Should be a very scale flying plane.
This one will be powered by 2 Kingtech K180s. I already installed one on some custom mounts I made and while its tight it fits. I also ran it with the rear of the plane staying nice and cool with the rear mounted engines. I have Tams very nice nozzles on the back.
 02-14-2017, 07:48 AM
#6


Nice looking scheme hoping to build one some day if they fix the main tires.
One of my complaints about SM is they don't listen, I mentioned the main tires are not correct. He said he would have it looked at but doesn't seem to have fixed yet.
One of my complaints about SM is they don't listen, I mentioned the main tires are not correct. He said he would have it looked at but doesn't seem to have fixed yet.


 02-14-2017, 04:45 PM
#13

Matt I'm willing to bet it's for looks and not functional. That thing would be a liability on a model. If you lose one on the real one ....whoooo weeeee ( insert Indiana jones short stuff voice ). Hang on lady you going for a ride. Probably not optimum at our scale of operation.....but who knows SM makes some pretty fancy gear these days.
02-15-2017, 04:35 AM
#17
That's fantastic!!! Be sure to check that planing link religiously before each takeoff. Like I said, as soon as you go weight on wheels you will have a hard time correcting the immediate and violent yaw in that direction. The full scale had a mandatory arrested landing upon discovery,whether it be a Light in the cockpit of the failure or by the pilot upon landing.
Great looking bird can't wait to hear your impressions of the build / flying.
Great looking bird can't wait to hear your impressions of the build / flying.
Last edited by yeahbaby; 02-15-2017 at 04:50 AM.
02-15-2017, 01:18 PM
#20
02-15-2017, 01:20 PM
#21

Kris,
Why did you pick the D model over the E or F ?? Was it just you personal preference ( looks,ect. ) or is there something about the E/F that is of concern ?? Just wondering, I like the C also.. Blue Angels..
Dan
Why did you pick the D model over the E or F ?? Was it just you personal preference ( looks,ect. ) or is there something about the E/F that is of concern ?? Just wondering, I like the C also.. Blue Angels..
Dan
Last edited by rcjetsaok; 02-15-2017 at 02:56 PM.
02-16-2017, 01:21 AM
#22
Keith it looks tight. Don't think you can go much bigger and these tires I have are not fully inflated yet. When I get her done I will see what the options are. The brakes are cool on this plsne. It has 3 row disk brakes. I felt like I was working on a hawker trying to line up all the disk packs putting the wheels on.
Dan no reason other then I like the C-D version looks. The E-F flies good when I saw jim flying his.
Dan no reason other then I like the C-D version looks. The E-F flies good when I saw jim flying his.
02-16-2017, 09:13 AM
#24
Keith it looks tight. Don't think you can go much bigger and these tires I have are not fully inflated yet. When I get her done I will see what the options are. The brakes are cool on this plsne. It has 3 row disk brakes. I felt like I was working on a hawker trying to line up all the disk packs putting the wheels on.
Dan no reason other then I like the C-D version looks. The E-F flies good when I saw jim flying his.
Dan no reason other then I like the C-D version looks. The E-F flies good when I saw jim flying his.
02-16-2017, 05:41 PM
#25
Keith I agree I think if they just gave the main tires a larger side wall they would be fine.
Will try and post some pics later. Moving along fast. Hardest part so far is getting the dam servo wires through the wings.... It took about 3 hours just to get the wires through. Also the instructions on their website suck and are not very clear on how to install the wing servos. Pretty sure my servo pockets where different from the ones in the manual.
Will try and post some pics later. Moving along fast. Hardest part so far is getting the dam servo wires through the wings.... It took about 3 hours just to get the wires through. Also the instructions on their website suck and are not very clear on how to install the wing servos. Pretty sure my servo pockets where different from the ones in the manual.