


Need advice on large scale foam core wing
 02-16-2017, 06:55 AM
#1

Thread Starter
Join Date: Jan 2013
Location: Berlin, GERMANY
Posts: 152
Likes: 0
Received 0 Likes
on
0 Posts
I am building a foam core wing for a 95" warbird. I already glued the retract mounts. The retracts and wheels are quite large, my question is, should I cut out the wheel wells and sheet afterwards or should I sheet first and open up the wells later? Second question: Wing consists of 3 sections and plugging the outer wings with carbon tube (12 inches, per side, so goes into the 6 inch). I have build a half rib to house the sleeve. So question now is, what should I do with the spar? Should I build a spar to full length and depth of the sections or partial. Wing will be sheeted with 2mm balsa. Flying weight is 12-14 kgs thats about 30lbs.
 02-18-2017, 02:32 PM
#2
Senior Member

Join Date: Dec 2016
Location: Norway
Posts: 221
Likes: 0
Received 0 Likes
on
0 Posts
I would prefer to dig out the wheel wells after applying the balsa skins, but I would use vacuum to apply them so if you just use the off-cuts and weight I guess you have a choice. I would worry that the balsa skins would "sag" and not follow the airfoil as good just above the wells. About a spar I would make it for sure, properly with the spar caps attached to a shear web similar to what you would find in a built up or molded wing, but perhaps you can find some examples where others have done what you want (quicker and simpler) with success. I always like a proper aircraft structure and in that context a wing spar seems to me a vital part of it, but I guess it's not always necessary.
02-19-2017, 11:37 AM
#3
Senior Member
Join Date: Mar 2002
Location: Kingston,
ON, CANADA
Posts: 4,925
Likes: 0
Received 3 Likes
on
3 Posts
I would cut out for the retracts before sheeting it. The mounts for the landing gear brackets have to be spread out through the foam for strength. in fact, the fore and aft ones should go all the way to the leading edge and braced to the leading edge spar. The wheel wells should be also lined to the foam surface to glue to the sheeting when it's installed.
Don't forget, those once in a while rough landings have to be taken up with those gear mounts.
Gord.
Don't forget, those once in a while rough landings have to be taken up with those gear mounts.
Gord.
02-21-2017, 04:48 AM
#4

To best answer your questions, can I get just a little information from you. How do intend on applying the sheeting? Vacuum, bricks or other means? What type of adhesive are you going to use? Epoxy resin, contact adhesive, Gorilla foaming glue or something like Titebond wood glue?
Bob
Bob
Last edited by sensei; 02-21-2017 at 05:24 AM.
02-21-2017, 07:39 AM
#5
Thread Starter
Join Date: Jan 2013
Location: Berlin, GERMANY
Posts: 152
Likes: 0
Received 0 Likes
on
0 Posts
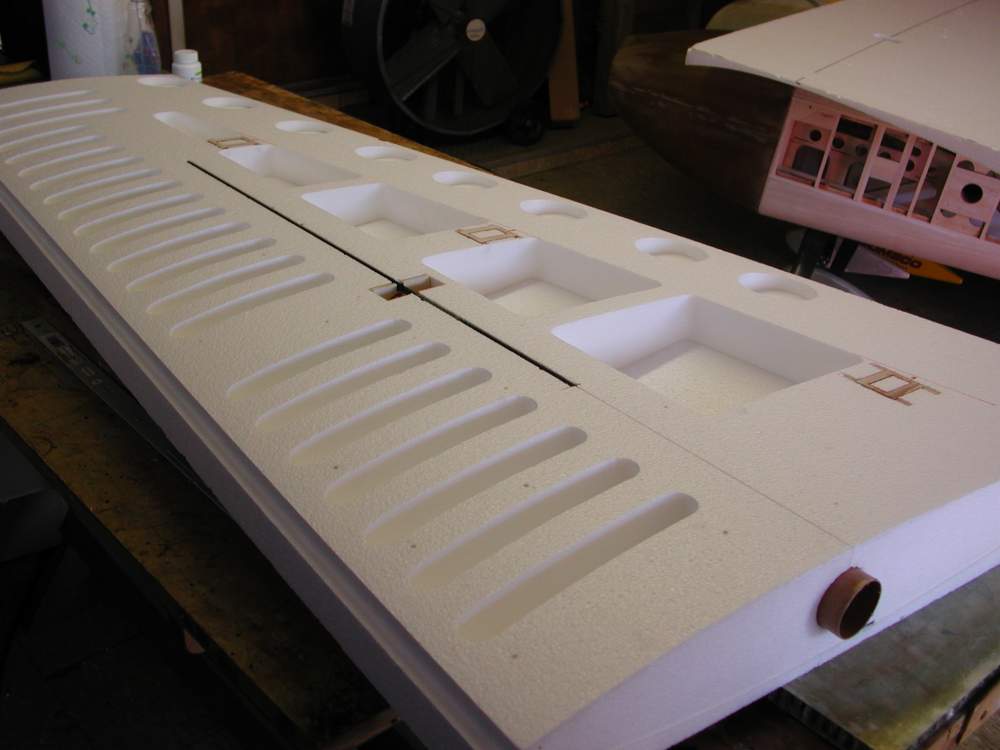
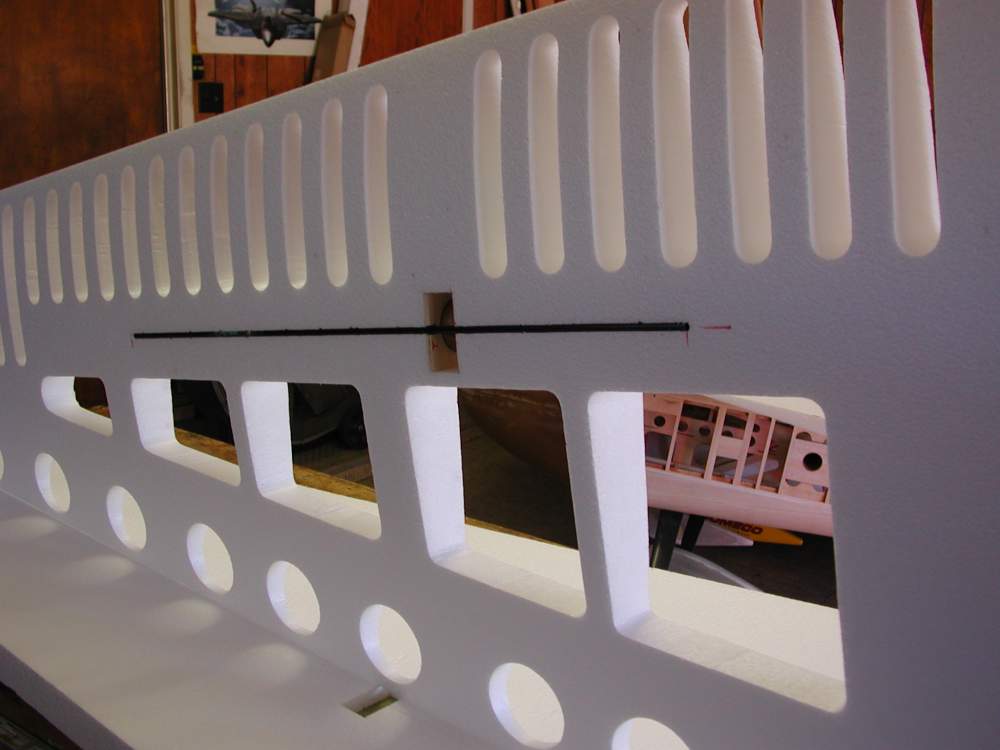
Thanks for the input. I will apply the sheeting with bricks using PU based glue (foaming). I plan to apply patches of carbon cloth in the area of the retracts and then apply balsa over it. I think where there is carbon, I will use 24h epoxy instead of PU. I started carving the wheel well on one side already. Will post a picture as soon as I am home.
02-21-2017, 09:24 AM
#6
Using epoxy resin with the carbon fiber layup is a must if you are to add any real strength to the areas of application. PU with the carbon cloth alone will add almost nothing in strength. I have built many giant scale foam core wings and tail feathers in the past, some with PU for skin attachment and all these days with slow cure epoxy and vacuum. I utilize epoxy and vacuum because of it's superior strength overall and lightweight bond lines. I always start by installing my wing tube sockets, servo boxes or rails, spare extenders as pictured below or landing gear rails. I install everything prior to skinning with PU, and I do so using the foam core shucks lined with handy wrap to keep thing from sticking together. Once in the shucks I place plenty of bricks in place to insure that the pressure from the PU won't hydrolic the shucks off the wing cores during the curing process. After cure, the next day I pull everything apart, clean everything up while insuring that all PU that swelled is carefully sanded back to the (OML) outer mold line of the wing cores. I am now ready to apply my skins, Note: Prior to performing the skinning I always cut 4 pieces of 3/4" thick MDF matching the core shucks perimeter, I place one MDF down on top of the bagging, then the shuck. After the application of the resin and skins I then place the other shuck down followed by the MDF, immediately followed by the bagging and debulking process. The purpose of the MDF is to apply even pressure across both sides of the shucks without any edges of foam caving in due to thin cross sections or holes for things like landing gear pockets, servo pockets or open bays, I use the other two MDFs for the other wing. Another reason I like to use the epoxy for skins is If I have layers of glass or carbon fiber to apply, I am already in the resin process for the skins, and there is no better or stronger time then right now while everything is wet for the application of composite reinforcement. Now this is just the way I do things, and I only mention it as food for thought. I do wish you the very best in whatever you decide to do.
P.S. the wing in the picture that my flying buddy is holding has a span of 164"
Bob


P.S. the wing in the picture that my flying buddy is holding has a span of 164"
Bob
Last edited by sensei; 02-21-2017 at 09:35 AM.
02-21-2017, 01:47 PM
#8
Bob
Last edited by sensei; 02-21-2017 at 01:51 PM.
02-21-2017, 03:51 PM
#9
Senior Member
Join Date: Mar 2002
Location: Kingston,
ON, CANADA
Posts: 4,925
Likes: 0
Received 3 Likes
on
3 Posts
A buddy and I built a wing something like this, as mentioned above, with tree layers of carbon fibre cloth over the balsa sheeting. On the last coat we put on a sheet of mylar plastic sheet over the cloth, then vacuum bagged it. It left such a smooth finish when the mylar was peeled off that it took no finishing other than roughing it up a bit to make the paint bond to it.
