


new build 1945??
 03-24-2017, 09:36 AM
#1
Senior Member
Thread Starter
Join Date: Dec 2012
Location: littlestown, PA
Posts: 758
Likes: 0
Received 0 Likes
on
0 Posts
I'm starting a new project. I thought the the forum isn't complete without build threads and something to talk about.
Here is a teaser of the tanks hull. Any guesses?
Here is a teaser of the tanks hull. Any guesses?
 03-24-2017, 11:41 AM
#7
Senior Member
Thread Starter
Join Date: Dec 2012
Location: littlestown, PA
Posts: 758
Likes: 0
Received 0 Likes
on
0 Posts
It will be a Taigen / Tamiya hybrid. I'm using the Panther F kit for the chassis. What you see has bee undone. I want to allow more engine deck height. I'll be making the casemate similar to a marder I.
03-25-2017, 09:34 AM
#8
Very nice Troy!
There's a good read on the Jagdpanther tank destroyer in Panzer Tracts No.9-3. Matter of fact, the whole concept and design of the Jagdpanther and possible versions is so interesting.
There's a good read on the Jagdpanther tank destroyer in Panzer Tracts No.9-3. Matter of fact, the whole concept and design of the Jagdpanther and possible versions is so interesting.
03-25-2017, 02:30 PM
#9


Join Date: Nov 2012
Location: USA
Posts: 903
Likes: 0
Received 0 Likes
on
0 Posts
http://www.ludwigs-hobby-seite.de/panzerzerstoerer.htm
You ever see this? He makes awesome kits, maybe saved you some cutting!
You ever see this? He makes awesome kits, maybe saved you some cutting!
03-27-2017, 06:19 AM
#10
Senior Member
Thread Starter
Join Date: Dec 2012
Location: littlestown, PA
Posts: 758
Likes: 0
Received 0 Likes
on
0 Posts
I saw his kit and am going to do my own thing. At least thats my plan. Thanks for the link though.
My plan is to use as much of the upper hull for the JP as possible. This may take some extra cutting and FAB but i'll retain the Tamyia reciol, elevation and travese mounts. I may ditch the elevation and traverse in favor of servos.
The IBU3 seems like pretty good choice for this task. I'll also be avoiding the Tamyia JP flash issue in the MFU. (I'm done buying those).
The hull will be shared with the taigen Panther F kit I'm working on. My problem here is that the rear hull plate has the exhaust for the panther but the Jagdpanther 2 would have exhaust like the Elephant. I may just have to leave it panther style.
The original idea is to swap uppers. The JagdPanther 2 with the IBU3 and the F with a clark. The only thing to unplug would be the motors, power and speaker. Knowing me I'll probably add the smoker. Everything else will stay on the control board for that particular upper. I'm playing around with mounting the boards upside down on the bottom of the upper to make this even more streamlined. This will also incude the RX.
Last edited by Rustytrax; 04-12-2017 at 10:05 AM.
03-27-2017, 06:29 AM
#11
As far as the exhaust I would just leave the rear hull full of tools and just run an exhaust pipe along under side the sponson... like you said, the Elefant did.
I think you have a good strategy going. I think a few years ago Nathan from Oklahoma Tanks made something like this too?
I think you have a good strategy going. I think a few years ago Nathan from Oklahoma Tanks made something like this too?
03-27-2017, 07:13 AM
#12
Senior Member
Thread Starter
Join Date: Dec 2012
Location: littlestown, PA
Posts: 758
Likes: 0
Received 0 Likes
on
0 Posts
His build is what inspired me to make one.
The issue is that the rear on the Taigen dosent leave me many options since this one came broken. I had to cement it back together I opted to also cement it to the hulls plastic wingsfor extra support.
Another lower would probably be the way to go and make two dedicated chassis.
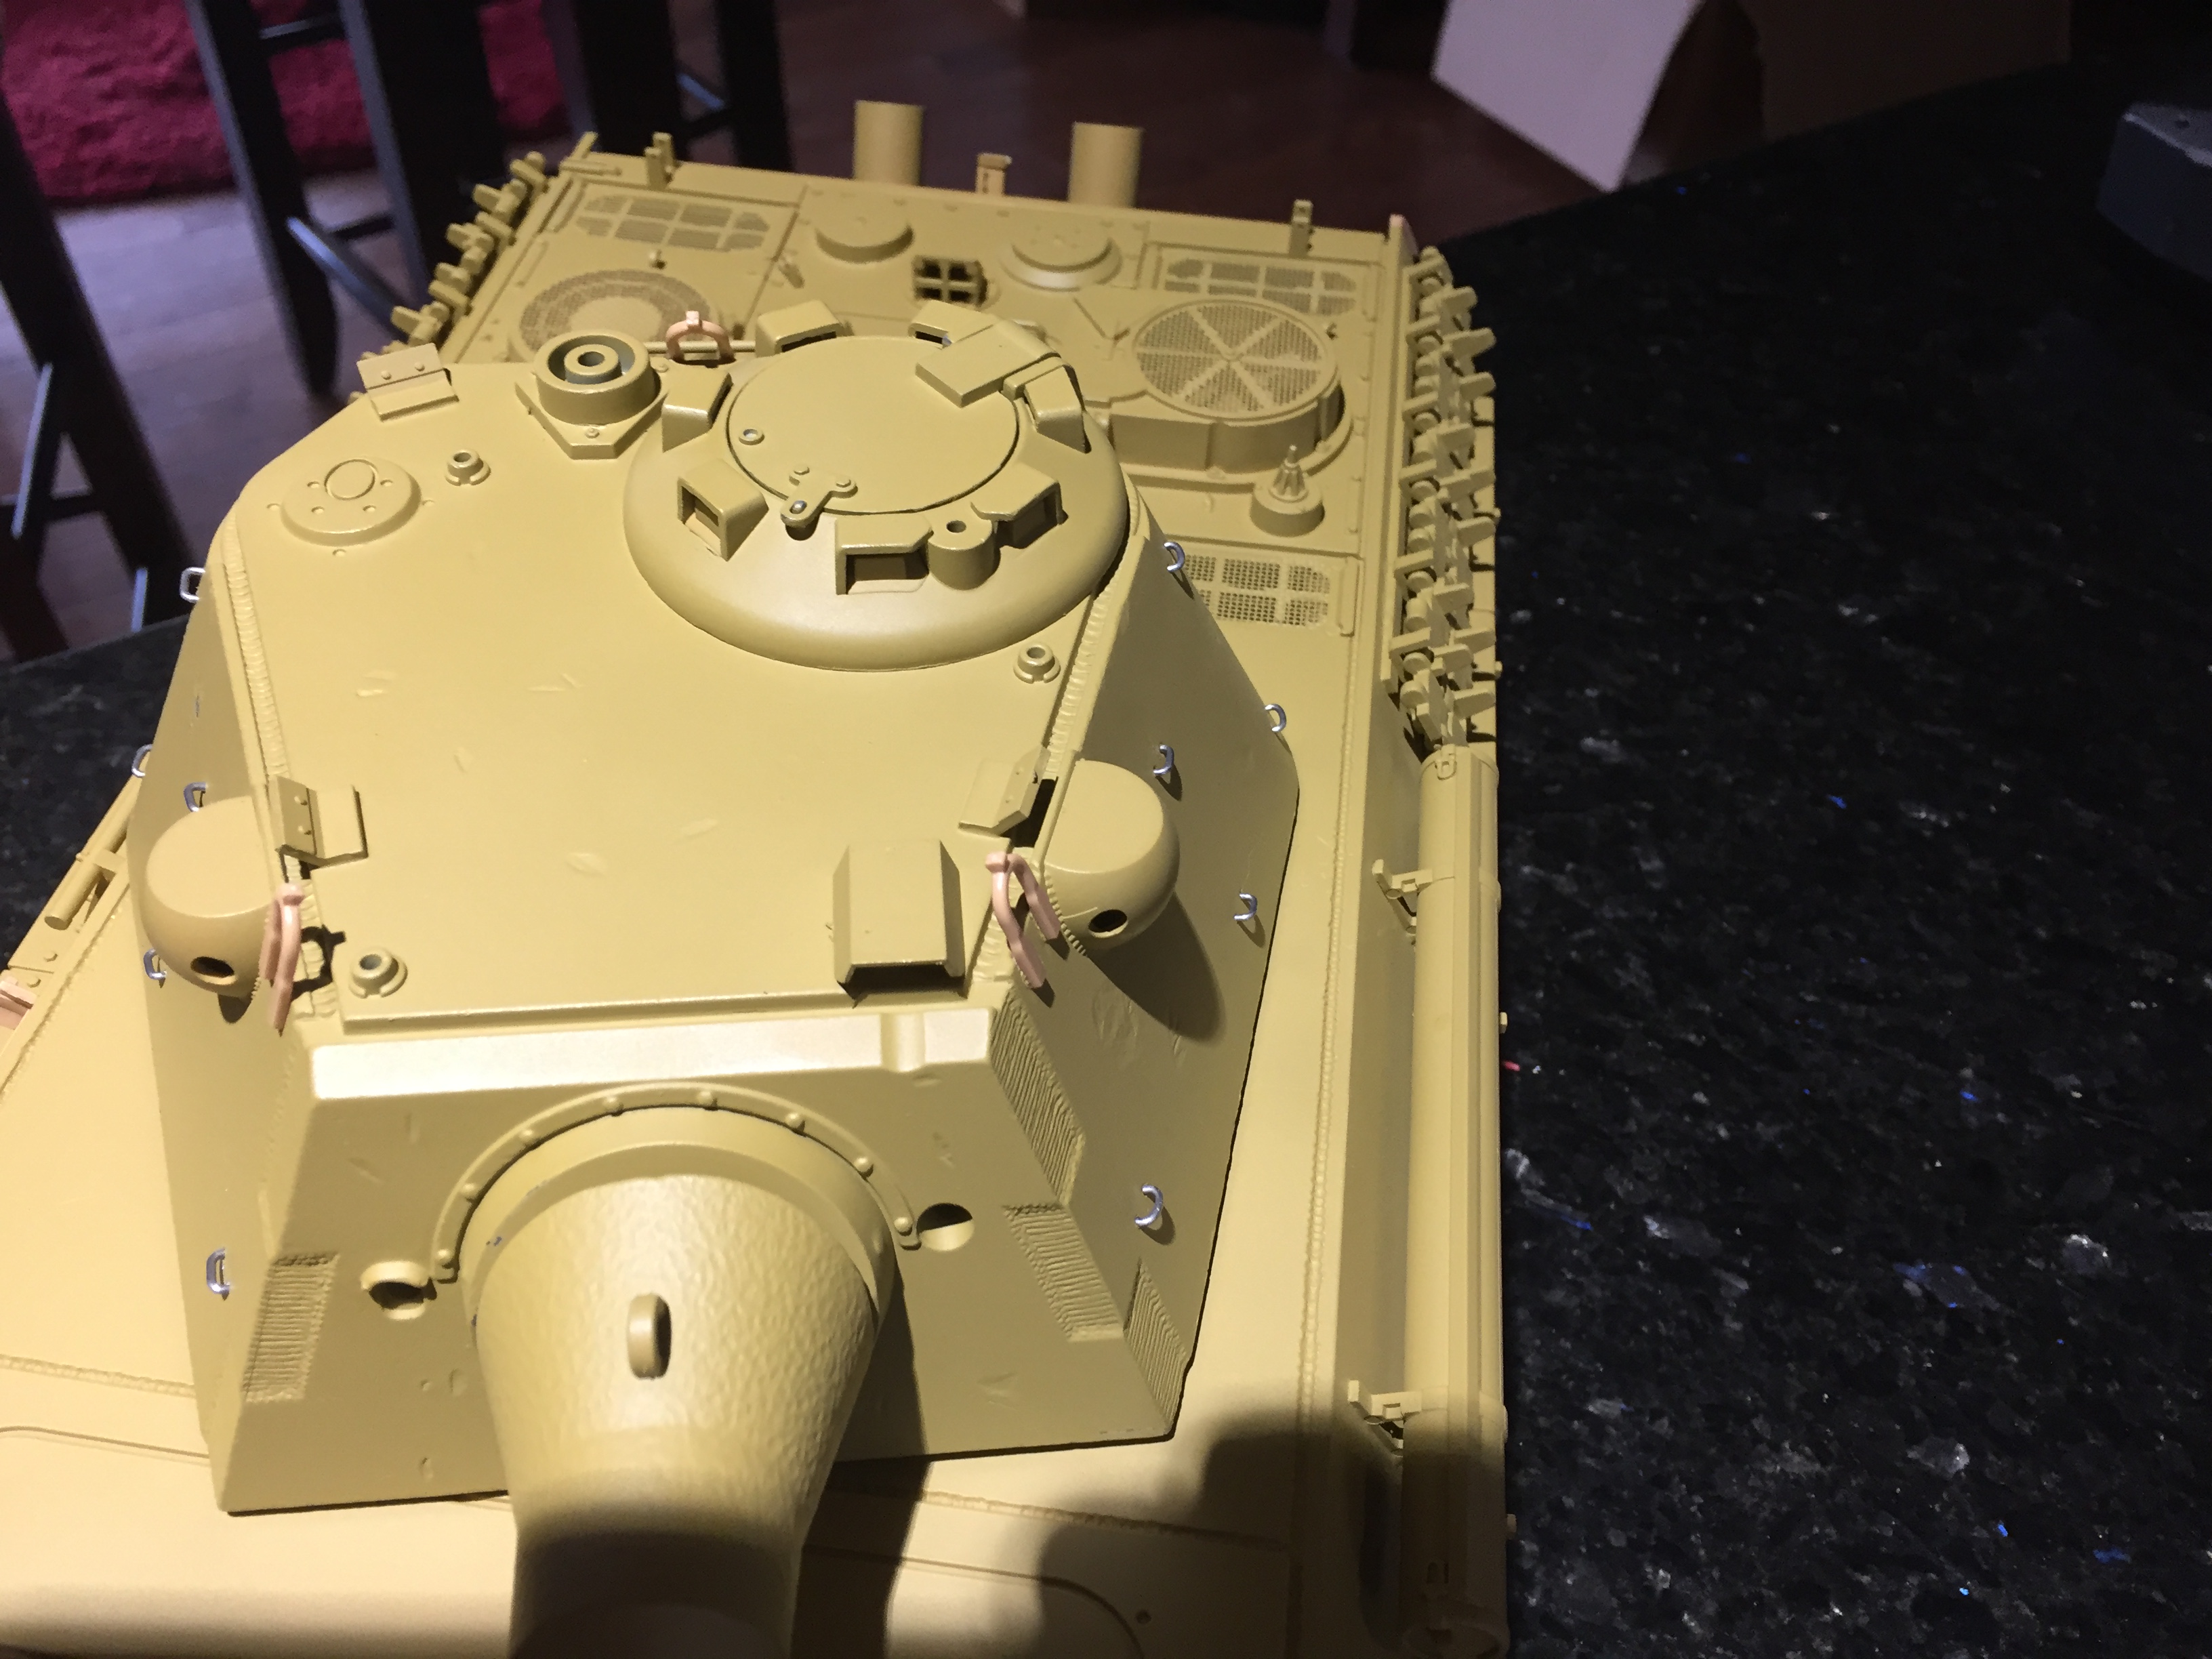
On a positive note I made the stowage loops for the turret out of metal yesterday. I drilled the metal turret slightly under size and set steel loops with a little hammer.

I'm working on the bonnet for the mantelt.
The issue is that the rear on the Taigen dosent leave me many options since this one came broken. I had to cement it back together I opted to also cement it to the hulls plastic wingsfor extra support.
Another lower would probably be the way to go and make two dedicated chassis.
On a positive note I made the stowage loops for the turret out of metal yesterday. I drilled the metal turret slightly under size and set steel loops with a little hammer.
I'm working on the bonnet for the mantelt.
03-29-2017, 03:29 PM
#15
Senior Member
Thread Starter
Join Date: Dec 2012
Location: littlestown, PA
Posts: 758
Likes: 0
Received 0 Likes
on
0 Posts
I started to fab the hull more today after taking it apart and deciding to raise the case-mate. Turns out I'll need to trim the mantlet a tiny bit.
I added a tab to fit the slots in the Taigen rear hull plate. This should hold the upper on combined with the galcias slotting into the hull.
Currently the upper is just resting on my super calibrated markers to give me reference points for lift.


The biggest hassle was fighting flex after the case-mate and engine deck were cut free.
I added a tab to fit the slots in the Taigen rear hull plate. This should hold the upper on combined with the galcias slotting into the hull.
Currently the upper is just resting on my super calibrated markers to give me reference points for lift.
The biggest hassle was fighting flex after the case-mate and engine deck were cut free.
Last edited by Rustytrax; 03-29-2017 at 03:31 PM.
03-30-2017, 06:15 AM
#18
Senior Member
Thread Starter
Join Date: Dec 2012
Location: littlestown, PA
Posts: 758
Likes: 0
Received 0 Likes
on
0 Posts
Cruiser, I get what your sayin, but that upper is only 30 bucks. For the record the engine deck is now in 6 pieces.
My next delema is how high do I want the engine deck. My though process is like this. The Panther engine comartment was pretty tight. The height can't change much. If they dropped the carbs and added fuel injection it would allow for the lower deck and increase HP like on the "F". the radiators need to most space. They can be reconfigured an ducted to get air flow. Thermodynamics would be the challenge like on the Elephant. If I do another lower I'll make a radiator on the rear plate in one of the storage boxes. A crew operated bypass would let it be used when needed and closed if not or punchtured. It would also act as a supplemental heater in cold.
So all this means that I'm leaning toward a stepped engine deck. Higher on the outside for the radiators and radiator exhaust fans but lower in the middle over what was the carbs and now FI. That approach lets the gun traverse a bit and still have some drepression for defilade situations.
This approach also keeps the gun ring intact and would still make it able to be remoedl from the front as it was on the late JP.
03-30-2017, 06:37 AM
#19
Senior Member
Thread Starter
Join Date: Dec 2012
Location: littlestown, PA
Posts: 758
Likes: 0
Received 0 Likes
on
0 Posts
I think this going to take a very different play style compared to a gun forward TD.
Lots of work yet to be done!!!!
03-30-2017, 09:35 AM
#20
It's interesting doing a search on the Jagdpanther II: http://forum.worldoftanks.eu/index.p...61-i-nuovi-td/
03-30-2017, 11:45 AM
#21
Senior Member
Thread Starter
Join Date: Dec 2012
Location: littlestown, PA
Posts: 758
Likes: 0
Received 0 Likes
on
0 Posts
I have issues with that design. The gun won't move for two reasons. The first is the mount is horrible and extended out of the casemate and the second is even if the mount were fixed they chopped the casemate width causing what would be breach, load tray and recoil space issues. Not to mention the crew space. AAARRRRGGG Charlie Brown!
LOL, like I said that thing gives me issues. Thats what happens when you try to keep the base width of the hull and just extend up.
The way this one is being done has the opposite effect. It needs the lower width increased to the point of the side fender, but then corrected like the Panther D / A so it would still be able fit on the rail cars.
The other way is like Ludwigs that uses the tiger 2 chassis. Like the Panther 2. Maybe I should call this one a JP 1.5 or "F"????
Mine will has issues as well. Guess thats just the nature of a "what if" paper panzer.
BTW did that site come up in Italian for anyone else?
Last edited by Rustytrax; 03-30-2017 at 05:19 PM.
03-30-2017, 01:53 PM
#22
Yeah, you obviously know what you want as far as it being a battle tank. I myself have never really looked into them too closely.
Anyway, I am excited to see this being built as I am trying to build a Jagdpanther too. Not as exciting as yours but I can see the JP 1.5 is very interesting after studying some drawings.
Anyway, I am excited to see this being built as I am trying to build a Jagdpanther too. Not as exciting as yours but I can see the JP 1.5 is very interesting after studying some drawings.
03-30-2017, 05:12 PM
#23
Senior Member
Thread Starter
Join Date: Dec 2012
Location: littlestown, PA
Posts: 758
Likes: 0
Received 0 Likes
on
0 Posts
Well thanks for being my audience. Since you are following I'll show the updates for today, while the glue dries. Oh, and WOW this takes a lot of glue in comparison to just putting one together. I bet a half bottle when i'm done.
So it is moving along and I'm ready to do the rear case mate joint and build the radiator boxes. Today I layered the sides and continued the slope on the case mate. So far all this has required a panel on the inside of the case mate so I can build up to the existing part.
It's hard not to get ahead of yourself and not let the glue dry. This card stock sucks up glue like a fat kid and a chocolate malt. Ok, maybe you don't need to be a fat kid to suck down a malt. Speaking from personal experience.


Since you are following I'll show the updates for today, while the glue dries. Oh, and WOW this takes a lot of glue in comparison to just putting one together. I bet a half bottle when i'm done.So it is moving along and I'm ready to do the rear case mate joint and build the radiator boxes. Today I layered the sides and continued the slope on the case mate. So far all this has required a panel on the inside of the case mate so I can build up to the existing part.
It's hard not to get ahead of yourself and not let the glue dry. This card stock sucks up glue like a fat kid and a chocolate malt. Ok, maybe you don't need to be a fat kid to suck down a malt. Speaking from personal experience.
03-31-2017, 06:17 AM
#24
Senior Member
Thread Starter
Join Date: Dec 2012
Location: littlestown, PA
Posts: 758
Likes: 0
Received 0 Likes
on
0 Posts
I went ahead started on the rear casemate junction and the engine deck.
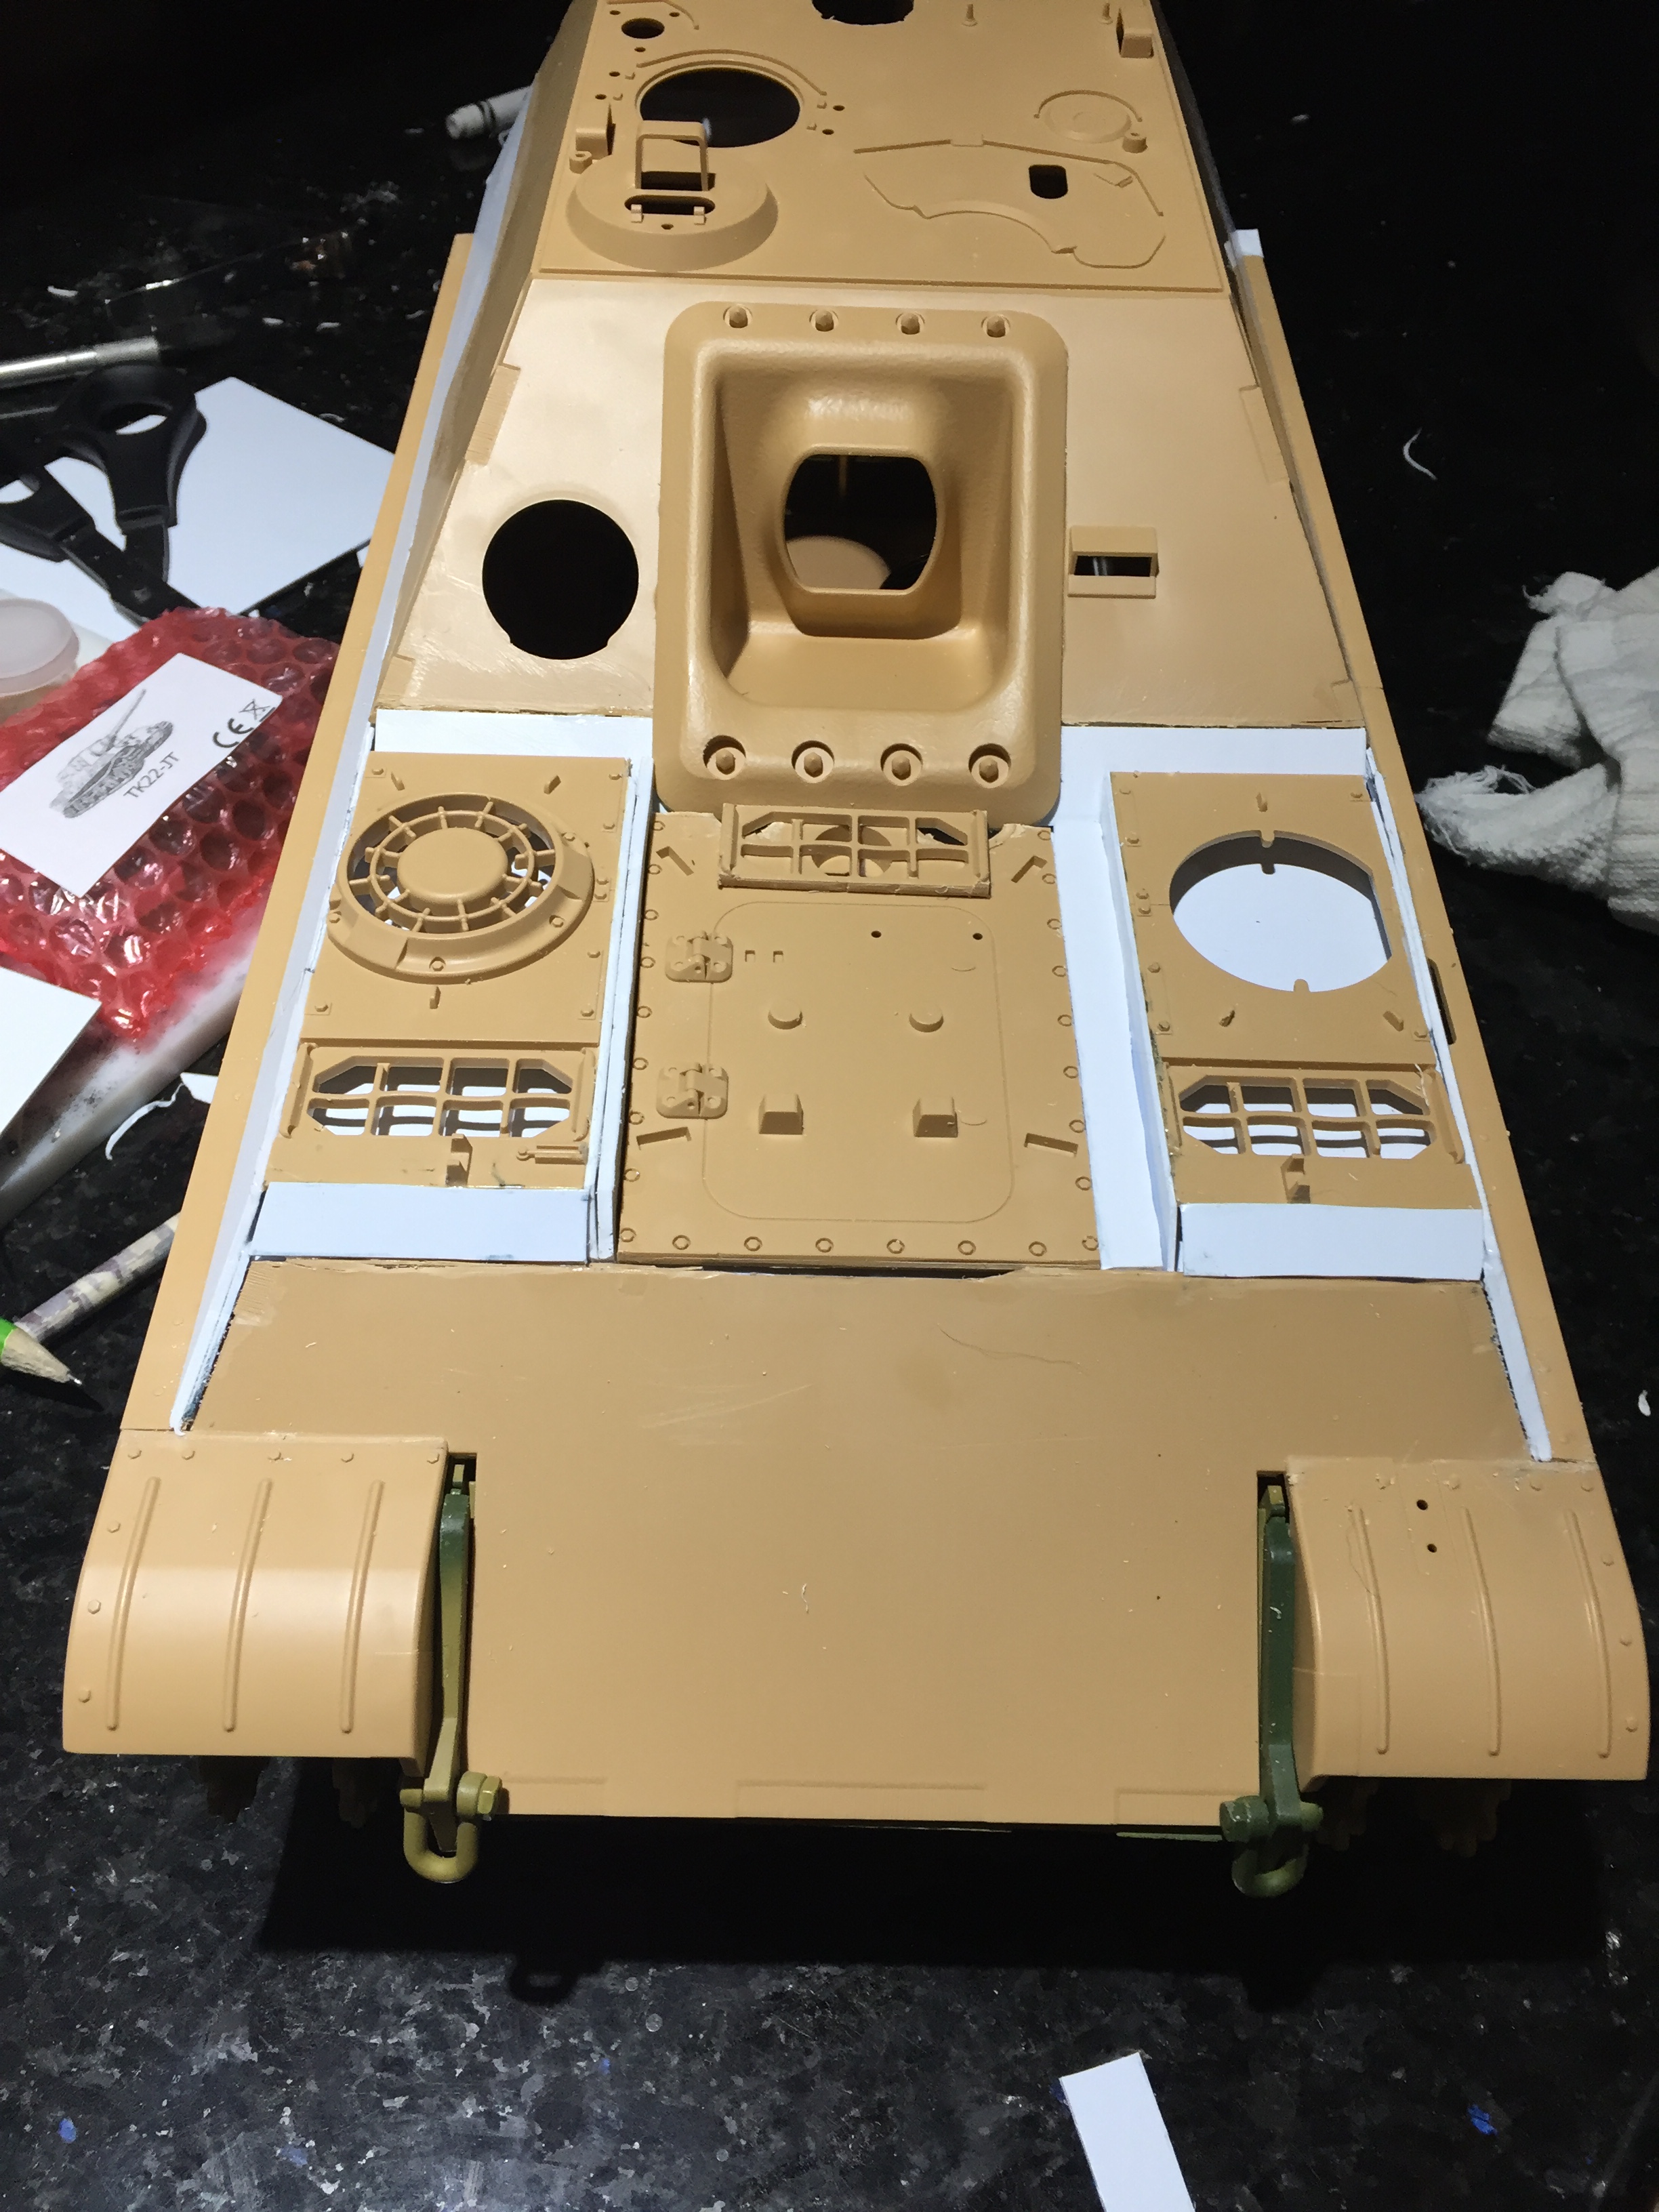
I'm considering adding a sloped plate between the engine access door and the drivers side radiator housing.
Next I'll need to build a gun cradle. not sure if I'll put it on the glacias or the engine deck.
Thoughts????
I'm considering adding a sloped plate between the engine access door and the drivers side radiator housing.
Next I'll need to build a gun cradle. not sure if I'll put it on the glacias or the engine deck.
Thoughts????
Last edited by Rustytrax; 03-31-2017 at 06:20 AM.