


Our Aeromarine and Blackjack 55 continual builds...
 03-10-2011, 09:00 PM
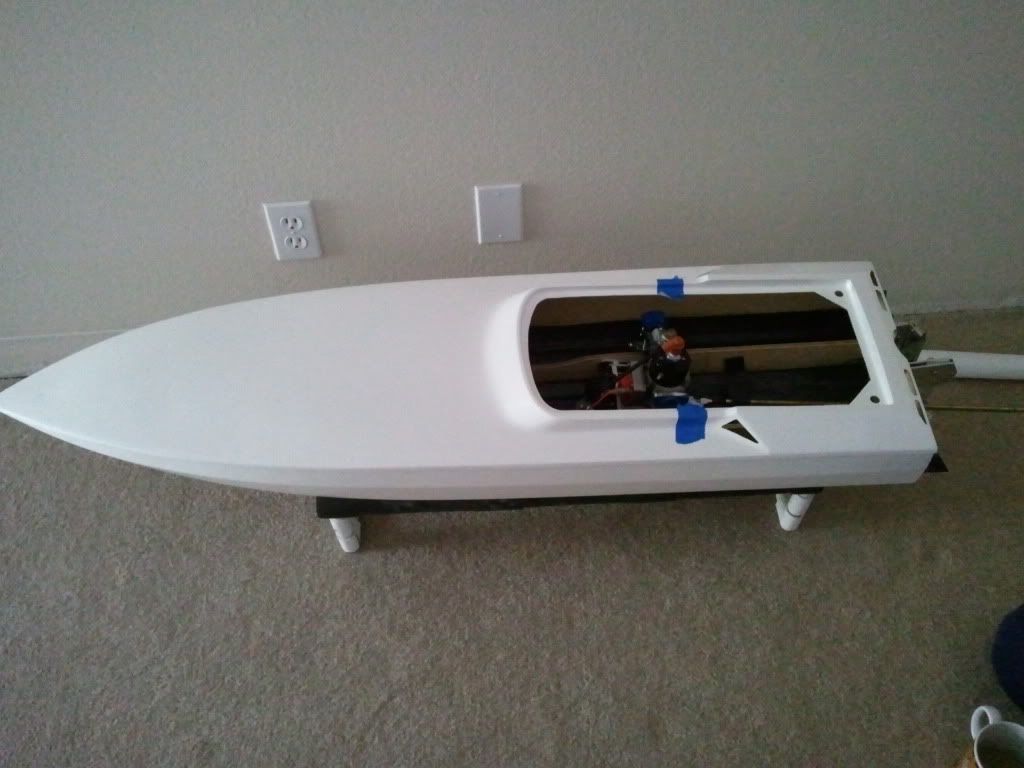
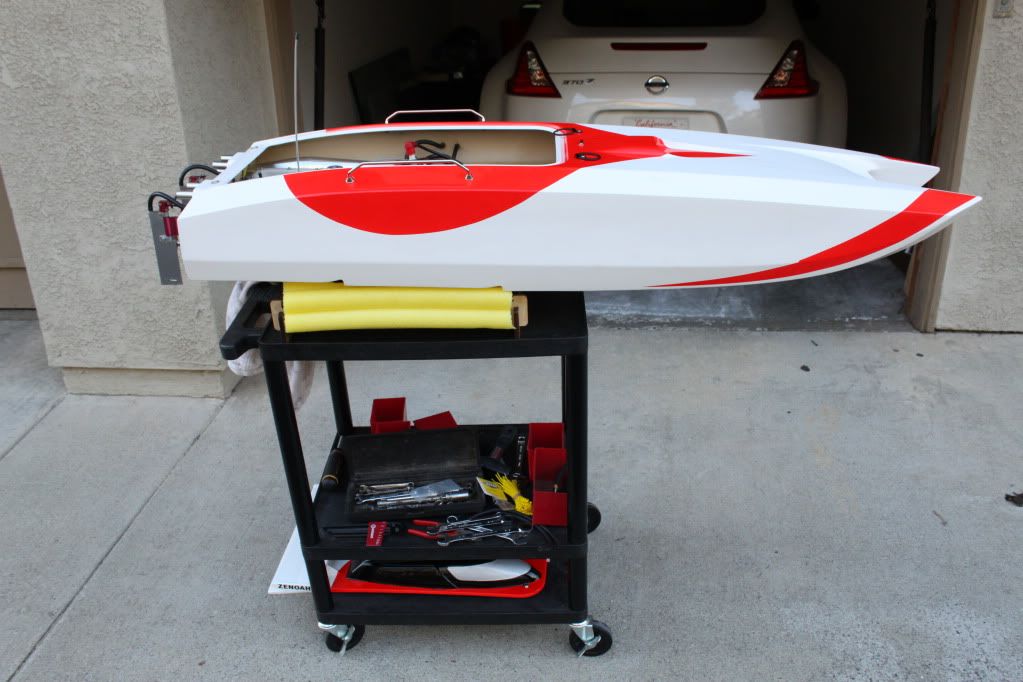
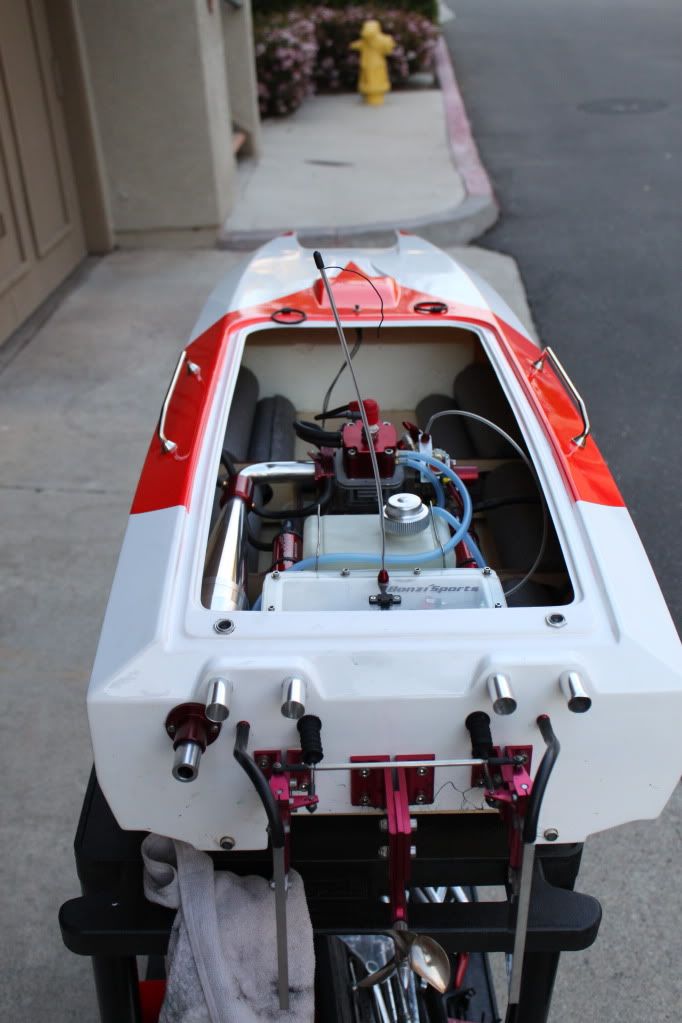
Here is a full shot of the boat, I just finished mounting the motor mounts and drilling the stringers.
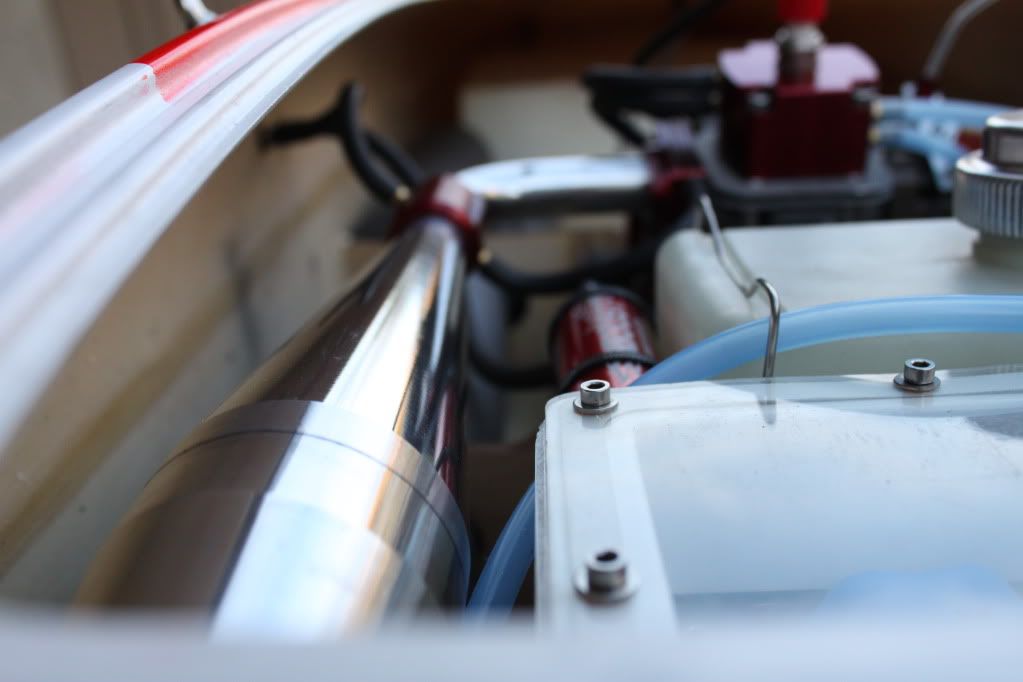
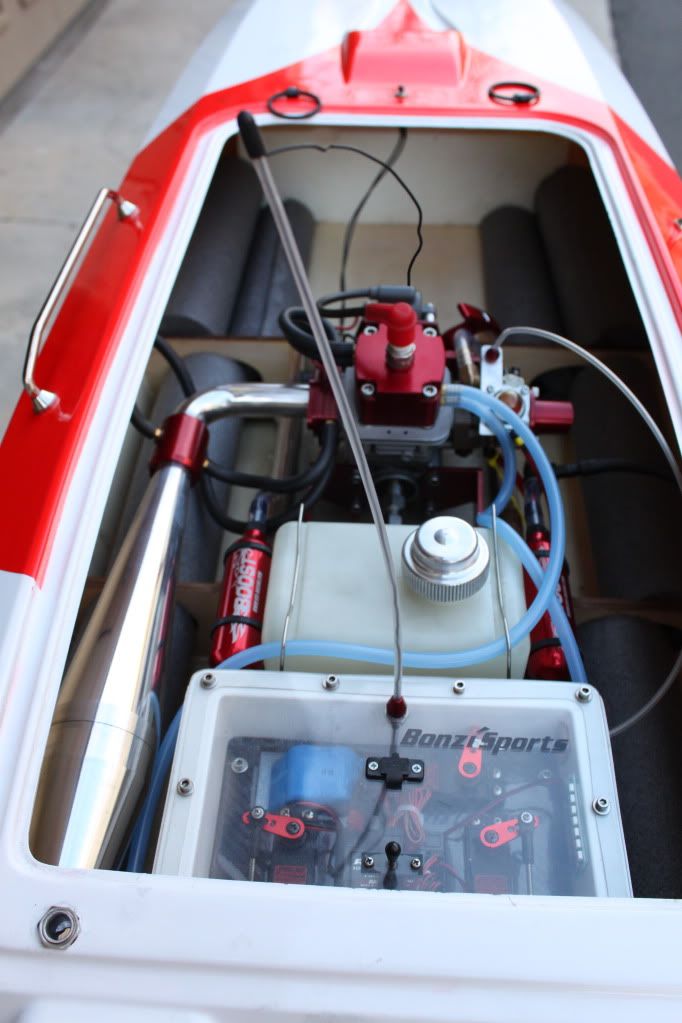
Here is a better view of the motor compartment... You can begin to see the fiber layup we put in the entire bottom of the boat.
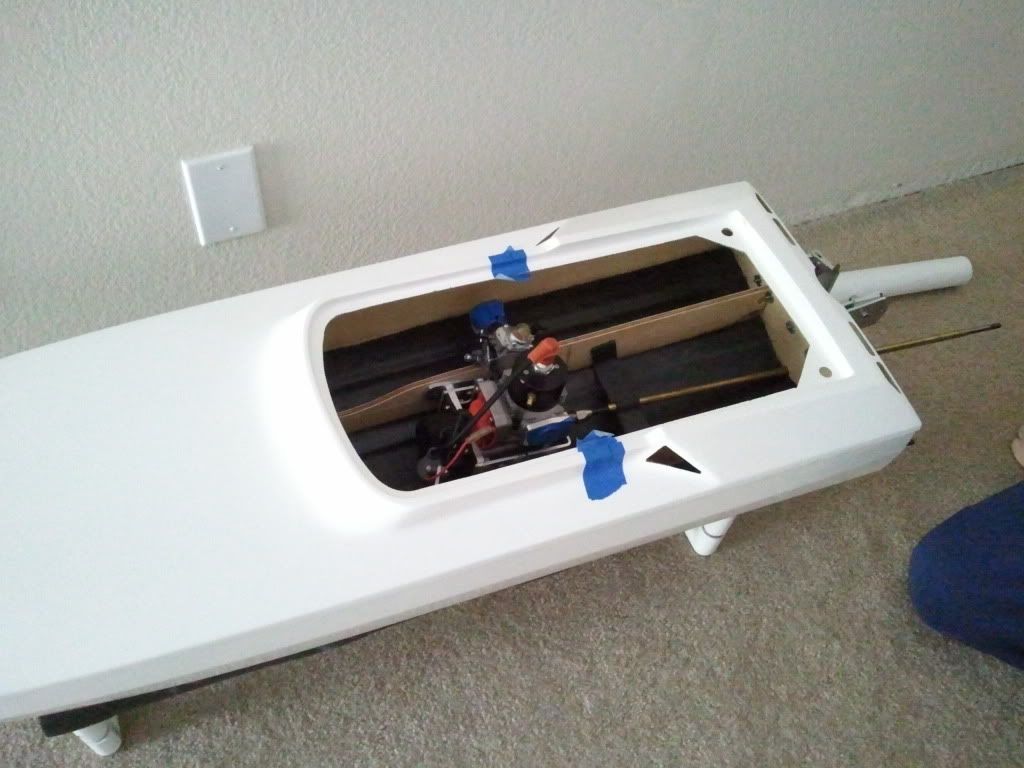
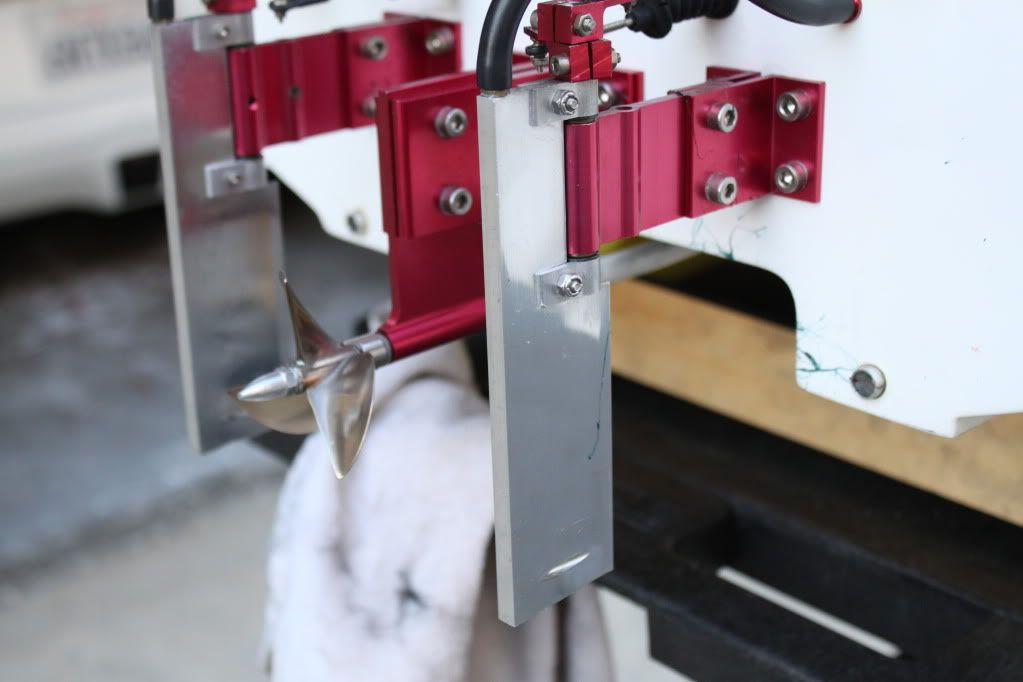
We also made the flex shaft housing out of fiber. In this picture you can see the flex shaft housing bracket as well as the bottom of the boat all in aircraft grade carbon fiber.

 03-11-2011, 09:00 AM
Our next couple of steps will be to drill and mount the autobailer, as well as drill and mount the outlet nipples for the water exhaust returns. I will take more pictures as the build comes alonng, most of our aftermarket parts will be home fabricated with aircraft grade carbon fiber. My father n law builds the F18 hornet for a living. So he is really good at working with the stuff....as you can see.
03-11-2011, 09:01 AM
Our next couple of steps will be to drill and mount the autobailer, as well as drill and mount the outlet nipples for the water exhaust returns. I will take more pictures as the build comes alonng, most of our aftermarket parts will be home fabricated with aircraft grade carbon fiber. My father n law builds the F18 hornet for a living. So he is really good at working with the stuff....as you can see.

 03-11-2011, 11:59 AM
03-11-2011, 02:16 PM
03-11-2011, 11:59 AM
03-11-2011, 02:16 PM
[link=http://www.rcuniverse.com/forum/m_10375255/tm.htm]58" Catamaran Build[/link]
03-11-2011, 03:17 PM
03-11-2011, 10:19 PM
On a side note, I just tore my Bonzi Built Zenoah apart as I am going to take the clutch out, but I can't figure out how to get the clutch shoe assembly off the actual motor. My boat is in pieces, good thing I am going to the NAMBA races this weekend at Legg Lake!
- See you on the lake!
03-14-2011, 06:50 PM
So this weekend was pretty eventful. I finally got to check out some actuallive RC boat racing and my dad and I went to the NAMBA sanctioned heat raceshere in Whitter, Ca. It was greatto see some of the twin engine out-riggers rolling the track at like 70mph orso.
<o ></o>
></o>
Also this weekend I decided that I had had enough with theclutch in my BJ55 and decided to take it out completely along with allaccessory parts associated with it. So, let the work begin!
<o></o>
First thing I did was on Friday night, I took apart myentire boat. I took all the linesoff the motor (Water, Fuel and Vacuum) lines. I then disassembled the boost bottles from my boat, so Icould get the water pump out. Itook the water pump out along with all mounting hardware and water lines. I then pulled the engine out, Iloosened all four bolts that hold the motor mounts in place and removed theexhaust pipe. I also disconnectedthe throttle cable as needed. Idisconnected the stock kill switch by unbolting the ground from the bottom ofthe block and disconnecting the plug to the coil. I (with the help of my dad) used a battery terminal pullerto pull off the old clutch shoes. I got the terminal puller from Kragen Auto Parts for like 6.99 orsomething.
<o></o>
On Sunday we went to the races at Legg Lake in Whitter andthe guys from Insane Boats were there with there shop of parts. My dad and I had a field day, I pickedup a new square drive collet, and a shaft saver ring. My dad picked up a new Walboro 275 carb with no prime, thealuminum isolator block, with either nylon or ceramic gaskets (I don’tremember) he also got a shaft saver ring and a couple of other things.
<o></o>
When I got home from the races and my in-laws house I hadthe bug to get my boat back together, so I headed to the garage. I used separate bins to keep all thedifferent parts for the various areas of the boat together, this was assemblywould be a snap. From there I wentto town. I assembled the motorback together first. I reinstalledthe stock Pro Boat kill switch and fastened it back on to the motor. I then installed the pull start and thecoil assemblies back to the motor. I used a Philips head screw driver to reinstall the throttle cable backto it’s semi original position (I still need to work on the idle and position alittle). Once the motor itself wasback together I put the square drive collet back on to the crank and tightenedit down. I adjusted the colletusing two wrenches to tighten the collet to the crank. I then ran a dry fit of my flex shaftthrough the stuffing tube to make sure the length of the shaft would correctlyline up with the square drivecollet.
<o></o>
Once everything was dry fit and correct…I then went aheadand greased the flex shaft with Pro Boat Marine grease and put it through theshaft saver ring and in to the square drive. From there I put the correct nylon spacers in the flex shaftwhere the prop shaft connects and tightened the shaft saver ring in the correctspot.
<o></o>
After that I decided that it was time to break out themothers polishing cream and do some work on my prop, and my exhaust pipe,trying to take off all the old baked on 2-stroke oil build up. I polished and buffed both until theywere as shiny as I could get them. I then reattached the exhaust pipe and cuttwo new water lines, as the old ones were too short to fit due to the waterpump being there. After I was doneconnecting the prop shaft and polishing, I connected the water lines and fuellines using tiny zip ties to seal the connections where ever the host easilycame off. I then fired up themotor and that is where I ran in to a couple problems.
<o></o>
<o></o>
So, when I was at the races I noticed that no one runs theremotors with the idle screw in them. I asked why and everyone said that they took the idle screw out so theycould use the “brake” feature of the radio to choke the motor out when they aredone running. They said it actslike a remote kill switch. My goalis to set up my boat to do this as well. I have the JR XR3i stock radio, and read in the manual how to set thebrake sensitivity, however…my problem comes with the motor. I got it started and it started to idleand then it seemed to just start ramping up almost to full power before I shutit off using the kill switch.
<o></o>
My question is this (you’ll have to forgive me as I am newto the boating / RC scene) Does anyone know how I can stop it from rampingup? Does it have to do withadjusting the throttle cable? Whatis the best way to test this as I won’t be able to have the boat moving as Iwill need to see what I am doing (Obviously). I was wondering if anyone knows how to control the idlespeed? I know how to do it throughthe radio, but I am afraid to let the motor idle for too long out of the wateras I am afraid it will get to hot.
<o></o>
Anywho. Here are some pictures I snapped tonight afterfinishing all the mods…
 <o></o>

Hope you enjoy!
03-14-2011, 07:36 PM
To adjust thottle just watch Paul's video explains it well ..... and it's cable like yours
http://www.youtube.com/watch?v=UVyXzMXh3i0
Nice boat
03-14-2011, 07:45 PM
I use about 1/4"
03-14-2011, 08:05 PM
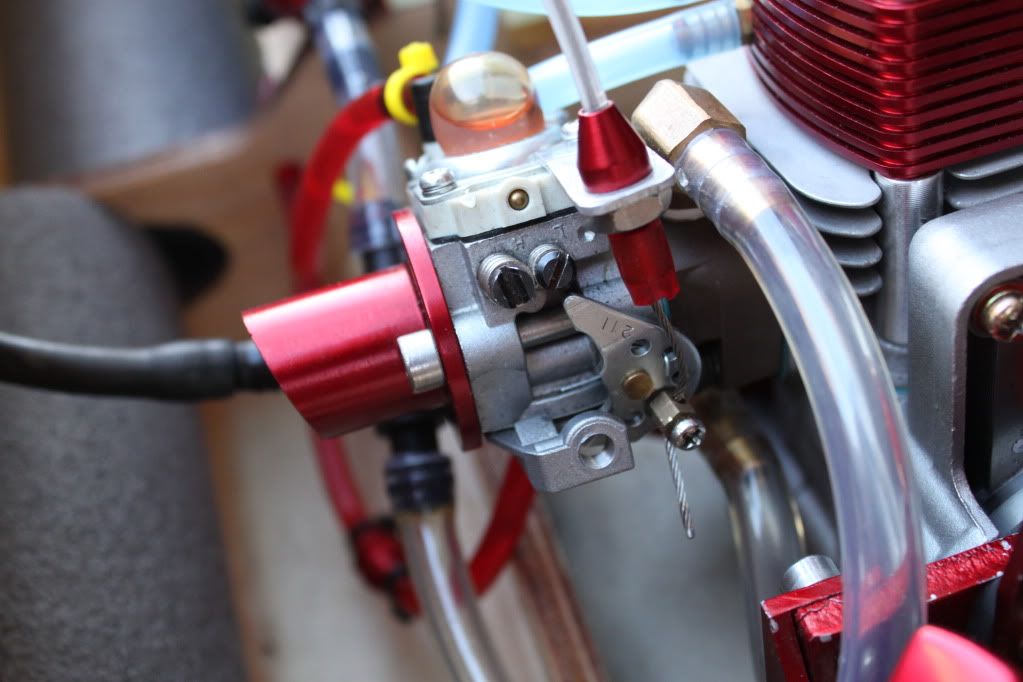
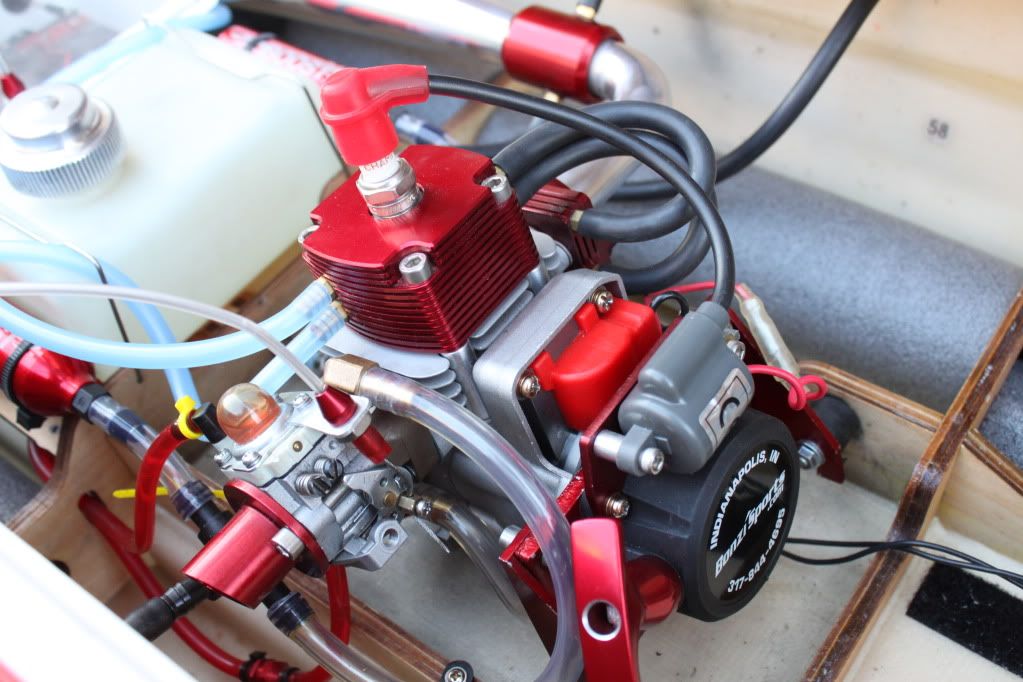
OK, to reality. Toss those boost bottles, they're the snake oil of RC boats as they do nothing. The velocity stack is also bling that I won't say that it doesn't do anything but it does, it kills top end. There are very few velocity stacks on the market that actually help and that isn't one of them.
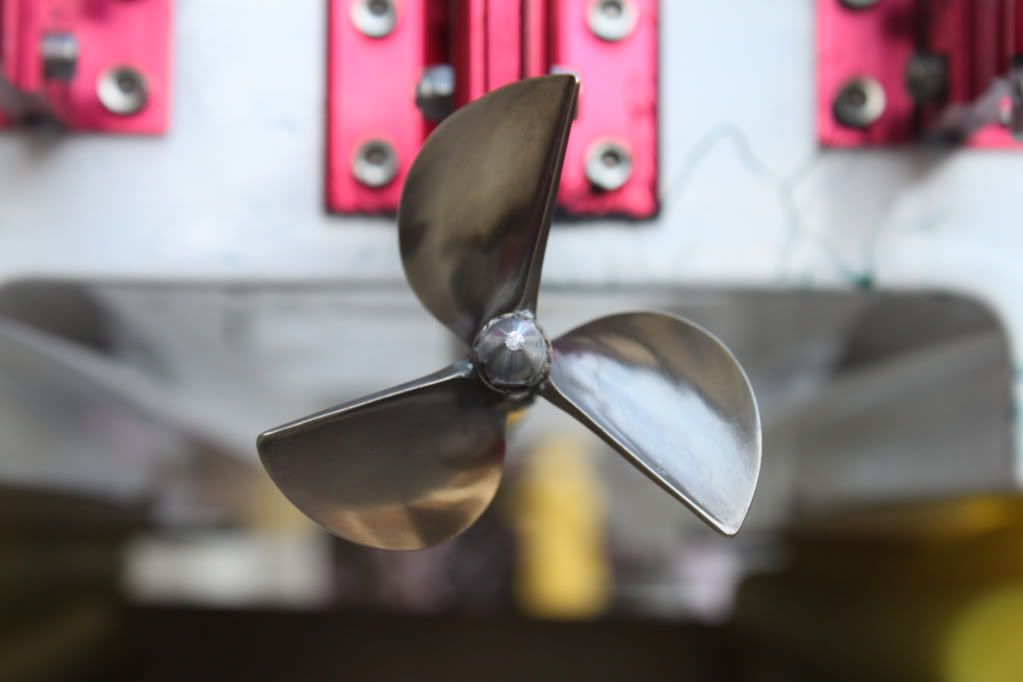
Now, the streamlined prop nut. Unless you like replacing props, put a slice of fuel/water tubing between it and the prop as it will work as a lock nut.
The engine ramping up issue. Your fuel mixture could be off causing that. Try the 257 at 2 turns out on the low-speed needle and 1 turn out on the high and adjust from there if it needs it.
03-14-2011, 08:25 PM
I use Zuber (locking nut)
I would move your shaft saver tight to collet to - sometimes cause vibration when they are half way like that
Biggest thing I see id the no gap on the drivedog though
Have fun - check carb like Ron says too
03-14-2011, 08:37 PM


One other observation is that you might want to straighten (or replace) your throttle cable. It has a large kink near the carb that could potentially lead to issues down the road (you should hold the cable nut when you tighten the retaining screw). It is not a HUGE deal right now but if the cable binds or keeps you from throttling back later on then you will be dealing with a runaway boat. Same goes for the excess throttle cable that may contact the boost bottle hose and keep you from throttling down - use a pair of cutters or small cut off wheel to remove the excess cable.
Boat is looking good - keep the pics coming
 03-14-2011, 08:49 PM
- - As for the Velocity stack you are referring to the red anodized piece on the carb correct? Just making sure i understand you correctly. If it robs me of top end, do I just take it off completely? Also, do you know what carb I have on there...is it the 257 carb already, if not is there a way that I can tell which one I have?
- - As for the prop nut, should I just go with a regular one? I really like how it looks. What do you mean go through props? I bought this boat used so I really don't know that much about it, I was trying to figure out what the boost bottles do for my boat. I know that they increase performance for a Banshee Quad, however it has considerably more carb back pressure, as the engine is much larger.
- - As for the shaft, it is a square drive and square shaft. It tapers to round, but I am not sure how to get that gap? It isn't a one piece, so what your saying is that I could get a one piece shaft?
Thanks for all the info guys, I am super new to this and am learning everyday as I go. I am going to start with setting up the radio and servos and throttle. I will see about getting a replacement for the throttle cable and then go from there. I am fortunate enough to have Insane Boats right down the freeway so I can pick up parts as I need them. I might order that online though.
To adjust thottle just watch Paul's video explains it well ..... and it's cable like yours
http://www.youtube.com/watch?v=UVyXzMXh3i0
Nice boat
03-14-2011, 09:14 PM
03-14-2011, 09:21 PM
I can't tihnk of the model number of that carb but it is a good one so you really don't need to replace it unless it does have problems.
With going through props I mean that the streamlined prop nuts have an issue with coming off when you don't want them to so when they do (usually when you let off the throttle) they'll pay a visit to see Davey Jones at the bottom of wherever you're running at.
You've probably got a few of us confused as to which flex cable setup that you have as the stock Pro Boat cable should be round all the way. A square drive will have the squared and at the collet and I don't see any sign of it being square there. With a square drive you don't need the 1/4" gap between the drive dog and the strut but a round cable all the way does need it as the cable will wind-up and shorten under load in the water. The results could be ugly as it can snap the cable then you'll lose not only the prop but the drive dog and your prop nut which then costs more money.
Parts of this come from the files of "Don't ask me how I know.....".
03-14-2011, 10:39 PM
IT'S A GOOD CARB
If it's a square drive then u don't need gap but do need a teflon washer between the dog drive if it's Pro Boat stuff
look at Gizmo's for Zuber nut smaller than reg nut and self locking
03-15-2011, 09:31 AM
i run the same type of throttle setup as you along with the same radio set the trim (throttle) to 0 them make shure the butterfly is fully closed take the cable and make shure there is no play in it tighten screws (cable clamp) now set the trim to about +10 on the TX this should be enough throttle for the engine to run if engine does not idle turn up the trim if the engine idles to fast turn down trim to kill the engine just push the trigger forward and the engine wil stop one other thing the engine will idle at a lower speed on land than with a load placed on it (in the water) so you may have to playu with it at the pond
Thanks again for your help!
03-15-2011, 09:42 AM
I am curious to learn how to actually tune these motors as I have a feeling I am going to be in the boating hobby for the long haul. I would like to get to learn all about the motors, that way if anything were to ever go wrong I am able to fix it.
That YouTube video definitely helped me a lot as I was going to throw away my idle screw, but i am not glad that i kept it. I will be taking more pictures of the Aeromarine build in the next coming week or so. I was hoping to run my boat this weekend, but it is supposed to rain here in Southern California.
03-15-2011, 10:17 AM
WT-644 - 1 1/2 turns High, 1 1/2 turns Low
WT-603 - 1 1/2 turns High, 1 5/8 turns Low
WT-257 - 1 turn High, 2 turns Low
WT-488 - 1 1/8 turns High, 1 1/2 turns Low
WT-813/A - 1 1/2 turns High, 1 1/2 turns Low
the 813 is same as 257 except it 813 has a acclerator pump - I like them better than 257
03-15-2011, 01:52 PM
03-15-2011, 01:56 PM
Not all carbs have the same settings your 813A is in here
WT-644 - 1 1/2 turns High, 1 1/2 turns Low
WT-603 - 1 1/2 turns High, 1 5/8 turns Low
WT-257 - 1 turn High, 2 turns Low
WT-488 - 1 1/8 turns High, 1 1/2 turns Low
WT-813/A - 1 1/2 turns High, 1 1/2 turns Low
the 813 is same as 257 except it 813 has a acclerator pump - I like them better than 257
Thanks!
03-15-2011, 08:06 PM