


48" X cat design and build
 01-28-2014, 10:57 PM
#51
Senior Member
Join Date: Jan 2005
Location: blackpool, UNITED KINGDOM
Posts: 11,390
Likes: 0
Received 2 Likes
on
2 Posts
Hi Daz looking good mate,i can see what Cobus is talking about but i agree you dont need to use gelcoat.A trick ive used is to run a bead of clay arround that seam line to seal and also make it a slight (tiny) concave shape this makes for a nice smooth edge.Another good way is to use sheet wax on the whole flange area but its expensive.Or you could also try this wax and run some of this round that join and use a filleting tool same as with clay.Either way im sure youll do a good job as allways.
Mart
http://www.ecfibreglasssupplies.co.u...lock-650g.aspx
Mart
http://www.ecfibreglasssupplies.co.u...lock-650g.aspx
 01-31-2014, 02:25 AM
#52

Thread Starter

Join Date: Sep 2010
Location: Staffs, UNITED KINGDOM
Posts: 895
Likes: 0
Received 0 Likes
on
0 Posts
Will effect neatness of split line if you planning on molding color and not painting.
http://www.rcuniverse.com/forum/spee...ethically.html
http://www.rcuniverse.com/forum/spee...boat-hull.html
http://www.rcuniverse.com/forum/spee...ethically.html
http://www.rcuniverse.com/forum/spee...boat-hull.html
Understand what you saying and appreciate it not planning to much yet main thing is get it moulded and 1st 1 out will be just plain white finish and get it tested
Ill do 2 coats of tooling gelcoat so will wetsand it back also which will finish the flanges off
Hi Daz looking good mate,i can see what Cobus is talking about but i agree you dont need to use gelcoat.A trick ive used is to run a bead of clay arround that seam line to seal and also make it a slight (tiny) concave shape this makes for a nice smooth edge.Another good way is to use sheet wax on the whole flange area but its expensive.Or you could also try this wax and run some of this round that join and use a filleting tool same as with clay.Either way im sure youll do a good job as allways.
Mart
http://www.ecfibreglasssupplies.co.u...lock-650g.aspx
Mart
http://www.ecfibreglasssupplies.co.u...lock-650g.aspx
 02-20-2014, 09:27 AM
#53
Thread Starter
Join Date: Sep 2010
Location: Staffs, UNITED KINGDOM
Posts: 895
Likes: 0
Received 0 Likes
on
0 Posts
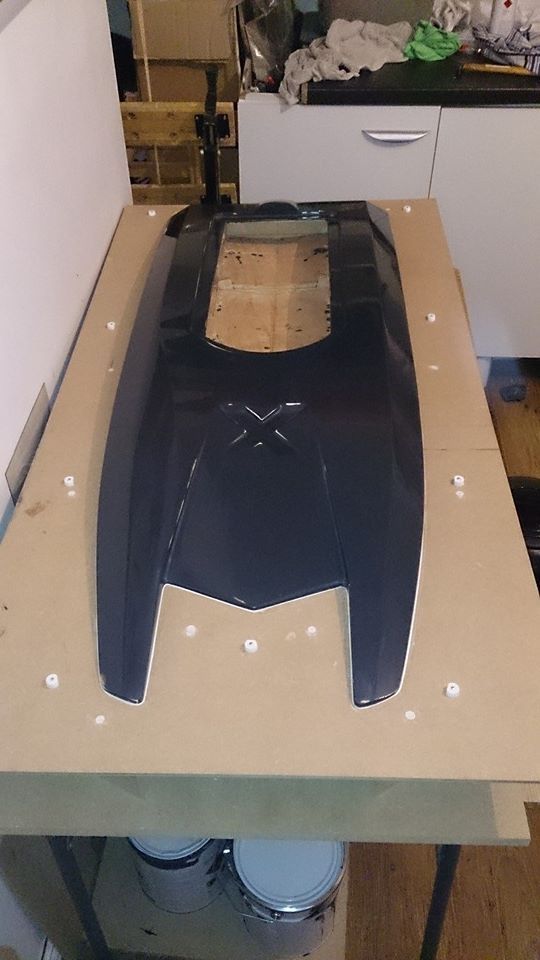
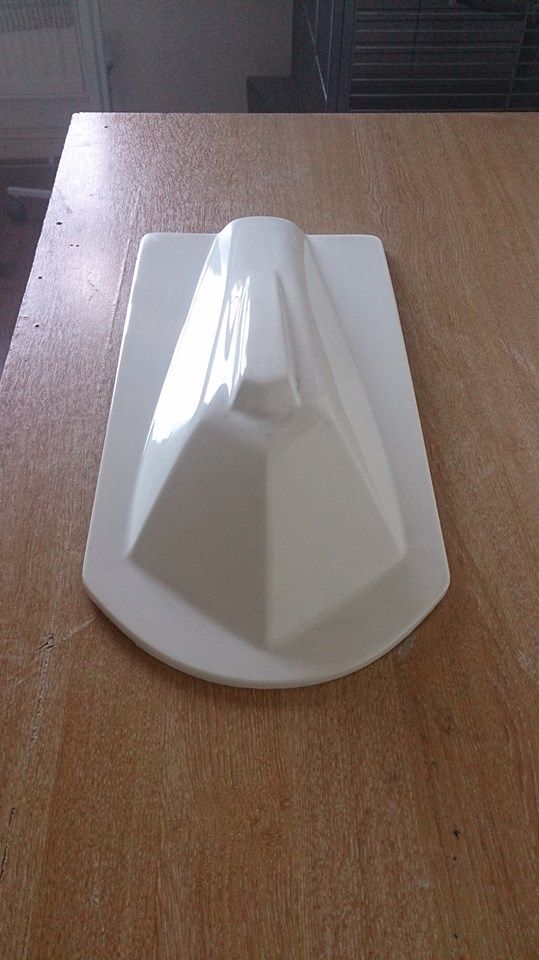
Finally started moulding this project
Got the hatch moulded and polished up
Also filled the small gaps round parting board and added locating pegs
Hoping to mould main hull in the next couple of days
Got the hatch moulded and polished up
Also filled the small gaps round parting board and added locating pegs
Hoping to mould main hull in the next couple of days


 02-27-2014, 05:33 AM
#54
Thread Starter
Join Date: Sep 2010
Location: Staffs, UNITED KINGDOM
Posts: 895
Likes: 0
Received 0 Likes
on
0 Posts
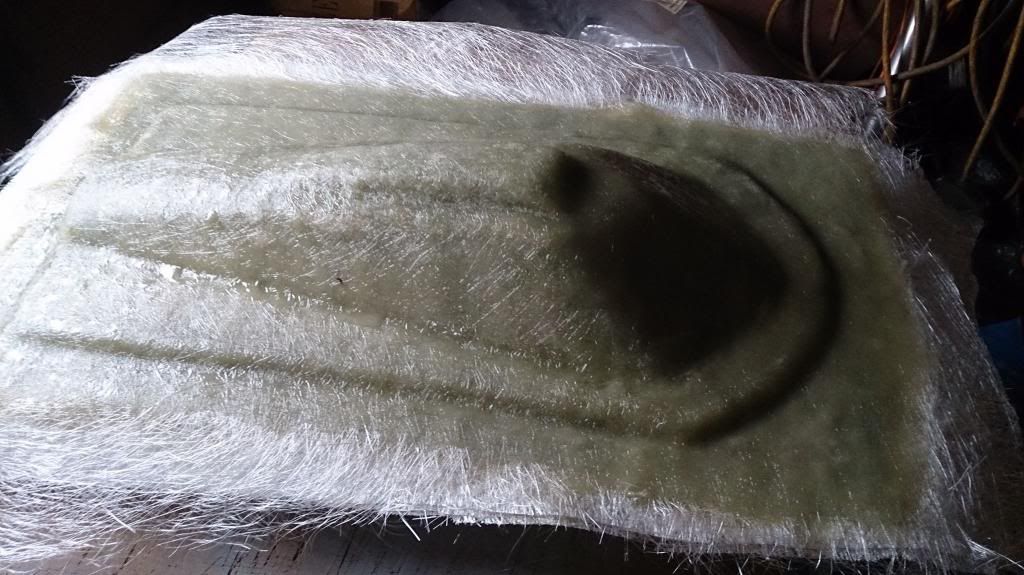
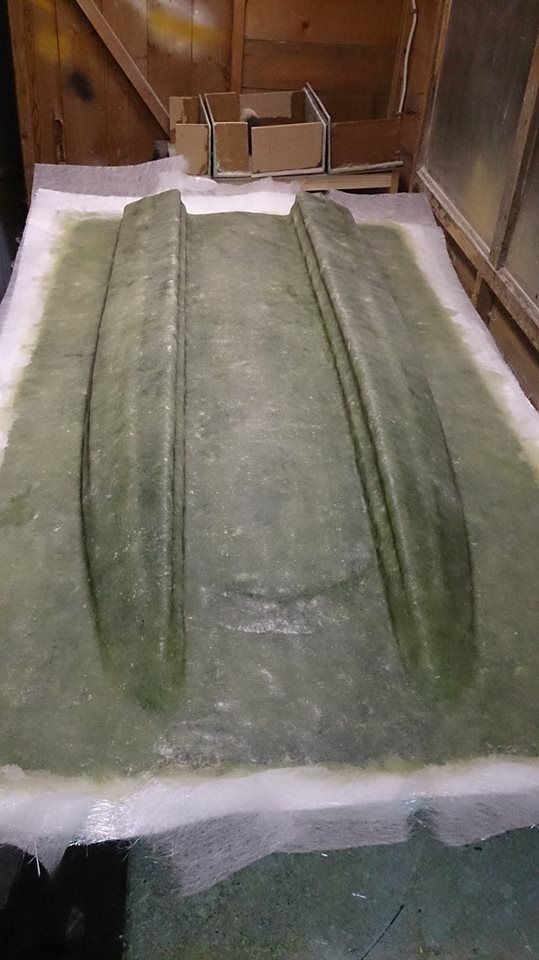
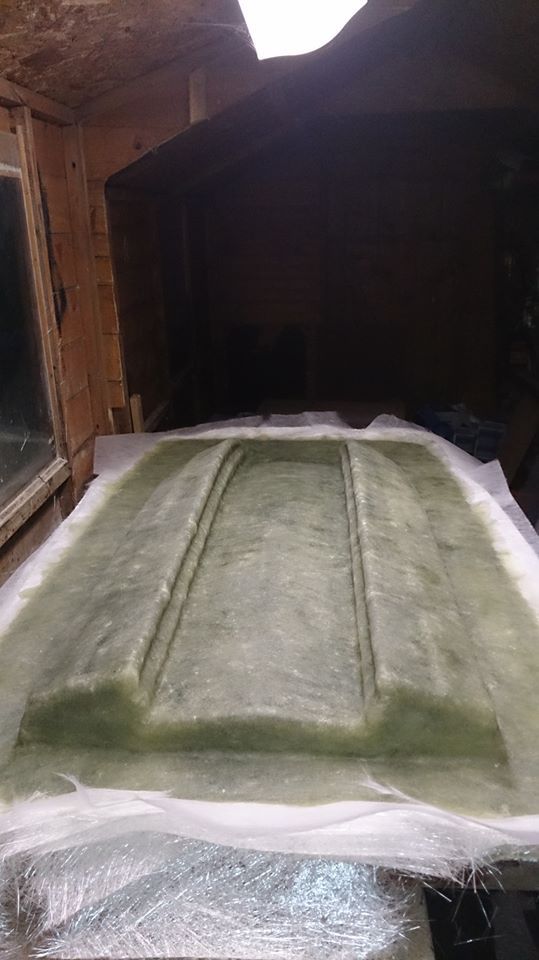
Well finally getting there
Topdeck is now moulded just needs trimming and will add some wood to back it up ,just gotta leave it now for a week or so to fully cure before splitting and prep the bottom for moulding
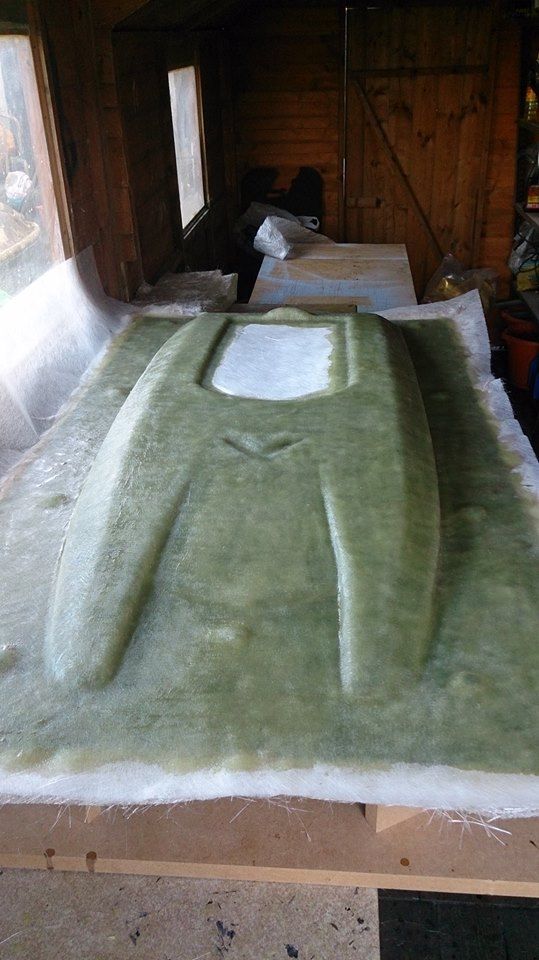
Topdeck is now moulded just needs trimming and will add some wood to back it up ,just gotta leave it now for a week or so to fully cure before splitting and prep the bottom for moulding

 03-18-2014, 12:01 AM
#55
Thread Starter
Join Date: Sep 2010
Location: Staffs, UNITED KINGDOM
Posts: 895
Likes: 0
Received 0 Likes
on
0 Posts
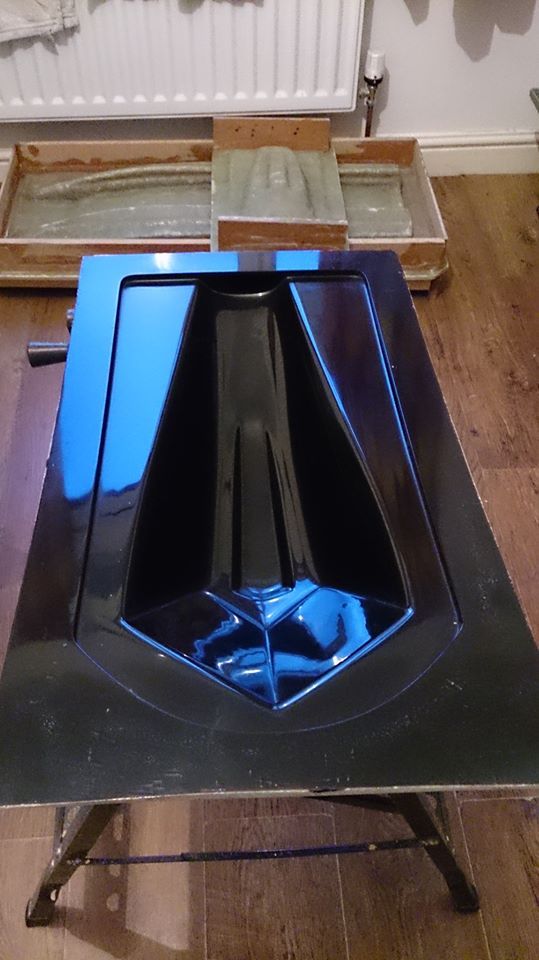
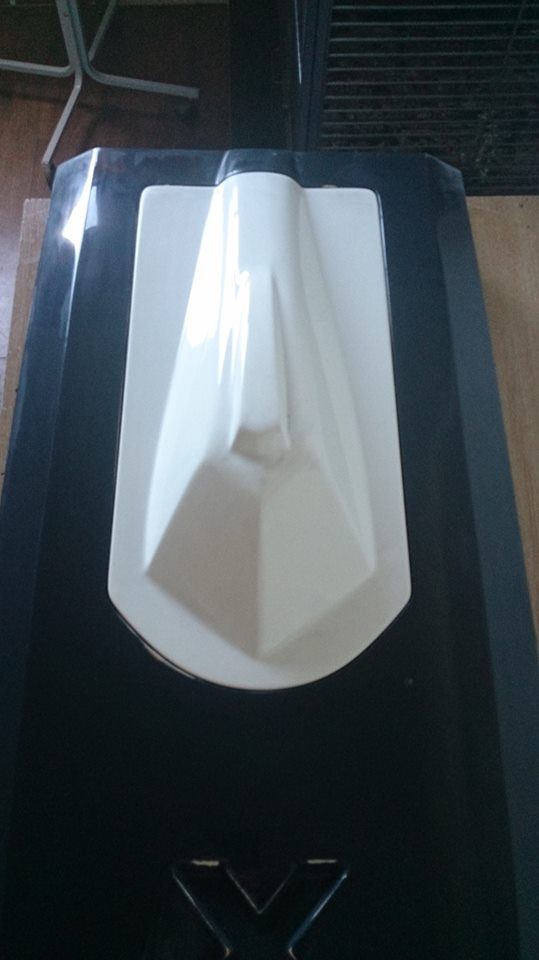
Made 1st hatch for this build,only thin layup to break in the mould but also 1st time test fit and check clearances round the engine ,fits nice and clearance is not an an issue so pretty happy
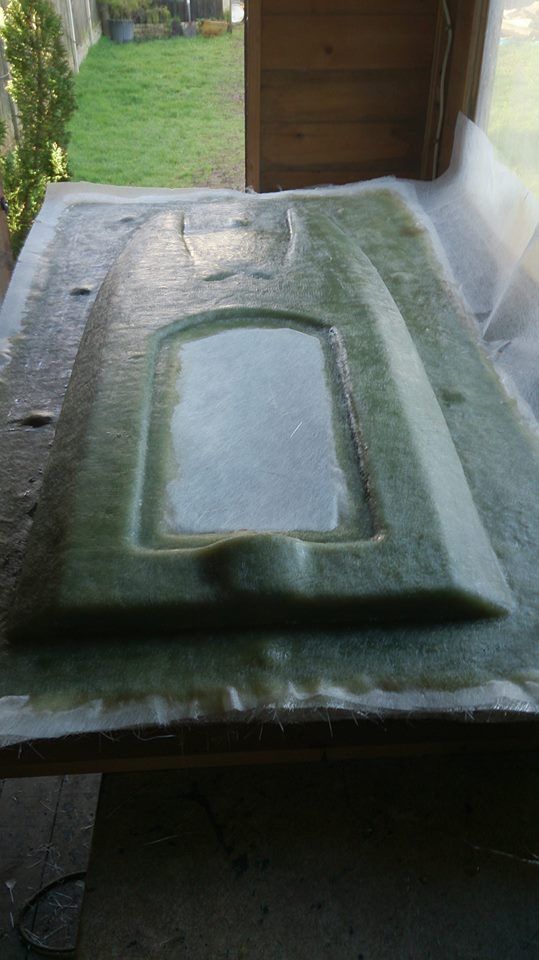
Also now moulded the bottom of this build,fingers crossed releases ok in a week or so ,then wont be long before laying up and pulling the 1st hull


Also now moulded the bottom of this build,fingers crossed releases ok in a week or so ,then wont be long before laying up and pulling the 1st hull

 03-23-2014, 09:47 AM
#56
Thread Starter
Join Date: Sep 2010
Location: Staffs, UNITED KINGDOM
Posts: 895
Likes: 0
Received 0 Likes
on
0 Posts
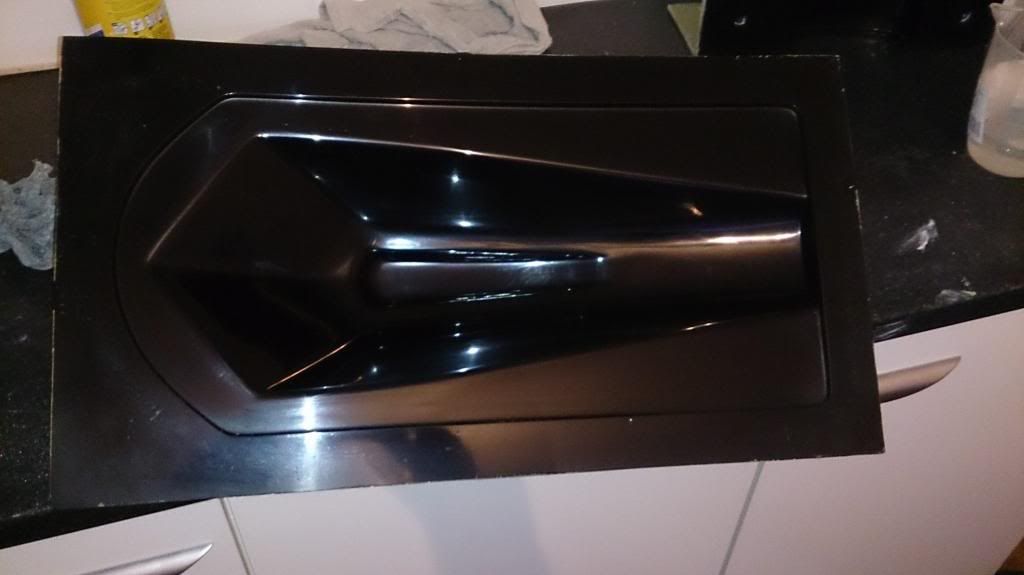
Having really good day today and very happy
Released the 48" X-cat moulds even the plug/hull came out on 1 piece lol
Ill spend a couple days now wet sanding and polish them all up
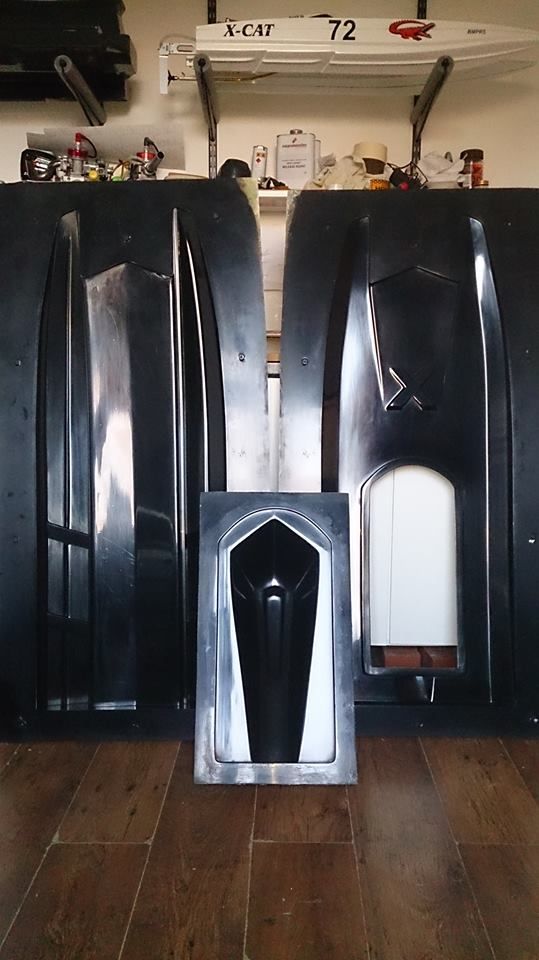
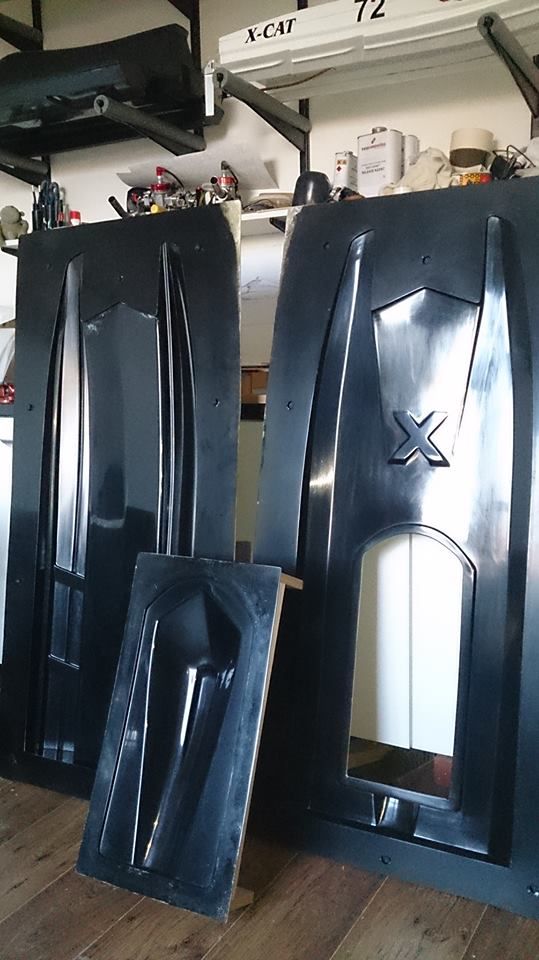
Released the 48" X-cat moulds even the plug/hull came out on 1 piece lol
Ill spend a couple days now wet sanding and polish them all up


 04-03-2014, 03:45 AM
#60
Thread Starter
Join Date: Sep 2010
Location: Staffs, UNITED KINGDOM
Posts: 895
Likes: 0
Received 0 Likes
on
0 Posts
Just placed engine and exhaust in hull while still in moulds so while letting it cure I can make a start on the stringers and transom plate and check clearances
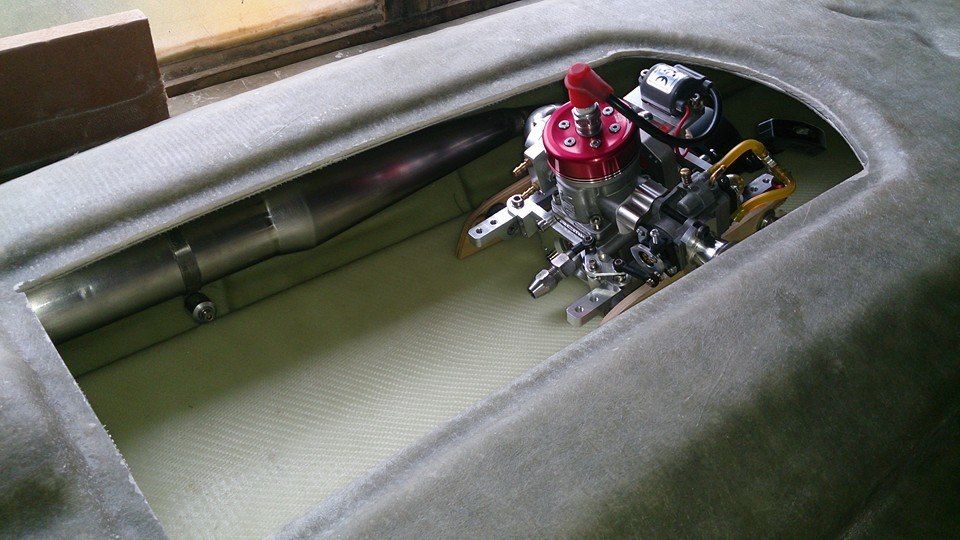
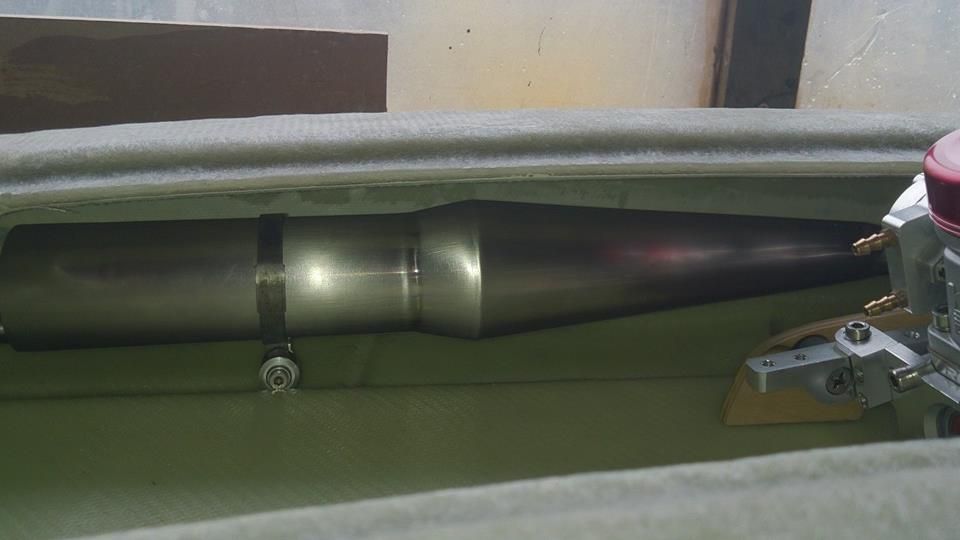
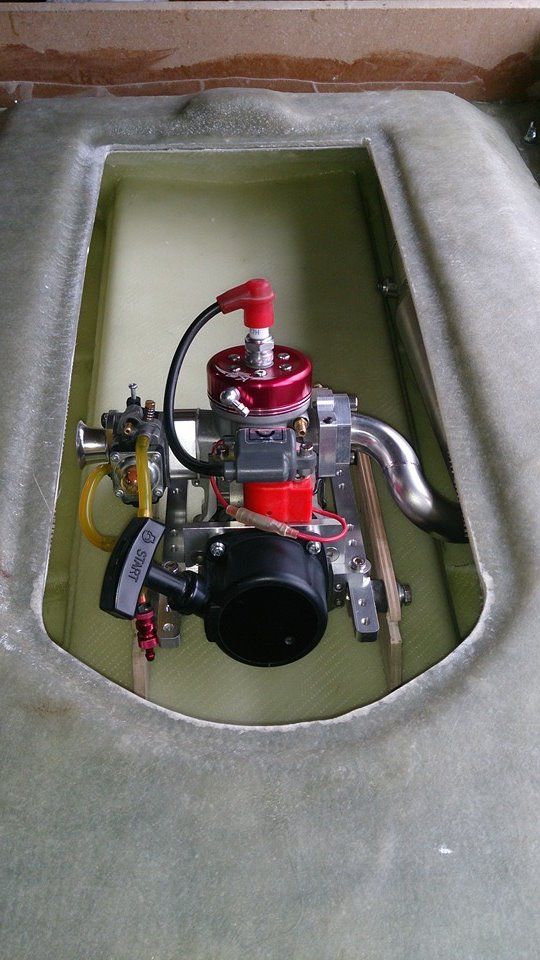
Modified the exhaust to get a better tune length
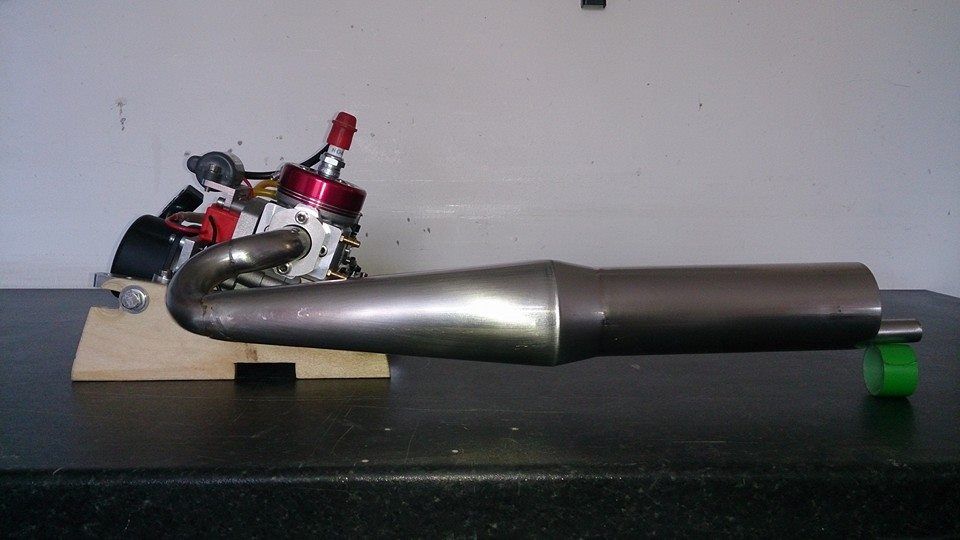


Modified the exhaust to get a better tune length


 04-04-2014, 04:34 AM
#62
Senior Member
Join Date: Apr 2007
Location: Cape Town, , SOUTH AFRICA
Posts: 822
Likes: 0
Received 0 Likes
on
0 Posts
I know you guys may not have exposed exhaust have you consider moving the motor back and having the radio box in front of it with the tune pipe running forward and exiting through the deck? Had a guy here do it and although it looked funny the thing went like stink. You can then run a normal header.
Cobus
Cobus
Last edited by Hesco Racing; 04-04-2014 at 04:44 AM.
04-04-2014, 06:05 AM
#64
Junior Member
Join Date: Jan 2012
Location: Fairfax,
VA
Posts: 20
Likes: 0
Received 0 Likes
on
0 Posts
04-04-2014, 06:36 AM
#65
Thread Starter
Join Date: Sep 2010
Location: Staffs, UNITED KINGDOM
Posts: 895
Likes: 0
Received 0 Likes
on
0 Posts
Hi espressoo
used a stanley blade ,very carefully and at the right angle just as the FG goes green state of curing
dont need to remove it from mould to do it
used a stanley blade ,very carefully and at the right angle just as the FG goes green state of curing
dont need to remove it from mould to do it
04-04-2014, 08:59 AM
#66
Junior Member
Join Date: Jan 2012
Location: Fairfax,
VA
Posts: 20
Likes: 0
Received 0 Likes
on
0 Posts
Wow, so you just use a box cutter as the FG is curing? That's brilliant and saves a lot of FG dust in the workshop. Do you cut it to the edge of the mold and is there any shrinkage of the hull during the curing process?
04-04-2014, 01:00 PM
#67
Thread Starter
Join Date: Sep 2010
Location: Staffs, UNITED KINGDOM
Posts: 895
Likes: 0
Received 0 Likes
on
0 Posts
yes bud ,its the the inbetween of to soft an cured
catch it just right trims dead easy anf use the flange/edge carefully holding the blade at the right angle so it doesnt damage the mould
ot had much shrinkage on smaller versions ,this is the 1st one of these but so far so good
catch it just right trims dead easy anf use the flange/edge carefully holding the blade at the right angle so it doesnt damage the mould
ot had much shrinkage on smaller versions ,this is the 1st one of these but so far so good
04-05-2014, 01:30 AM
#69
Thread Starter
Join Date: Sep 2010
Location: Staffs, UNITED KINGDOM
Posts: 895
Likes: 0
Received 0 Likes
on
0 Posts
Cheers wetneck
Stringers can be added either or after ,iv done a few after no problems ,plan is once released the hull and sorted placement of everything for CG ill finish the stringers then make templates,that way when i layup another hull they will be installed while still in the mould
Seam is already done and joined just waiting to release it now ,problem have to be pretty quick when joining them like this ,but ill try and get pics next time round


 04-05-2014, 01:05 PM
#72


I know you guys may not have exposed exhaust have you consider moving the motor back and having the radio box in front of it with the tune pipe running forward and exiting through the deck? Had a guy here do it and although it looked funny the thing went like stink. You can then run a normal header.
Cobus
Cobus
F1 - Cat looks awesome. Great effort!!
04-06-2014, 12:28 AM
#73
Thread Starter
Join Date: Sep 2010
Location: Staffs, UNITED KINGDOM
Posts: 895
Likes: 0
Received 0 Likes
on
0 Posts
Thanks Jaw
im pretty happy with the way it came out just hope it performs well ,been a long on going project but getting there now haha
@ Mike2735
Thanks Mike ill be posting vids etc and will keep you posted bud
im pretty happy with the way it came out just hope it performs well ,been a long on going project but getting there now haha
@ Mike2735
Thanks Mike ill be posting vids etc and will keep you posted bud
