


48" X cat design and build


 04-07-2014, 08:08 AM
#78

Thread Starter

Join Date: Sep 2010
Location: Staffs, UNITED KINGDOM
Posts: 895
Likes: 0
Received 0 Likes
on
0 Posts
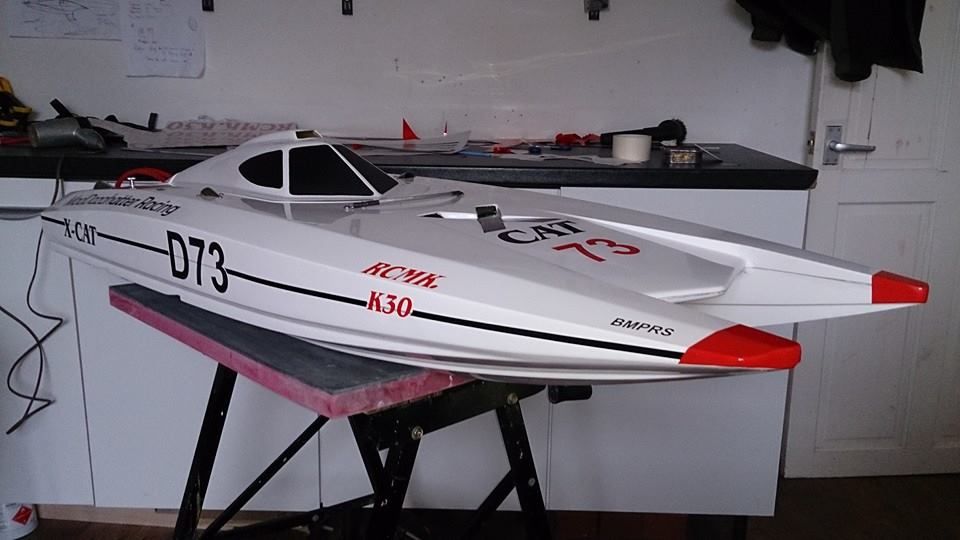
Coming along nicely, all cutting and drilling is now done
Final trimmed hatch opening
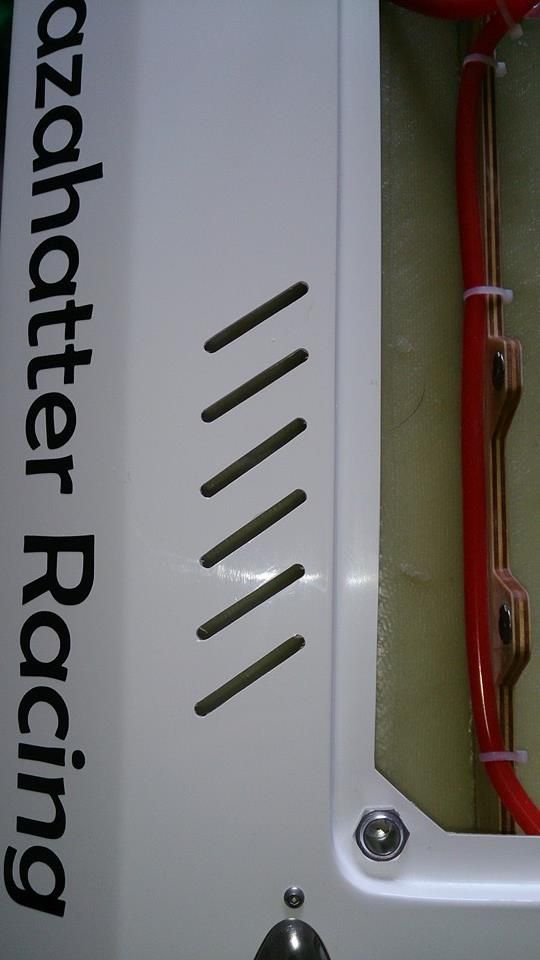
Cut and fitted stainless scoops, 1 short but on order haha
Grab handles,exhaust and water outlets fitted, holes drilled for cooling pipes
Front hatch hold down tab done
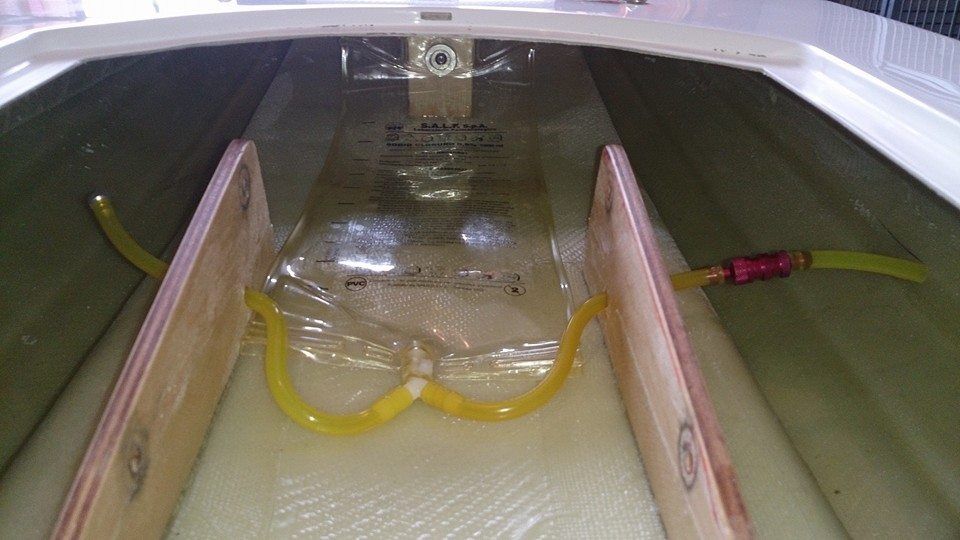
Stuffing tube shaped and epoxied in
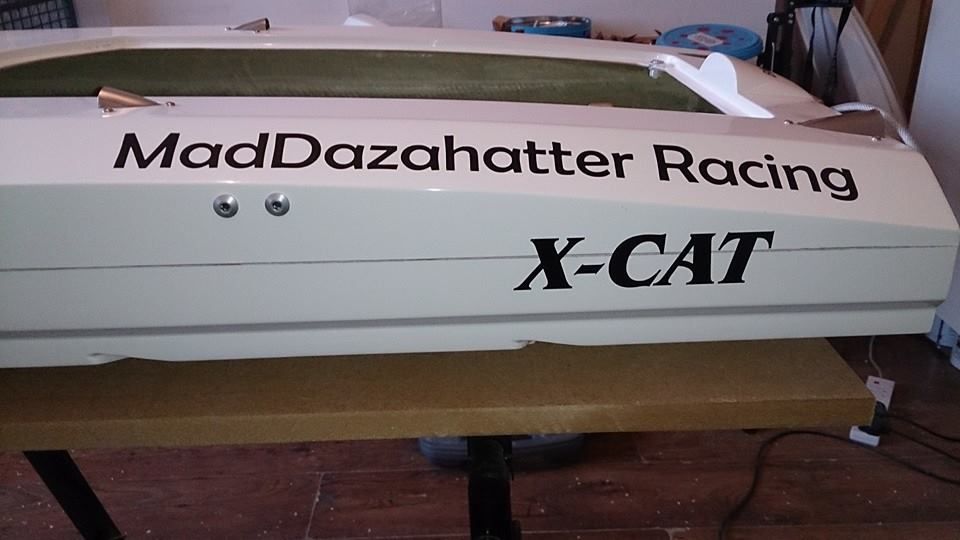
Also fitted some vinyl & ordered rest today
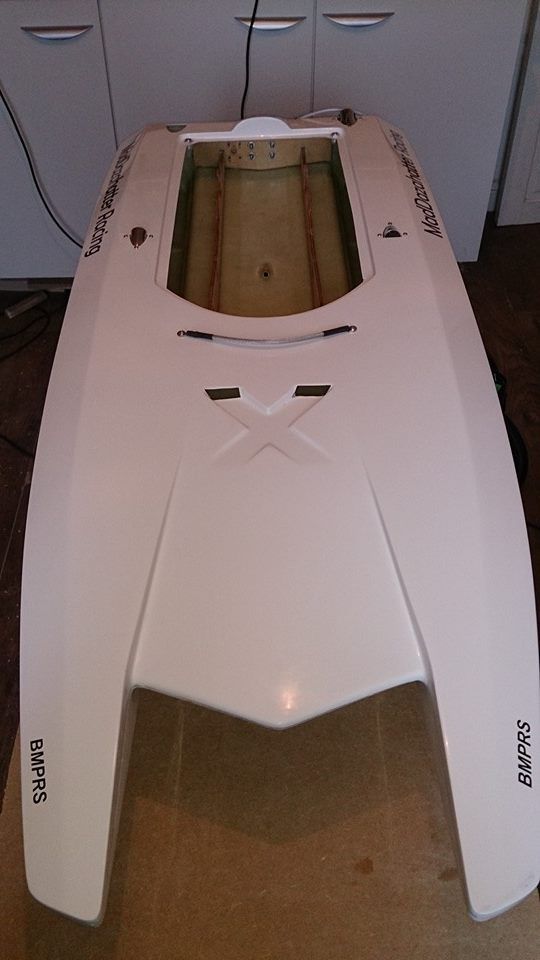
Start installing everything now
Final trimmed hatch opening
Cut and fitted stainless scoops, 1 short but on order haha
Grab handles,exhaust and water outlets fitted, holes drilled for cooling pipes
Front hatch hold down tab done
Stuffing tube shaped and epoxied in
Also fitted some vinyl & ordered rest today


Start installing everything now
04-07-2014, 09:34 AM
#79
Senior Member
Join Date: Apr 2007
Location: Cape Town, , SOUTH AFRICA
Posts: 822
Likes: 0
Received 0 Likes
on
0 Posts
OK looks good, well done. been long time to get to this point.
1 tip where the stringer go into the transom plate. Notch the corner off at angle to allow any water maybe coming into the boat between the stringers to drain out to the sides.
Nice placement of the throttle servo. Have done about 14 radio boxes for guys and never thought of that way.
Another suggestion is the hatch locating tab. Have had plenty hatches with tabs like that crack the deck when the sucker flips. Last couple boats had the tab go under the deck. That way when it does rip of it does not take fiberglass with it or crack the deck.
I think you have less than half of the air outlets you need. That boats is going to starve of air and run ridiculously hot. 3 times bigger out than in.
Next boat drill the 2 water out lets not in line. When you race past the front one sprays water over the back one and you can not see if the back one is really pumping.
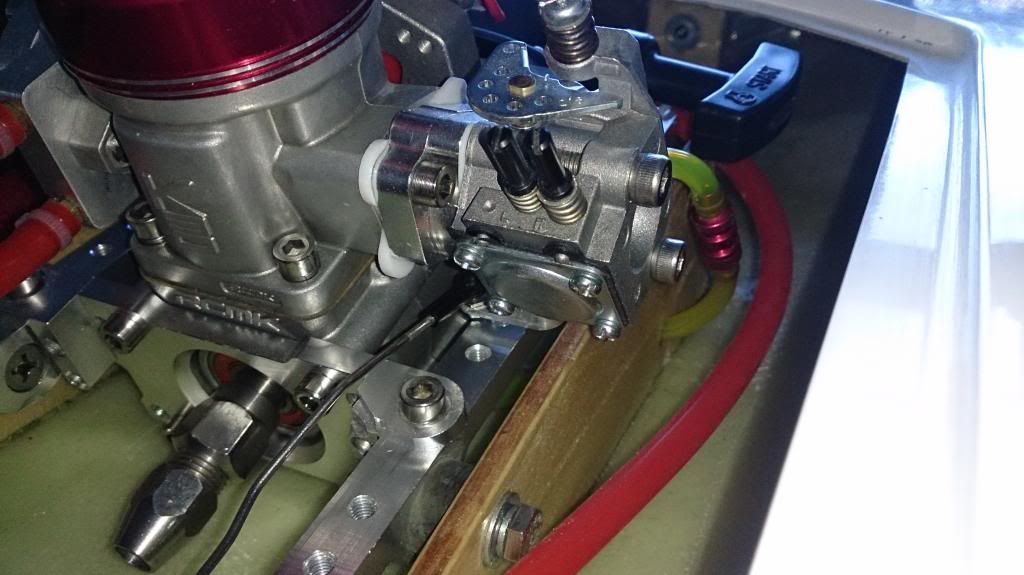
Why does your carb look wonky. Have you got it inside out no something just looks funny is it a different isolator block?
Cobus
And assume the pool noodles are still coming?
1 tip where the stringer go into the transom plate. Notch the corner off at angle to allow any water maybe coming into the boat between the stringers to drain out to the sides.
Nice placement of the throttle servo. Have done about 14 radio boxes for guys and never thought of that way.
Another suggestion is the hatch locating tab. Have had plenty hatches with tabs like that crack the deck when the sucker flips. Last couple boats had the tab go under the deck. That way when it does rip of it does not take fiberglass with it or crack the deck.
I think you have less than half of the air outlets you need. That boats is going to starve of air and run ridiculously hot. 3 times bigger out than in.
Next boat drill the 2 water out lets not in line. When you race past the front one sprays water over the back one and you can not see if the back one is really pumping.
Why does your carb look wonky. Have you got it inside out no something just looks funny is it a different isolator block?
Cobus
And assume the pool noodles are still coming?
04-07-2014, 09:51 AM
#80
Thread Starter
Join Date: Sep 2010
Location: Staffs, UNITED KINGDOM
Posts: 895
Likes: 0
Received 0 Likes
on
0 Posts
Thanks Cobus
Ill do the suggestions on next hull
I can add more outlets for air
Its a different Isolater block rotates the carb round ,ill get a pic for you
Pool noodles are still to come LOL
Ill do the suggestions on next hull
I can add more outlets for air
Its a different Isolater block rotates the carb round ,ill get a pic for you
Pool noodles are still to come LOL
04-07-2014, 09:51 AM
#81
Thread Starter
Join Date: Sep 2010
Location: Staffs, UNITED KINGDOM
Posts: 895
Likes: 0
Received 0 Likes
on
0 Posts
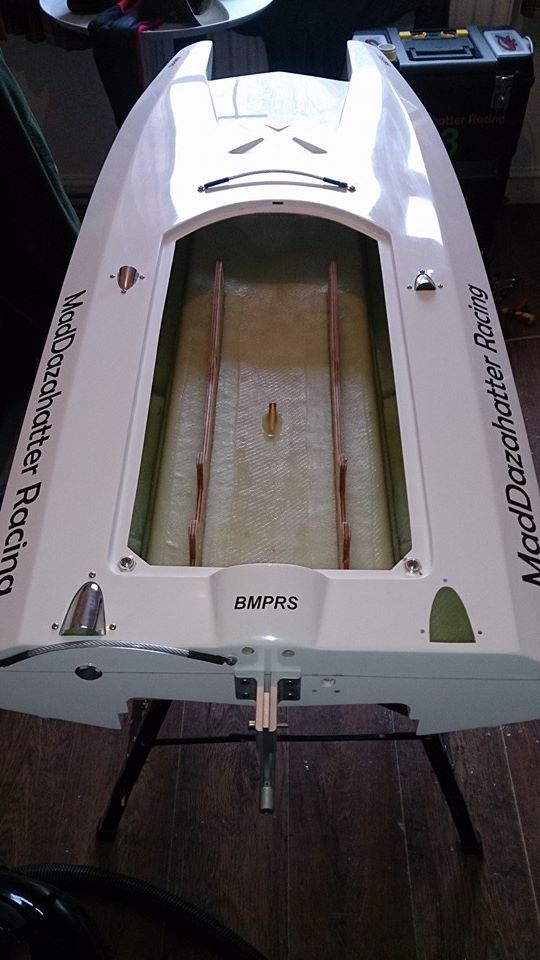
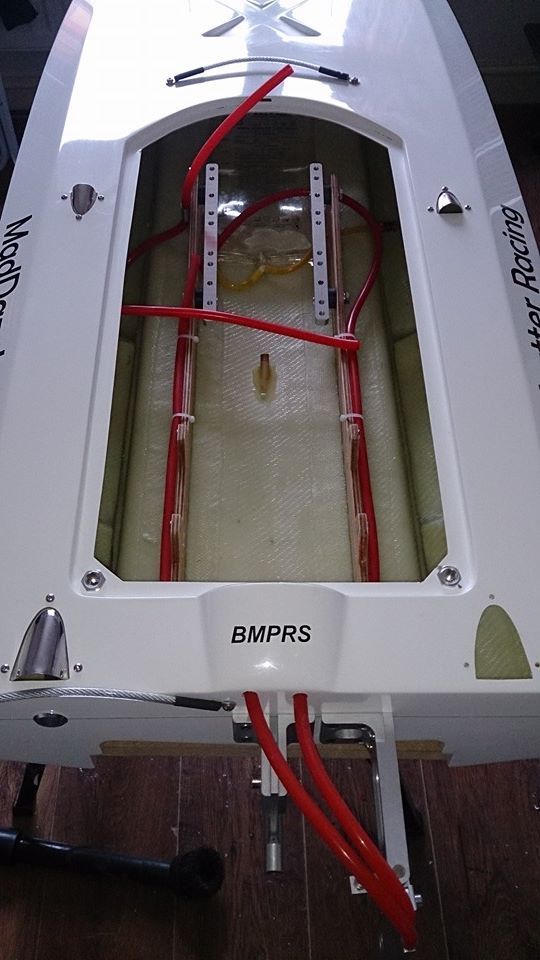
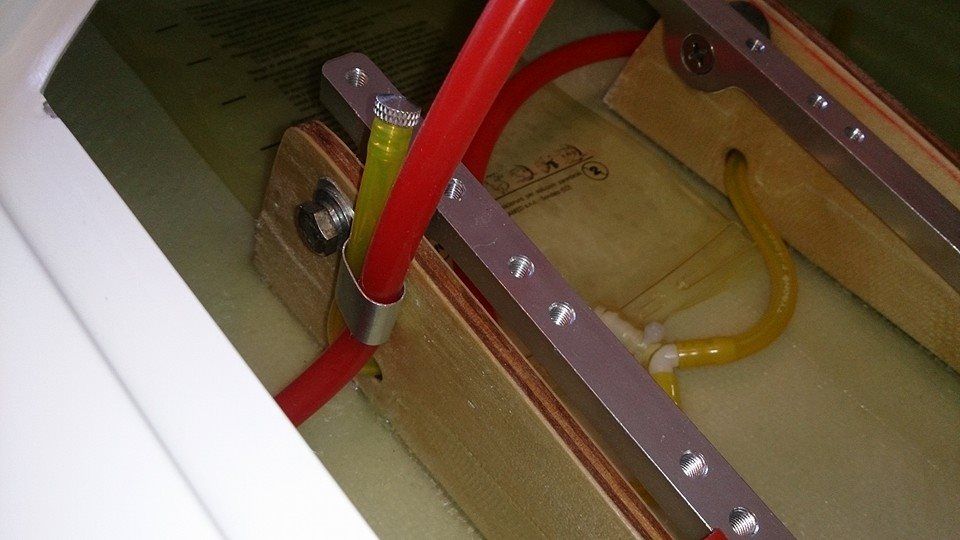
Starting to install everything now Fuel secured and pipe work sorted,installed rudder and cooling pipe,made a piece to hold cooling and filler side of fuel pipes tidy and away from exhaust & engine rails in


 04-07-2014, 10:22 AM
#82
Thread Starter
Join Date: Sep 2010
Location: Staffs, UNITED KINGDOM
Posts: 895
Likes: 0
Received 0 Likes
on
0 Posts
Engine and exhaust installed,fuel & cooling pipes plumbed in
Also changed the carb to 1048 see how it runs with this on to start with


@ Cobus ,iso block rotates the carb and puts the throttle arm under itself
Also changed the carb to 1048 see how it runs with this on to start with


@ Cobus ,iso block rotates the carb and puts the throttle arm under itself


 04-07-2014, 12:42 PM
#86
Thread Starter
Join Date: Sep 2010
Location: Staffs, UNITED KINGDOM
Posts: 895
Likes: 0
Received 0 Likes
on
0 Posts
LOL just trying to get it done bud so its ready for weekend race ,boyd will be racing his V2 X cat aswell so gonna be a fun day setting up and testing LOL
Plus need to get back on the other builds
Plus need to get back on the other builds
04-07-2014, 02:00 PM
#87
Senior Member
Join Date: Apr 2007
Location: Cape Town, , SOUTH AFRICA
Posts: 822
Likes: 0
Received 0 Likes
on
0 Posts
Do you have exponential curve on your transmitter that you use? If not I would rethink you throttle servo horn setup. The way you have it you are going to have a very dead stick at WOT. If I had to guys your would move the trigger/stick nearly half of the travel before the carb reacts.
Also look at the steering link on the rudder side. That "quicklink" system tends to wear the steering block arms's hole out within a few runs and then you start getting slop on the steering. If I were you I would turn the whole link rod around and have the ball link on the rudder side. Those quicklinks last much longer in the plastic servo horns.
Just 2cents from 16 years of racing and building boats.
Cobus
Last edited by Hesco Racing; 04-07-2014 at 02:06 PM.
04-08-2014, 12:25 AM
#88
Thread Starter
Join Date: Sep 2010
Location: Staffs, UNITED KINGDOM
Posts: 895
Likes: 0
Received 0 Likes
on
0 Posts
Hi Cobus
Yes bud i got expo on TX ,radio box placed in temp while i wait for other vent to arrive then can install it properly and set everything up
I appreciate all experienced advice ,ill look at the steering link when i can reinstall radiobox
Yes bud i got expo on TX ,radio box placed in temp while i wait for other vent to arrive then can install it properly and set everything up
I appreciate all experienced advice ,ill look at the steering link when i can reinstall radiobox
04-08-2014, 08:05 AM
#89
Thread Starter
Join Date: Sep 2010
Location: Staffs, UNITED KINGDOM
Posts: 895
Likes: 0
Received 0 Likes
on
0 Posts
Started the engine for 1st time ,2nd pull it fired straight up so well pleased ,no major issues
http://www.youtube.com/watch?v=X408mVNA6Ac&list=UUaL9d4jUpBXPgaKCz3ASTow&feature=share
Also decided to make slight mod and allow more exhaust heat out
http://www.youtube.com/watch?v=X408mVNA6Ac&list=UUaL9d4jUpBXPgaKCz3ASTow&feature=share
Also decided to make slight mod and allow more exhaust heat out


 04-10-2014, 08:17 AM
#94
Senior Member
Join Date: Apr 2007
Location: Cape Town, , SOUTH AFRICA
Posts: 822
Likes: 0
Received 0 Likes
on
0 Posts
Nice one on the steering rod much neater and straight. Just noticed you have the rudder bottom still parallel with the hull bottom. We file the rudder as to not have it generate lift just steering. Have had boat do funny things and then it comes back to the bottom of the rudder not taken away. Not saying you must do it just something to watch. Enjoy I'm sure she will run great.
Cobus
Cobus
04-10-2014, 09:04 AM
#95
Thread Starter
Join Date: Sep 2010
Location: Staffs, UNITED KINGDOM
Posts: 895
Likes: 0
Received 0 Likes
on
0 Posts
Thanks Cobus
Ill keep an eye for funny things happening
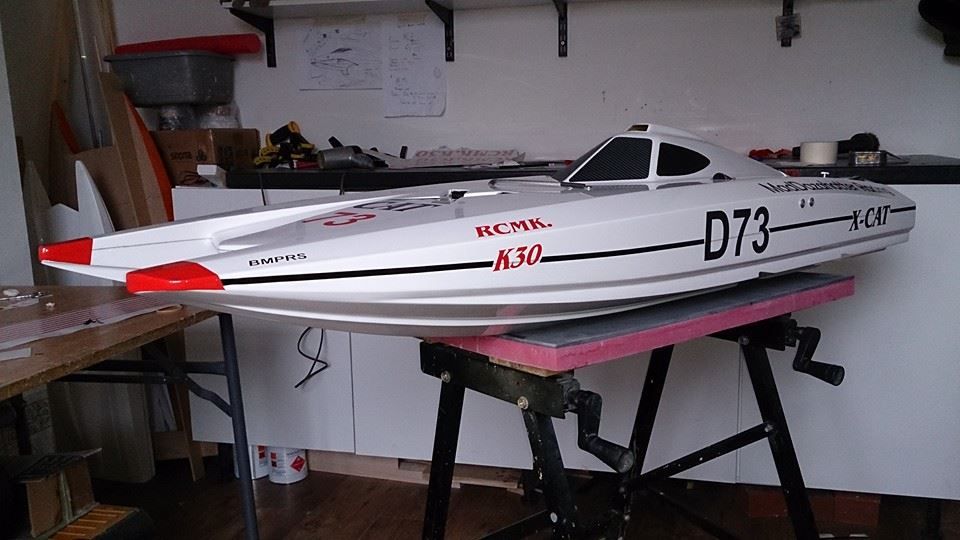
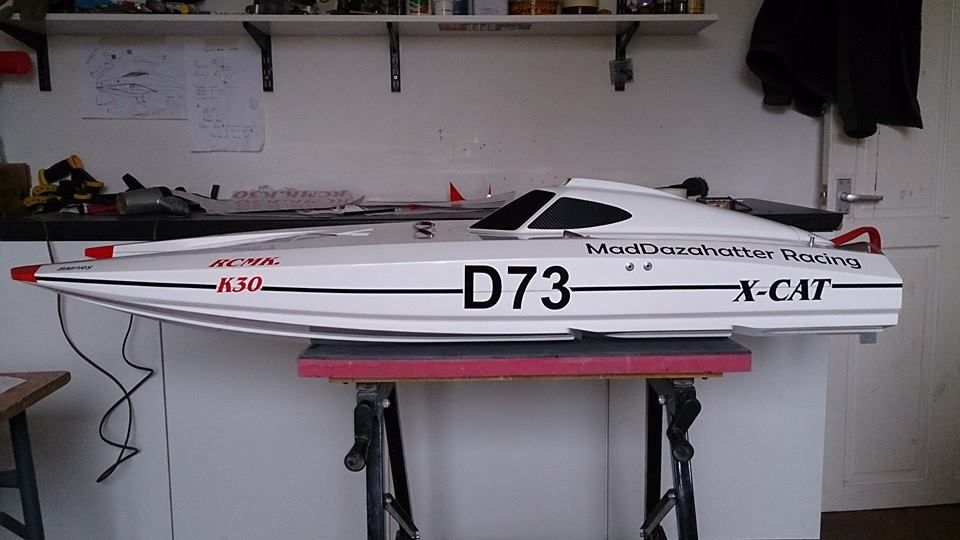
Really looking forward to running it iv just doing the vinyl on it as only got rest of it today
Ill get vids
Ill keep an eye for funny things happening
Really looking forward to running it iv just doing the vinyl on it as only got rest of it today
Ill get vids
04-10-2014, 09:09 AM
#96
Thread Starter
Join Date: Sep 2010
Location: Staffs, UNITED KINGDOM
Posts: 895
Likes: 0
Received 0 Likes
on
0 Posts
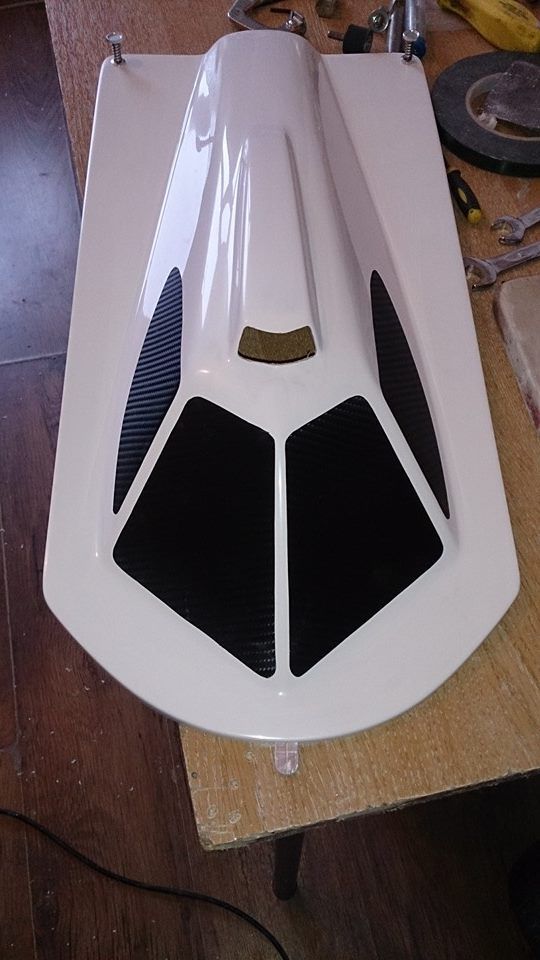
All finished and ready,added rest of vinyl and had ago at vinyl wrapping the sponson tips which hasnt worked out to bad
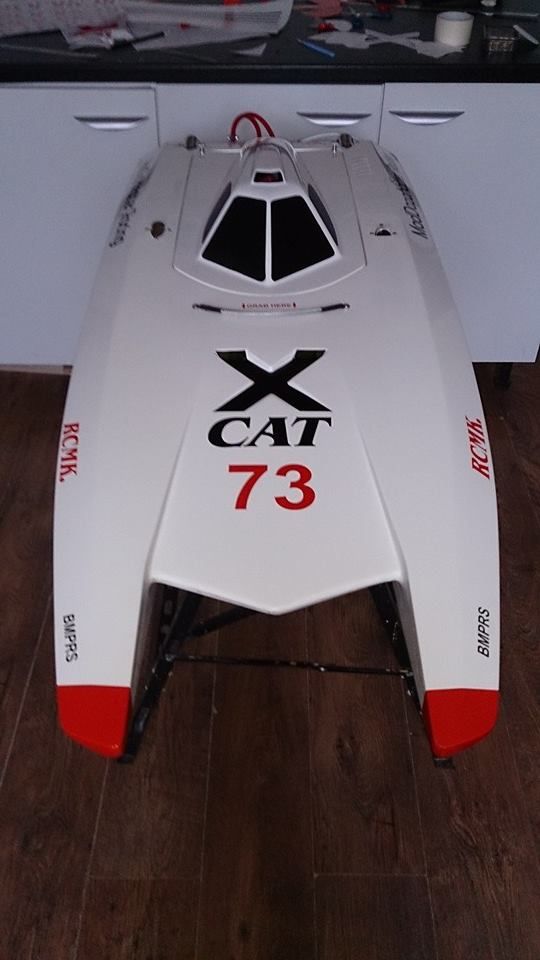
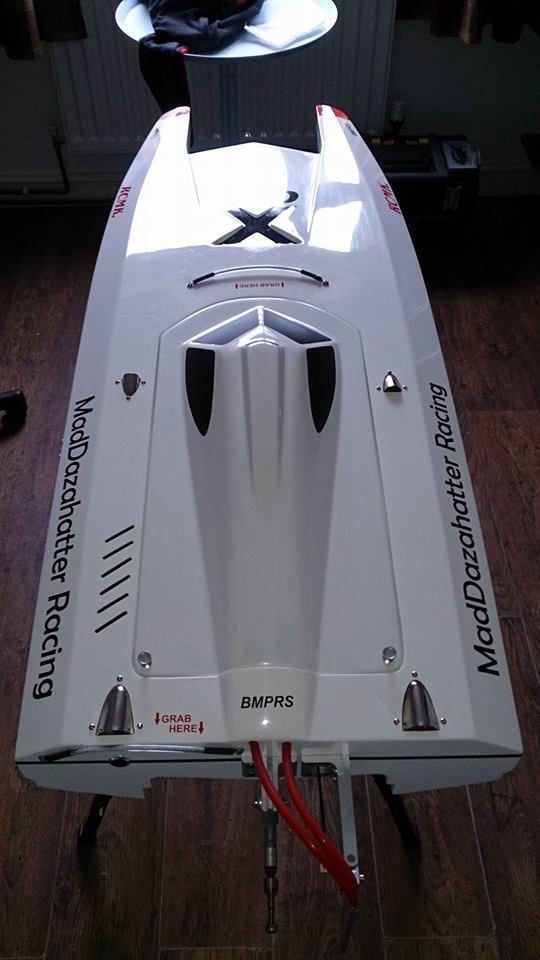


Last edited by F1madness; 04-10-2014 at 09:14 AM.
04-16-2014, 06:13 AM
#98
Thread Starter
Join Date: Sep 2010
Location: Staffs, UNITED KINGDOM
Posts: 895
Likes: 0
Received 0 Likes
on
0 Posts
Thanks Greg
Did run this weekend but crashed out 2/3 rds of a lap round ,steering servo clamp failed and lost steering,no major damage only couple small repairs and new flexi will fix it and get back on the water soon
Did run this weekend but crashed out 2/3 rds of a lap round ,steering servo clamp failed and lost steering,no major damage only couple small repairs and new flexi will fix it and get back on the water soon
04-16-2014, 07:32 AM
#100
Thread Starter
Join Date: Sep 2010
Location: Staffs, UNITED KINGDOM
Posts: 895
Likes: 0
Received 0 Likes
on
0 Posts
The 1/4 scale servo is just a bit higher than the posts
Stripped the threads on 1 side so servo came loose
1st time iv had this happen and used the same mounts and servos before and never had any issues
Iv sorted now and is solid
Stripped the threads on 1 side so servo came loose
1st time iv had this happen and used the same mounts and servos before and never had any issues
Iv sorted now and is solid