


48" X cat design and build
 12-23-2012, 12:50 PM
#1

Thread Starter

Join Date: Sep 2010
Location: Staffs, UNITED KINGDOM
Posts: 895
Likes: 0
Received 0 Likes
on
0 Posts
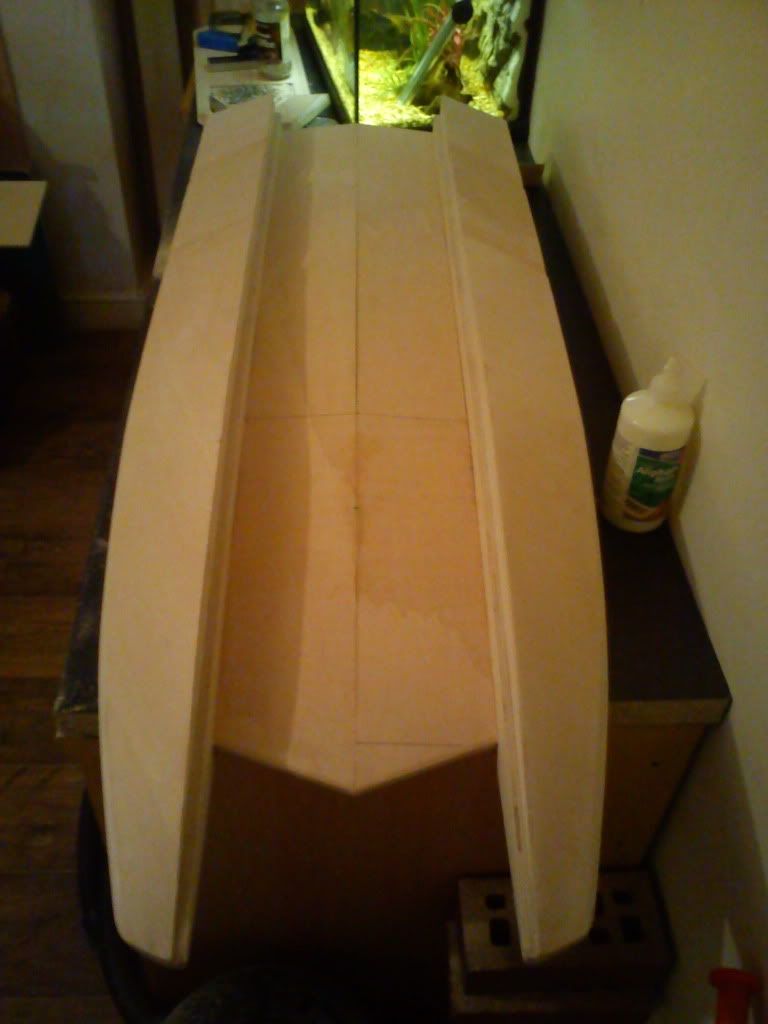
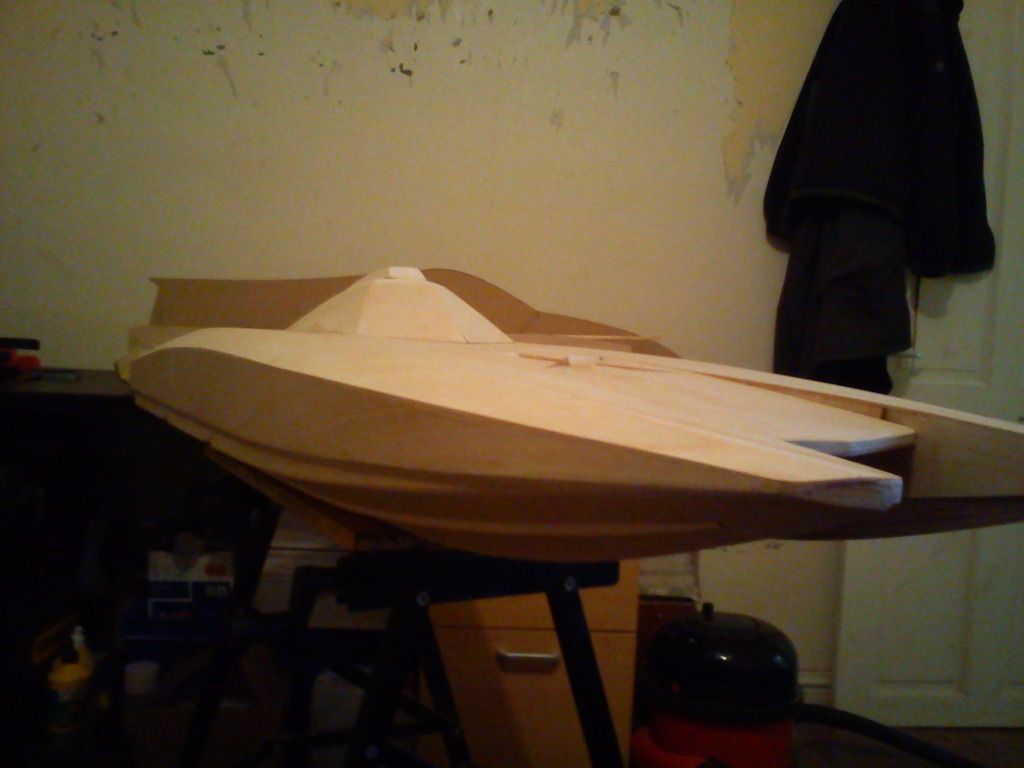
After designing and building the 38" Xcat for either nitro or eleccy and proving to run and handle with solid performance i thought id build a bigger brother to it for gas
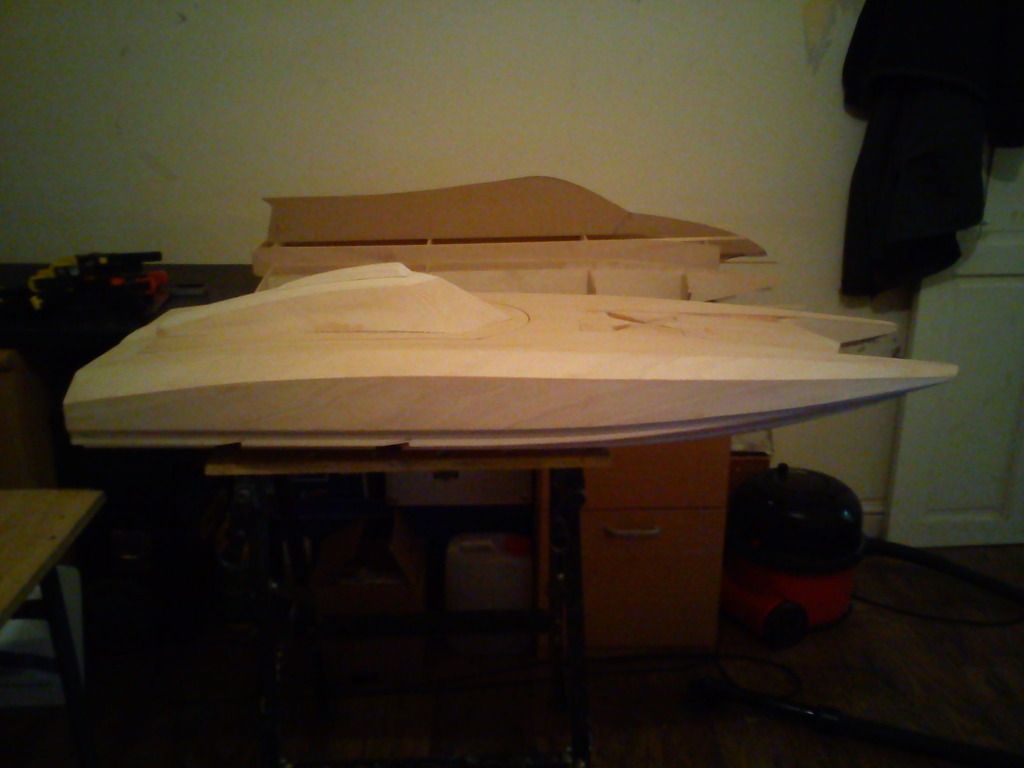
This is the original 38" version
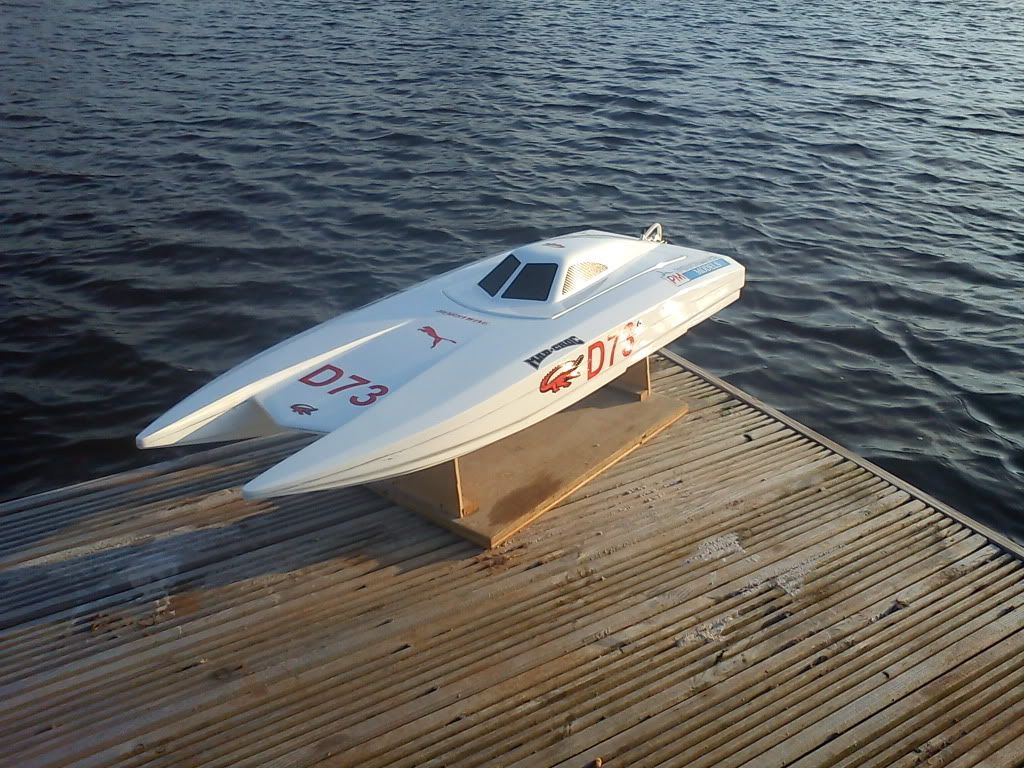
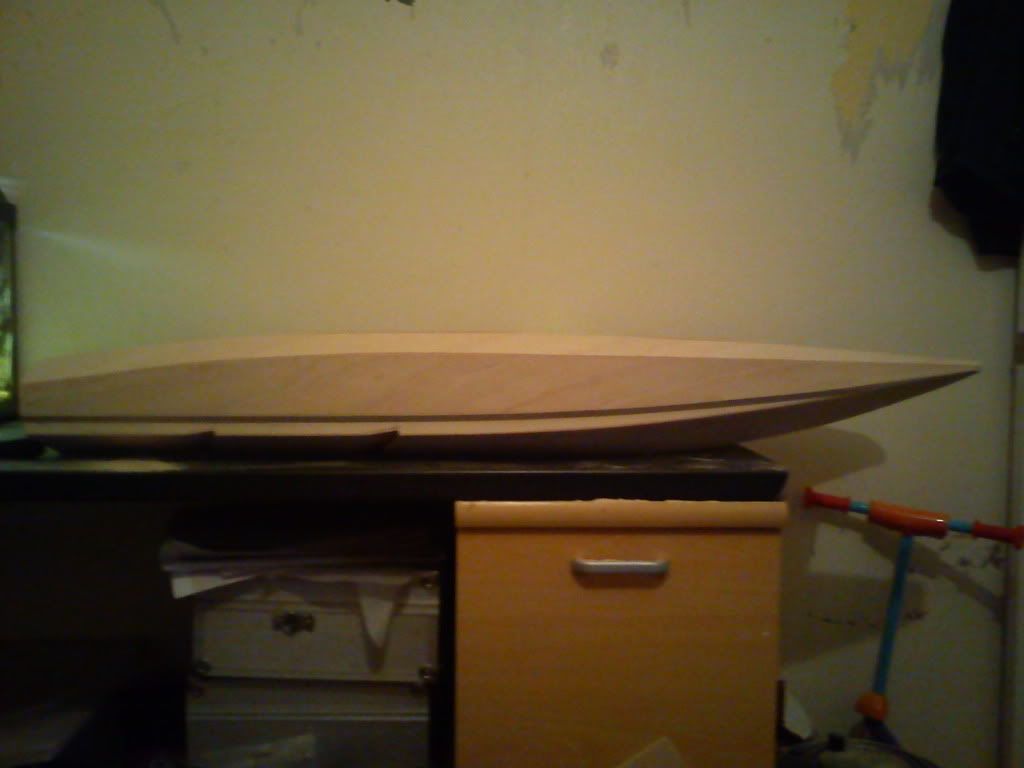
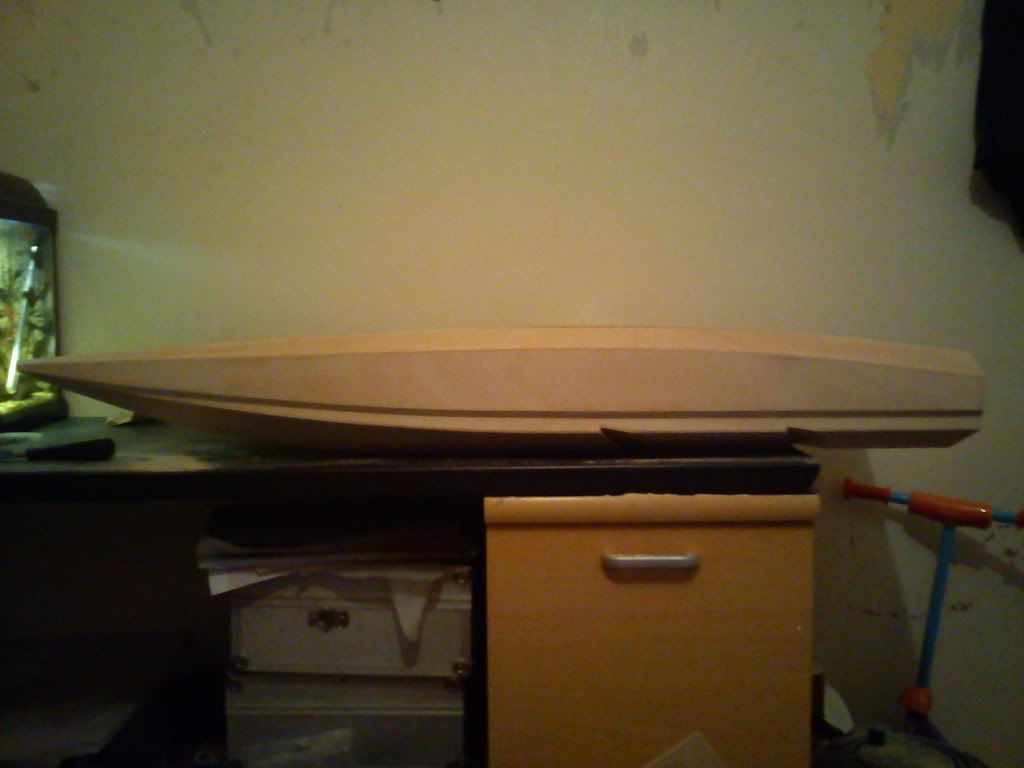
Hopefully this will perform the same and prove to be a fast,stable design,iv smoothed out some of the lines for more sleak look,just starting on the hatch hoping to have it finished soon

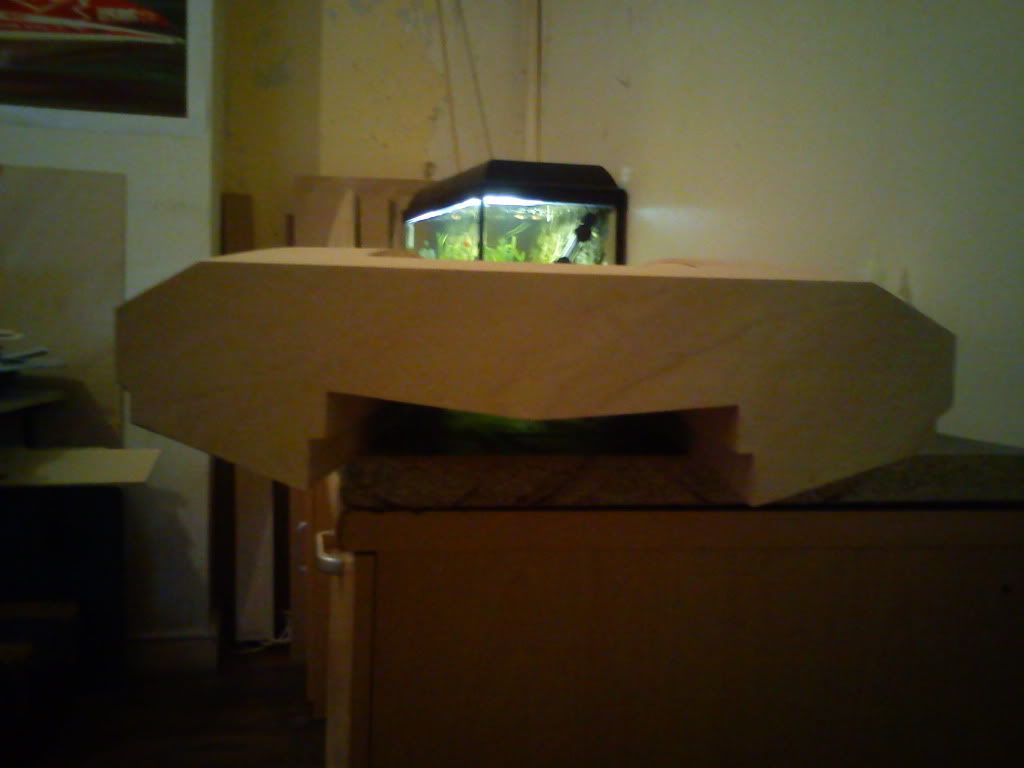
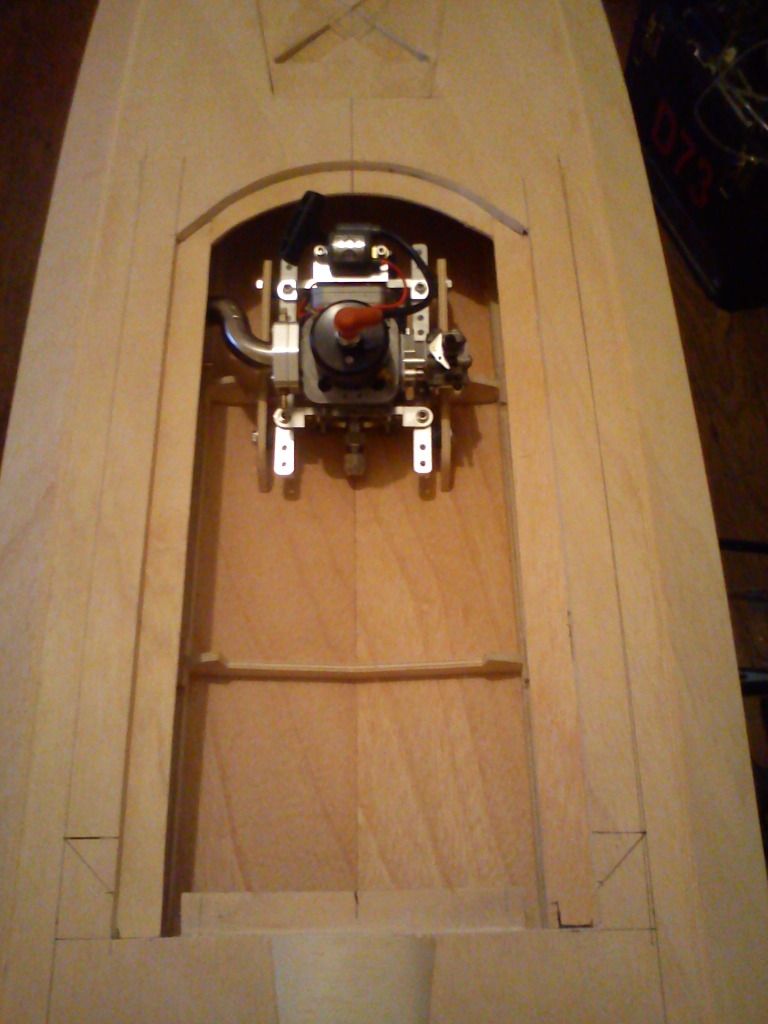
Pic of rough setup,will be powered by Se engine and enough room for exhaust and fuel bag in the sponson

This is the original 38" version
Hopefully this will perform the same and prove to be a fast,stable design,iv smoothed out some of the lines for more sleak look,just starting on the hatch hoping to have it finished soon
Pic of rough setup,will be powered by Se engine and enough room for exhaust and fuel bag in the sponson


 12-29-2012, 02:36 PM
#8
Thread Starter
Join Date: Sep 2010
Location: Staffs, UNITED KINGDOM
Posts: 895
Likes: 0
Received 0 Likes
on
0 Posts
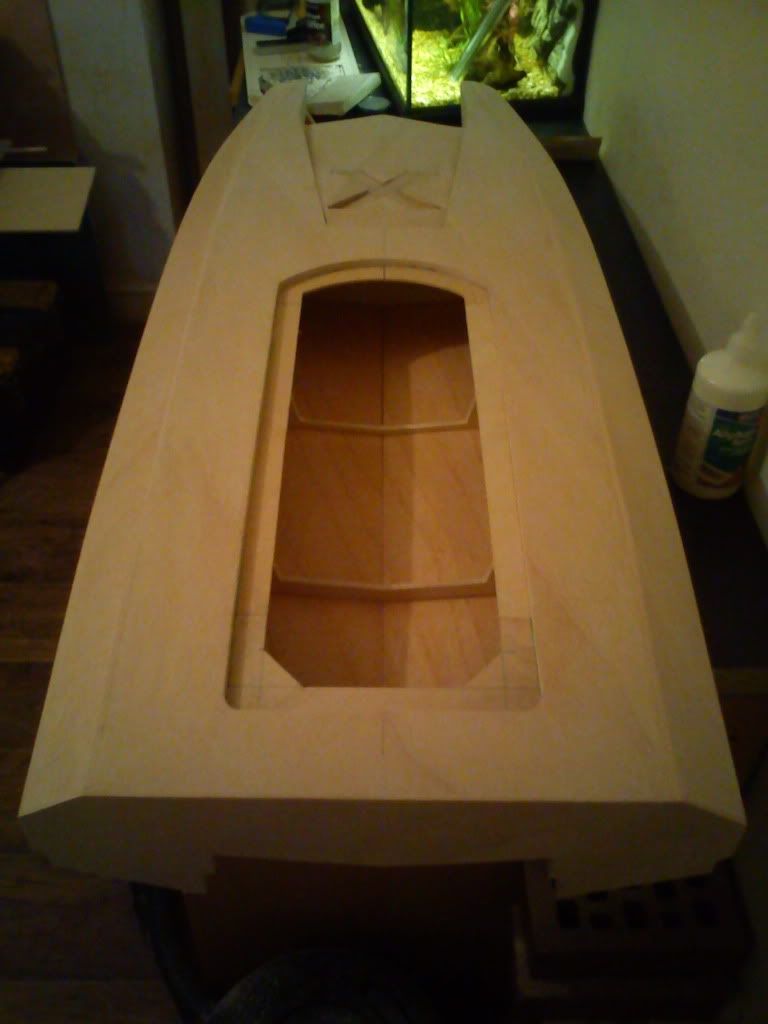
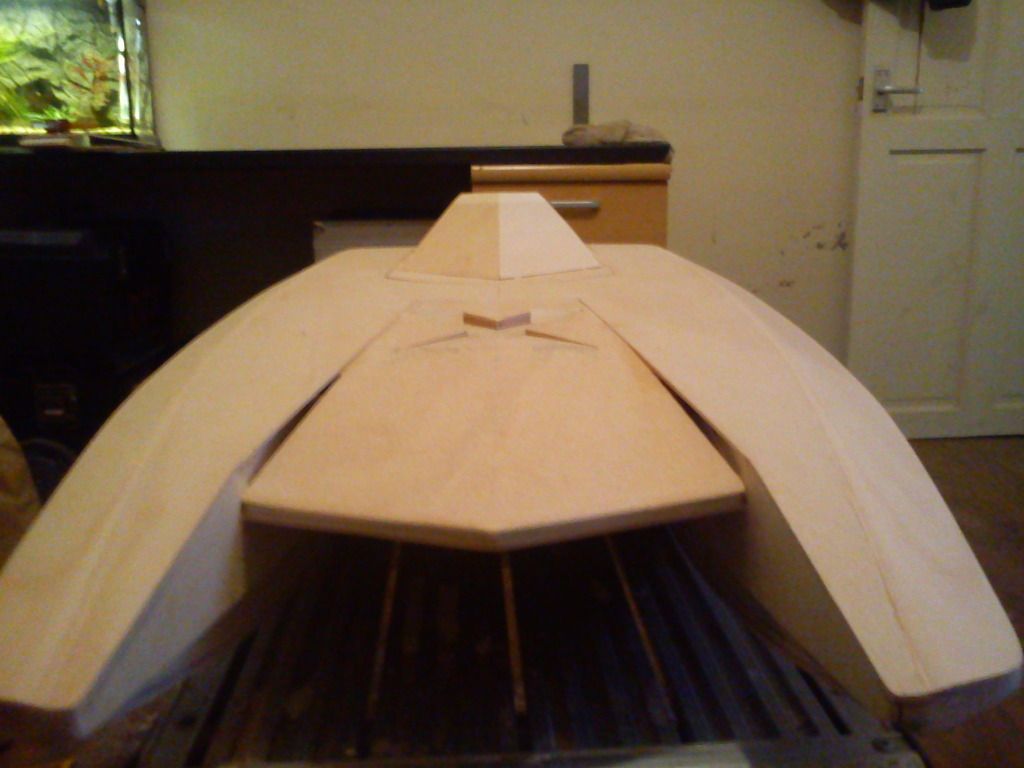
Started on the hatch,still some shaping up to do and add the roof duct,also going to design the air ducts on the rear to allow air to escape aswell just not sure yet which design ill go with


01-04-2013, 11:42 AM
#9
Thread Starter
Join Date: Sep 2010
Location: Staffs, UNITED KINGDOM
Posts: 895
Likes: 0
Received 0 Likes
on
0 Posts
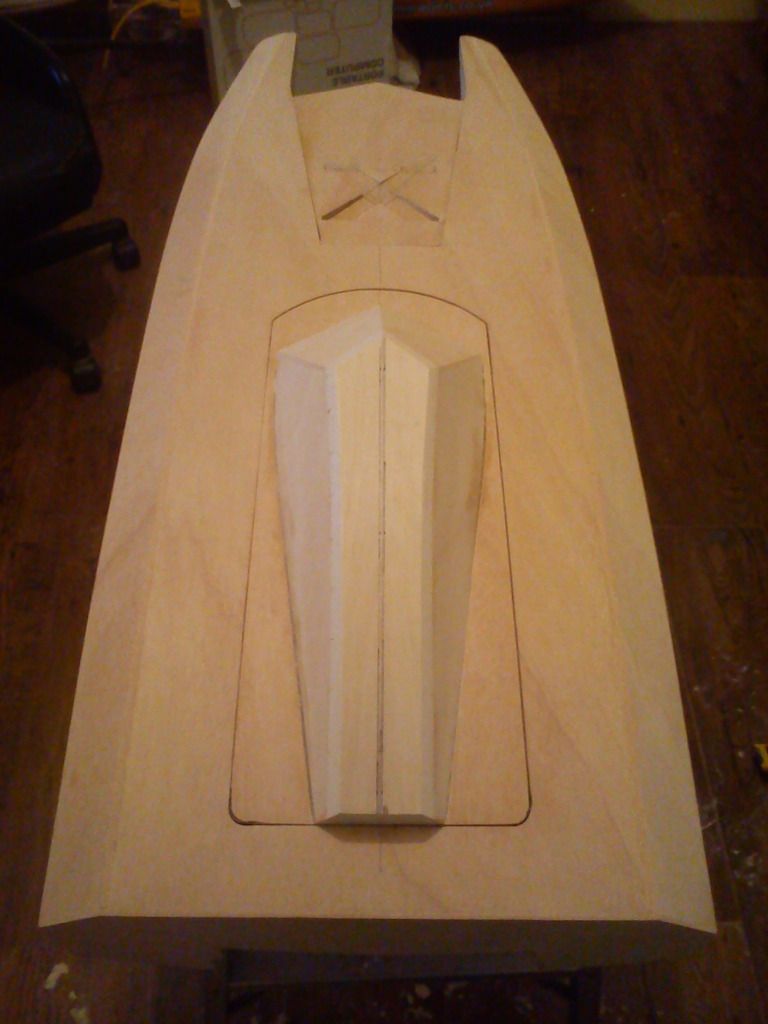
Thanks to sponsorship of Millpond models,engine,exhaust maniflold,mounts etc arrived today for the X cat,fitted it up to check clearances,once in FG will have more room round the exhaust but everything fits nicely so far
Also made the hatch opening 2" wider for better access and cleanrance

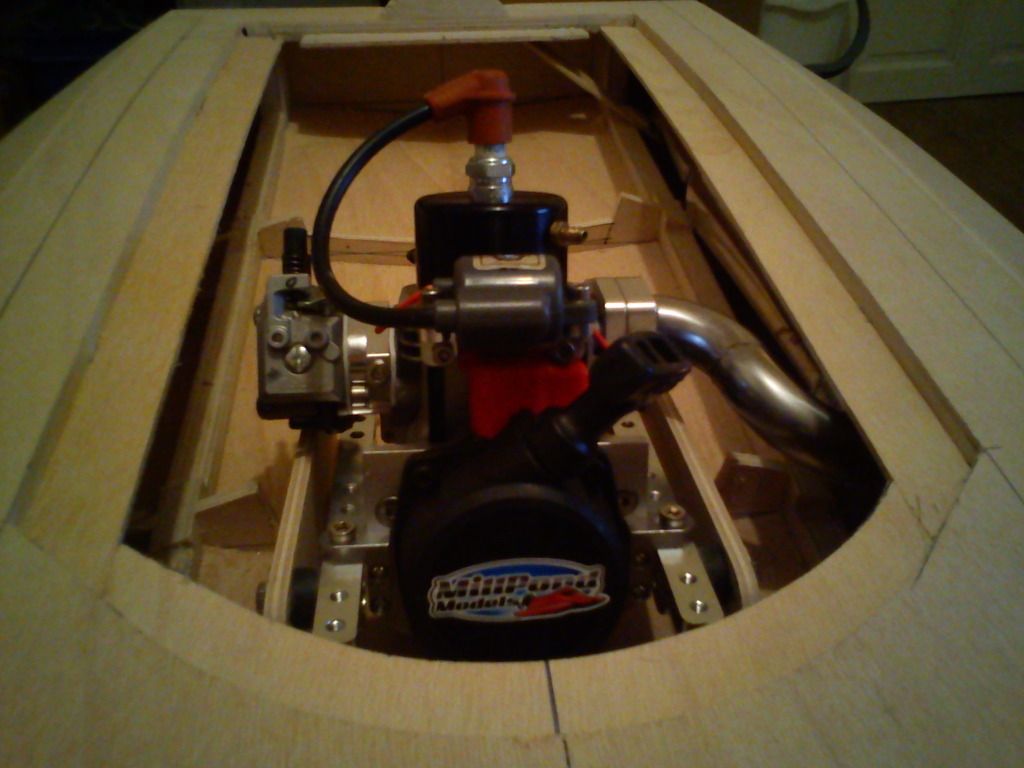
Also made the hatch opening 2" wider for better access and cleanrance
 01-05-2013, 01:08 PM
#12
Senior Member
Join Date: Apr 2007
Location: Cape Town, , SOUTH AFRICA
Posts: 822
Likes: 0
Received 0 Likes
on
0 Posts
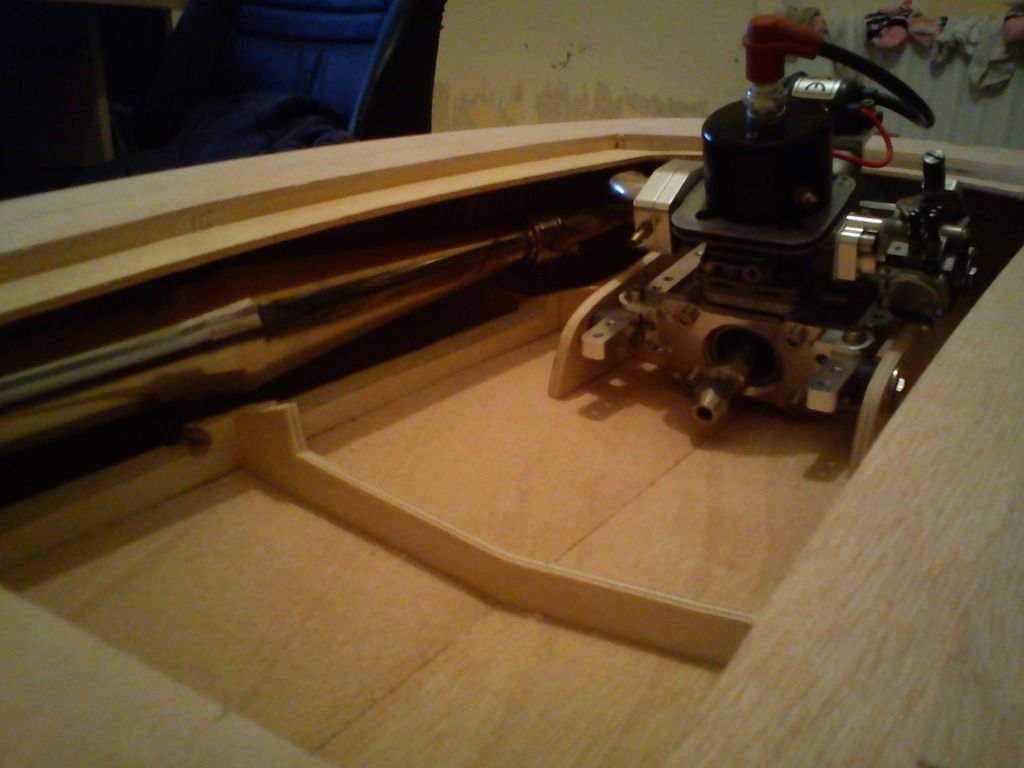
Make an option not to run the pipe in the hull. At the moment options are limited. Also that header will make the pipe length a tad long which might hinder performance. Not to mentions the swear words that might come from trying to get the clamps tightened under the deck or getting the waterlines fitted from pipe to side of the boat. Rest looks great.
Cobus
Cobus
01-05-2013, 02:01 PM
#13
Thread Starter
Join Date: Sep 2010
Location: Staffs, UNITED KINGDOM
Posts: 895
Likes: 0
Received 0 Likes
on
0 Posts
Hi Cobus
Thanks bud,my only worry is the pipe is slighty too long,i thought about it after trying it in
Problem i got is building it so it complies with the regs of the BMPRS racing that means the exhaust can have no more than 2" exposed so best way is inside the hull,i tried a 105* manifold and set the lenght of pipe roughly where id expect it to be and theres more than 2" exposed
The only thing i did think of was extened the back of the sponsons (but not the ride pads and transom) this way could use different manifold angled downwards to achieve getting the pipe in the sponson that would allow correct/closer distance to tune the pipe
01-07-2013, 01:35 AM
#14
Senior Member
Join Date: Apr 2007
Location: Cape Town, , SOUTH AFRICA
Posts: 822
Likes: 0
Received 0 Likes
on
0 Posts
OK
http://www.bhhanson.com/Images/headers.JPG
Try number 11,12 or 13 would get the pipe length shorter.
Cobus
http://www.bhhanson.com/Images/headers.JPG
Try number 11,12 or 13 would get the pipe length shorter.
Cobus
01-07-2013, 03:49 AM
#15
Senior Member
Join Date: Jan 2005
Location: blackpool, UNITED KINGDOM
Posts: 11,390
Likes: 0
Received 2 Likes
on
2 Posts
ORIGINAL: Hesco Racing
Make an option not to run the pipe in the hull. At the moment options are limited. Also that header will make the pipe length a tad long which might hinder performance. Not to mentions the swear words that might come from trying to get the clamps tightened under the deck or getting the waterlines fitted from pipe to side of the boat. Rest looks great.
Cobus
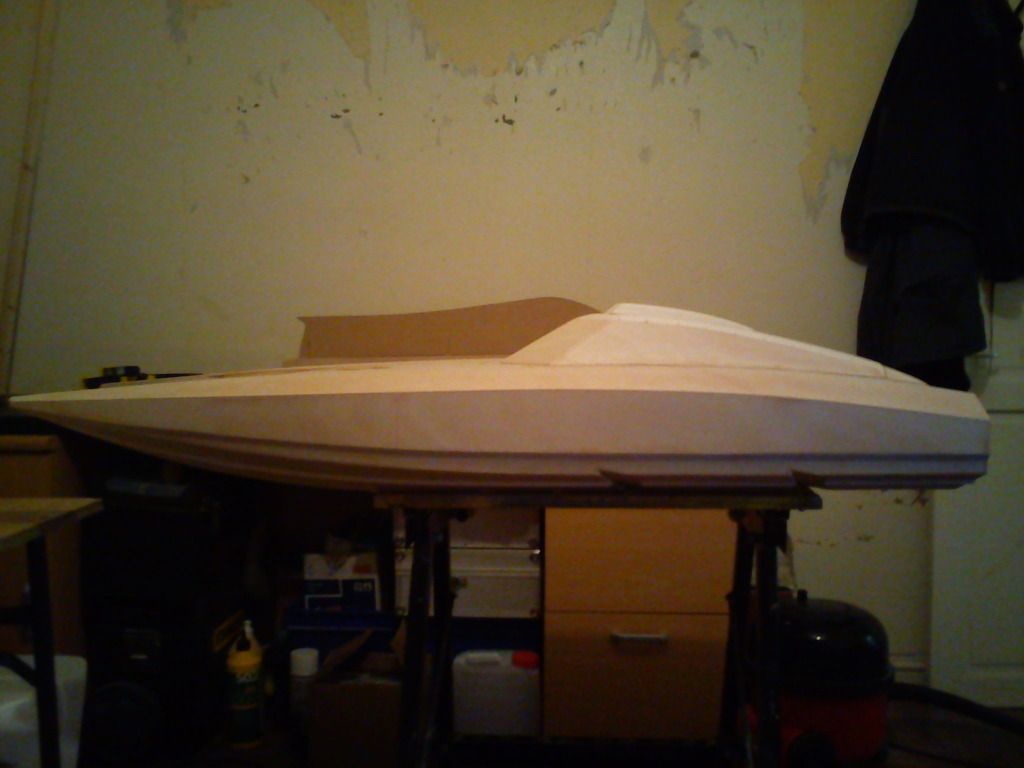
I do agree though things do look very cramped under that deck,heat buildup could be a problem not to mention difficulty for the builder in accessing things inside there.Boats perfect for electric but for gas i think the hatch is too narrow and too short,you could do with the motor been much further forward to allow dif headers to be used,racers dont want to use deep vee wrap forward headers.
Dont mean to be negative mate but i think if you intend making these available then you might want to rethink things slightly before you go to the trouble of making a mould etc.
On the plus side the hull looks nice.
Mart
01-07-2013, 04:14 AM
#16
Thread Starter
Join Date: Sep 2010
Location: Staffs, UNITED KINGDOM
Posts: 895
Likes: 0
Received 0 Likes
on
0 Posts
Cheers Cobus
Thanks mart
it looks more cramped than it actually is,there 1/2" framework top and bottom where the exhaust is fits in,i widend the hatch opening 2" and everything fits in nicely,its only the exhaust manifold/tuning the pipe that will be a problem,but looking at them exhaust manifolds cobus posted will solve that problem,the engine is on cg of the design of the hull so moving it further forward would cause running problems/porpoising
Ill be adding rear vents or louvres to allow heat escape just havnt got that far ahead LOL
01-07-2013, 06:04 AM
#17
Senior Member
Join Date: Jan 2005
Location: blackpool, UNITED KINGDOM
Posts: 11,390
Likes: 0
Received 2 Likes
on
2 Posts
Because you engines so far back it means you cant get the right pipe lengths needed and keep the pipe enclosed,moving it forward would make things much easier.On a cat the cog needs to be arround 34% not sure where your at now.
01-07-2013, 07:40 AM
#18
Thread Starter
Join Date: Sep 2010
Location: Staffs, UNITED KINGDOM
Posts: 895
Likes: 0
Received 0 Likes
on
0 Posts
i wont be changing anything it will work as it is,im gonna order a couple of the Bhhanson manifolds and experiment with those which im sure will work without issues and tune the length of the pipe where it needs to be
i know where the cg needs to be and is set at that
so will see once done and tested on the water where the next move is,its working progress and experimenting,this is only the 2nd gas boat iv designed and built so i expect teething issues but will work them out
i know where the cg needs to be and is set at that
so will see once done and tested on the water where the next move is,its working progress and experimenting,this is only the 2nd gas boat iv designed and built so i expect teething issues but will work them out
01-07-2013, 12:09 PM
#21
Senior Member
Join Date: Apr 2007
Location: Cape Town, , SOUTH AFRICA
Posts: 822
Likes: 0
Received 0 Likes
on
0 Posts
CG O CG where for art thow CG. I have always laughed when someone says I know where the Cg must be. I'v build I think 9 cats for our stock cat class from the same molder and each boats motor is at 32% (stock motor) and if you measure from the transom to the plug center everyone is different. No molder (in my opinion) can lay-up every boat exactly as the previous one unless it is vacuum infused molding. Now when you start playing with different HP motors the CG moves around the 34% but even that is a thumb-suck as I've seen hulls run stock motors at 34% and have the right racing attitude. Mod motor would then sit at near 36%. Having the limited space in front of your motor is a hindrance. But it is your design and if your happy with it keep it as is.
Also 2 cents on the lip the hatch sits on. Many boat makers never make that lip deep enough and as a result the hatch starts warping because it does not have a descent return lip. Insane gen 2 is one of the culprits only a 6mm hatch lip. Looks does not always make it practically better.
Keep it up your boat is going to be great and i wish you all the luck and lots of fun times on the dam.
Cobus
01-07-2013, 02:16 PM
#22
Senior Member
ORIGINAL: martno1fan
Cant run uncovered pipes here at recognised meets.
I do agree though things do look very cramped under that deck,heat buildup could be a problem not to mention difficulty for the builder in accessing things inside there.Boats perfect for electric but for gas i think the hatch is too narrow and too short,you could do with the motor been much further forward to allow dif headers to be used,racers dont want to use deep vee wrap forward headers.
Dont mean to be negative mate but i think if you intend making these available then you might want to rethink things slightly before you go to the trouble of making a mould etc.
On the plus side the hull looks nice.
Mart
ORIGINAL: Hesco Racing
Make an option not to run the pipe in the hull. At the moment options are limited. Also that header will make the pipe length a tad long which might hinder performance. Not to mentions the swear words that might come from trying to get the clamps tightened under the deck or getting the waterlines fitted from pipe to side of the boat. Rest looks great.
Cobus
Make an option not to run the pipe in the hull. At the moment options are limited. Also that header will make the pipe length a tad long which might hinder performance. Not to mentions the swear words that might come from trying to get the clamps tightened under the deck or getting the waterlines fitted from pipe to side of the boat. Rest looks great.
Cobus
I do agree though things do look very cramped under that deck,heat buildup could be a problem not to mention difficulty for the builder in accessing things inside there.Boats perfect for electric but for gas i think the hatch is too narrow and too short,you could do with the motor been much further forward to allow dif headers to be used,racers dont want to use deep vee wrap forward headers.
Dont mean to be negative mate but i think if you intend making these available then you might want to rethink things slightly before you go to the trouble of making a mould etc.
On the plus side the hull looks nice.
Mart
This is a great build Daz , if you was thinking about an electric option a twin would be the way to go with this size hull you would need a much bigger hatch the motors or the batterys would need to go in the sponsons it would be very cramped to work with that size hatch even with a single electric you would have large batterys to fit in the sponsons , also if the hatch was square at the front you could have wider spaced docking pins with just locks at the rear (and for electric easy to tape up )
for myself access is is very important when looking for a new hull please dont think its negative its just a thought before you get too far with the mold making ,
keep up the good work , phil.
01-08-2013, 10:37 AM
#23
Thread Starter
Join Date: Sep 2010
Location: Staffs, UNITED KINGDOM
Posts: 895
Likes: 0
Received 0 Likes
on
0 Posts
Appreciate all the comments and concerns etc but it will be staying as it is
there will be more room once moulded
Phil it will be staying gas powered for now,if i did think about running FE it would twin 56 series motors on HV setup,but too be honest i prefer the longer gas run times over FE
there will be more room once moulded
Phil it will be staying gas powered for now,if i did think about running FE it would twin 56 series motors on HV setup,but too be honest i prefer the longer gas run times over FE

 02-06-2013, 12:02 PM
#25
Junior Member
Join Date: Jan 2012
Location: Fairfax,
VA
Posts: 20
Likes: 0
Received 0 Likes
on
0 Posts
Nice build. How long did it take you to get to the first pic you posted? Your wood work looks very good and limited glue/bondo so far. What type of wood did you use to skin it and any plans of making a mold or is this the actual running hull?