


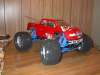
Proboat Miss Budweiser 1/12 – Awesome!
 03-24-2005, 03:51 AM
#1
Member
Thread Starter

Join Date: Dec 2004
Location: Atlanta,
GA
Posts: 95
Likes: 0
Received 0 Likes
on
0 Posts
Proboat Miss Budweiser 1/12 – Awesome!
Hopefully this post will help other Miss.Bud 1/12 owners get their boat up and running. Without rcuniverse.com and the really great members on this forum I don’t believe I would have been able to get my Bud running the way it is now without some headache so I wanted to give back to the forum. No I do not work for HorizonHobby/Proboat.
My wife bought me the Miss Budweiser as a Valentines Day’s gift and I must say it’s an awesome boat, it looks and runs great. I am not new to boats but this is my first nitro and hydro boat so I am a beginner in that respect.
Before opening the box I did a lot of research and was a bit discouraged by the many people that were having issues running it and the not so positive crowd that were bashing the boat, at this point I thought about returning[ ] it to the store (I am glad I didn’t because I read reviews from other boaters and magazines that told a more positive story so I went ahead and got started on breaking in the boat. I included a laundry list of items and useful links noted at the bottom.
Breaking in the boat:
These are the steps I took.
a.)
Don’t skip this step:
Read all 3 manuals (Python Radio, Dynamite .15 engine, Proboat Miss Bud) thoroughly. I understand we are in a Plug and Play generation and expect that all gadgets and gizmos work with a push of a button, get that idea out of your head because this is not a toy and you can be injured or injure someone if you don’t know what your doing. Sorry but some patience is required .
.
b.)
Go over all the screws and make sure they are all tightened up.
c.)
Using the glow plug wrench (DYN2510) remove the glow plug from the engine.
Get a bottle of after-run oil (I use Prather after Run Engine Oil) and place a few drops into the engine chamber and a few drops into the carburetor. Put a cloth over the glow plug opening (so the oil doesn’t splash in your face) and pull on the starter to work the oil into the engine. (This will make it easier to pull start the engine and help lessen the wear on the cylinder while starting).
Screw the Glow Plug back into the engine head.
d.)
Remove the drive shaft per the instructions in the manual under Maintainance: Section 6 for original version or Section 7 for the Flex cable version and lubricate the drive shaft with silicone grease (I use Prather Cable Grease). Replace the shaft and note that the flat edge on the shaft lines up with the screw in the Drive Dog.
If you don’t have the manual you can get it here for free.
[link=http://www.horizonhobby.com/ProdInfo/Files/prb2200-manual.pdf]1st version Miss Budweiser manual[/link]
[link=http://www.horizonhobby.com/ProdInfo/Files/MsBudlow-res.pdf]Improved Miss Budweiser 1/12 RTR Flex Cable version [/link]
e.)
Get Fuel Line clamps (see picture 1) and put them on each end of the fuel line. Tank to engine and exhaust to tank. This is to prevent air pressure/fuel from leaking out of the pressurized fuel system.
Test the tank for leaks before adding fuel. You can do this by taking the tank out, submerge it under water, seal one end of the fuel line and blow air into the other end. If air leaks at the outlets on the tank use the fuel line clamps there. If the cap leaks make sure it’s on tight, some users on this forum have suggested using a thin garden hose washer or a paper washer from another bottle or tank cap. After testing the tank reinstall in hull.
f.)
Read Section 5 in the manual about the needle valve settings. I never messed with any of the needles except for the HIGH SPEED valve. Leave the other valves alone. The Manual says 3 ½ turns out (counter clockwise) from the closed position. I double checked this by turning my high speed needle all the way in (clockwise) until I could not turn it in anymore and then count the turns out (counter clockwise) until I was 3 ½ out. This should give you a slightly rich mixture.
Note: a turn is a complete 360 degree rotation. It may help to mark one side of the screwdriver with a marker so you can know exactly where you are in the turn.
Turn the Radio ON and note the range that the throttle moves when you pull the trigger on the radio, note how the carburetor opens and closes when you pull and release the trigger. If the carburetor is closed all the way when you release the trigger the engine will not start or it will be very difficult to. You need to start the engine with the carburetor slightly open but not too much or you can damage the engine when starting from over reving. This can be easily done from the radio by turning the throttle adjust knob until the carburetor opens a quarter of the way.
Add fuel (I used Trinity Break in Fuel 20%). then prime the engine by pulling on the starter a few times before adding the Glow starter to get fuel in the line. Once I saw fuel in the line I added the glow starter and gave it a few short pulls. Mine started with about 2 or 3 pulls.
g.)
I read conflicting details from experienced boaters on breaking in a nitro boat engine out of water and in water. I did both and went with a magazines method and rigged up an in shop water system (See picture 2). to keep the engine cool while I ran the break in fuel through it making sure not to over rev the engine. I basically ran a few tanks at idle, a tank at ¼ throttle, 2 tanks at ½ throttle and a tank at full. At each throttle range I only held the throttle down for a few seconds and then released for a few seconds then back on for a few seconds until the tank was finished. I ran the last tank at full throttle until it was finished and then I was off to the lake to complete the break in process doing the same thing in water until the engine responded with a high pitched sound.
Boat Upgrades:
The following upgrades are listed as necessary & optional.
Necessary Upgrades:
a.)
Aeromarine 7008 - Autobailer (Applies to the Original Miss.Bud 1/12)
[link=http://www.rocketcityracing.com/pilot.asp?pg=products&specific=jrgpmrn0]Aeromarine 7008 - Autobailer [/link]
If water gets in the hull it will be sucked out the back while it’s running. I installed mine on the left stern (rear) sponson since you will be making mostly right turns the water will rush to the left and out the autobailer. There are posts on rcuniverse explaining the installation. One tip is to use tape over the location before your drill preventing the outer layer from splitting and chipping the finish. I also used a special drill bit that prevented ripping.
b.)
Get good hex tools with comfort-grip anodized handles, stay away from the cheap stuff they flex too much and wear out the screw heads.
c.)
Fuel Line clamps - Get these at any Hobby store.
d.)
[link=http://www2.towerhobbies.com/cgi-bin/wti0001p?&I=LX9154&P=ML]Bru Line Pushrod seals w/Hardware [/link]
Replace the existing seals with these, use silicone on the screws to make them water tight. They help keep water out of the radio box and boat hull.
e.)
Prather Micro Balloon & Epoxy
[link=http://www2.towerhobbies.com/cgi-bin/wti0001p?&I=LXDS36&P=7]Prather Micro Balloon [/link]
I agree with the other bud owners that some areas inside the hull are a bit thin especially around the engine compartment. The area under the engine seems adequate but around the engine area it's too thin and after hearing all the horror stories of people cracking the hull while starting it I had to find a solution.
I whipped up a mixture of 90 minute Epoxy and Prather Micro Balloon. The label on the micro balloon will give you the ratio to use. The micro balloon I used is a very fine brown powdery substance; I recommend you use a dust mask while working with it. I used Devcon 90 minute epoxy (syringe type) because it allowed me time to get the mixture right and to apply the mixture to the INSIDE of the hull without it drying on me too soon. Once mixed I had a thick brown paste with the consistency of Elmer’s glue.
I applied this using disposable epoxy brushes to all the areas around the engine compartment and areas in the hull that I felt flexing was an issue especially where the hull would be sitting on the stand while starting the bud. I also applied some to the hull area above the fuel tank and to the underside of the cowl lip where it meets the hull. This allowed me to hold the cowl and toss the bud myself without the risk of cracking the cowl or the hull. It would also help to apply some of the mix on areas of the cowl and around the screw holes that flex to minimize the chance of the cowl ripping out of the screws while tossing.
Also when applying the mixture try to apply it in a balanced manner. It will add weight, not a significant amount but if you add the mixture on one side of the hull try and add the same amount to the other side as well to keep things balanced while the boat gets on plane.
Once this stuff dries it will be very smooth and does not need sanding. I left it to cure for 24 hours and when I came back the hull was solid. No more flexing or very little flexing in certain areas.
f.)
3M Transparent Duct tape
This is very sticky and I was only able to find it at Lowes and Wal-Mart. When I asked for it at the "other big hardware store" they looked at me funny and said " Transparent duct tape?? Never heard of it, what you want that for? " after that reply I didn't bother trying to explain I wanted to keep water out of my Radio box on my RC boat, he may have then said whats RC? So I just looked around for it myself. I used this to tape down the lid for the receiver box, standard radio sealing tape woudn't seal too well to the surface, duct tape did the trick.
g.)
Medium Party Balloons. I stuffed the Receiver and Battery pack in 2 balloons each and then zipped tied the ends. Helps keep them dry.
h.)
Build a stand out of PVC and use pipe insulation to cover the pipe. I made my stand with a joint (using a smaller pipe) in the middle right under the engine area. This relieves some of the pressure off the hull while holding the engine down to start the boat. (See picture 3). I only use the original stand to carry the boat in the tote bag.
I.)
Door and Window High Density Foam Tape weather-strip 1/8” thick ¼” wide. – Necessity
After reading about the many people with water in the Bud I found that simple 2$ dollar foam tape can seal the cowl up good. I used some light CA along the areas that I was going to apply the foam to. Don’t use too much or else it will make the foam get hard. As you can see from the pics I added the foam tape to the inside of the cowl and to the top of the cowl lip. If you look closer at the underside of the cowl lip you can see the micro ballon. I suggest you apply more to the cowl as it is a bit flexible. After running about a gallon of fuel in my bud I get maybe a few teaspoons full of water into the hull if any at all under normal conditions. (See Picture 4 & 5)
J)
Flotation:
This applies to the Original Miss.Bud 1/12. Use Pool noodles, pipe insulation or packaging peanuts to help the boat float if you run into trouble. I stuffed the sponson with packaging peanuts and stuff the sides all the way to the stern of the Bud with pipe insulation. It helps to lubricate the pipe insulation with light oil making it easier to slide inside the hull.
I also glued some strips of pipe insulation to the cowl in the event it flew off and I had to retrieve it. Trim the insulation so it does not restrict air flow, it does not take much to keep the cowl or the bud afloat.
k)
Retrieval system:
This is not an upgrade but get a good retrieval system. I have 2. I have an electric boat rigged with a tennis ball attached to a long floating cord. I make a couple of tight turns around a stranded boat and snag it on the rudder or something (it would help to glue a small hook onto the front of the hull to help the line snag there instead) and bring it back slowly. Once I retrieved my bud in the middle of the lake and was bringing it in and could not tell that I was towing the Bud from the rudder a bit too fast since it was so far away and when it got closer I realised that my towing caused water to rush over the back into the engine compartment and submerged the Bud[X(], so tow slowly. Luckly I added the floatation and when I stopped near the shore it floated right back to the surface with most of the water draining out via the autobailer.
I also use the fishing like attached to a tennis ball method. This works well if the boat is about 80 or so feet away. Throw the ball over the boat and move the line around until you snag the boat and then reel the ball and the boat back in slowly. You can also attach the ball to a fishing poll and cast the ball over the boat and reel it in.
You can get an inflatable raft here for cheap :[link=http://tinyurl.com/6z7v9]Inflatable raft[/link]
[link=http://www.rcgroups.com/forums/showthread.php?t=266574]Boat Retrieval Systems[/link]
Optional Upgrades:
a.)
Prather Water Outlet – optional upgrade (Applies to the Original Miss.Bud 1/12)
[link=http://www2.towerhobbies.com/cgi-bin/wti0001p?&I=LXDR18&P=ML]Prather Water Outlet – optional upgrade[/link]
This makes the water outlet looks neat and will keep the water outlet line from falling into the hull. My factory water outlet was on really tight and sealed well with silicone but the chrome Prather outlet adds a nice touch.
b.)
Bru Line Antenna - Optional – looks good, sturdy, has a mast cap on the top.
[link=http://www2.towerhobbies.com/cgi-bin/wti0001p?&I=LX9162&P=ML]Bru Line Antenna [/link]
My factory antenna wouldn’t stay in the hole firmly. I could have used silicone to make it stay but I liked the Bru-Line antenna, it’s securely screwed to the hull.
Cleaning and maintaining the finish:
I use denatured alcohol to clean up fingerprints and oil on the hull.
Use quick spray wax on hull to keep it shinny. I also wax and clean the underside of the hull to help lessen the drag.
Use tape on the edge of horizontal stabilizer (sounds cooler) or rear wing to prevent the screw driver handle from scratching the finish when trying to remove the tuned pipe.
Troubleshooting issues I see other boaters have:
1.) Getting the right Nitro/Air mixture to start the boat.
- make sure fuel system is air tight
- Richen out or Lean in the valve depending on weather and location.
- Use good fuel, fuel can go bad if not stored properly
- Check to see that that glow plug is good
- If the starter is hard to pull, loosen the glow plug just a bit to lessen the compression. When started tighten the
plug.
2.) Keeping water out.
- Change push rod seals
- Add window/door seal to cowl
- Use waterproof tape or transparent duct tape to seal up the radio box.
Another way that water gets into the boat is through the three holes in the cowl (very rarely). This has only happened to me a few times when I ran the bud in 10 – 20 mph gust winds[X(] with the water choppy (not recommended) and watch this baby get some air[X(], I must say I felt a bit nervous because the boat look like it would take off and flip. When it did look like it would take off I would make corrections and back off the throttle a bit to regain control. Regardless of the water getting into the 3 holes never cover them up, the engine needs to breathe and stay cool while running.
3.) Getting the boat on plane.
- Must toss the boat at full throttle about 6 inch from the surface with a gentle forward motion.
- Engine must be tuned (correct mixture) correctly to give the boat the power needed to stay on plane especially on turns when the prop loads up the engine.
4.) Oily gunky/residue around engine pipe area – rcboatmodeler 05 May/June issue has a great article titled “ Get rid of the goop” in the RC Zone section.
- Tighten the muffler bolts
- Zip tie the tuned pipe coupler ( don’t let the pipes touch it will cause radio interference)
- clamp the exhaust line going to the tank
5.) Servos going crazy.
- grease up the shaft, metal on metal contact creates some kind of interference with the receiver. Use lots and lots of grease.
- Maybe they got wet, use a blow dryer to dry them out and let them sit for awhile powered off before using them again.
- Someone else in the area is on the same frequency, if this is the case I wouldn't run the boat at all until I am sure the frequency is clear.
Best Practices:
Most of these are common sense practices.
Do check the radio range before each days run. You may also discover that you are not the only one in the area on the same frequency.
Ensure the rudder range dial on the radio is set to maximum or the boat won't turn sharp enough.
Check all bolts and make sure the fuel tank cap is on tight (once my cap came off[X(] after a lap and shut the boat down, only to discover that I put the wrong cap from the fuel bottle on the tank
To stop the boat push the throttle trigger forward. This will cause the carburetor to close and shut down the engine, this method works perfectly. I had to use this method once when I made a turn too wide and was headed for some rocks (it’s true what they say rocks attract boats. I pushed the throttle forward in time and shut the boat down before it hit the rocks and just retrieved the boat after.
I try to grease the shaft after each hour now.
Replace nicked plastic props, they will cause the boat to cavitate. (Relatively cheap, 2$)
Remove any floating sticks in the surrounding area before running. I use my fishing line and tennis ball to snag big branches.
I try not to hit any live animals (ducks, goose, swans, people), people’s fishing lines and I pray that my lake doesn’t have turtles or frogs (haven’t seen any yet)
I am still running the stock prop which seems to work well and still using the original glow plug.
Anticipate all turns, start turning the boat early. Once you get the hang of the boat you will know when to make the turns.
You can make left turns, I make them all the time, just be very cautious[:-]. I only make left turns when I need to correct the boats course.
Stay focused with you eyes on the boat at all times while running because 30 mph into the rocks, duck, shore, etc.. can happen in the blink of an eye. Don’t let anyone distract you while running.
Horizon Hobby/Proboat Support:
Their technical support has been great and responsive. Just don't be a jerk when you call and they will help you out. People don’t like to talk to jerks and they will be less likely to help if you are one.
When I couldn’t pull the screw in the drive dog to remove the shaft and the only way around this was to remove the engine and tank (big pain) I contacted them and they suggested that I heat up the screw and remove it but by then it was too late I had already rounded out the screw and was not about to get the Dremel out to try and fix it but they sent me a new shaft with drive dog in 2 days free of charge.
My tank was leaking air and they sent me a new tank and cap, also 2 days free of charge.
If your boat is still under warranty don’t hesitate to call, they will give you good support and because of their great support I bought a lot more stuff from them afterwards.
Other Upgrades:
- Metal Y535 Octura blade and other sizes
- Du-Bro Kwik-Switch mount
- Better sealing of Radio Box.
- Faster rudder servos
- [link=http://www2.towerhobbies.com/cgi-bin/WTI0095P?FVSEARCH=S684&FVPROFIL=++&search3=Go]TigerDrive Starter[/link] - replaces the pull starter and allows you to use a portable drill to start the boat. Confirm size here http://www.sullivanproducts.com before ordering
My first run:
After a few half ***** tosses I figured out the boat only needs a gentle toss about 6 inches above the water with a gentle forward motion. The boat ran great, I was a bit surprised by the speed once the boat got on plane and was nervous at first ( I know some of you think 30 mph is nothing, but for my first time controlling something other than my car and fullsize boat that I sit in at that speed had my adrenaline pumping. My biggest fear was loosing control and crashing into the rocks or the shore since a few people on this forum reported that happend to them.
Once the engine was broken in I was able to put the boat in the water and get it to plane after about 10 seconds but usually I just toss it since that’s quicker and less likely to cause the exhaust pipe to get covered with water from the back wash and shut down the engine. The boat ran great and each time I was able to bring it in to shore and add fuel, start it on the first pull and I was off again, no fiddling with the mixture.
2nd day I came back to the lake and tried to start her up and she gave me a little trouble, this is where I said you need patience because from what I have read about Nitro engines they can be very fickle from day to day based on weather condition so keep your cool and just keep trying. It took me about 30 mins to figure out that since the weather was much colder I needed to lean the needle in a bit. Since I was trying to start her a bit rich she was flooded and hydro locked, I removed the glow plug, turn her upside down to drain the excess fuel while pulling the starter flipped her back over screwed the glow plug back in made about a ½ to 1 turn in and she started and I was off again. I then started to pay special attention to the weather before I go out each time. Colder weather = lean her IN, Warmer weather = Richen her OUT. You will find more details on fuel mixture on this forum.
Conclusion:
So the box says RTR and some people gripe about the boat being crap etc. because they have a few issues, most of the problem I see people having is they don't take time to understand what is wrong and try to work through them before giving up. Like most things man made its not perfect, a little patience with some elbow grease thrown in will make this purchase more rewarding. The price of $299 is a steal even with all the items you may have to add. If the boat was say $499 and I had to do this work then I would probably feel a bit cheated. I didn't mind that I had to do some work to get this boat to where it is now, I actually had more fun working on it than if I had taken it out of the box and thrown it in the water. I have more appreciation for the boat now and this is what makes this hobby a hobby. Just remember to have fun!.
I will post a few pics of her running in the water and a link to a video before the weekend.
Good Reads:
Do a search on rcuniverse for Miss Bud and read all the posts. They have tons of useful info
Performance Mods for the Miss Budweiser Hydro
http://www.*********.org/missbud_mods.htm
http://www.rcreality.com/missbud.htm
Nitro Engine Basics: Starting, Cleaning and Fixing Problems
http://p198.ezboard.com/fehobbiesfrm...picID=56.topic
http://www.namba.com/index_ie.htm
Boat tips
http://www.funrcboats.com/tips1.htm
http://www.rcuniverse.com/forum/m_29.../tm.htm#299959
Links:
Dubro E/Z Glo GLo-Plug Ignitor with Beep tester
http://www2.towerhobbies.com/cgi-bin...&I=LXJGS6&P=ML
Fuel:
Trinity Break In Fuel 20% Quart
http://www2.towerhobbies.com/cgi-bin...?&I=LXUU69&P=7
Trinity Monster Brew 20% Quart
http://www2.towerhobbies.com/cgi-bin...?&I=LXGPG9&P=7
Wildcat Eliminator Plus Car 20%N 18%O Quart
http://www2.towerhobbies.com/cgi-bin...&I=LXAKD8&P=ML
Prather After Run Engine Oil 2 oz.
http://www2.towerhobbies.com/cgi-bin...&I=LXDR80&P=ML
Prather Cable Grease
http://www2.towerhobbies.com/cgi-bin...&I=LXDR02&P=ML
Bru Line Pushrod seals w/Hardware
http://www2.towerhobbies.com/cgi-bin...&I=LX9154&P=ML
Prather Micro Balloon
http://www2.towerhobbies.com/cgi-bin...?&I=LXDS36&P=7
Bru Line Antenna - Optional - you can silicone the factory antenna
http://www2.towerhobbies.com/cgi-bin...&I=LX9162&P=ML
Aeromarine 7008 - Autobailer - necessary
http://www.rocketcityracing.com/pilo...cific=jrgpmrn0
Prather Water Outlet - optional
http://www2.towerhobbies.com/cgi-bin...&I=LXDR18&P=ML
The opinions expressed here are mine and not those of RC Universe and no I do not work for Proboat. You are free to use this advice as you see fit. I accept no liability for anything that may happen to you, your boat, your dog or anyone for that matter from using this information. I hope this information proves useful to someone. If you see any incorrect information please correct me, I am not an expert and just trying to share my experiences with the Miss Budweiser 1/12.
Hopefully this post will help other Miss.Bud 1/12 owners get their boat up and running. Without rcuniverse.com and the really great members on this forum I don’t believe I would have been able to get my Bud running the way it is now without some headache so I wanted to give back to the forum. No I do not work for HorizonHobby/Proboat.
My wife
bought me the Miss Budweiser as a Valentines Day’s gift and I must say it’s an awesome boat, it looks and runs great. I am not new to boats but this is my first nitro and hydro boat so I am a beginner in that respect.Before opening the box I did a lot of research and was a bit discouraged by the many people that were having issues running it and the not so positive crowd that were bashing the boat, at this point I thought about returning[
] it to the store (I am glad I didn’t because I read reviews from other boaters and magazines that told a more positive story so I went ahead and got started on breaking in the boat. I included a laundry list of items and useful links noted at the bottom.Breaking in the boat:
These are the steps I took.
a.)
Don’t skip this step:
Read all 3 manuals (Python Radio, Dynamite .15 engine, Proboat Miss Bud) thoroughly. I understand we are in a Plug and Play generation and expect that all gadgets and gizmos work with a push of a button, get that idea out of your head because this is not a toy and you can be injured or injure someone if you don’t know what your doing. Sorry but some patience is required
. b.)
Go over all the screws and make sure they are all tightened up.
c.)
Using the glow plug wrench (DYN2510) remove the glow plug from the engine.
Get a bottle of after-run oil (I use Prather after Run Engine Oil) and place a few drops into the engine chamber and a few drops into the carburetor. Put a cloth over the glow plug opening (so the oil doesn’t splash in your face) and pull on the starter to work the oil into the engine. (This will make it easier to pull start the engine and help lessen the wear on the cylinder while starting).
Screw the Glow Plug back into the engine head.
d.)
Remove the drive shaft per the instructions in the manual under Maintainance: Section 6 for original version or Section 7 for the Flex cable version and lubricate the drive shaft with silicone grease (I use Prather Cable Grease). Replace the shaft and note that the flat edge on the shaft lines up with the screw in the Drive Dog.
If you don’t have the manual you can get it here for free.
[link=http://www.horizonhobby.com/ProdInfo/Files/prb2200-manual.pdf]1st version Miss Budweiser manual[/link]
[link=http://www.horizonhobby.com/ProdInfo/Files/MsBudlow-res.pdf]Improved Miss Budweiser 1/12 RTR Flex Cable version [/link]
e.)
Get Fuel Line clamps (see picture 1) and put them on each end of the fuel line. Tank to engine and exhaust to tank. This is to prevent air pressure/fuel from leaking out of the pressurized fuel system.
Test the tank for leaks before adding fuel. You can do this by taking the tank out, submerge it under water, seal one end of the fuel line and blow air into the other end. If air leaks at the outlets on the tank use the fuel line clamps there. If the cap leaks make sure it’s on tight, some users on this forum have suggested using a thin garden hose washer or a paper washer from another bottle or tank cap. After testing the tank reinstall in hull.
f.)
Read Section 5 in the manual about the needle valve settings. I never messed with any of the needles except for the HIGH SPEED valve. Leave the other valves alone. The Manual says 3 ½ turns out (counter clockwise) from the closed position. I double checked this by turning my high speed needle all the way in (clockwise) until I could not turn it in anymore and then count the turns out (counter clockwise) until I was 3 ½ out. This should give you a slightly rich mixture.
Note: a turn is a complete 360 degree rotation. It may help to mark one side of the screwdriver with a marker so you can know exactly where you are in the turn.
Turn the Radio ON and note the range that the throttle moves when you pull the trigger on the radio, note how the carburetor opens and closes when you pull and release the trigger. If the carburetor is closed all the way when you release the trigger the engine will not start or it will be very difficult to. You need to start the engine with the carburetor slightly open but not too much or you can damage the engine when starting from over reving. This can be easily done from the radio by turning the throttle adjust knob until the carburetor opens a quarter of the way.
Add fuel (I used Trinity Break in Fuel 20%). then prime the engine by pulling on the starter a few times before adding the Glow starter to get fuel in the line. Once I saw fuel in the line I added the glow starter and gave it a few short pulls. Mine started with about 2 or 3 pulls.
g.)
I read conflicting details from experienced boaters on breaking in a nitro boat engine out of water and in water. I did both and went with a magazines method and rigged up an in shop water system (See picture 2). to keep the engine cool while I ran the break in fuel through it making sure not to over rev the engine. I basically ran a few tanks at idle, a tank at ¼ throttle, 2 tanks at ½ throttle and a tank at full. At each throttle range I only held the throttle down for a few seconds and then released for a few seconds then back on for a few seconds until the tank was finished. I ran the last tank at full throttle until it was finished and then I was off to the lake to complete the break in process doing the same thing in water until the engine responded with a high pitched sound.
Boat Upgrades:
The following upgrades are listed as necessary & optional.
Necessary Upgrades:
a.)
Aeromarine 7008 - Autobailer (Applies to the Original Miss.Bud 1/12)
[link=http://www.rocketcityracing.com/pilot.asp?pg=products&specific=jrgpmrn0]Aeromarine 7008 - Autobailer [/link]
If water gets in the hull it will be sucked out the back while it’s running. I installed mine on the left stern (rear) sponson since you will be making mostly right turns the water will rush to the left and out the autobailer. There are posts on rcuniverse explaining the installation. One tip is to use tape over the location before your drill preventing the outer layer from splitting and chipping the finish. I also used a special drill bit that prevented ripping.
b.)
Get good hex tools with comfort-grip anodized handles, stay away from the cheap stuff they flex too much and wear out the screw heads.
c.)
Fuel Line clamps - Get these at any Hobby store.
d.)
[link=http://www2.towerhobbies.com/cgi-bin/wti0001p?&I=LX9154&P=ML]Bru Line Pushrod seals w/Hardware [/link]
Replace the existing seals with these, use silicone on the screws to make them water tight. They help keep water out of the radio box and boat hull.
e.)
Prather Micro Balloon & Epoxy
[link=http://www2.towerhobbies.com/cgi-bin/wti0001p?&I=LXDS36&P=7]Prather Micro Balloon [/link]
I agree with the other bud owners that some areas inside the hull are a bit thin especially around the engine compartment. The area under the engine seems adequate but around the engine area it's too thin and after hearing all the horror stories of people cracking the hull while starting it I had to find a solution.
I whipped up a mixture of 90 minute Epoxy and Prather Micro Balloon. The label on the micro balloon will give you the ratio to use. The micro balloon I used is a very fine brown powdery substance; I recommend you use a dust mask while working with it. I used Devcon 90 minute epoxy (syringe type) because it allowed me time to get the mixture right and to apply the mixture to the INSIDE of the hull without it drying on me too soon. Once mixed I had a thick brown paste with the consistency of Elmer’s glue.
I applied this using disposable epoxy brushes to all the areas around the engine compartment and areas in the hull that I felt flexing was an issue especially where the hull would be sitting on the stand while starting the bud. I also applied some to the hull area above the fuel tank and to the underside of the cowl lip where it meets the hull. This allowed me to hold the cowl and toss the bud myself without the risk of cracking the cowl or the hull. It would also help to apply some of the mix on areas of the cowl and around the screw holes that flex to minimize the chance of the cowl ripping out of the screws while tossing.
Also when applying the mixture try to apply it in a balanced manner. It will add weight, not a significant amount but if you add the mixture on one side of the hull try and add the same amount to the other side as well to keep things balanced while the boat gets on plane.
Once this stuff dries it will be very smooth and does not need sanding. I left it to cure for 24 hours and when I came back the hull was solid. No more flexing or very little flexing in certain areas.
f.)
3M Transparent Duct tape
This is very sticky and I was only able to find it at Lowes and Wal-Mart. When I asked for it at the "other big hardware store" they looked at me funny and said " Transparent duct tape?? Never heard of it, what you want that for? " after that reply I didn't bother trying to explain I wanted to keep water out of my Radio box on my RC boat, he may have then said whats RC? So I just looked around for it myself. I used this to tape down the lid for the receiver box, standard radio sealing tape woudn't seal too well to the surface, duct tape did the trick
.g.)
Medium Party Balloons. I stuffed the Receiver and Battery pack in 2 balloons each and then zipped tied the ends. Helps keep them dry.
h.)
Build a stand out of PVC and use pipe insulation to cover the pipe. I made my stand with a joint (using a smaller pipe) in the middle right under the engine area. This relieves some of the pressure off the hull while holding the engine down to start the boat. (See picture 3). I only use the original stand to carry the boat in the tote bag.
I.)
Door and Window High Density Foam Tape weather-strip 1/8” thick ¼” wide. – Necessity
After reading about the many people with water in the Bud I found that simple 2$ dollar foam tape can seal the cowl up good. I used some light CA along the areas that I was going to apply the foam to. Don’t use too much or else it will make the foam get hard. As you can see from the pics I added the foam tape to the inside of the cowl and to the top of the cowl lip. If you look closer at the underside of the cowl lip you can see the micro ballon. I suggest you apply more to the cowl as it is a bit flexible. After running about a gallon of fuel in my bud I get maybe a few teaspoons full of water into the hull if any at all under normal conditions. (See Picture 4 & 5)
J)
Flotation:
This applies to the Original Miss.Bud 1/12. Use Pool noodles, pipe insulation or packaging peanuts to help the boat float if you run into trouble. I stuffed the sponson with packaging peanuts and stuff the sides all the way to the stern of the Bud with pipe insulation. It helps to lubricate the pipe insulation with light oil making it easier to slide inside the hull.
I also glued some strips of pipe insulation to the cowl in the event it flew off and I had to retrieve it. Trim the insulation so it does not restrict air flow, it does not take much to keep the cowl or the bud afloat.
k)
Retrieval system:
This is not an upgrade but get a good retrieval system. I have 2. I have an electric boat rigged with a tennis ball attached to a long floating cord. I make a couple of tight turns around a stranded boat and snag it on the rudder or something (it would help to glue a small hook onto the front of the hull to help the line snag there instead) and bring it back slowly. Once I retrieved my bud in the middle of the lake and was bringing it in and could not tell that I was towing the Bud from the rudder a bit too fast since it was so far away and when it got closer I realised that my towing caused water to rush over the back into the engine compartment and submerged the Bud[X(], so tow slowly. Luckly I added the floatation and when I stopped near the shore it floated right back to the surface with most of the water draining out via the autobailer
. I also use the fishing like attached to a tennis ball method. This works well if the boat is about 80 or so feet away. Throw the ball over the boat and move the line around until you snag the boat and then reel the ball and the boat back in slowly. You can also attach the ball to a fishing poll and cast the ball over the boat and reel it in.
You can get an inflatable raft here for cheap :[link=http://tinyurl.com/6z7v9]Inflatable raft[/link]
[link=http://www.rcgroups.com/forums/showthread.php?t=266574]Boat Retrieval Systems[/link]
Optional Upgrades:
a.)
Prather Water Outlet – optional upgrade (Applies to the Original Miss.Bud 1/12)
[link=http://www2.towerhobbies.com/cgi-bin/wti0001p?&I=LXDR18&P=ML]Prather Water Outlet – optional upgrade[/link]
This makes the water outlet looks neat and will keep the water outlet line from falling into the hull. My factory water outlet was on really tight and sealed well with silicone but the chrome Prather outlet adds a nice touch.
b.)
Bru Line Antenna - Optional – looks good, sturdy, has a mast cap on the top.
[link=http://www2.towerhobbies.com/cgi-bin/wti0001p?&I=LX9162&P=ML]Bru Line Antenna [/link]
My factory antenna wouldn’t stay in the hole firmly. I could have used silicone to make it stay but I liked the Bru-Line antenna, it’s securely screwed to the hull.
Cleaning and maintaining the finish:
I use denatured alcohol to clean up fingerprints and oil on the hull.
Use quick spray wax on hull to keep it shinny. I also wax and clean the underside of the hull to help lessen the drag.
Use tape on the edge of horizontal stabilizer (sounds cooler) or rear wing to prevent the screw driver handle from scratching the finish when trying to remove the tuned pipe.
Troubleshooting issues I see other boaters have:
1.) Getting the right Nitro/Air mixture to start the boat.
- make sure fuel system is air tight
- Richen out or Lean in the valve depending on weather and location.
- Use good fuel, fuel can go bad if not stored properly
- Check to see that that glow plug is good
- If the starter is hard to pull, loosen the glow plug just a bit to lessen the compression. When started tighten the
plug.
2.) Keeping water out.
- Change push rod seals
- Add window/door seal to cowl
- Use waterproof tape or transparent duct tape to seal up the radio box.
Another way that water gets into the boat is through the three holes in the cowl (very rarely). This has only happened to me a few times when I ran the bud in 10 – 20 mph gust winds[X(] with the water choppy (not recommended) and watch this baby get some air[X(], I must say I felt a bit nervous because the boat look like it would take off and flip. When it did look like it would take off I would make corrections and back off the throttle a bit to regain control. Regardless of the water getting into the 3 holes never cover them up, the engine needs to breathe and stay cool while running.
3.) Getting the boat on plane.
- Must toss the boat at full throttle about 6 inch from the surface with a gentle forward motion.
- Engine must be tuned (correct mixture) correctly to give the boat the power needed to stay on plane especially on turns when the prop loads up the engine.
4.) Oily gunky/residue around engine pipe area – rcboatmodeler 05 May/June issue has a great article titled “ Get rid of the goop” in the RC Zone section.
- Tighten the muffler bolts
- Zip tie the tuned pipe coupler ( don’t let the pipes touch it will cause radio interference)
- clamp the exhaust line going to the tank
5.) Servos going crazy.
- grease up the shaft, metal on metal contact creates some kind of interference with the receiver. Use lots and lots of grease
.- Maybe they got wet, use a blow dryer to dry them out and let them sit for awhile powered off before using them again.
- Someone else in the area is on the same frequency, if this is the case I wouldn't run the boat at all until I am sure the frequency is clear.
Best Practices:
Most of these are common sense practices.
Do check the radio range before each days run. You may also discover that you are not the only one in the area on the same frequency.
Ensure the rudder range dial on the radio is set to maximum or the boat won't turn sharp enough.
Check all bolts and make sure the fuel tank cap is on tight (once my cap came off[X(] after a lap and shut the boat down, only to discover that I put the wrong cap from the fuel bottle on the tank
To stop the boat push the throttle trigger forward. This will cause the carburetor to close and shut down the engine, this method works perfectly. I had to use this method once when I made a turn too wide and was headed for some rocks (it’s true what they say rocks attract boats
. I pushed the throttle forward in time and shut the boat down before it hit the rocks and just retrieved the boat after.I try to grease the shaft after each hour now.
Replace nicked plastic props, they will cause the boat to cavitate. (Relatively cheap, 2$)
Remove any floating sticks in the surrounding area before running. I use my fishing line and tennis ball to snag big branches.
I try not to hit any live animals (ducks, goose, swans, people), people’s fishing lines and I pray that my lake doesn’t have turtles or frogs (haven’t seen any yet)
I am still running the stock prop which seems to work well and still using the original glow plug.
Anticipate all turns, start turning the boat early. Once you get the hang of the boat you will know when to make the turns.
You can make left turns, I make them all the time, just be very cautious[:-]. I only make left turns when I need to correct the boats course.
Stay focused with you eyes on the boat at all times while running because 30 mph into the rocks, duck, shore, etc.. can happen in the blink of an eye
. Don’t let anyone distract you while running. Horizon Hobby/Proboat Support:
Their technical support has been great and responsive. Just don't be a jerk when you call and they will help you out. People don’t like to talk to jerks and they will be less likely to help if you are one.
When I couldn’t pull the screw in the drive dog to remove the shaft and the only way around this was to remove the engine and tank (big pain) I contacted them and they suggested that I heat up the screw and remove it but by then it was too late I had already rounded out the screw and was not about to get the Dremel out to try and fix it but they sent me a new shaft with drive dog in 2 days free of charge.
My tank was leaking air and they sent me a new tank and cap, also 2 days free of charge.
If your boat is still under warranty don’t hesitate to call, they will give you good support and because of their great support I bought a lot more stuff from them afterwards.
Other Upgrades:
- Metal Y535 Octura blade and other sizes
- Du-Bro Kwik-Switch mount
- Better sealing of Radio Box.
- Faster rudder servos
- [link=http://www2.towerhobbies.com/cgi-bin/WTI0095P?FVSEARCH=S684&FVPROFIL=++&search3=Go]TigerDrive Starter[/link] - replaces the pull starter and allows you to use a portable drill to start the boat. Confirm size here http://www.sullivanproducts.com before ordering
My first run:
After a few half ***** tosses I figured out the boat only needs a gentle toss about 6 inches above the water with a gentle forward motion. The boat ran great
, I was a bit surprised by the speed once the boat got on plane and was nervous at first ( I know some of you think 30 mph is nothing, but for my first time controlling something other than my car and fullsize boat that I sit in at that speed had my adrenaline pumping. My biggest fear was loosing control and crashing into the rocks or the shore since a few people on this forum reported that happend to them. Once the engine was broken in I was able to put the boat in the water and get it to plane after about 10 seconds but usually I just toss it since that’s quicker and less likely to cause the exhaust pipe to get covered with water from the back wash and shut down the engine. The boat ran great and each time I was able to bring it in to shore and add fuel, start it on the first pull and I was off again, no fiddling with the mixture.
2nd day I came back to the lake and tried to start her up and she gave me a little trouble, this is where I said you need patience because from what I have read about Nitro engines they can be very fickle from day to day based on weather condition so keep your cool and just keep trying. It took me about 30 mins to figure out that since the weather was much colder I needed to lean the needle in a bit. Since I was trying to start her a bit rich she was flooded and hydro locked, I removed the glow plug, turn her upside down to drain the excess fuel while pulling the starter flipped her back over screwed the glow plug back in made about a ½ to 1 turn in and she started and I was off again. I then started to pay special attention to the weather before I go out each time. Colder weather = lean her IN, Warmer weather = Richen her OUT. You will find more details on fuel mixture on this forum.
Conclusion:
So the box says RTR and some people gripe about the boat being crap etc. because they have a few issues, most of the problem I see people having is they don't take time to understand what is wrong and try to work through them before giving up. Like most things man made its not perfect, a little patience with some elbow grease thrown in will make this purchase more rewarding. The price of $299 is a steal even with all the items you may have to add. If the boat was say $499 and I had to do this work then I would probably feel a bit cheated. I didn't mind that I had to do some work to get this boat to where it is now, I actually had more fun working on it than if I had taken it out of the box and thrown it in the water. I have more appreciation for the boat now and this is what makes this hobby a hobby. Just remember to have fun!
.I will post a few pics of her running in the water and a link to a video before the weekend.
Good Reads:
Do a search on rcuniverse for Miss Bud and read all the posts. They have tons of useful info
Performance Mods for the Miss Budweiser Hydro
http://www.*********.org/missbud_mods.htm
http://www.rcreality.com/missbud.htm
Nitro Engine Basics: Starting, Cleaning and Fixing Problems
http://p198.ezboard.com/fehobbiesfrm...picID=56.topic
http://www.namba.com/index_ie.htm
Boat tips
http://www.funrcboats.com/tips1.htm
http://www.rcuniverse.com/forum/m_29.../tm.htm#299959
Links:
Dubro E/Z Glo GLo-Plug Ignitor with Beep tester
http://www2.towerhobbies.com/cgi-bin...&I=LXJGS6&P=ML
Fuel:
Trinity Break In Fuel 20% Quart
http://www2.towerhobbies.com/cgi-bin...?&I=LXUU69&P=7
Trinity Monster Brew 20% Quart
http://www2.towerhobbies.com/cgi-bin...?&I=LXGPG9&P=7
Wildcat Eliminator Plus Car 20%N 18%O Quart
http://www2.towerhobbies.com/cgi-bin...&I=LXAKD8&P=ML
Prather After Run Engine Oil 2 oz.
http://www2.towerhobbies.com/cgi-bin...&I=LXDR80&P=ML
Prather Cable Grease
http://www2.towerhobbies.com/cgi-bin...&I=LXDR02&P=ML
Bru Line Pushrod seals w/Hardware
http://www2.towerhobbies.com/cgi-bin...&I=LX9154&P=ML
Prather Micro Balloon
http://www2.towerhobbies.com/cgi-bin...?&I=LXDS36&P=7
Bru Line Antenna - Optional - you can silicone the factory antenna
http://www2.towerhobbies.com/cgi-bin...&I=LX9162&P=ML
Aeromarine 7008 - Autobailer - necessary
http://www.rocketcityracing.com/pilo...cific=jrgpmrn0
Prather Water Outlet - optional
http://www2.towerhobbies.com/cgi-bin...&I=LXDR18&P=ML
The opinions expressed here are mine and not those of RC Universe and no I do not work for Proboat. You are free to use this advice as you see fit. I accept no liability for anything that may happen to you, your boat, your dog or anyone for that matter from using this information. I hope this information proves useful to someone. If you see any incorrect information please correct me, I am not an expert and just trying to share my experiences with the Miss Budweiser 1/12.
 03-24-2005, 04:45 AM
#4

Join Date: Mar 2005
Location: Staunton,
VA
Posts: 157
Likes: 0
Received 0 Likes
on
0 Posts
Boataddict...EXCELLENT POST!
I too am new to this nitro boating thing,dont work for HH, wife let me spend the money etc..
I am having a blast. it is some work to maintain the miss bud though as you well know. I am going to try out your ideas. I like the foam in the cowling idea. I used a thin bead of silicone on the inside of the cowling to keep the water out, works, but sticks to the hull, starts to peel etc.
I did not know that there even was a warranty with these boats. Hex head screw on the drive dog(engine side) rounded out. I ahve definately learned alot in the past couple of weeks.
Using your post as a good place to start on fixing up my boat.
Thanks

 03-24-2005, 10:53 AM
#6
Junior Member
Join Date: Mar 2005
Location: Sawyer,
MI
Posts: 18
Likes: 0
Received 0 Likes
on
0 Posts
JOB, WELL DONE!! BOAT ADDICT. I really enjoyed reading your artical (ProBoat should give you money for that haha). I too have just purchased a Miss Bud 1/12 and am looking forward to running it this summer. I have made some of the mods so far. I do have one question. How do you get floatation up into the sponsons? These are sealed off aren't they? I guess i am kind of lost what actual area you are talking about.
Anyways, keep up the great posts and work, you should start your own Miss Bud thread. You really do have alot of knowledge and good ideas for this boat.
BOAT ADDICT- THIS BUDS FOR YOU
[8D]
03-24-2005, 11:09 AM
#7
Member
Thread Starter
Join Date: Dec 2004
Location: Atlanta,
GA
Posts: 95
Likes: 0
Received 0 Likes
on
0 Posts
Here is the video as promised. I will make another video with more angles and closer shots when I get a chance.
http://www.rcpics.net/view_single.php?medid=52446
http://www.rcpics.net/view_single.php?medid=52446
03-24-2005, 11:35 AM
#8
Member
Thread Starter
Join Date: Dec 2004
Location: Atlanta,
GA
Posts: 95
Likes: 0
Received 0 Likes
on
0 Posts
Letitloose, I appreciate the good feedback.
The only floatation I could use for the sponson was the peanut or popcorn sized packaging foam that usually comes in any shipped packages. ( This only applies to the 1st version of the Miss.Budweiser, the newer version is totally sealed off)
Remove the tank and engine and look up in the hull towards the front in the sponson and you will see a small opening, one on the right above the weight and on the left above the water outlet.
I basically stuffed it through the small openings on both sides of the sponson with my fingers until I could stuff it no more and cut my pipe insulation long enough from the stern to that point to wedge them up there. Some will break while stuffing them but as long you get enough of them up there they will help keep the Bud from sinking if it took on too much water. But I highly recommend that you use pipe insulation for the rest of the hull, they help a lot.
I found this page a while back and forgot to include it in the list of links.
http://home.earthlink.net/~lakeboygpr/id9.html
In one of the photos you will see the pipe insulation. The only difference with mine is I wedged another piece in the gap to keep the popcorn foam in the front.
I hope this help, good luck running your Bud this summer.
03-24-2005, 12:52 PM
#9
Senior Member
My Feedback: (3)

Join Date: Jun 2004
Location: KEWANEE,
IL
Posts: 1,630
Likes: 0
Received 0 Likes
on
0 Posts
where did you get the Du-Bro Kwik-Switch mount ? and thanks for the post! i have one comming in the mail and it will be great to get all this stuff. my eyes are buggin after all that reading[X(]
03-24-2005, 01:37 PM
#10
Member
Thread Starter
Join Date: Dec 2004
Location: Atlanta,
GA
Posts: 95
Likes: 0
Received 0 Likes
on
0 Posts
I haven't installed the quick switch mounts yet. I only listed it as an optional upgrade in my post.
Here is a pic from someone else's page, they did a pretty good job of mounting it.
http://tinyurl.com/67qgg
Here are the links from TowerHobbies. They have multiple switches
Dubro Kwik Switch Mount
http://www2.towerhobbies.com/cgi-bin...?&I=LXD664&P=7
Dubro Kwik Switch Mount with Charging jack:
http://www2.towerhobbies.com/cgi-bin...?&I=LXD665&P=M
Great Planes Switch/Charge Jack Mounting Set
http://www2.towerhobbies.com/cgi-bin...&I=LXJ778&P=ML
Hope this helps zzman
03-24-2005, 10:07 PM
#11
Member
Join Date: Jul 2003
Location: McCool, MS,
Posts: 36
Likes: 0
Received 0 Likes
on
0 Posts
The Y535 is well worth the 20 bucks it costs. It will put the boat on plane on its own easily. I actually play with cutting doughnuts and betting it off plane. Streighten it out and off you go again.
03-25-2005, 09:42 AM
#13
Junior Member
Join Date: Mar 2005
Location: Sawyer,
MI
Posts: 18
Likes: 0
Received 0 Likes
on
0 Posts
I have a question is ther anyway to get the y535 prop sharpened when new. i bought the new three blade from octura but they come rough (you have to balance and sharpen) . i don't want to have to do this myself. Any input would be appreciated . Thanks![8D]
03-25-2005, 01:45 PM
#15
Member
Thread Starter
Join Date: Dec 2004
Location: Atlanta,
GA
Posts: 95
Likes: 0
Received 0 Likes
on
0 Posts
Letitloose
Here are a few links I found on RCU. I believe funrcboats.com offers the Prop Finishing service.
http://www.funrcboats.com/StorePropFinDetails.htm
http://www.geocities.com/jwohlt5362/Propguide1.html
http://www.rcprops.com/TechNotes/rcprop_tech_info.htm
Here are a few links I found on RCU. I believe funrcboats.com offers the Prop Finishing service.
http://www.funrcboats.com/StorePropFinDetails.htm
http://www.geocities.com/jwohlt5362/Propguide1.html
http://www.rcprops.com/TechNotes/rcprop_tech_info.htm
03-27-2005, 11:24 AM
#16
Senior Member
My Feedback: (3)
Join Date: Jun 2004
Location: KEWANEE,
IL
Posts: 1,630
Likes: 0
Received 0 Likes
on
0 Posts
ORIGINAL: letitloose
I have a question is ther anyway to get the y535 prop sharpened when new. i bought the new three blade from octura but they come rough (you have to balance and sharpen) . i don't want to have to do this myself. Any input would be appreciated . Thanks![8D]
I have a question is ther anyway to get the y535 prop sharpened when new. i bought the new three blade from octura but they come rough (you have to balance and sharpen) . i don't want to have to do this myself. Any input would be appreciated . Thanks![8D]
what gets me is they are advertized as balanced and sharpened???what the heck...
03-29-2005, 04:47 AM
#17
Member
Thread Starter
Join Date: Dec 2004
Location: Atlanta,
GA
Posts: 95
Likes: 0
Received 0 Likes
on
0 Posts
After running about 2 gallons of fuel in the Bud, the lower screw in the turning fin came loose and fell out in the lake I was running in this weekend. After the lower screw fell out the fin pivoted outwards, this caused the Bud to jump out of the water for a second and bend the remaining screw[X(]. I secured the fin and the screws to the hull with some 2-ton epoxy. She is good to go now. I suggest everyone secure the fin as well.
. I suggest everyone secure the fin as well.
04-01-2005, 04:24 PM
#18
Member
Thread Starter
Join Date: Dec 2004
Location: Atlanta,
GA
Posts: 95
Likes: 0
Received 0 Likes
on
0 Posts
Here are some other Miss Bud 1/12 videos I found. Thanks to cheaterpete on radiocontrolzone.com for providing them.
http://www.thecheatersgang.com/cool.avi
http://www.thecheatersgang.com/cool2.avi
http://www.thecheatersgang.com/cool3.mov
Original Post - http://forums.radiocontrolzone.com/s...highlight=late
http://www.thecheatersgang.com/cool.avi
http://www.thecheatersgang.com/cool2.avi
http://www.thecheatersgang.com/cool3.mov
Original Post - http://forums.radiocontrolzone.com/s...highlight=late
04-02-2005, 12:10 AM
#19
Junior Member
Join Date: Mar 2005
Location: Lake Side Drive,
MO
Posts: 2
Likes: 0
Received 0 Likes
on
0 Posts
Boat Addict you are the man when it comes to informative posts... But I have a small Hydro Newbie question.. Boat stands, Seen alot of them made from PVC which looks good last long time etc.. Question is: Does anyone have a set of plans to make one? I can do the cutting and gluing, however what size pvc, how many elbows etc... Any help is appreciated.
04-02-2005, 02:43 PM
#20
Member
Thread Starter
Join Date: Dec 2004
Location: Atlanta,
GA
Posts: 95
Likes: 0
Received 0 Likes
on
0 Posts
I saw a great article in the February 05 issue of the RCboatmodeler magazine by Rick Eyrich.Titled: How to make your own boat stand. In this article he outlined steps for making a wooden and PVC stand.
The article will give you some good pointers if you decide wood or PVC.
Here is the link to the article online (sorry no pictures) but if you get your hands on the magazine they have a few good
pictures in there. http://www.findarticles.com/p/articl...02/ai_n9477869
From your post I see you want PVC and I assume you have a Hydro.
Basically, all the fittings will be the same size as the pipe. If you use 3/4" pipes, use 3/4" fittings. The only time I used a different size diameter pipe was when I joined the middle of the stand with a smaller pipe to support the area under the Buds engine at the same time supporting the undersides of the BUD , see picture 3 above. To keep things simple you can skip that part if you want but I felt it was neccessary after hearing other Bud owners getting stress cracks from starting the Bud. I have used 2 gallons of fuel and so far no stress cracks.
Here are the parts I used to make my stand.
4 - T fittings - 3/4"
1 - length of PVC pipe - 3/4" - Usually 10 feet - Had Lowes cut mine in half to fit in my car.
4 - 90 Degree elbows - 3/4"
- The area to support the engine:
2 - 3/4" T with a 1/2" reducer joint.
1 - Short length of 1/2" to connect the middle
Cut and dry fit all the parts to length first before you glue.
Get a can of PVC cement at the Hardware store and put a small amount of cement on the joints with the applicator. You can cement the pipes fitted. I once tried to apply the cement first then put it together only to find that the cement had dried so quickly and bonded the PVC together. It was almost impossible to move the pipes into positions afterwards. So dry fit first, then apply the cement around the joints, it will seep into the joints and bond the pipes together.
Note: PVC Cement is very toxic, use a vapor mask and/or well ventilated area before using it.
Wrap the pipe with the correct size foam pipe insulation and use CA to seal the sides or wrap the ends with tape.
Or you can get pipe insulation that have adhesive sides (I found this at Walmart), see picture.
Total cost to complete my stand was about $10.
If you don't want to build it you can always order one here.
http://www2.towerhobbies.com/cgi-bin...?&I=LXDR31&P=7
I hope this helps.
04-02-2005, 03:27 PM
#21
Senior Member
My Feedback: (4)
Join Date: Jun 2004
Location: covington,
WA
Posts: 1,460
Likes: 0
Received 0 Likes
on
0 Posts
I got my stand from Pro boat it maches the Miss Bud.. http://community.webshots.com/user/Teamchrome
04-02-2005, 08:02 PM
#22
Junior Member
Join Date: Mar 2005
Location: Lake Side Drive,
MO
Posts: 2
Likes: 0
Received 0 Likes
on
0 Posts
Boataddict, Again you are too kind. Thanks so much for the parts list!! I will drop over to my local hardware store and start some shopping. I also picked up all of you necessary upgrades today and will begin the install tomorrow. Again thanks~!!
And yes I have the Miss Budweiser 1/12. I have some additional upgrades to the battery/receiver/servo box that I am going to try and if they work I will post here.
Nitro_rcr
1/12 Miss Bud
2.5 Mad Max T-maxx
2.5 4-Tec
04-02-2005, 09:36 PM
#23
Junior Member
Join Date: Apr 2005
Location: Wellington, CO
Posts: 22
Likes: 0
Received 0 Likes
on
0 Posts
Wow boataddict, that was really good. I am going to get a miss bud soon and will probabley use most or all of the things on that list. btw, do you have plans for the in shop water system? I don't have a cule how.
04-03-2005, 09:59 PM
#24
Member
Thread Starter
Join Date: Dec 2004
Location: Atlanta,
GA
Posts: 95
Likes: 0
Received 0 Likes
on
0 Posts
The water rig I have allowed me to do part of my break-in on the bench by hooking my garden hose/outdoor faucet to my water-cooled engine.
I found an adapter made by Marine Specialities.
You can order a Home Run water Kit from Marine Specialties for
$17.75 the Part# is FS-WV01
Link to their site http://www.marinespecialties-rc.com/buildingsup.htm
OR
You can build a water feed system for about $10.
I bought all the parts at Home Depot.
Here are the part details. see picture for assembly info.
1.)
Watts
12" PVC Hose - Filter Supply Line Splicer
1/4" Compression to 1/4" Compression
2.)
Watts
A-85 - PB225
1/8" x 1/4" I.D Hose Barb to MIP adapter
3.)
Watts
A-16 - PB966-P 1/4" x 1/4" Tube to FIP Couple w/insert
4.)
Watts
A-696 - PBGHR4 - 3/4" x 1/4 " Female Hone to compression.
5.)
Fish tank AIR pump Line or ICE maker water line.
6.)
Teflon Tape
Note: This rig will allow your engine to stay cool while you break-in or test on the bench but I also recommended that you continue to break-in the engine in the water. The engine needs some load to break-in fully.
I hope this info helps.