


Balsa wing for SIG Kougar?
 11-04-2018, 09:06 AM
#1

Thread Starter

I’ve got a Kougar that’s been around since 1989.
The wing has been broken and glued 3 times now.
The wing weighs 2.6 pounds.
Had anybody made a Balsa wing for a Kougar?
The wing has been broken and glued 3 times now.
The wing weighs 2.6 pounds.
Had anybody made a Balsa wing for a Kougar?
 11-04-2018, 01:05 PM
#2
Geeat flying planes, Ive taken mine to the field every day I’ve went this year.
As for a balsa wing, I haven’t seen that for the Kougar. However, Sig still sells the Kougar wing kit for around $60.
Best of luck with the repairs!
11-05-2018, 05:22 AM
#4
I don't see why it wouldn't/couldn't/shouldn't be done......
given similar shape and dimension,....an airfoil is an airfoil...., and as long as it produces enough lift to get the plane in the air, you can expect similar results. all the other aspects are just semantics. weight and strength are not an issue, if the wing is built decently and an imbalance from a slightly different wing weight can be easily compensated or adjusted. the plane doesn't know and doesn't care what the wing is made of.
given similar shape and dimension,....an airfoil is an airfoil...., and as long as it produces enough lift to get the plane in the air, you can expect similar results. all the other aspects are just semantics. weight and strength are not an issue, if the wing is built decently and an imbalance from a slightly different wing weight can be easily compensated or adjusted. the plane doesn't know and doesn't care what the wing is made of.
11-05-2018, 09:32 AM
#5

That is indeed a heavy wing. Sig has always been notorious for putting heavy wood in their kits though. Although an all wood built up wing would work just fine, unless somone out there has plans/templates scratch building one is going to be a ton of work. Foam wings can actually be made quite light. In most cases the wood selection for the skins and the adhesive used to attach the skins is what piles on the weight. Weight of course is always a factor with our models, lighter will always fly better. If you decide to go with another foam wing, I would be happy to publish some more information and pictures on building light foam wings.
11-05-2018, 02:05 PM
#6

Anything is possible. I built this airplane from pictures and a small picture of the plans. It featured a foam tapered wing. I did a built up wing and the plane is slightly larger than in the plans. Yes, it is doable.
 11-05-2018, 04:30 PM
#7
Thread Starter
That is indeed a heavy wing. Sig has always been notorious for putting heavy wood in their kits though. Although an all wood built up wing would work just fine, unless somone out there has plans/templates scratch building one is going to be a ton of work. Foam wings can actually be made quite light. In most cases the wood selection for the skins and the adhesive used to attach the skins is what piles on the weight. Weight of course is always a factor with our models, lighter will always fly better. If you decide to go with another foam wing, I would be happy to publish some more information and pictures on building light foam wings.
11-05-2018, 05:42 PM
#8
As I had stated, the two main components that can add weight in a hurry to a foam wing in the sheeting itself and the adhesive. Back in the day a very popular adhesive was contact cement. Both the foam core and the sheeting were coated after the sheeting was edge glued. The resultant wing was heavy and had ridges that were almost impossible to sand out.
My method is nothing really new but does result in a light and straight wing. The first thing to consider is the sheeting. I tend to order my sheeting pretty well in advance and end up getting a variety of weights although I tend to ask for contest grade. No worries as I tend to put the slightly heavier sheets on the wing high point and at the trailing edge. This gives good overall strength by putting a more dense sheet where the stress is greatest and makes for a bit of a stiffer aileron.
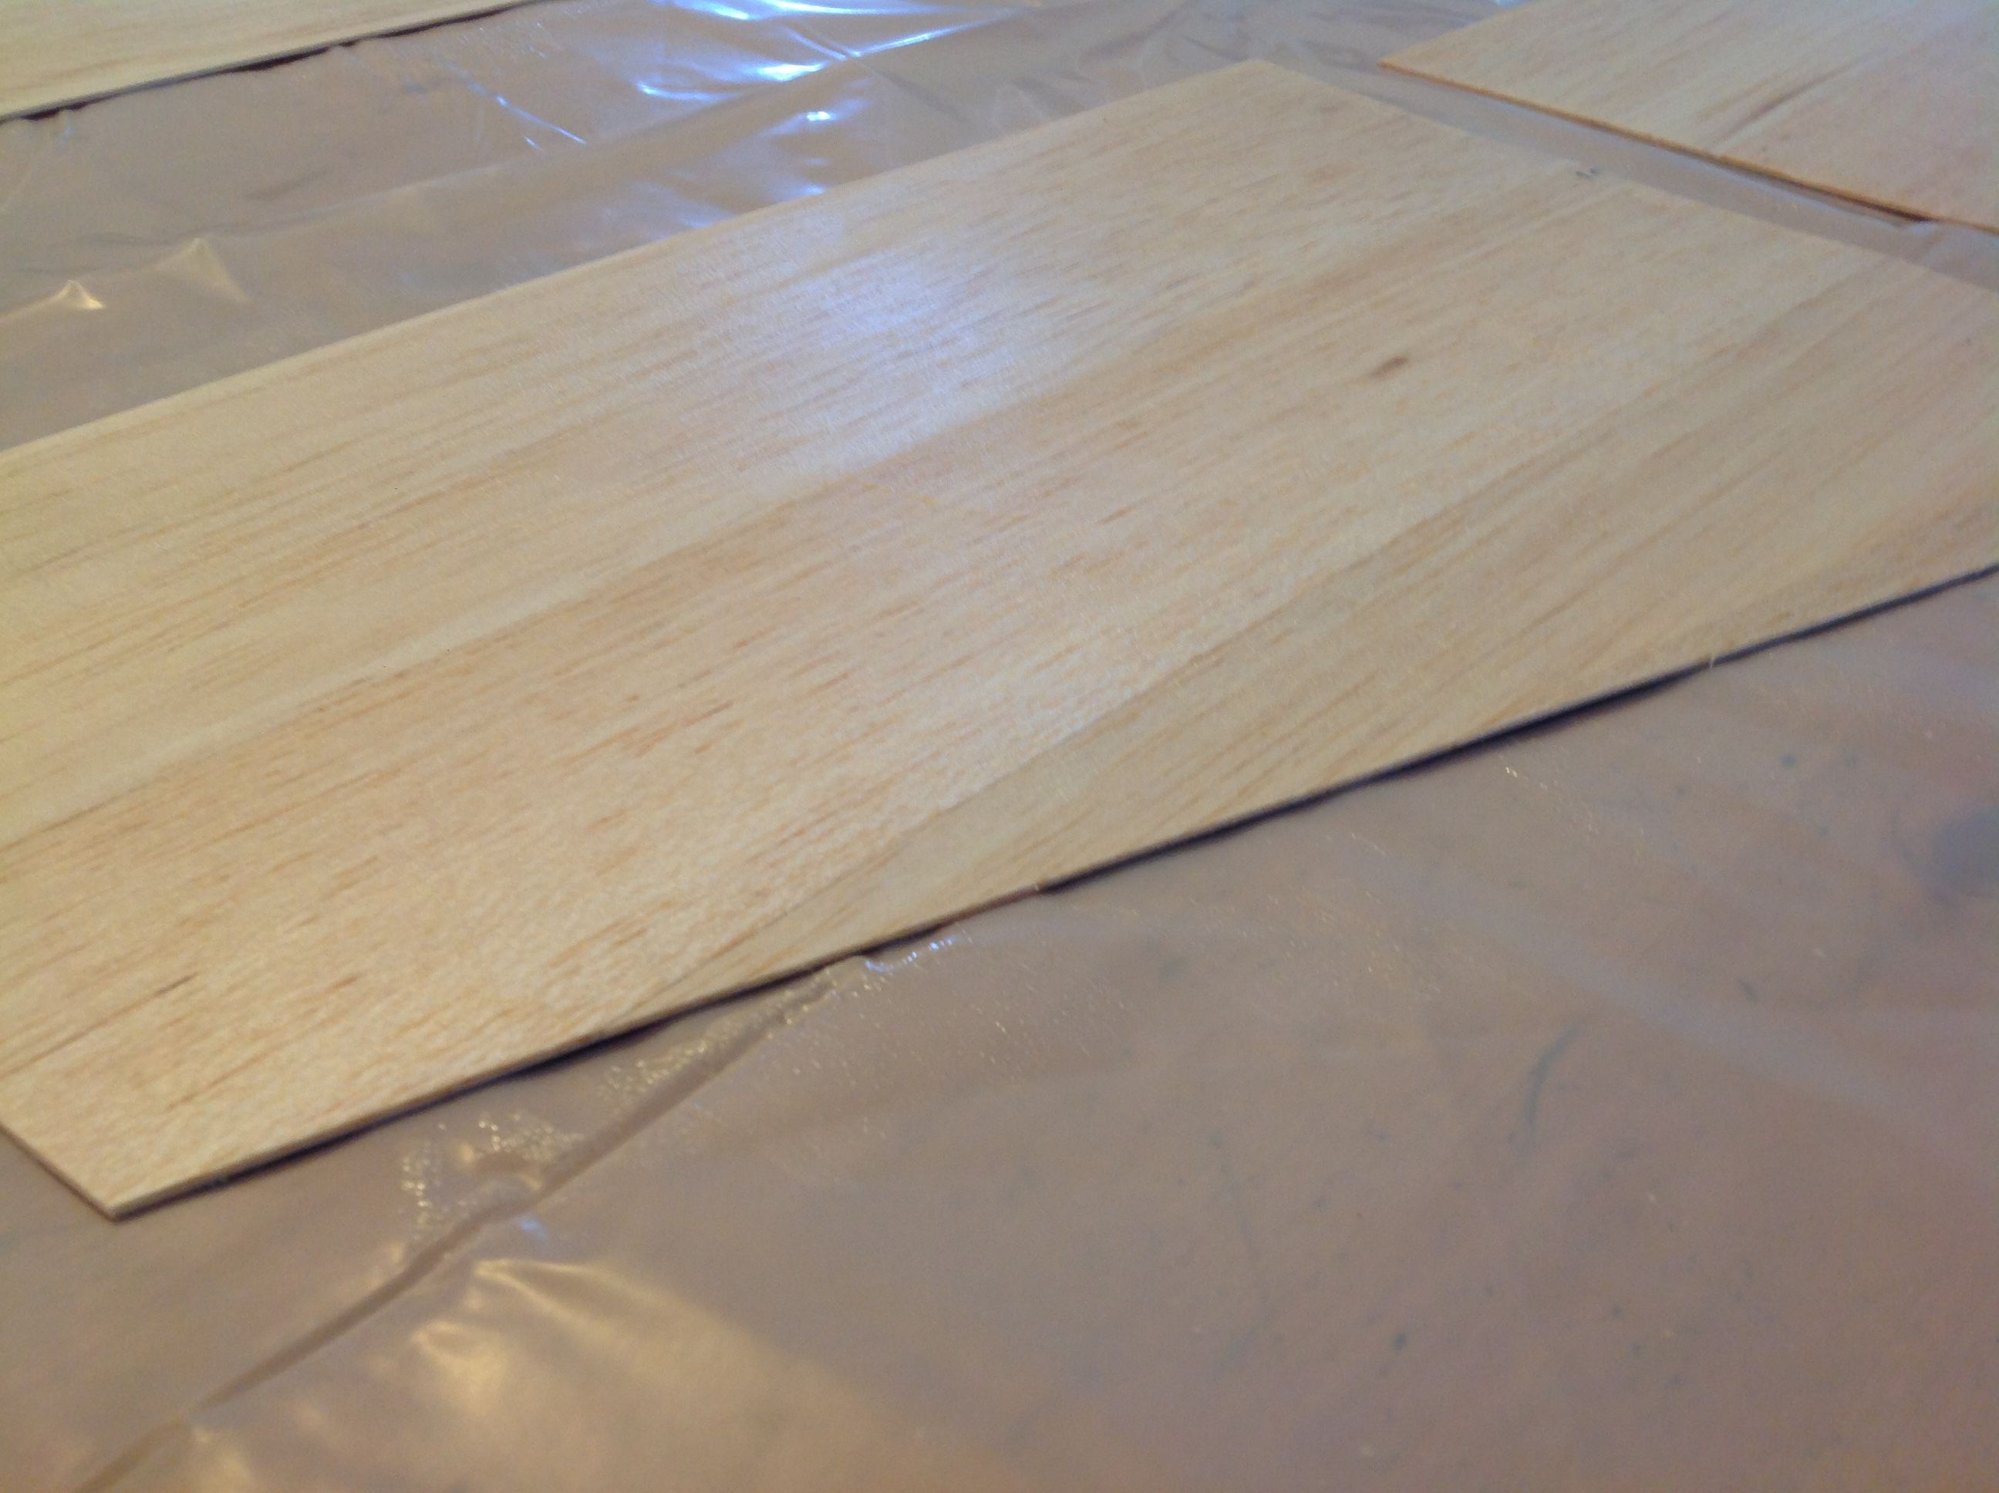
Sheeting preperation begins with trimming the edges straight and then taping them together with blue painters blue painters masking tape. Cut them to size with only 1/8" oversize to the cores. Do not edge glue the sheets together. Core prep is to simply block sand them to get rid of any imperfections and have a nice smooth surface. This is important as what you are doing is increasing the surface area in which the glue will bond the wood to the foam. This drastically reduces the amount of glue used. Dust the cores clean. Do not skimp as any dust left behind will affect the bond strength.
Now its option time. I personally have been applying pressure via vacuum bagging for over 15 years now and I would not use any other method. That is not to say that I expect everyone to run out and get a bagging system although I highly reccomend one. They can be built for well under 100.00. Using a bagging system allows the use of epoxy laminating resin to bond the skins and will yield the lightest weight. However if not bagging, you can use Gorilla Glue.
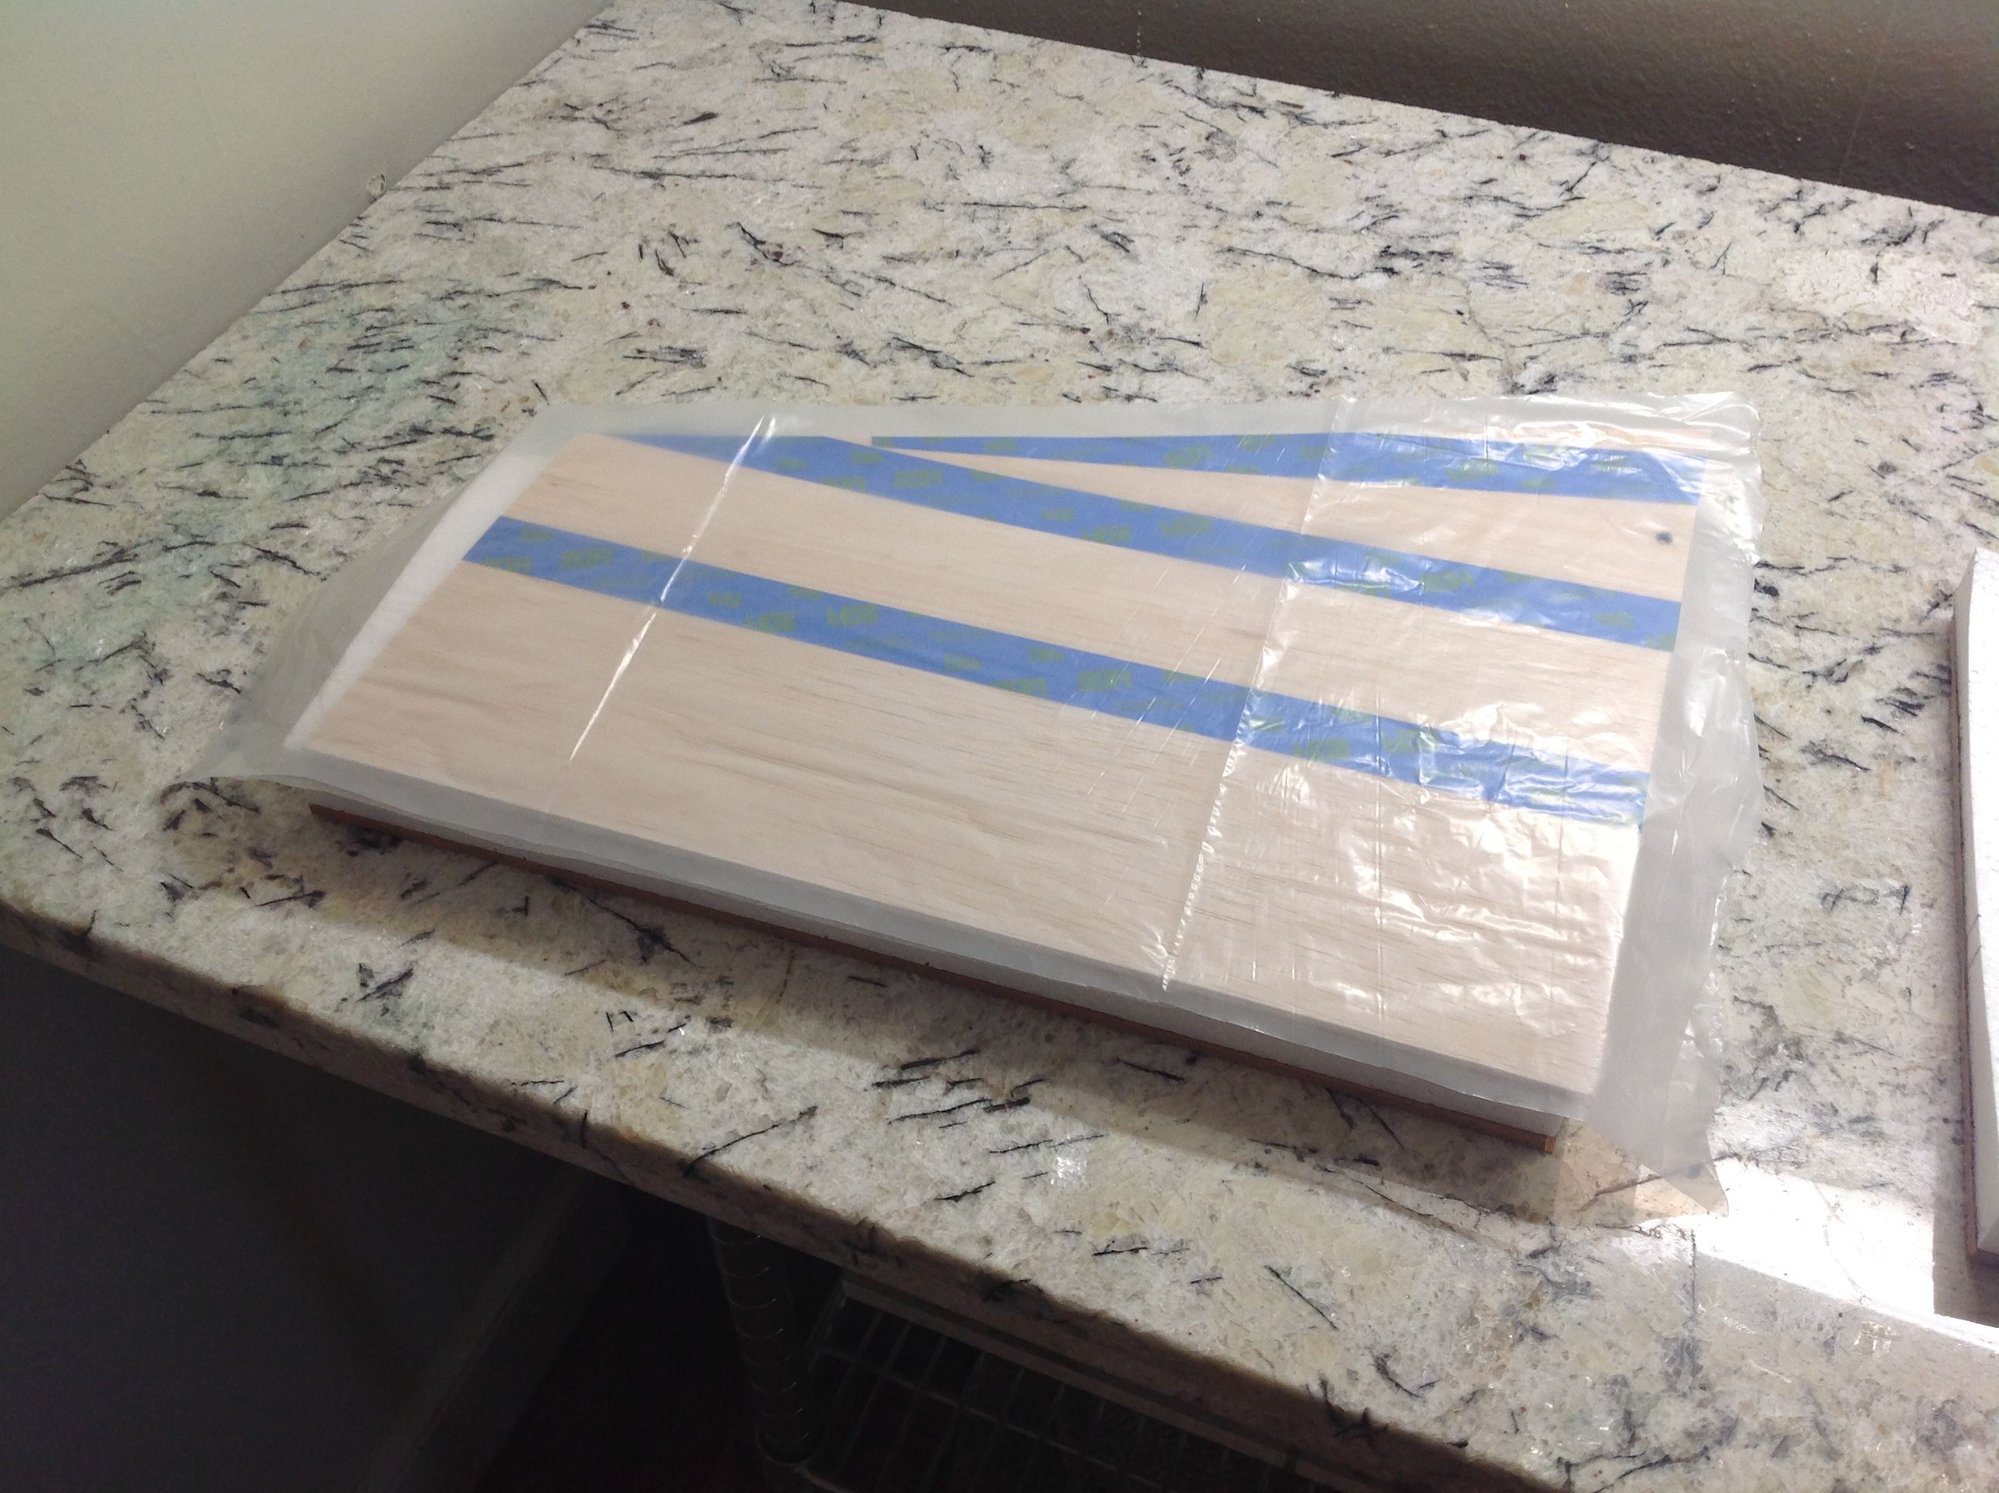
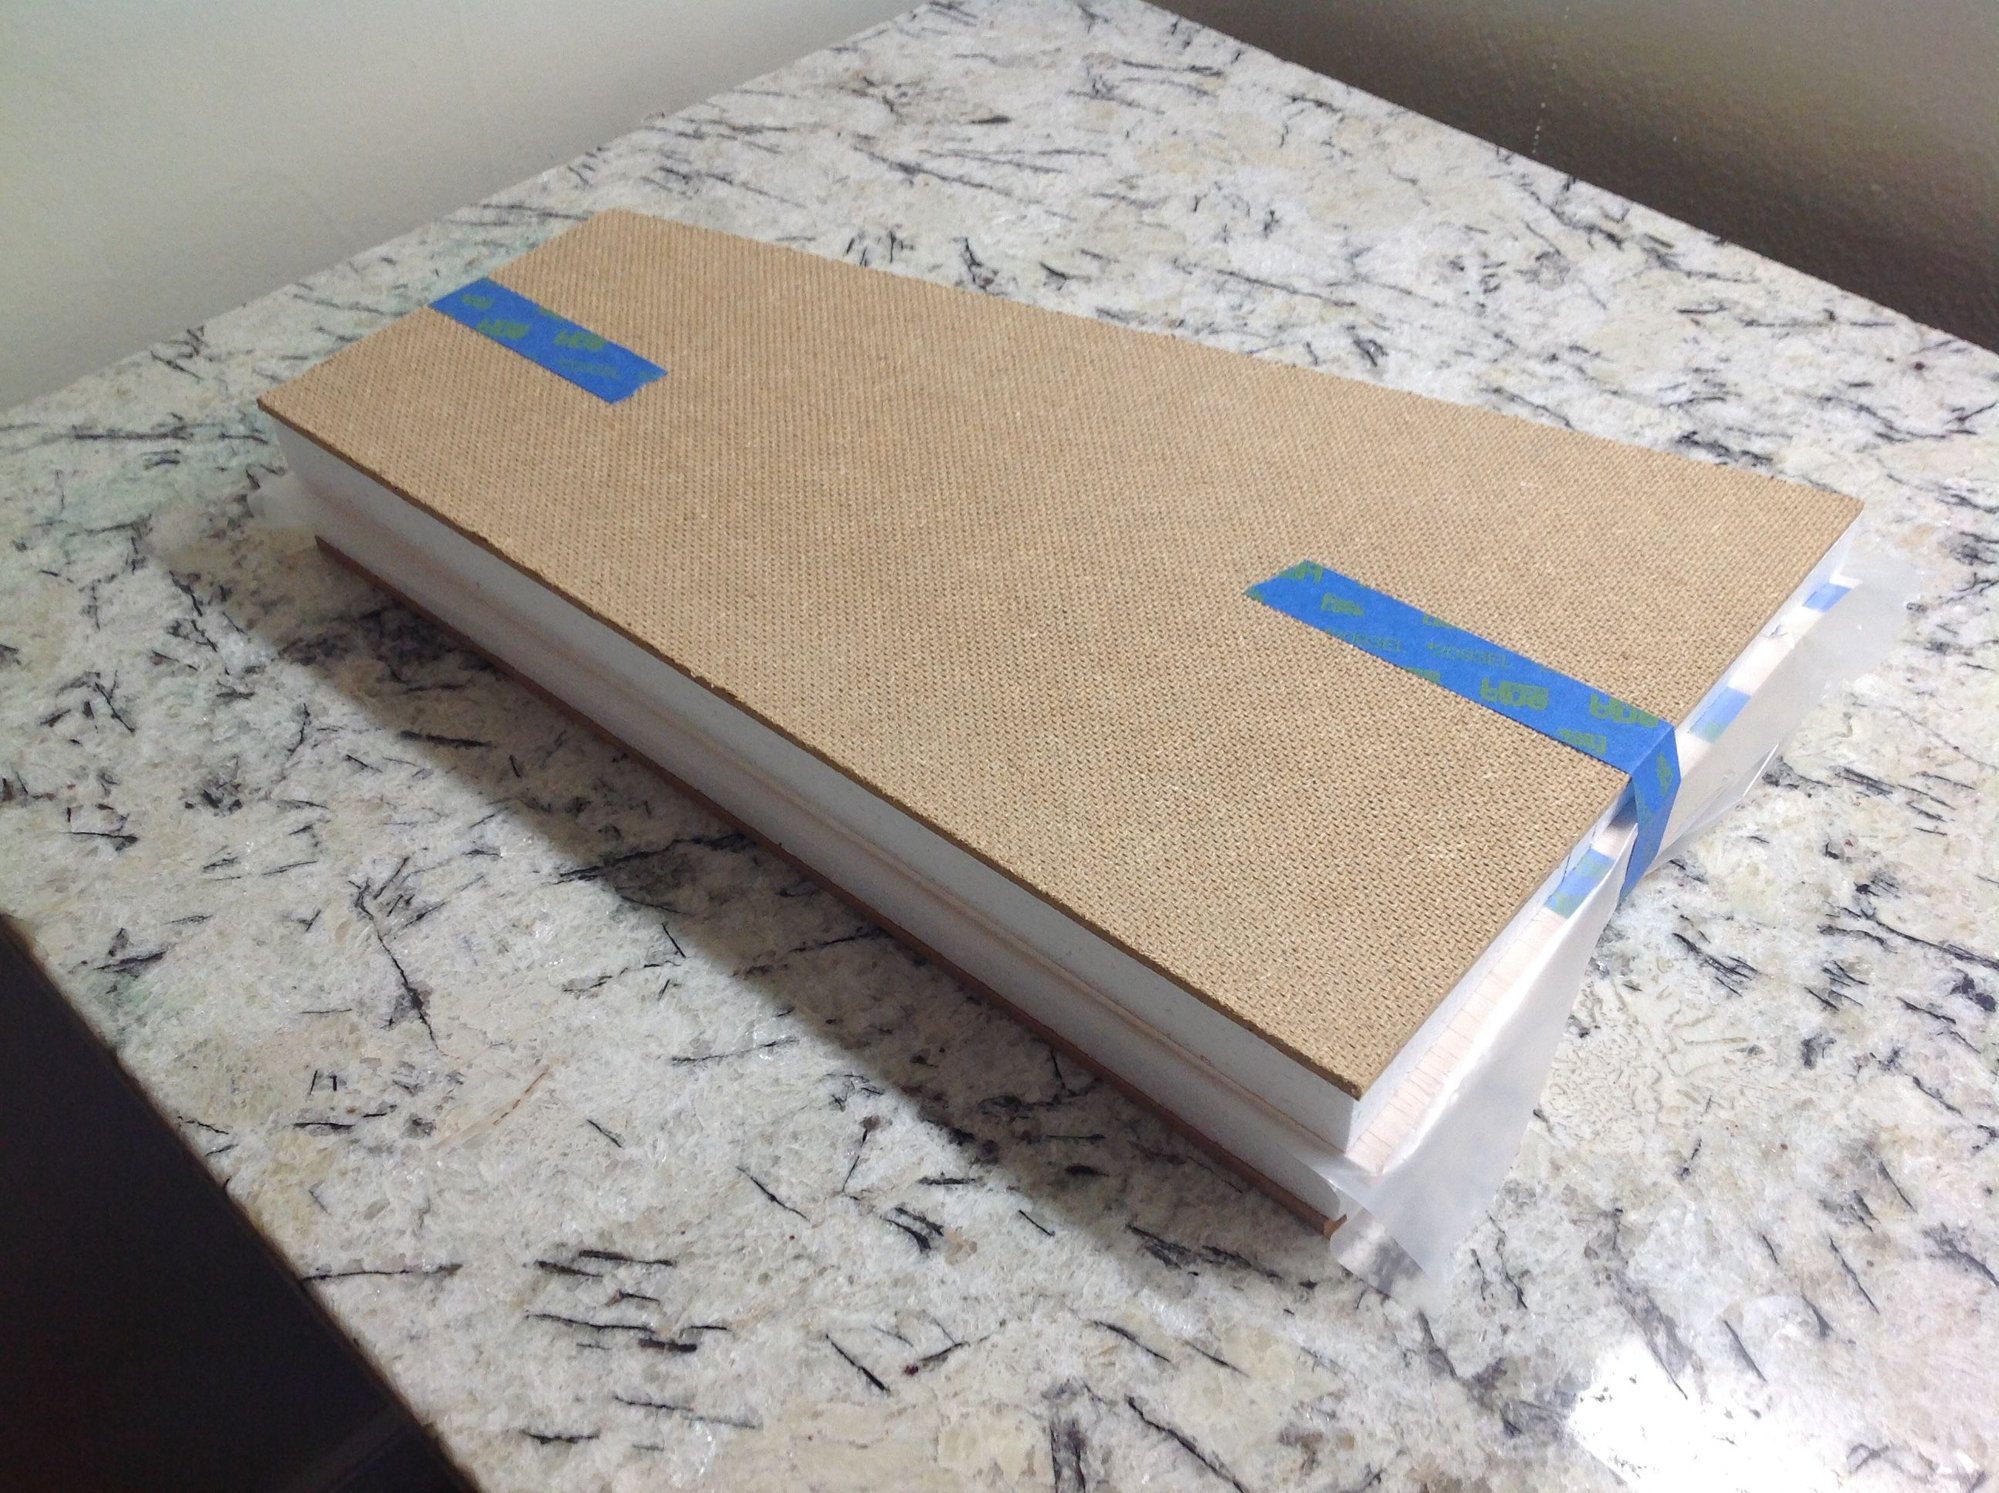
Now that the cores and sheeting are prepped, apply adhesive to the sheeting. Use just enough to get a light sheen on the surface. I will tend to apply a little heavy and then remove the excess. This is a little faster and allows some glue penetration into the sheeting. Place the sheeting onto the cores and lightly tape into place with blue painters tape. Place the cores with sheeting into the shucks after placing a sheet of 1 mil plastic on the shucks. This keeps the sheeting from sticking to the shucks should any glue bleed through. Tape the shucks together and then tape pieces of 1/4" pressboard to the shucks. The pressboard should be cut to the exact outline of the shucks.
If vacuum bagging, you have used laminating epoxy and will simply place the assembly into a bag and pull 4" of vacuum. I do this on a marble table. Most shops that specialize in stone countertops will sell scraps at a reasonable price. For most applications you only need 4'x2'.
If going with mechanical pressure, you will have used Gorilla Glue and just place the assembly onto a flat table or slab of marble and stack sandbags or phone books on the assembly. It's best not to use rigid weights such as bricks. After 48 hours cure time you are ready to pull the wings out of the shucks and admire your light, straight wing panel.
My method is nothing really new but does result in a light and straight wing. The first thing to consider is the sheeting. I tend to order my sheeting pretty well in advance and end up getting a variety of weights although I tend to ask for contest grade. No worries as I tend to put the slightly heavier sheets on the wing high point and at the trailing edge. This gives good overall strength by putting a more dense sheet where the stress is greatest and makes for a bit of a stiffer aileron.
Sheeting preperation begins with trimming the edges straight and then taping them together with blue painters blue painters masking tape. Cut them to size with only 1/8" oversize to the cores. Do not edge glue the sheets together. Core prep is to simply block sand them to get rid of any imperfections and have a nice smooth surface. This is important as what you are doing is increasing the surface area in which the glue will bond the wood to the foam. This drastically reduces the amount of glue used. Dust the cores clean. Do not skimp as any dust left behind will affect the bond strength.
Now its option time. I personally have been applying pressure via vacuum bagging for over 15 years now and I would not use any other method. That is not to say that I expect everyone to run out and get a bagging system although I highly reccomend one. They can be built for well under 100.00. Using a bagging system allows the use of epoxy laminating resin to bond the skins and will yield the lightest weight. However if not bagging, you can use Gorilla Glue.
Now that the cores and sheeting are prepped, apply adhesive to the sheeting. Use just enough to get a light sheen on the surface. I will tend to apply a little heavy and then remove the excess. This is a little faster and allows some glue penetration into the sheeting. Place the sheeting onto the cores and lightly tape into place with blue painters tape. Place the cores with sheeting into the shucks after placing a sheet of 1 mil plastic on the shucks. This keeps the sheeting from sticking to the shucks should any glue bleed through. Tape the shucks together and then tape pieces of 1/4" pressboard to the shucks. The pressboard should be cut to the exact outline of the shucks.
If vacuum bagging, you have used laminating epoxy and will simply place the assembly into a bag and pull 4" of vacuum. I do this on a marble table. Most shops that specialize in stone countertops will sell scraps at a reasonable price. For most applications you only need 4'x2'.
If going with mechanical pressure, you will have used Gorilla Glue and just place the assembly onto a flat table or slab of marble and stack sandbags or phone books on the assembly. It's best not to use rigid weights such as bricks. After 48 hours cure time you are ready to pull the wings out of the shucks and admire your light, straight wing panel.
11-05-2018, 05:47 PM
#9
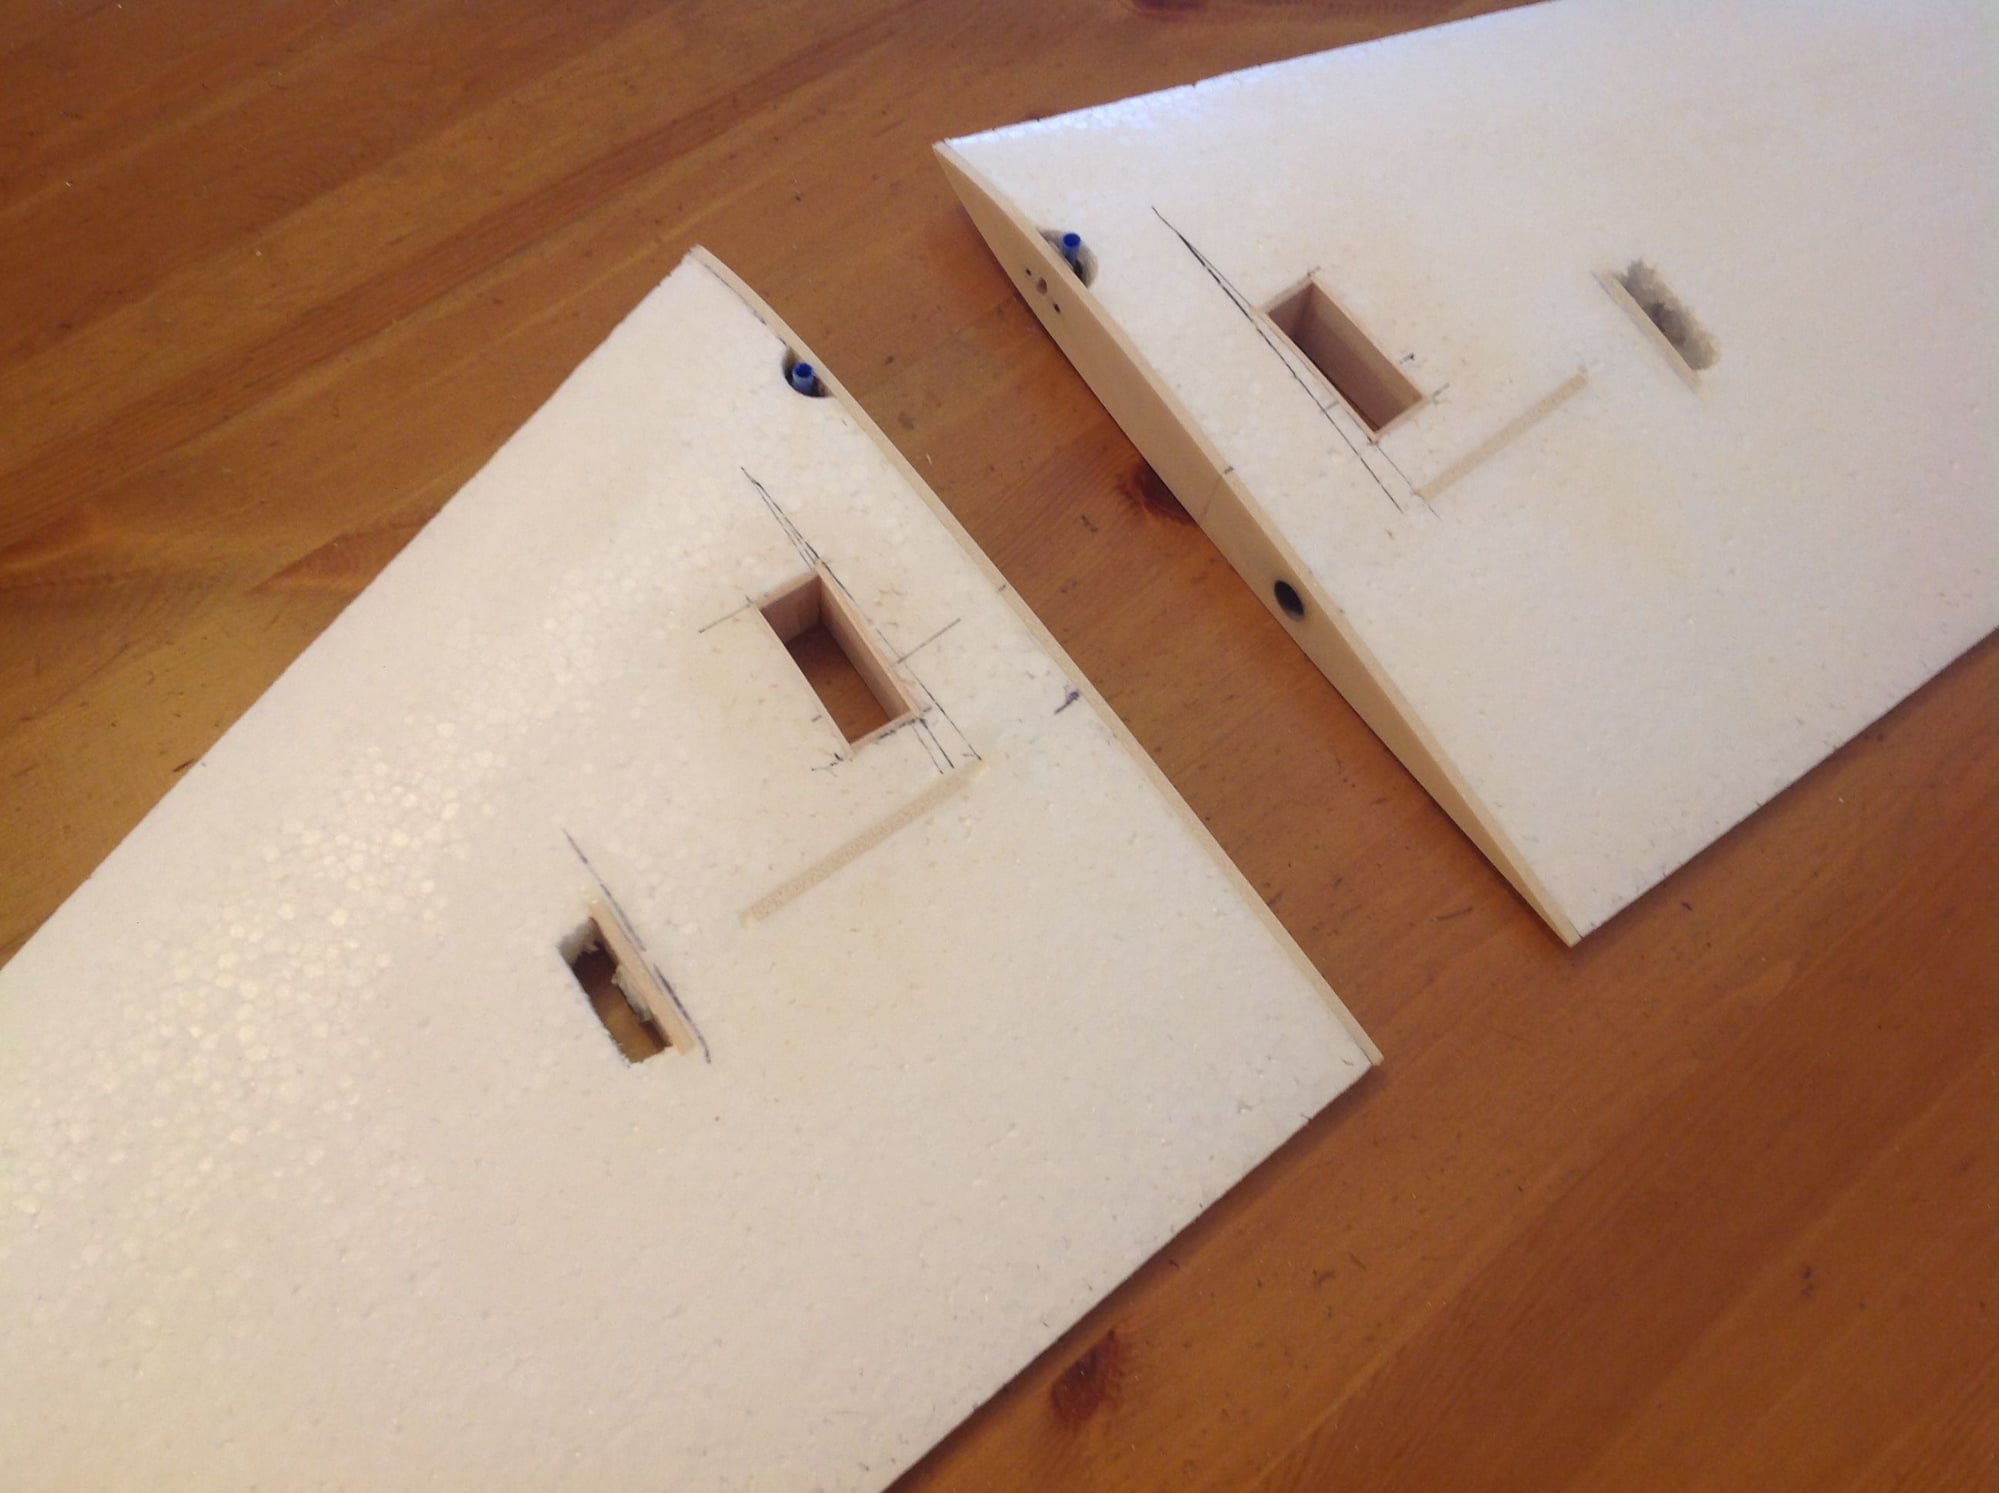
Although a stab is shown the same prep applies for a wing. Note that the joiner socket, root rib and servo box has been done prior to sheeting.

Application of epoxy laminating resin.
Use just enough to produce a sheen on the skins. This applies for epoxy and Gorilla Glue.

 11-05-2018, 06:07 PM
#12
Great posts! (although someday I hope my shop will have a slab of marble!)
I just used Gorilla Glue on the latest wing cores, and followed advice found on this forum to spread it into a thin coat with a nice sheen. It's held up flawlessly to date.
The Kougar wing, in my opinion, is a nice design. Simple to construct and allows a good blend of speed, manueverability, and nice slow landing speeds. Once you get the CG correct, the plane just floats in and lands almost like a trainer.
Last edited by BalsaGhost; 11-05-2018 at 06:58 PM.
11-05-2018, 06:51 PM
#14
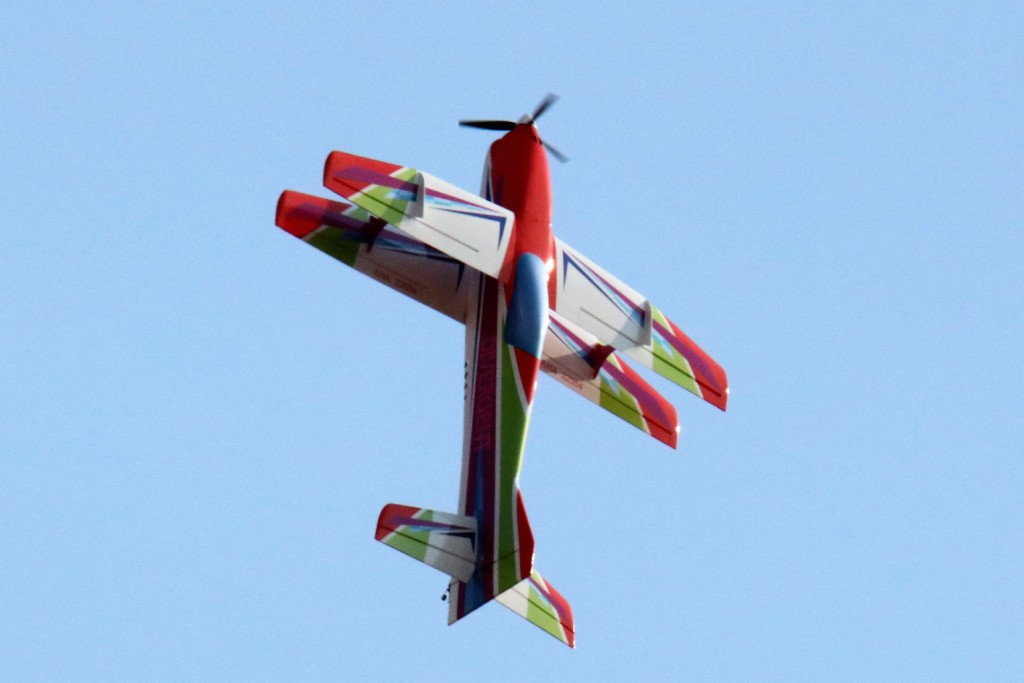
I agree, I would see if the cores can be found elsewhere and then get the sheeting locally. No doubt that the wing kit will include sheeting for that price but will be of questionable weight. Many craft stores carry balsa. I get a fair amount of mine from Michaels craft store. My wife gets discount coupons all the time for 20 to 25% off entire purchases. They even send out 40% off single item coupons. Since I showed some construction pictures, how about a picture of the finished airplane?
11-11-2018, 06:13 AM
#16
Thread Starter
11-11-2018, 09:33 AM
#17
Banned
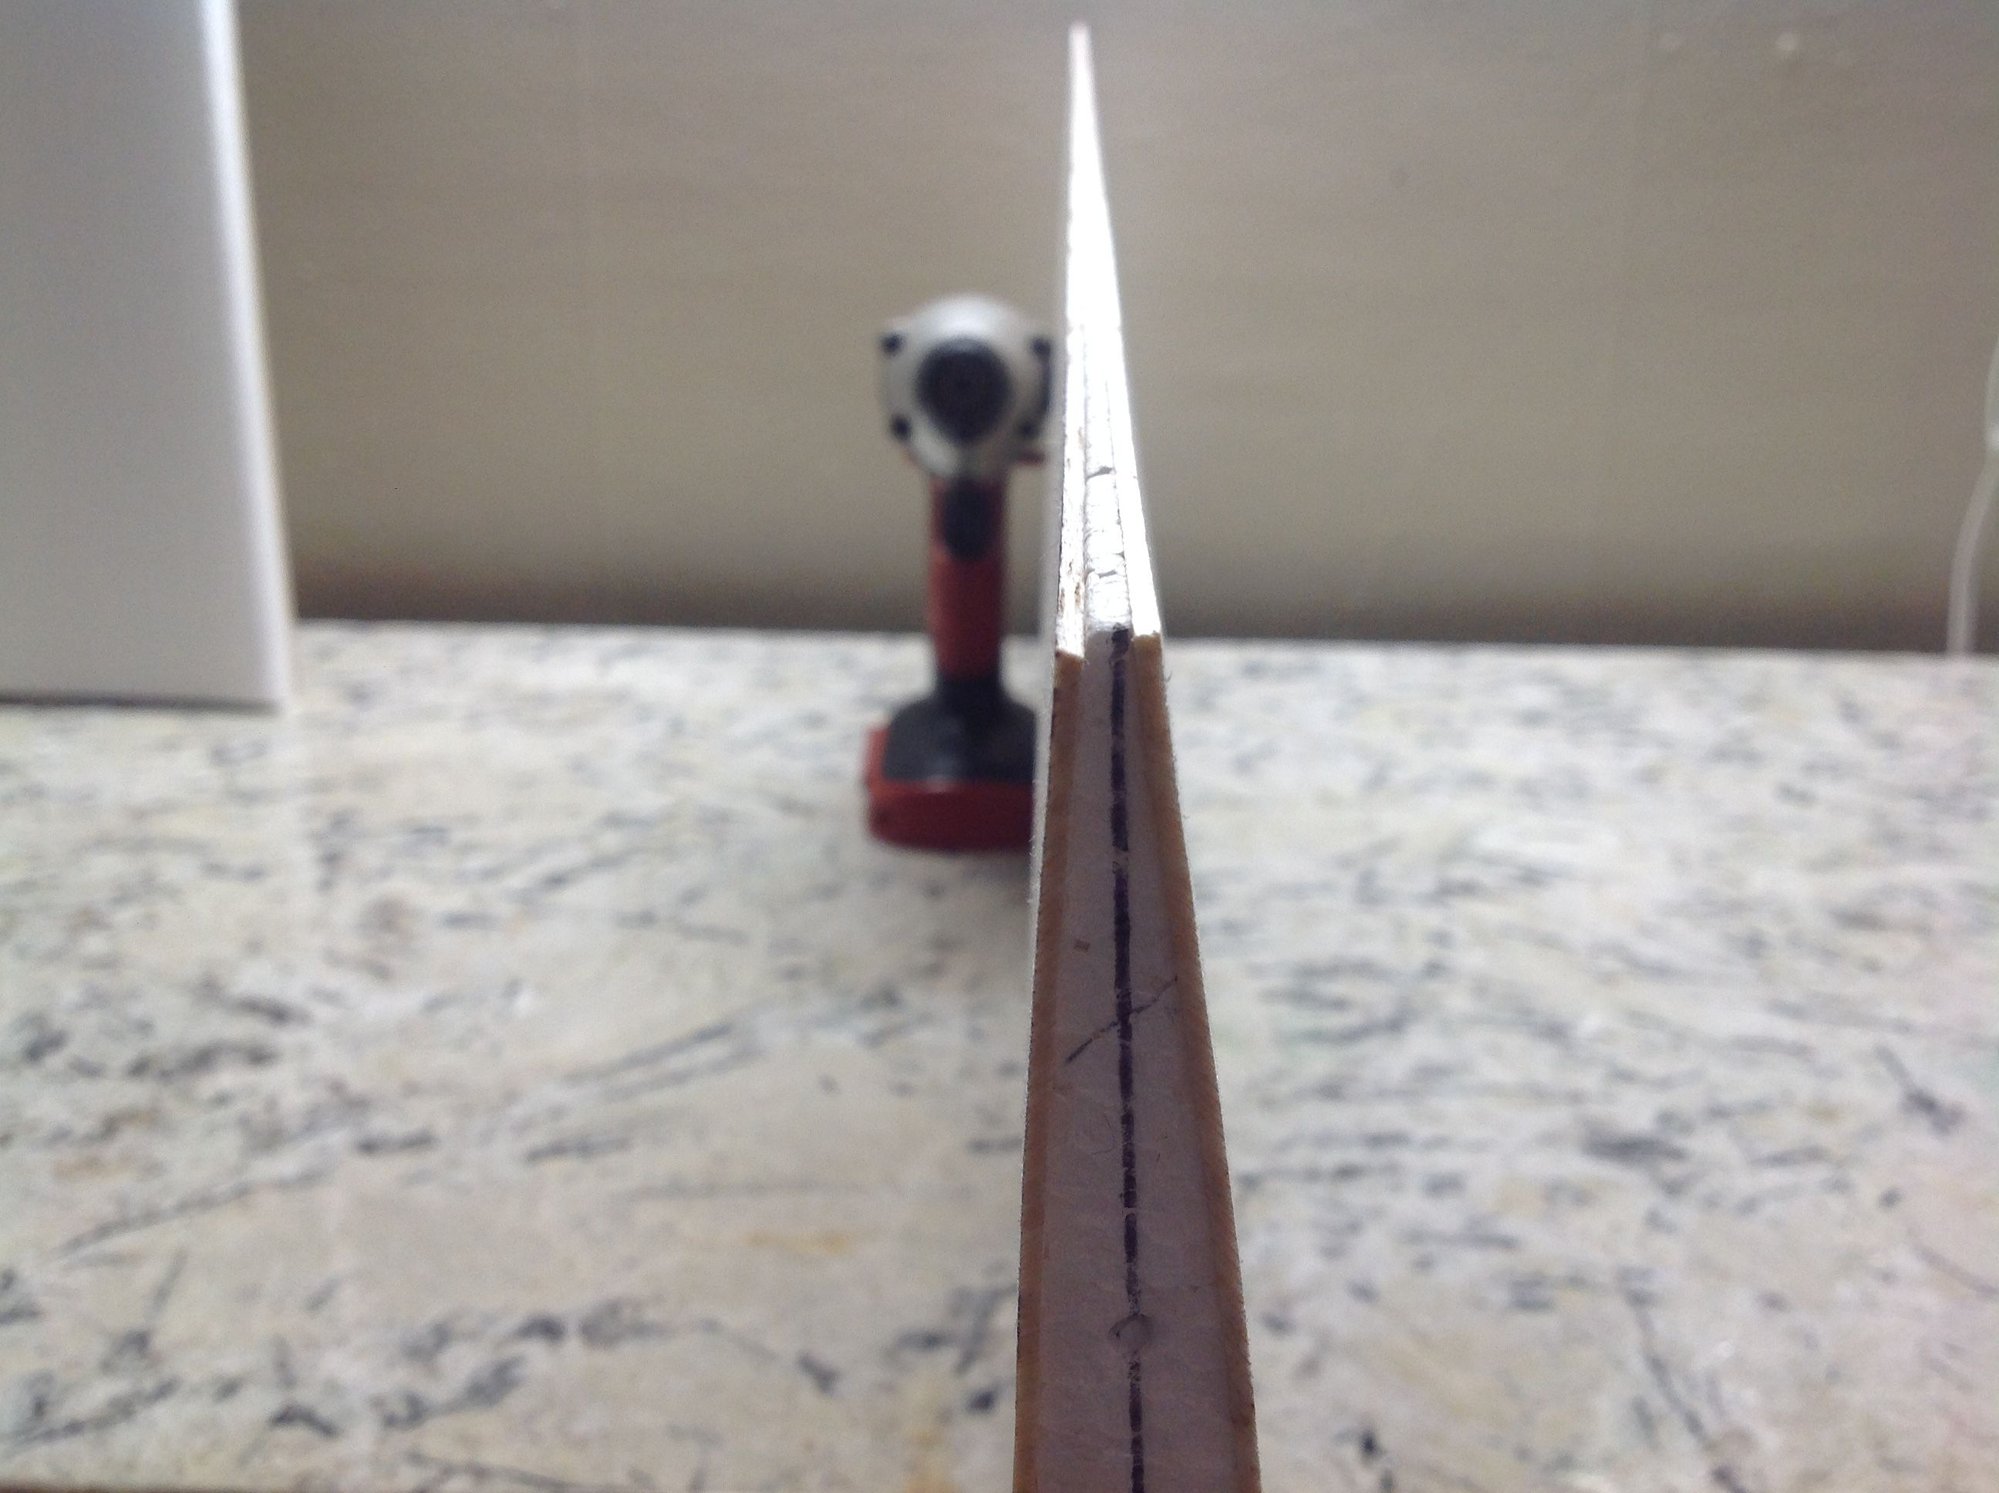
The second is the profile of the root and tip airfoils. Easiest ways to do this would be to trace around the remnants of the original foam wing assuming at least one half is intact. Reduce accordingly for any sheeting that may be on it. From these profiles you then cut templates from 3/16 or thicker ply. Mark the top and bottom of the templates even if they're symmetrical. The hard part is orienting the two templates to each other for proper wing sweep, washout, etc. Once they are lined up with each other you then drill alignment holes in them. These holes are then used, with bolts, to clamp rib blanks between the templates. You then carve and sand away everything outside the templates until you end up with what looks like a very short wing panel. Notch for spars and trim for LE and TE and go from there. The number of blanks will equal the number of wing ribs on each side. So you do the carving/sanding process twice. One for each side of the wing.
It's not hard but does require paying attention to what you're doing. Was a time I'd roll the parts for a wing out in an afternoon and have it framed up that evening. But I've slowed down a bit since then. And once you've done it, you wonder why you never did it before.
The accuracy is all in how your measurements are when doing the initial profiles and templates. Of course you also have to determine how many ribs per side. For the Kougar I'd be tempted to space them every 2 inches. Maybe as much as 2.5. I'd have to look it over first.
Here's a video showing the basic technique. Should give you the idea. A table mounted drum or disc sander is super helpful with this process.
11-11-2018, 05:10 PM
#18
You can also get replacement cores from Eureka...wing-k
I've only done foam core wings once, for a Big John bipe, but it worked so well I'll do it again. I bought cores from Eureka and watched a couple of Youtube videos. The one I went with used Gorilla glue. What was interesting was to see how little he used. He rolled it out with a firm four inch paint roller. At first I though it would never work, but as I kept rolling it spread out. Then I misted the balsa sheets and applied weight. I used a piece of marble, as above, with some slate stacked on top. It worked great. For anyone who used vacuum bagging, more power to ya, but I don't see how it could end up any lighter than what I got with weights. Also the tip above was good...don't edge glue the sheets. I did, but won't bother the next time.
RCG seems to have changed photo uploading method and after getting everything set up I couldn't figure out where to click to make them attach...sorry. Jim
11-12-2018, 04:00 AM
#19
It all depends on which material you are comfortable with; foam or balsa. I’ve been comfortable with balsa. I’m now experimenting with cutting foam wings and building with foam.
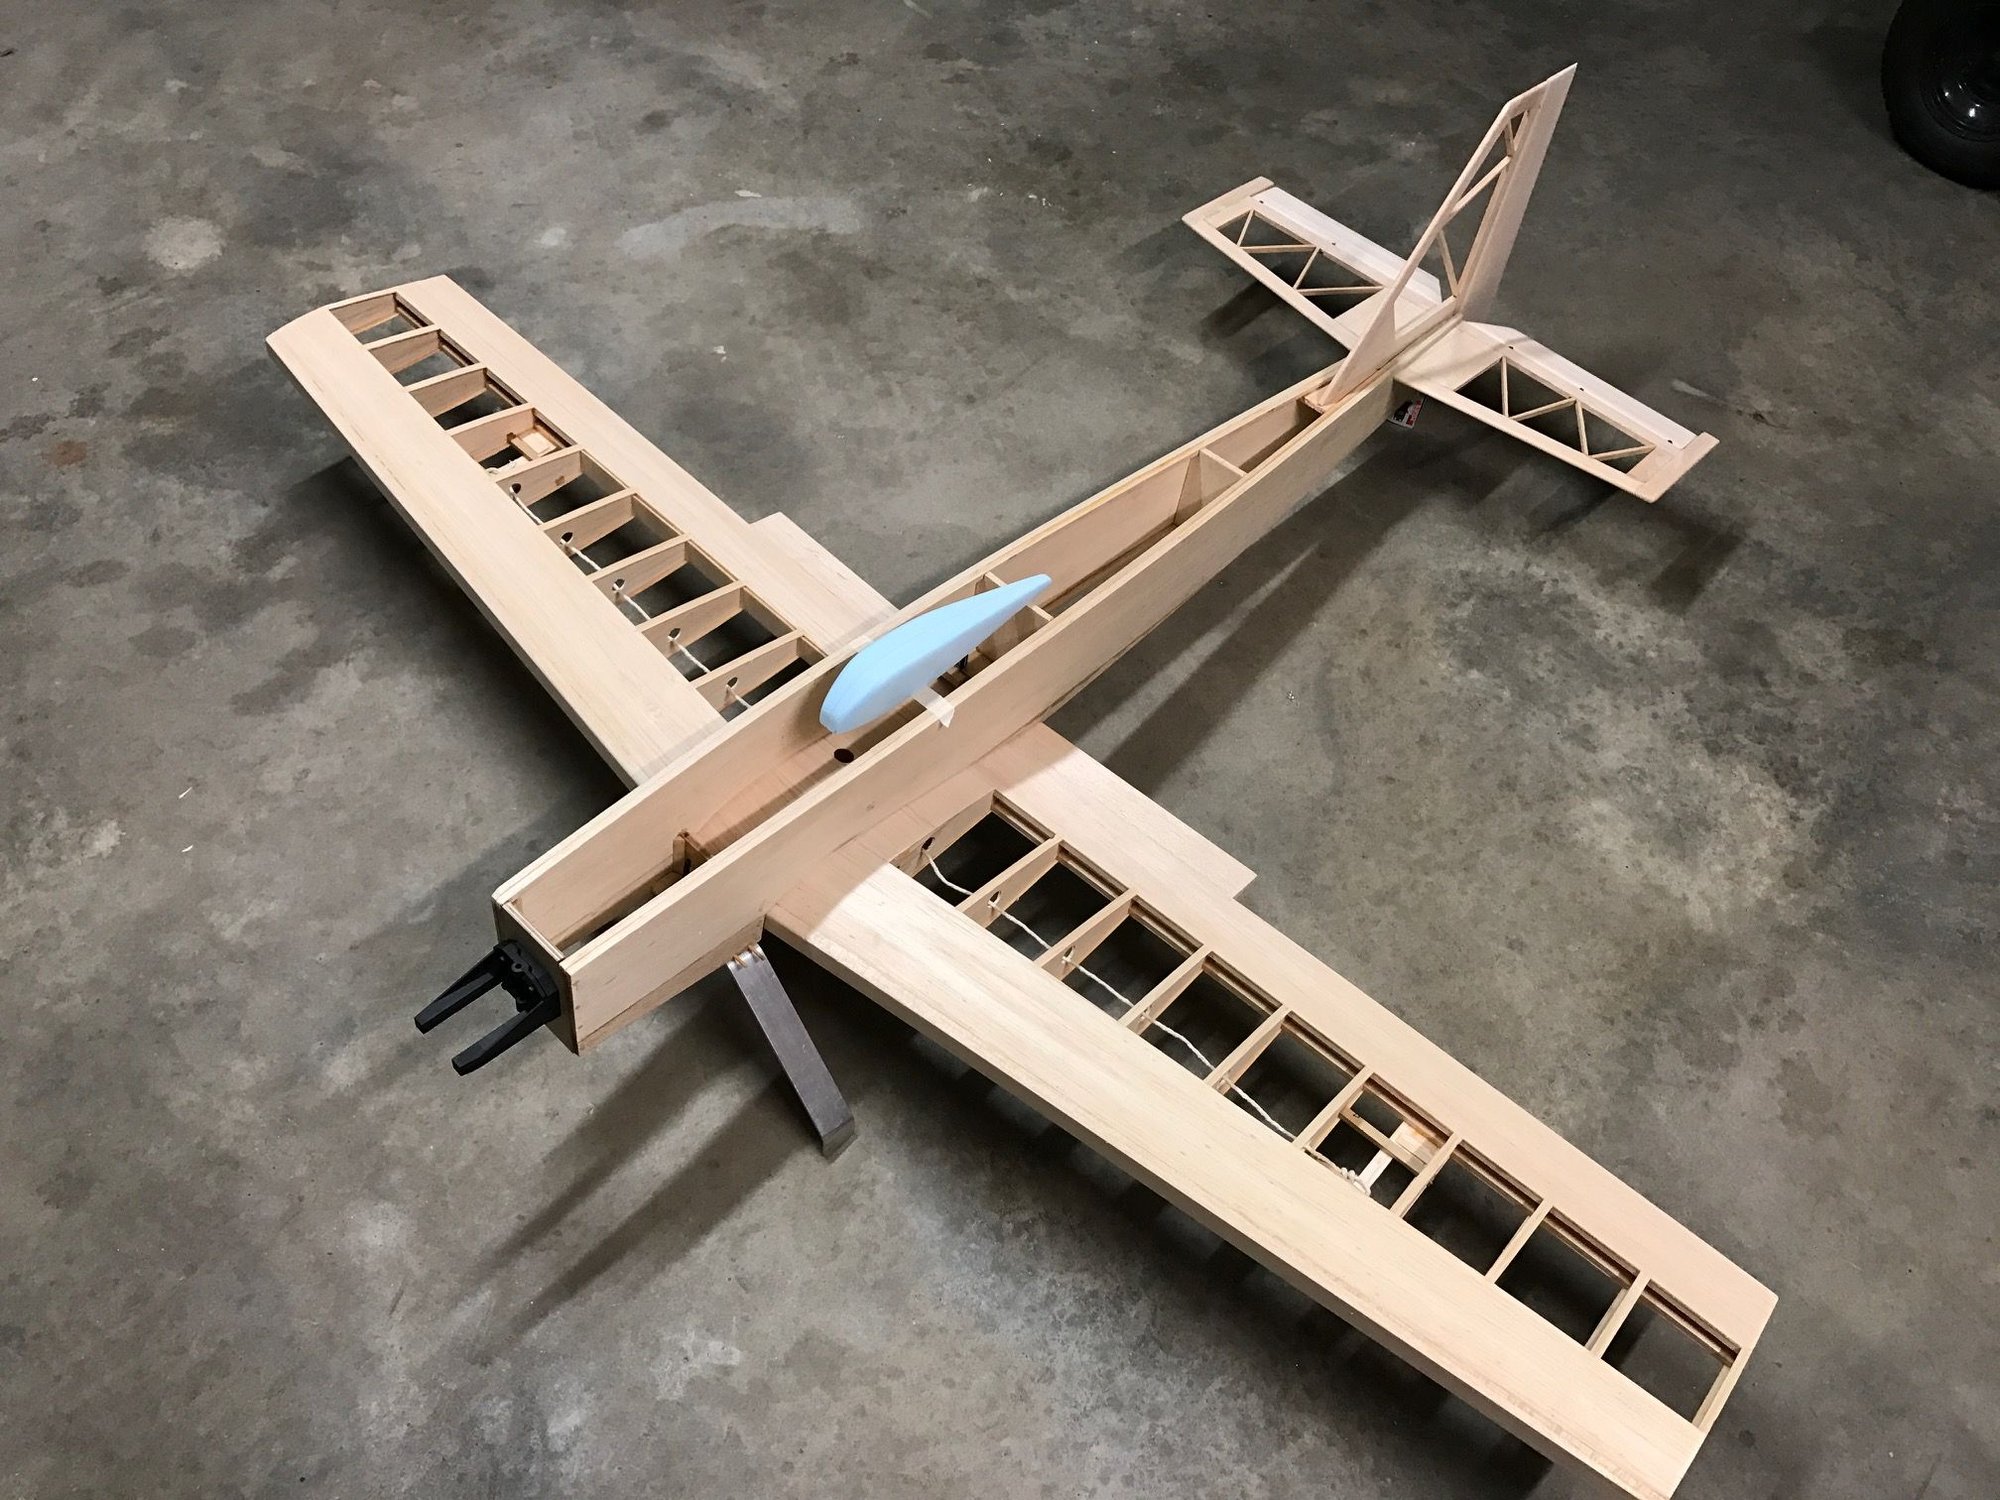
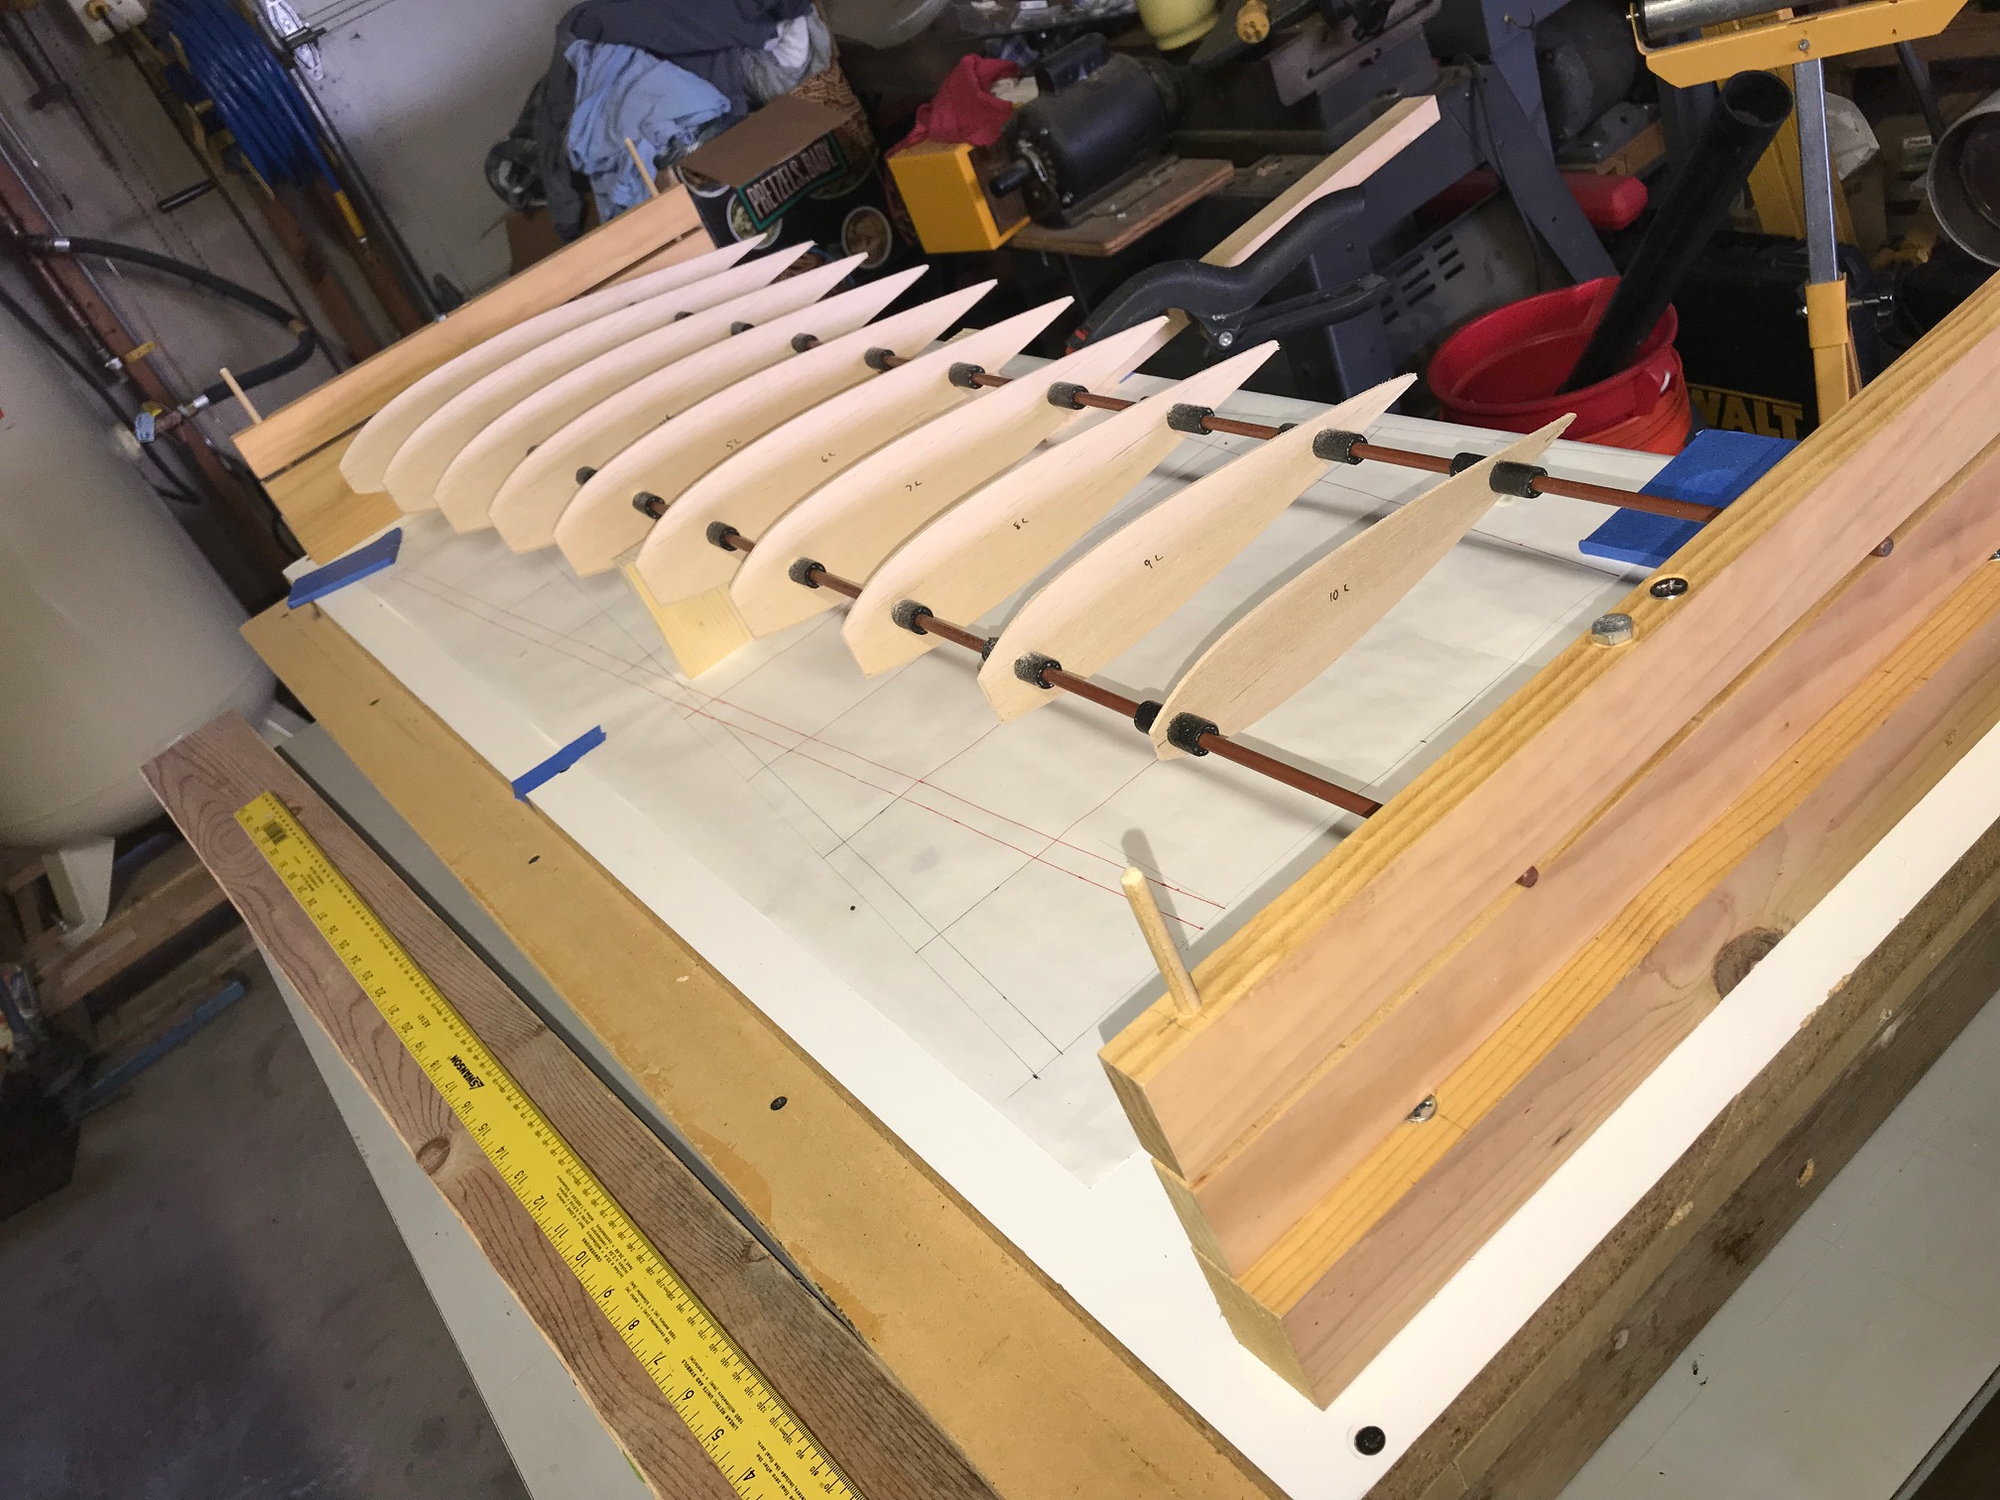
As Appowner stated, a balsa wing is not hard to build. Here is a picture of what he states. My plan is just drawn lines on freezer paper. Shaped wing ribs and rib spacing. Tapered wings are best built in a jig, IMO. Even the jig is not hard to make. You just need to give it a try. The sooner you start the sooner you finish; balsa or foam.
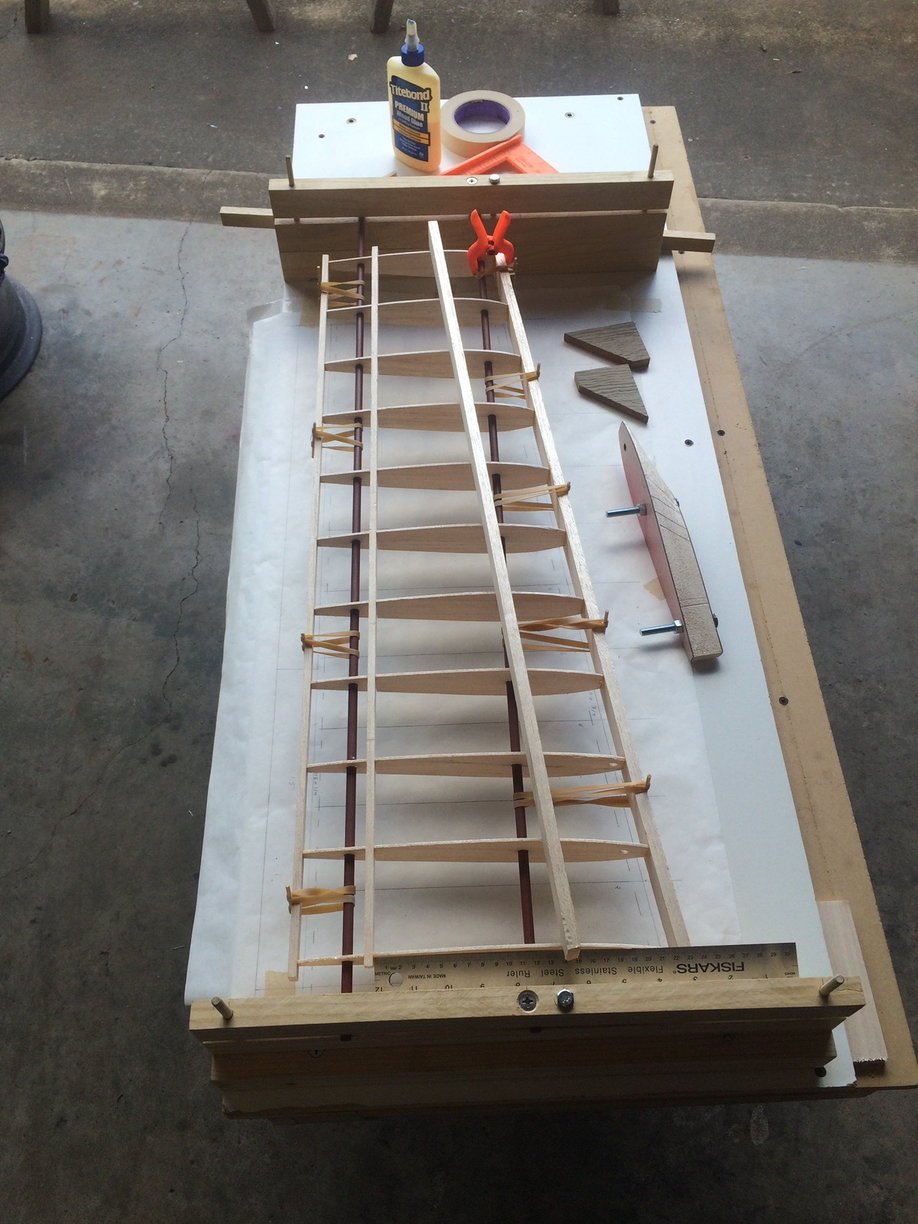
As Appowner stated, a balsa wing is not hard to build. Here is a picture of what he states. My plan is just drawn lines on freezer paper. Shaped wing ribs and rib spacing. Tapered wings are best built in a jig, IMO. Even the jig is not hard to make. You just need to give it a try. The sooner you start the sooner you finish; balsa or foam.
11-12-2018, 07:49 AM
#20
I haven’t seen the Kougar wing plan. Thought I’d post these pictures. Wing has LE-TE sweep which may be what a Kougar has. So wing building is not too difficult. Just vary your technique a bit.

01-11-2019, 06:44 AM
#21
My Feedback: (6)
When I built my Kougar, I used 3M77 spray adhesive and it worked great. Has never separated and the wing came out light in weight, also very strong. The formula for 3M 77 has been changed ( Uncle's orders) so I don't know how it works now. Titebond has a spray adhesive that is supposed to be foam safe...I have a can but haven't used it on a foam wing yet.
I did all the wood carving and shaping out side in the back yard....looked like a saw mill after I finished.
Mine is powered by a Scorpion 3026-10 on either 4S or 5S. 65 A total.
I did all the wood carving and shaping out side in the back yard....looked like a saw mill after I finished.
Mine is powered by a Scorpion 3026-10 on either 4S or 5S. 65 A total.
02-11-2019, 09:44 AM
#22

My Feedback: (4)
Join Date: Jan 2002
Location: Westhampton Beach,
NY
Posts: 860
Likes: 0
Received 0 Likes
on
0 Posts
if its from 1989 maybe its time to simply build a new one?
My Kougar has so much fuel in the wing I have spent months trying to get it out and nothing will stick to the wood so I'm about to get a kit and start over.
There is a nice build thread on YouTube with a build -a-long of the Kougar. My next one will definitely have retracts, wish my King Kobra had them.
Bill S.
03-08-2019, 07:57 PM
#23
Thread Starter
Good news-I found a built but never flown Kougar!
got it dirt cheap.
its built very well and looks cool because the builder left off the plastic turtleneck and used a different canopy.
I put a Super Tigre 51 on it.
I can’t wait to fly it!
got it dirt cheap.
its built very well and looks cool because the builder left off the plastic turtleneck and used a different canopy.
I put a Super Tigre 51 on it.
I can’t wait to fly it!


