


Making tools to build with
 10-08-2013, 09:35 PM
#1

Thread Starter
I have read several times over the years the question, "where do you buy your building tools), some of them you have to make, like the mini squares I just did and I know others have made things to aid them in the many different building tool needs. So lets see some of your creations that make the job easier to do.
My squares were made from 1/8" and 1/16" aircraft plywood cut on a table saw and the slot for the leg to fit into was cut with a 1/16" kerf also on the table saw then the leg was glued into it and using a protractor to get it perfectly square and clamped till glue dried. I used Titebond glue. You can make them any size you want, I made them for building wings, marking rib location on spars and getting them straight vertically. Used high liters for color so I can find them and not pitch them in the trash as scrap.
My squares were made from 1/8" and 1/16" aircraft plywood cut on a table saw and the slot for the leg to fit into was cut with a 1/16" kerf also on the table saw then the leg was glued into it and using a protractor to get it perfectly square and clamped till glue dried. I used Titebond glue. You can make them any size you want, I made them for building wings, marking rib location on spars and getting them straight vertically. Used high liters for color so I can find them and not pitch them in the trash as scrap.

 10-14-2013, 03:04 AM
#4

Hey Leroy, her is something I did a few years ago that might interest you. I took a Great Planes hinge slotter and turned it into a biscuit slotter for building my fuselages. The biscuits are 1/64" thick birch plywood that can be laid out with pencil and template then cut with scissors, or they can be cut real fast with a laser, I have done it both ways and all works well, just slot all joints, slide all joints together with biscuits and wick thin CA into joints.


Here are the test results -------------------No Biscuit --Biscuit
Bending (inch-pounds) ----------------------- 2 --------- 7
Axial (pounds) --------------------------------- 11 ------- 26
Bob
Here are the test results -------------------No Biscuit --Biscuit
Bending (inch-pounds) ----------------------- 2 --------- 7
Axial (pounds) --------------------------------- 11 ------- 26
Bob
Last edited by sensei; 10-14-2013 at 03:19 AM. Reason: Image too small
 10-15-2013, 11:59 AM
#7
Senior Member

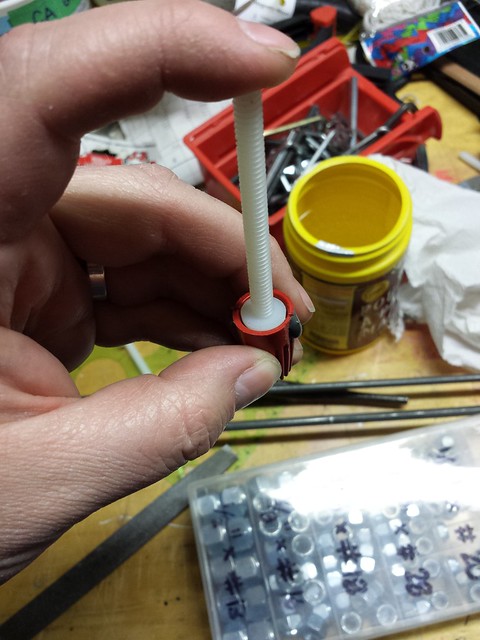
More of a field tool than a build tool, but the 5mm wing bolts that came with my Pulse 125 had sharp edges and were really hard on the fingers. Enter the wing bolt tool:

Last year I cartwheeled the airplane, breaking both wing bolts. I couldn't find any 5mm replacements so I went with 1/4-20. Problem solved.
Last year I cartwheeled the airplane, breaking both wing bolts. I couldn't find any 5mm replacements so I went with 1/4-20. Problem solved.
10-15-2013, 02:13 PM
#8

My Feedback: (3)
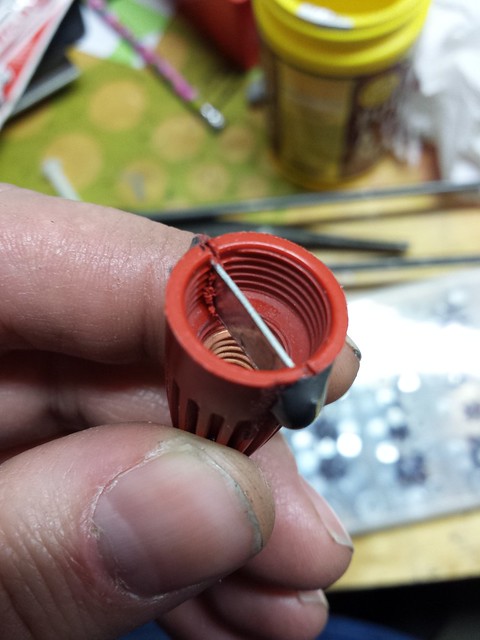
Camshaft bearing puller for an OS 1.20 Surpass. No way could I get those bearings out. So I used a socket head cap screw that I slit up the middle with a cutting wheel, then pared the head down to where it would just fit into the bearing (note the taper), squeeze down and expand back out on the other side. At this point, you cut a washer in two and slip it into the slit so the fork can't close back up. Now you put a washer on it, thread on a bolt and crank down to pull that bearing free. Of course, all of this is done with mitts on after you have warmed the crankcase in the oven.
The engine is back in fine form and good for another 20 years (I hope).
Dave

The engine is back in fine form and good for another 20 years (I hope).
Dave
10-21-2013, 08:34 PM
#9
Thread Starter
This is what I was hoping for, great ideas from great minds, Bob the slotter is a great idea for stick construction. Tom I can see where a fuse. jig can really aide in getting it straight and square, good stuff.
Leroy
Leroy
10-22-2013, 08:55 PM
#11
Thread Starter
Here is a couple more tools, these really make a nice straight covering lip to fold over, balsa sticks with a blade CA'd in them. Ever scrounge around looking for something to mix some epoxy in, well start saving those spray can lids, most of them have a nice cup in the center of them.
Leroy
10-28-2013, 04:55 PM
#12
Senior Member
Join Date: Nov 2003
Location: Edgewood,
TX
Posts: 294
Likes: 0
Received 0 Likes
on
0 Posts
these are some that I have in the garage right now. Left is a sanding block for sanding the V on the front of control serfaces. The 90 with the quarter circle cut out is for aligning the rudder post when installing. And there is my $.50 yard stick incidence meter. I almost always build to 0,0,0. If I do want to check washout or for wing warps, I use an angle finder. But most time I just level everything with the bubble. It's really pretty accurate, and for the best accuracy you just make sure it is always facing the same direction, everything will be in line for sure that way.
The second picture is my "heavy 90" I cut it into a 2X4 (obviously), tweaked the saw until I got a good 90 (even most of the store bought 90's I have at least a little off!) But it has three different hole sizes in it that I use for soldering bullet connectors onto wires. Just put the connector into the how. and solder away.
Austin
10-30-2013, 06:48 PM
#15
Join Date: Jan 2013
Location: edgewood,
TX
Posts: 74
Likes: 0
Received 0 Likes
on
0 Posts
yes it does, I've been wanting to make a smaller balsa one for the smaller planes. I figure if you are careful in building it, and if you always reference it the same way, it's probably as accurate as any I could buy, certainly accurate enough for a sport flyer like me.
Same with my triangles. I sand and trim until I'm satisfied that they are "good enough" I have at least 4 "speed squares", 2 framing squares, a drafting "T" square, various other objects for squaring. I can take any 2 of them and strike a line off of the edge of my building table and they won't line up exactly. The drafting triangles you get from the art store are good. Some of the carpenters squares will be square on one side of the blade, and not the other. Most levels wont read the same if you flip them end for end. But, I'm buying "bargain" stuff for the most part. I know if I looked beyond the local hardware stores and went to drafting or engineering supply houses I could pay a lot of money and get more accurate stuff, but I have to tell myself it's a model airplane, I don't work for NASA, I don't even fly competition...so it's good "enough."
Austin
02-01-2014, 09:11 PM
#16
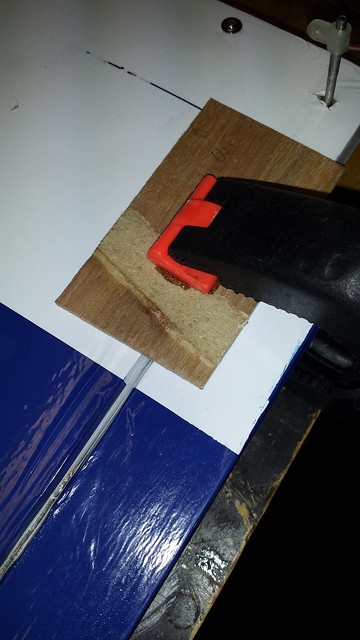
We all need straight edges to build. When I first started building I used a 36" aluminum ruler.
For the size of planes I was building it was to long most of the time. I then bought a second
one and cut it at 1ft this gave me a 12", 24", and 36" straight edge. Or cut your own to any
length to suit your needs.
For the size of planes I was building it was to long most of the time. I then bought a second
one and cut it at 1ft this gave me a 12", 24", and 36" straight edge. Or cut your own to any
length to suit your needs.
The following users liked this post:
1boxhead (03-20-2023)
02-06-2014, 09:31 AM
#20

 02-06-2014, 10:10 AM
#21
Senior Member
Here's another one... control clamp to hold an aileron / elevator / rudder at centre position while setting up a linkage.
Clamp applied by JD and Beastlet, on Flickr
Clamp applied by JD and Beastlet, on Flickr
09-14-2014, 05:56 AM
#24

I made a pair of jigs for aligning bi plane wings
Adjustable parallelograms
It accommodates different chord gaps and chords. Great for setting up interplane struts between the wings.
Attaches to my magnetic building board with four permanent magnets per parallelogram. All of my building is done on a magnetic board, so this had to match that.
I attempted to make on out of steel. What a nightmare. Maybe with a mill you could get all of the holes to align, but not a drill press.
Ken
