


Blind nut in very rear of plane
 02-09-2015, 06:06 PM
#1

Thread Starter
My Feedback: (15)
Join Date: Nov 2009
Location: Somerset,
NJ
Posts: 67
Likes: 0
Received 0 Likes
on
0 Posts
So I need so help here folks. I'm building an MSR and I went to assemble the tail wheel and one of the blind nuts came loose on me. So now I have the 3mm x 30mm blot that just turns. Can't tighten - can't get the bolt out. Only thing I know I can do is to get my Dremel out and cut the bolt which would obviously free the blind nut and I could shake it out of the rear of the plane. But if I did that, how do i reinstall a new one? Any tricks with out cutting up the covering? Thanks for reading.
 02-09-2015, 08:16 PM
#2

Is the screw stripped in the blind nut or is it loose and the blind nut has been pushed out of the wood? You can pull on the screw and try to seat the blind nut again? I have used piano wire, hot glue to put blind nuts in places my hands could not fit.
Buzz.
Buzz.
02-10-2015, 05:03 AM
#3

After cutting the old bolt off it sounds like getting a new blind nut will be near impossible without surgery, so a couple options I can thing of,
1- Epoxy in a 4-40 threaded insert, they make a few different styles,
2- Cut out a small area epoxy in a ply or hardwood block, drill and tap for the new bolt
inserts
http://www3.towerhobbies.com/cgi-bin...DxcaArCn8P8HAQ
https://www.google.com/webhp?sourcei...eaded%20insert
good luck
1- Epoxy in a 4-40 threaded insert, they make a few different styles,
2- Cut out a small area epoxy in a ply or hardwood block, drill and tap for the new bolt
inserts
http://www3.towerhobbies.com/cgi-bin...DxcaArCn8P8HAQ
https://www.google.com/webhp?sourcei...eaded%20insert
good luck
Last edited by scale only 4 me; 02-10-2015 at 05:07 AM.
02-10-2015, 03:34 PM
#4

Join Date: Sep 2006
Location: The Sunshine state, when it's not raining!
Posts: 8,131
Likes: 0
Received 2 Likes
on
2 Posts
If the current B-nut is just free turning try applying downward pressure while turning. But if it has to be cut, cut the bolt head off being sure not to push the shaft into the fuse. Tie a piece of thread to the bolt shaft long enough to reach through to an opening. Work the shaft and B-nut out of the fuse while leaving the thread end to end. Now you can remove the B-nut from the shaft, screw a new B-nut onto the cut shaft and pull it back through the fuse and work it through the hole. Using pliers pull the new B-nut tight using a wedge to pull against. Screw the shaft out, use a new bolt to tighten the B-nut all the way down and remove the bolt. Run ca into the hole enough to reach through and around the new B-nut. Far easier to do than to explain.
02-10-2015, 05:37 PM
#5
Thread Starter
My Feedback: (15)
Join Date: Nov 2009
Location: Somerset,
NJ
Posts: 67
Likes: 0
Received 0 Likes
on
0 Posts
Thank Robert. That is a great way to do it. I wish I had thought of that yesterday. Well it turned out that the blind nut had poor threading and I basically just turned the blind nut out of the wood. So here is what I did. I cut the bolt and was easily able to get the blind nut and what was left of the bolt shaft out of the fuse. I then made out of thin maple plywood a 5/8 x 5/8 square and put an mounted a new blind nut onto that square. I then made a handle out of thin copper wire to act as a cradle. I used a push rod and taped my cradle to the end of the push rod. I inserted it into the fuse down to the tail area and with the aide of a light I then used another push rod and through the hole in the bottom of the fuse I lined up the hole in the blind nut to the push rod. This was not an easy task. Once I was able to do that I then put 30 minute epoxy carefully on the bottom of the maple plywood and repeated what I just stated. Once I got the push rod through the blind nut hole from the bottom of the fuse, I then pulled the long push rod so my tape would come off and now the assembly just dropped to the bottom of the inside of the fuse with the blind nut lined up with the pre driilled hole. Right now my epoxy is drying, SO if my idea works, the epoxy should harden and the blind nut should be lined up - I just have to take the tape off the push rod that is lining everything up and insert my bolt and I should be good to go. Talk about explaining that - but I truly like your idea way better - its just that I know I messed up the wood inside so I figured I would be better off trying to put in a whole new piece of ply. I took some pictures of my assembly, if my idea works I will post.
02-11-2015, 08:55 AM
#7
Join Date: Jan 2015
Posts: 280
Likes: 0
Received 0 Likes
on
0 Posts
Run a tap through the blind nut before you try to
use a screw. If there is any epoxy in the threads
it will jam the screw but the tap will clean it out.
If it doesn't take, drill the wood to fit a dowel the
same size or slightly bigger than the blind nut.
Drill a hole in the dowel to fit the blind nut.
Glue the blind nut to the dowel,
then glue the dowel with the blind nut
into the hole in the airframe.
Finally cut off and sand any extra
dowel sticking out.
Jenny
02-11-2015, 11:15 AM
#8
Thread Starter
My Feedback: (15)
Join Date: Nov 2009
Location: Somerset,
NJ
Posts: 67
Likes: 0
Received 0 Likes
on
0 Posts
Wow - that is really a clever technique. I think I will be ok and yes I did find that when I removed the blind nut, the threads were messed up and I did need a tap to clean them up.
02-11-2015, 02:13 PM
#9

I have taken soft screws that fit the blind nut cut off the head of the bolt and drill out a small hole through the centre of the remaining thread. solder a length of flex cable in the hole. Be sure to keep the threads free of solder. The thread should be long enough to pass through the hole with some thread on the outside. Feed a string/wire/flexible tube or another wire through the hole and to a place where the flexable wire in the thread can be connected and pull back through the hole until the blind nut is lined up with the hole and the threads are showing. Feed a washer then nut over the wire onto the thread and tighten until the blind nut sinks into the wood on the other side. Remove the nut,washer and short threaded adaptor from the blind nut and insert the intended screw in the the blind nut. Once you have a set of these made up you will wonder what you did without them.
Dennis
Dennis
02-12-2015, 06:26 AM
#10
Thread Starter
My Feedback: (15)
Join Date: Nov 2009
Location: Somerset,
NJ
Posts: 67
Likes: 0
Received 0 Likes
on
0 Posts
Dennis - That is really a neat trick. That is super clever. I'm sure not easy to drill a hold through the center of say a 4-40 threaded bolt shaft and I'm sure its tricky to try to pull that assembly back and through the original hole in the plane, but with time I'm sure it works. Very clever. Well my technique worked and I'm attaching a picture of what I did. I chose my way only because I know when I 'unseated' the blind nut in the rear of the plane, I chewed up the wood that the teeth were mounted in. So with that said, I felt better to try and get another piece of small ply in that area. As you can see from my picture I just made small cradle and used a long push rod to get it to the back of the plane. I used 30 minute epoxy on the bottom of the cradle and I put some light lithium grease in the blind nut hole to prevent epoxy from getting into the threads. I then used a shorter straight push rod and from the bottom outside of rear fuse I lined up the blind nut hole with the short push rod so I was centered over my original hole. I then pulled the long push rod out and let the cradle fall into place. I taped the shorter rod in place and came back the next day, removed the short push rod and had inserted my new threaded bolt in place. Worked fine. 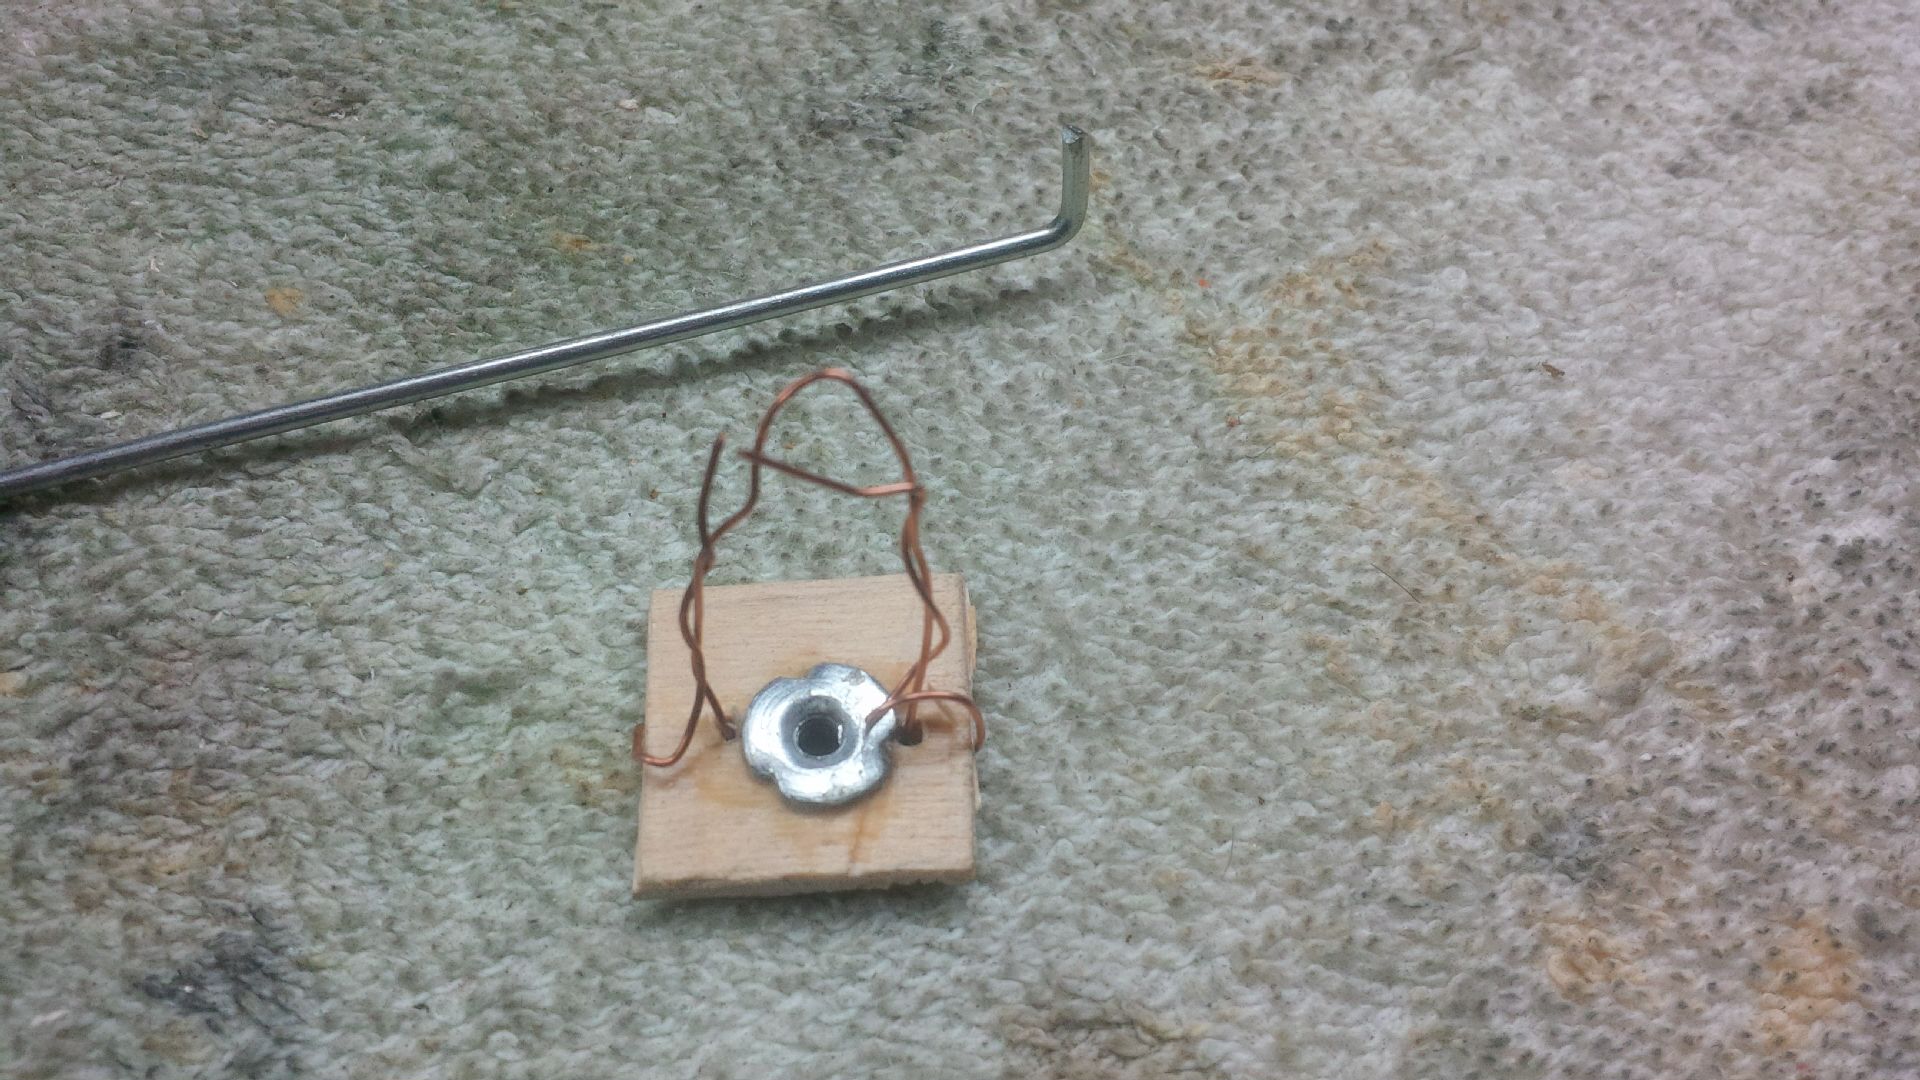
02-12-2015, 07:07 AM
#11
Dennis - That is really a neat trick. That is super clever. I'm sure not easy to drill a hold through the center of say a 4-40 threaded bolt shaft and I'm sure its tricky to try to pull that assembly back and through the original hole in the plane, but with time I'm sure it works. Very clever. Well my technique worked and I'm attaching a picture of what I did. I chose my way only because I know when I 'unseated' the blind nut in the rear of the plane, I chewed up the wood that the teeth were mounted in. So with that said, I felt better to try and get another piece of small ply in that area. As you can see from my picture I just made small cradle and used a long push rod to get it to the back of the plane. I used 30 minute epoxy on the bottom of the cradle and I put some light lithium grease in the blind nut hole to prevent epoxy from getting into the threads. I then used a shorter straight push rod and from the bottom outside of rear fuse I lined up the blind nut hole with the short push rod so I was centered over my original hole. I then pulled the long push rod out and let the cradle fall into place. I taped the shorter rod in place and came back the next day, removed the short push rod and had inserted my new threaded bolt in place. Worked fine.
Dennis
