


applying koverall with WBPU
 02-12-2009, 02:16 PM
#26
Senior Member
My Feedback: (1)

Join Date: Aug 2005
Location: Eugene, Or
Posts: 1,152
Likes: 0
Received 0 Likes
on
0 Posts
I've been doing Polycryllic and Polyester Dress liner (close to koverall) and I've been really happy with the results..
The method I used is outlined in my Citabria build starting on page 3.
http://www.rcuniverse.com/forum/m_62...itabria/tm.htm
What I' do is put down 1 coat of polycryllic on areas that I know I won't just be able to brush the fabric down on.
Tight curves and edges..
I'll try to get the LE and TE of all flight surfaces and any edges or corners.
I'll let that dry..
When it's dry I'll lay out the fabric and brush it on with polyc around the edges if it's an open frame work.
I'll let that dry and come back with a heat gun to shrink it..
When it's shrunk tight I'll go back with the poly and coat any open area I left uncoated
For solid surfaces like a sheeted wing or stab I'll just start in the middle and work both ways until it's has a full coat.
Either method I'll be sure to wet out an inch past where I plan to trim off. Coated fabric cuts cleanly. uncoated frays.
After the first full coat dries it's time for the iron work.. Just treat it like any iron on fabric. The polyc melts with heat and the fabric will stick.
This is where I'll work around the wing tips and edges. The coated fabric will stick to the pre-coated wood like it was treated with balsa-rite.
You can get coated fabric to stlick to uncoated wood or vise versa but it's not a strong hold.. it's much better when both are preped.
What you don't want to do is take a heat gun or iron to it while the poly is still wet. The heat will cause the surface to set then boil the water out of the wet poly underneath causing bubbles to form that lift the fabric. These are a royal pain to get out. I've also seen the wet polyc boil on the surface and instantly dry into a bubbly foamy mess.
It's best to let it dry for a few hours then come back to shrink and iron down the edges.
A few more coats of polyc should blend in all the seams.
If you do happen to burn a hole with the gun just cut out a patch from clean fabric and brush it on over the hole. After a few coats you won't see the edges.
Last thing.. keep some new sharp blades handy.. The Fabric dulls them quickly..
I also did this method on my stick build
http://www.rcuniverse.com/forum/m_59..._1/key_/tm.htm
Great stuff..
 02-12-2009, 02:27 PM
#27
Senior Member
My Feedback: (1)
Join Date: Aug 2005
Location: Eugene, Or
Posts: 1,152
Likes: 0
Received 0 Likes
on
0 Posts
Almost forgot..
I prime With Kilz2 latex primer.. The only trick to using it is the sanding part..
It has to be wet sanded.. I use a 99 cent bottle of window cleaner is a wetting agent.. spray, sand, wipe down, repeat..
If you try and sand it dry it'll just clog the paper almost instantly.. By wet sanding I can sand out an entire wing with 1 piece of paper.
I used exterior grade Water Based Poly Urethane for a final coat.. It's holding up to 15% nitro on the stick but you should clean it between flights or it might get a little tacky.. If you forget just clean it up and it'll dry again in a few hours.
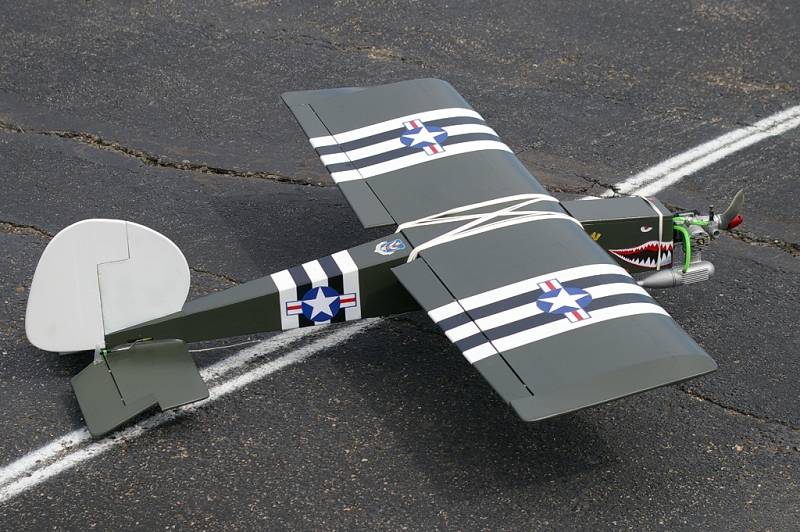
Dress Liner, PolyC, Kilz Primer, 99cent rattle can flat color, color laser logos and 2 coast of satin Exterior WBPU
I prime With Kilz2 latex primer.. The only trick to using it is the sanding part..
It has to be wet sanded.. I use a 99 cent bottle of window cleaner is a wetting agent.. spray, sand, wipe down, repeat..
If you try and sand it dry it'll just clog the paper almost instantly.. By wet sanding I can sand out an entire wing with 1 piece of paper.
I used exterior grade Water Based Poly Urethane for a final coat.. It's holding up to 15% nitro on the stick but you should clean it between flights or it might get a little tacky.. If you forget just clean it up and it'll dry again in a few hours.
Dress Liner, PolyC, Kilz Primer, 99cent rattle can flat color, color laser logos and 2 coast of satin Exterior WBPU

 02-12-2009, 09:00 PM
#29
Senior Member
Thread Starter

Join Date: Jan 2006
Location: Brandon,
MB, CANADA
Posts: 1,057
Likes: 0
Received 0 Likes
on
0 Posts
very nice! I could only hope my plane turns out like that when im done. I will make sure to post the results when i get there. Im just finishing up a few details on my seniorita, then i will start covering. I want to post pics of the process, but my gf will have the camera next week while she is in BC. I can take still images with my video camera (thank you santa), but they are blurry. I want to video tape the process, but i dont think the files will be in the right format to edit and post. (it records in avi format)
02-13-2009, 03:40 PM
#30
Junior Member
Join Date: Aug 2006
Location: Alton,
IA
Posts: 3
Likes: 0
Received 0 Likes
on
0 Posts
excellent info - been looking for this as I am about to cover a Sig Skybolt (electric conversion) with Koverall and WBPU
Thanks!
Steve
Thanks!
Steve
02-14-2009, 10:03 PM
#31

My Feedback: (6)
Join Date: Sep 2005
Location: KincardineOntario, CANADA
Posts: 277
Likes: 0
Received 0 Likes
on
0 Posts
I discovered a little trick to get rid of frayed edges. After you sand down the WBPU and talc layer you might get some fibers from the koverall or dress lining hangin out at the trailing edges. Instead of trying to cut these annoying little hairs off with scissors or a knife I just burn then off with a lighter. The fibers burn off beautifully...works well for me.
02-14-2009, 10:37 PM
#32
Senior Member
Thread Starter
Join Date: Jan 2006
Location: Brandon,
MB, CANADA
Posts: 1,057
Likes: 0
Received 0 Likes
on
0 Posts
thats good to know. does it shrink that local area anymore, or have you noticed? I probably will start covering the fuse of my plane tomorrow, so i might try and figure a way to video tape it.
02-15-2009, 06:14 AM
#33
My Feedback: (6)
Join Date: Sep 2005
Location: KincardineOntario, CANADA
Posts: 277
Likes: 0
Received 0 Likes
on
0 Posts
Nope...it does not shrink the fabric in that area because you only touch the flame to the "hairs" as quickly as you can, and then move the flame away.
02-15-2009, 03:10 PM
#34
Senior Member
Thread Starter
Join Date: Jan 2006
Location: Brandon,
MB, CANADA
Posts: 1,057
Likes: 0
Received 0 Likes
on
0 Posts
ok sounds good. I started covering the fuse of my plane. I will have to buy an editing software cause of the file type, so video taping is out. I dont have a camera til sunday, so no pics. But so far so good. Its really a painless process, and i cant see this taking me too long. Im hoping that i will have everything covered and ready for paint some time during next week. I originally wanted to do a cream/orange scheme, but the look of the olive drab on sscherin's plane has really caught my eye. i probably will decide when im in home depot buying the paint.
02-16-2009, 04:16 PM
#36
Senior Member
Thread Starter
Join Date: Jan 2006
Location: Brandon,
MB, CANADA
Posts: 1,057
Likes: 0
Received 0 Likes
on
0 Posts
thanks for that, I have pics of the covering in my build thread (kadet seniorita build) Its a real pain to post them, and the quality isnt that great. But i guess its better than nothing. As soon as im done with the fuse and control surfaces, I will have to buy more koverall for the wing. In the mean time, I will probably start to paint. I should have my camera back for that.
02-19-2009, 08:38 AM
#37
Senior Member
My Feedback: (8)
Join Date: Sep 2002
Location: Minneapolis,
MN
Posts: 147
Likes: 0
Received 0 Likes
on
0 Posts
Ok, I'm ready to give this a try.
Have the Koverall which I still plan to use. Only question I have is:
Polyurethane vs Polycryllic
Use one or the other or both?
Have the Koverall which I still plan to use. Only question I have is:
Polyurethane vs Polycryllic
Use one or the other or both?
02-19-2009, 03:00 PM
#38
Senior Member
My Feedback: (1)
Join Date: Aug 2005
Location: Eugene, Or
Posts: 1,152
Likes: 0
Received 0 Likes
on
0 Posts
Hmm I never tried WBPU for the application coat..
I don't know if it'll have the same iron down properties as the Polyc does..
2nd this is the sheen.. I prefer to do the application with satin polyc and base coats with flat and finish with gloss or satin depending on the project.
3nd this is what are you flying? On an electric you could get away with all Polyc but 15% glow will wipe the stuff right off. (I've tried it)
I'm not sure about gas.. but Latex paint does fine on a gasser as a finish coat.
Exterior Water Based PolyUrethane can take the glow fuel for a few hours. It's what I used on the Stick.. Just clean between flights and it's good to go.
Solvent based Exterior Polyurethane (stinky) can take glow fuel all day but has a yellow tint over white.
I did my flight box with it and it's survived fuel spills and exhaust residue without a mark on it.
Oh one tip I forgot to mention before..
FOr the fabric.. If it has any wrinkles or folding creases just set the iron to low and iron them out on a flat surface before applying the fabric to the plane... Just get it hot enough to take out the wrinkles.. Not shrink it.
02-20-2009, 10:35 PM
#39
Senior Member
My Feedback: (8)
Join Date: Sep 2002
Location: Minneapolis,
MN
Posts: 147
Likes: 0
Received 0 Likes
on
0 Posts
I went ahead with the PolyC and got the the Koverall on one wing panel so far. This is my first try with any covering other than Monokote or Ultracote. So far I am impressed with how well it went on and how nicely it shrunk tight. It was much easier to trim around the edges than I expected.
Only problem I had was the wrinkles that were in the fabric from the start. Your tip about ironing it out before hand will be tried on the next wing panel.
Still not decided what paint to use after I get the fabric/PolyC done. Leaning toward Top Flite LusterKote for a nice shiny finish on this Sig Something Extra.
02-21-2009, 02:39 AM
#40
Senior Member
My Feedback: (1)
Join Date: Aug 2005
Location: Eugene, Or
Posts: 1,152
Likes: 0
Received 0 Likes
on
0 Posts
Nelsons is supposed to be a great water based paint and fuel proof with the cross linker.
http://www.nelsonhobby.com/paint.html
I haven't tried it myself
http://www.nelsonhobby.com/paint.html
I haven't tried it myself


 04-06-2009, 07:45 AM
#49
ORIGINAL: smkrcflyer
oldscaleguy
What type of primer do you use? How many coats of polyc do you put on?
oldscaleguy
What type of primer do you use? How many coats of polyc do you put on?
04-22-2009, 08:54 AM
#50
Junior Member

Join Date: Oct 2008
Location: Ewing, NJ
Posts: 5
Likes: 0
Received 0 Likes
on
0 Posts
ORIGINAL: dhal22
don't forget about adding talc to the next few applications, it fills in the weave nicely that way.
don't forget about adding talc to the next few applications, it fills in the weave nicely that way.