B. Comments on the assembly.
a) Mounting the electric motor.
b) Mounting landing gear.
c) Mounting servos, linkages and the stab.
d) Mounting S.BUS hubs, one in tail and one under wing tube on fuselage floor.
e) Mounting Electronic Speed Controller (ESC) with the S.BUS2 current sensor.
f) Mounting receiver and Scorpion Backup Guard.
g) Flight LiPo battery tray for the 10 cell LiPo.
h) Galactika transportation cover.
a) Mounting the electric motor.
Hacker Q80-14XS F3A was choosen for my Galactika. It is a very nice electric motor.
I have used same motor in Sebart MythoS Pro for 2 seasons without any problem.
Specifications:
Powerange: Max. 2800W (15 sec.)
Idle Current @ 8,4V: 0,9 A
Resistance (Ri): 0,025 Ohm
RPM/Volt (kv): 209 U/min-1
Weight: 528g
Diameter: 88,5 mm
Length: 69 mm
Shaft diameter: 8 mm
Recommeded Timing: 25�
Switching Frequenzy: 8 kHz (according to manual and Hacker German hompage)
16 kHz (according to Hacker English homepage), I use 8 kHz
A carbon motor mount and a carbon rear support was bought from f3alorenz.de and what I needed to do myself was proper plywood distance so the motor got aligned with the nosering on fuselage with a distance of 1.8 millimter between spinner backplate and nosering.
I made the plywood spacers of hard high quality multilayer plywood that I shaped so as little material was needed as possible to save some weight but not to much so it became weak.
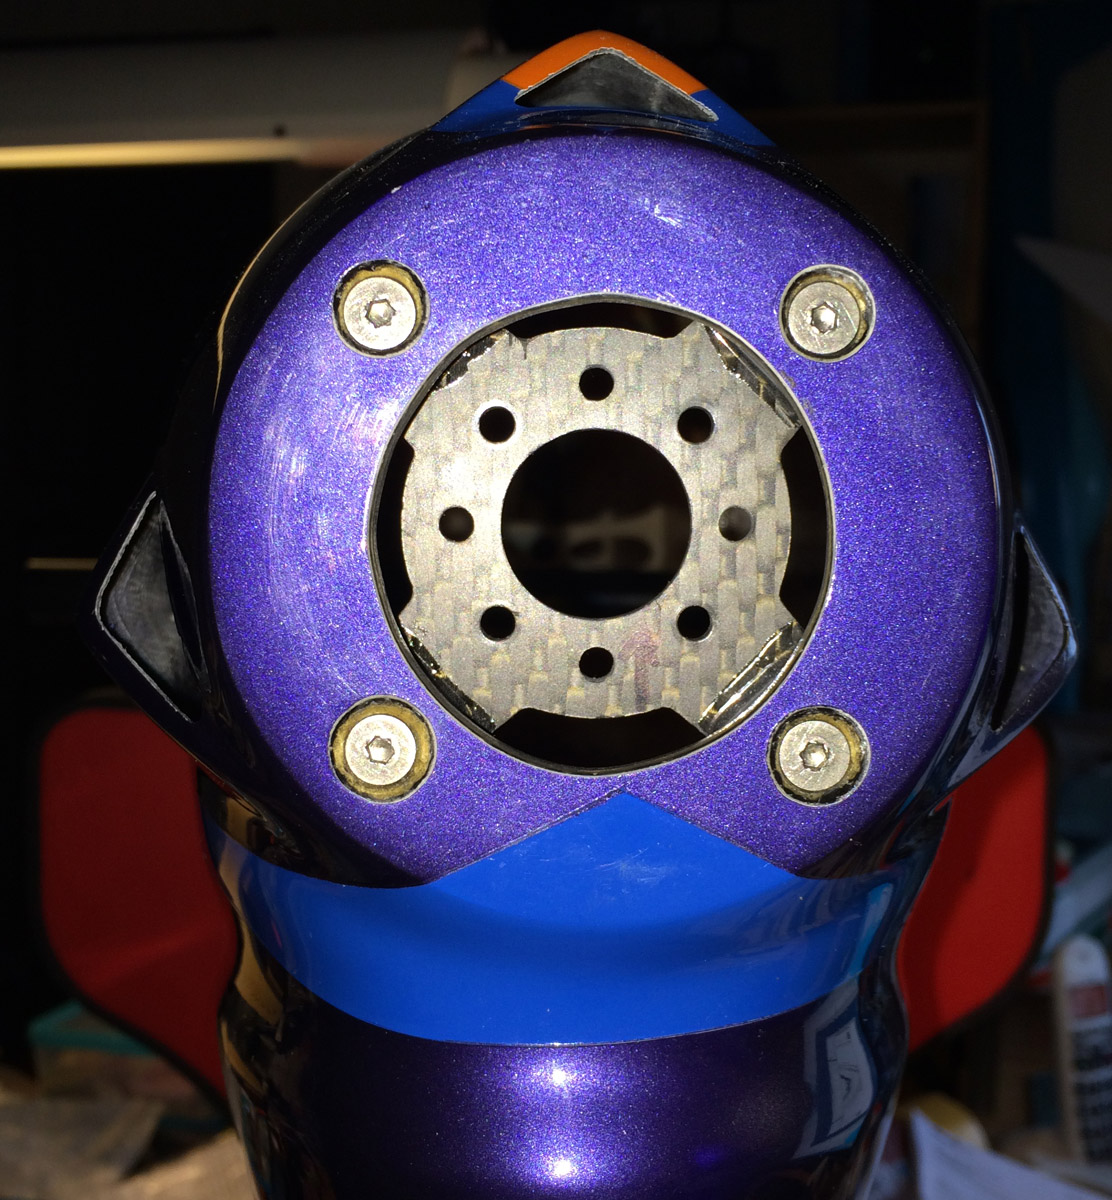
I enlarged with a Dremel the nosering center hole to help cooling the motor etc better. The 4 screws was countersunk in nosering after checking that the 82 mm Falcon vented electric carbon spinner was aligned properly at nosering.
After the spacers was glued to the carbon motor mount the spacers was gradually grinded down with fine wet sandpaper on a table so the motorshaft was exactly perpendicular both horizontally and vertically. I checked with feeler guage that it was finally exactly 1.8 mm around the nosering to the spinner backplate. I had the motor in and out of fuselage for this fine adjustment maybe 10 times.
The carbon motor mount was bought from f3alorenz.de and it has item no 2302.
I mounted also a rear support for the Q80-14XS, it is made of carbon and has a center metal tube (that is pressed in and glued to the rear support) that goes in to the rear ball bearing on the motor and it fits perfectly.
I have the same solution on my MythoS Pro. Although the rear support is fastened with nylon screws, that is shipped with the rear support, it is enough strenght.
Small carbon "ears" for fastening of the rear carbon support was glued on fuselage inner side with slow curing epoxy mixed with West System 402 Micro fibres so the epoxy did not flow. The carbon rear support was bought from f3alorenz.de also and item no was 381 (discontinued now).
I have prepared so i can use 0.1 or 0.2 mm titanium shims (washers) between the carbon motor mount and nosering inside to change angle on motor shaft. I doubt i need to change that.
Later I found out that RS -Ralph Schweizer Modelltechnik- has same carbon motor mount with nice aluminium spacers of different thickness and shims.
If I had known that before I started to mount the motor I would have tried these spacers to save some time. It is this, at the top of page:
http://www.ralphschweizer.com/neueprodukte.htm
Mounting of the motor was the most time consuming part of the assembly for me and requires the most precision. I spent almost one week of evenings, a couple hours each evening, before I was satisfied and had finished mounting the motor.
Hacker Q80-14XS F3A fits very well in the Galactika nose. No problem at all was encountered mounting it in my Galactika.
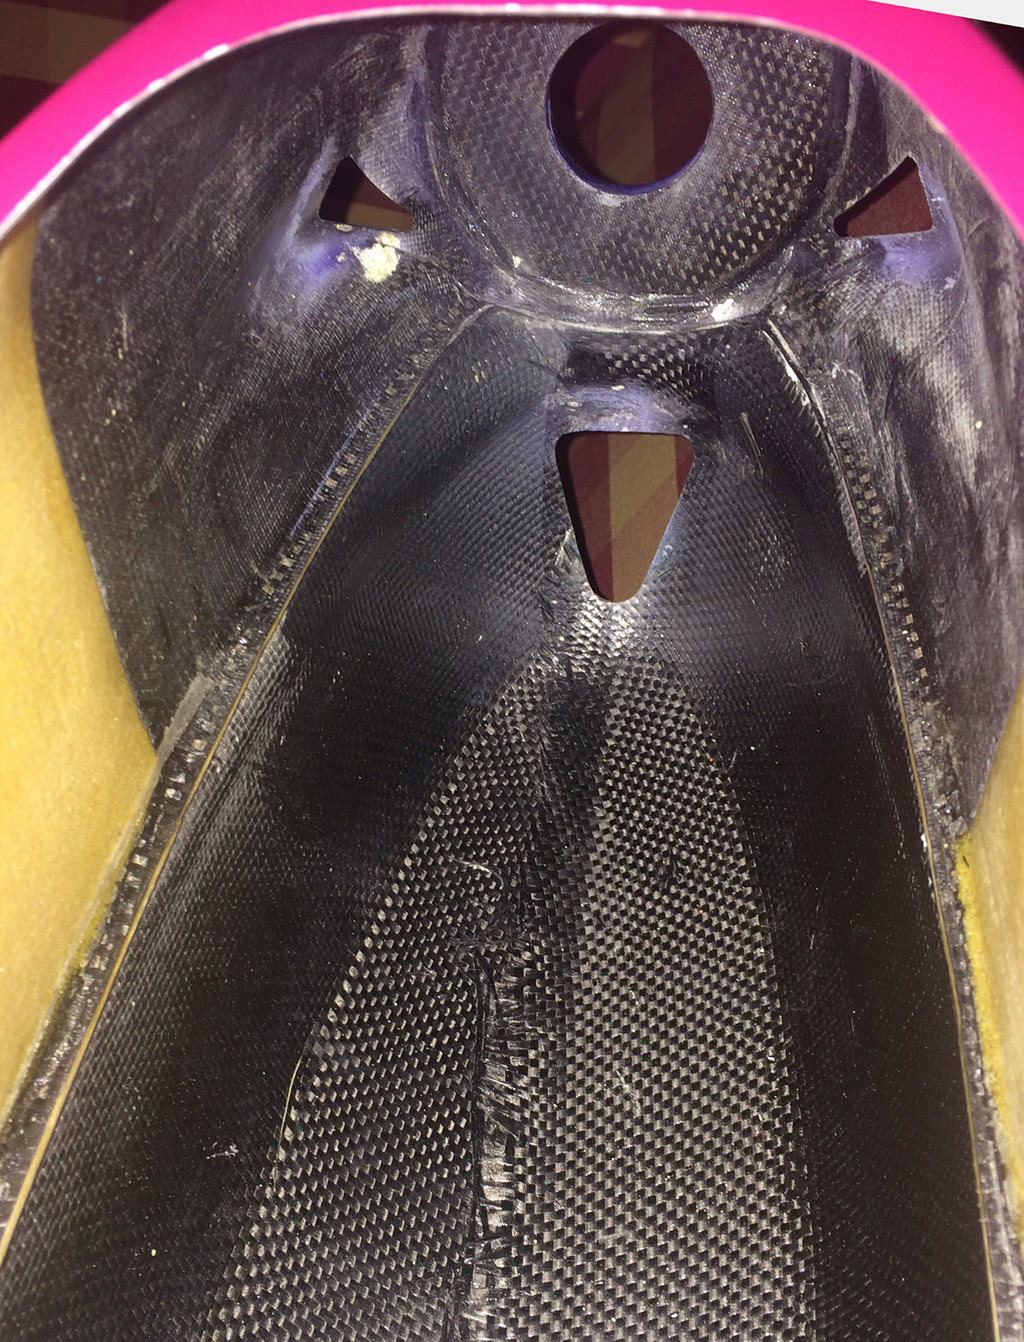
Galactika nose waiting for a Hacker Q80-14XS F3A motor.
Carbon motor mount mounted and screws countersunk in nosering. Nosering center hole has been enlarged here to give better cooling.

Plywwod spacers made and glued to the carbon motor mount. All plywood that is exposed was brushed with a thin layer of epoxy to withstand moisture.

Carbon motor mount testmounted inside fuselage with 25 mm M4 screws, later replaced with lighter titanium screws and with lock nuts.

Hacker Q80-14XS F3A in place in my Galactika with the rear carbon support.
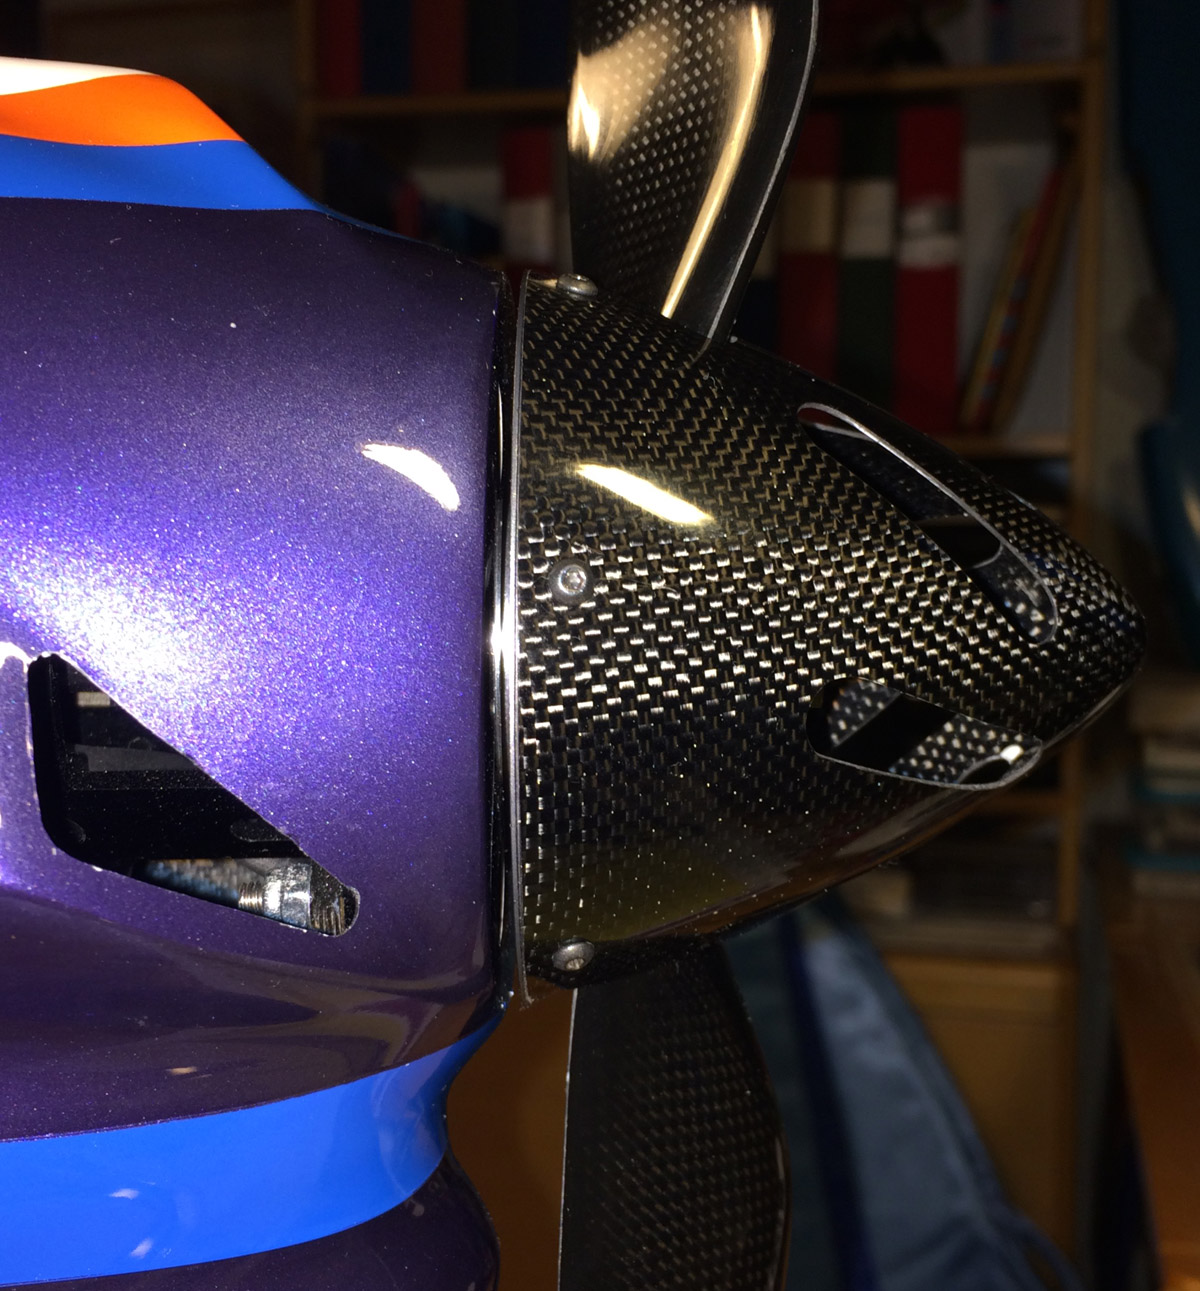
Falcon 82 mm electric vented spinner mounted to check alignment againts nosering - all looking good. It is 1.8 mm space between backplate of spinner and nosering making room for any future change of motor angle.

Spinner front view.
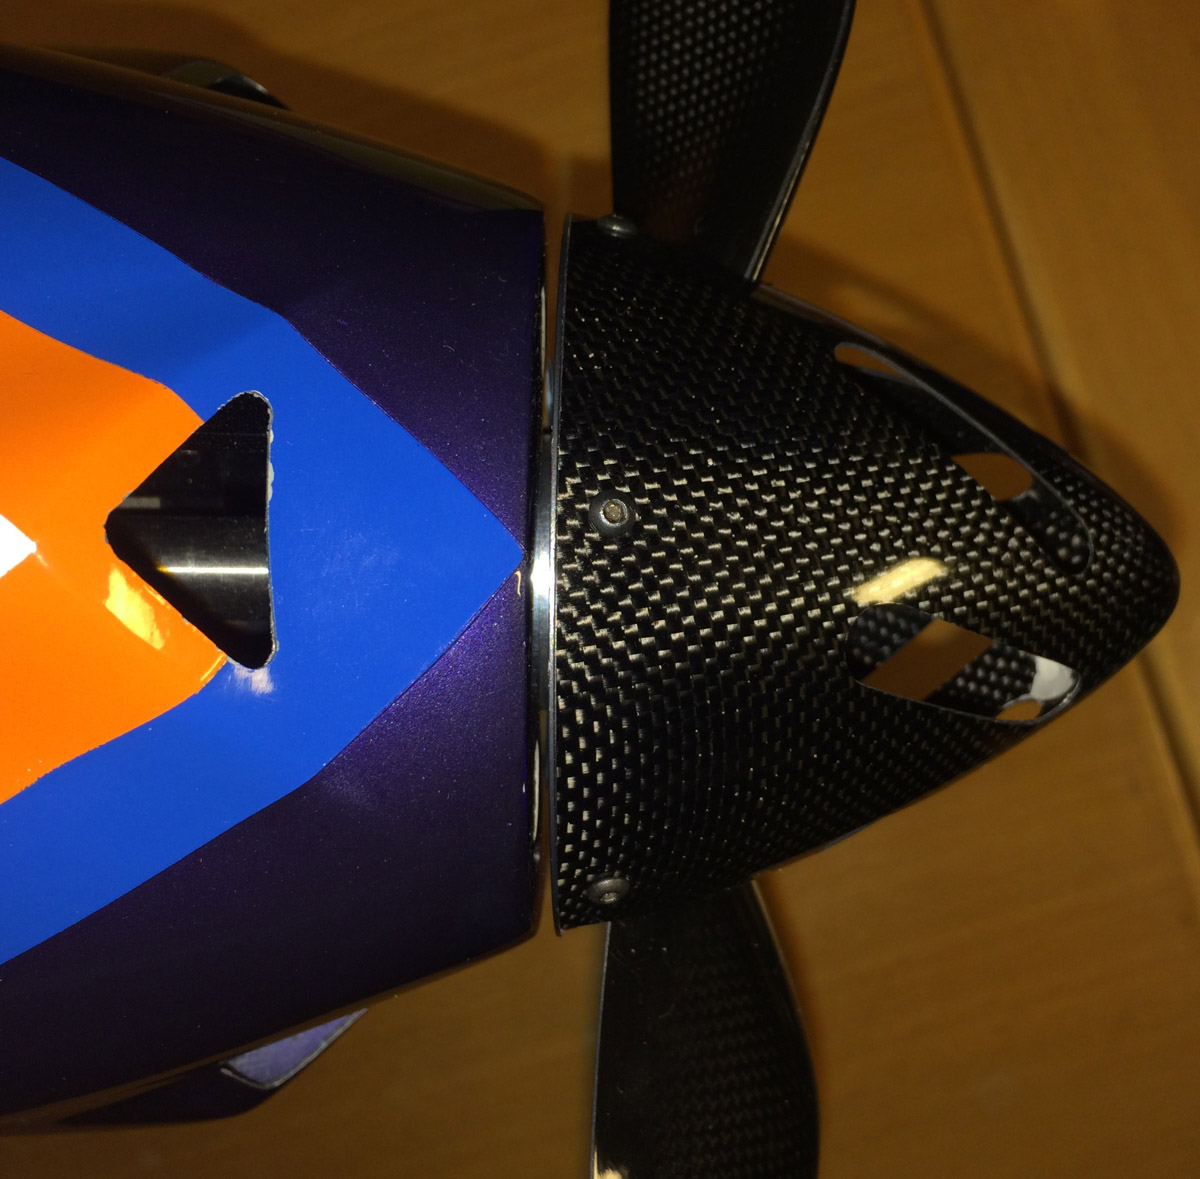
Spinner top view.
/Bo