I've been going to do this for awhile. In my opinion, these diesels are the most under rated engines from the classic era. Both ENYA Direct and Bobby Brooks ( shtterman on EBAY) offer almost enough spares to completely build one of the engines from scratch. Surprisingly the only spare part not available from Bob is the backplate. Haven't checked this item out with Ken yet. He did do a new batch of engines a few years ago so they may be available from Enya Direct. On the other hand backplates are relatively easy to make.
Here are links to a few engine tests in the 1960's.
http://sceptreflight.net/Model%20Eng...-D%20MkII.html
http://sceptreflight.net/Model%20Eng...kII%20(2).html
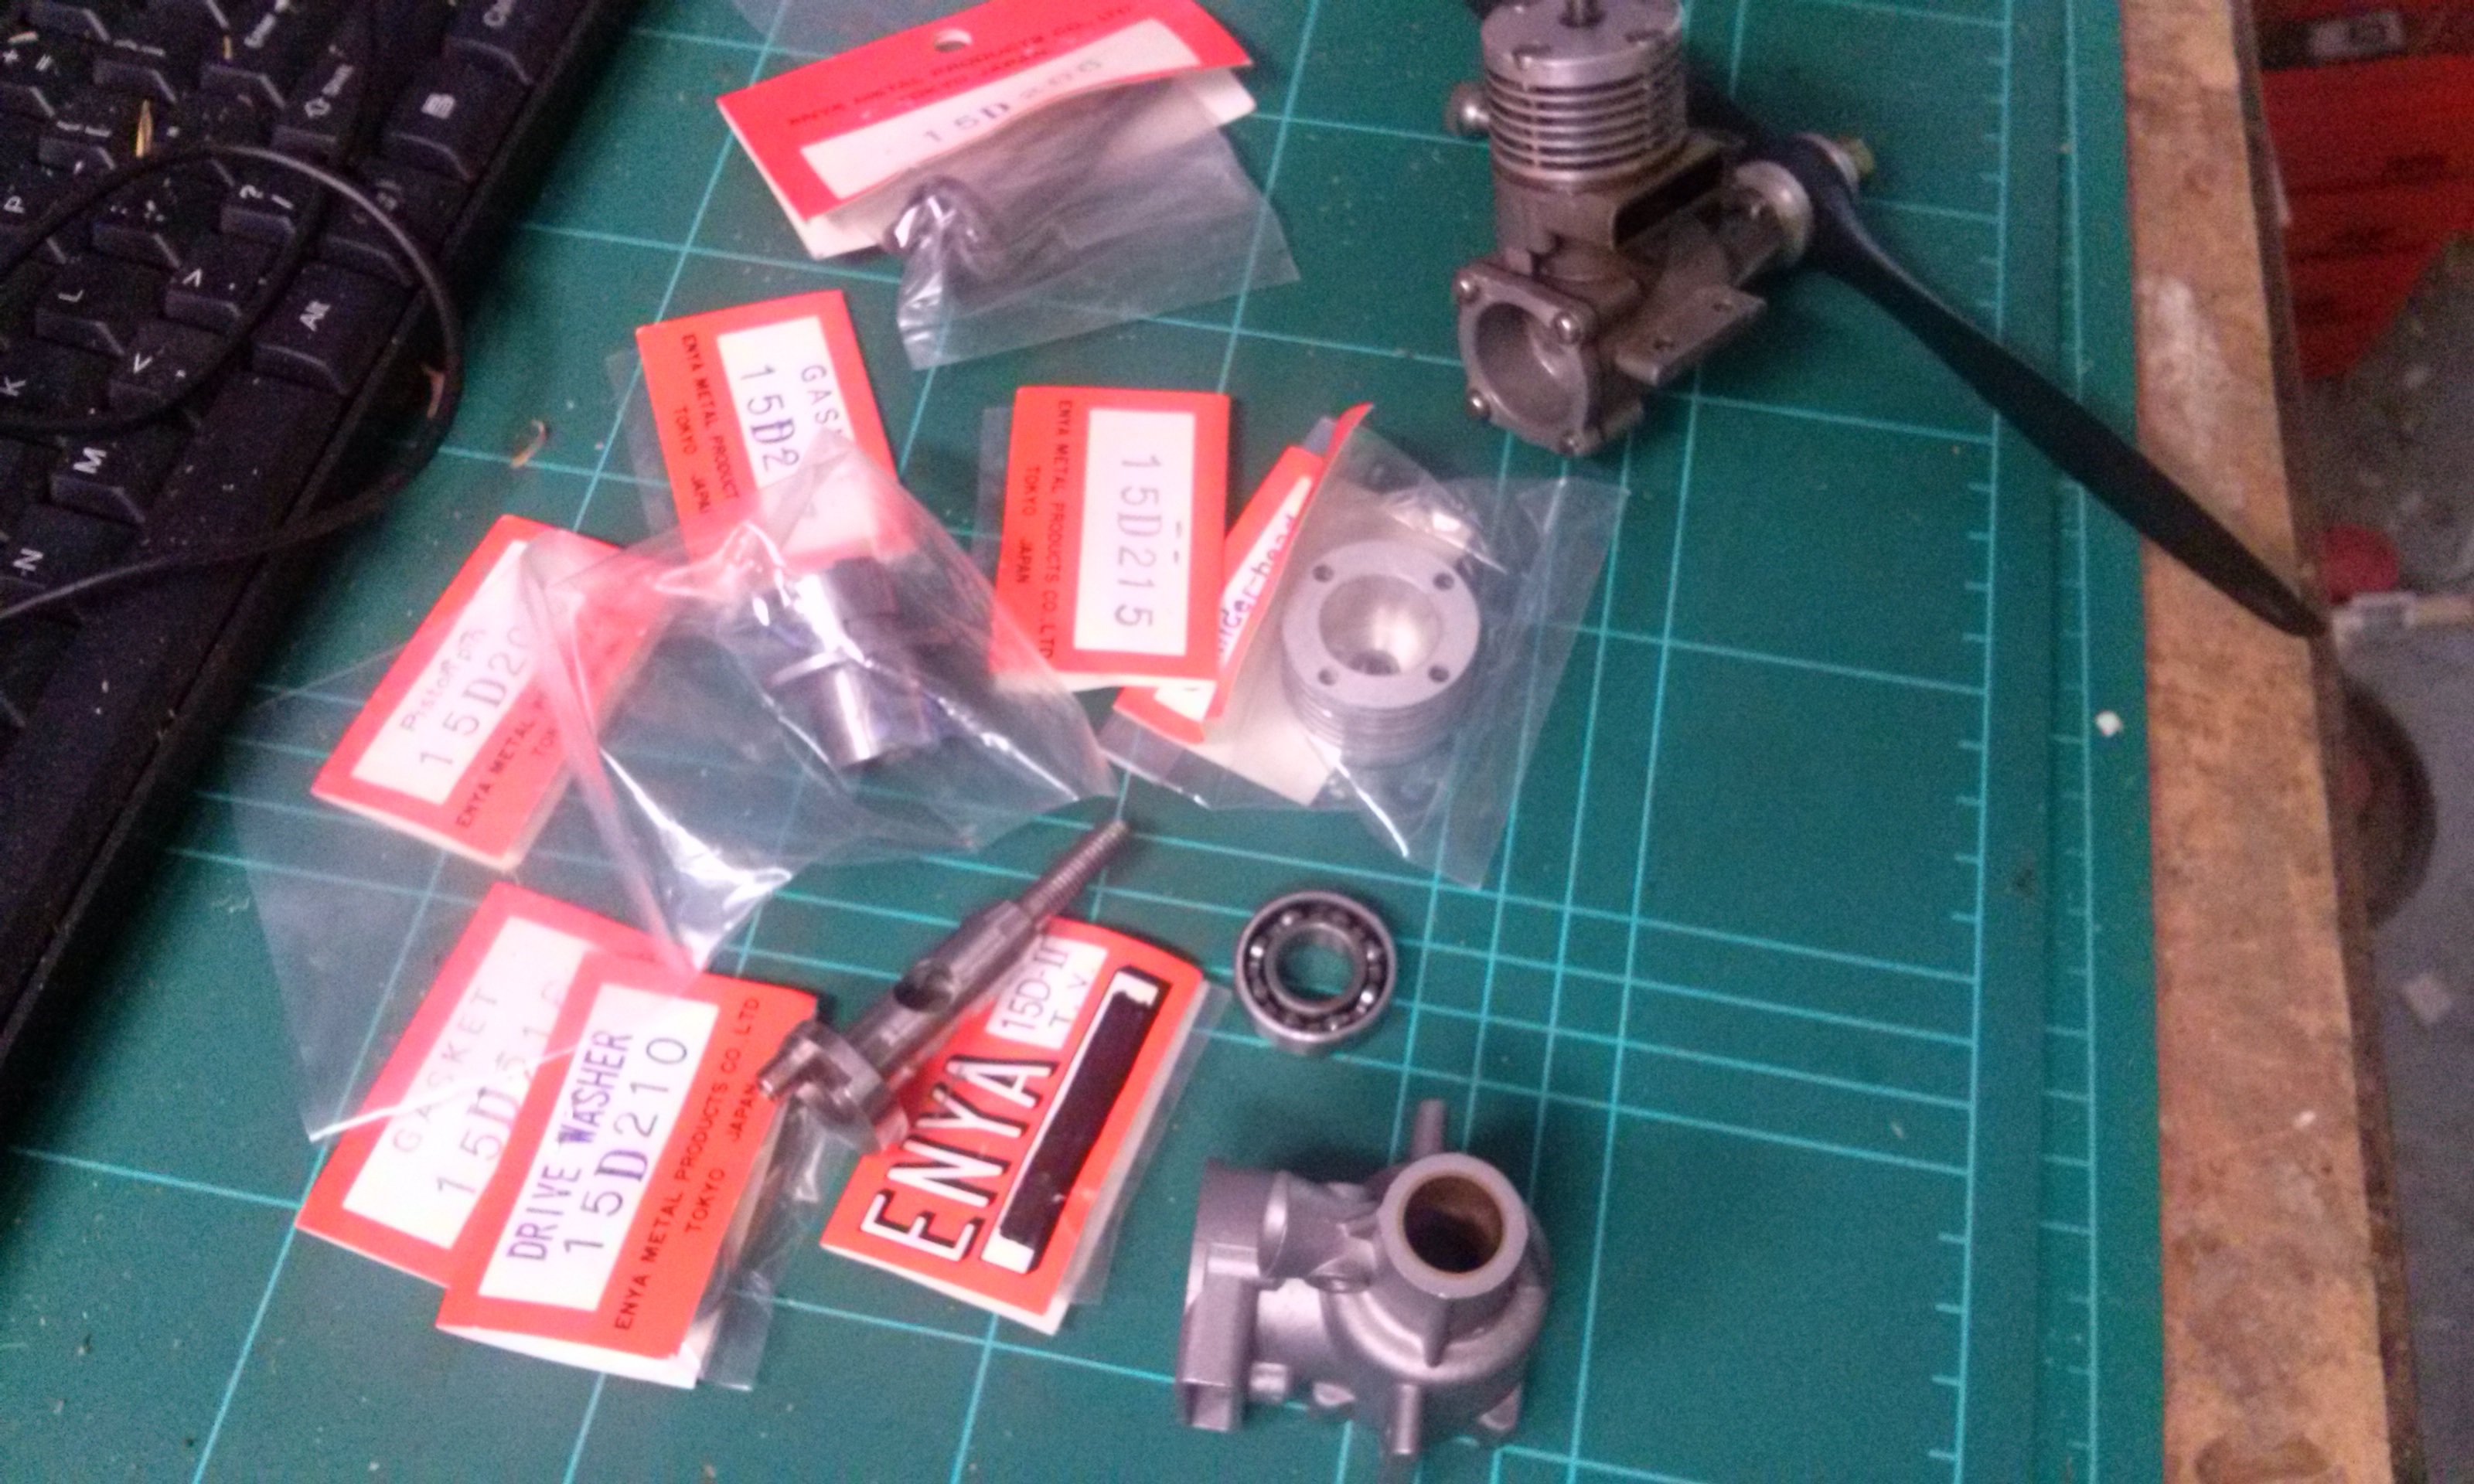
I already have a very nice mk2 assembled from a parts engine off EBAY and a few spares from Ken Enya. Recently I inherited a box of ENYA Glow and diesel engines and spares including a complete 15D mk1 engine, and a few additional mk2 bits.
The pic below shows the assembled new engine. I usually fit ball races using a cheap toast oven to heat the crankcase. I use a 0 to 360 degree C Mercury thermometer suspended inside to check the temperature. This crankcase need to be heated to 180 degrees C to get sufficient expansion to fit the ballrace. Most other engines need only 150 degrees C. The shaft is rather tight in the full length Cuprous bearing. Hopefully it'll loosen up with some running.

The mk2 has an enormous conrod and a large diameter crank to fix weaknesses in the mk1. The engine performance tests of the engine show it to be the most powerful 2.5cc diesel engine of the era (circa 1960).
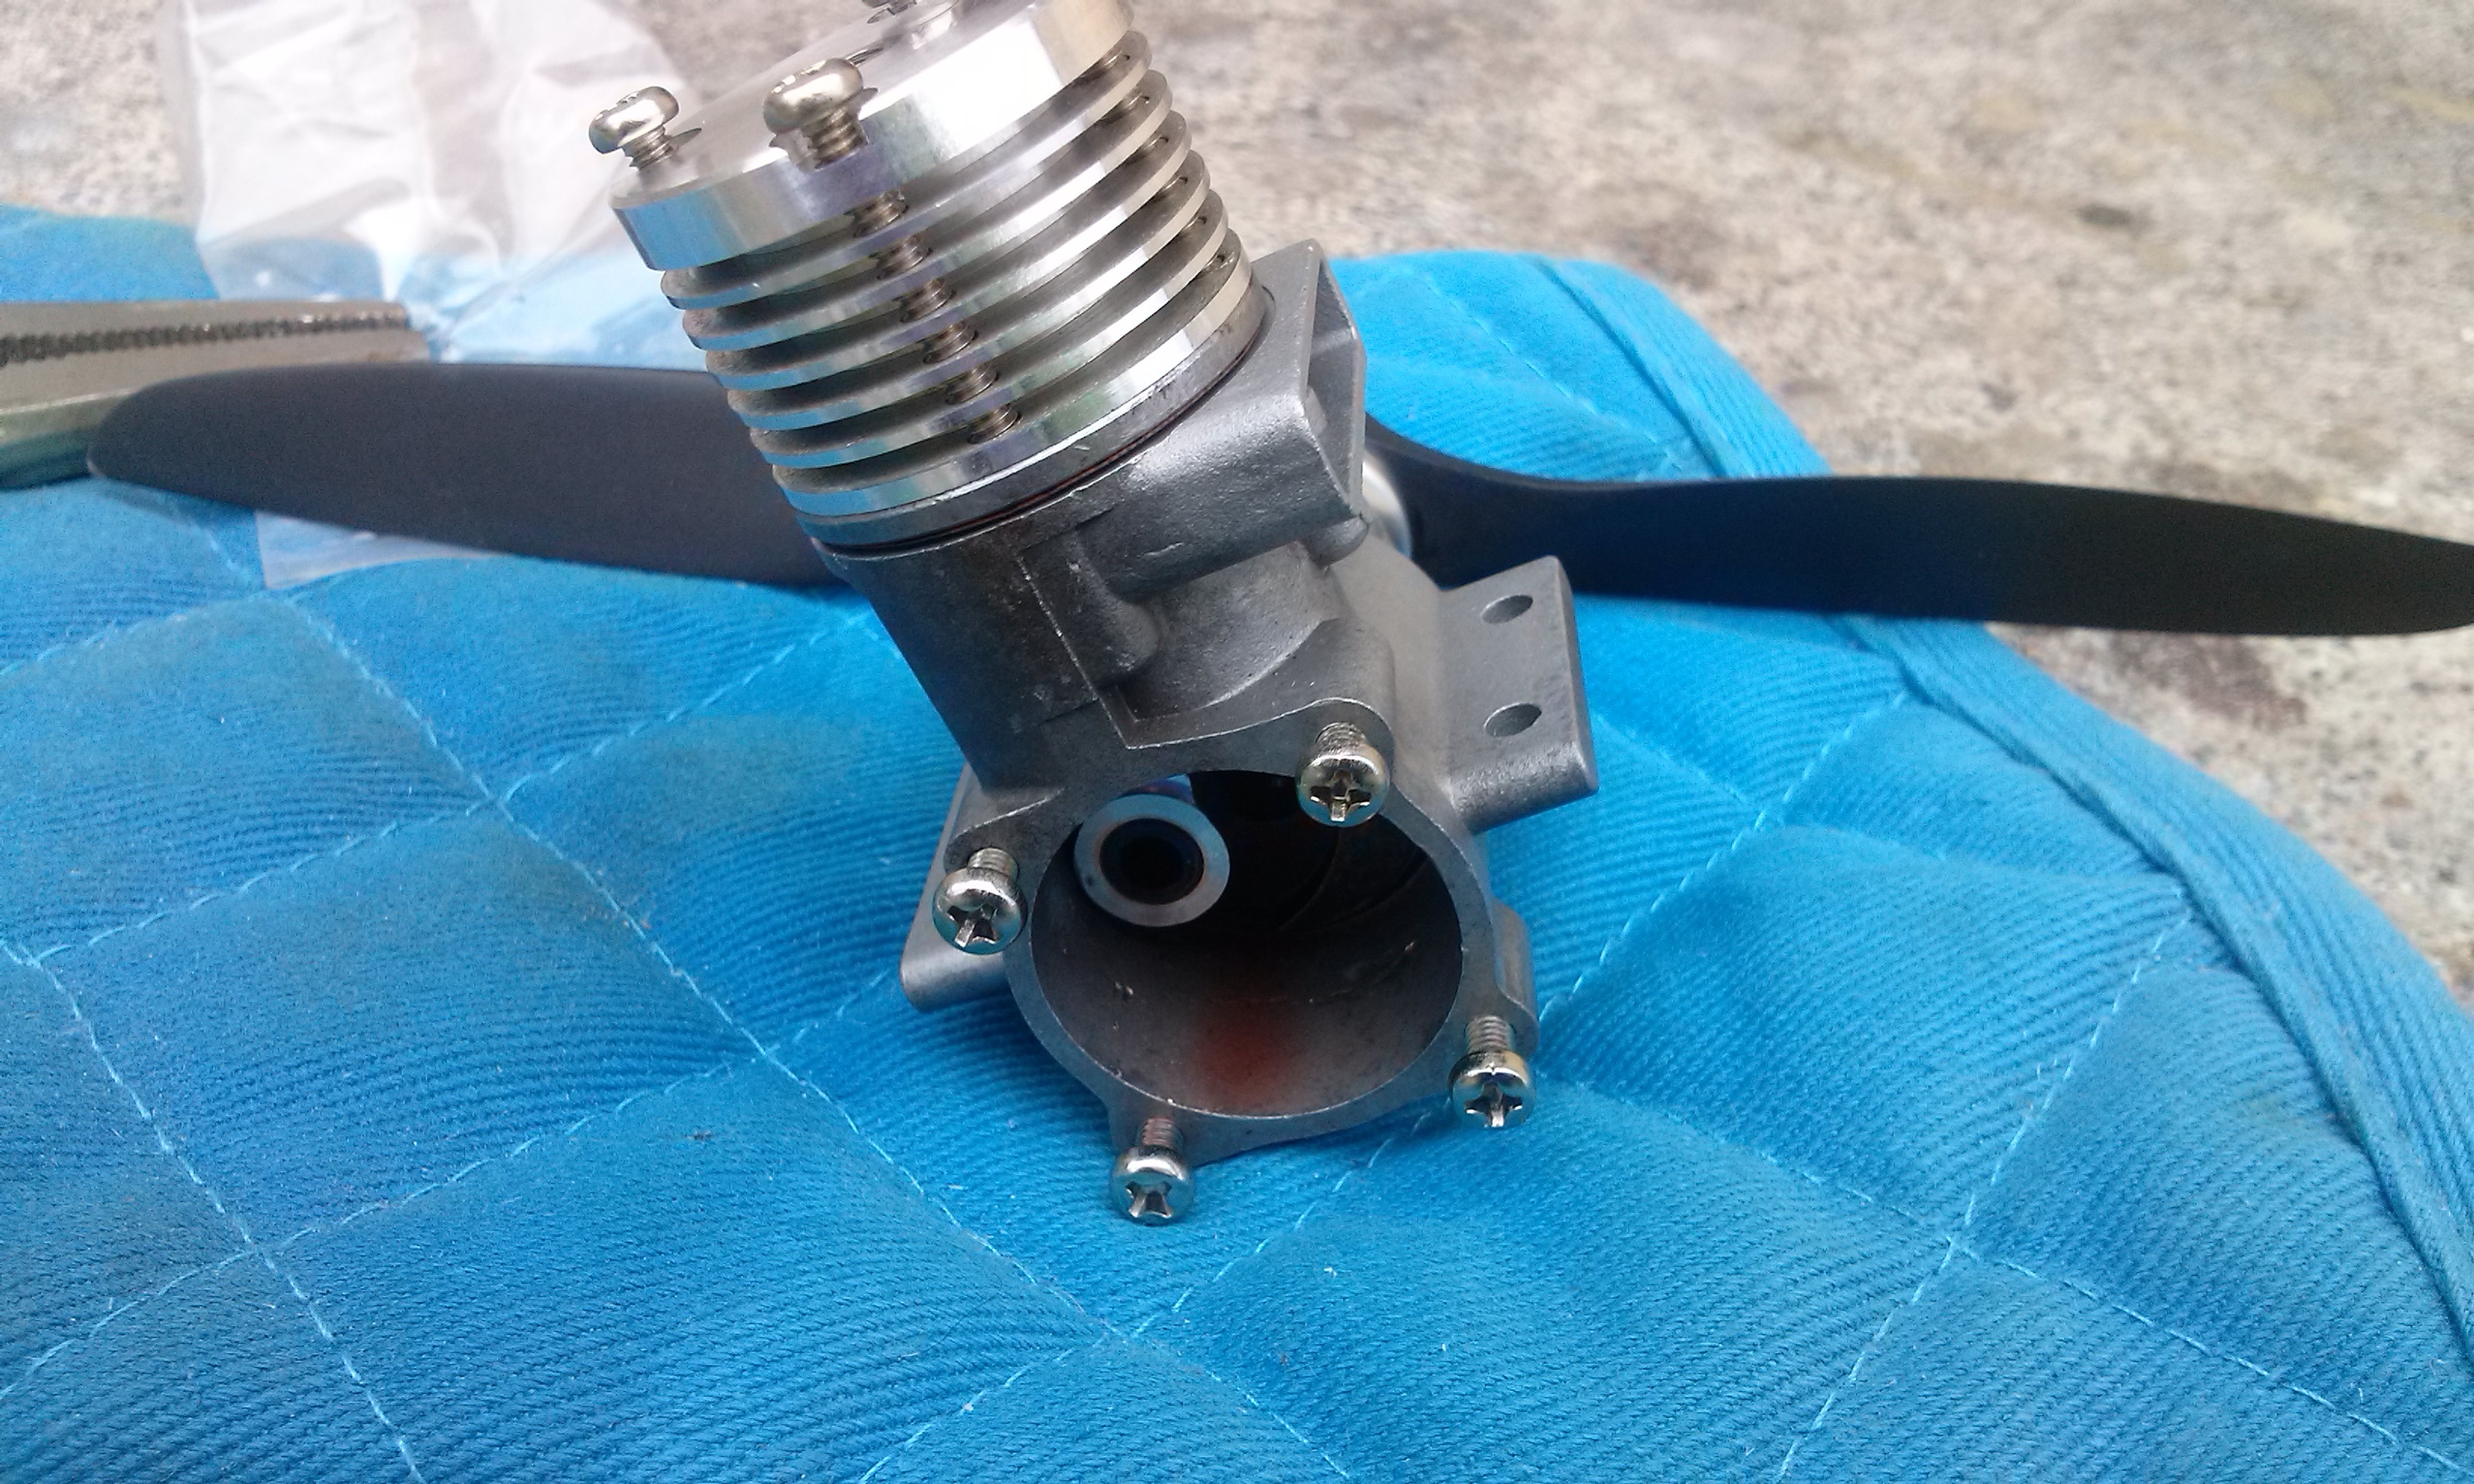
Unfortunately I chose to use the Phillip headed (JIS?) screws. The cooling fins are held down with four screws. The originals were slot headed and I had a packet with existing spares. I found it difficult to nip up the ones shown. Also the screw through the exhaust is slightly longer than the other three. Only got that right second time around. Strangely the head/cooling fins (four screws) fit only one way. The new compression screw is also very tight in the new head. Rather than run a tap through I'll wait to see if it loosens up after the contra piston has had a bit of use.

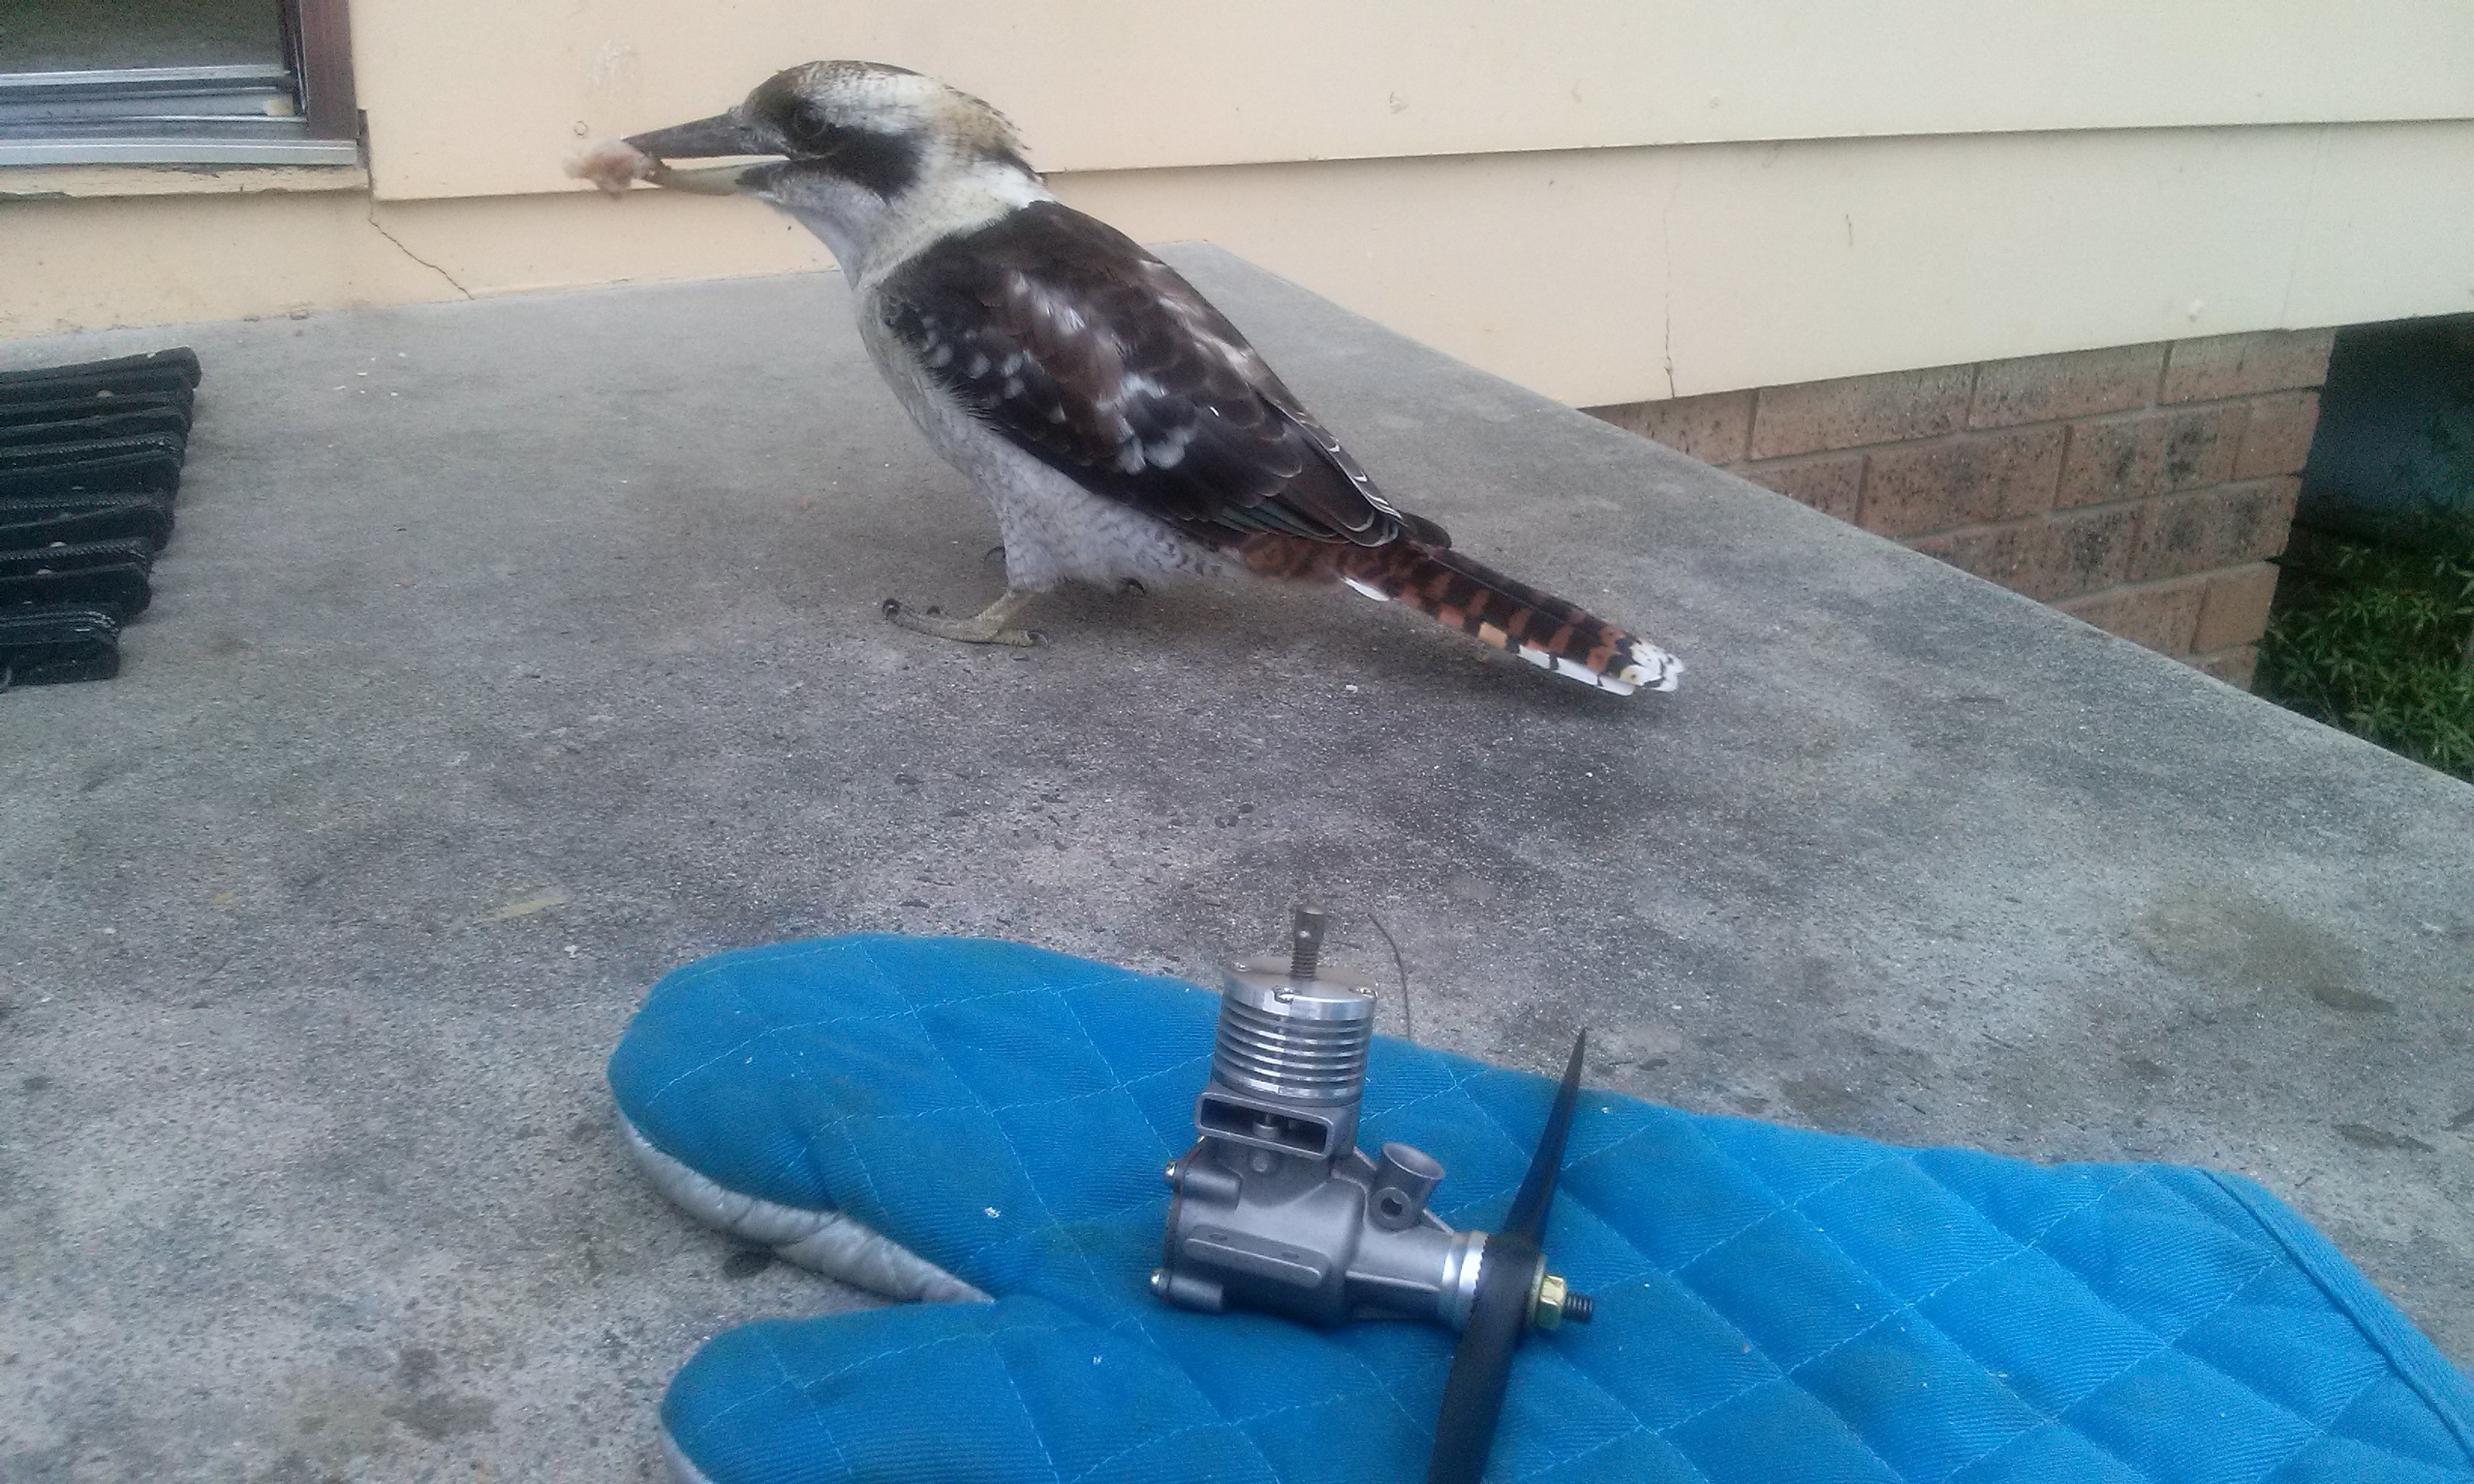
Just after final assembly these two flying pirates turned up for a free feed. You have to watch them, once they flew off with my best pencil, and another time a fresh 3 gram tube of CA.
I've temporarily fitted a mk1 backplate. The engine is "stiff" but should run.