Want to give an update on my restoration progress. I have all the old covering removed from the control surfaces. I had to be careful getting it off, but I think the stab and elevators came out fine, the ailerons were a special chore because of the torque rods, but they should be fine to use again. I used my Dremel tool to cut the torque rods out. I will just need to fill in the gap from the torque rods with putty. The fin, rudder and ventral fin didn't come out so well. I plan on making new ones, using the originals for patterns. One thought I have is since I'm making new ones, is there any benefit in adding a little more rudder width? Possibly helping to improve stall turns or knife edge flying.
I did a little sanding on the body and cowl. They blend together fairly well. I'll need a little putty fill, but not much. I may try adding a little glass and resin in a couple areas on the cowl edges to clean it up better. First I'll wait until I do a pre mount of my OS 55 engine to see where I may need to cut to fit.
I marked the canopy location with pencil for a guide to do a little more rounding of the body as David suggested. This plane is built so beefy, that I'm sure a little more balsa removal won't hurt. It will even remove some more weight. That leads me to another question. It seems there are more areas I could go during this restoration to remove some weight. The area under the canopy could be cut out, leaving enough room for reattaching the canopy. As I go to make a new fin, I could do a framed up version, saving some balsa weight, add some extra holes in the stab and rudder to also remove some balsa weight. These areas will all be covered with Koverall, which adds significant strength. I've done this before with a 4 Star 120 build. I'd like an opinion on this idea.
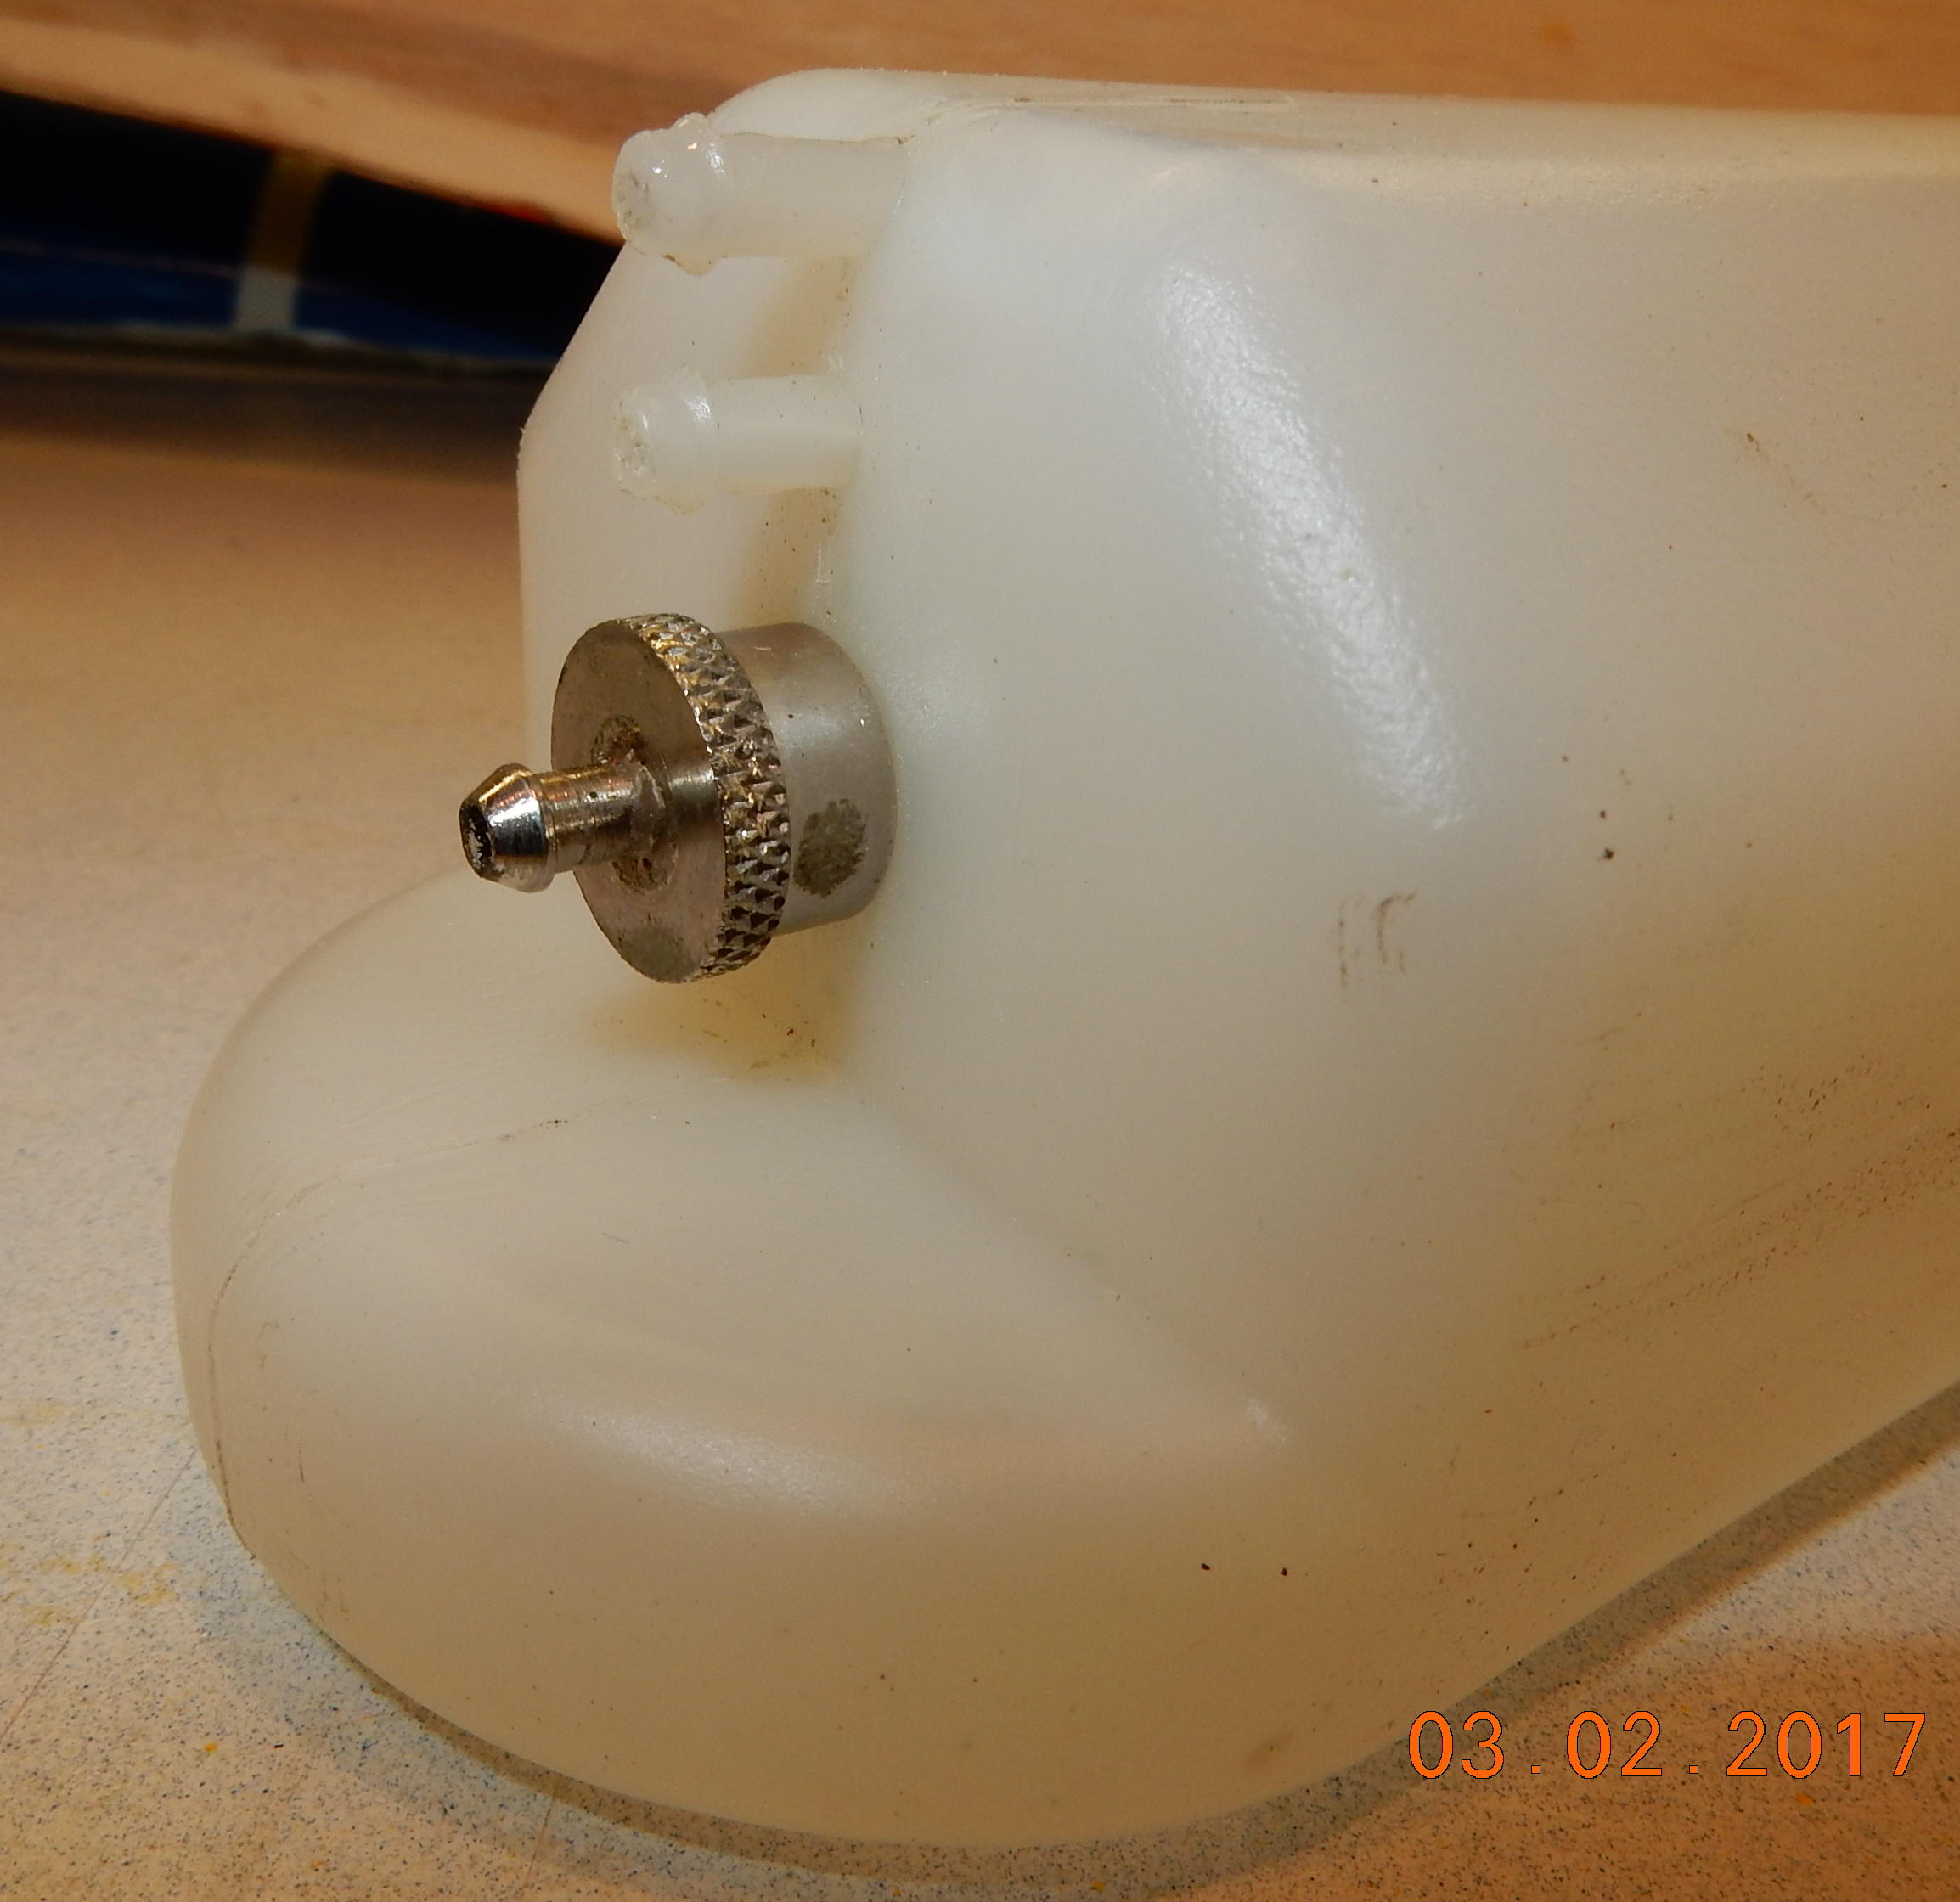
David's last post mentioned that the original tank I had was a good one, and I may just do a clean up and change fuel lines. I did do the clean up with denatured alcohol and pulled the stopper. This tank is different than any I have seen before, so I've attached photos of the removed stopper, and would like some a little explanation of it's setup. The stopper is not rubber like I've seen before. It is all metal with just a very snug fit into the tank. I thought the gnarled part of the stopper could be turned to loosen it, but as it turns out it just needs to be twisted and pulled to remove. The stopper still goes back in place with a tight fit. The two fuel fittings above the stopper I assume are the vent and fuel fill. They both just go to the tank with no lines after entry. Which is the vent, and which is the fill?
I've got my Hobbico retracts, axels, DuBro lite wheels and one mini servo on order. Only ordered one servo for now to check it out, and see if it will work for different applications.
Lamar