Because I had chosen a motor on the high side of the acceptable range (a Power 46 I had on hand), there wasn't enough room inside the cowl to fabricate shadow boxes to accept the entire cylinder pairs. Therefore, I had to figure out a way to install the dummy motor onto the cowl's exterior.
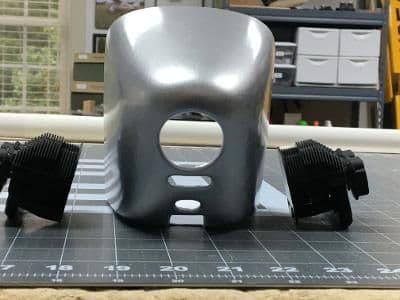
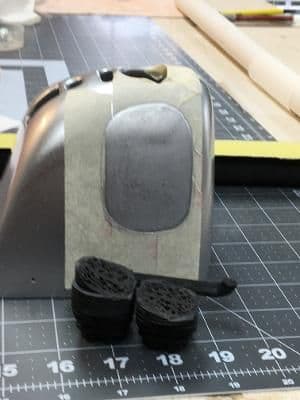
Here's what I had to work with: a painted cowl and two pairs of cylinders.
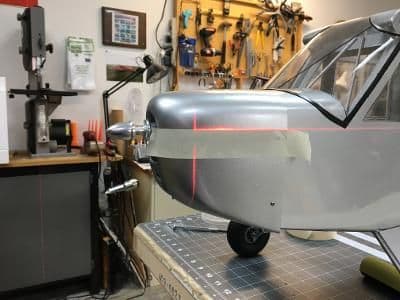
To start, I located the output center line with a laser level. I did this on the right side as well. Then I added several other horizontal strips of masking tape in an effort to protect the cowl's finish from the trial and error that would ensue.
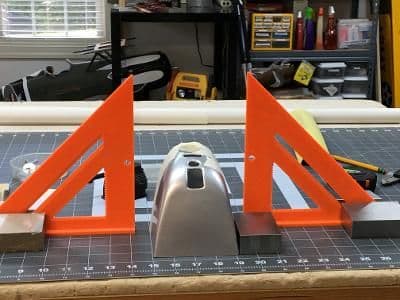
This is the jig I used during the process. The space between the triangles is the scale distance between valve covers on a Continental engine. I needed to get a partial cylinder bank to fit against the cowl and a triangle simultaneously. From this point forward, frustration trumped photography, so what follows is more words than pictures.
First, I sliced a wedge from a cylinder bank with a band saw. I chose points at the front and back of the bank that should, in my estimation, contact the cowl, leaving plenty of material in between for grinding.
As luck would have it, I had recently purchased an oscillating spindle sander at a 20% off Harbor Freight sale. Using the largest sanding cylinder, I gradually removed material from between my reference points. By gradually, I mean I moved countless times between the sander and the jig until I got a reasonable fit between the cylinder bank and the cowl. Now, it's only about 10 feet between the sander and my building bench. I bet I walked more than a half mile while sanding both banks. But, without that sander, I'd still be scratching my head.
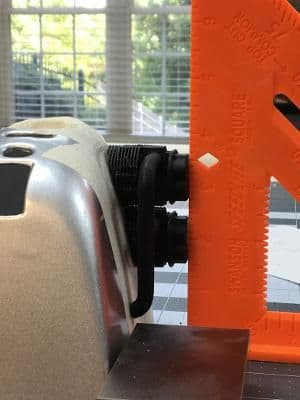
When I finally got the fit I wanted, I did remember to get a picture. Here, the valve covers are just touching the triangle's vertical edge which is parallel to the drive center line.
When I got both banks to fit in the jig, it was time to glue. Here I have cut an oblong shape in the masking tape and removed the center. It was large enough to accommodate the two cylinders and intake pipes with about a 1/8" margin. I scuffed the cowl paint with sandpaper. The cylinder bank needed no scuffing, having encountered the spindle sander on and off for over an hour.
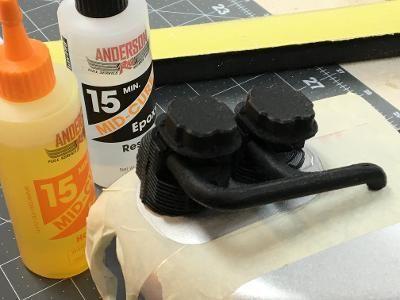
I used 15-minute epoxy to fasten the left cylinder bank to the cowl. I mixed enough to fill the tiny gaps that still remained after shaping.
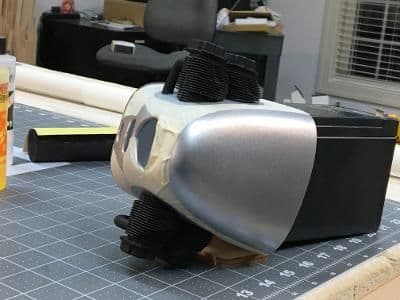
A couple of hours later, I did the same for the right bank.
Three days to go.
Next, engine cosmetics, as in eyebrows.