


New arfs I have recently tried.
 10-19-2021, 05:43 AM
#26
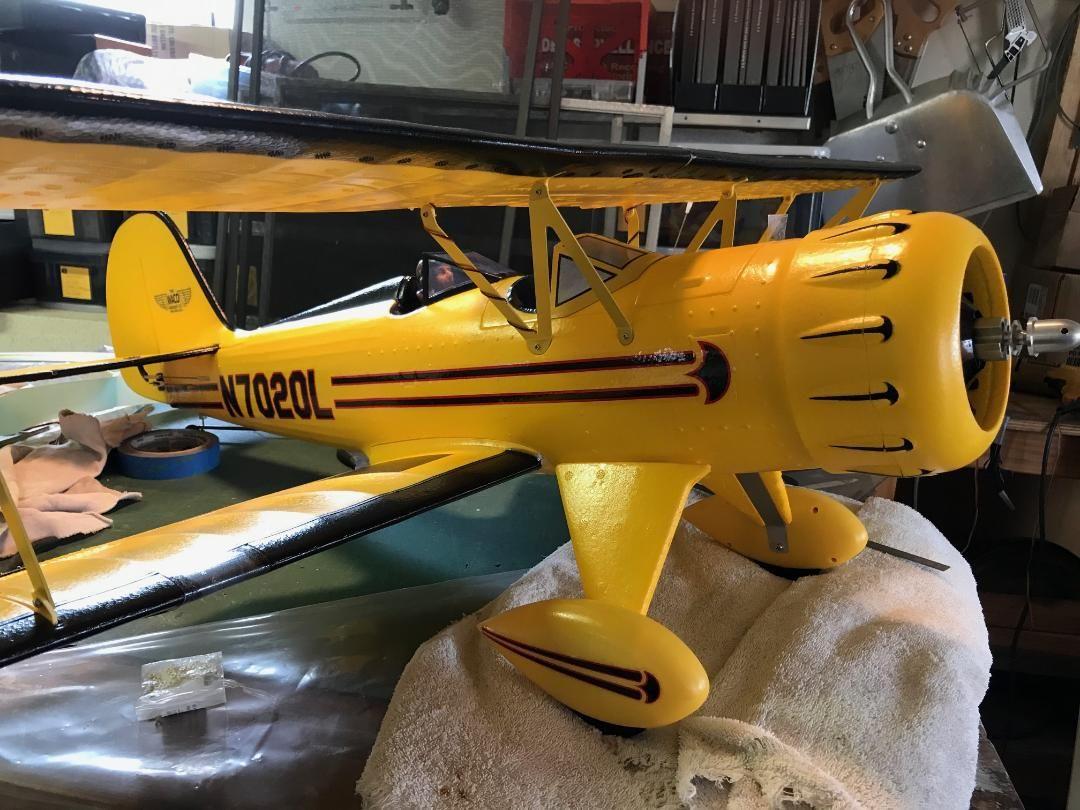
Here are two progress photos of the Waco. I won't drag everybody through the obvious build traumas (struggles with hardware, lack of decent instructions, etc.). So far, however, I like this model. Hopefully when the battery gets here late this week and I can balance the plane and go for a maiden.

I would sure like to know the aggregate hours up to maiden status for this arf if you decide to document that aspect of your experience.
Thank your for consideration.
Aaron-
 10-20-2021, 09:53 AM
#27

I have had the Dynam Waco for about six years now and its my most flown plane. Like most have said, throw away the hardware and re-glue and repaint the fuselage and you have a really good airplane. I replaced the servos and speed control and kept the motor.
The following users liked this post:
capt1597 (10-20-2021)
10-20-2021, 12:00 PM
#29

Thread Starter

The model I have has the cowl part of the fuselage, not separate. I will confirm this.
OMG! The cowl IS separate. I have now secured it with some steel pins (aka, finishing nails).
This is the beauty of these websites, thanks scottrc.
OMG! The cowl IS separate. I have now secured it with some steel pins (aka, finishing nails).
This is the beauty of these websites, thanks scottrc.
Last edited by allanflowers; 10-20-2021 at 12:10 PM.
10-31-2021, 01:38 PM
#30
Thread Starter
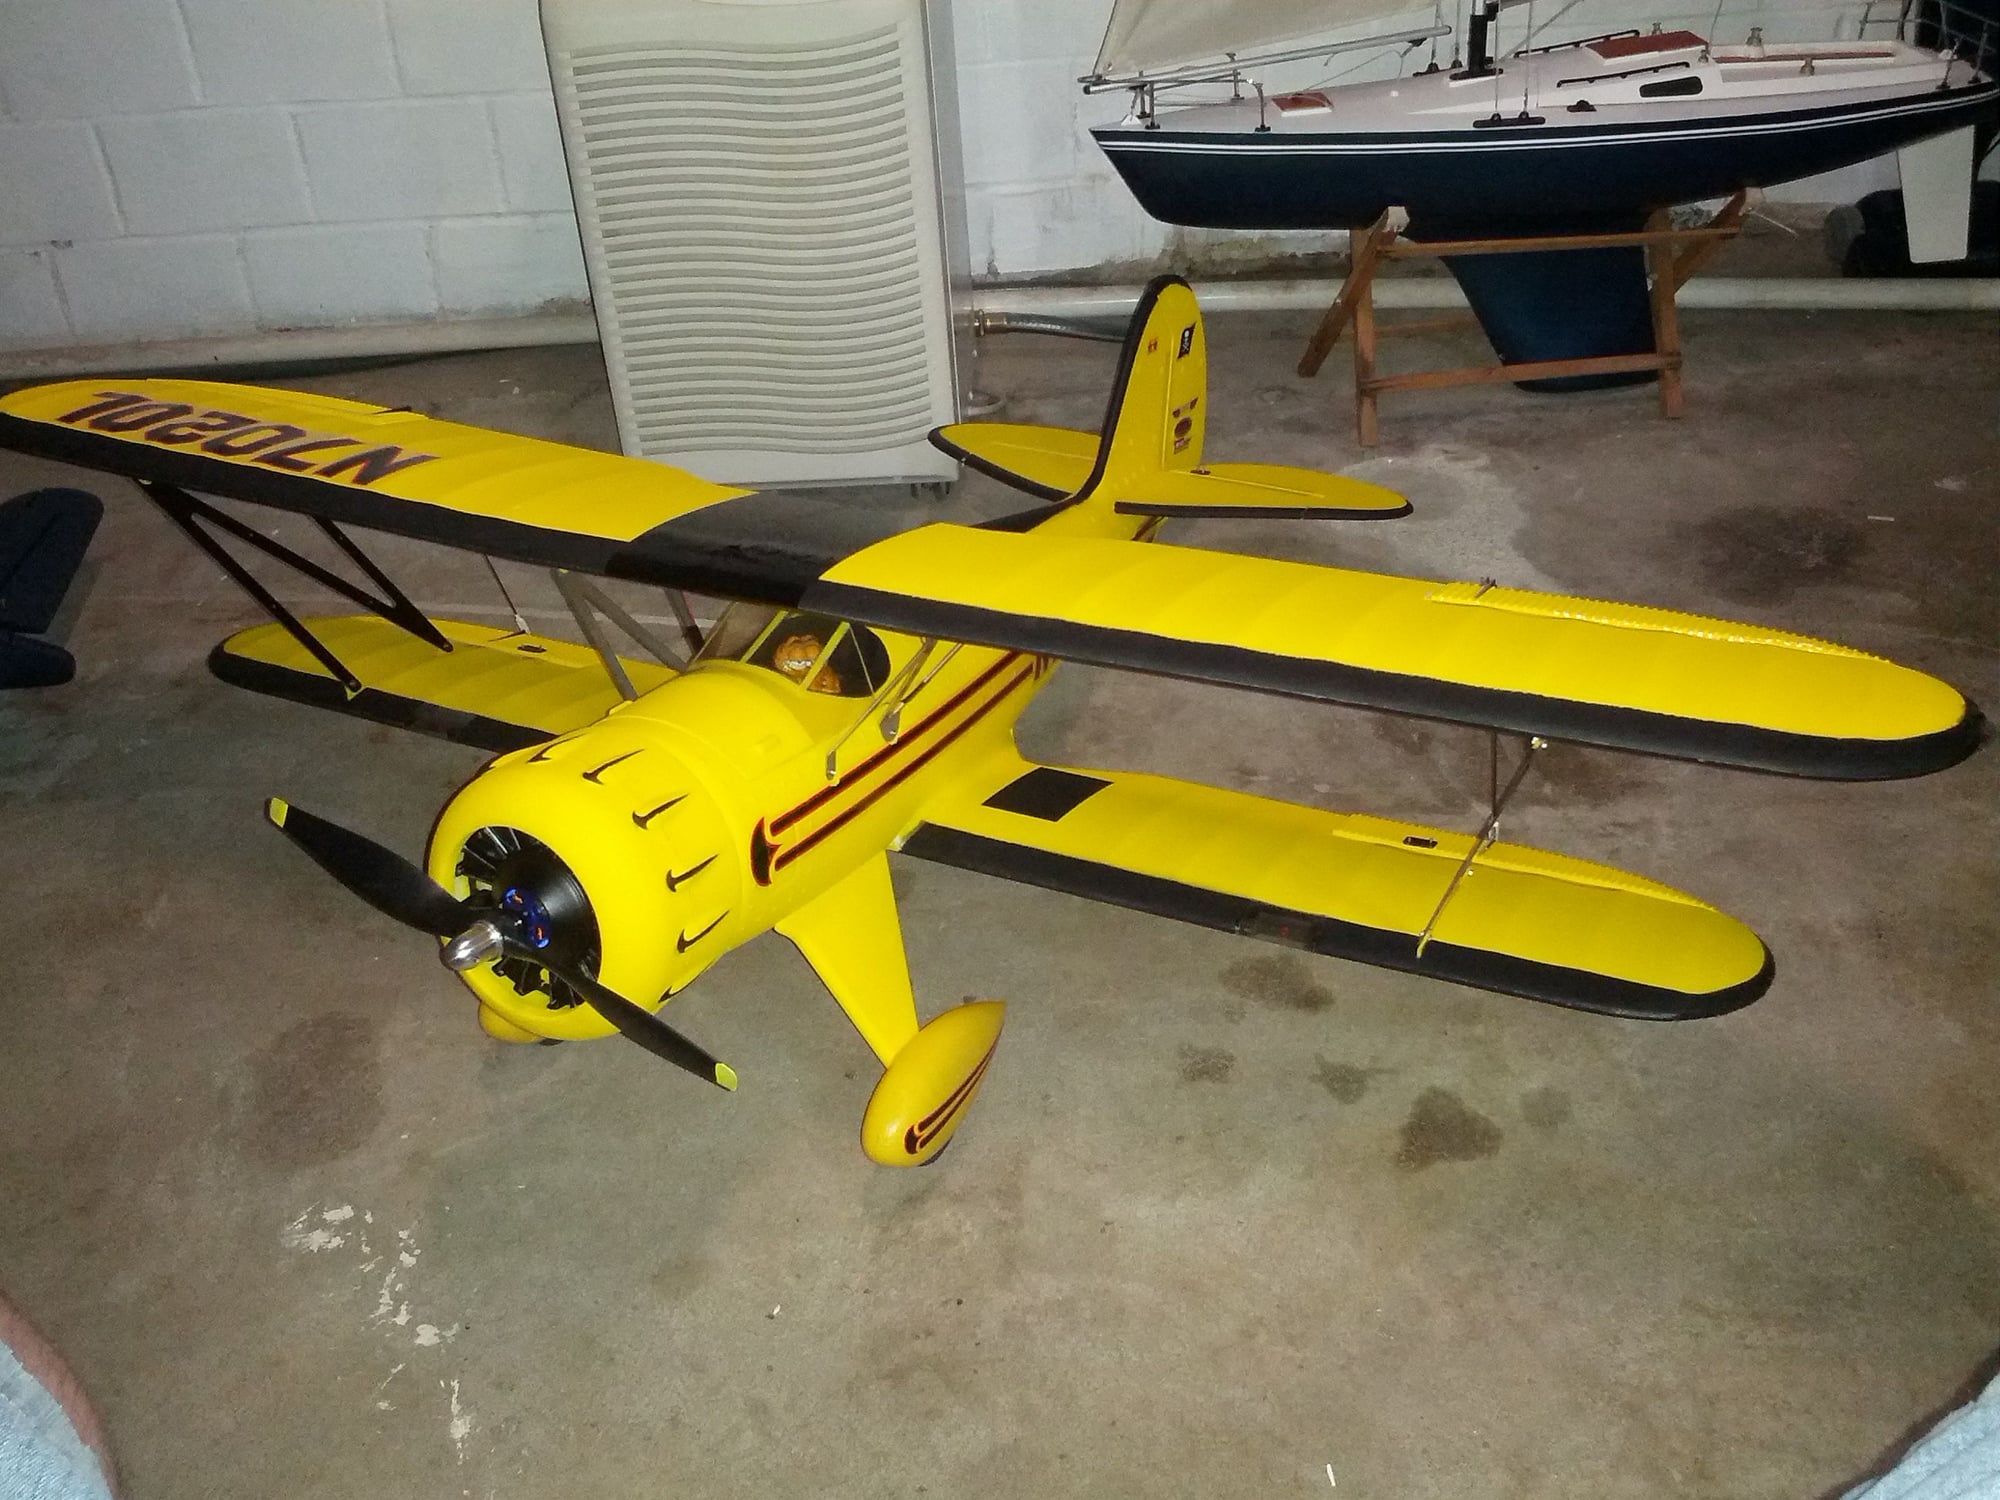
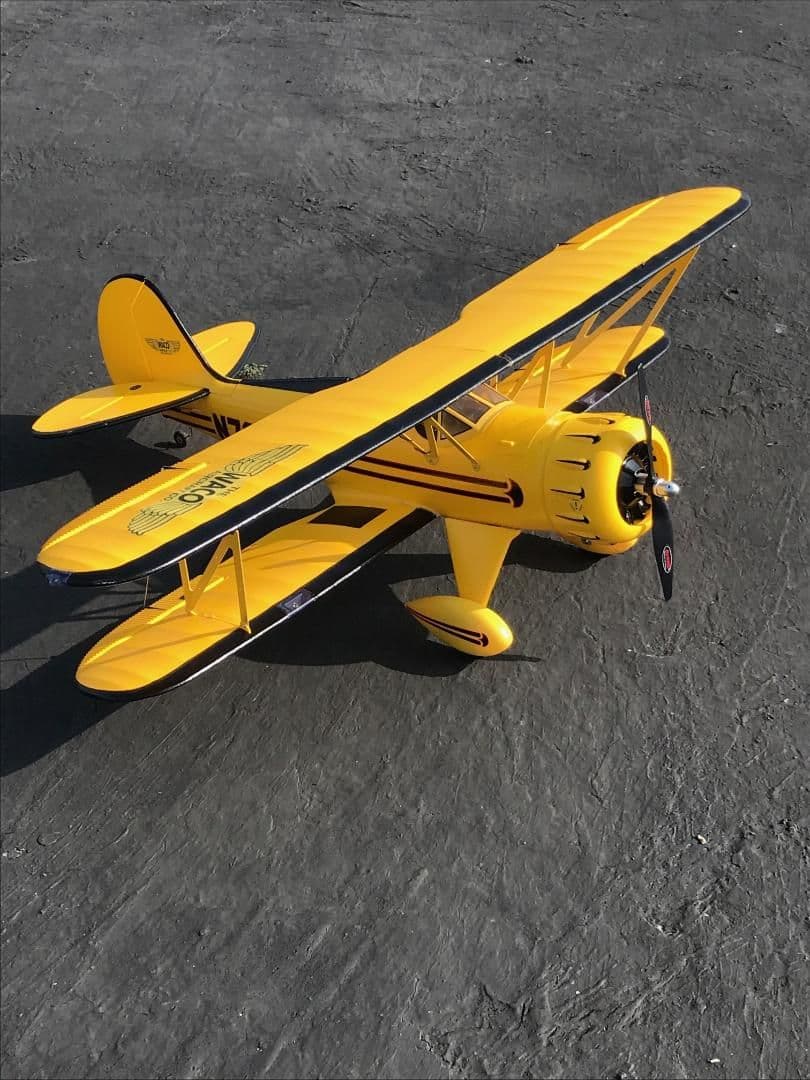
I finally was able to do the maiden flight on this Dynam Waco this Oct 31st morning.
Take off was fine, rudder not very sensitive but the plane tracked straight. Power with the new four cell 2200 battery was not very energetic.
It needed a few clicks of right aileron and a couple of up elevator, then flew pretty good hands off. I will want to refine the trims more in the future. After about 3-4 minutes, it seemed to be loosing power so I brought it in. I actually thought it wasn’t going to make it but managed to do the last couple hundred feet at about a yard high. The landing was good and the plane taxis easily enough.
After working to see if I could ‘reset’ the ESC, and finding the power felt okay with the battery at about 70%, I tried another flight. The takeoff was
fine again but it exactly didn’t leap into the air. Nonetheless, I had a strong 2 minute+ flight and decided, the trims being okay, to bring it in. The landing was quite good by my lax standards but, it was slightly aimed at the fence. I gave it full right rudder but couldn’t avoid the damn fence.
The repair will be doable but I am still p#### about the lack of rudder response. I had full right rudder for the last 50 feet and didn’t see much response at all.
It had been set to the low end of the manual’s recommendations but it is clearly not enough. I am not the best flyer but hate to accept blame for a poorly setup plane when I was following the manual’s exact recommendations.
Other issues on the model:
- Balance according to the manual is right on.
- Elevator distortion from packing, when the surface is lined up perfectly, the aerobalance section on the ends is distorted and may be causing slight problems.
- Same thing with rudder, distortion makes it hard to determine when the surface is properly lined up with the fuselage.
- As mentioned in the maiden flight report, I do not have a lot of confidence in this 2200 battery. This may be because my not being used to the ESC and it’s power output but, at the end of the day, I am struggling to keep altitude without resorting to a higher throttle setting than I am used to. Hopefully I can adjust to this situation without resorting to the bigger batteries, which I do have for all my other electrics.
- Plane looks great and draws lots of positive attention (partly because of the painted struts and Acrylic finish which brings out the color so much better.
_ EASY to see and fly!
_ I think the plane could be built and in the air with maybe three hours or so but I took about 15.
Last edited by allanflowers; 10-31-2021 at 01:45 PM. Reason: spelling
The following users liked this post:
capt1597 (11-01-2021)
 11-05-2021, 07:08 AM
#32
Thread Starter
Two flights yesterday. This model still seems sluggish, especially on takeoff. I find that the power curve is strange compared to my other electrics. There is still power but right at the top end of the throttle stick. At odds with this is the fact that the low end is almost immediate with the slightest stick - kind of dangerous because the slightest touch causes the prop to start. This is a problem when one is checking/measuring control surface movements. At the end of the day, a loop requires planning to get through it because the total power is limited.
I could try to find a battery with a higher C rating (the one I have is 35C) and that might help the feel of it.
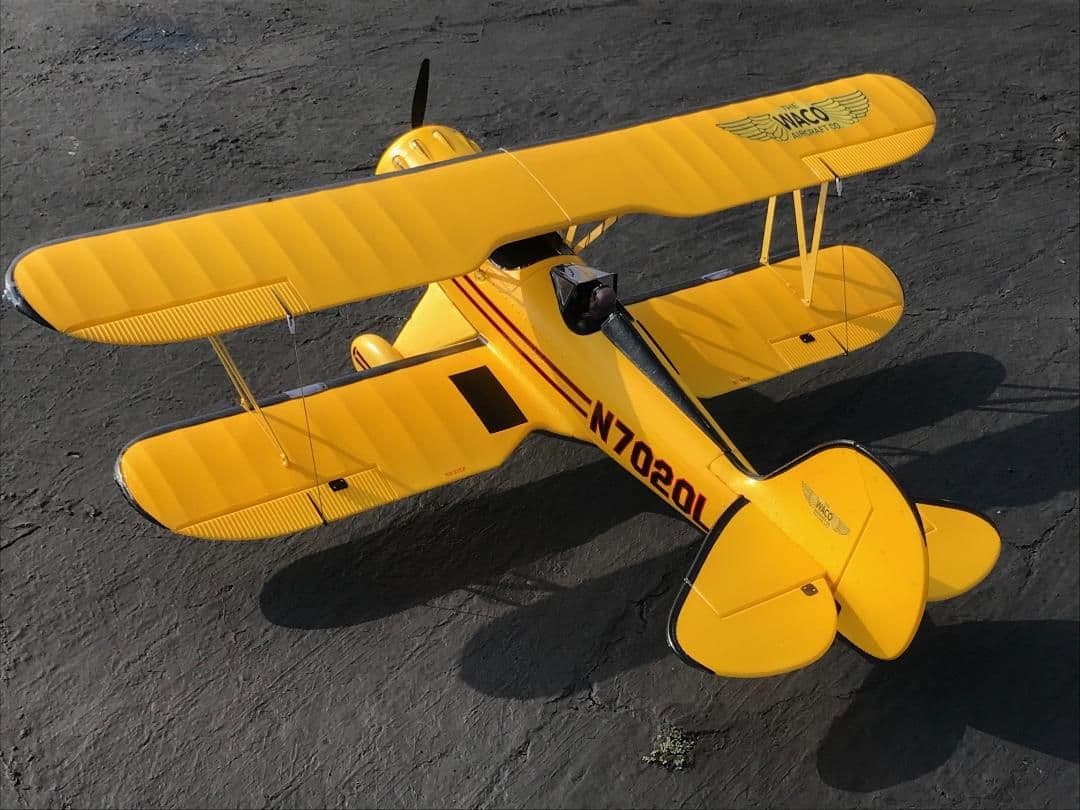
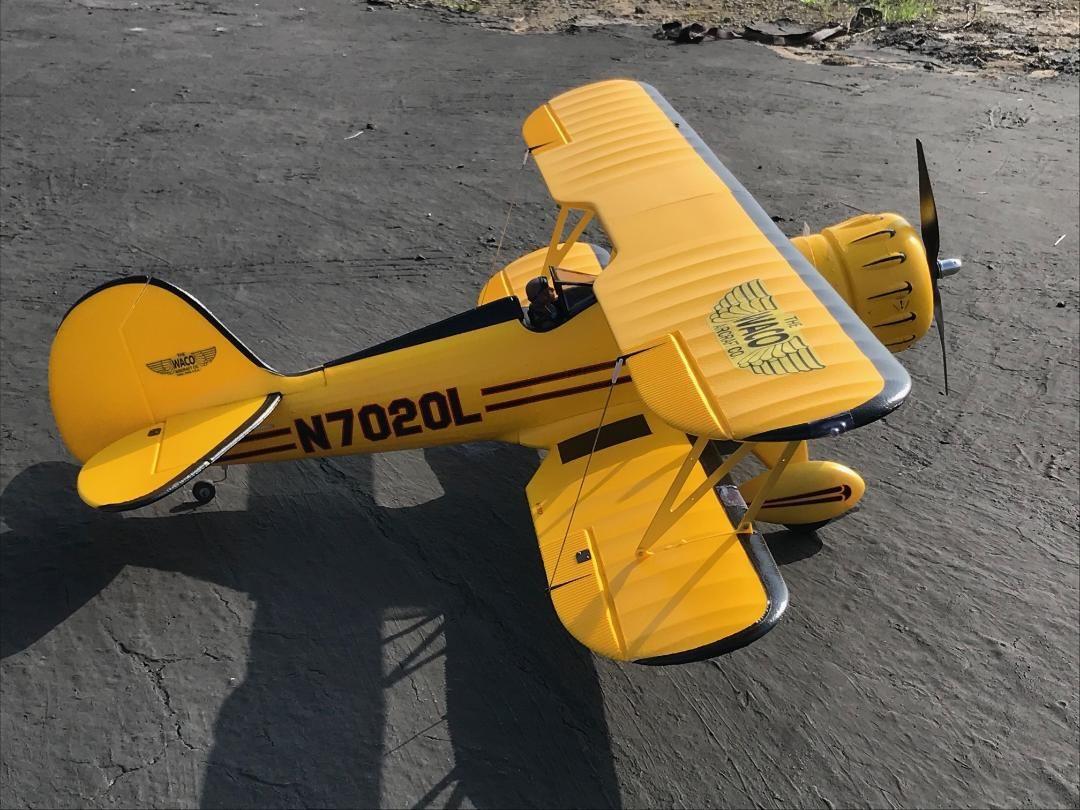
The plane is very easy to see and control so I will continue to work with it. It also draws compliments from other flyers because of its appearance.
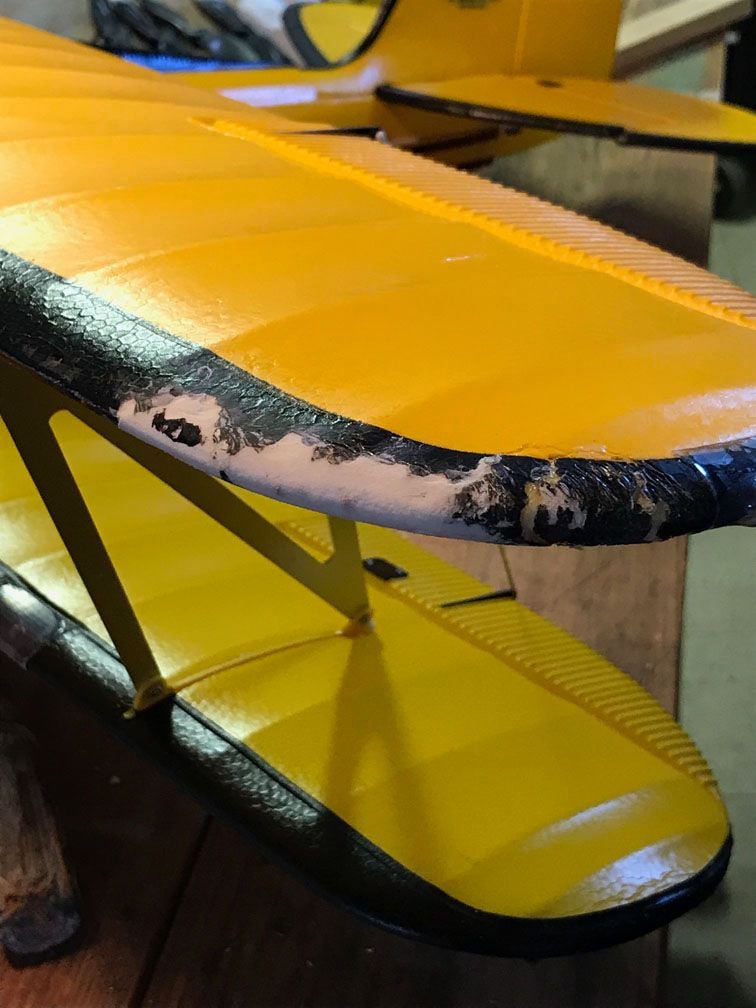
One comment on the use of lightweight spackle for the foam repairs - I pushed cut off toothpicks into the wound to support the repair. I also painted on some titebond glue as a sort of primer to help the spackle to adhere better. The foam is almost the same hardness as the foam and makes a pretty good looking repair when painted.
I could try to find a battery with a higher C rating (the one I have is 35C) and that might help the feel of it.
The plane is very easy to see and control so I will continue to work with it. It also draws compliments from other flyers because of its appearance.
One comment on the use of lightweight spackle for the foam repairs - I pushed cut off toothpicks into the wound to support the repair. I also painted on some titebond glue as a sort of primer to help the spackle to adhere better. The foam is almost the same hardness as the foam and makes a pretty good looking repair when painted.
Last edited by allanflowers; 11-05-2021 at 07:11 AM.
11-15-2021, 10:45 AM
#33
Thread Starter
I flew the Waco at the Veterans Day Fly-in at the Weedwackers Field in Lakeside, Ca on Saturday. Also, this morning at my club field in Chula Vista, I got in two flights on each model. A good day and perfect weather.
The following users liked this post:
capt1597 (11-15-2021)
12-02-2021, 02:14 PM
#34
Glad you got your Waco flying. I use a 4C 2600 and it gives it ample, scale power. Rudder and ailerons are set to full throw on the high rate and I fly it on the high rate pretty much all the time. Make sure your have either re-enforced the ailerons, rudder, and elevator with clear tape, or re-attached them with hinges or they will split and separate.
12-02-2021, 02:43 PM
#35
Thread Starter
Hi Scott. I flew the Waco this morning and, as usual, it flew fine but not with much authority. My 4S 2200 doesn't give very good performance or much flying time. I love the look of this plane in the air so am willing to mess around with it until I get it dialed in.
The other model recently reviewed (Maxford N-17), it needs more throws for any rolls. Loops are okay but rolls take way too much time and altitude. I will be trying other settings on aileron, etc. going forward. Again, a great looking model that I like to see on low flybys.
The other model recently reviewed (Maxford N-17), it needs more throws for any rolls. Loops are okay but rolls take way too much time and altitude. I will be trying other settings on aileron, etc. going forward. Again, a great looking model that I like to see on low flybys.
12-21-2021, 12:36 PM
#36
Thread Starter
As the winter storms bring rains here in San Diego, which tend to close our field access road, I have elected to get another ARF to keep me busy in the shop until the road dries out
Always a fan of warbirds but frankly bored with most renditions of the A6M Zero, I now have the Phoenix 55" zero - which looks pretty good on the webpage at Tower or Horizon. It is a true ARF, not a foamie ready to fly with the addition of an Rx. Therefore it will be a lot more work.
I recently "retired" another Phoenix ARF, a 55" Dauntless, which was very attractive but heavy and prone to tip stalls. I will be using the Hacker motor and servos from that plane for this one. Unfortunately, the speed control from that model was very damaged in the crash. A new one, just delivered yesterday, is on my bench.
I think this will be a fun plane to build and should fly a lot better than the Dauntless.
Here, I have decided to add some panel lines to the model, along with the meatballs, etc. provided in the box - using a fineliner Sharpie. Don't look too close as I am kinda faking it...
The following users liked this post:
capt1597 (12-22-2021)
 12-23-2021, 04:09 PM
#38
Thread Starter
I tried to make an improvement on the Phoenix design but couldn't. The servo linkage should hit the aileron more toward the middle rather than on the extreme inward end and I originally installed the servos in the wing to do that. However, I found that the aileron doesn't have the wood in the right place to support that modification. Now, having returned to their design, the wood works with the horn in this location.
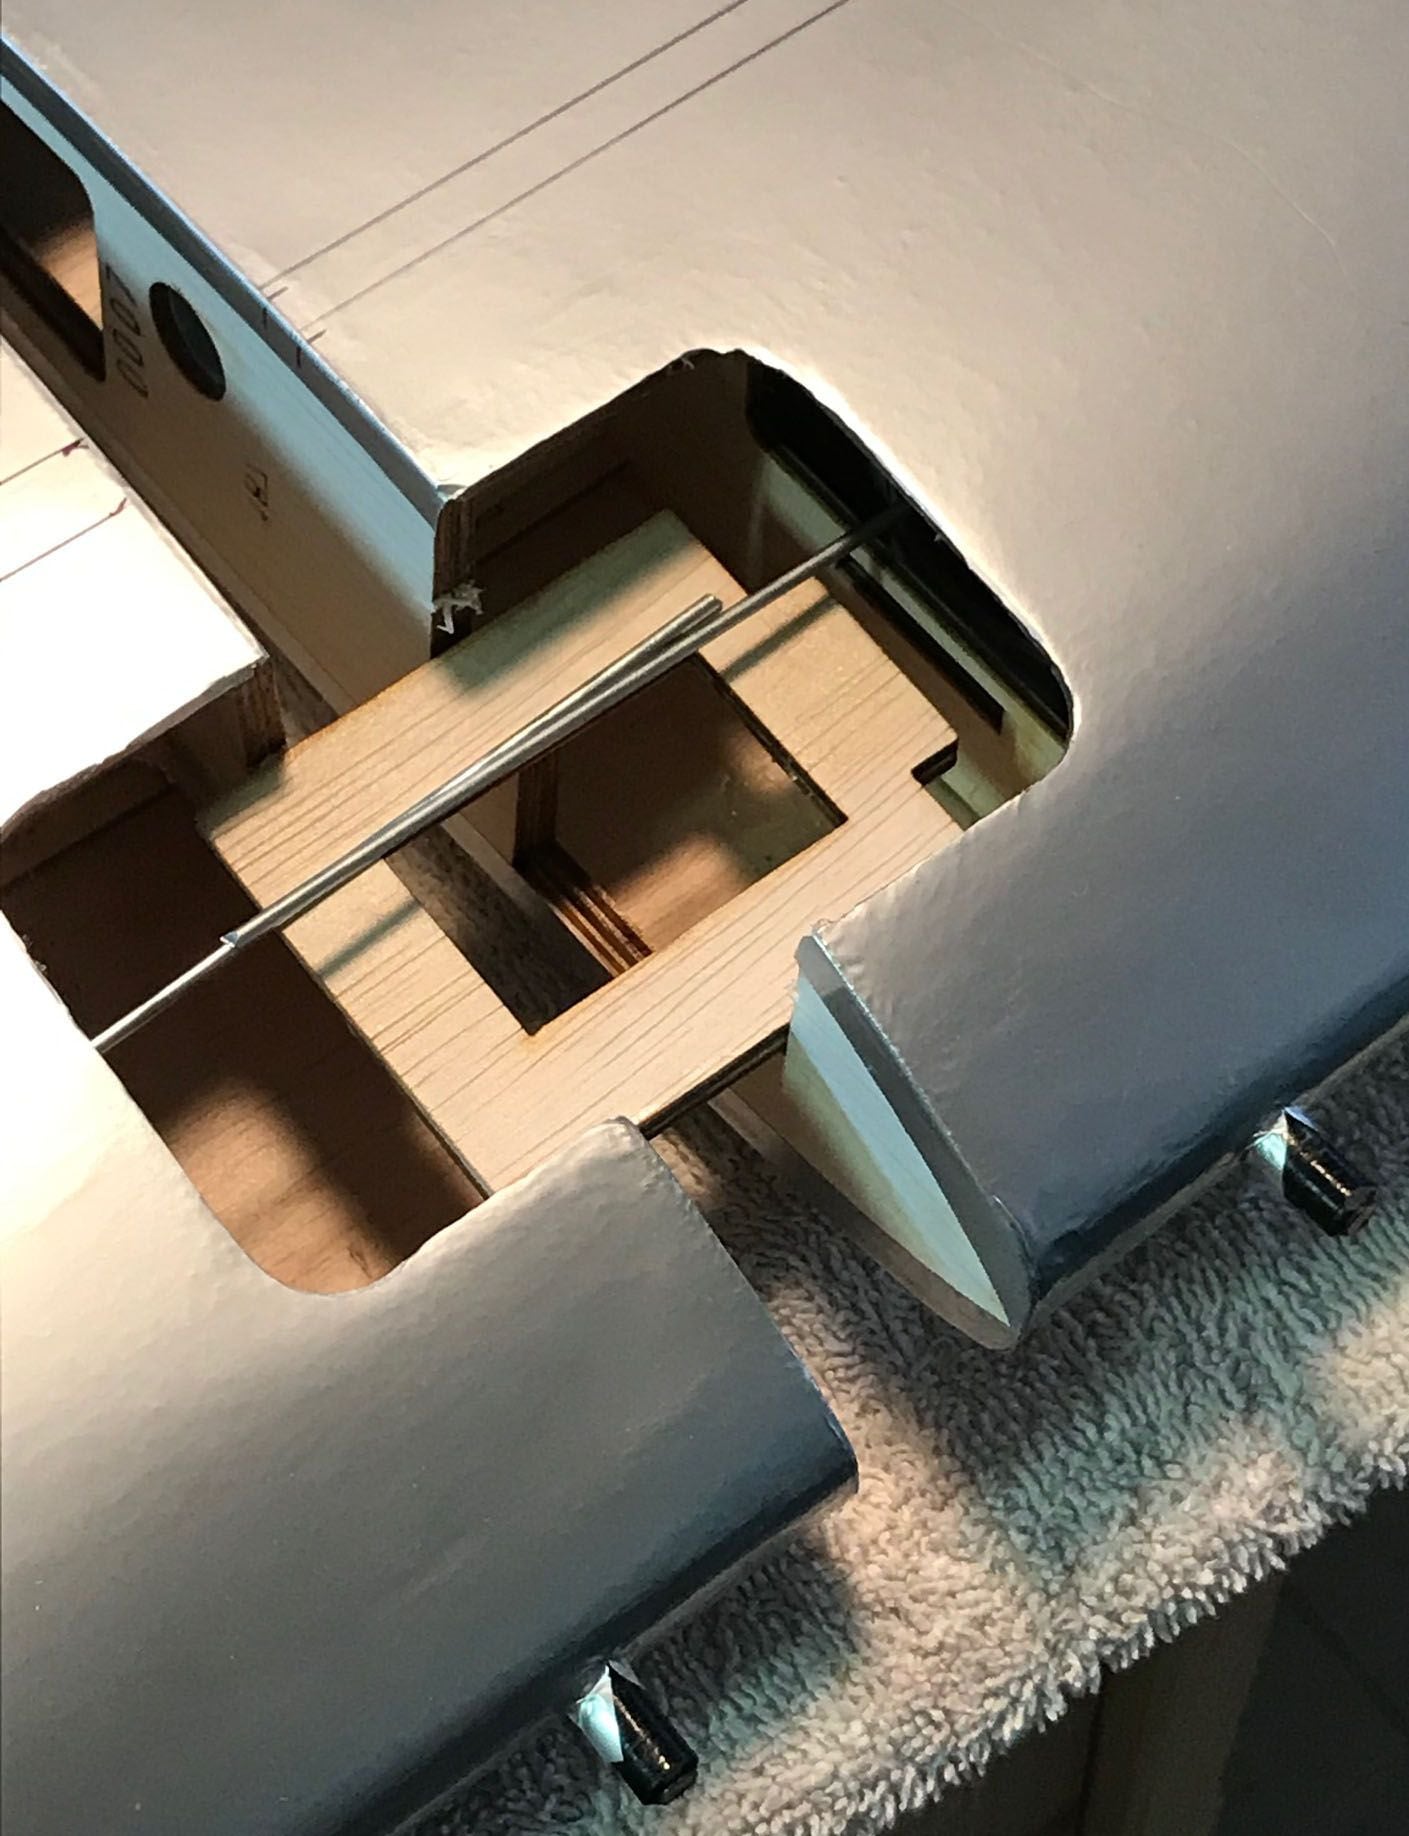
Next job is to address the landing gear installation. I wish they had used electric retracts but unfortunately they didn't so I have to install a retract servo in the middle with links driving the mechanisms, always a pain.
Having installed the servo horns in the ailerons, I was irritated by the cheap hardware (screws whose heads strip out). This model came from Vietnam but I doubt the hardware was manufactured there.
Last edited by allanflowers; 12-23-2021 at 04:10 PM. Reason: add photo
12-29-2021, 01:34 PM
#39
Thread Starter
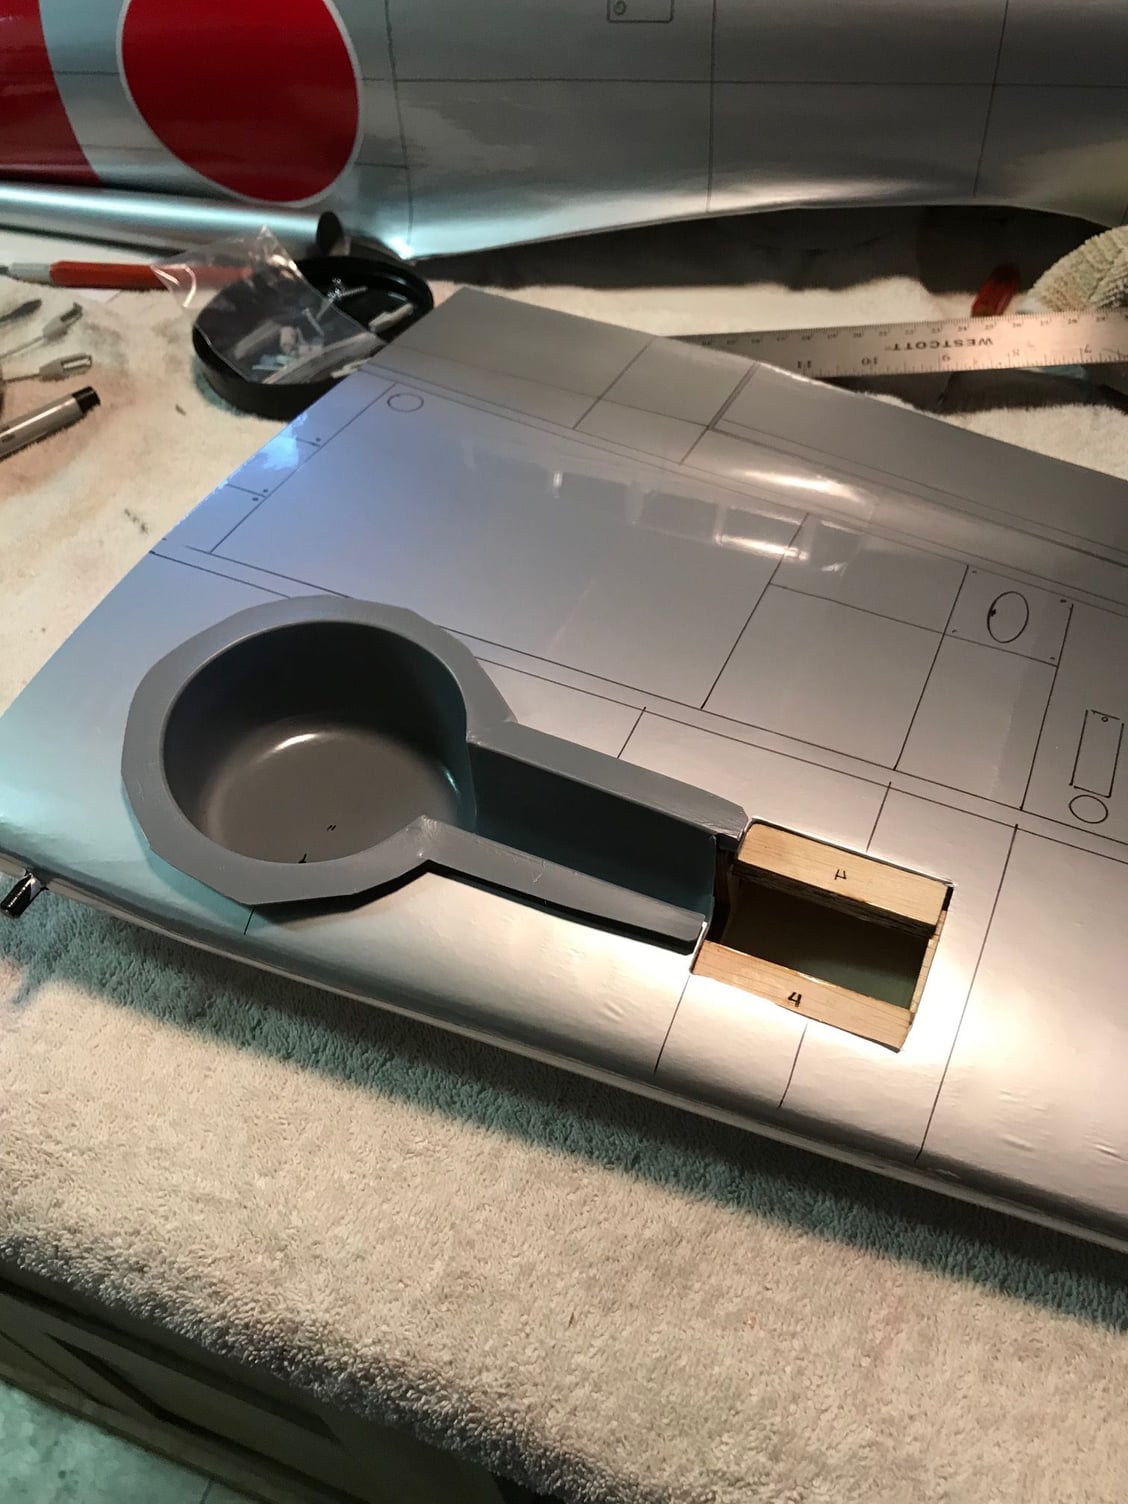
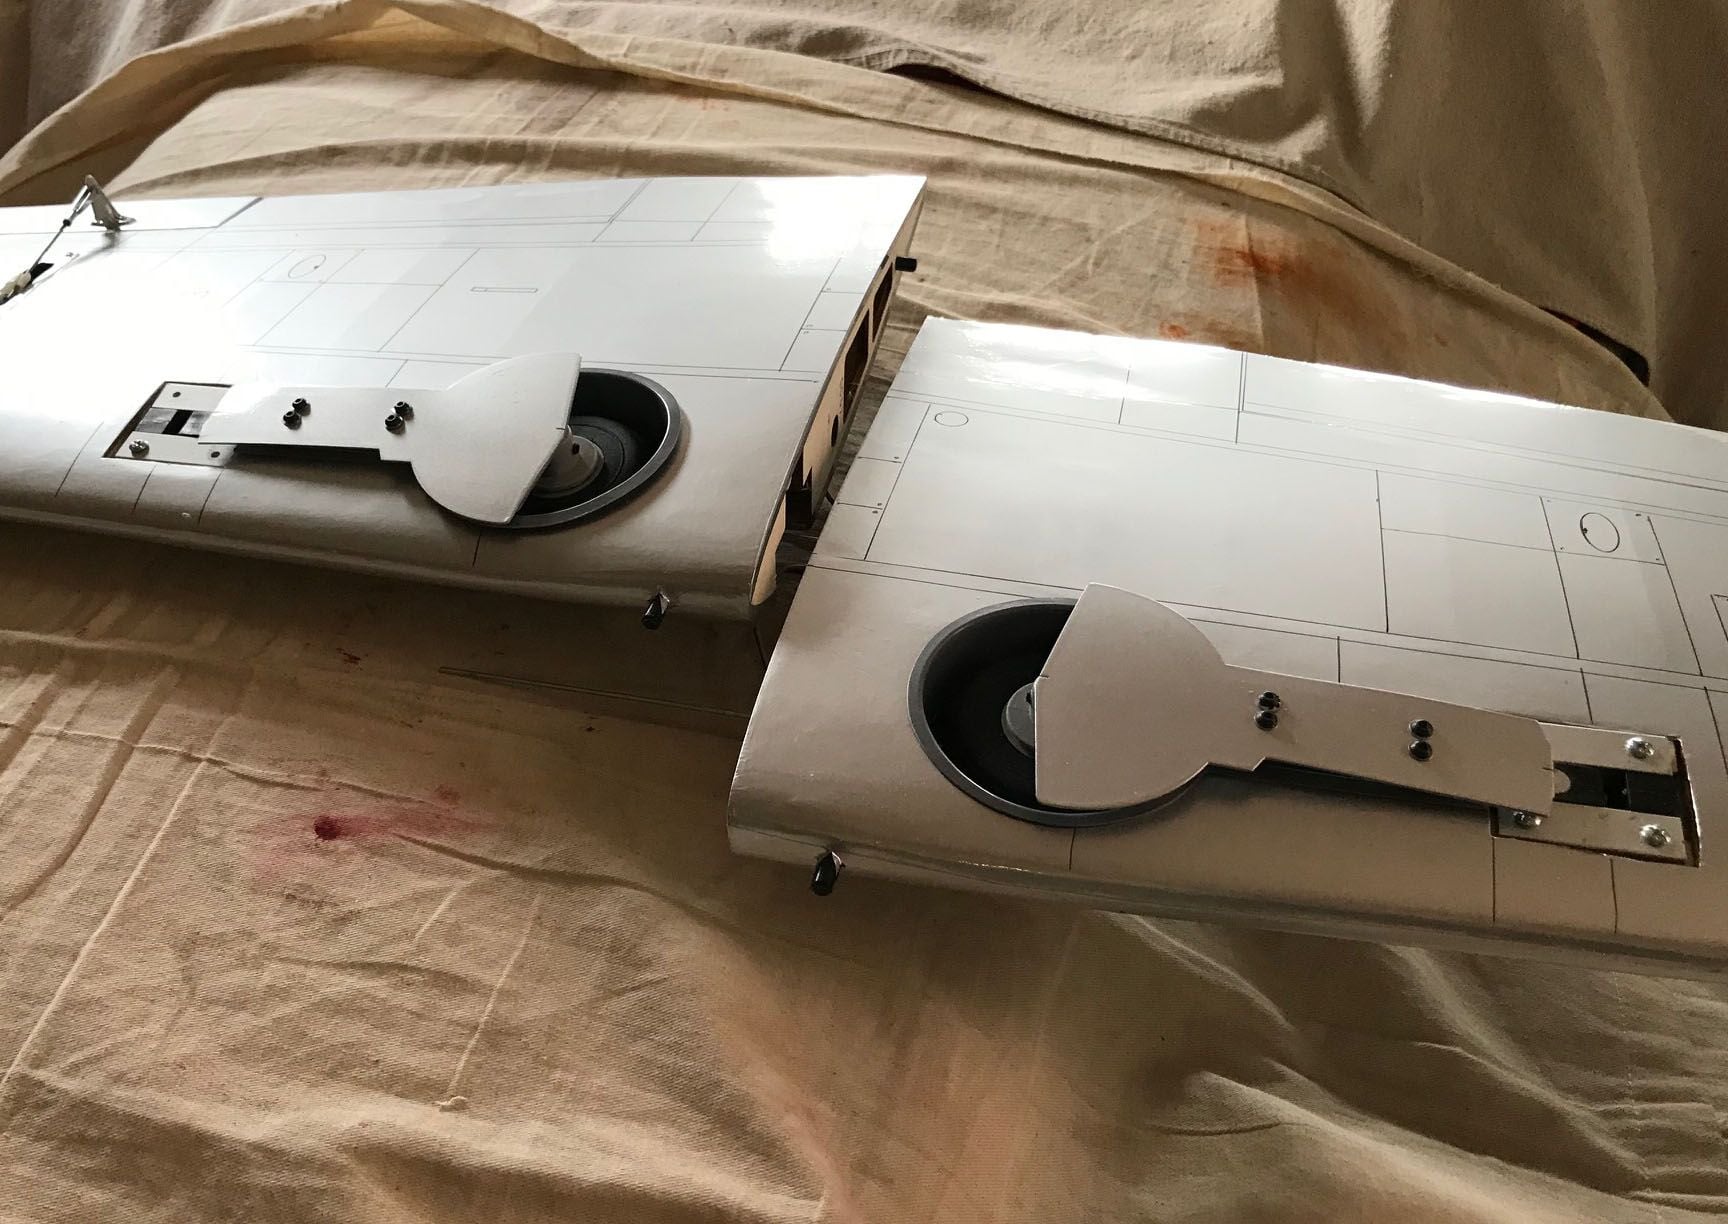
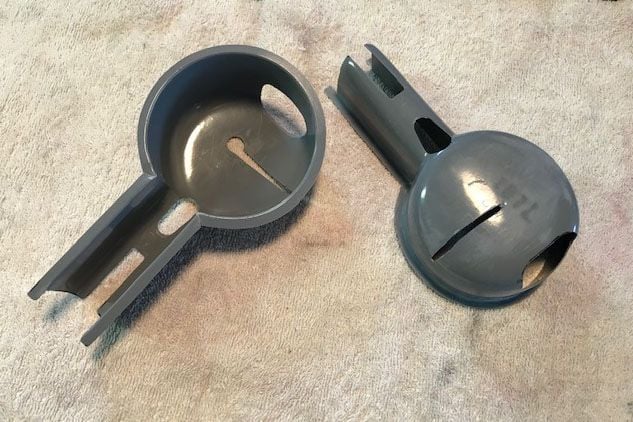
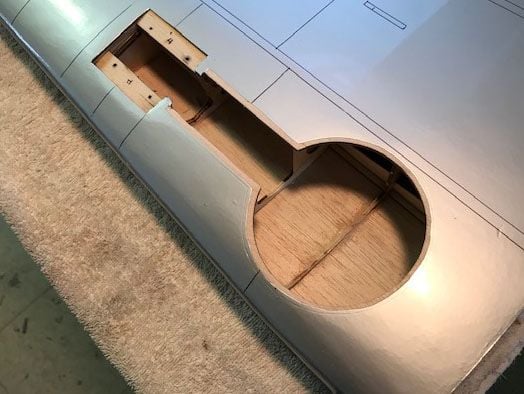
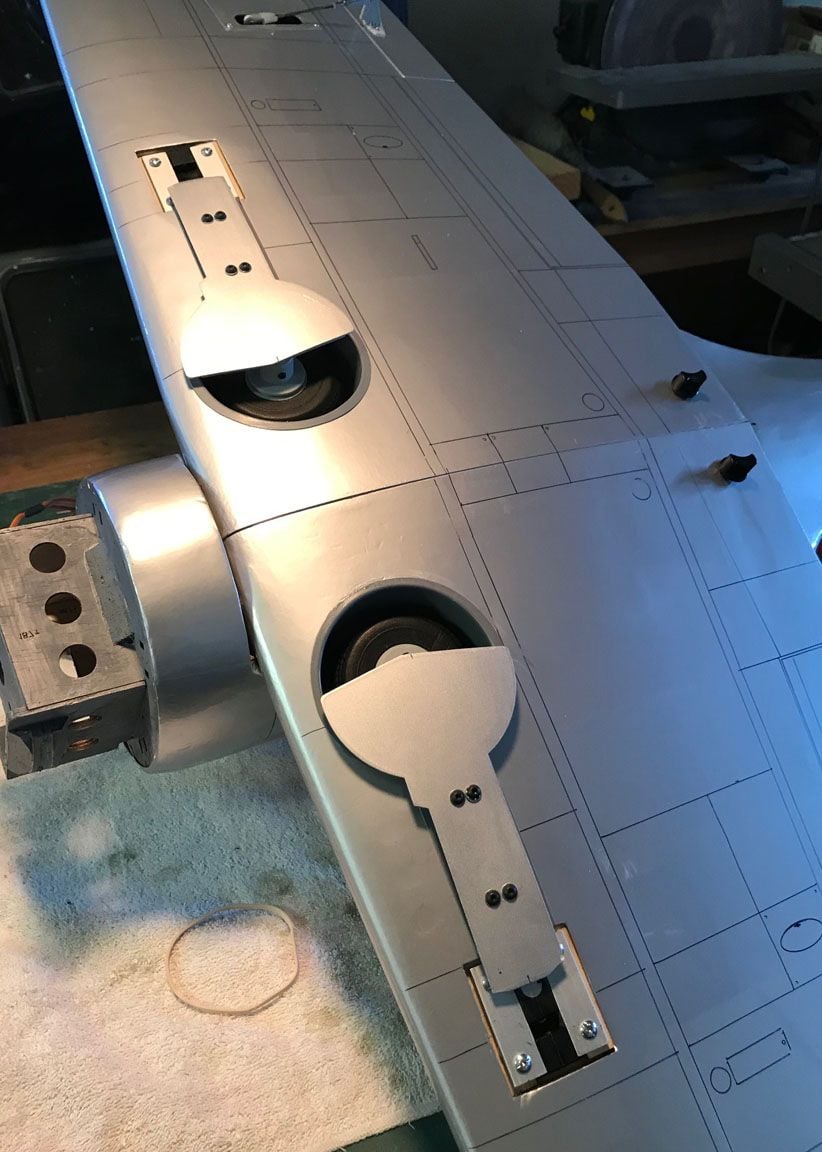
I am now working with the retract installation on this plane. First of all, the LG pants don't hug the wing like I would expect. They stand off about a quarter of an inch at least, hardly helping the aerodynamics. I looked at reconfiguring a set of electric retracts I have from a Nexa model project but that hardware is really sloppy fitting and cheap. At least the Phoenix parts are well made and give a tight fit, although not properly flush with the wing. I will attach a photo showing the LG pants fit to the wing so you can see.
Next issue was the retract installation on the in-wing blocks, which are NOT flat. I had to use a bunch of washers on one side and it still is not so good. The photo shows the result which is acceptable for now. This is a simple quality control issue and should have been done right.
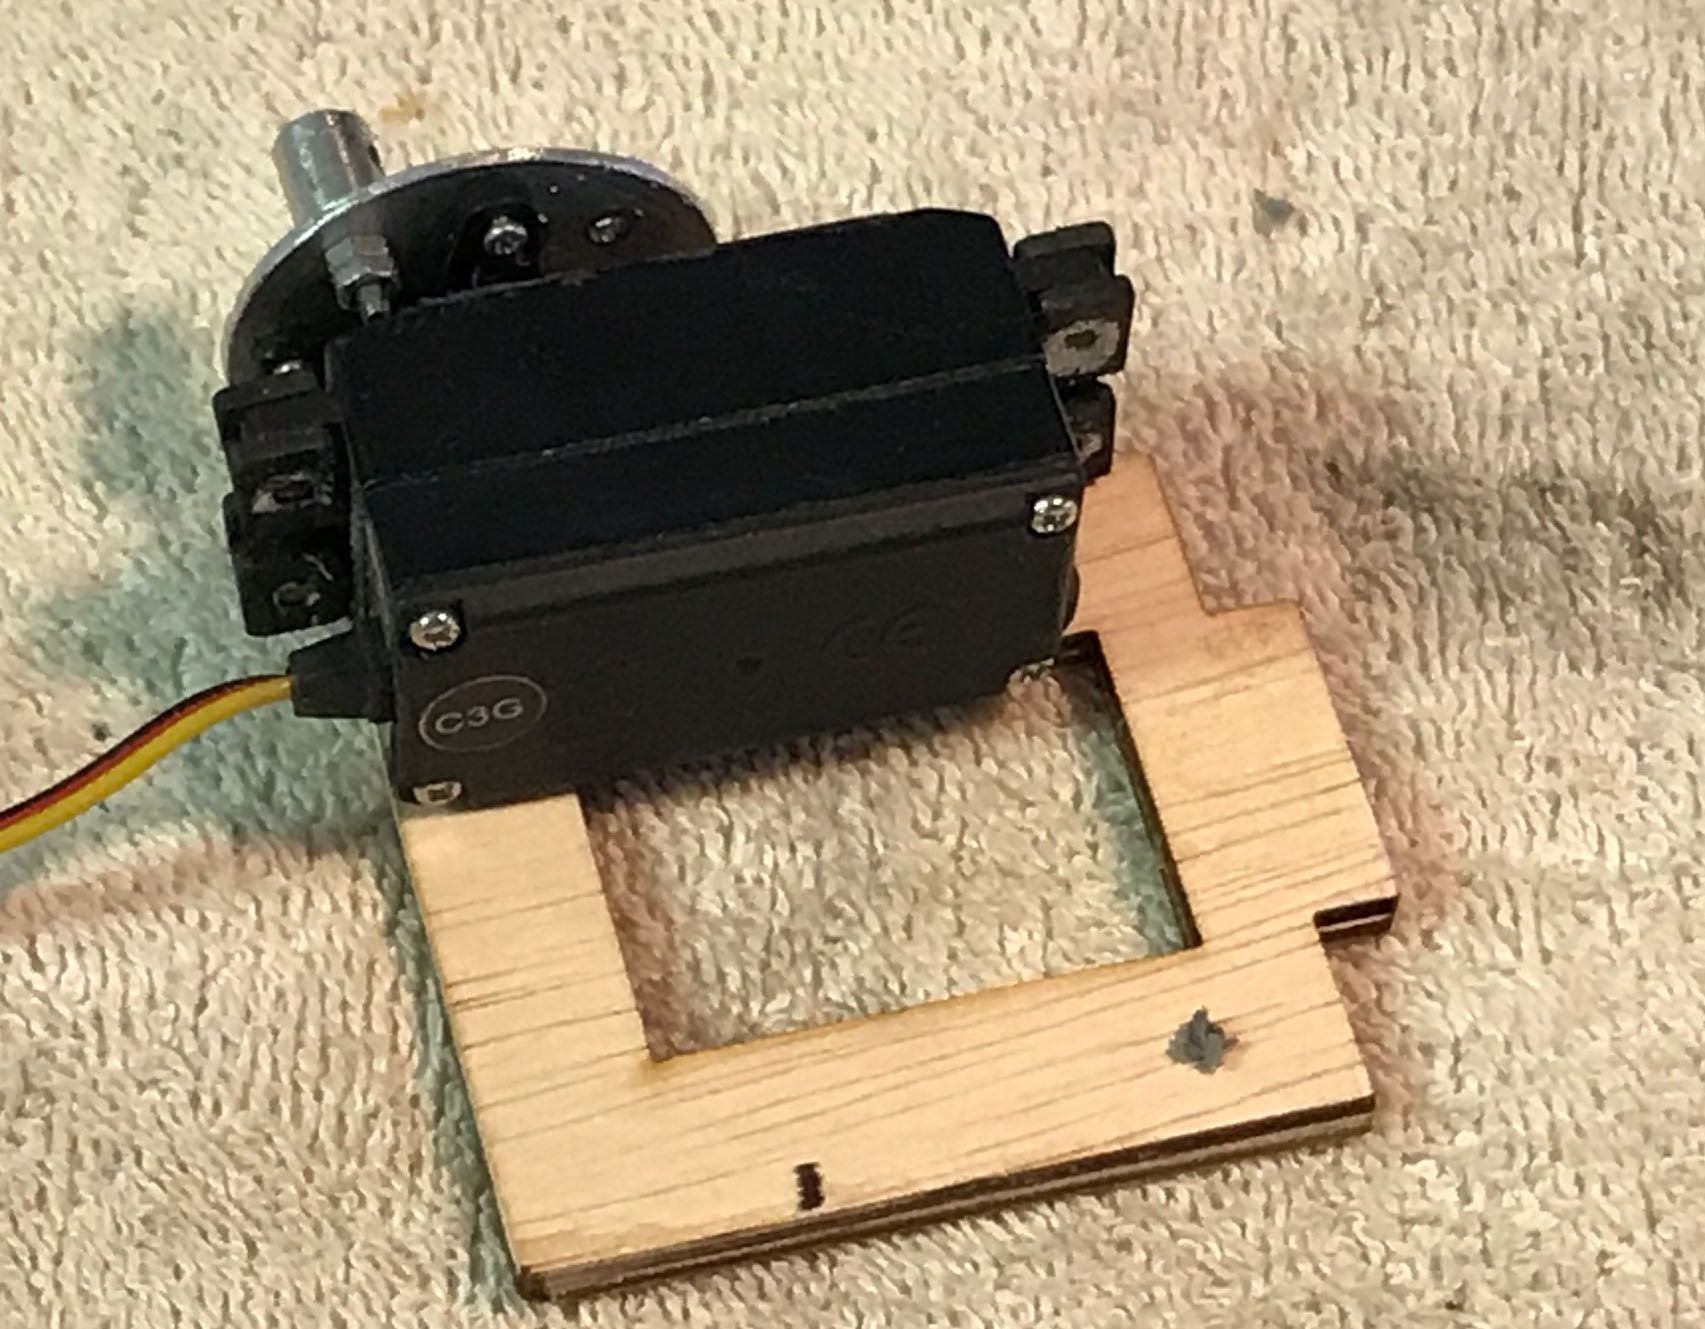
Now, I am moving on the retract servo installation. The kit provides a plywood plate which is not nearly big enough to handle the retract servo I am using from my previous Phoenix build (an ill-fated Dauntless). Given that there are very few appropriate retract servos available - especially from Tower where I got all this stuff, it is dumb that the plywood plate is about a half inch short. This is not a big deal since I can easily cut a new servo mount but it is completely unnecessary because Phoenix should have anticipated this obvious problem.
I have not yet finally installed the vacformed LG house since the link installation is still up in the air. It is hard to trim away at the house once it is epoxied in.
Next issue was the retract installation on the in-wing blocks, which are NOT flat. I had to use a bunch of washers on one side and it still is not so good. The photo shows the result which is acceptable for now. This is a simple quality control issue and should have been done right.
Now, I am moving on the retract servo installation. The kit provides a plywood plate which is not nearly big enough to handle the retract servo I am using from my previous Phoenix build (an ill-fated Dauntless). Given that there are very few appropriate retract servos available - especially from Tower where I got all this stuff, it is dumb that the plywood plate is about a half inch short. This is not a big deal since I can easily cut a new servo mount but it is completely unnecessary because Phoenix should have anticipated this obvious problem.
I have not yet finally installed the vacformed LG house since the link installation is still up in the air. It is hard to trim away at the house once it is epoxied in.
12-30-2021, 04:14 PM
#40
Thread Starter
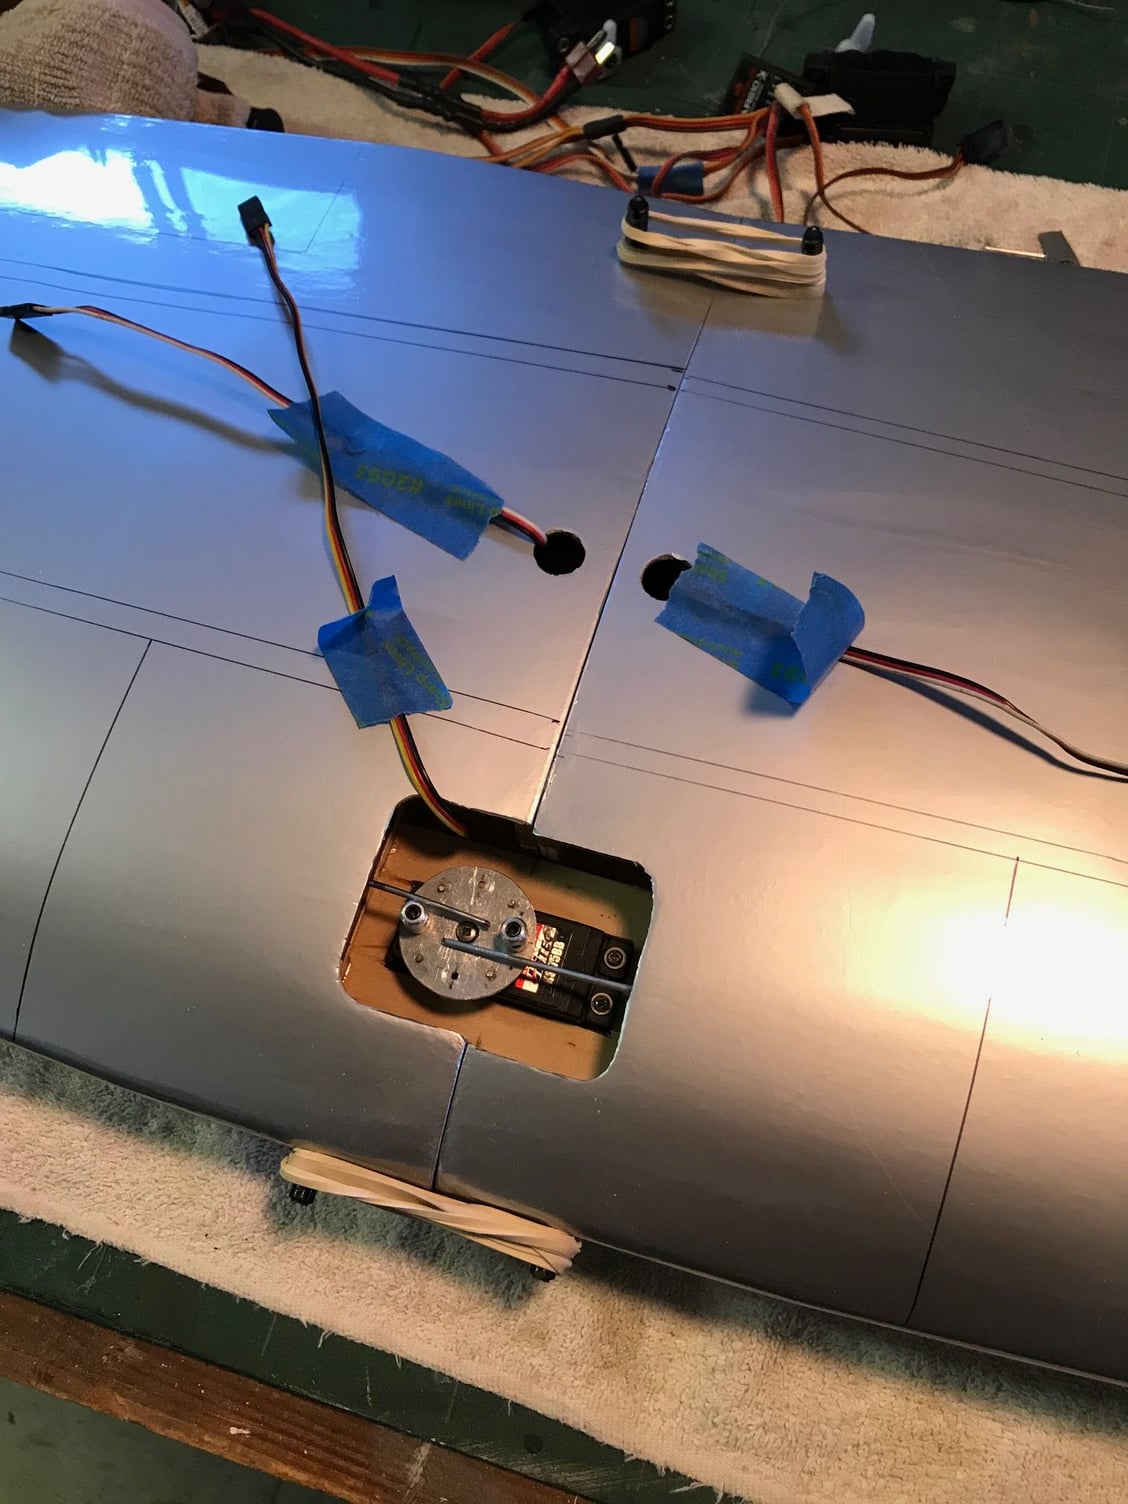
Today I worked on the retract installation. The plastic tubs that go in the wing had to be revised to allow more clearance for the drive links to the retract mechanisms. This meant enlarging the holes where the links pass through and preventing any hangups that might occur. It helped that earlier this year I went through the same issues on a Phoenix Dauntless, which had the same mechanisms � and problems. Hopefully this time I have headed off the problems I encountered then.
One solution was to make the new servo plate (which was needed anyway) to lower the servo down. I did not purchase the $65 low profile Futaba servo so the height is an issue.
The pix show the modifications I made to the plastic tubs, the new servo plate and some general shots of the area. It is always tricky gluing these tubs into the wing without messing up the covering. I used CA rather than epoxy which, last time, proved to be rather messy.
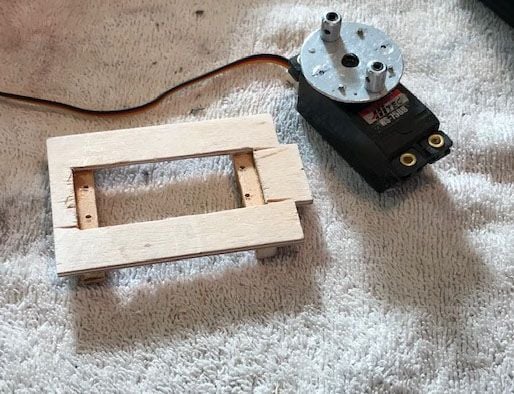
01-01-2022, 12:47 PM
#41
Thread Starter
Yesterday was spent working on the retract servo installation. This is a tricky task with the mechanical demands and potential problems. The plastic wheel houses had to be revised several times and the wire activation rod needed little bend adjustments. It still is only close, but good enough to install it and then join the two wings together this morning. This last step is a critical step in the overall build but greatly restricts further modification of the retract system � other than some final bending and trimming through the hole in the wing top.
The other thing today was fitting and installing the horizontal stab, making sure it is centered and straight. For the wing joining I used 30 minute epoxy but the stab was done with 5 minute. My garage/shop is a little cold in spite of a small electric heater so this epoxy was slow enough to get things straight.
Before putting the stab in place, I opened up the holes in the fuselage for the tail linkage wires. I hope to move on soon to installing the elevators and fin/rudder.
01-01-2022, 12:49 PM
#42
Thread Starter
This afternoon was used to finish the elevator and fin\rudder installation, with the tail wheel. Also I cut a hole in the fuselage bottom surface for an air exhaust, to let a little heat escape the fuselage.

Last edited by allanflowers; 01-01-2022 at 02:38 PM. Reason: update
01-02-2022, 04:14 PM
#43
Thread Starter
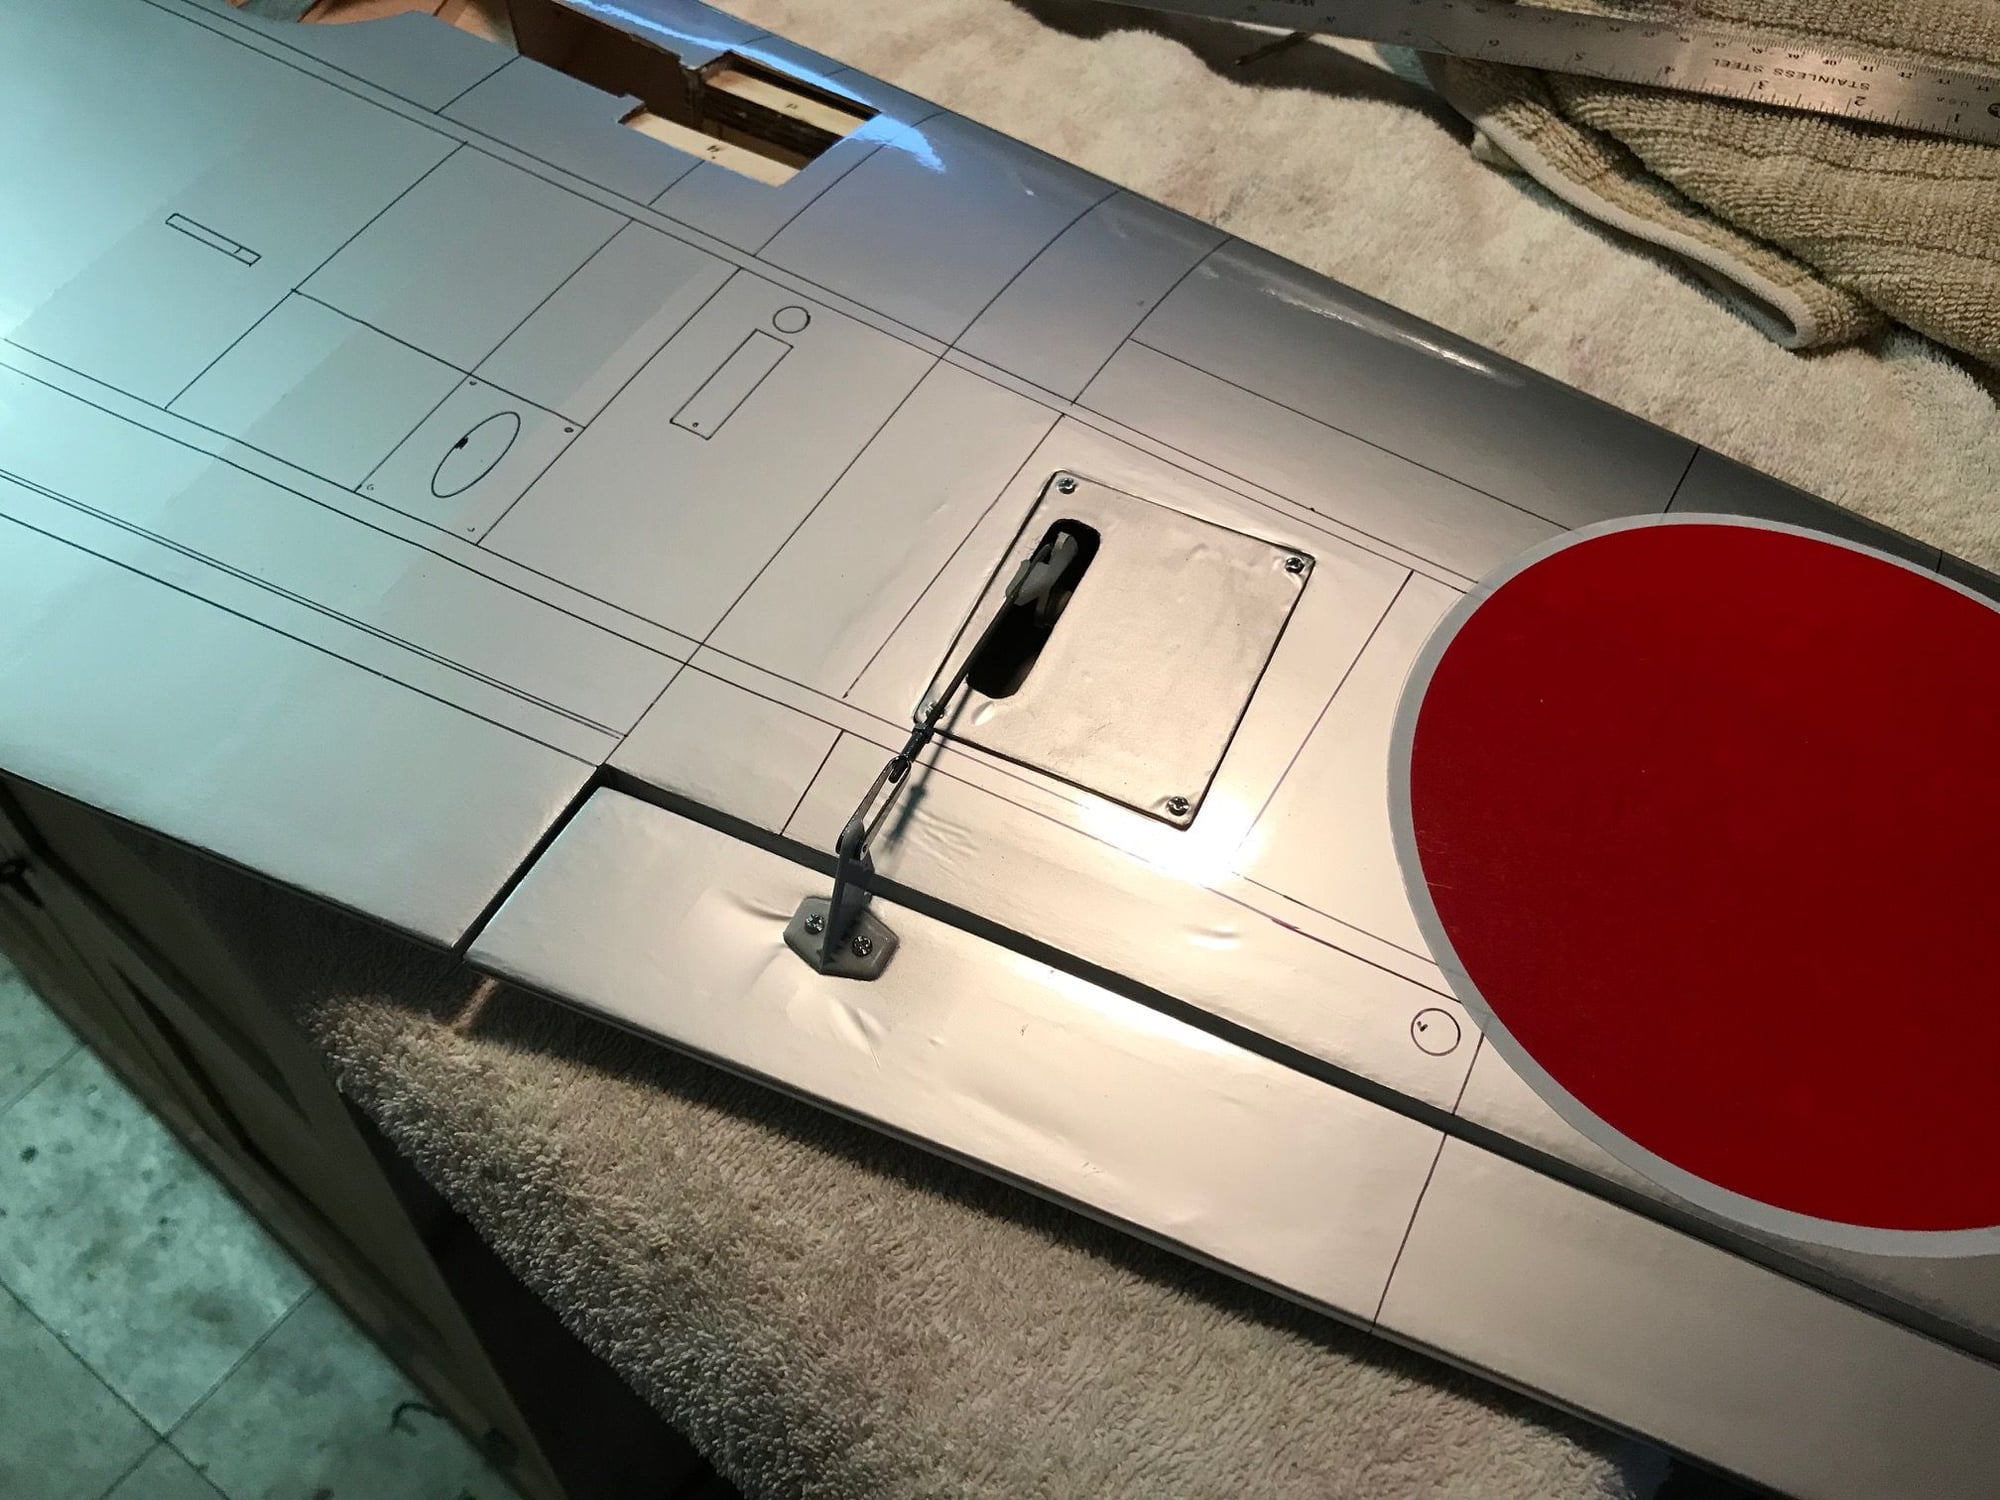
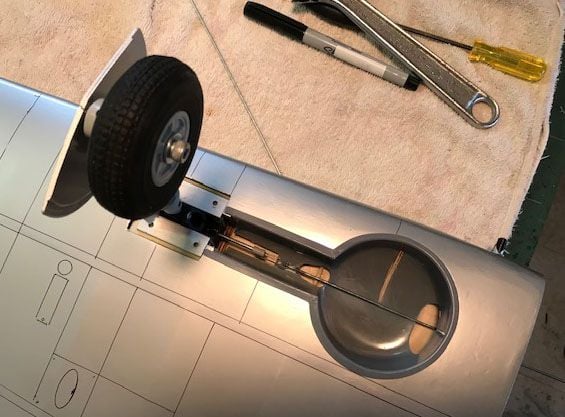
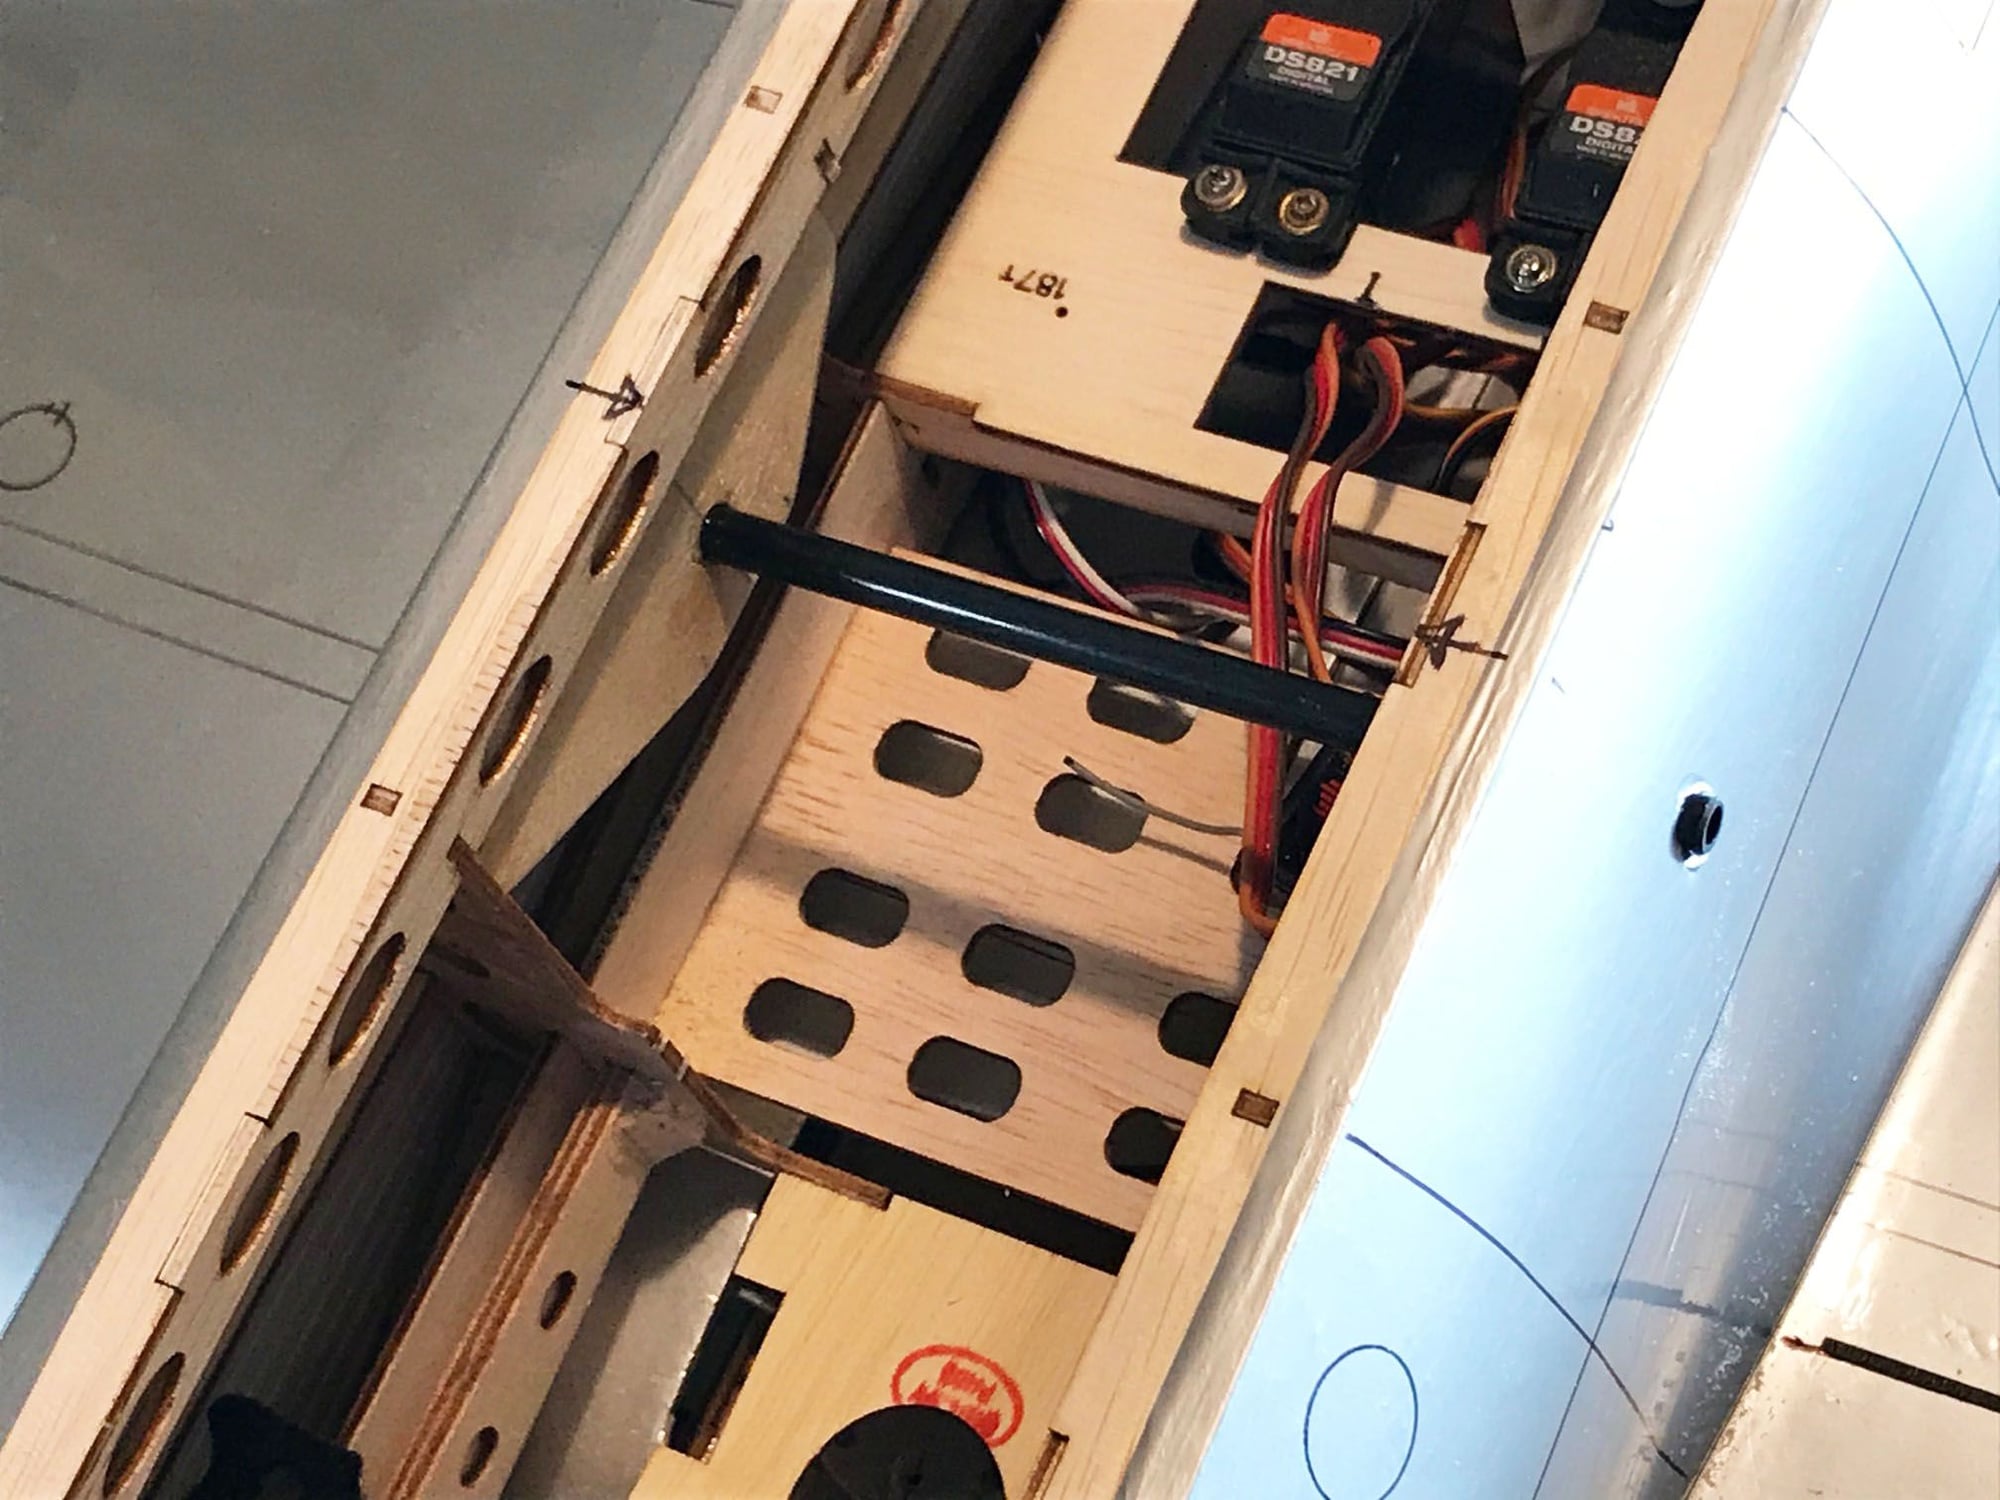
The retract system is hooked up and adjusted. It seems to work well, locking properly on both ends (two pics, top and bottom). Also the preliminary wing fitting which, with a little work, will be fine.
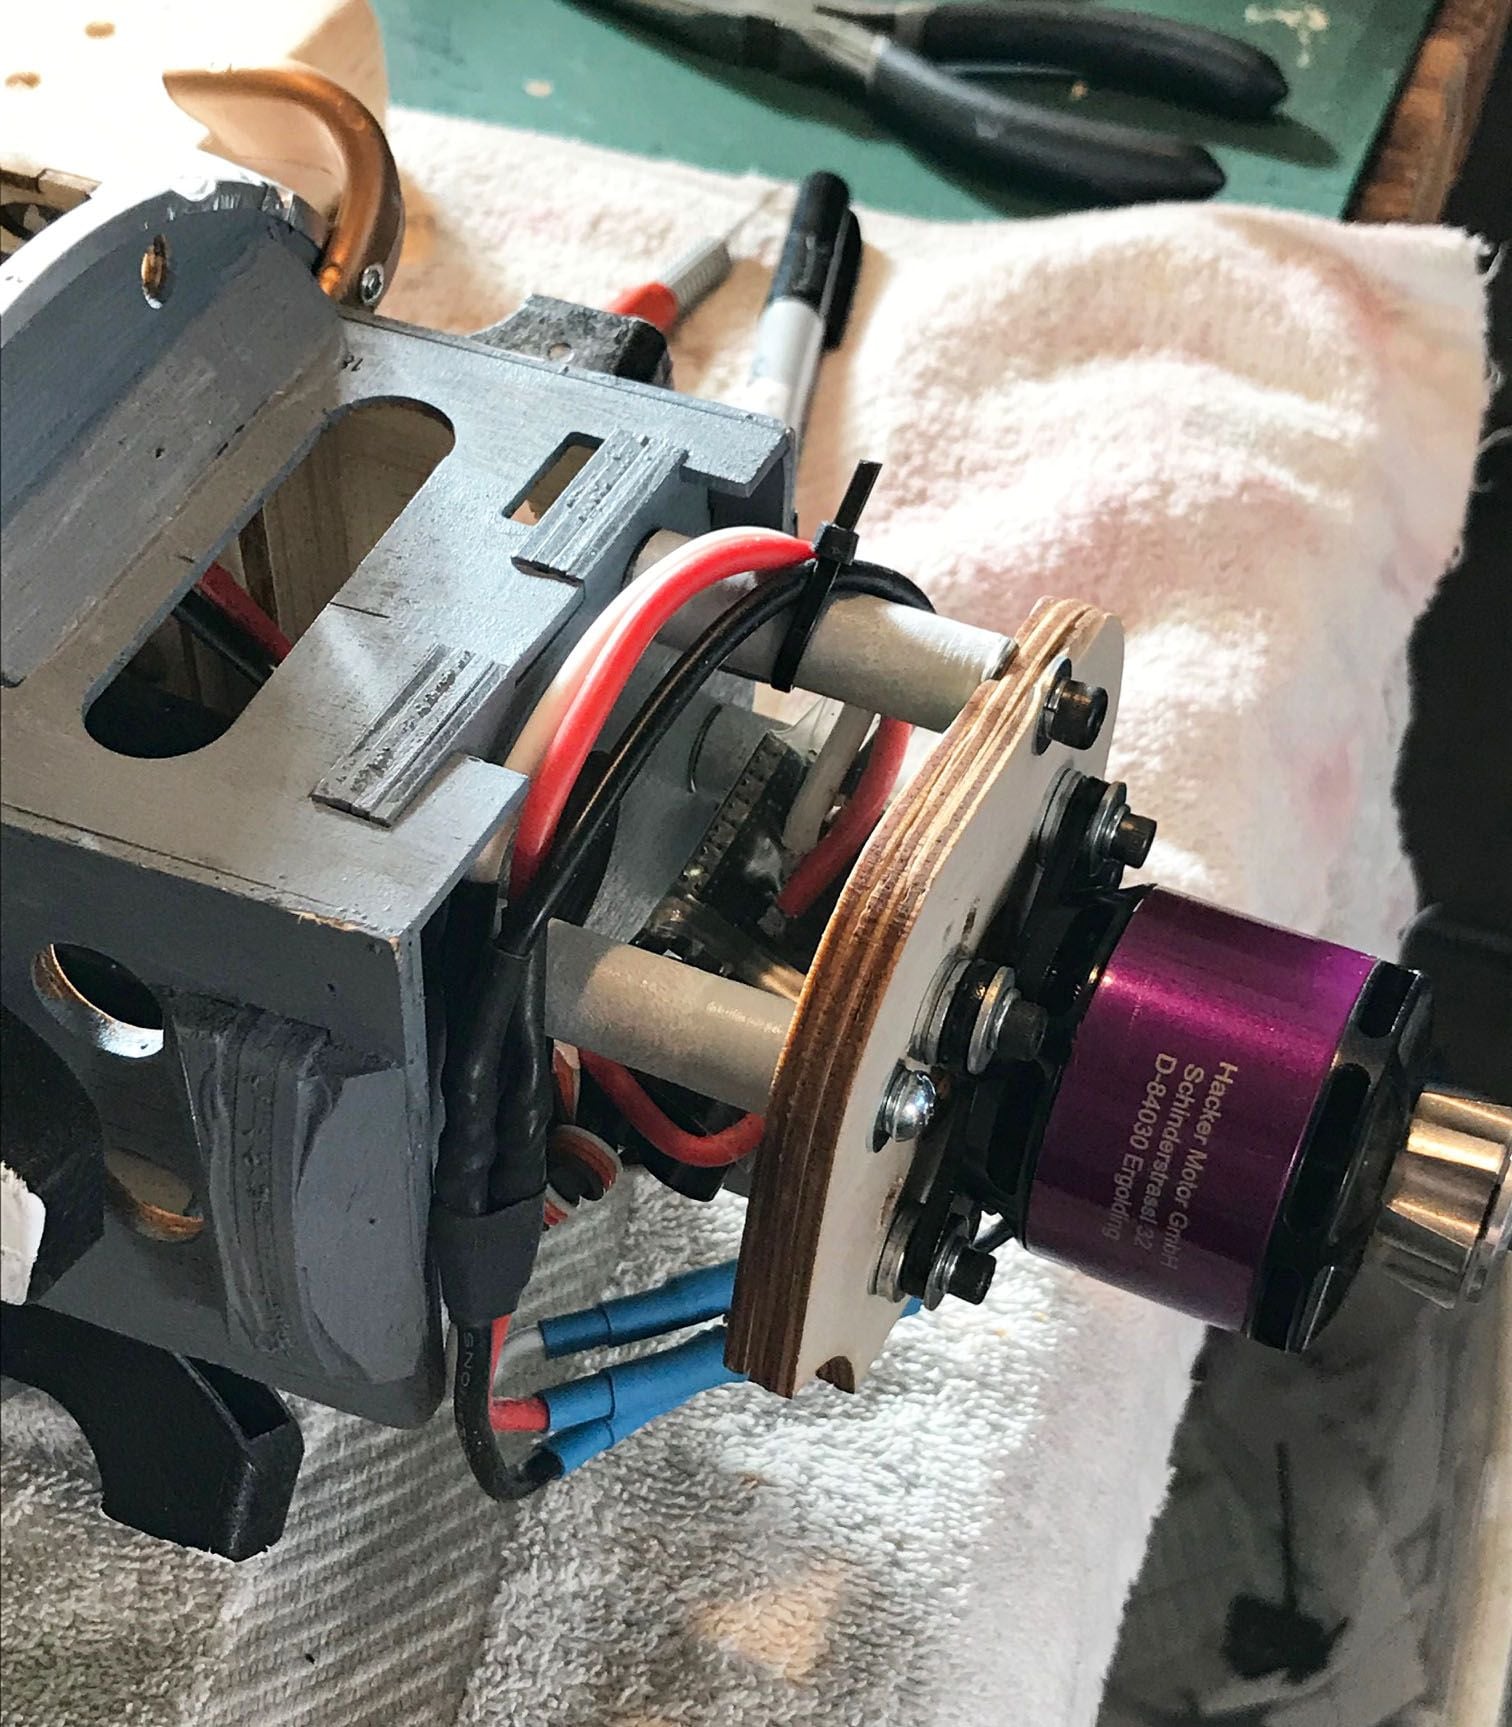
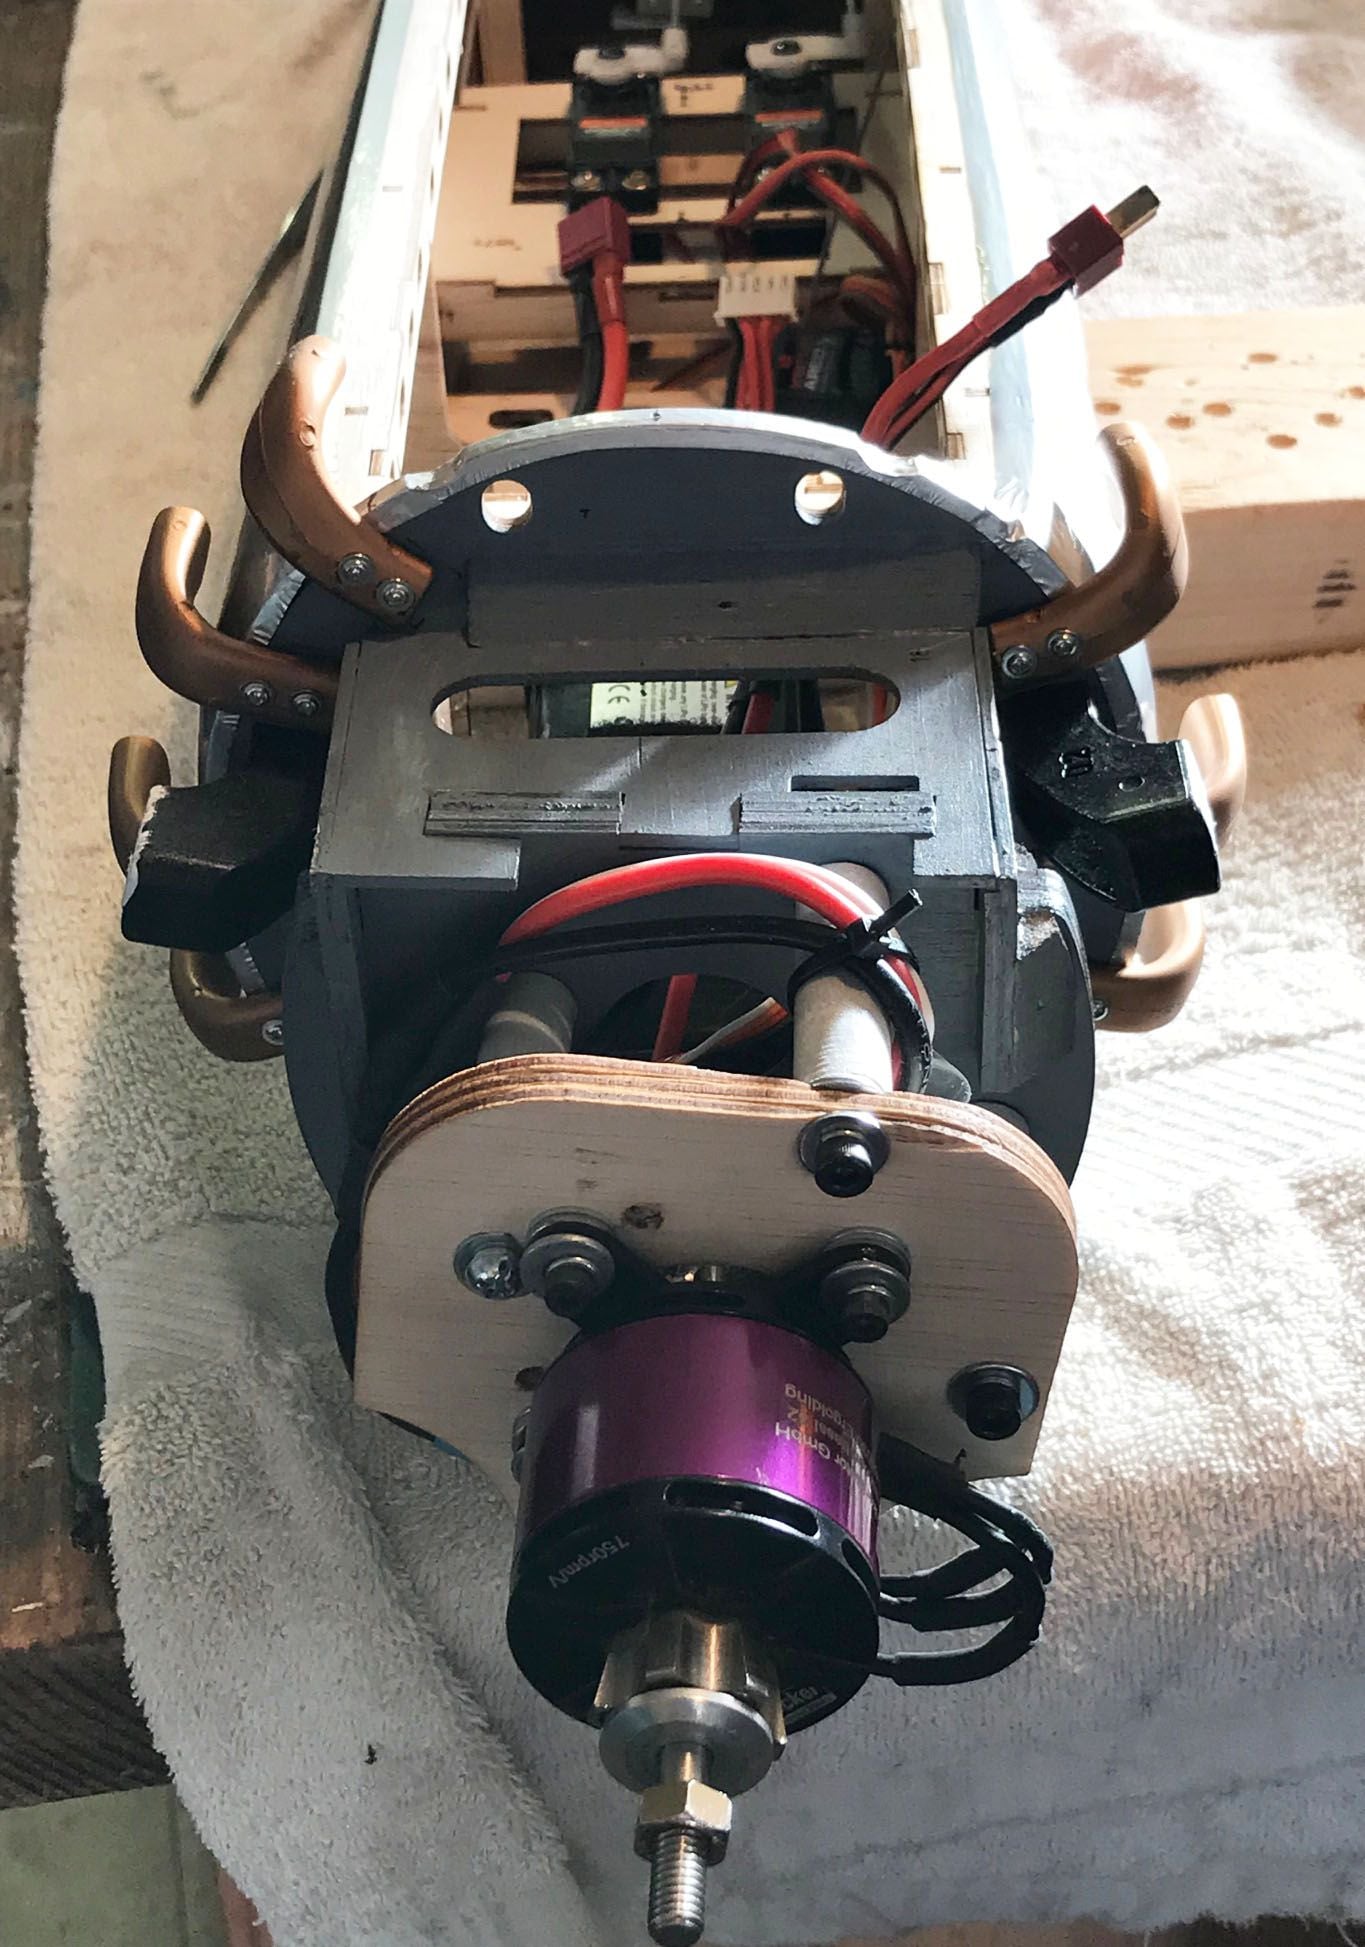
Next was the installation of the rudder and elevator horns, along with the links and servos for each. Finally I installed the exhaust pipes and have started on the electric motor install, using the Hacker from my Dauntless.


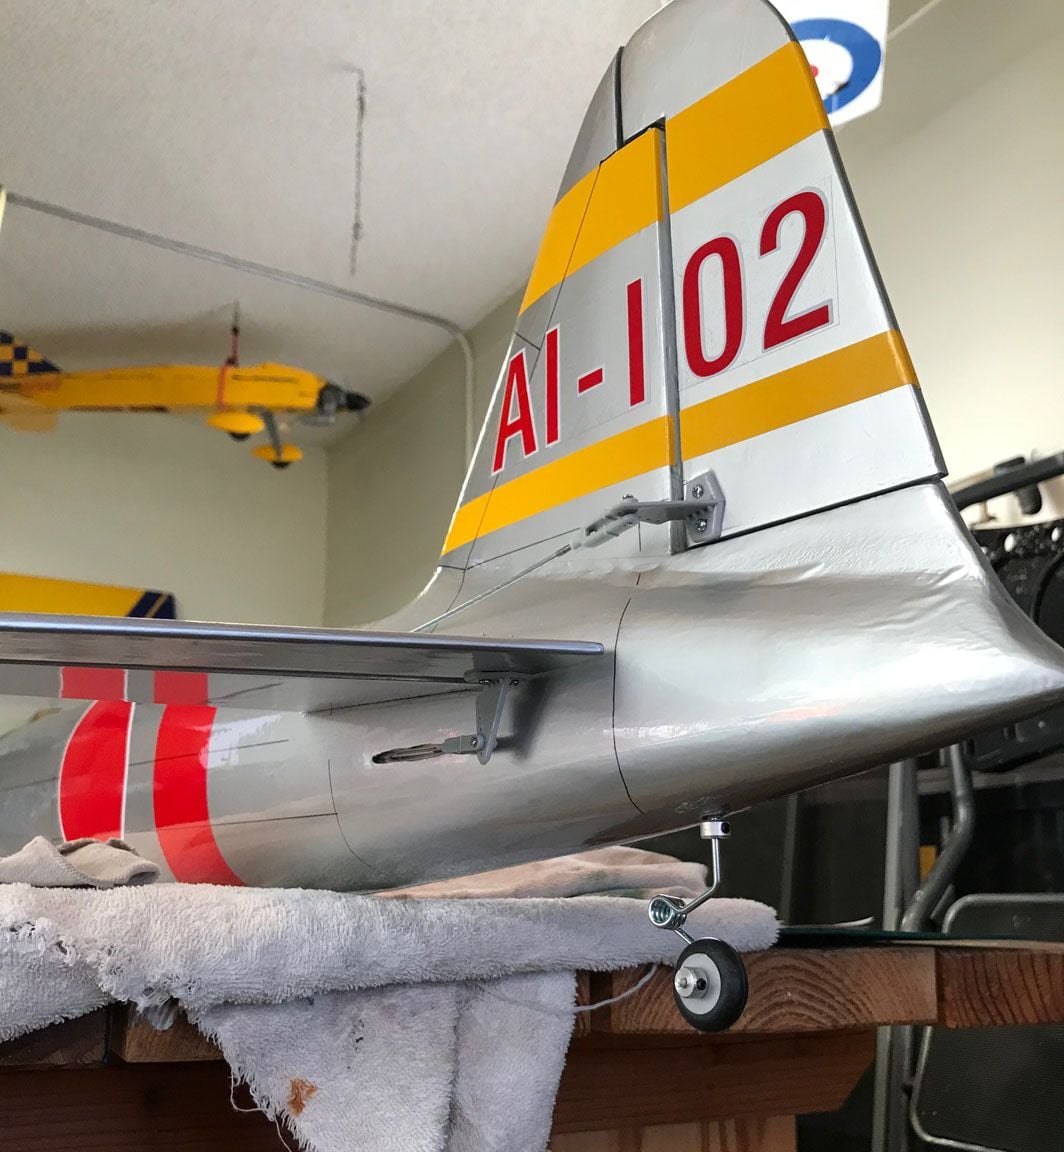
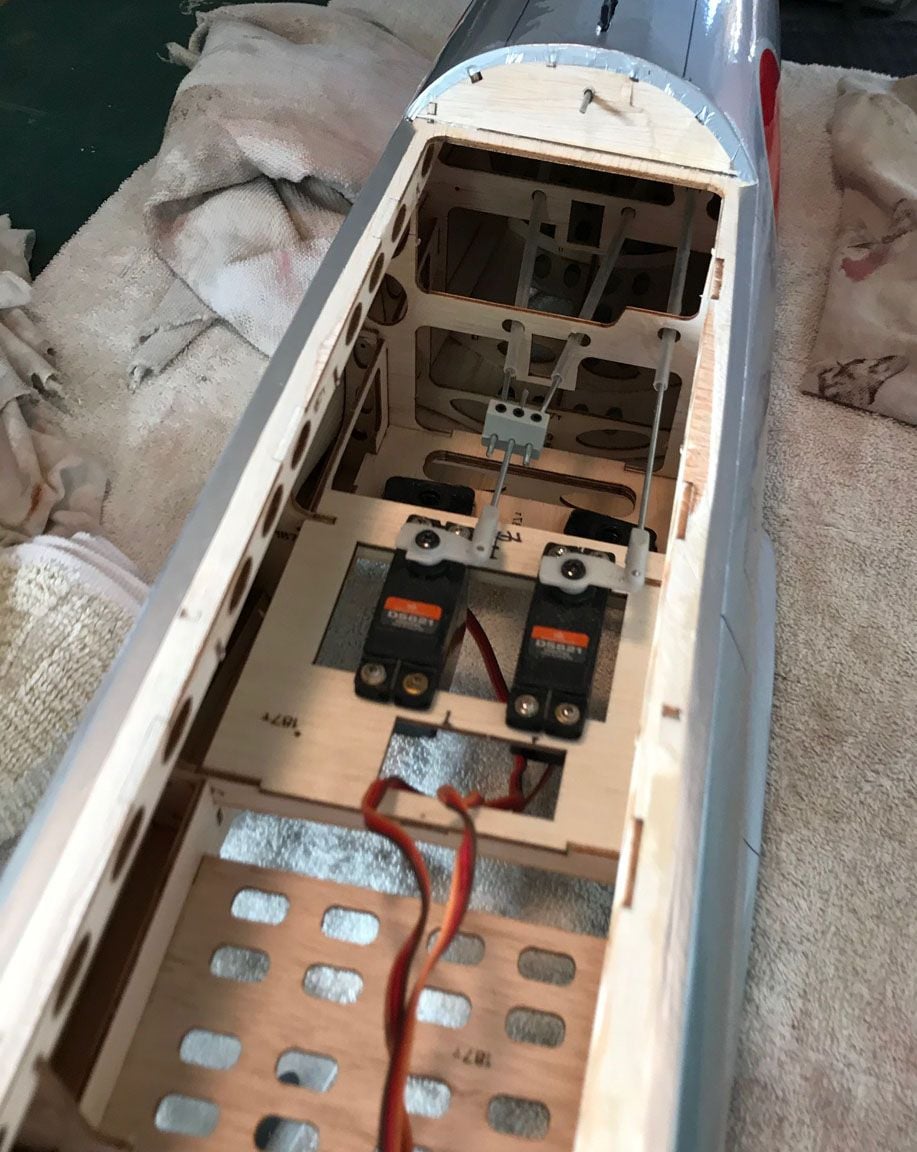
Next was the installation of the rudder and elevator horns, along with the links and servos for each. Finally I installed the exhaust pipes and have started on the electric motor install, using the Hacker from my Dauntless.
01-05-2022, 04:27 PM
#44
Thread Starter
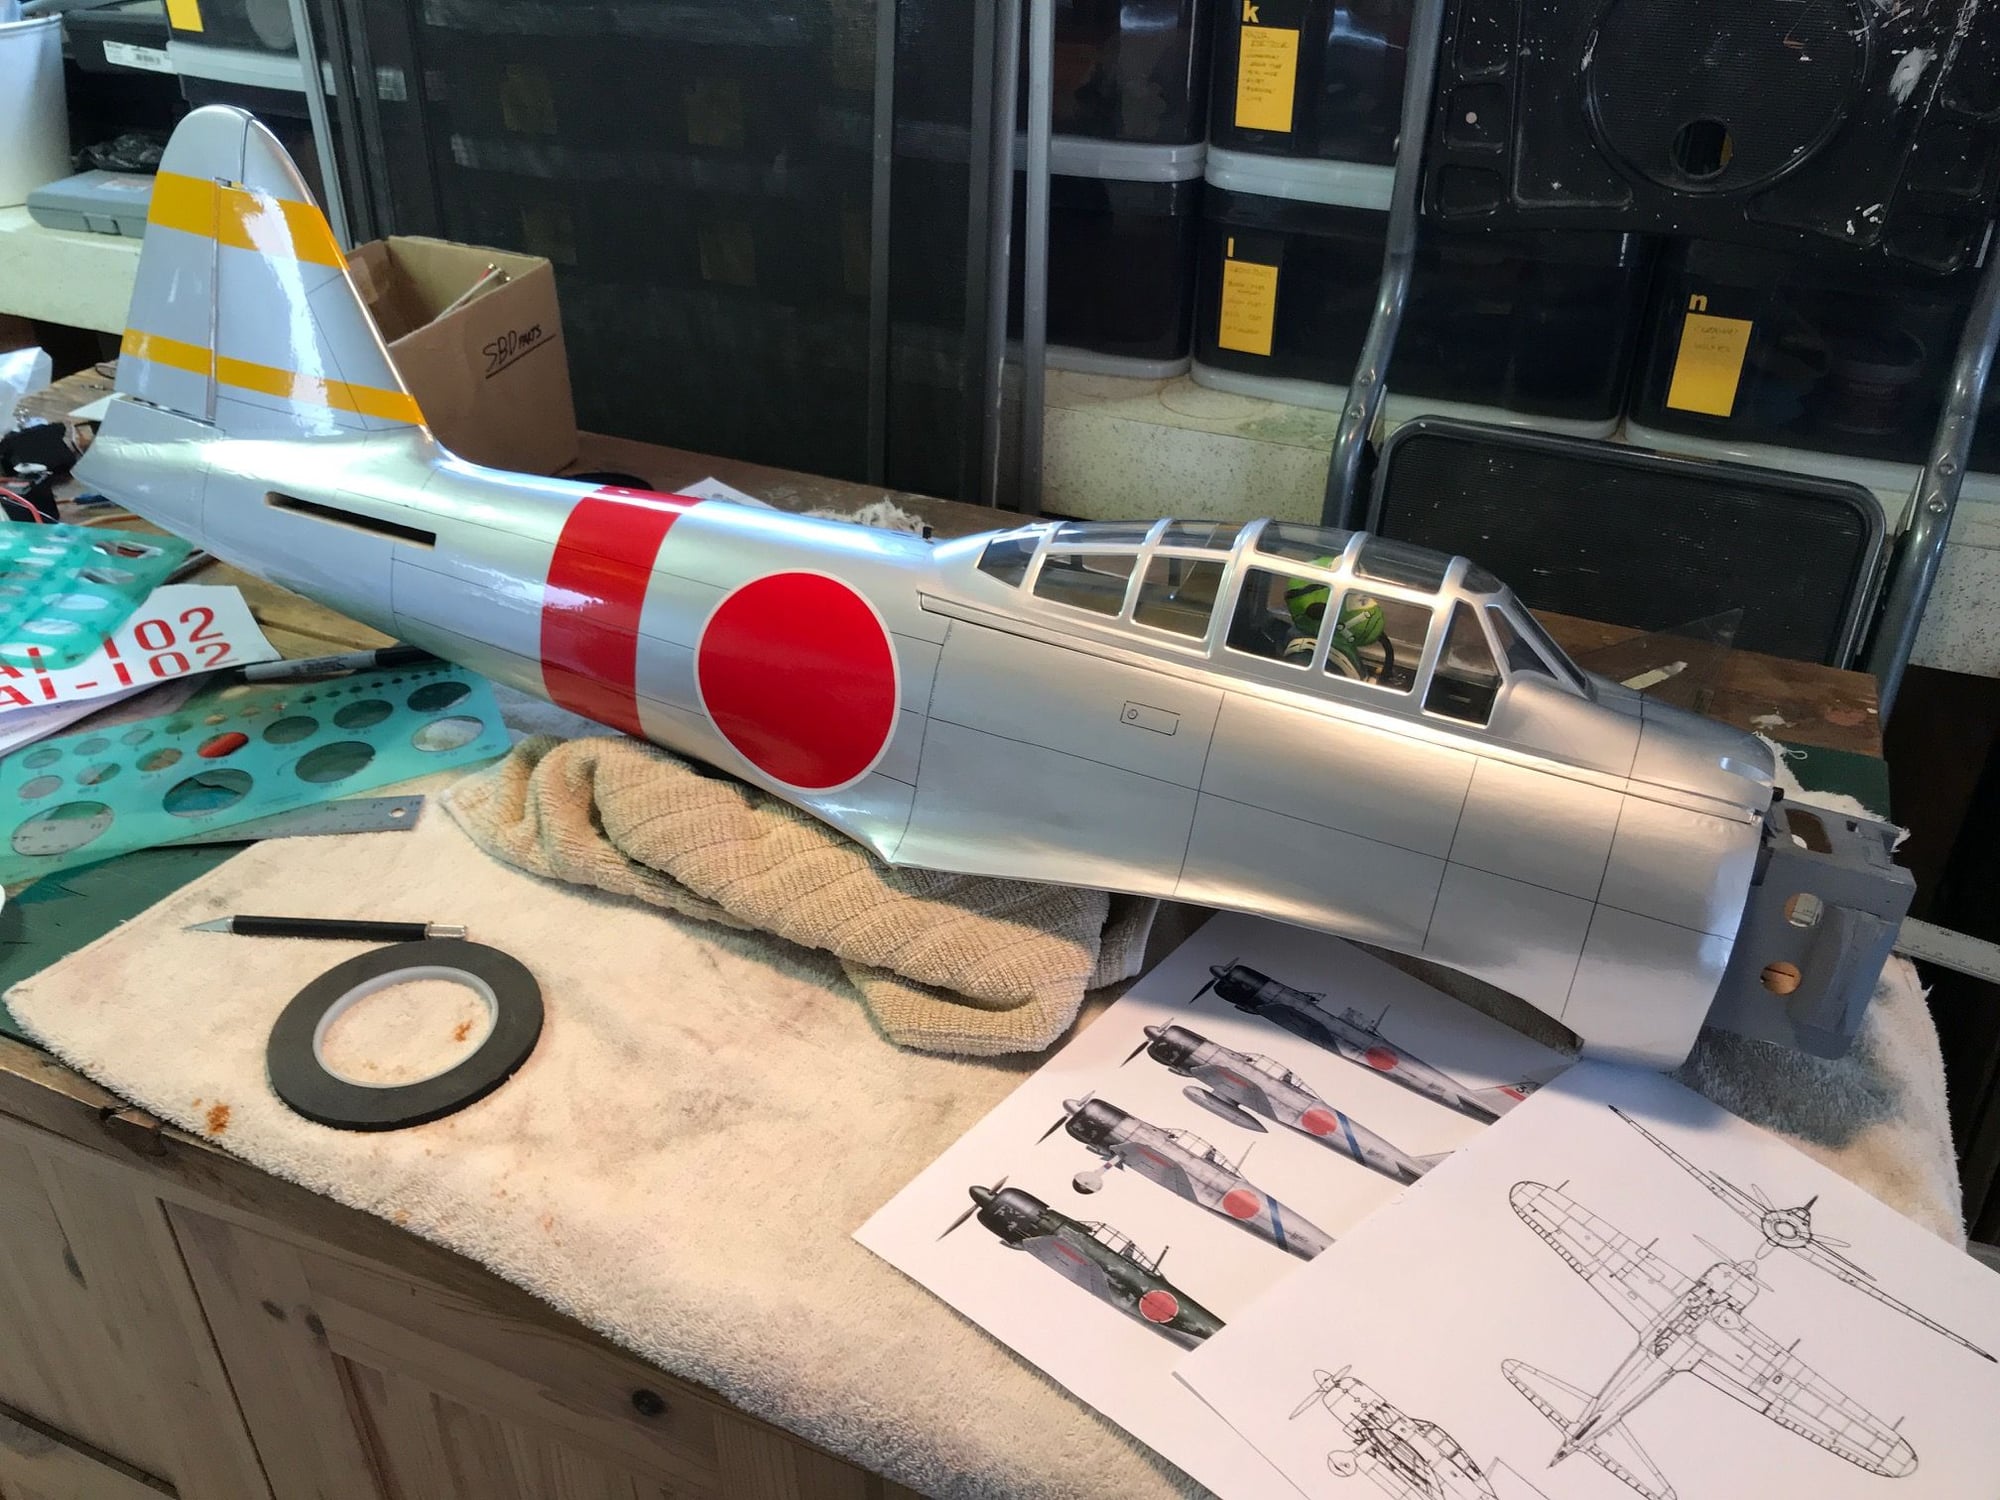
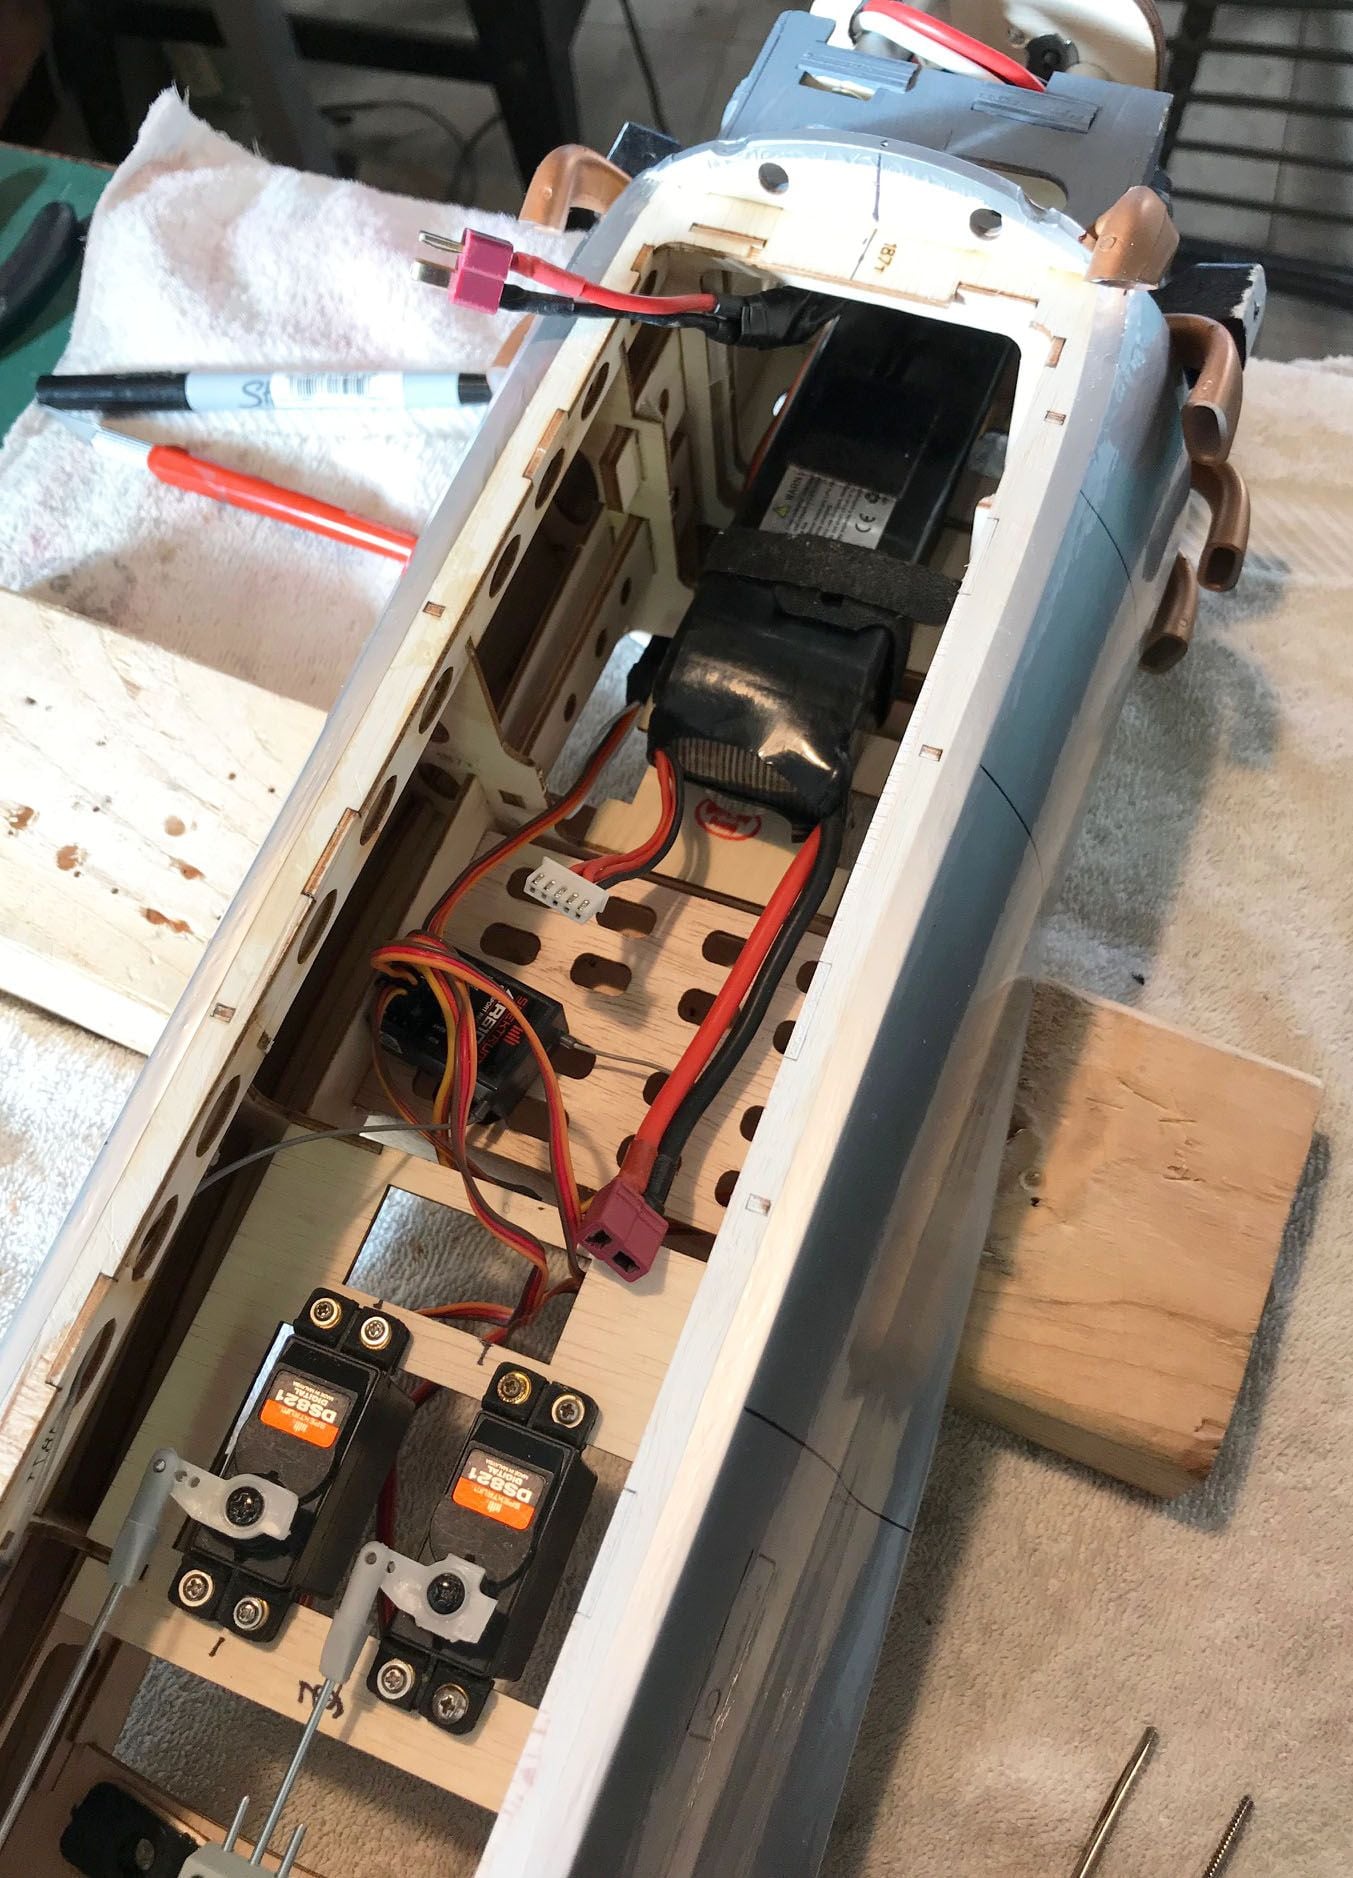
Progress on the Zero today. I soldered the connections for the new speed control to replaced the old damaged one. This meant rebinding the Rx after doing a reverse on the TX for the throttle control.
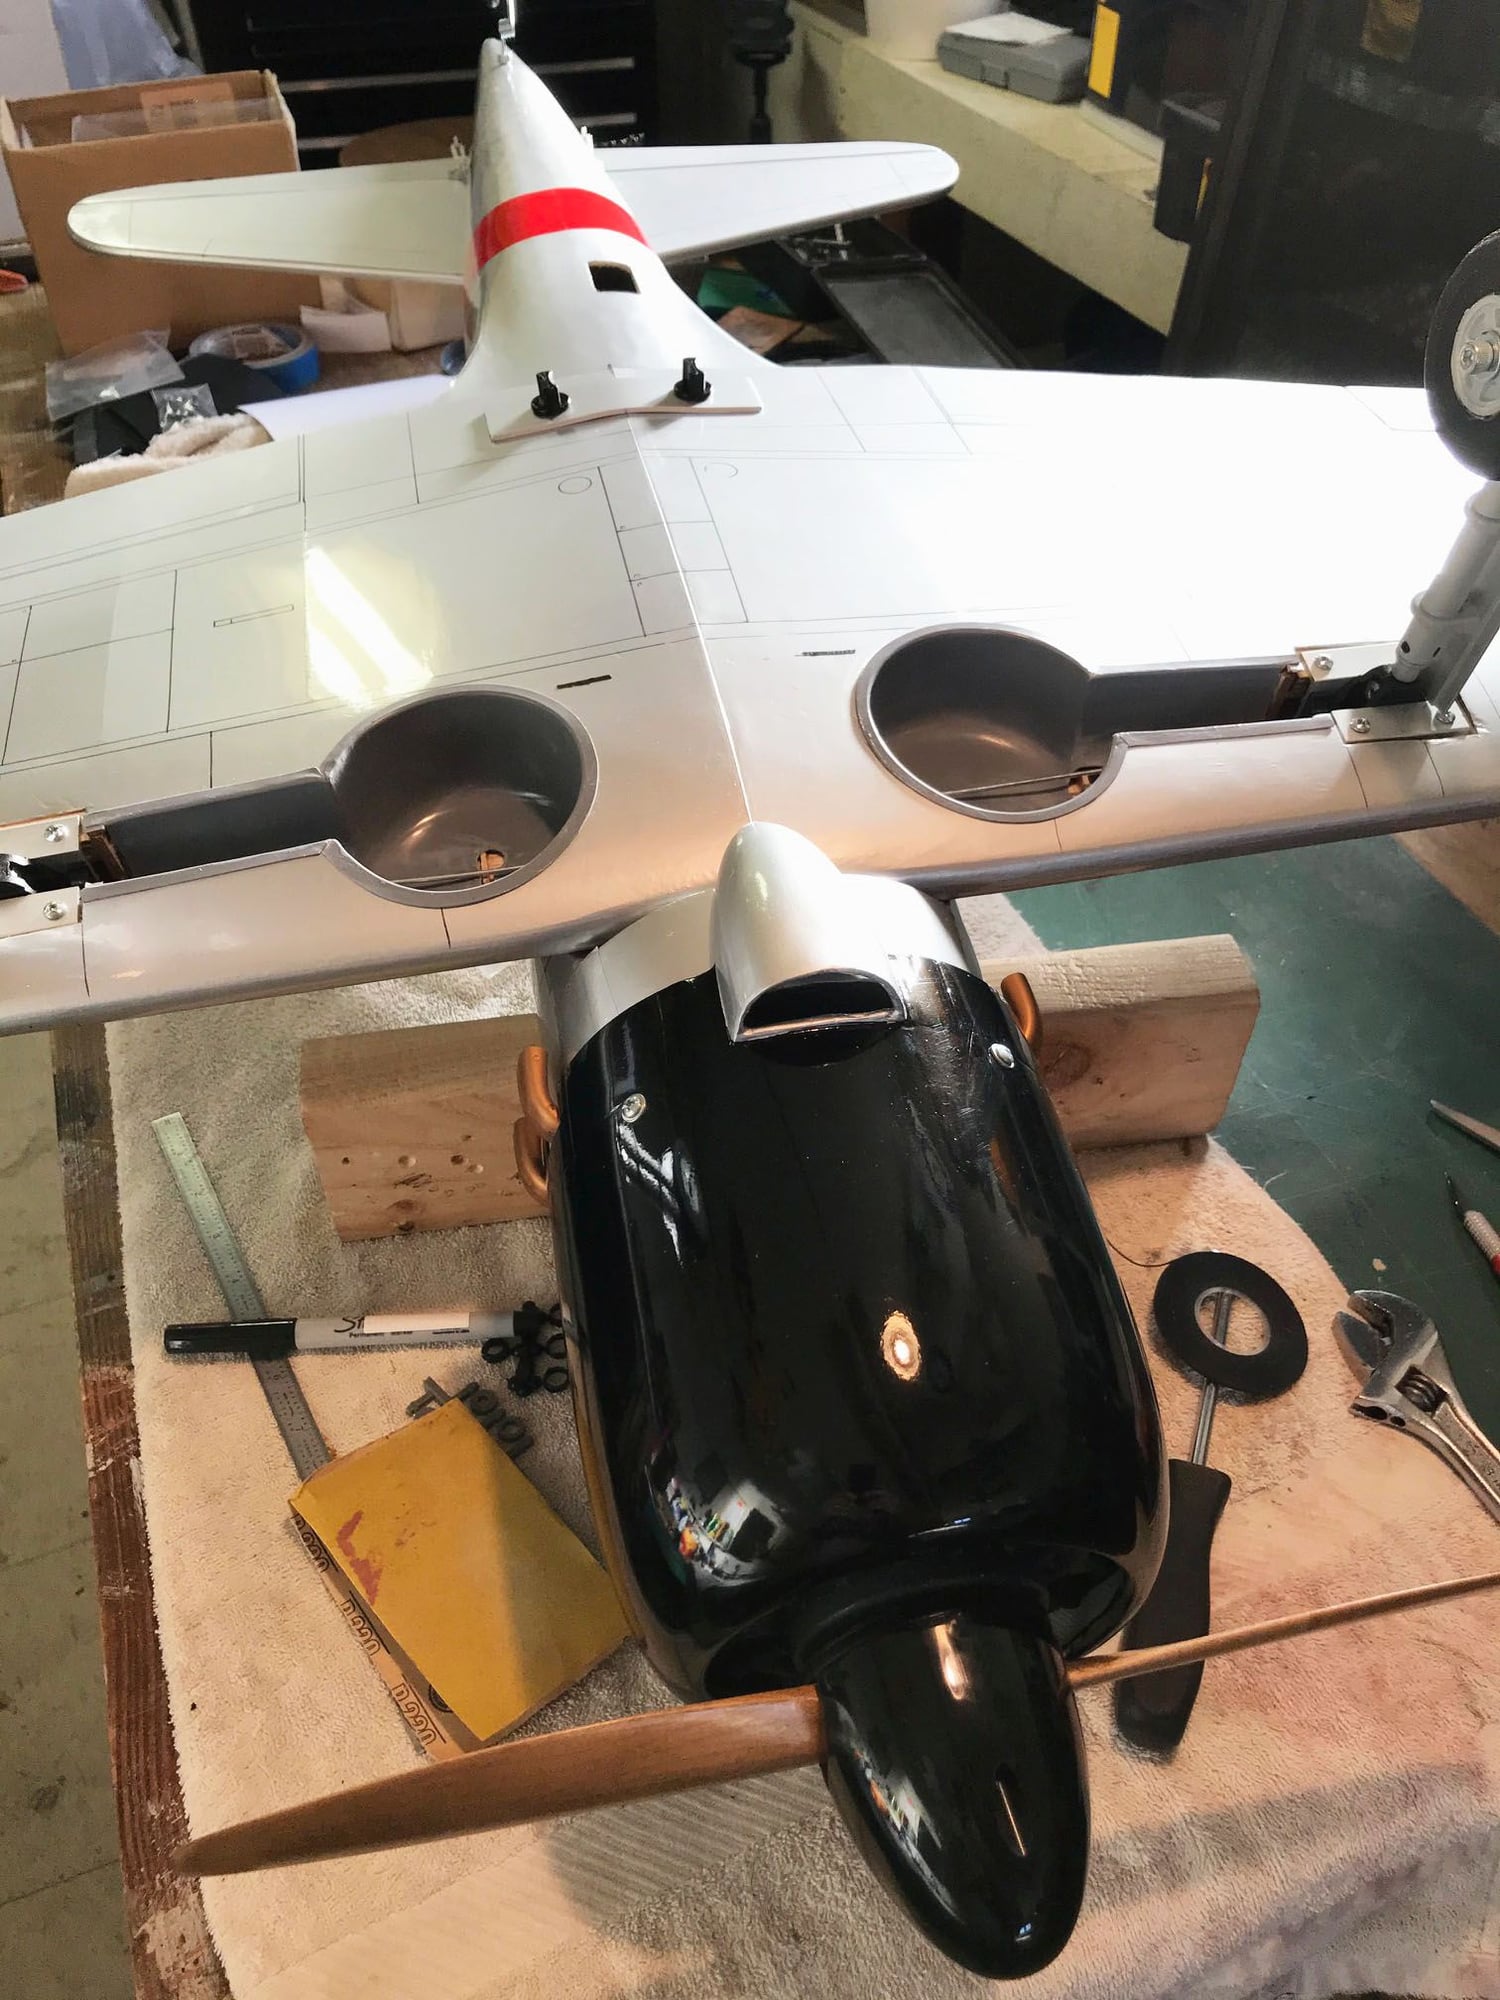
The cowl was marked, drilled and installed and the wing is now mounted. So the model is finally on its feet. My preferred APC 14-7 prop was too thick with the kit provided spinner/backplate so I installed a 14-7 wood prop instead.
The wires have been stuffed into the fuselage and zip tied in place. A little more work on wire management will be necessary. With the 4S 4000 battery all the way forward in the bay, the preliminary CG is about 15mm rearward of the suggested point � so I will have to find some lead, at least 8oz, to get it to balance properly.
The current overall weight is 6lb-2.6oz with battery so we will be near 7 lbs by the time it is ready to go.
I like this plane very much and am looking forward to finishing and flying it. It is a great looking model, far less boring than the foamie Zeros I have seen.
01-06-2022, 02:49 PM
#45
Thread Starter
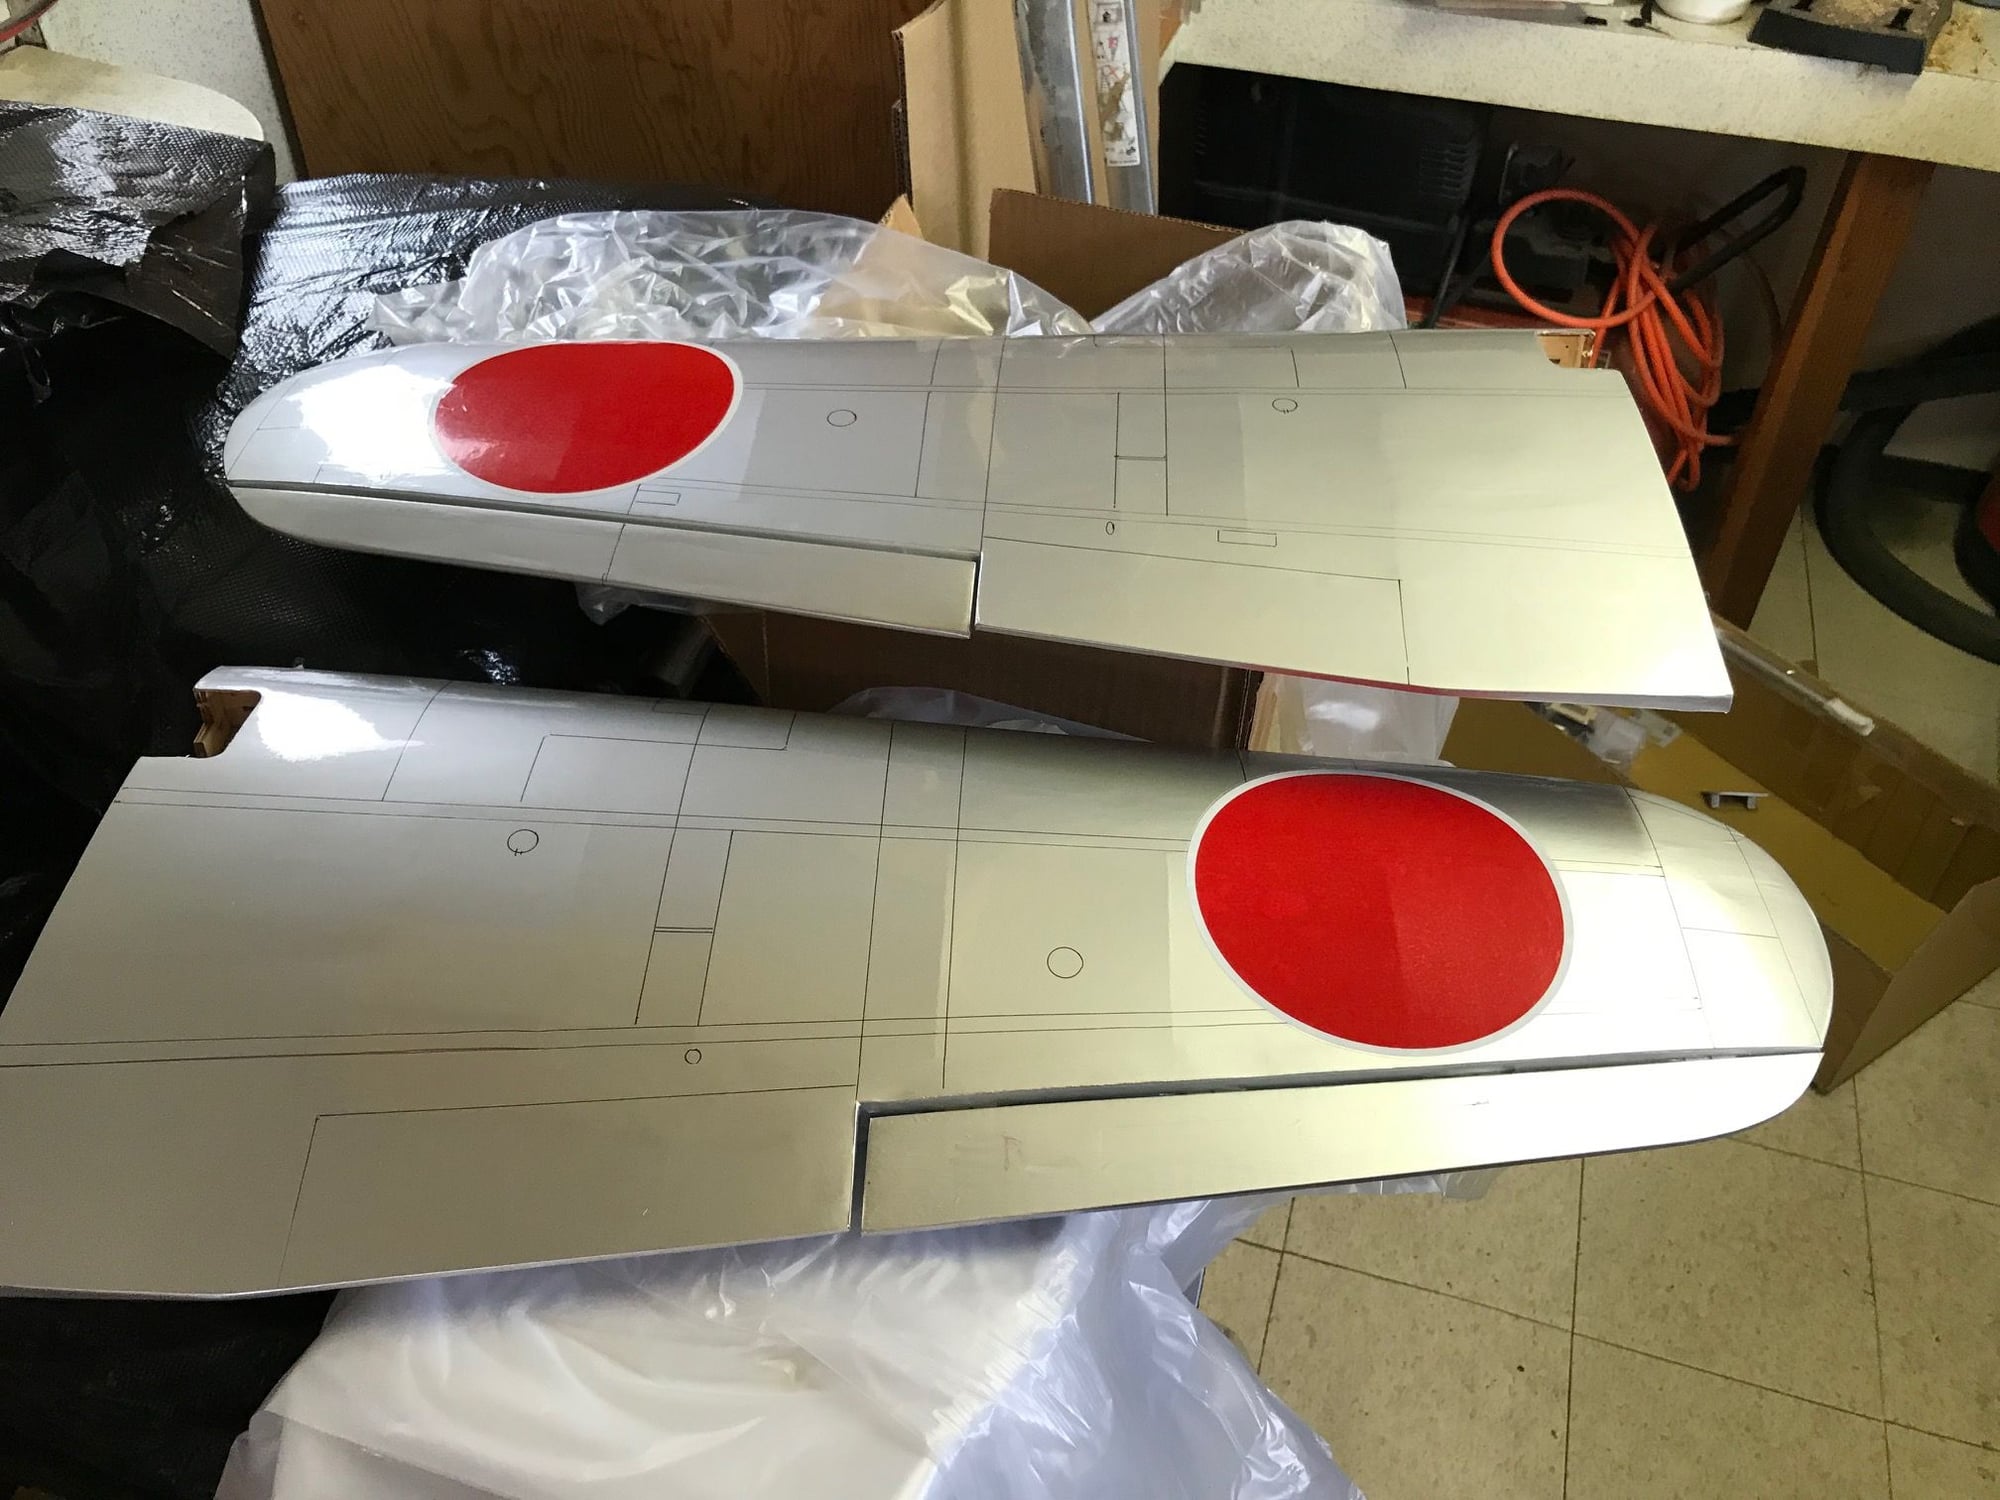
After a more careful check on the balance, it is clear that the plane is okay on its CG, with the proper battery in place. There was a little lateral imbalance which I have addressed with some weight in the left wingtip. The weight, more accurately measured, comes in at 6lbs, 3.0oz. I used a mail scale at each wheel for the total.
Today I worked on being able to hang the model from my garage ceiling, along with eight other planes. This involved a carbon fiber tube installed through the fuselage )at the balance point without battery), and use of a coat hanger wire device for the hanging (pix included).
Now, if our field's access drive will just dry out, I can get this plane out for its maiden flight. This could take a while as there is rain on the forecast... I will report when that happens.
01-07-2022, 02:46 PM
#46
Thread Starter
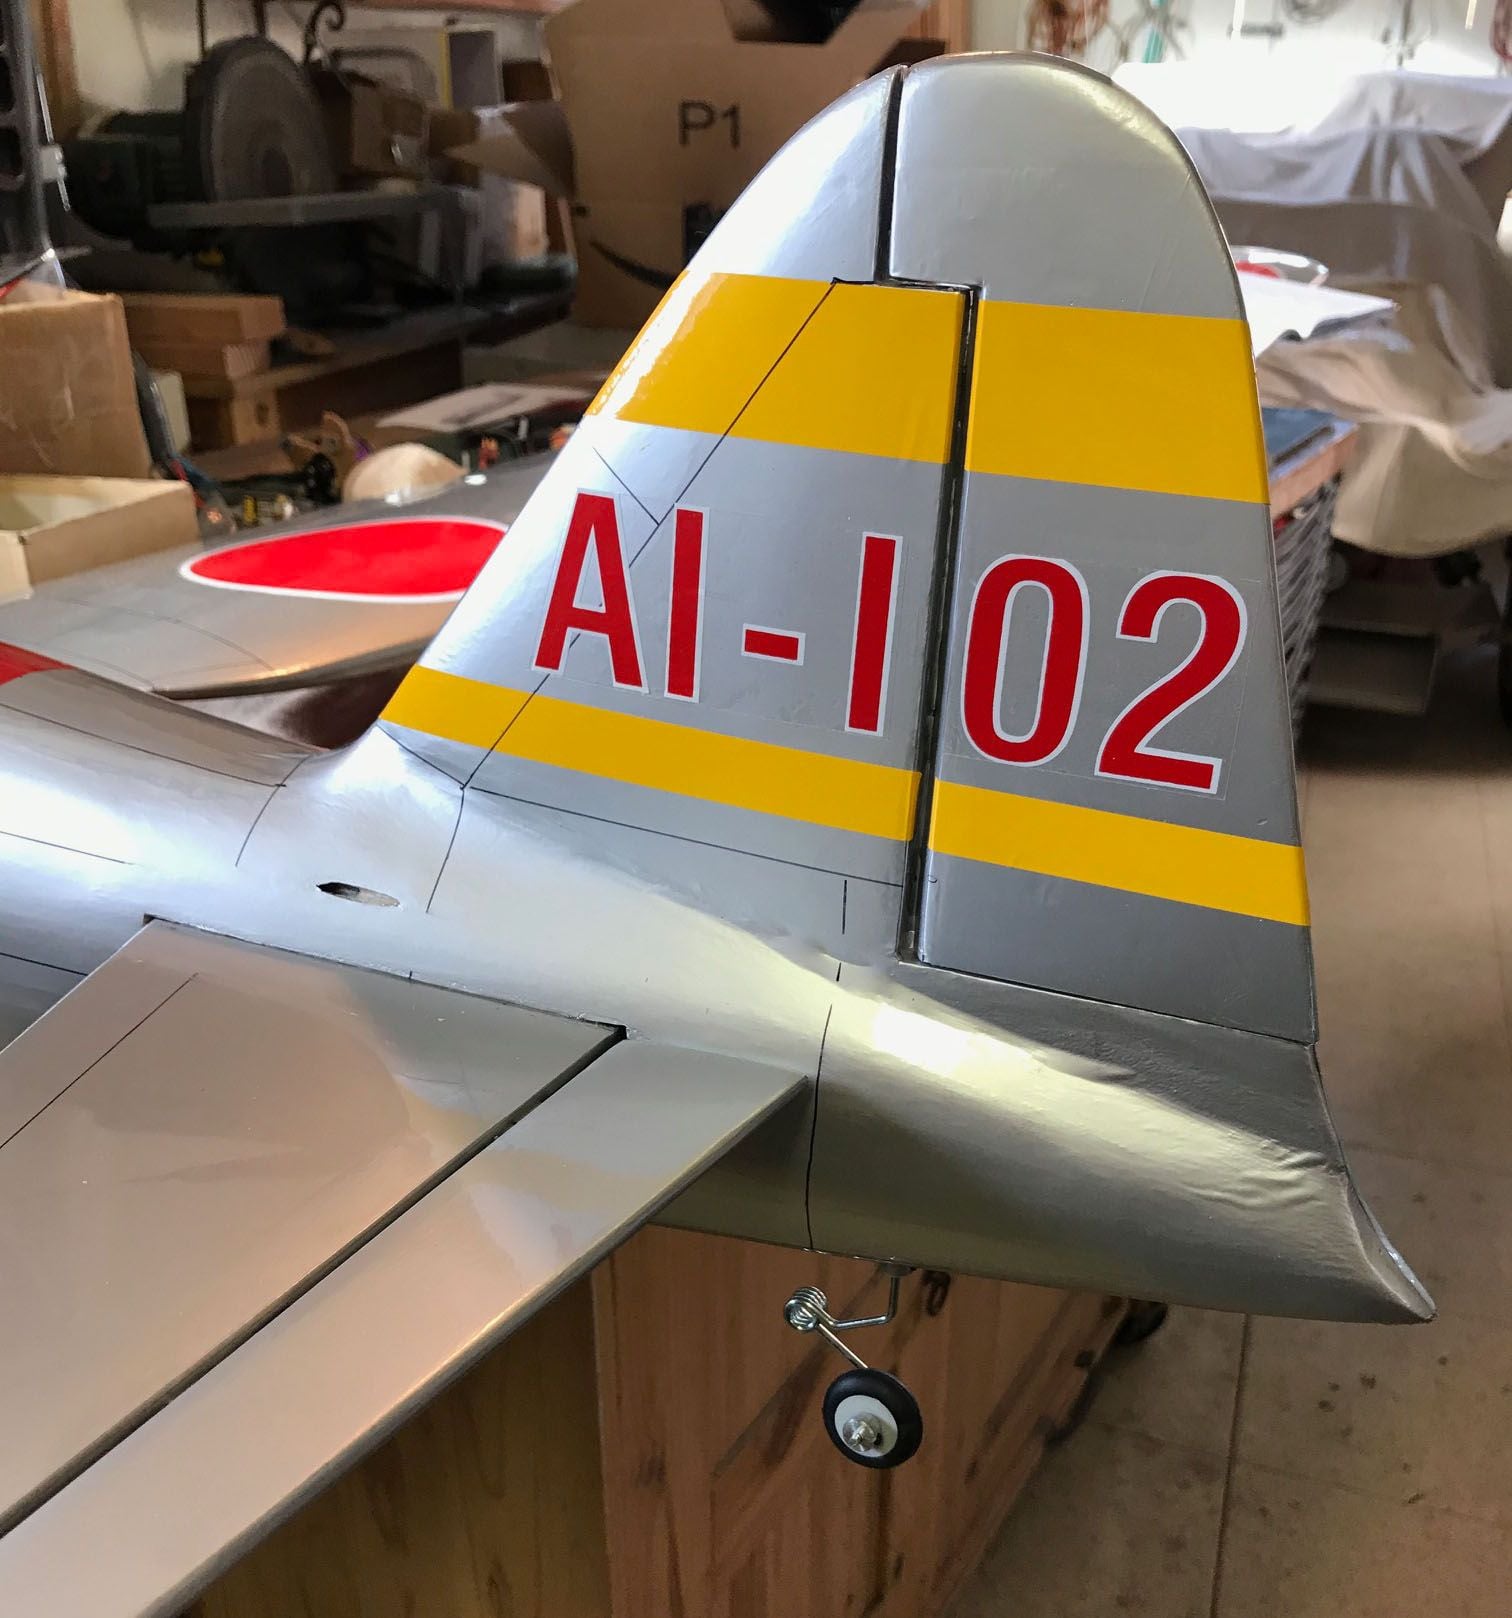
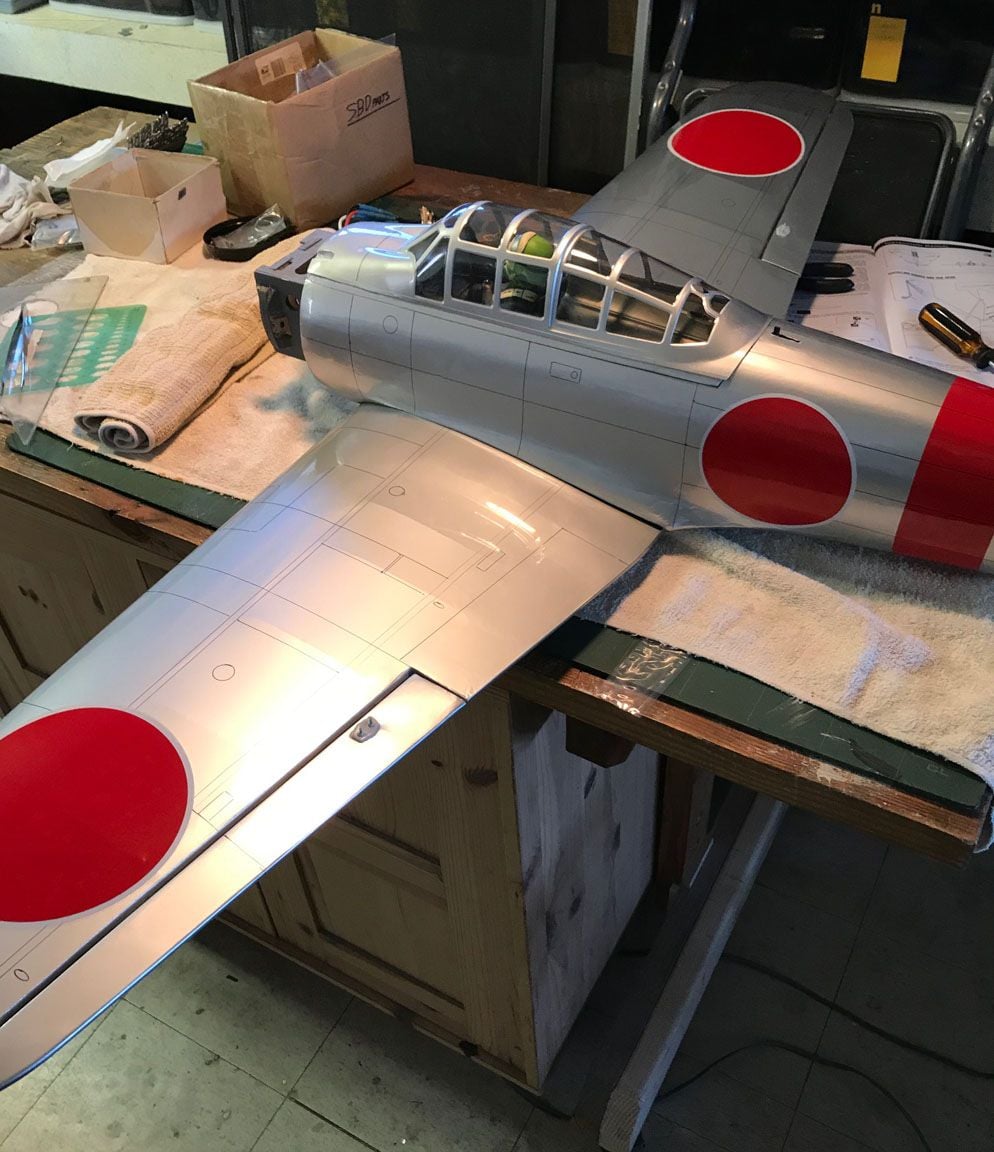
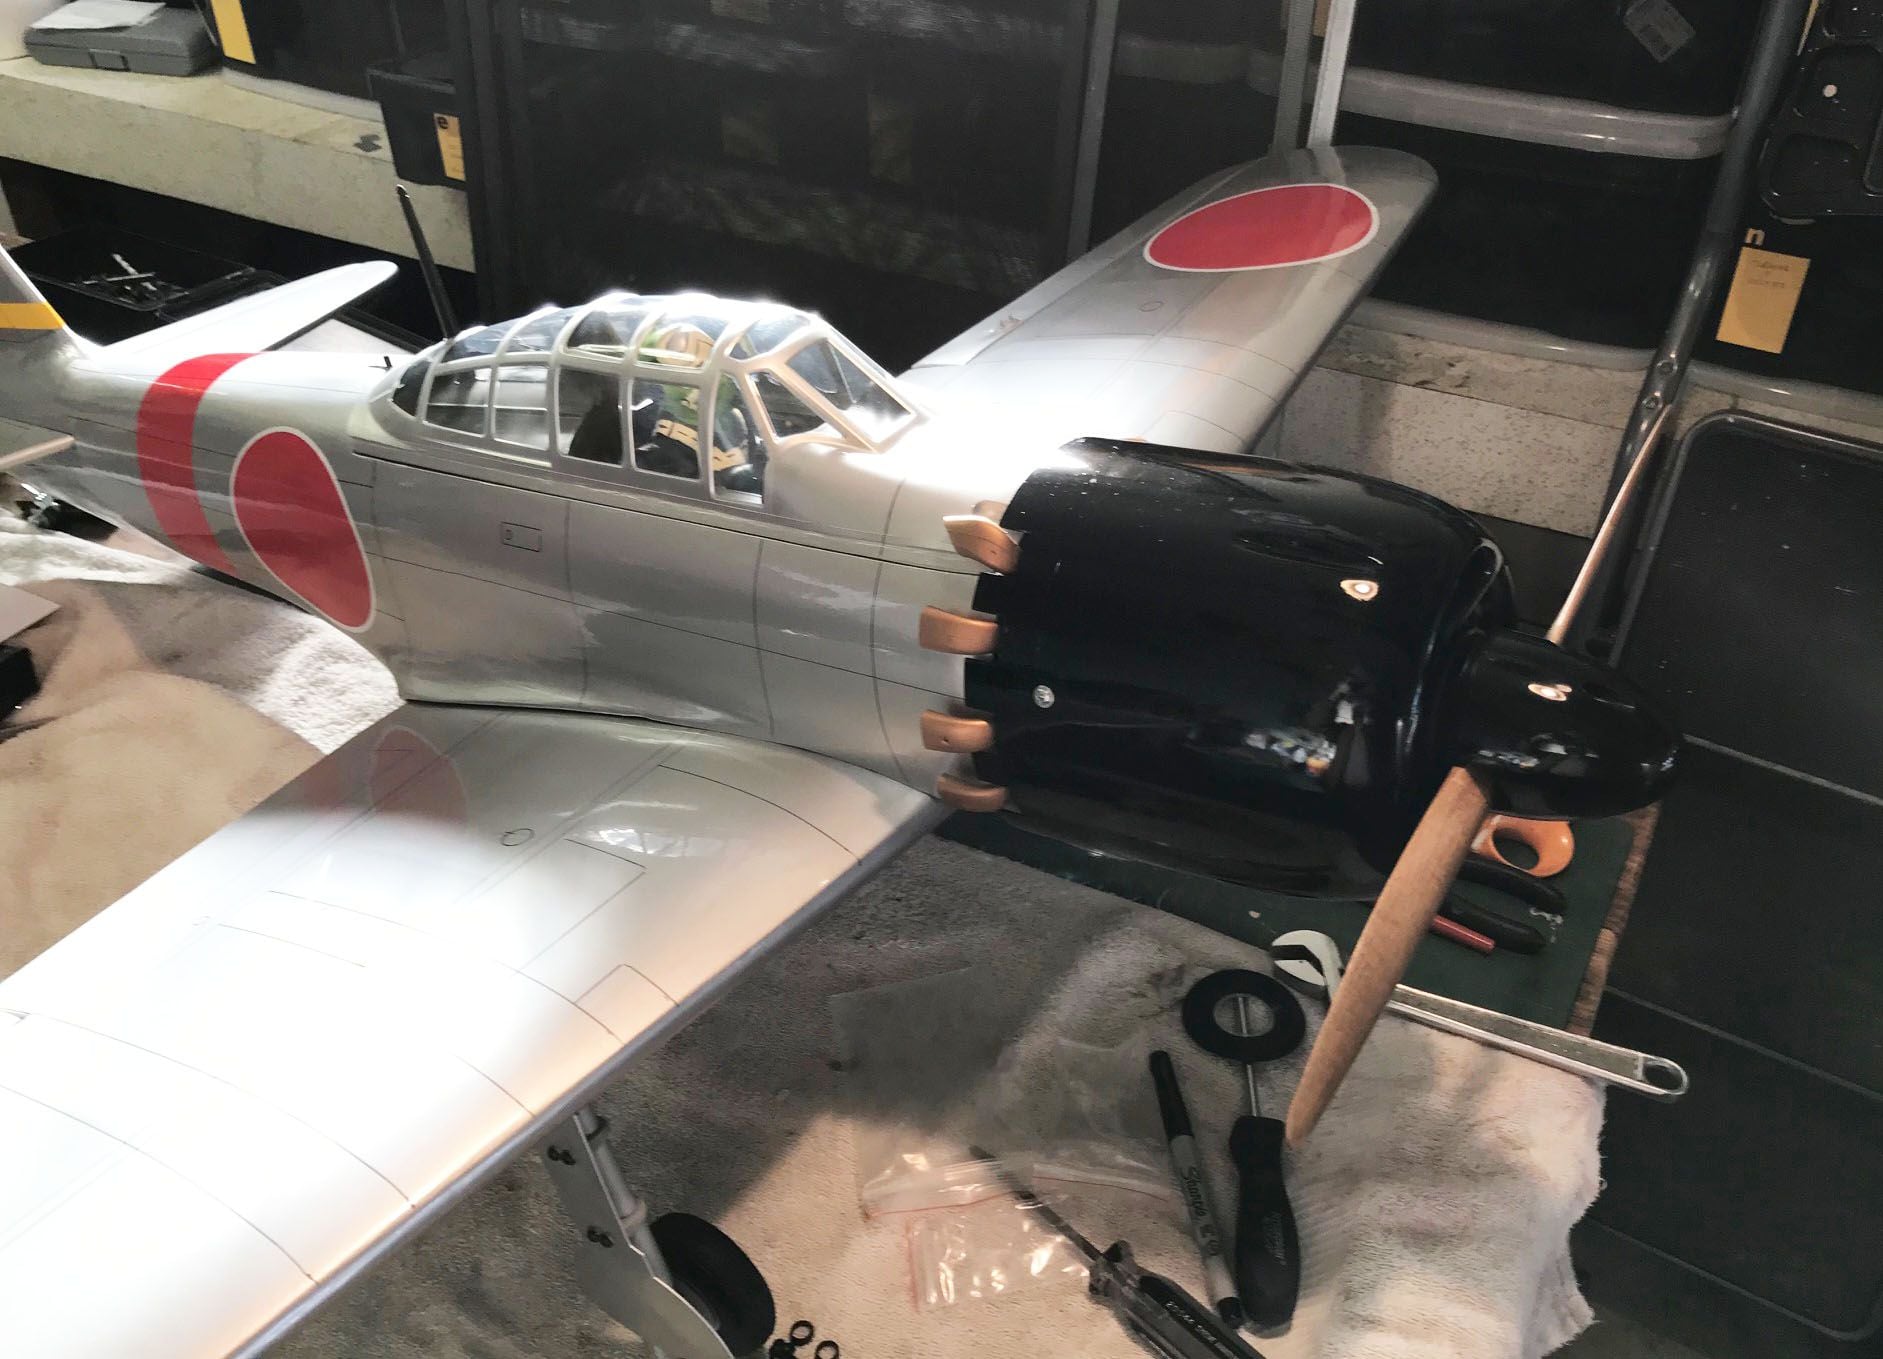
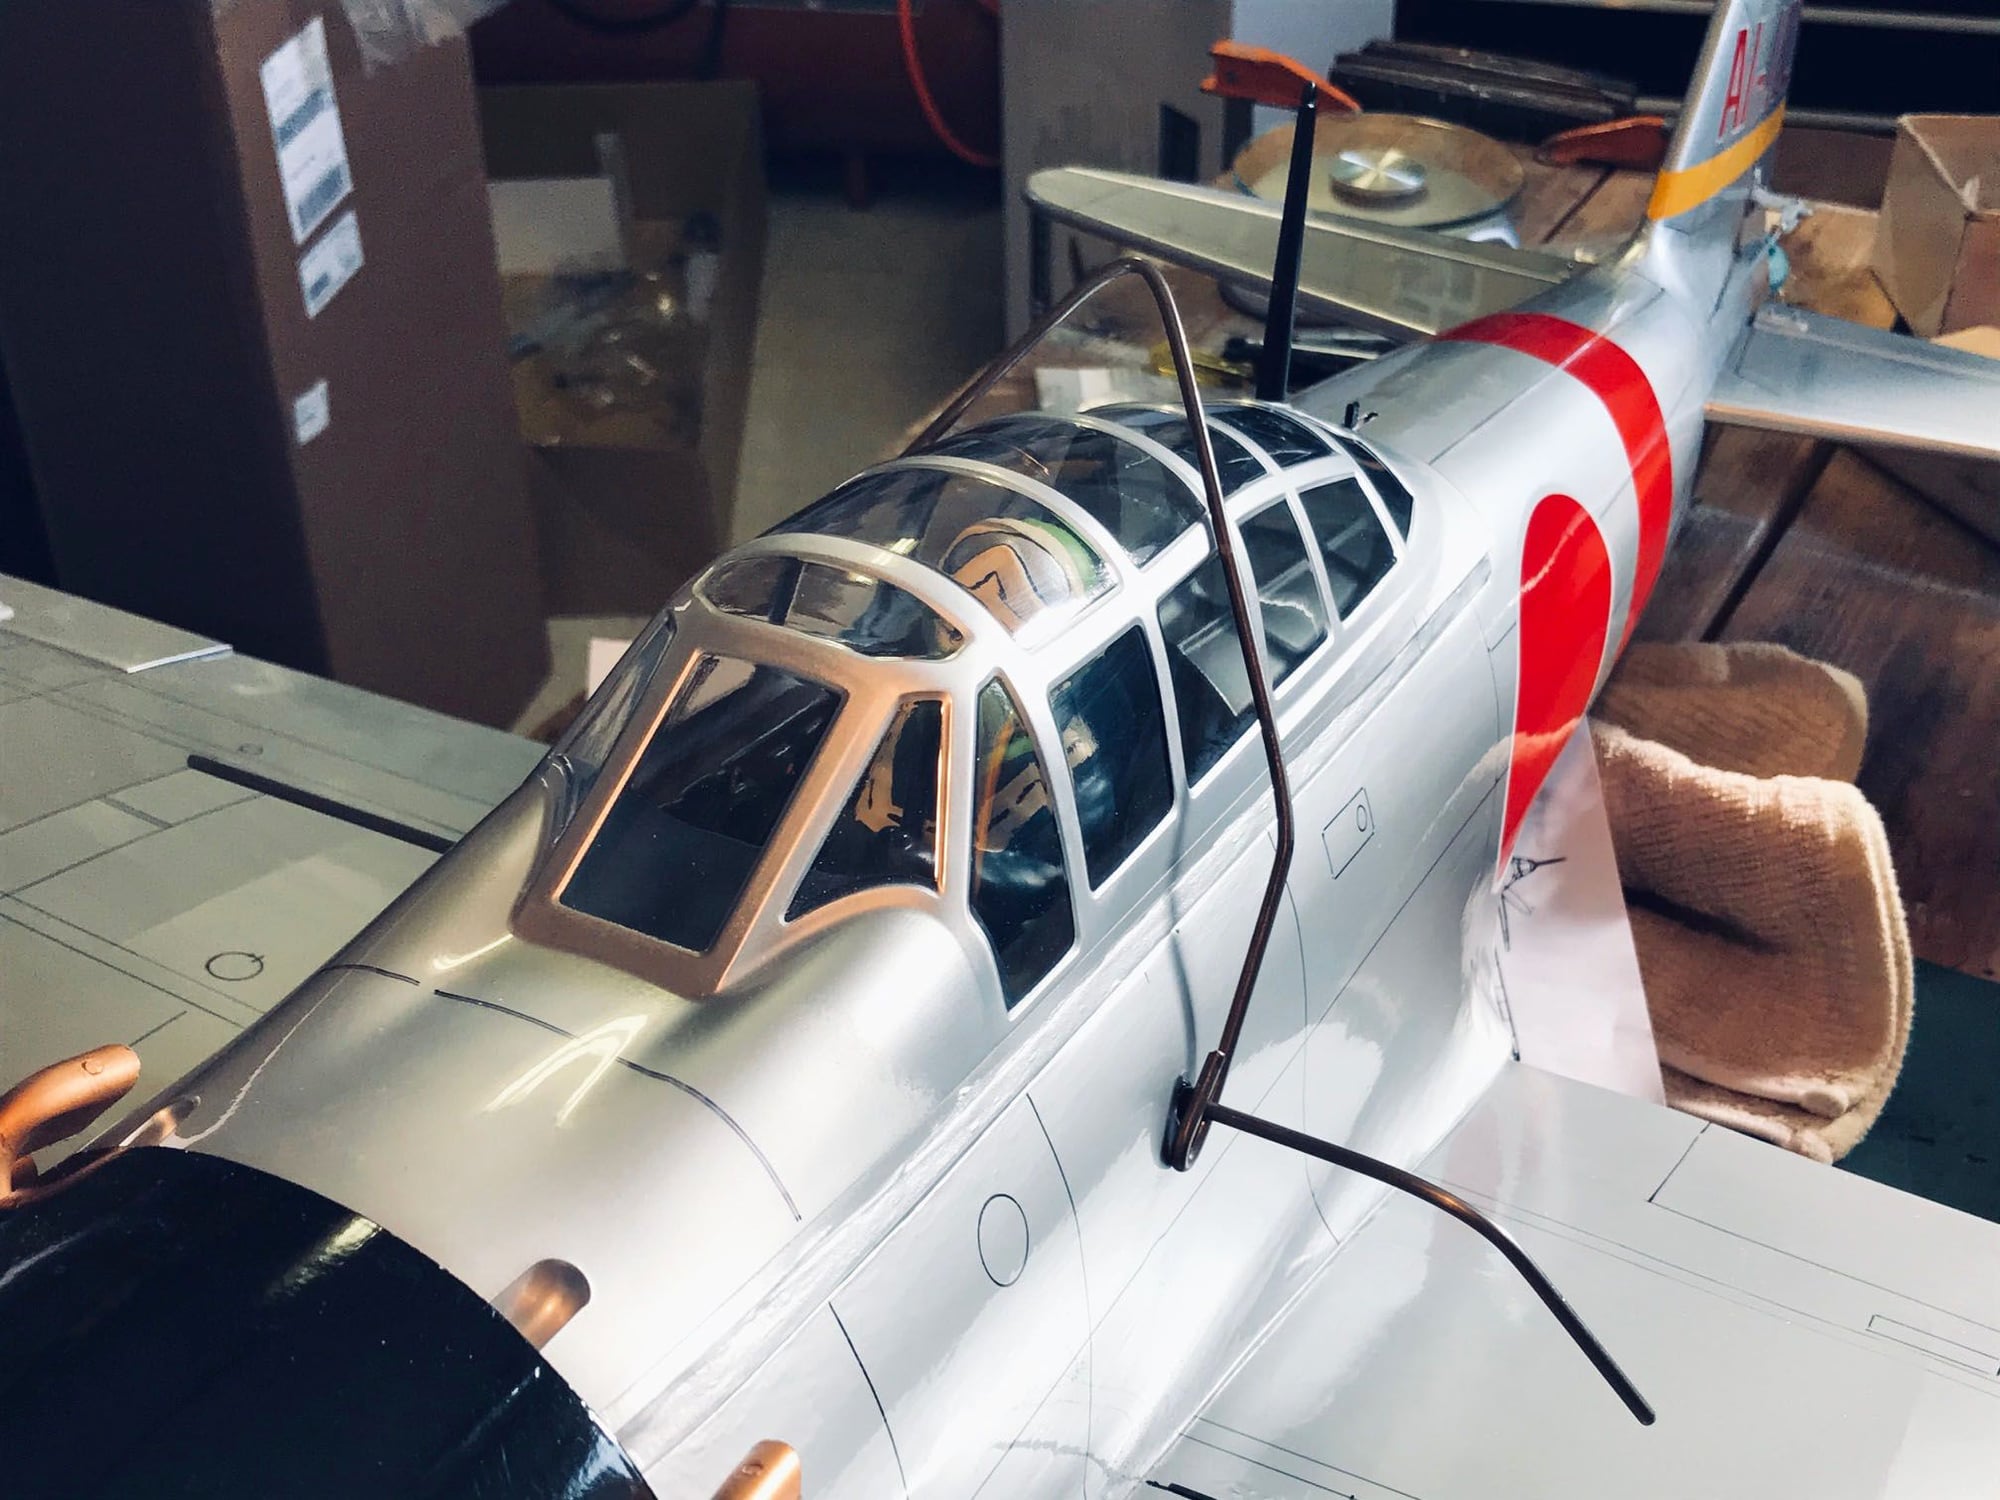
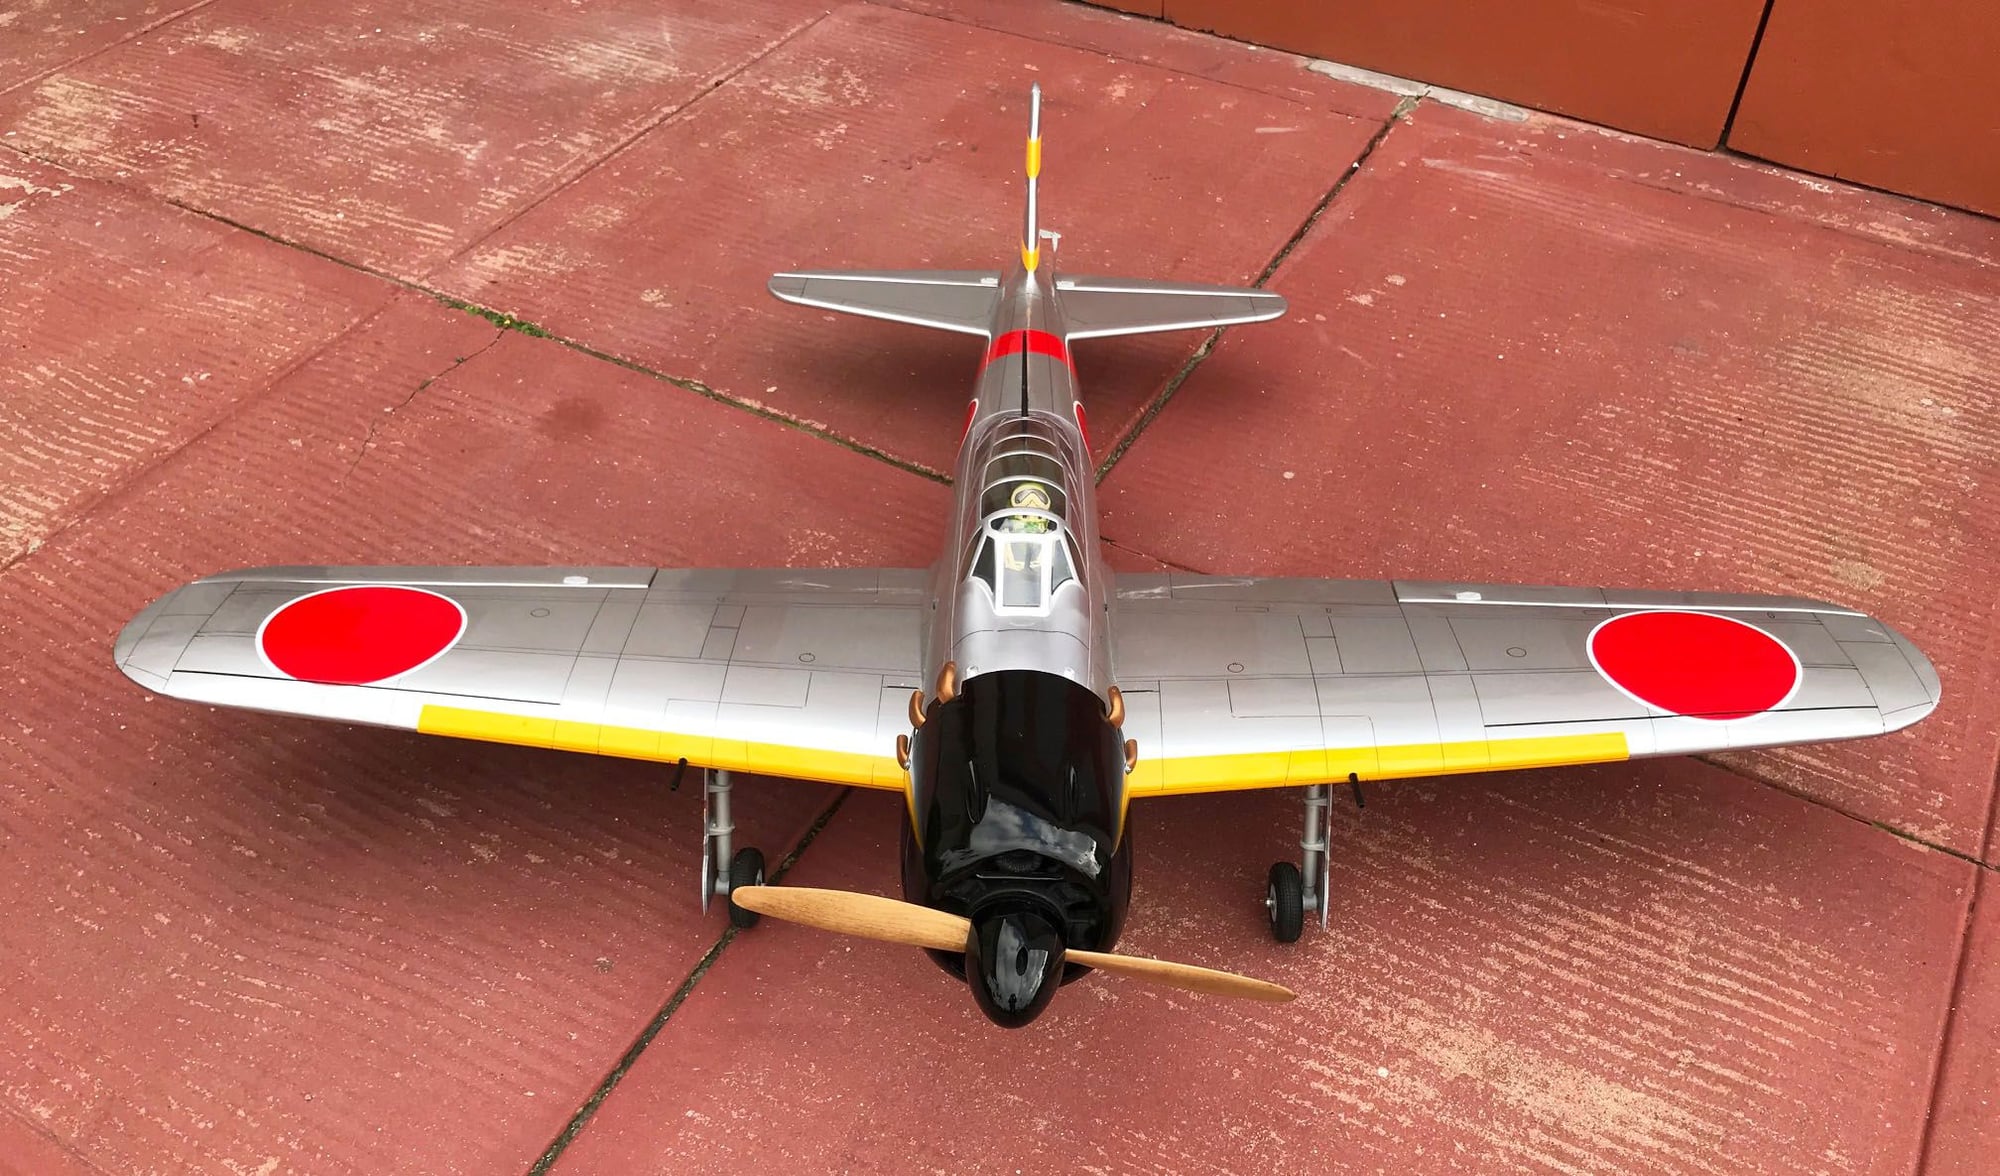
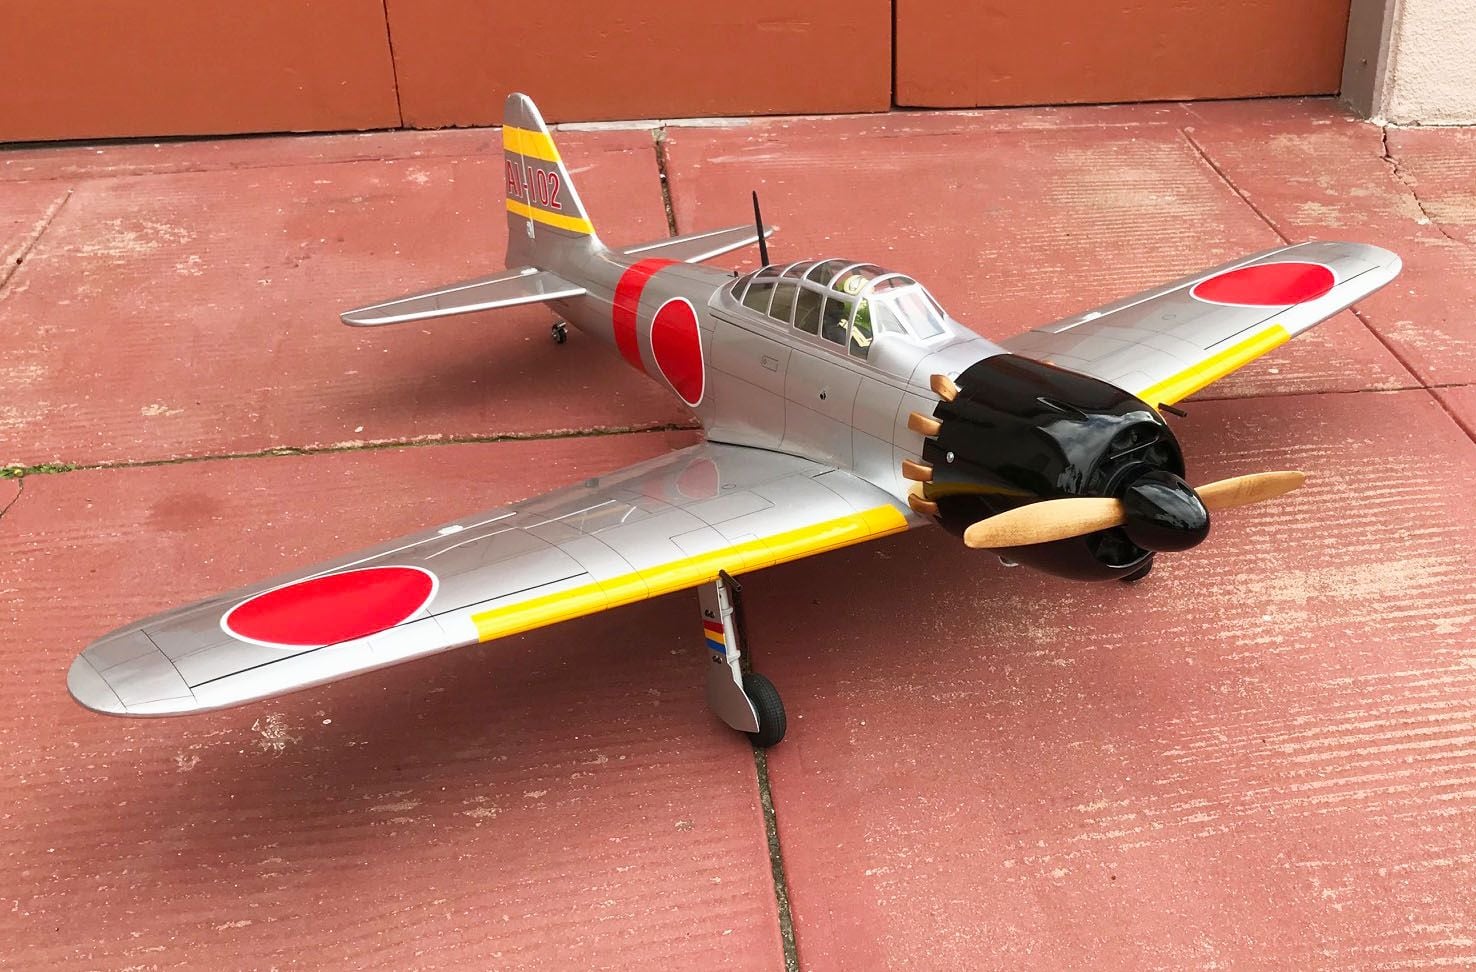
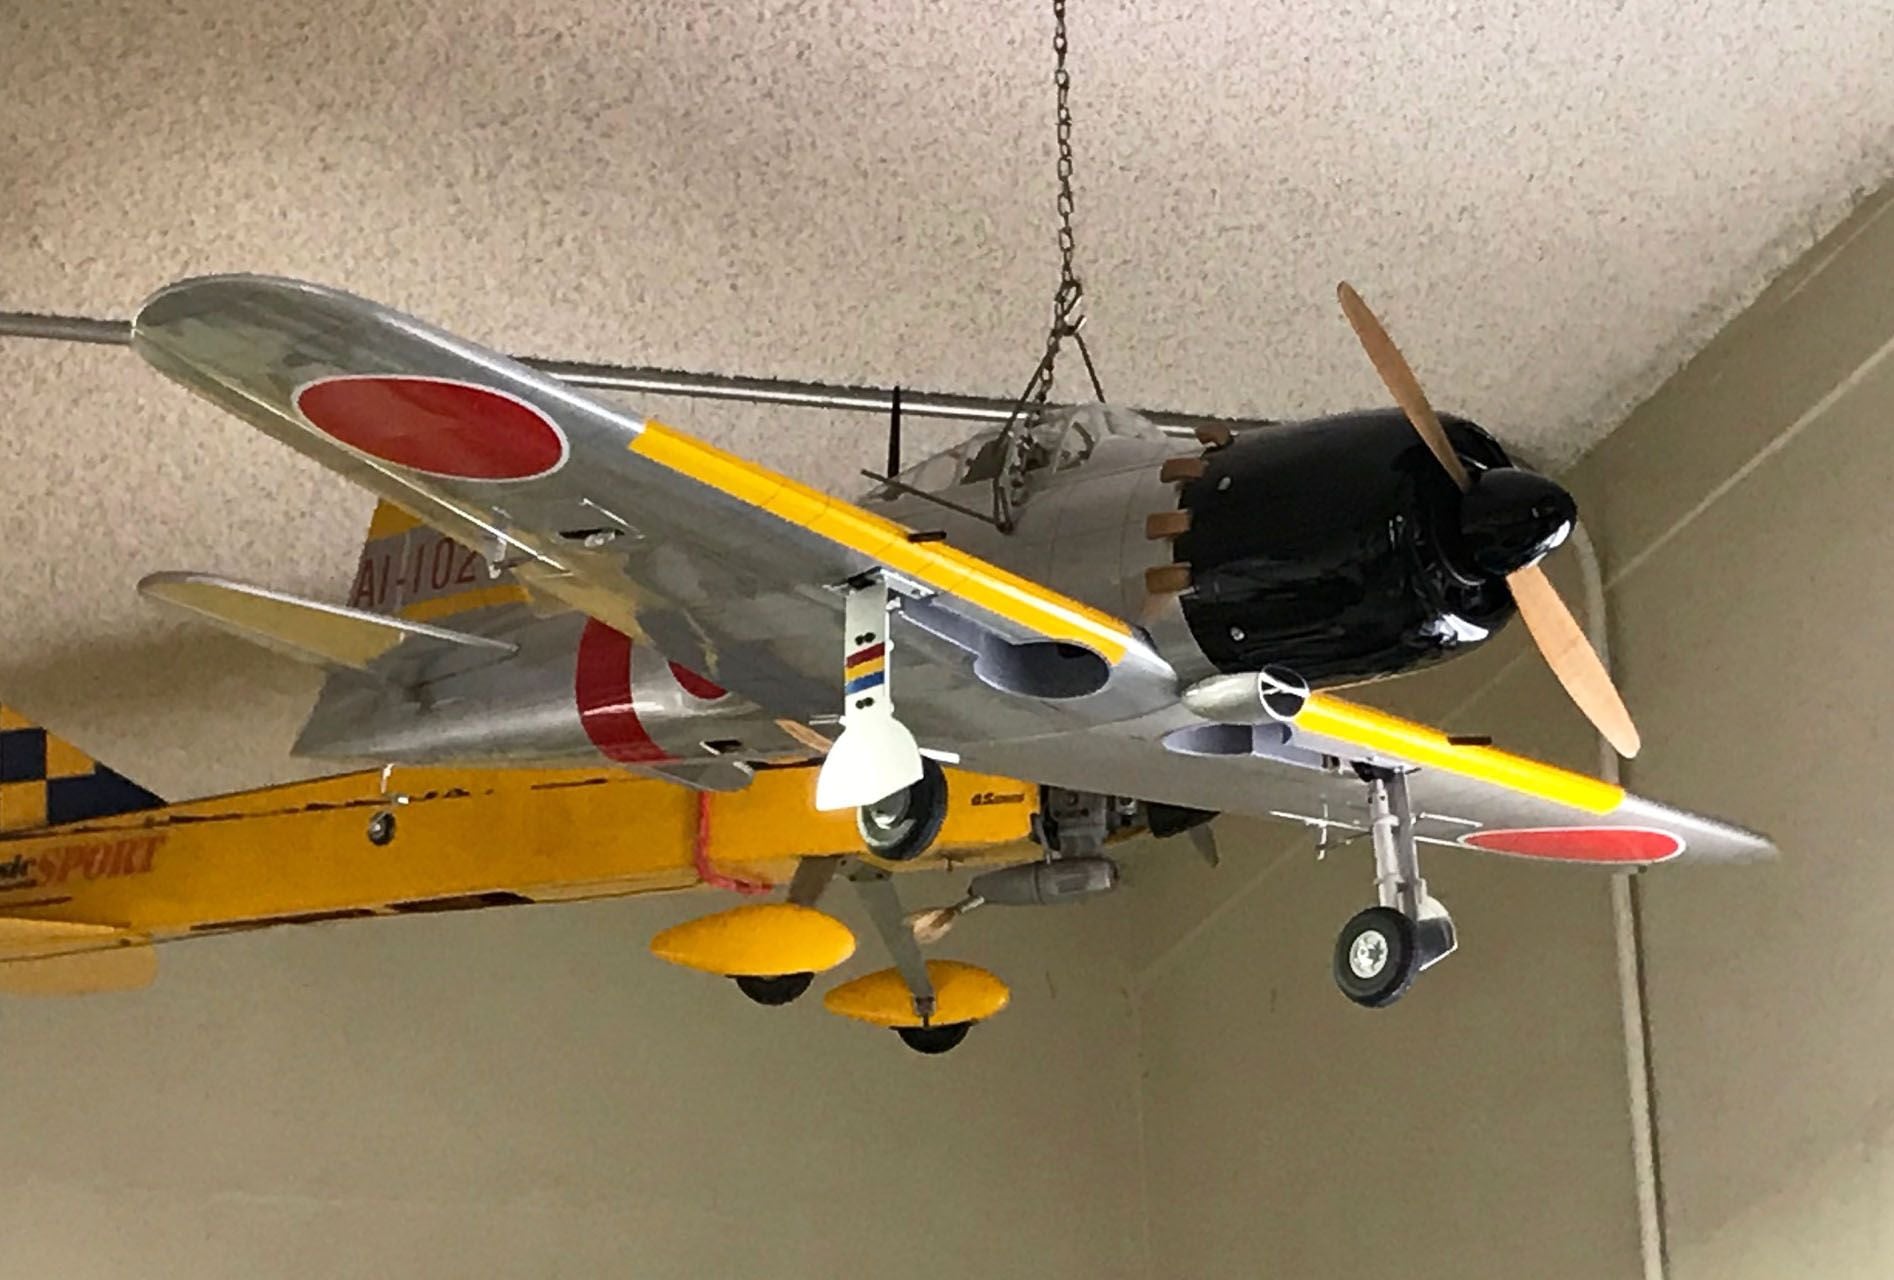
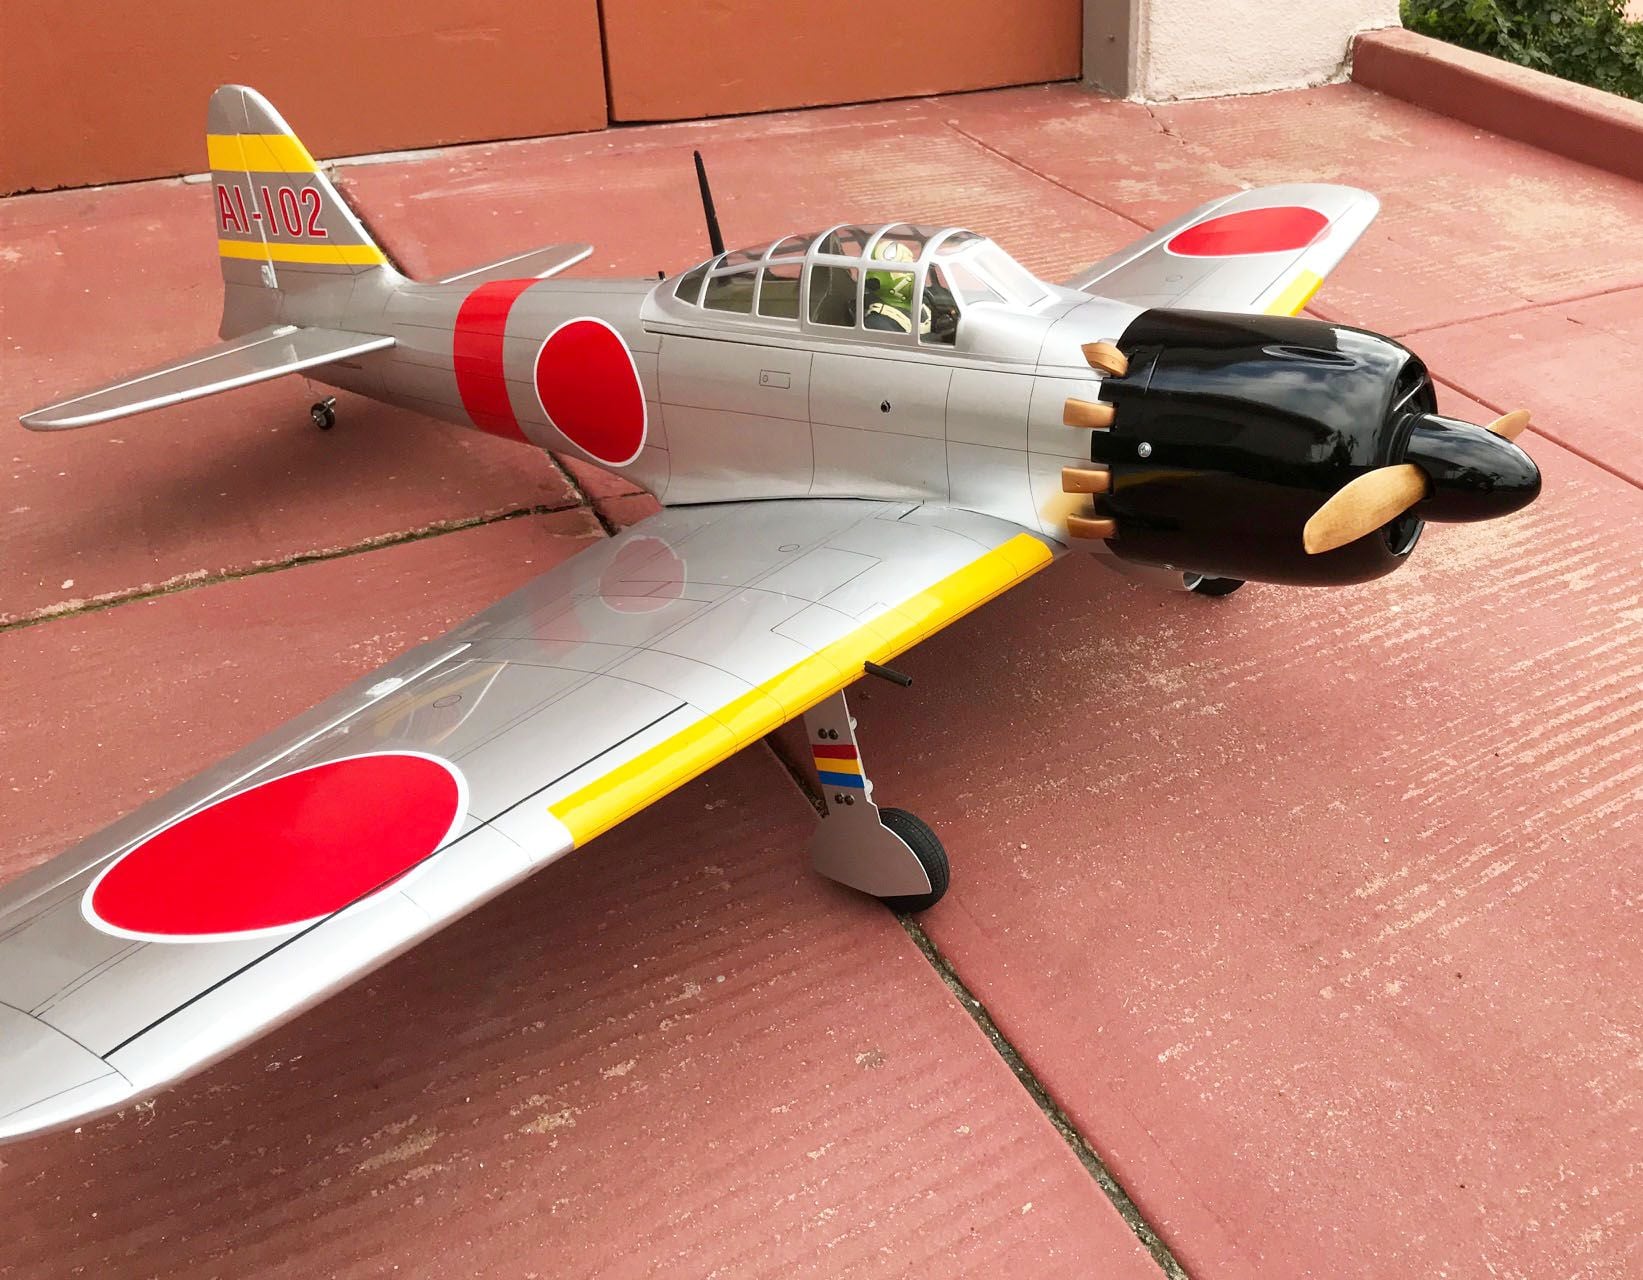
I completed the details on this model today. That included the yellow bands on the LE of the wing, the cannons and the little tricolor bands on the landing gear pants. Then I photographed it (preliminary since the best ones will be taken at the flying field) and hung it up in my hanger (garage). Here are the shots.


01-07-2022, 07:06 PM
#47
I completed the details on this model today. That included the yellow bands on the LE of the wing, the cannons and the little tricolor bands on the landing gear pants. Then I photographed it (preliminary since the best ones will be taken at the flying field) and hung it up in my hanger (garage). Here are the shots.
01-13-2022, 12:21 PM
#50
Thread Starter
I have been flying at the electric flyers' field recently with my regular field closed by the muddy road. I don't prefer this dirt field but it is actually pretty good these days and it seems to be less crowded than normal, and with mostly experienced flyers. I think I will be able to do the maiden on the Zero at this field.
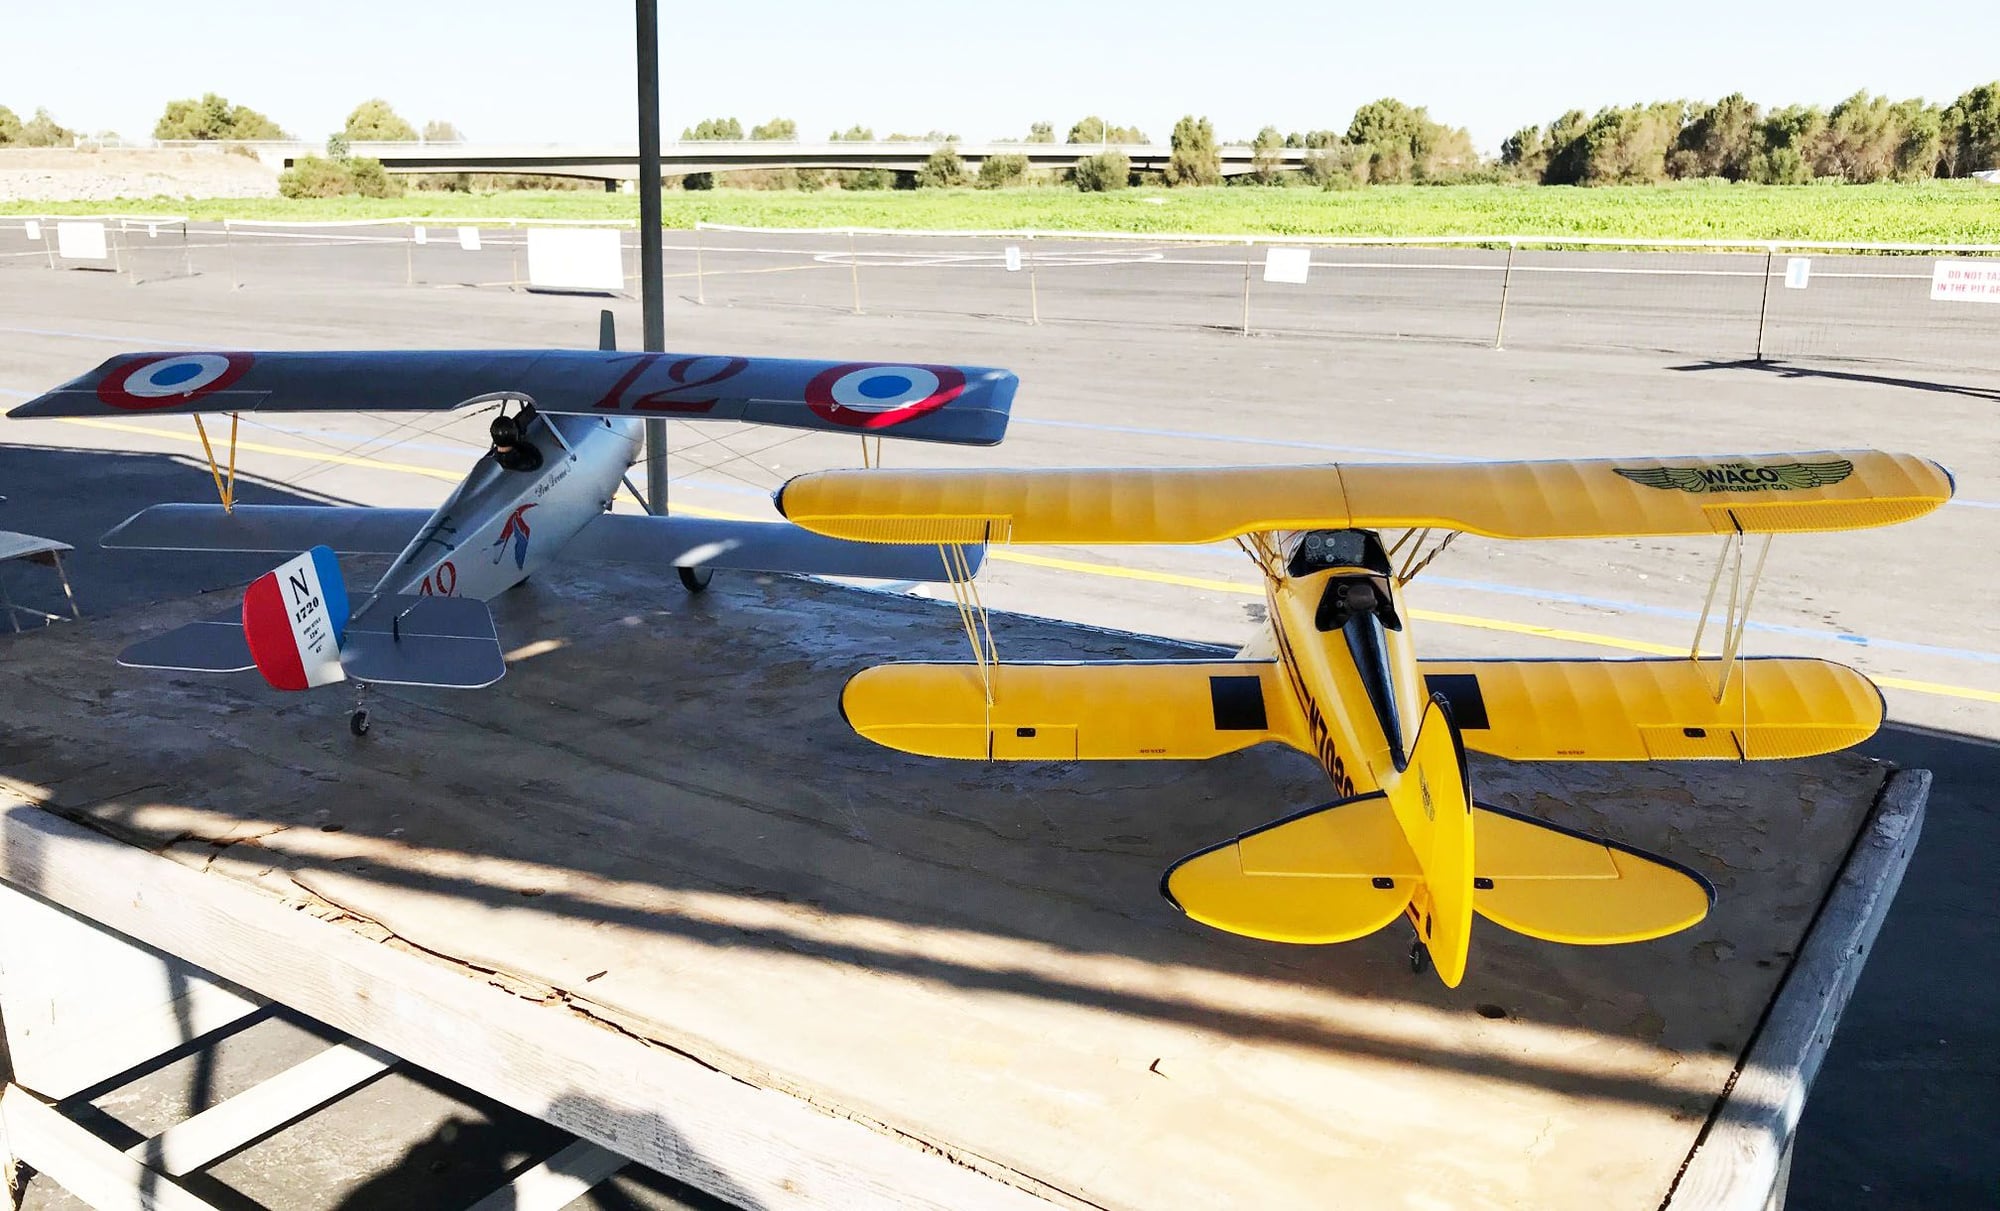
In the meantime, today, I did a couple of flights on the Waco, one with a different battery (4s4000-40c). With that heavier battery I can probably get 10 minutes in the air. It still is sketchy on a loop, struggling a bit at the top but at least not snapping or anything.
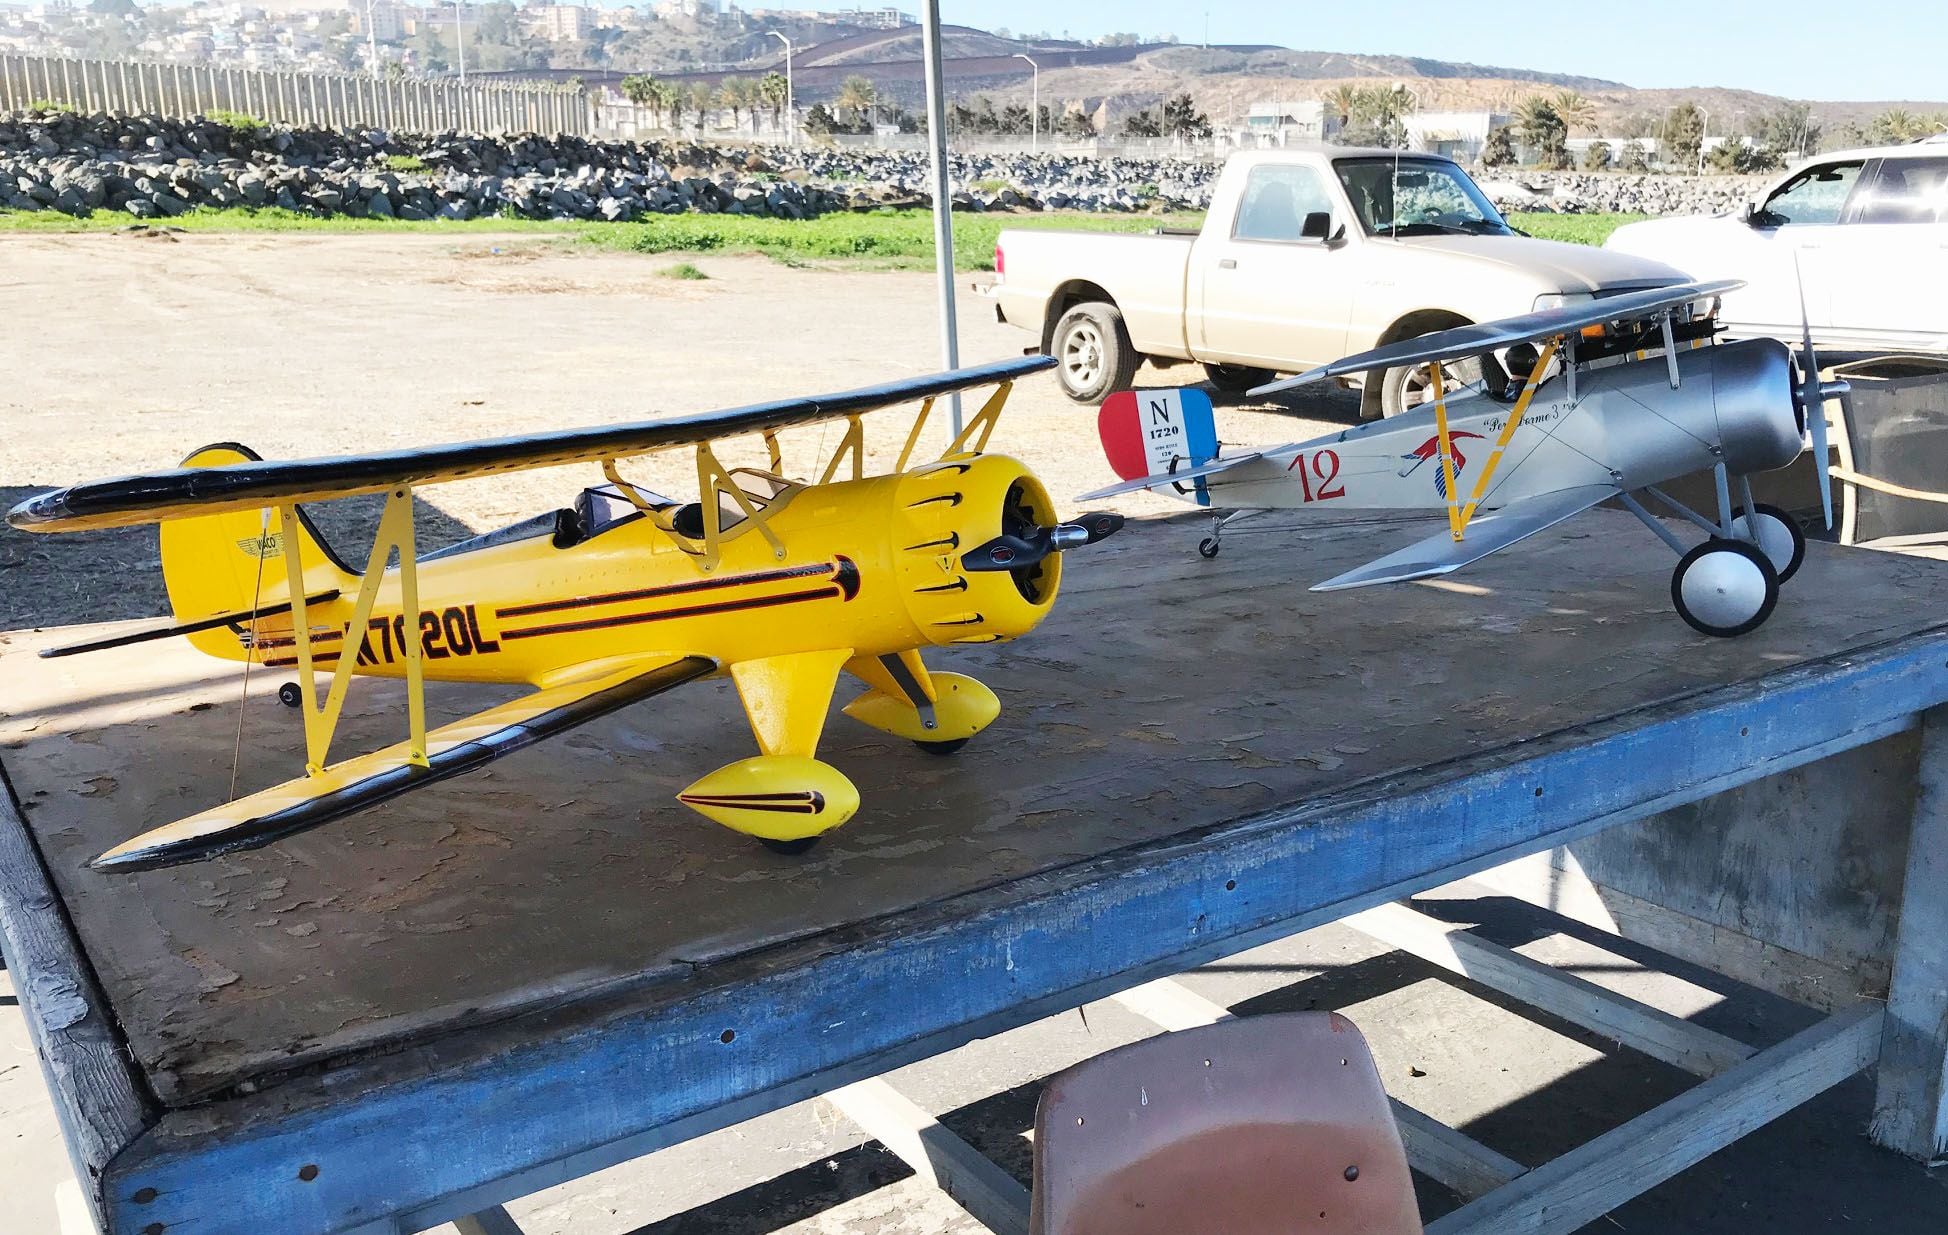
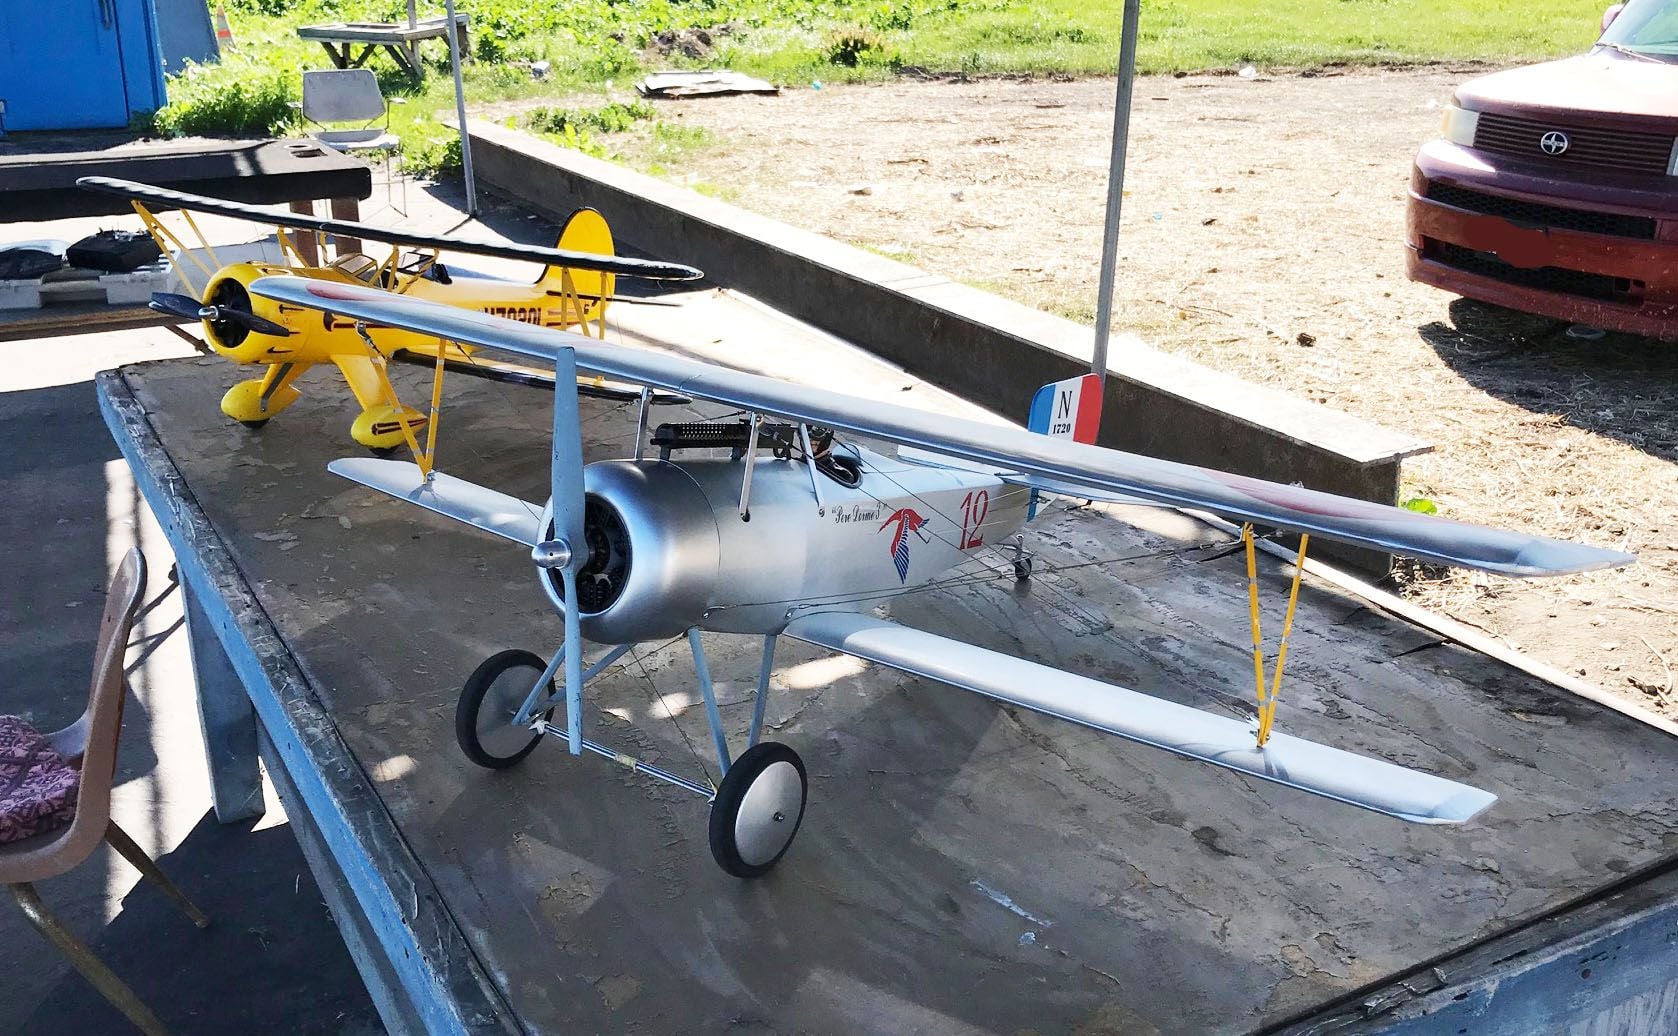
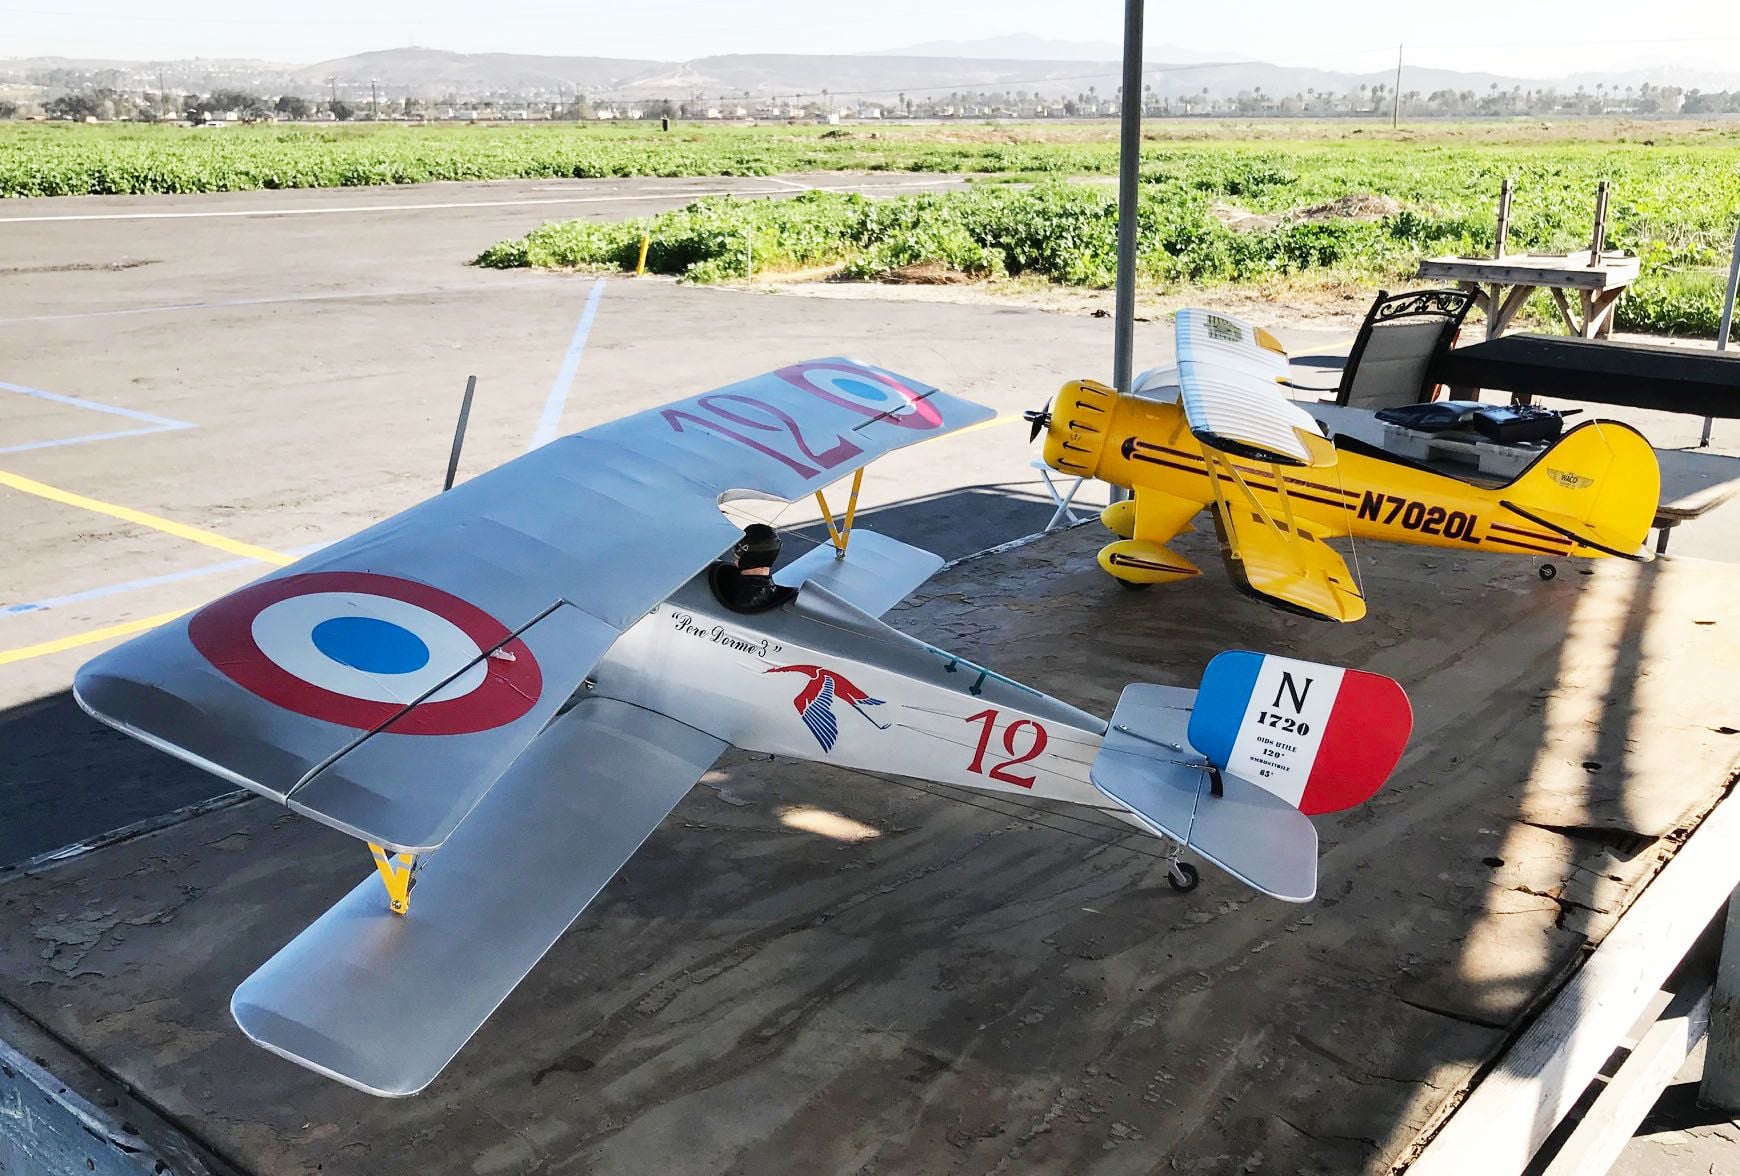
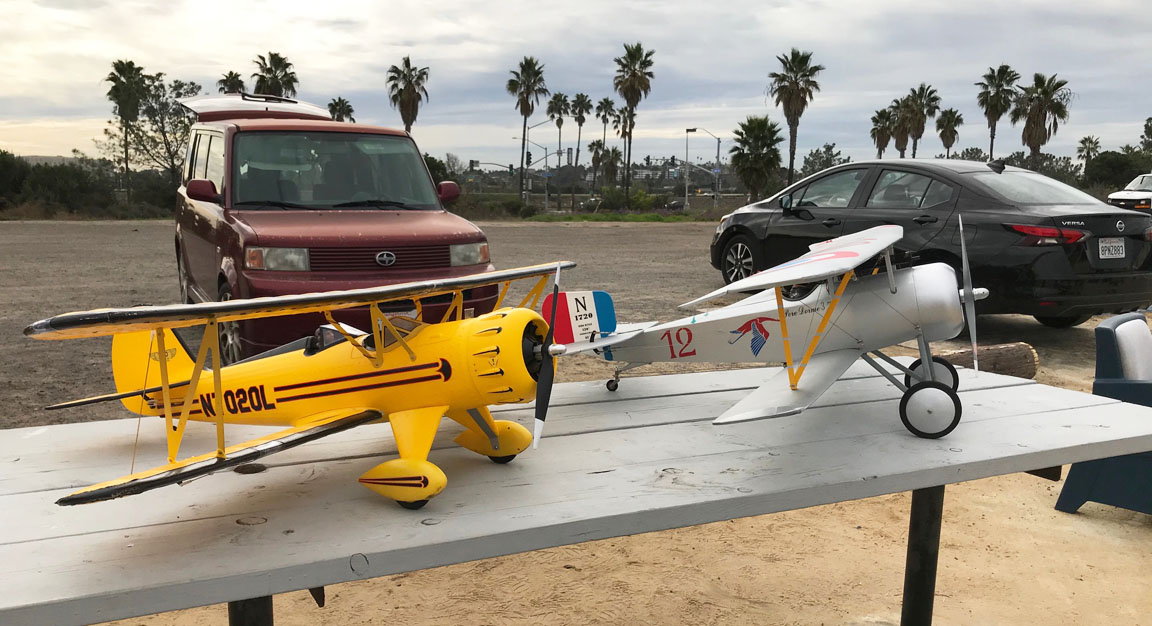
I also took the Nieuport 17 and flew it there (first time at this field). It did fine and the 4s4000 was at 75% after a four minute flight. I will post pix.


In the meantime, today, I did a couple of flights on the Waco, one with a different battery (4s4000-40c). With that heavier battery I can probably get 10 minutes in the air. It still is sketchy on a loop, struggling a bit at the top but at least not snapping or anything.
I also took the Nieuport 17 and flew it there (first time at this field). It did fine and the 4s4000 was at 75% after a four minute flight. I will post pix.