


old timers look here must be 50+ years only

 10-22-2018, 07:01 AM
#6352

Lately I have been unable to overcome the inertia on my scale DR.1 build. Old wood that keeps cracking blind nuts that seem to keep cross threading have really dampen my enthusiasm. I have been collecting short kits this year and feeling an old familiar itch I have decided to build something for my two oldest grandsons. Here is what I came up with Ken Willard's Sunday Flyers. Designed in from 1973 published in the March 1974 issue of American Aircraft Modeller.(Article and plans attached) I built one of these in 1974 as a young pup of 16. The design used Ace constant core foam wings back then and I ended up building the British version instead of the German version after trying to use some early CA glue to cement the wings together. I was able to turn the wings around and cutoff the damaged area to make the wingtip which I couldn't do for the German version. I used an OS Max .099 Pet to power it since it ws in stock at the LHS and the recommended OS Max .10 was not. This time around one is getting an near NIB OS .10 and the other a NIB OS .15. Both will have built up wings and be coved in ParkLite by Ultracote. I am planning on making them Christmas gifts house at Grandpa's place so we can fly when they come down. Short kits for both planes and the wings came from Rob over at BlasaWorkbench.com.

 10-22-2018, 02:44 PM
#6353

My Feedback: (3)
Hi flyerinOKC;
Greetings from Wickenburg, Arizona.
I enjoyed your write-up and photos of your renditions of the late, [and great], Ken Willard WWI designs in AM. His designs always flew, and I sure miss his articles.
And, on looking at a few photos of Ken in these old articles, I must say that you do resemble Ken somewhat: [ what say the rest of you out dere in the vast id of the 'net]. Hats off to Ken.
Many thanx for your efforts, build and photos; I dug up the old mag, + dug up several more of Ken's design articles, alas, anudder trip down 'ole memory lane, + I just mite whip up a similar WWI ship of my own. [See what you started], wil close for now, best regards from Wickenburg, AZ,
Joe Nagy.
10-22-2018, 06:08 PM
#6354

FlyerinOKC, good luck on the Christmas builds. That is a good project you will have going. I like biplanes but never built one. Maybe one day. Working with grandkids is fun. Christmas will be good. I have granddaughters and only one is slightly interested in airplanes. Post pictures along the way.
10-22-2018, 06:18 PM
#6355
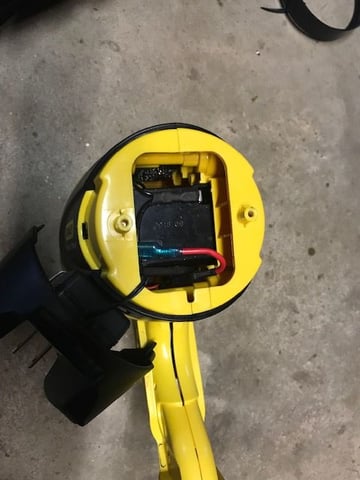
This is just a Stanley Spotlight disassembly frustration post.
Yesterday when I cleaned my chimney I used a 5 cell Mag light to look down the chimney, It was fair at best. I normal use my spotlight but the rechargeable battery had died a good while back. I�m going to the nearby Regional Airport tomorrow so I figured best buy a battery on the trip. So I proceeded to remove the battery.
I saw 2 Phillips screws on the back panel. I removed the screw and there was the battery. But no. The battery does not come out that way. The spotlight body encases the battery. So the body need to be pried open to get battery out. I now see 2 Phillips screws on the handle and 4 screws holding the body sides together. Oh, the 4 screws are hex screws.
So I remove the 2 Phillips screws and pry a cover on the backside of the handle. Then the hex screws. A good thing I noticed, the hex screws on the left side are short. The hex screws on the right side are long. Now I can get that battery out. No, the 2 sides still do not pry open. So I look a little more and I see a small hole on the bottom. I look down this deep hole and there is a tiny screw at the bottom of the hole. Looks like a Phillips. Well I tried every Phillips screwdriver I could fit in that hole and non would grip that screw. I got my flashlight and got a closer look. It had the grooves like a Phillips but it was actually a tiny square drive. I got my square driver and got that screw out. It was in there tight for a tiny screw.
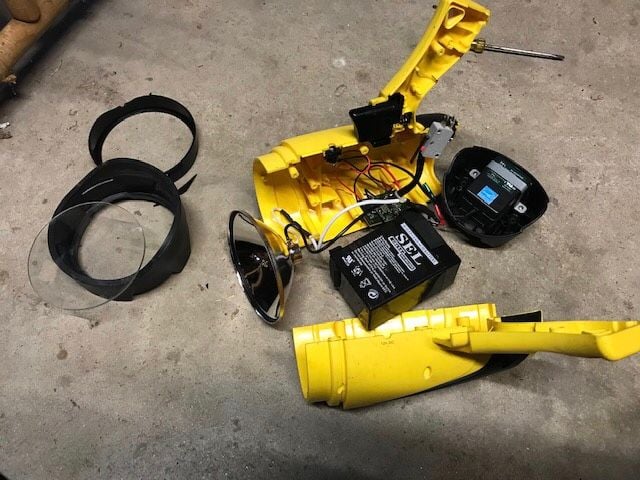
Now I could pry it open. No, the sides would not give. Looking at it more closely, I realized the front rubber bezel had to come off. So I got a putty knife and carefully pried the bezel off. Now the whole spotlight was apart. I could now get the battery out. Wow. A Phillips screwdriver, a hex driver, a square driver and a putty knife to get the battery out. And lots of frustration.
I wonder how many of these were broken or thrown away due to a dead battery. I have 2 other Stanley spotlights that were given to me because the battery died.
Yesterday when I cleaned my chimney I used a 5 cell Mag light to look down the chimney, It was fair at best. I normal use my spotlight but the rechargeable battery had died a good while back. I�m going to the nearby Regional Airport tomorrow so I figured best buy a battery on the trip. So I proceeded to remove the battery.
I saw 2 Phillips screws on the back panel. I removed the screw and there was the battery. But no. The battery does not come out that way. The spotlight body encases the battery. So the body need to be pried open to get battery out. I now see 2 Phillips screws on the handle and 4 screws holding the body sides together. Oh, the 4 screws are hex screws.
So I remove the 2 Phillips screws and pry a cover on the backside of the handle. Then the hex screws. A good thing I noticed, the hex screws on the left side are short. The hex screws on the right side are long. Now I can get that battery out. No, the 2 sides still do not pry open. So I look a little more and I see a small hole on the bottom. I look down this deep hole and there is a tiny screw at the bottom of the hole. Looks like a Phillips. Well I tried every Phillips screwdriver I could fit in that hole and non would grip that screw. I got my flashlight and got a closer look. It had the grooves like a Phillips but it was actually a tiny square drive. I got my square driver and got that screw out. It was in there tight for a tiny screw.
Now I could pry it open. No, the sides would not give. Looking at it more closely, I realized the front rubber bezel had to come off. So I got a putty knife and carefully pried the bezel off. Now the whole spotlight was apart. I could now get the battery out. Wow. A Phillips screwdriver, a hex driver, a square driver and a putty knife to get the battery out. And lots of frustration.
I wonder how many of these were broken or thrown away due to a dead battery. I have 2 other Stanley spotlights that were given to me because the battery died.
10-23-2018, 11:39 AM
#6356
FlyerinOKC, good luck on the Christmas builds. That is a good project you will have going. I like biplanes but never built one. Maybe one day. Working with grandkids is fun. Christmas will be good. I have granddaughters and only one is slightly interested in airplanes. Post pictures along the way.
 10-23-2018, 11:42 AM
#6357
This is just a Stanley Spotlight disassembly frustration post.
Yesterday when I cleaned my chimney I used a 5 cell Mag light to look down the chimney, It was fair at best. I normal use my spotlight but the rechargeable battery had died a good while back. I�m going to the nearby Regional Airport tomorrow so I figured best buy a battery on the trip. So I proceeded to remove the battery.
I saw 2 Phillips screws on the back panel. I removed the screw and there was the battery. But no. The battery does not come out that way. The spotlight body encases the battery. So the body need to be pried open to get battery out. I now see 2 Phillips screws on the handle and 4 screws holding the body sides together. Oh, the 4 screws are hex screws.
So I remove the 2 Phillips screws and pry a cover on the backside of the handle. Then the hex screws. A good thing I noticed, the hex screws on the left side are short. The hex screws on the right side are long. Now I can get that battery out. No, the 2 sides still do not pry open. So I look a little more and I see a small hole on the bottom. I look down this deep hole and there is a tiny screw at the bottom of the hole. Looks like a Phillips. Well I tried every Phillips screwdriver I could fit in that hole and non would grip that screw. I got my flashlight and got a closer look. It had the grooves like a Phillips but it was actually a tiny square drive. I got my square driver and got that screw out. It was in there tight for a tiny screw.
Now I could pry it open. No, the sides would not give. Looking at it more closely, I realized the front rubber bezel had to come off. So I got a putty knife and carefully pried the bezel off. Now the whole spotlight was apart. I could now get the battery out. Wow. A Phillips screwdriver, a hex driver, a square driver and a putty knife to get the battery out. And lots of frustration.
I wonder how many of these were broken or thrown away due to a dead battery. I have 2 other Stanley spotlights that were given to me because the battery died.
10-23-2018, 03:15 PM
#6358

Flashlight construction is for the convenience of the manufacturer to reduce costs, not the consumer, IMO. However, that battery looks like a standard sealed lead acid battery. Probably not hard to find a suitable substitute to put it back into service. However, the LED flashlights are so cheap now, I don't know if it is really worth it to mess with refurbishing an old unless one gets them for nothing, with nothing to lose and all to gain, being handy with refurbishing them. I just tossed a bunch of old flashlights because I can no longer readily get replacement bulbs for them. Those that are available cost more than they worth.
10-24-2018, 04:12 AM
#6359
Flashlight construction is for the convenience of the manufacturer to reduce costs, not the consumer, IMO. However, that battery looks like a standard sealed lead acid battery. Probably not hard to find a suitable substitute to put it back into service. However, the LED flashlights are so cheap now, I don't know if it is really worth it to mess with refurbishing an old unless one gets them for nothing, with nothing to lose and all to gain, being handy with refurbishing them. I just tossed a bunch of old flashlights because I can no longer readily get replacement bulbs for them. Those that are available cost more than they worth.
Yes, with technology things change. I was given an LED spotlight but did not care much for it. Still have it but dead battery. Maybe the battery was weak and not a fair test of the LED spotlight. I favor these old spotlights. They throw a good bright beam. It lights up my pasture like daylight.
I got the spotlight back on line. $12.97 for a battery, one year warranty. Sure is good. Tested it last night.
Last edited by ETpilot; 10-24-2018 at 04:14 AM.
10-26-2018, 03:22 PM
#6360
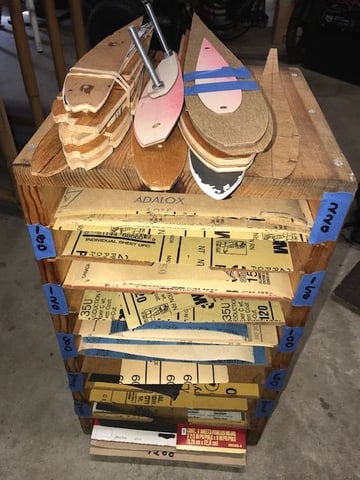
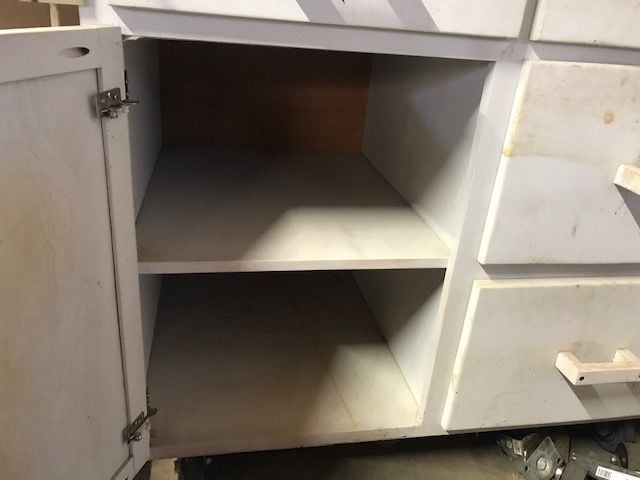
We had a couple of days of rain here. It gave me some time to reorganize my airplane building station. And maybe fix my bad habit. I build on an old set of kitchen base cabinet. I have it on wheels and can easily move it around. Plus I can work from all sides.
My bad habit is I always stuff the drawers and shelves with whatever I have in hand. The 2 utensil drawers I have organized with mostly tools. The 2 large drawers and 2 shelves has been anything goes. So I started emptying and sure did find a lot of things. I found a favorite protractor that has been missing a good while now. Plus other drafting instruments. Time to do something about it.
A good amount was assorted sandpaper. My many rolls of hand drawn plans, rib template and computer prints of things. Plus a bunch of other things. I started to box things up. Now I�m thinking of adding slide out trays in the shelf area to make it easy to find things. Just a little side project since I have to wait to order more covering material for my current build.
I hate to throw out my plans. Not sure if I�ll ever use them again. Saving them for a while. I just draw lines for my builds and work with that. Pictured is a tapered wing left and right side as an example. Only useful to me.
10-27-2018, 04:25 AM
#6362
Thanks, something like what you describe is what I have in mind. Something simple maybe without the drawer runners, if doable. Similar to the slide out trays on my sandpaper storage unit. I�ll give it some thought and see what I come up with. Anything is better than the mess I had.
10-29-2018, 05:47 AM
#6363
Thread Starter
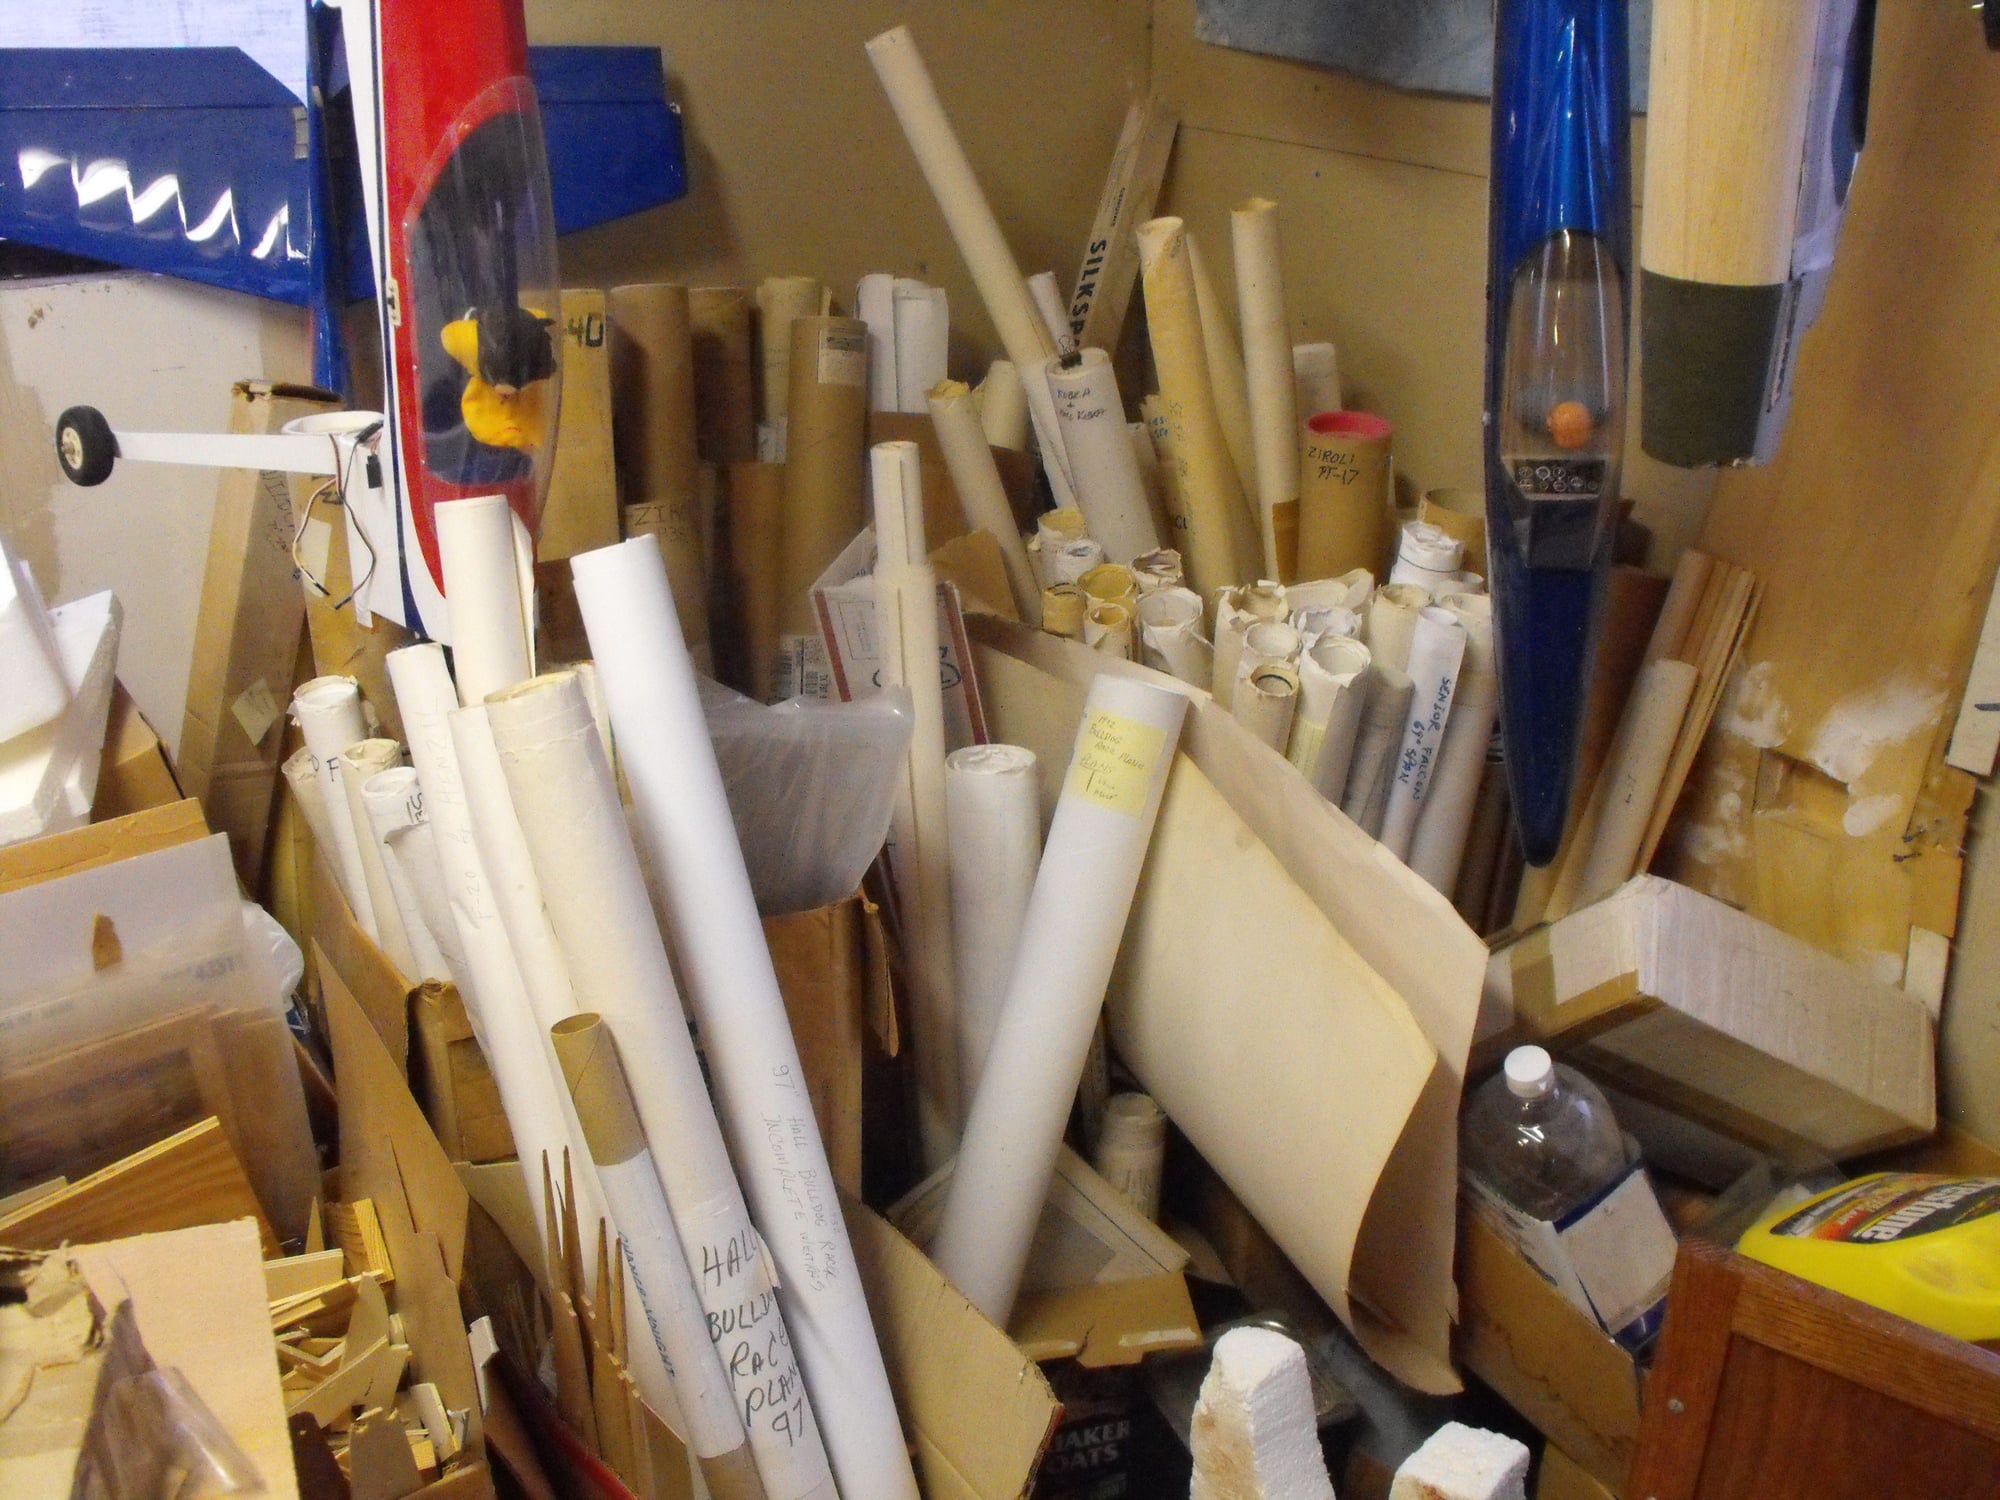
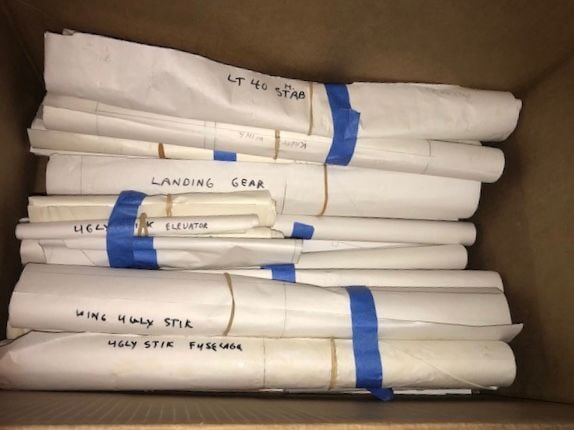
When it comes to being organized I do like you but one problem sticks I hate to throw out plans, look at this mess and that's not all of them. Lately I have down sized my pile of stuff by selling it off and have to fight not to accumulate more, it ain't easy. been busy in the shop until I sunk my motor-home in the mud and couldn't pull it out even with my tractor. I have it jacked up which took all day because my stabilizing jacks would not function, and all my batteries died. what the??? I'll get some Batt's today and try again before it rains............................................. ..Oh happy days!
I don't like these huge pictures!
10-29-2018, 06:34 AM
#6364
Donny I thought I had paper plans until I saw your stash. (Elctronic plans don't count right?) Since your in the mood to clean out do you have a .10 Enya or OS FP you want to part with? I'm building for the grandkid's Christmas and I need another .10. Bad year to be building against a deadline. I took the wife in for a test last Tuesday and she ended up in the hospital getting two stents put in. I take her back next Tuesday for at least two more. The doctors are bleeding my building fund dry!
10-29-2018, 11:11 AM
#6365

Join Date: Apr 2008
Location: Measnes, La Creuse, France.
Posts: 2,126
Received 146 Likes
on
123 Posts
Flyer please accept my best wishes even though I am a drunken European Socialist aethiest. When I hear stories like this I am gratetful that live in a country that practises socialised medicine.
Last edited by Telemaster Sales UK; 10-29-2018 at 11:14 AM.
10-29-2018, 03:06 PM
#6367
Flyer I hope your wife makes a fast recovery. My wife is down and out in NYC. She went there to visit with family and they all came down with some kind of bug. She�s supposed to fly back Wednesday but that is doubtful. Our medical system is out of control. Managing bills tends to be a nightmare.
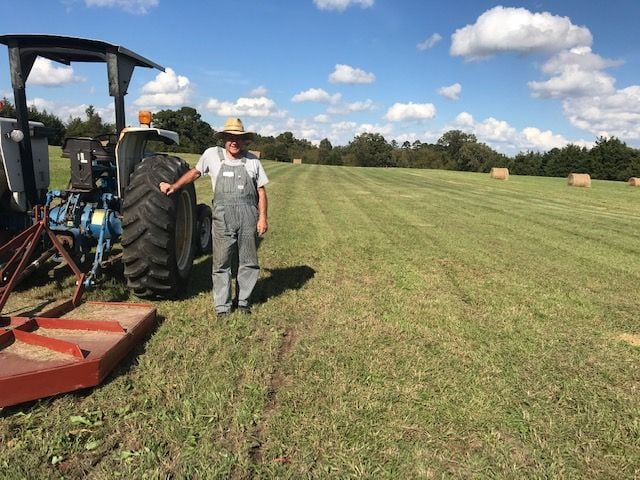
Donny, you asked for a mugshot. Here is one. Not a very good picture. Should have taken my hat off. I just mowed my runway. Ground was still a bit wet. But more rain coming this Wednesday. After this mowing I will go over it with my finish mower. Runway is 70x300�. It is centered on the property so I can fly in all quadrants. Or crash in all quadrants.
You sure do have a lot of plans.
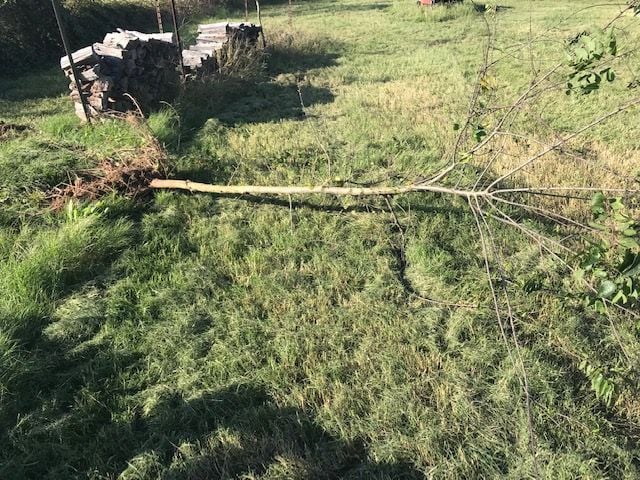
After I mowed, I decided to pull some small trees that have taken over a fence line. I have about half a dozen on the ground. It was a busy weekend and today a busy day. I did some troubleshooting on my Jeep and found the starter shot. Ordered a new one today. It gets here tomorrow. I�ll be down and dirty tomorrow. Love my Jeep.

Donny, you asked for a mugshot. Here is one. Not a very good picture. Should have taken my hat off. I just mowed my runway. Ground was still a bit wet. But more rain coming this Wednesday. After this mowing I will go over it with my finish mower. Runway is 70x300�. It is centered on the property so I can fly in all quadrants. Or crash in all quadrants.
You sure do have a lot of plans.
After I mowed, I decided to pull some small trees that have taken over a fence line. I have about half a dozen on the ground. It was a busy weekend and today a busy day. I did some troubleshooting on my Jeep and found the starter shot. Ordered a new one today. It gets here tomorrow. I�ll be down and dirty tomorrow. Love my Jeep.
10-29-2018, 03:38 PM
#6368
We have most expensive health costs of any country in the world. We are also the only country that doesn't put price controls on health care and prescription, and requires one bill for a hospital stay. They don't put up with this crap of a separate bill from every doctor etc.
10-29-2018, 11:09 PM
#6369
Join Date: Apr 2008
Location: Measnes, La Creuse, France.
Posts: 2,126
Received 146 Likes
on
123 Posts
That's a fine field you have there ET Pilot and it looks like you have fine weather.
I woke up to this.
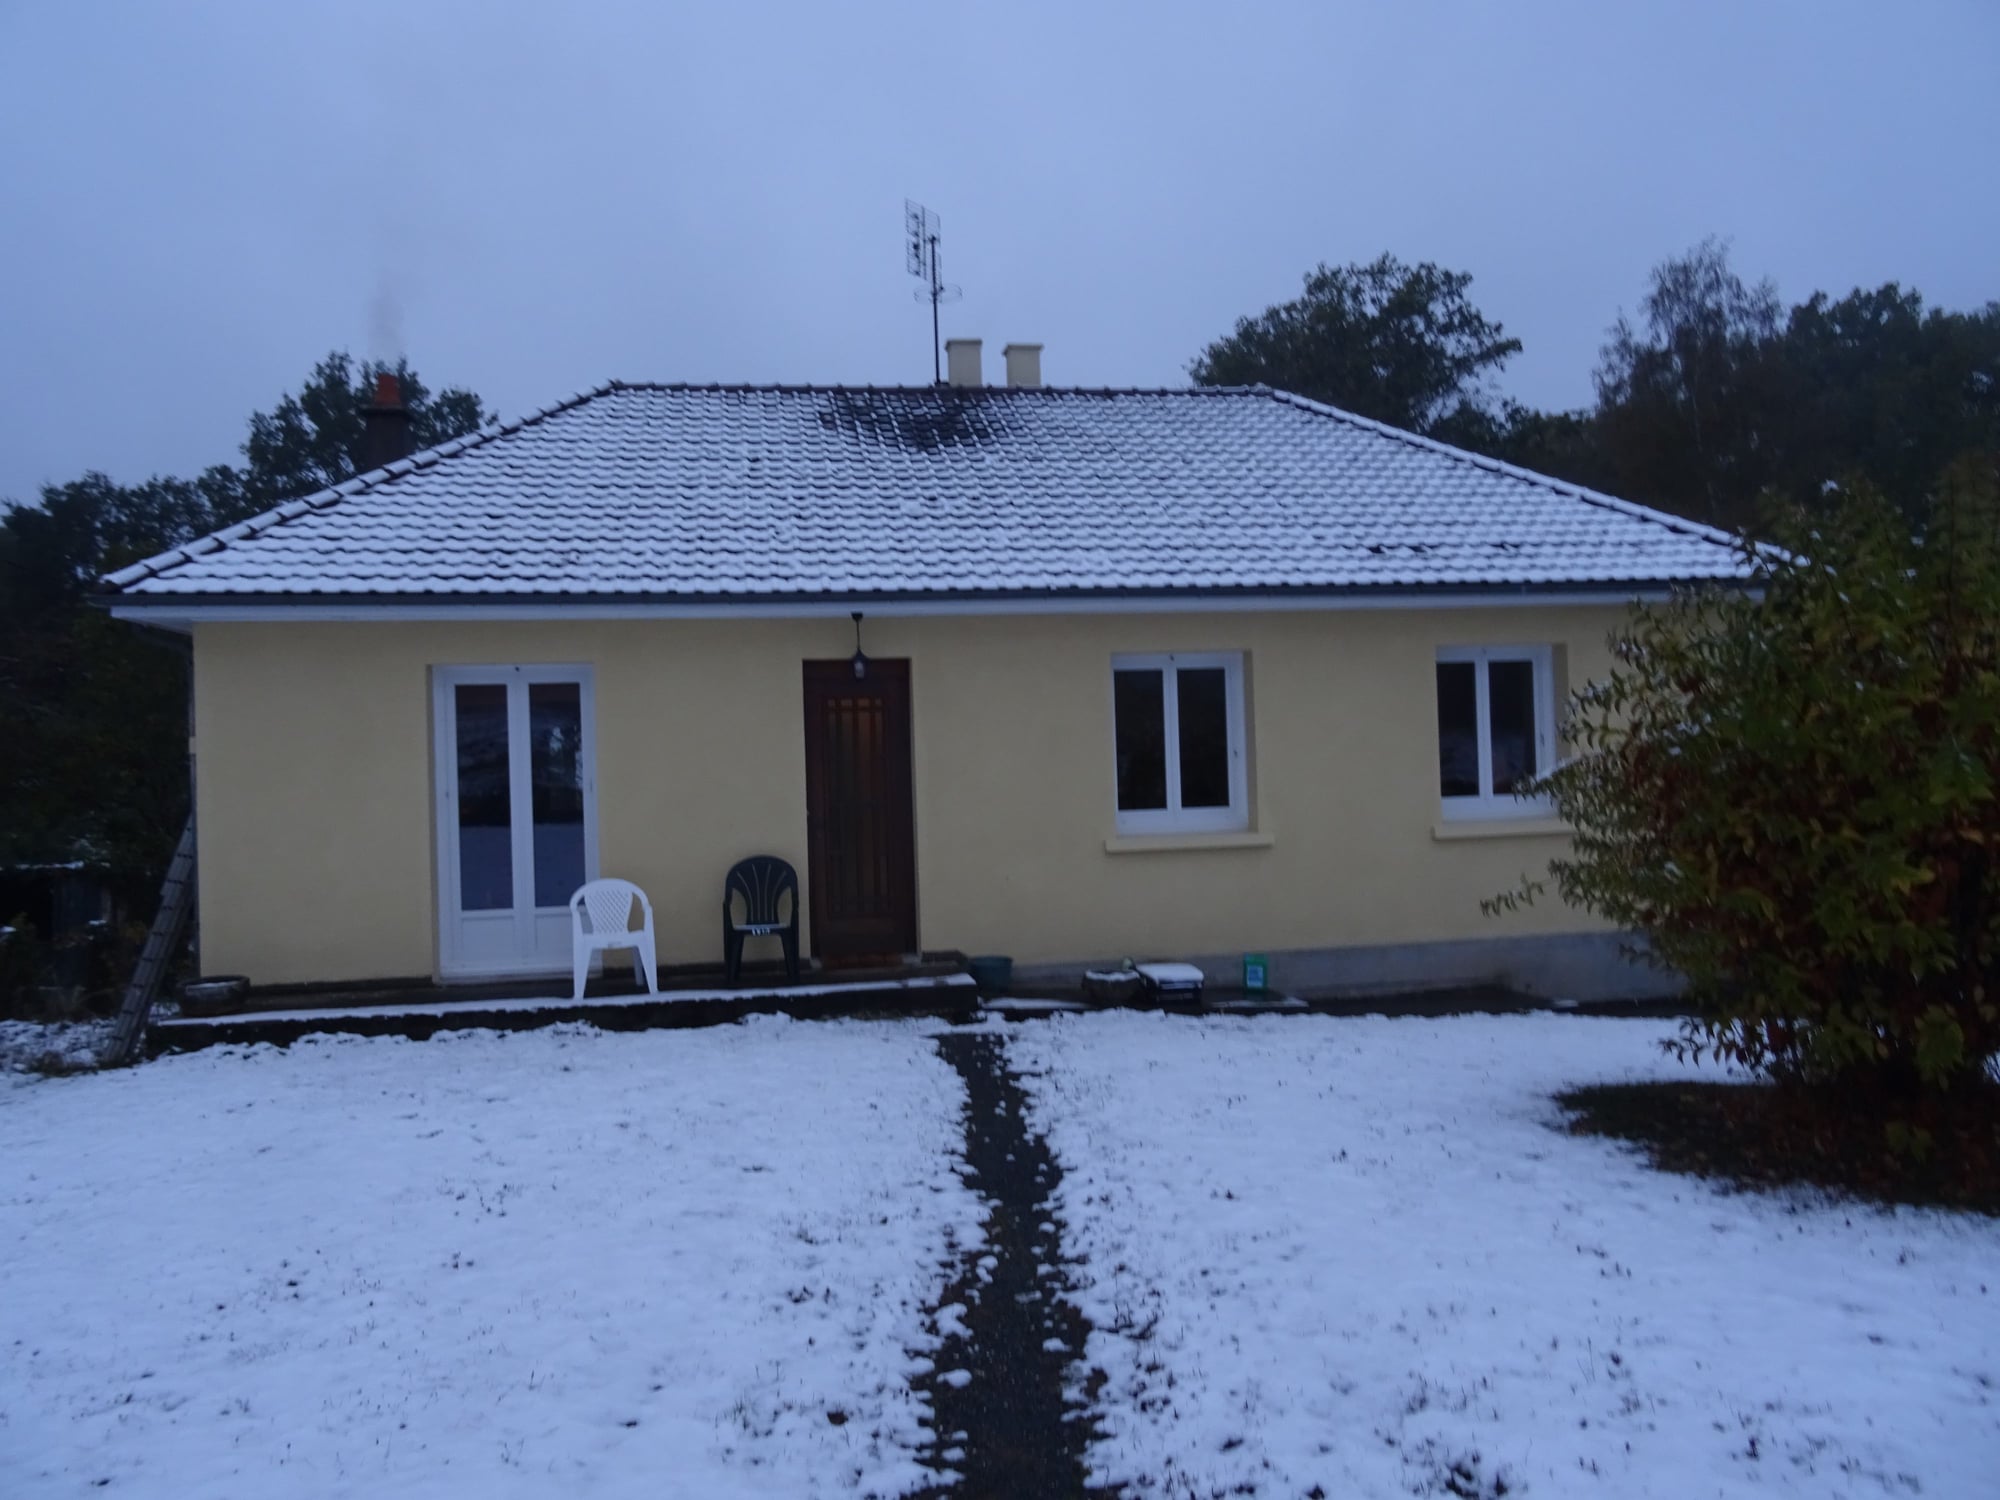
I won't be painting that chimney today but where did I put those model aircraft skis?
I woke up to this.
I won't be painting that chimney today but where did I put those model aircraft skis?
10-30-2018, 04:30 AM
#6371
Thread Starter
Donny I thought I had paper plans until I saw your stash. (Elctronic plans don't count right?) Since your in the mood to clean out do you have a .10 Enya or OS FP you want to part with? I'm building for the grandkid's Christmas and I need another .10. Bad year to be building against a deadline. I took the wife in for a test last Tuesday and she ended up in the hospital getting two stents put in. I take her back next Tuesday for at least two more. The doctors are bleeding my building fund dry!
make modifications in my mind. wishing I have the time and space to cut them out for a build. ............................... I do not know if I have a .10 size engine I will have to look, I have a pile of engines also.
Sorry to hear of your wife, but she will feel better, GOD bless!
10-30-2018, 05:04 AM
#6372
Thanks Donny and if I didn't already say it thank you to you too Telemaster. The test will be when she goes back next Tuesday and gets at least 2 more stents. The first two seem to really help her. Her color is better and she hs more energy. The only downsize is she is having problems tolerating all the drugs she is on to prevent blood clots and lower her heart rate. Her heart had been beating above 110 beats per minute and they needed to get it down below 100 to help her Afib. I'm the lucky one my heart rate is below 60.
A while back I bought the plans and assorted plastic parts for the 69" Brian Taylor Spitfire Mk 1A. I had them scanned to send to a laser cutter to get an estimate for a short kit. The only one I could find was in the UK and shipping costs were horrific. I got an email back from the laser cutter saying it was a great plan. He said a lot of scale birds leave a lot for the builder to figure out and this one wasn't like that. Drop me a PM with your email and I'll send you a copy to look at.
Mike
10-30-2018, 05:05 AM
#6373
Thread Starter
ETpilot
I love the look of a fresh cut field, yours looks fantastic! I see you have the bush hog you fixed up attached to your tractor, Looking Good!
Good to see a face (though small) that I can attach to your name.
You mentioned the starter on your jeep, I just got my motorhome out of a mud hole after a week of trying it doesn't take much of a hole to lock it in place solidly, It took a lot of jacking and stacks of wood to get the stabilizing jacks out of the ground so the tractor could haul it out. Man, am I glad that's done. But all my batteries are in bad shape.
10-30-2018, 05:35 AM
#6374
Thread Starter
Mike
I think I have a copy of the Brian Taylor Spit. in a PDF .................................................. ..........You guys need to contact me before purchasing plans I can send you drawings for free. I even have the GUFF telemaster recently purchased I got it free!
Here is one I just downloaded free off of the outerzone free plans site. there are several laser cutters that can do what you need............ lazer lizard...........manzano plans......ETC..........and probably have short kits ready to ship. do a google search before spending your hard earned money.
Last edited by donnyman; 10-30-2018 at 05:38 AM.
10-30-2018, 05:37 AM
#6375
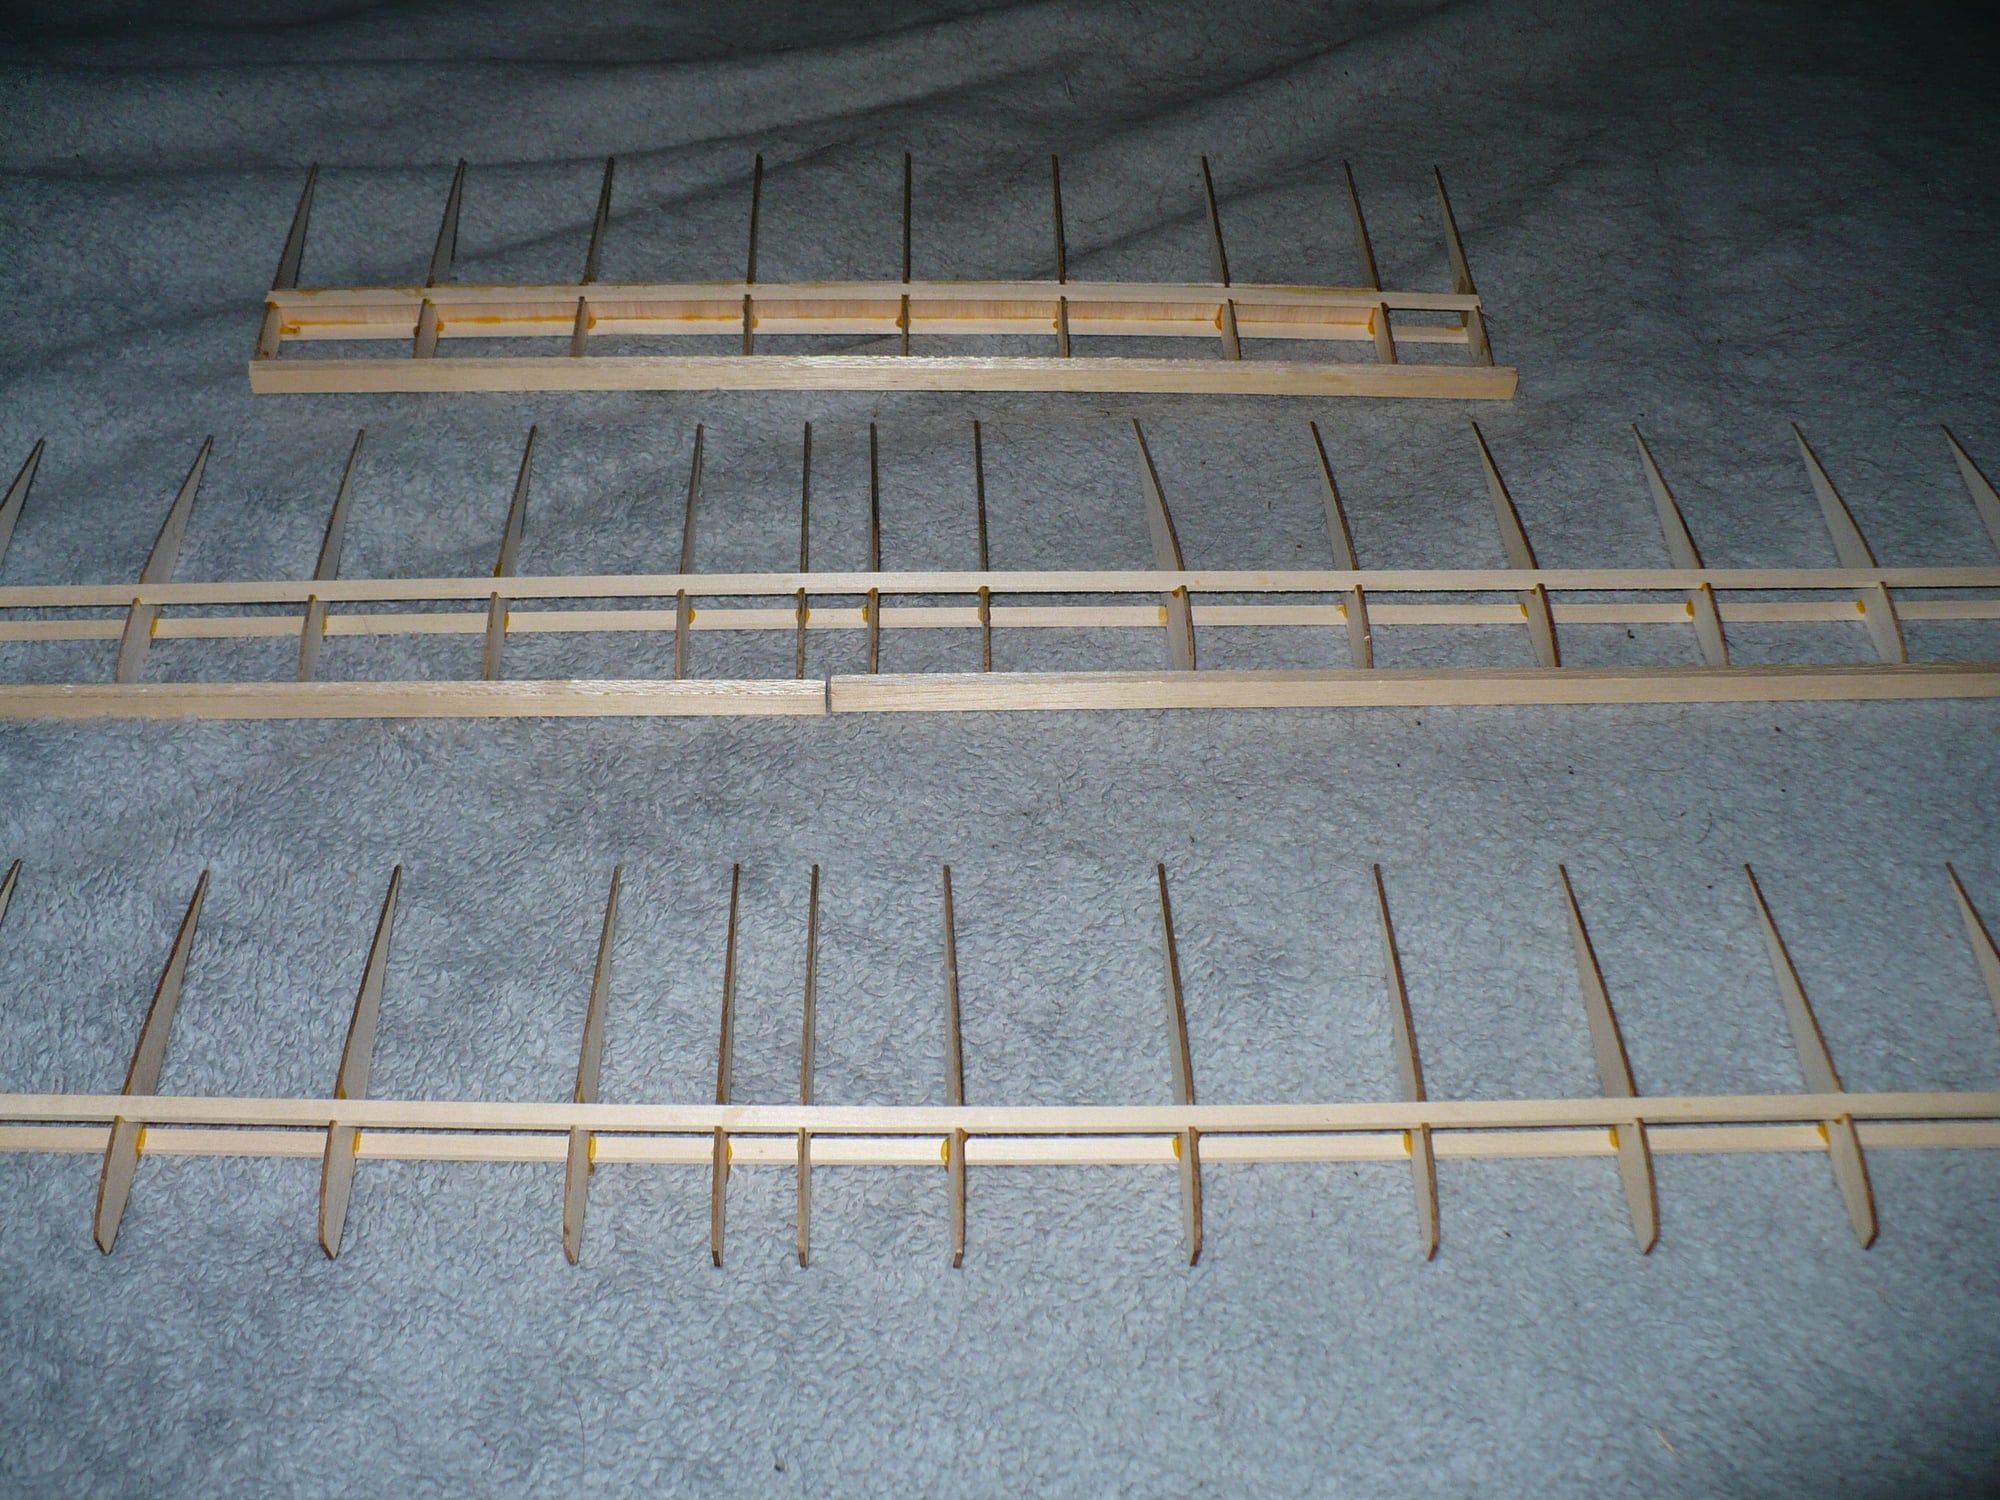
I have been working on the kids airplanes but I haven't started a building thread yet. Since everyone else has been posting pictures I will go ahead and give you guys an advance peek at my progress. The first photo is the current stage of the first fuselage.As you can see Millie the Chocolate Lab is supervising. I am working on getting the firewall location set in the position I want it. I will add triangle stock to increase the glue area. The second photo shows three wings in different stages of being built. I have decided to use a basic D-Tube wing construction with web shears on the back side of the spars. I start with one basswood spar glue the balsa ribs in place, allow the the gue to set up a bit then add the top basswood spar. The sheeting will be 1/16" balsa the web shears are 3/32" balsa because I didn't have enough 1/16" balsa on hand. The two ribs close together in the middle indicate where I cut the wing panels a part so I can add the dihedral braces.

First fuselage
First fuselage
Last edited by FlyerInOKC; 10-30-2018 at 05:40 AM.