


Mod'd Hostetler 1/4 GeeBee R2
 05-02-2012, 03:38 PM
#51

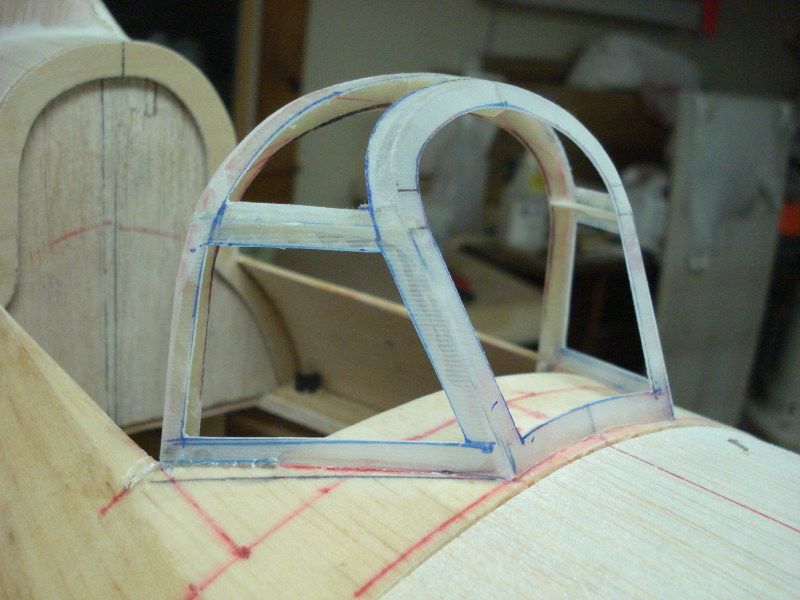
Finished the windscreen:
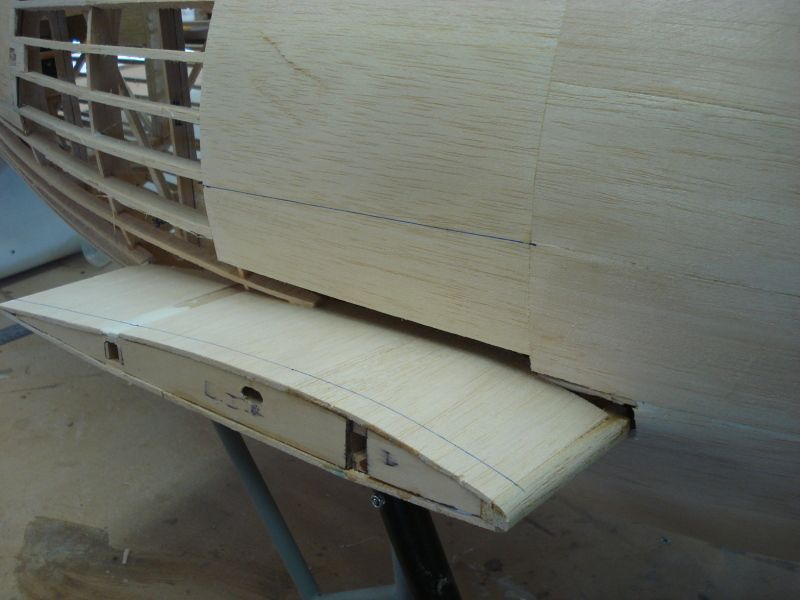
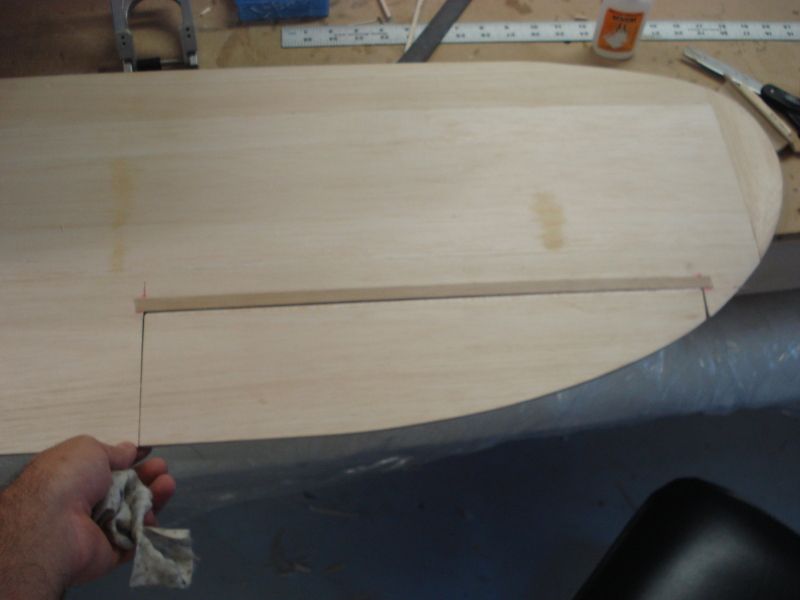
Sheeted the bottom of both wing panels and installed and shaped the wing tip blocks:

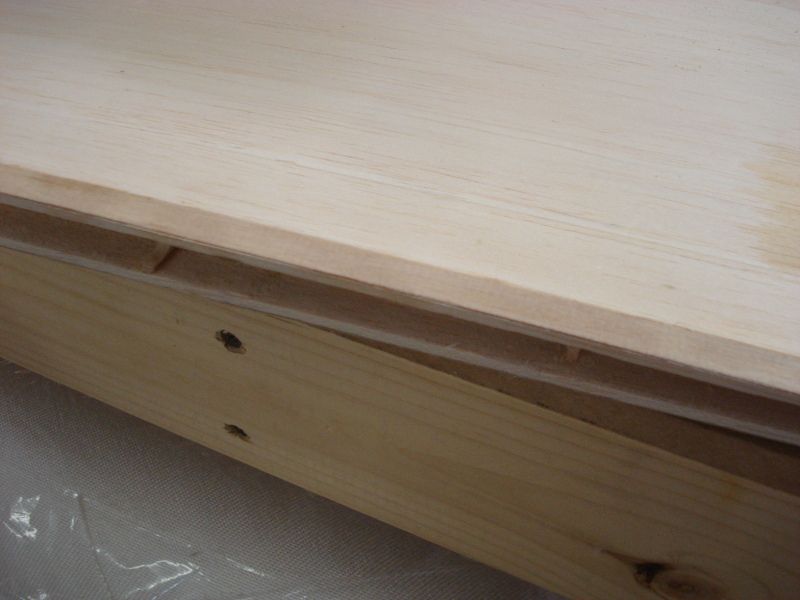
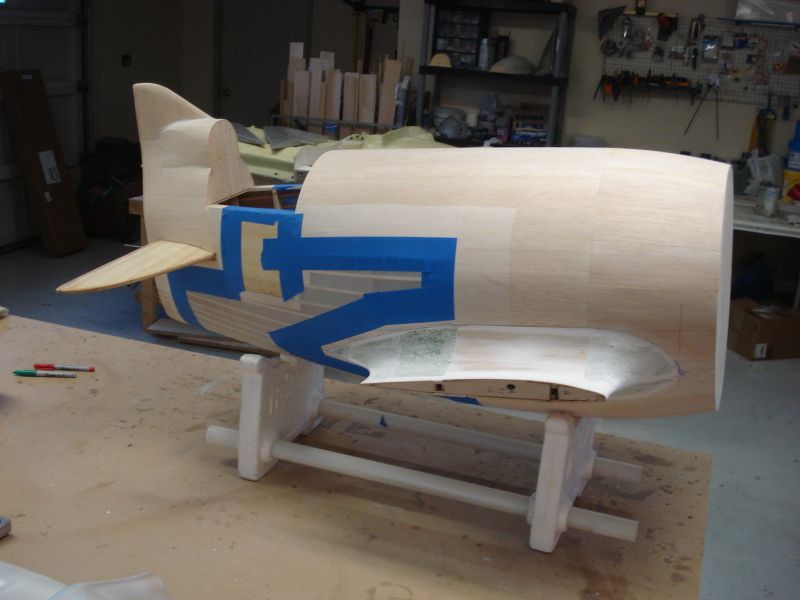
Then the sheeting on the nose of the fuselage was completed
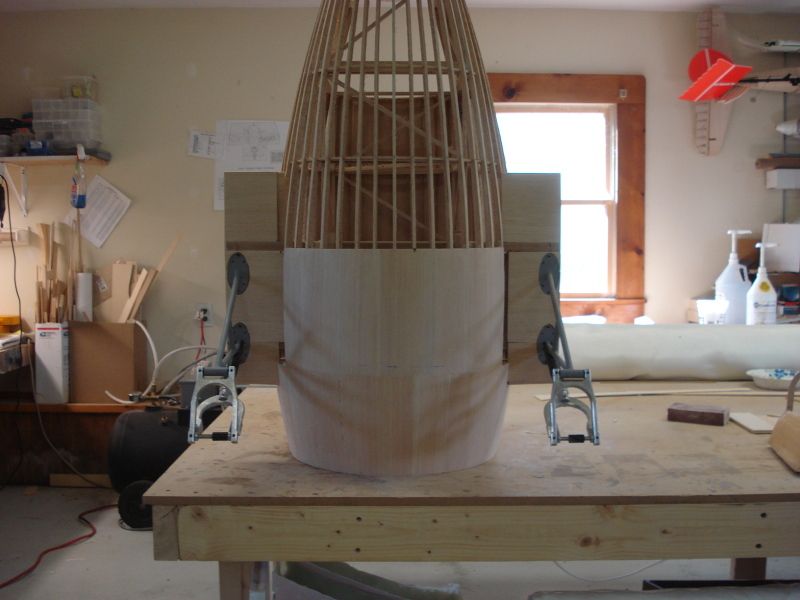
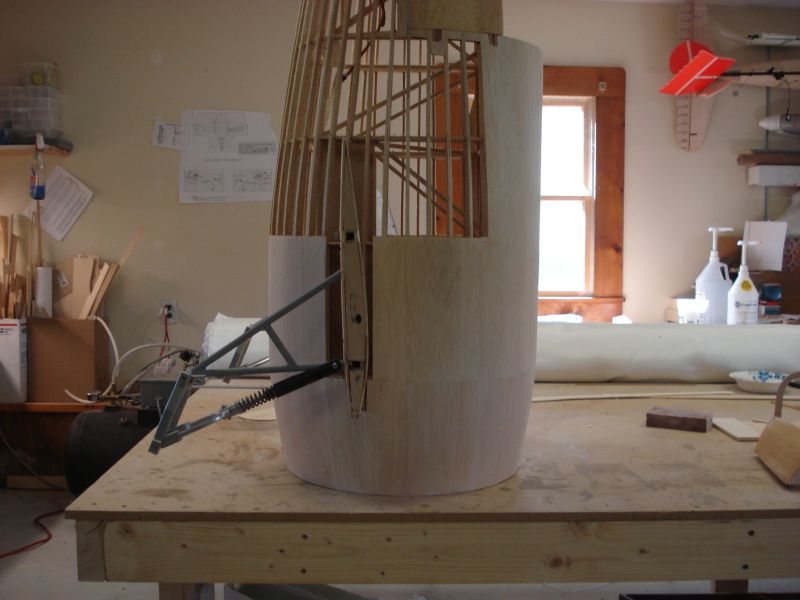

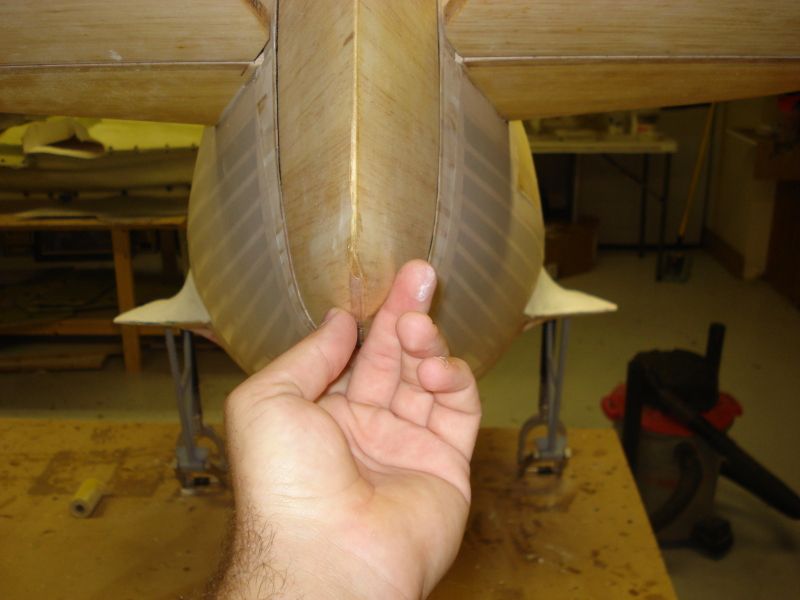
As you can see, the sheeting is not a tight fit up against the wing.. more on this later.
My new Favorite HATE is wing fillets! god these things suck, now I remember why i prefer fiberglass fuselages of old airplanes. lol
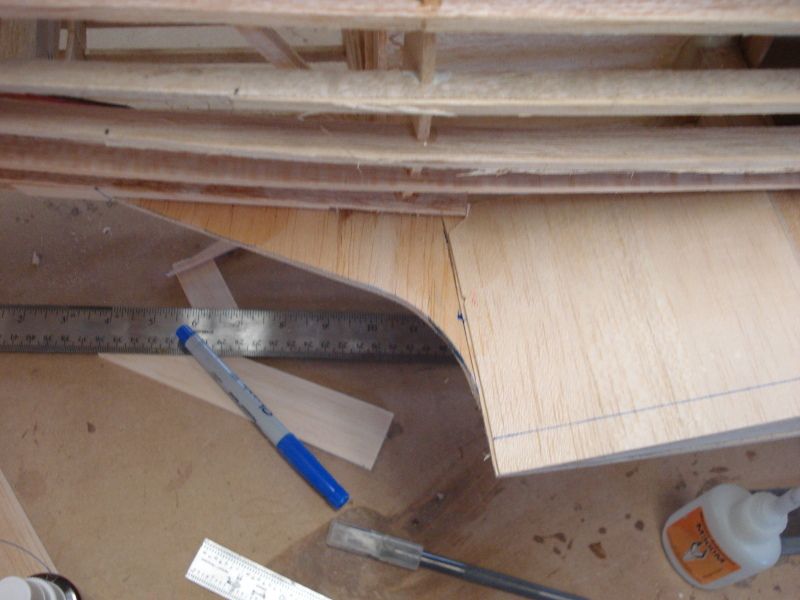
First up was a Radius tool of 2.125"
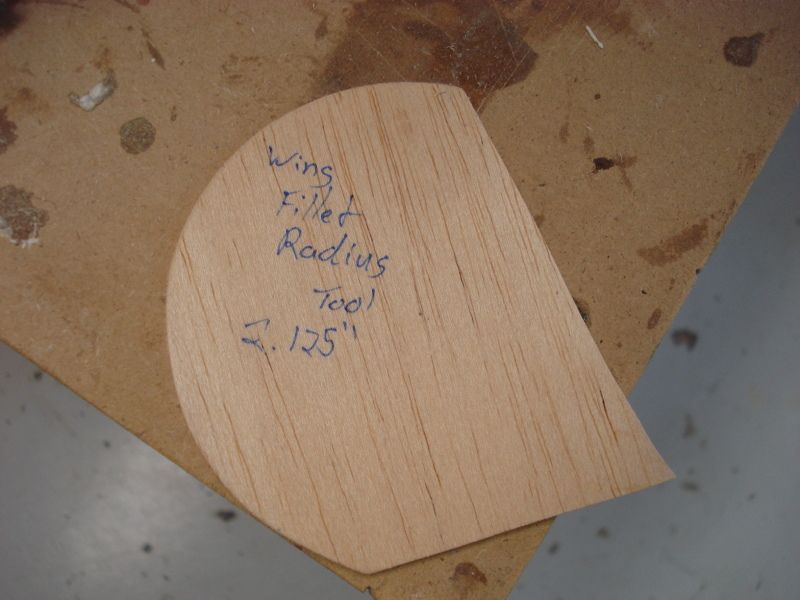
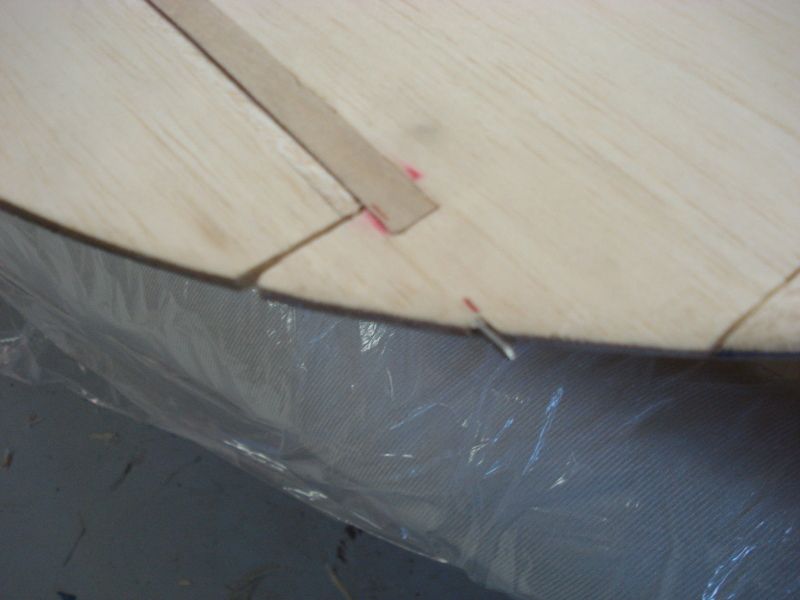
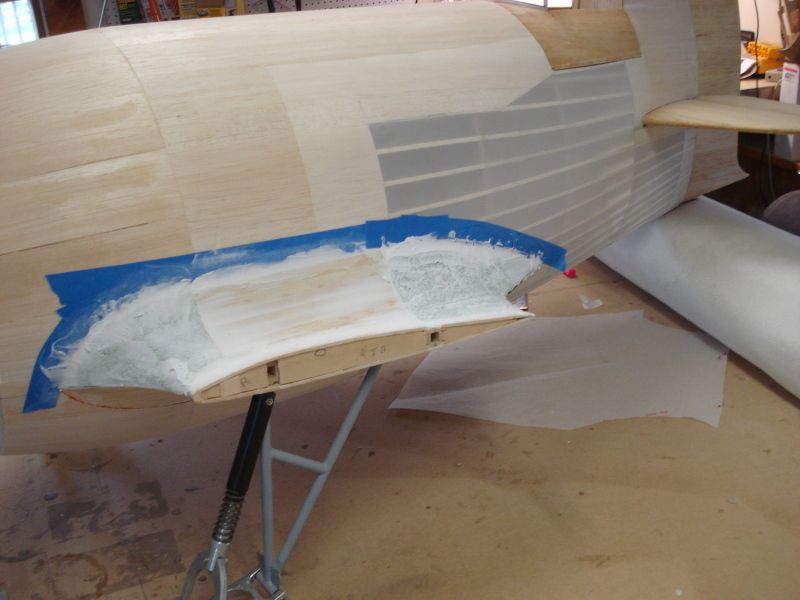
Then the center fillet outline was drawn on the fuselage, and the fillet edge line drawn on the wing:
The trailing edge fillet piece was then made, then a piece of filler balsa was glued in between 2 stringers. After that, the TE fillet piece was glued into place:
More balsa was installed between some stringers so as to give the fabric covering something to adhere to, and then the rest of the fillet outline was drawn onto the fuselage.

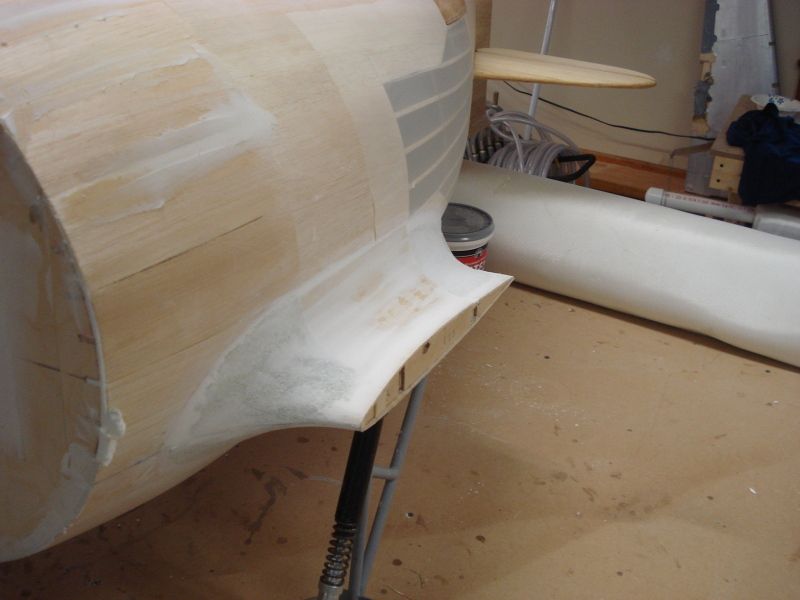
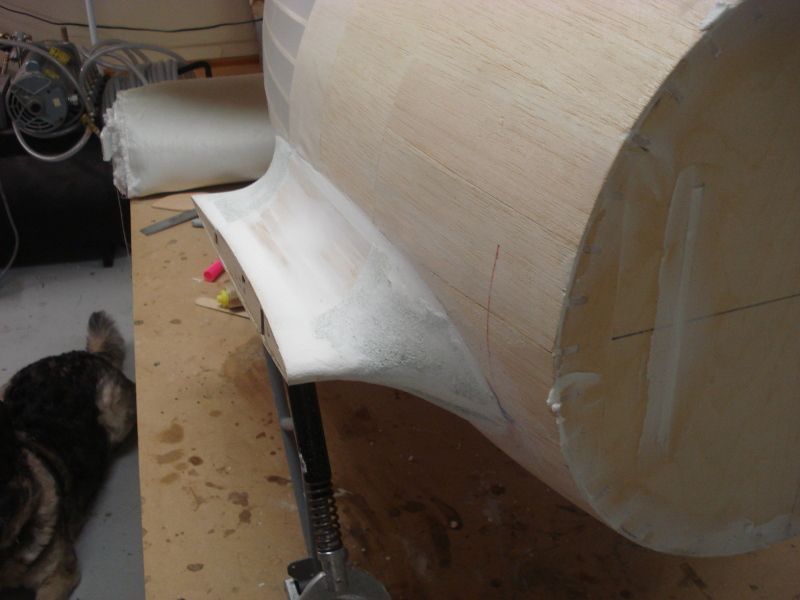
Then the LE fillet piece, and 2 wing fillet bulkheads were cut and installed.
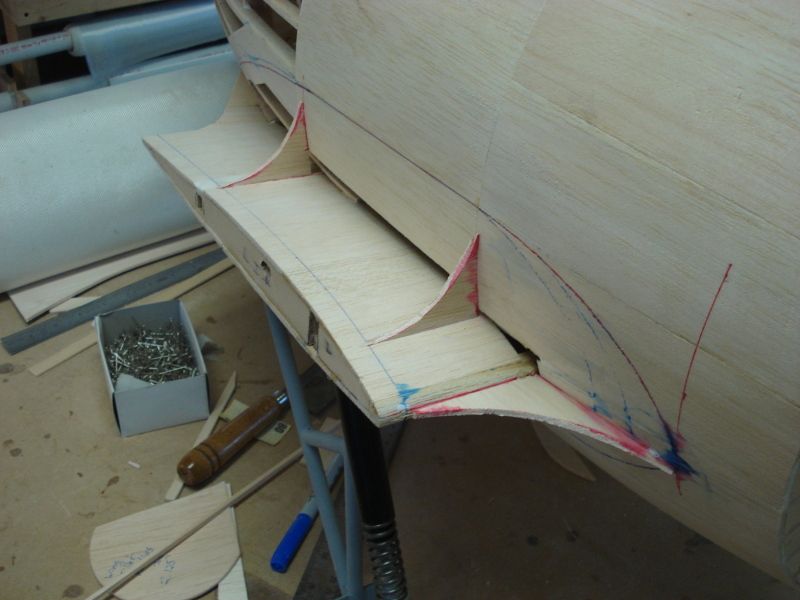
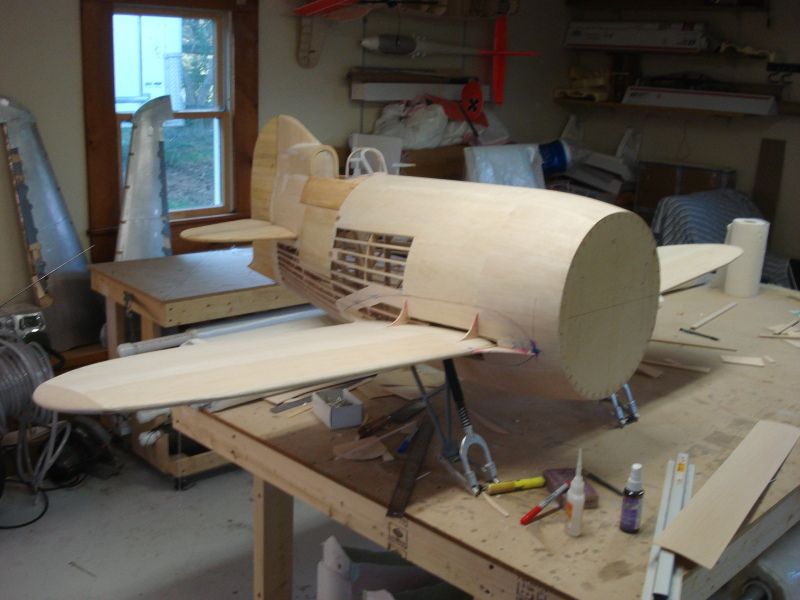
And a quick mock-up...
Sheeted the bottom of both wing panels and installed and shaped the wing tip blocks:
Then the sheeting on the nose of the fuselage was completed
As you can see, the sheeting is not a tight fit up against the wing.. more on this later.
My new Favorite HATE is wing fillets! god these things suck, now I remember why i prefer fiberglass fuselages of old airplanes. lol
First up was a Radius tool of 2.125"
Then the center fillet outline was drawn on the fuselage, and the fillet edge line drawn on the wing:
The trailing edge fillet piece was then made, then a piece of filler balsa was glued in between 2 stringers. After that, the TE fillet piece was glued into place:
More balsa was installed between some stringers so as to give the fabric covering something to adhere to, and then the rest of the fillet outline was drawn onto the fuselage.
Then the LE fillet piece, and 2 wing fillet bulkheads were cut and installed.
And a quick mock-up...
 05-02-2012, 05:13 PM
#52

looks great...
IMHO I personally would fill in the gap between the fuselage and the wing. Doing this would create additional support for the wing and the fillet supports.
Not much extra support but every little bit helps.
Just a thought / suggestion from someone else who hates fillets unless they are from a fish.
05-02-2012, 07:11 PM
#53
ORIGINAL: sebo
looks great...
IMHO I personally would fill in the gap between the fuselage and the wing. Doing this would create additional support for the wing and the fillet supports.
Not much extra support but every little bit helps.
Just a thought / suggestion from someone else who hates fillets unless they are from a fish.
filling the gap would provide marginal (if any) additional support for the stub wings.. All of the flying stress' of the wings are supported by the flying wires (which in the case of this particular model, are 100% necessary and functional).
05-02-2012, 09:12 PM
#55
I saw a scale one fly at Cecil Field airshow many years ago....did a lot of zig-zaggin while taxiing....can't see over cowl to taxi......really flew nice......low passes too.
05-02-2012, 09:20 PM
#56
I noticed that you "think" BEFORE you build..............I build then ask myself why I did it a certain way when there is a much simpler and sensible way of doing it. Your way is much better but I get to tinkerlonger. I love to build. Flying is just a necessay evil.
05-03-2012, 07:54 AM
#57
Join Date: Feb 2012
Location: North Reading, MA
Posts: 184
Likes: 0
Received 0 Likes
on
0 Posts
Well...not that I needed any proof. But I know now my building skills need a boat load of improving. I hate the fact you make it look so easy (jealous of course) lol. One hell of a build and builder. My hats off to you!!!!
05-03-2012, 08:00 AM
#58
My Feedback: (6)

Join Date: Feb 2003
Location: Grand Junction, Colorado
Posts: 1,484
Likes: 0
Received 4 Likes
on
4 Posts
Looking Good! Do you think you can give a weight of what the Fuselage as it is now is. With or without gear, I just wanted to compare to my build of the same plane but I made the inner structure a little bit differently. I am at the same stage as you except I haven't done the fillets or the canopy yet. Just curious.
Thanks
Thanks
05-03-2012, 08:15 AM
#59
ORIGINAL: frequent flyer
Looking Good! Do you think you can give a weight of what the Fuselage as it is now is. With or without gear, I just wanted to compare to my build of the same plane but I made the inner structure a little bit differently. I am at the same stage as you except I haven't done the fillets or the canopy yet. Just curious.
Thanks
05-04-2012, 07:37 PM
#60
I've been doing a bit more work.. slowly when motivated!
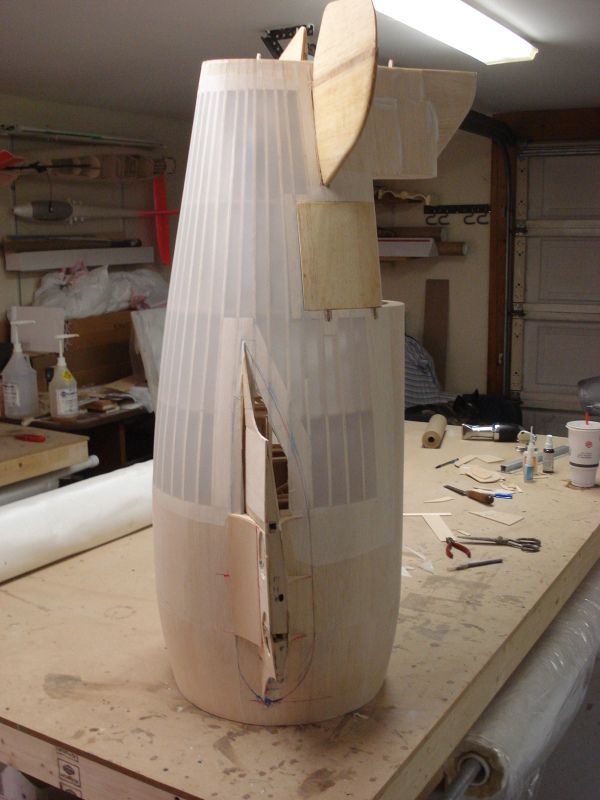
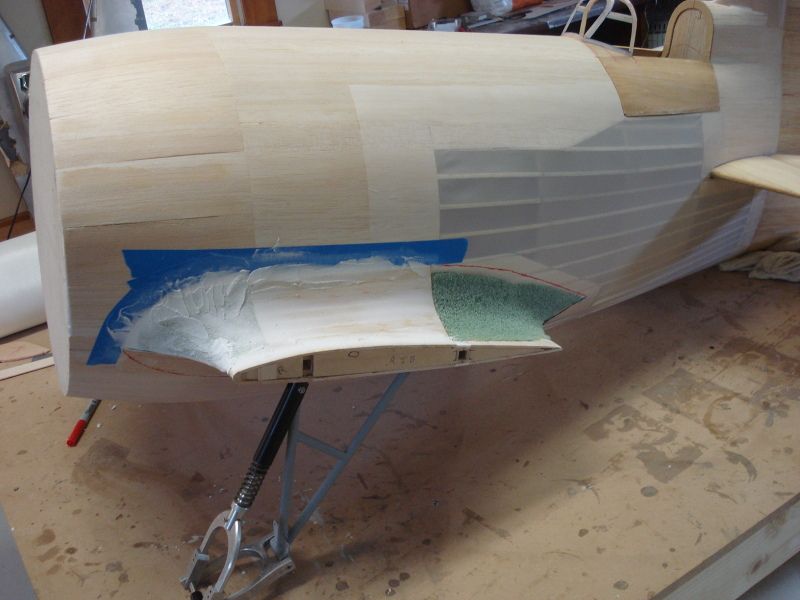
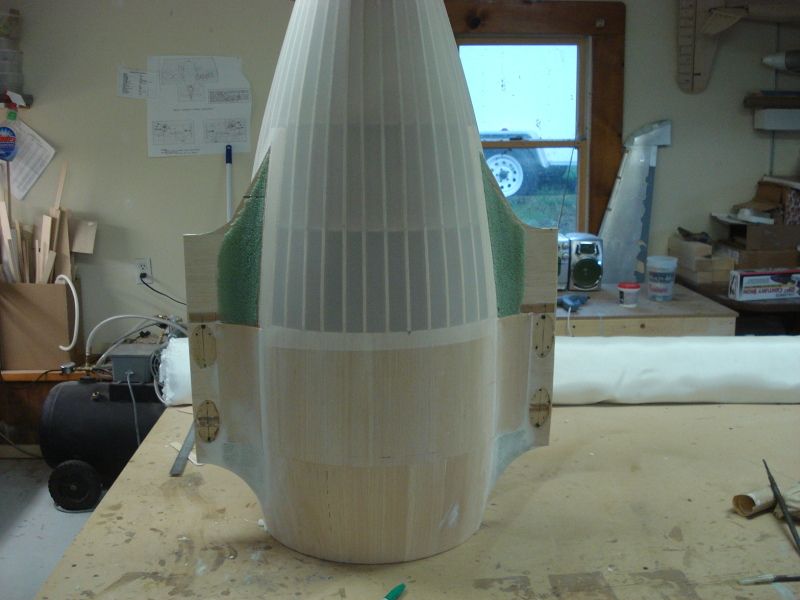
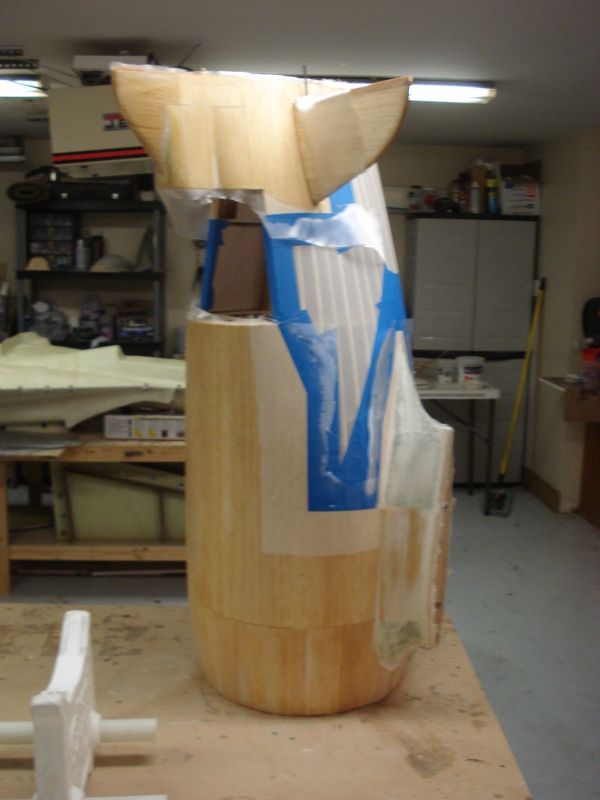
First up was getting the fuse ready for glassing and fillet finishing... What does this entail you ask? Well... First up, it means covering the open area's of the fuse. Soo... out came A BIG (IE 1/2 a full roll) piece of Solartex, the iron and heat gun and about an hour and a half later, The fuselage was covered for where I planned on covering. Once the fillets and completed and the fuselage final sanded, the rest of it will get glassed. The glass will overlap the solartex on the solid sheeted surfaces essentially Locking the solartex in place.. or atleast that is what I think/hope will happen:
And if you are wondering if that is ONE solid piece of solartex running front one side to the other, It is.. I had a co-worker who is involved in the hobby bet me $20 it couldn't be done.... But now he's no-where to be found

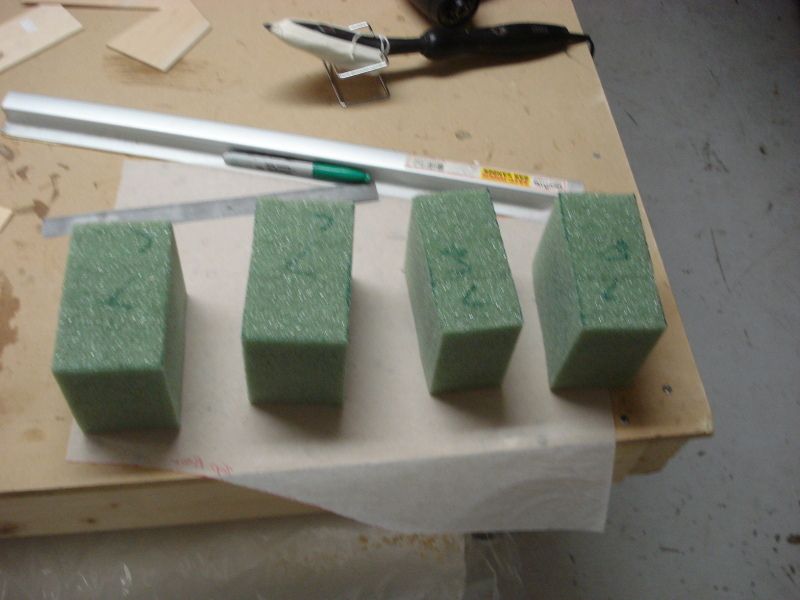
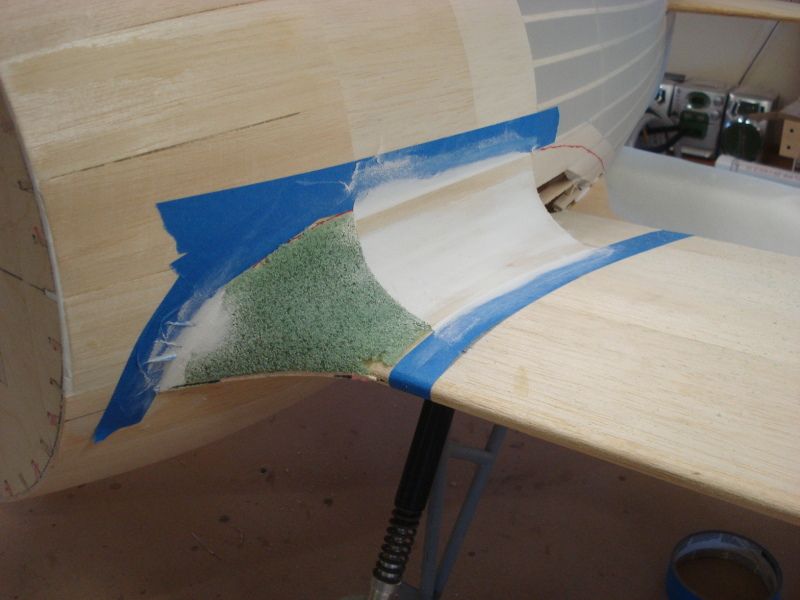
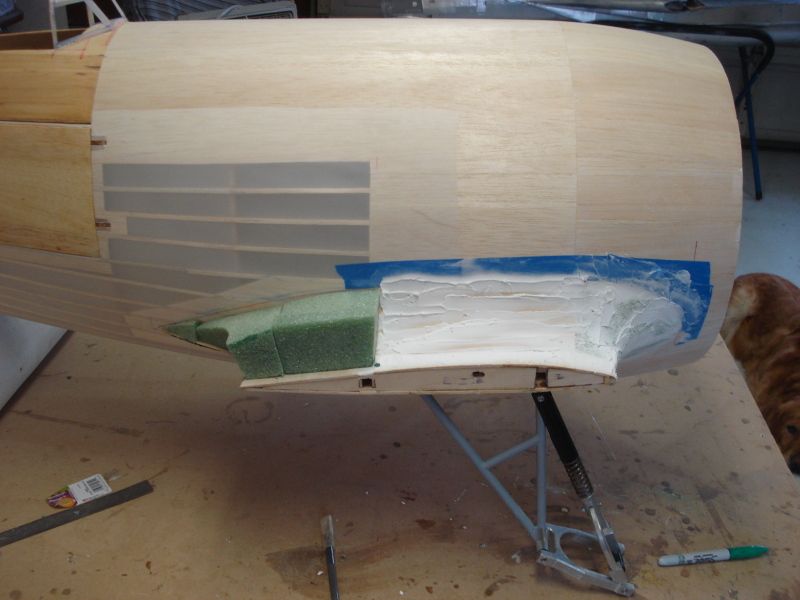
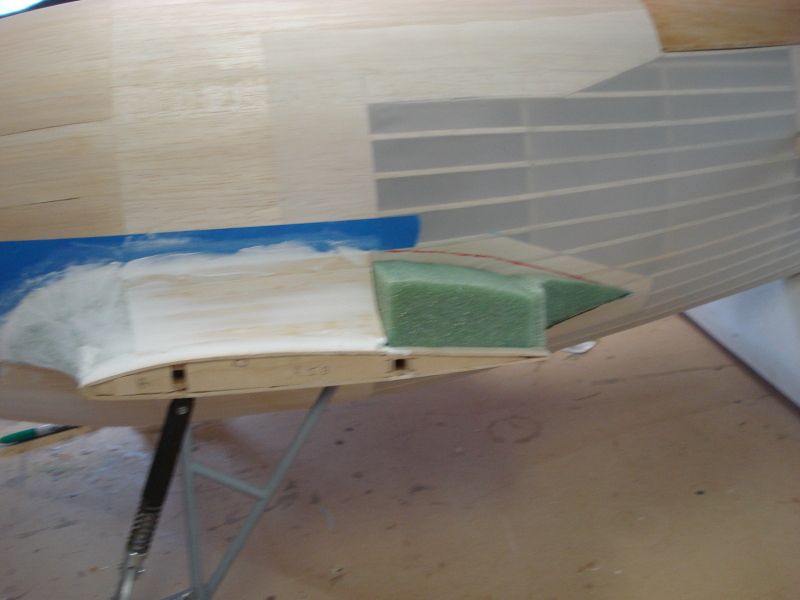
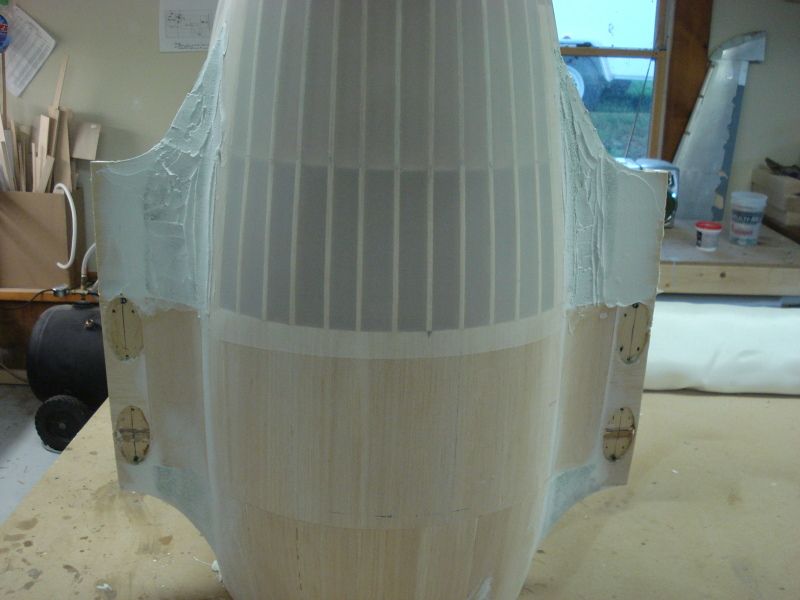
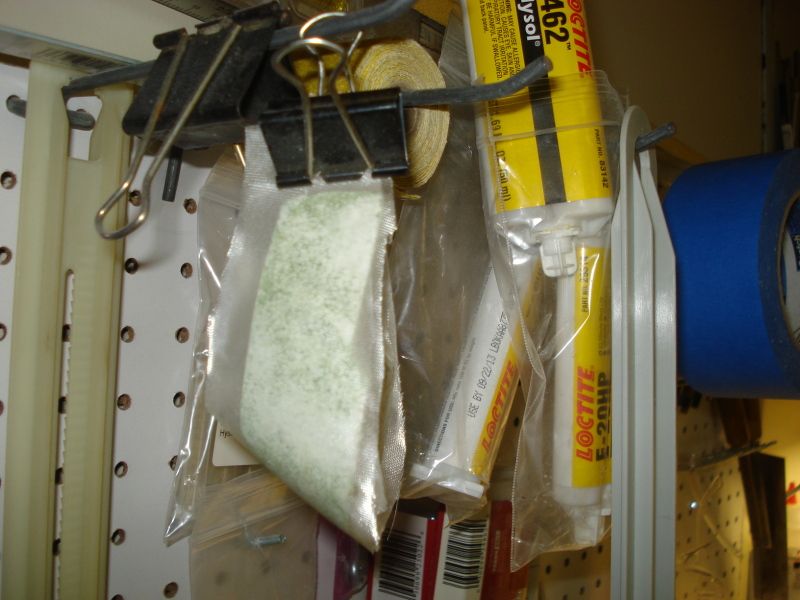
Then i took some green floral foam and chopped out some over-sizes blocks for the LE portion of the wing fillets. I prefer to use this stuff b/c it is very dense and strong, but it is extremely light way and easy to sand as well. Once these are shaped, they will get glassed as well:
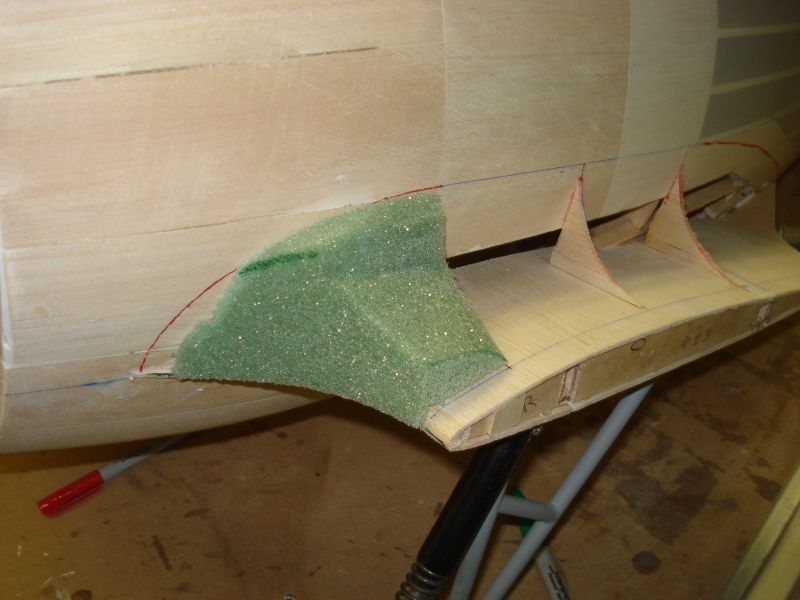
Then the central portion of the top wing fillets were strip planked, and the top LE foam blocks chopped and then a few globs of Hot-glue used to hold them in place:

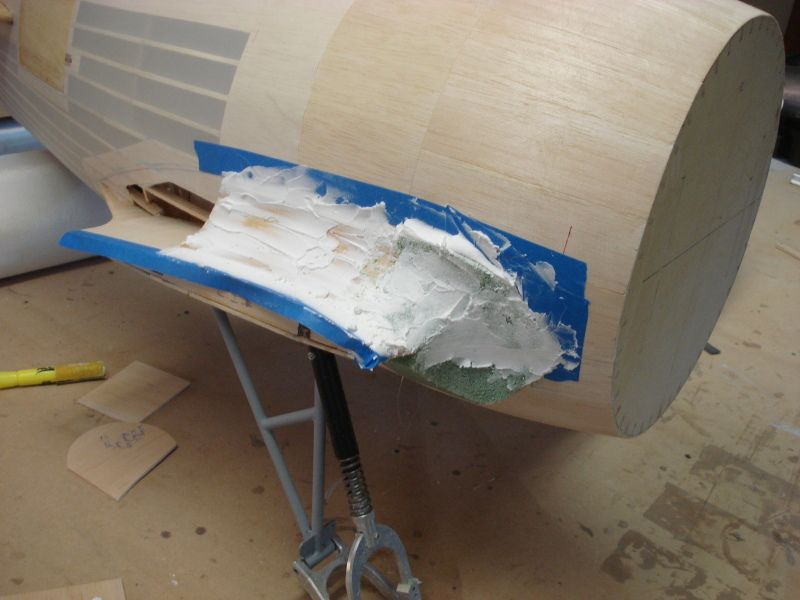
Lightweight dry-wall spackle was then smeared on the strip planked portion of the fairing and around the perimeter of the foam Le fairing, and then left to cure for a few hours:
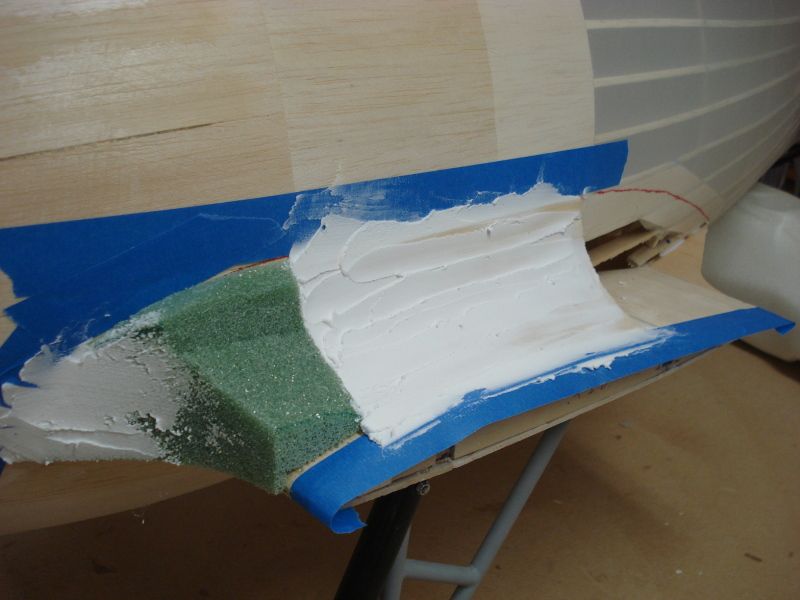
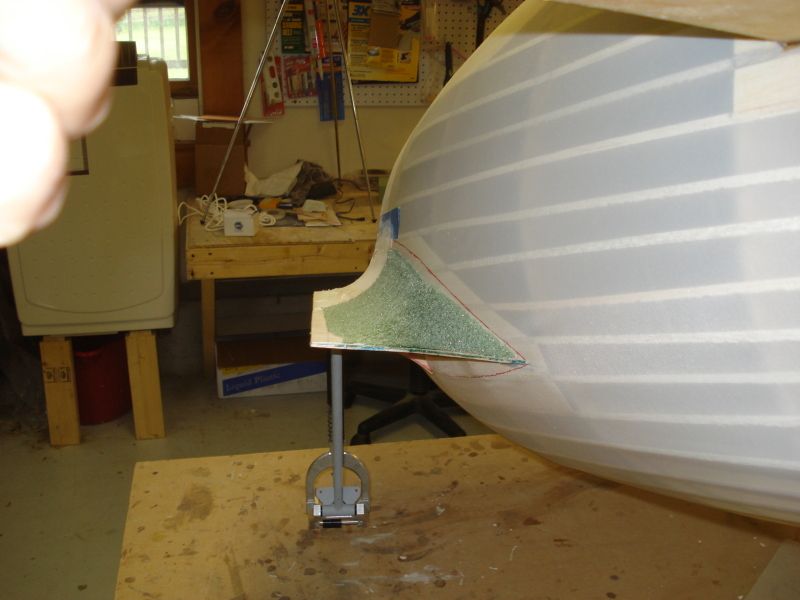
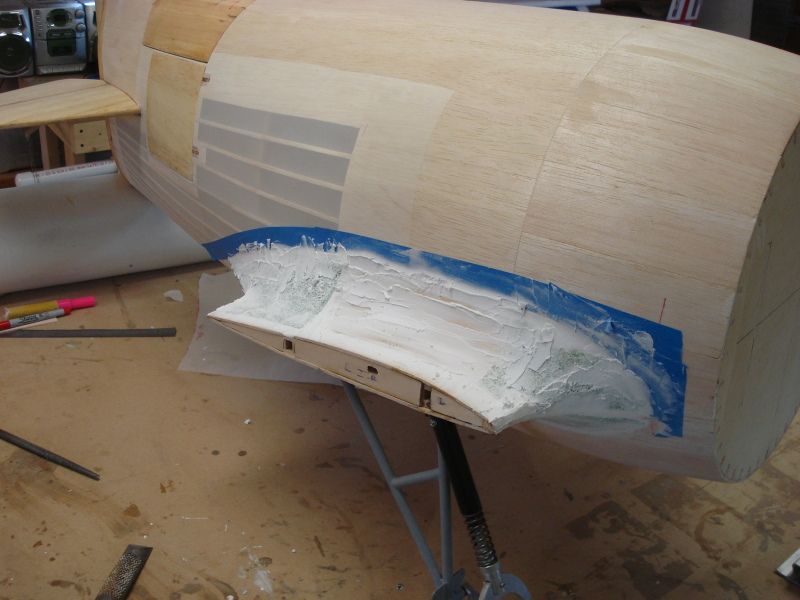
Then some 80 grit sandpaper wrapped around a Hi-lighter pen was used to rough shape the foam and dry-wall spackle. Then some spackle thinned down with water to about a cake frosting consistency was smeared over the foam and left to cure.. this typically fills in the voids in the foam giving a nice smooth surface, albeit sometimes it takes a few coats:
Then it was time to begin work on the ailerons... finally.
But before starting that description, I have to say, Nigel's aileron hinges are AWESOME!!!!!!!! I love these things and will definitely be using them in future builds (probably even the F-14 build) as they are compact and work great..
First up, was drilling out the hole in the hinges for a piece of .062" music wire.
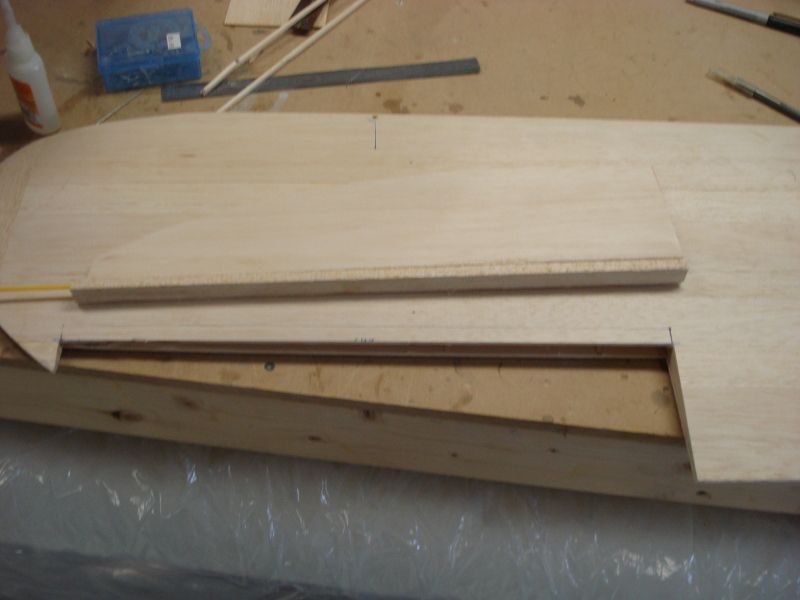
Then the aileron was cut free from the wing panel, and then the aileron LE was cut back 5/32" in prep for the aileron leading edge stick. The LE with the 1/2 round groove in it for a piece of yellow nyrod, was then glued to the aileron with the 1/2 round groove centered on the aileron. then the nyrod tube and the other half of the aileron LE was glued into place, then rounded to shape:
Then the rear spar was slotted where Nigel's hinges go into their already installed pockets, and the wing ribs Cut back and 1/2 rounded:
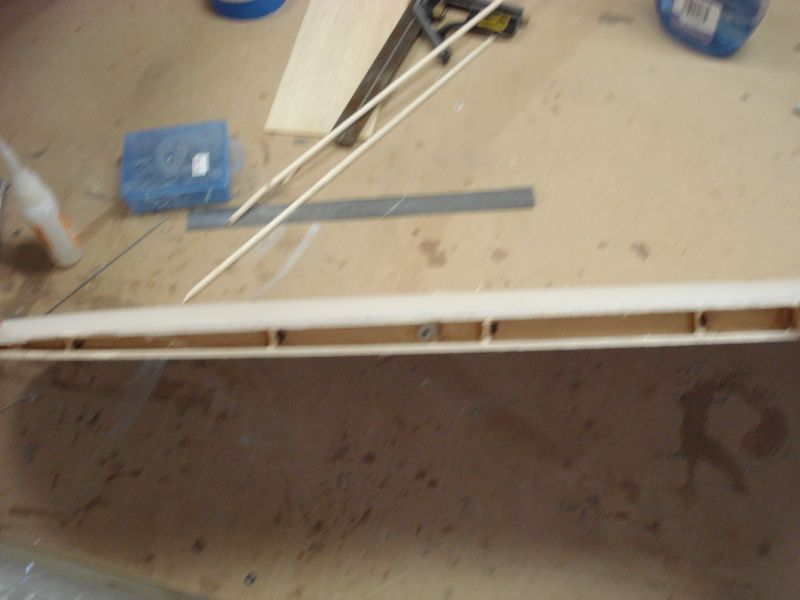
Then 1/64" plywood was cut into 1/2" wide strips and then inset into the wing trailing edge. This gives a nice straight, strong aileron gap seal edge. The balsa sheeting under the ply was then highly tapered to clear the shaped Aileron LE:
A hole was then drilled into the wing-tip to allow the hinge-pin rod to slide into the aileron hinge tube and hinges:
Then the hinges and aileron were test fit, which worked out nearly perfect! A piece of nyrod will now be installed into the wingtip and a set-screw silver soldered to the end of the hinge pin. This will let me screw the hinge pin into the wing tip making easy installation and removal of the aileron possible. I also need to order my RDS system so I can cut the slots for the RDS pockets as well:
First up was getting the fuse ready for glassing and fillet finishing... What does this entail you ask? Well... First up, it means covering the open area's of the fuse. Soo... out came A BIG (IE 1/2 a full roll) piece of Solartex, the iron and heat gun and about an hour and a half later, The fuselage was covered for where I planned on covering. Once the fillets and completed and the fuselage final sanded, the rest of it will get glassed. The glass will overlap the solartex on the solid sheeted surfaces essentially Locking the solartex in place.. or atleast that is what I think/hope will happen:
And if you are wondering if that is ONE solid piece of solartex running front one side to the other, It is.. I had a co-worker who is involved in the hobby bet me $20 it couldn't be done.... But now he's no-where to be found
Then i took some green floral foam and chopped out some over-sizes blocks for the LE portion of the wing fillets. I prefer to use this stuff b/c it is very dense and strong, but it is extremely light way and easy to sand as well. Once these are shaped, they will get glassed as well:
Then the central portion of the top wing fillets were strip planked, and the top LE foam blocks chopped and then a few globs of Hot-glue used to hold them in place:
Lightweight dry-wall spackle was then smeared on the strip planked portion of the fairing and around the perimeter of the foam Le fairing, and then left to cure for a few hours:
Then some 80 grit sandpaper wrapped around a Hi-lighter pen was used to rough shape the foam and dry-wall spackle. Then some spackle thinned down with water to about a cake frosting consistency was smeared over the foam and left to cure.. this typically fills in the voids in the foam giving a nice smooth surface, albeit sometimes it takes a few coats:
Then it was time to begin work on the ailerons... finally.
But before starting that description, I have to say, Nigel's aileron hinges are AWESOME!!!!!!!! I love these things and will definitely be using them in future builds (probably even the F-14 build) as they are compact and work great..
First up, was drilling out the hole in the hinges for a piece of .062" music wire.
Then the aileron was cut free from the wing panel, and then the aileron LE was cut back 5/32" in prep for the aileron leading edge stick. The LE with the 1/2 round groove in it for a piece of yellow nyrod, was then glued to the aileron with the 1/2 round groove centered on the aileron. then the nyrod tube and the other half of the aileron LE was glued into place, then rounded to shape:
Then the rear spar was slotted where Nigel's hinges go into their already installed pockets, and the wing ribs Cut back and 1/2 rounded:
Then 1/64" plywood was cut into 1/2" wide strips and then inset into the wing trailing edge. This gives a nice straight, strong aileron gap seal edge. The balsa sheeting under the ply was then highly tapered to clear the shaped Aileron LE:
A hole was then drilled into the wing-tip to allow the hinge-pin rod to slide into the aileron hinge tube and hinges:
Then the hinges and aileron were test fit, which worked out nearly perfect! A piece of nyrod will now be installed into the wingtip and a set-screw silver soldered to the end of the hinge pin. This will let me screw the hinge pin into the wing tip making easy installation and removal of the aileron possible. I also need to order my RDS system so I can cut the slots for the RDS pockets as well:
05-04-2012, 08:13 PM
#62
ORIGINAL: sebo
Thanks for the idea of the foam blocks.........I'll use them on my Lancair.
Thanks for the idea of the foam blocks.........I'll use them on my Lancair.
 05-11-2012, 05:55 AM
#63
Join Date: Feb 2012
Location: North Reading, MA
Posts: 184
Likes: 0
Received 0 Likes
on
0 Posts
Hey Invertmast, Its been a whole 6 days with no update? You probably maidened LOL. This build is one of my favorites. I look forward to seeing the progress.
05-11-2012, 10:16 AM
#64
L klord. No maiden yet! My wife came home last saturday so when her and the lil guy are around, i make it a point to spend as little time in the shop monday thru friday, but on the weekend, its my time! Ha. Im in no huge hurry to finish this thing anyways, im still debating on power systems, and have more pressing projects to complete.
Thomas
Thomas
05-15-2012, 03:11 PM
#65
Three days of work later... And if i didn't say it loudly enough last time.... I HATE WING FILLETS!
But, they are nearly done...
First... foam blocks cut and installled on the top TE fairing pieces..
Then rough shaped with a 1/2 round file and a round file
Then smeared with filler:
Then sanded to shape to the finished product.. this is after about 6 filler and sanding sessions!

Then the bottom TE foam blocks are cut, installed and rough shaped:
Then the cake frosting, i mean filler is smeared on (no its not really cake frosting!):
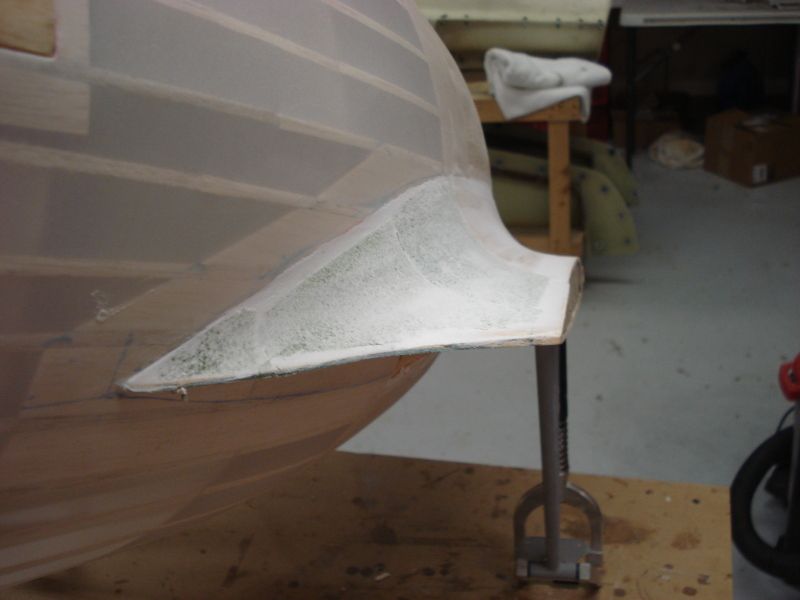
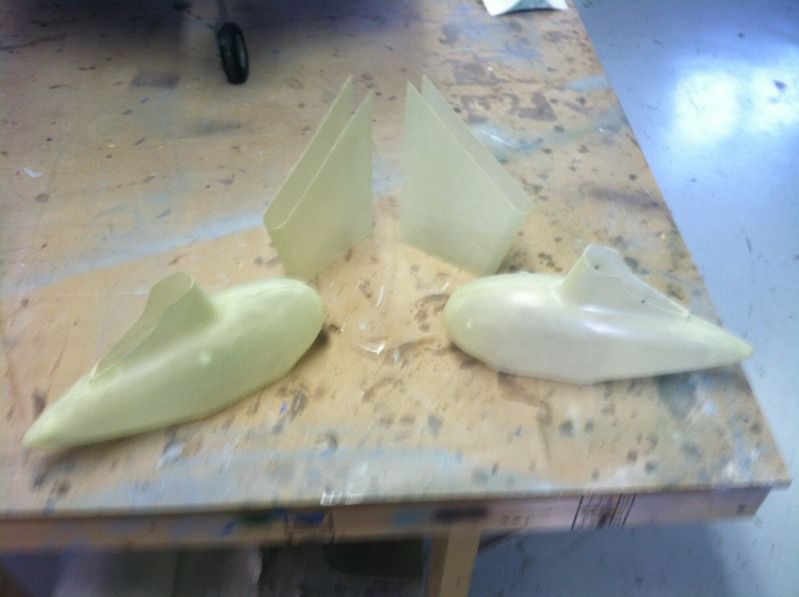
During all of that, I also cut out, sanded to shape, and filled/sanded the Tailwheel fairing a couple dozen times. It is now ready for glassing with a layer or 2 of 2oz glass. Then i'll do more filling and sanding, then paint it, more filling and sanding, till it is perfect, then clear coat it and MOLD it... so these little gems will be available for sale on as needed basis for who-ever wants one:

But, they are nearly done...
First... foam blocks cut and installled on the top TE fairing pieces..
Then rough shaped with a 1/2 round file and a round file
Then smeared with filler:
Then sanded to shape to the finished product.. this is after about 6 filler and sanding sessions!
Then the bottom TE foam blocks are cut, installed and rough shaped:
Then the cake frosting, i mean filler is smeared on (no its not really cake frosting!):
During all of that, I also cut out, sanded to shape, and filled/sanded the Tailwheel fairing a couple dozen times. It is now ready for glassing with a layer or 2 of 2oz glass. Then i'll do more filling and sanding, then paint it, more filling and sanding, till it is perfect, then clear coat it and MOLD it... so these little gems will be available for sale on as needed basis for who-ever wants one:
05-16-2012, 05:31 PM
#66
After sanding the filler off the bottom TE fairing pieces smooth, it was time do so some glassing..
First up was taping off a perimeter on the fabric for the glass to butt up against to:
Then the entire fuselage top, bottom, vertical fin/back side and fairings were glassed... yeap, all of it glassed at once. Im being lazy and not doing 1/2 on one day and the other the next.. so i'm trying a new process of trying to d it all..
I also glassed the tail wheel fairing with 2 layers of a tightly woven 2oz cloth:
And then I put some filler around the aileron gap seals so the wing bottom can be glassed tomorrow:
05-18-2012, 09:07 PM
#67
Senior Member
I'm not a modeler by any stretch of the wildest imaginations, but the diligence and skill you and others have is simply amazing!
10-07-2012, 11:23 AM
#68
Junior Member
Join Date: Oct 2005
Location: Rochester, NY
Posts: 28
Likes: 0
Received 0 Likes
on
0 Posts
Beautiful work! I am looking at building an Adrian Page GB and learning a lot from your excellent thread. Where can I find landing gear and pants like that?
Johnny U.
Johnny U.
 10-07-2012, 08:17 PM
#70
ORIGINAL: Rocketman320
Beautiful work! I am looking at building an Adrian Page GB and learning a lot from your excellent thread. Where can I find landing gear and pants like that?
Johnny U.
Beautiful work! I am looking at building an Adrian Page GB and learning a lot from your excellent thread. Where can I find landing gear and pants like that?
Johnny U.
01-01-2013, 05:26 PM
#71
Member
Join Date: Aug 2012
Location: EdentonNC
Posts: 35
Likes: 0
Received 0 Likes
on
0 Posts
Love this thread folks!
Ran into this video while looking for RC Gee Bee flight characteristics. It's in German but lots of scale detail available as Delmar Benjamin uncrates and assembles his R2.
http://www.youtube.com/watch?v=8nStjpGgc28&feature=endscreen
I may be wrong butMr. Benjamin appears to land short and damages his left gear fairing. His recovery was quick but hair-raising. I understand details are on his website.
Several 1/3 scalemodels on display andin flight and some horrid landings by them as well.
I hope to follow in your footsteps, Mr. Thomas W., please continue this excellent thread. May I ask how you cut out the bulkheads and ribs?
Thank you.
Jules
01-06-2013, 08:13 PM
#74
I didn't feel like working on my Horten 229 much today, so I figured I may as well get the glass parts for the GeeBee ready to be mounted. I have finally decided on power plants, so the GeeBee will be getting a Seidel ST-7-70 radial. This motor was originally installed on my 1/5 FW-190 and flew it "ok" at 30lbs of weight. Since I'm pretty much on track for the GeeBee to end up at 20lbs the seidel should fly the stink outa the GeeBee. I'm also waiting on the payment for the FW-190 since i have sold it, so once that arrives I can order the flying wires, paint and the remainder of the stuff needed to finish this project. I hope to have it complete by the end of April. So much for making Top-gun with it this year.. oh well, maybe next!
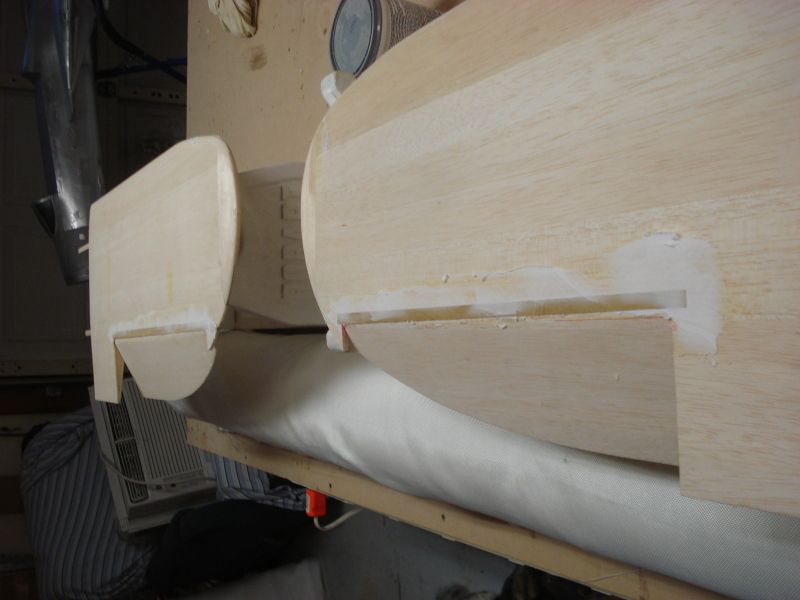
Here's a pic of the wheel pants:
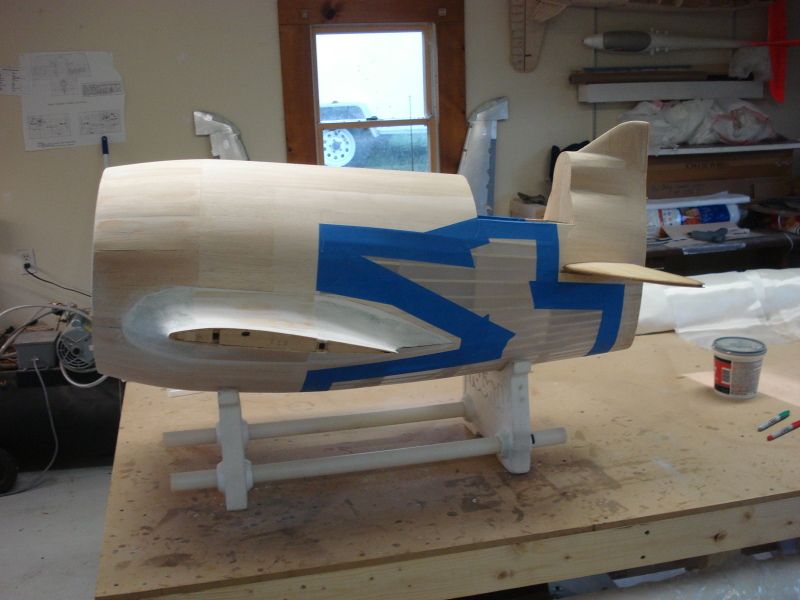
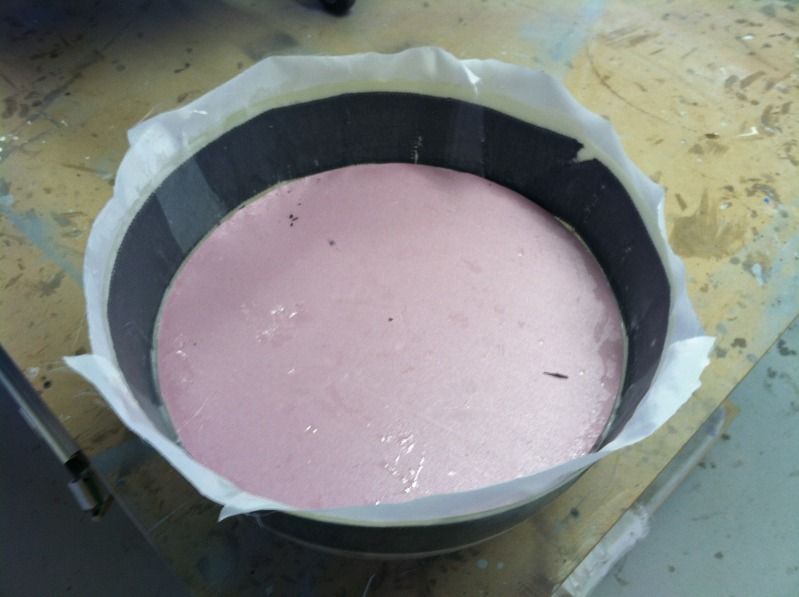
And one of the cowling. The cowling was a little flimsy around the back edge, so i laminated some 3" carbon fiber tape to the back of it. I hope this will stiffen up this edge and keep it "round" (thats what the pink foam round piece is for, to keep it round while the carbon cures) and also provide a nice strong edge for the cowling mounts to epoxy to. the white fabric you see above the cowl edge is peel-ply. this gets peeled off after the epoxy cures. It eliminates any sanding and makes the surface ready for any secondary bonding.
Here's a pic of the wheel pants:
And one of the cowling. The cowling was a little flimsy around the back edge, so i laminated some 3" carbon fiber tape to the back of it. I hope this will stiffen up this edge and keep it "round" (thats what the pink foam round piece is for, to keep it round while the carbon cures) and also provide a nice strong edge for the cowling mounts to epoxy to. the white fabric you see above the cowl edge is peel-ply. this gets peeled off after the epoxy cures. It eliminates any sanding and makes the surface ready for any secondary bonding.
01-29-2013, 06:16 PM
#75
The GeeBee project is slowing coming back to life. The seidel and all its ancillaries have been removed from the FW-190 and once the 190 is done with its retrofit and shipped off to its new owner, and the two Horton's completed (well, atleast one completed and the other molded) i'll be getting back to work on the GeeBee. Plus, all that waiting time will give the flying wire company time to get them made up and for them to arrive..
So, here's what the Seidel is going to look like in the GeeBee cowl.
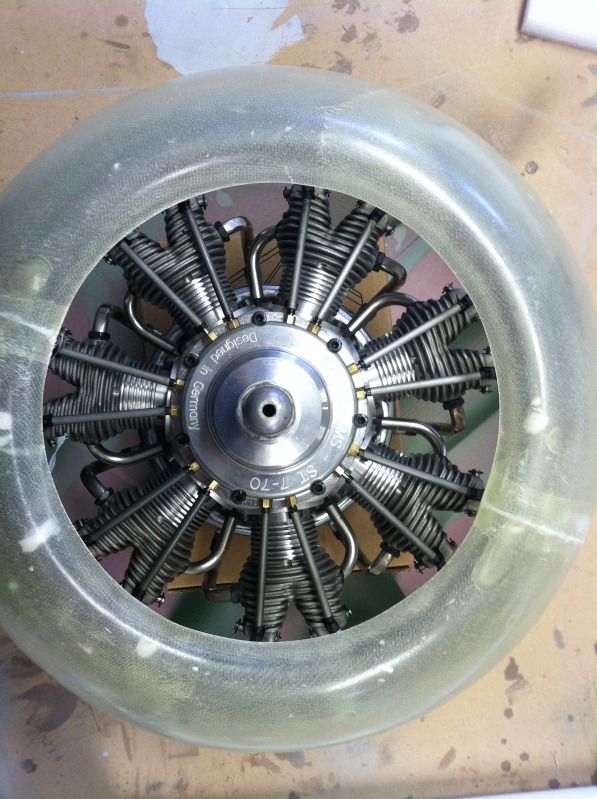
So, here's what the Seidel is going to look like in the GeeBee cowl.