JW Büker Jungmeister build
 08-13-2022, 02:35 AM
#151
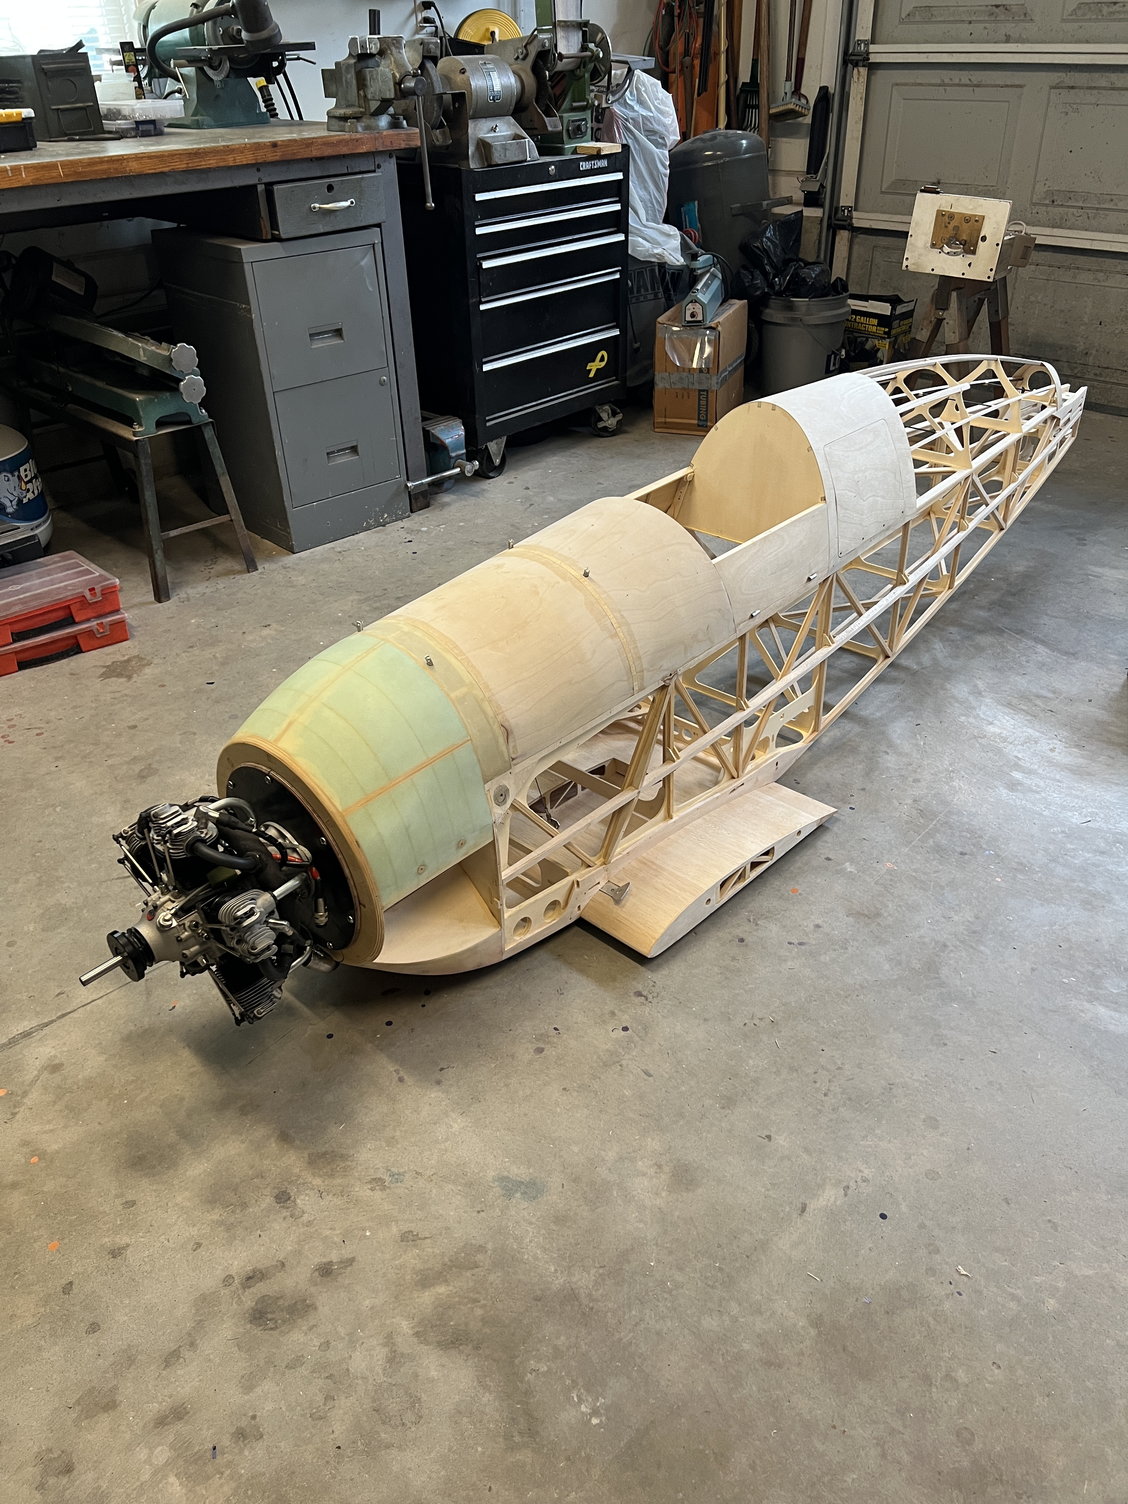
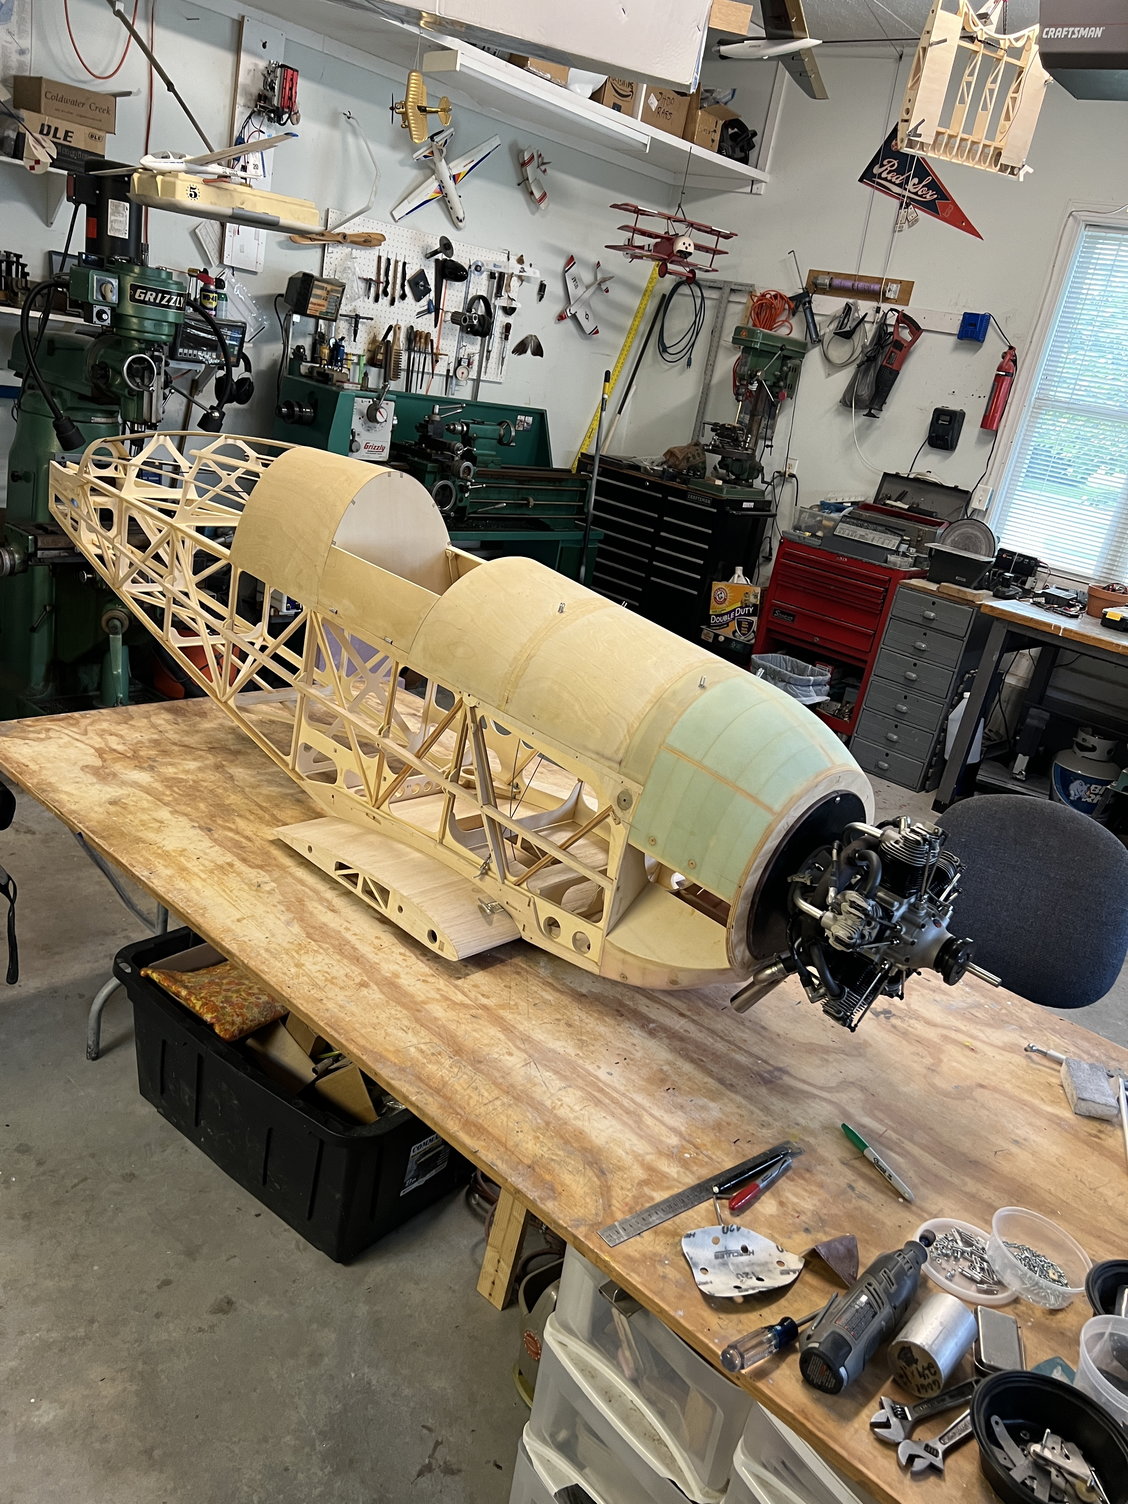
Fun times in the shop! You know you're getting close to finished when it comes time to mount the engine. I had envisioned a 1/2 inch thick piece of plywood as a mount but after I looked at the plans there was only a 1/4 of thickness available for a mount. Apparently the Moki 300 is longer than the 250. So I started looking around the shop for a suitable candidate. 1/4 inch aluminum plate would work fine but I didn't have a big enough piece. Then I ran into a piece of stock I've had kicking around for as long as I can remember. I have no idea where it came from.
This piece of material started life as a piece of high quality 7-ply plywood. But then the manufacturer took it and turned into what is best describe as a thick piece of phenolic. It was vacuum infused with a resin that looks, acts and SMELLS exactly like phenolic when you cut it (if you've ever cut phenolic you know what I'm talking about). Anyway, it's a fantastic candidate to be my thin, strong/stiff motor mount.
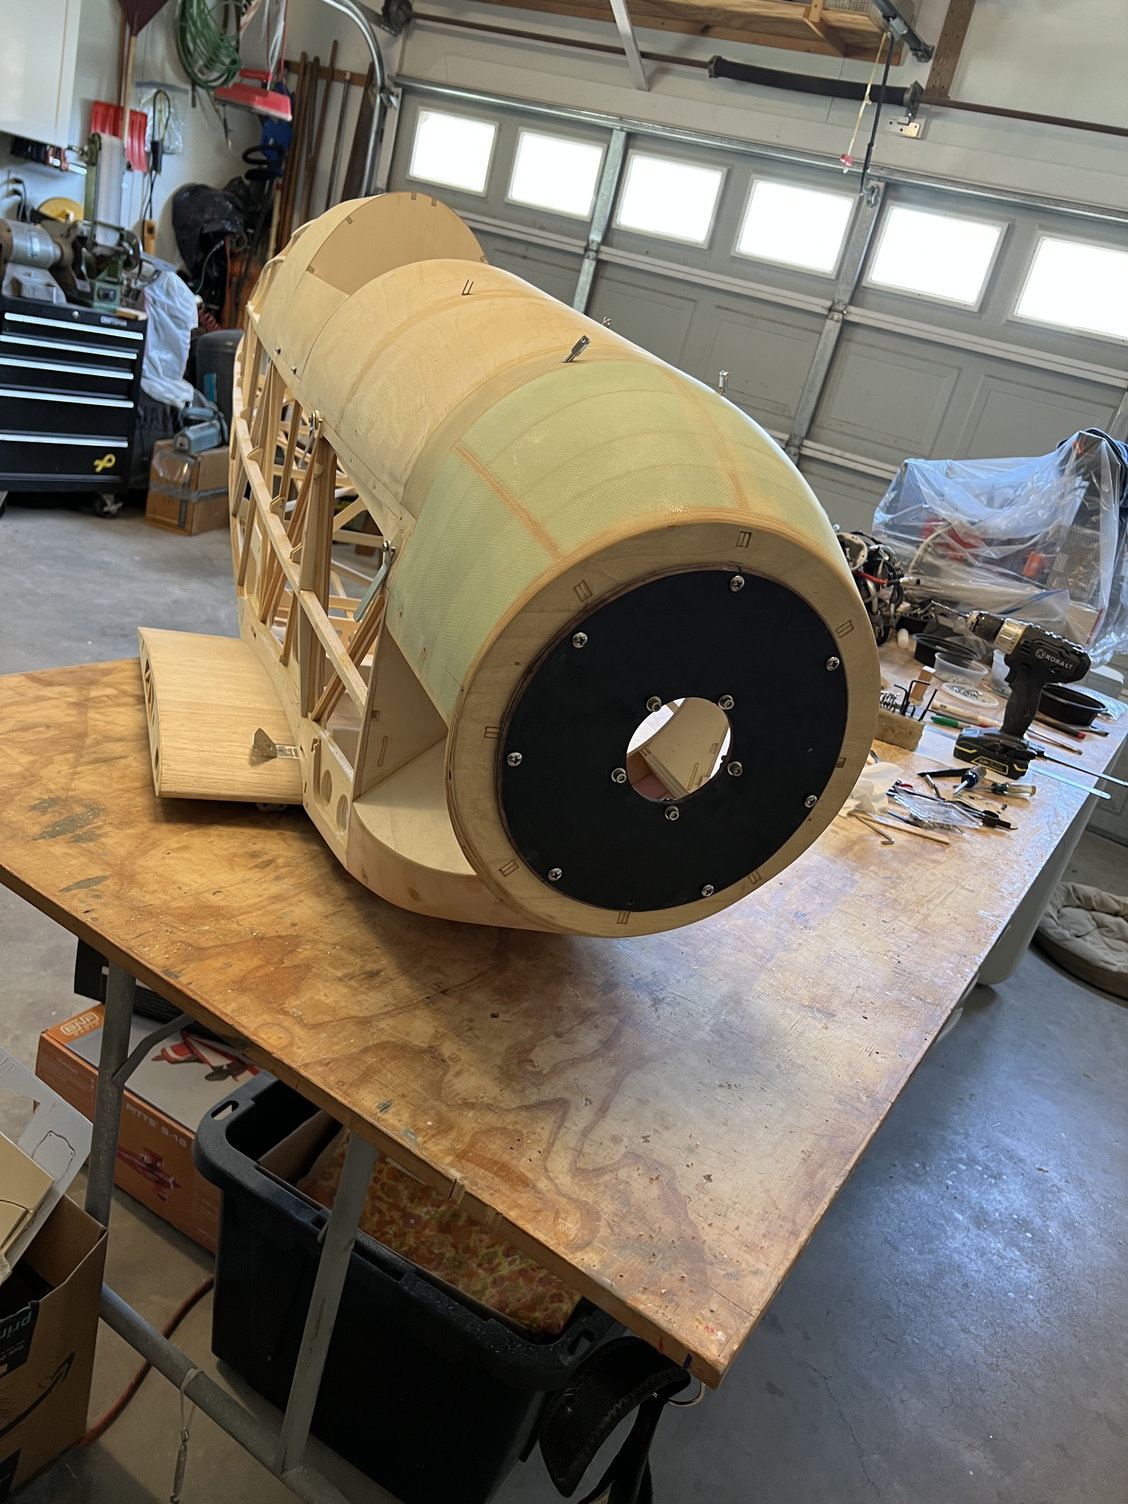
The only tricky part of the whole install was clearance for the 2-into-1 exhaust. The scant thickness of that mount didn't allow ANY clearance so I had to mill away most of the lower plywood ring of the fuselage front former. Structurally it's not a problem but it was quite a project. I stopped milling/sanding when I had about 3/8ths of clearance - not as much as I'd like but enough I think.
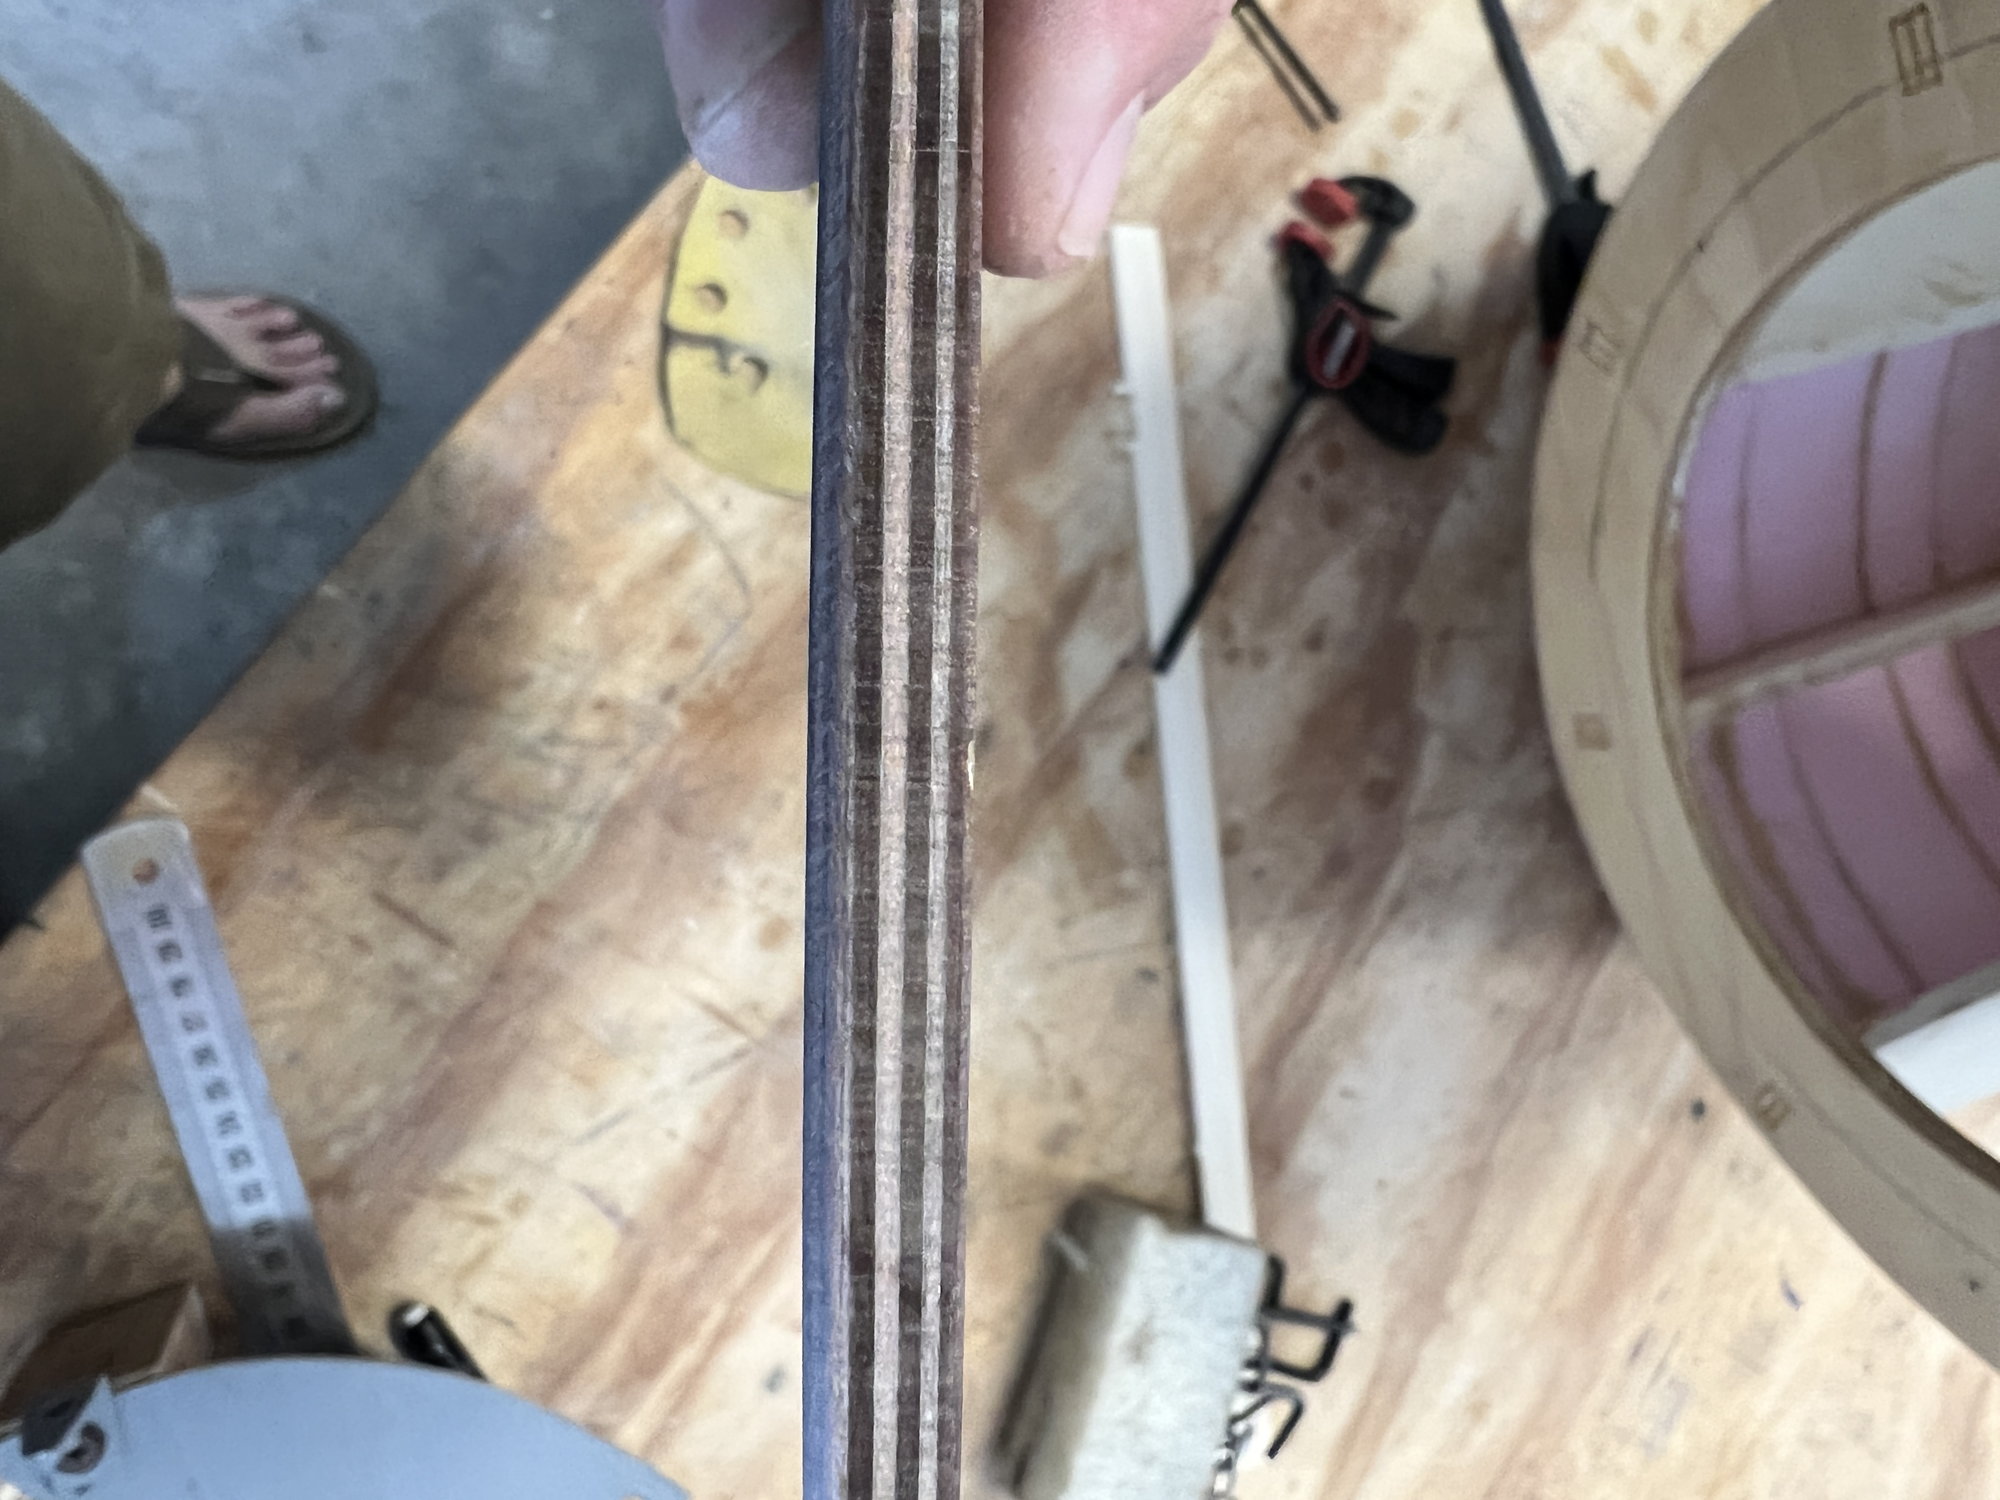
This material started out as 7-ply as you can see
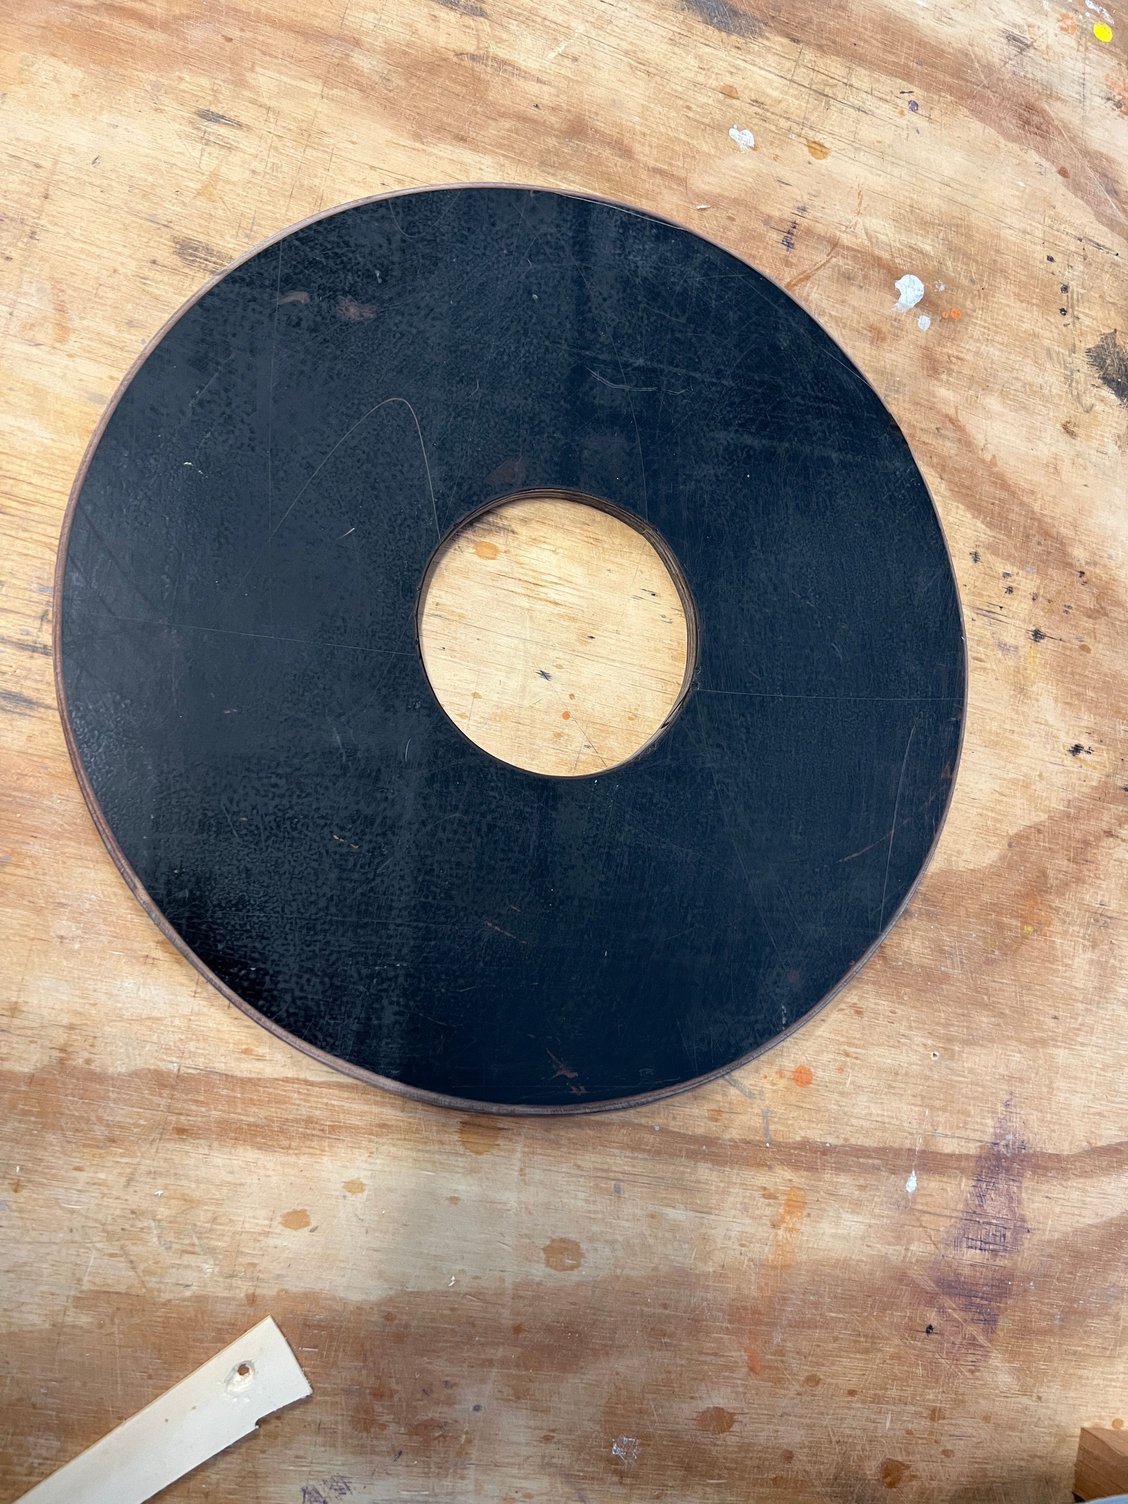
Here's the motor mount. It's not the lightest choice but close to perfect, I think.
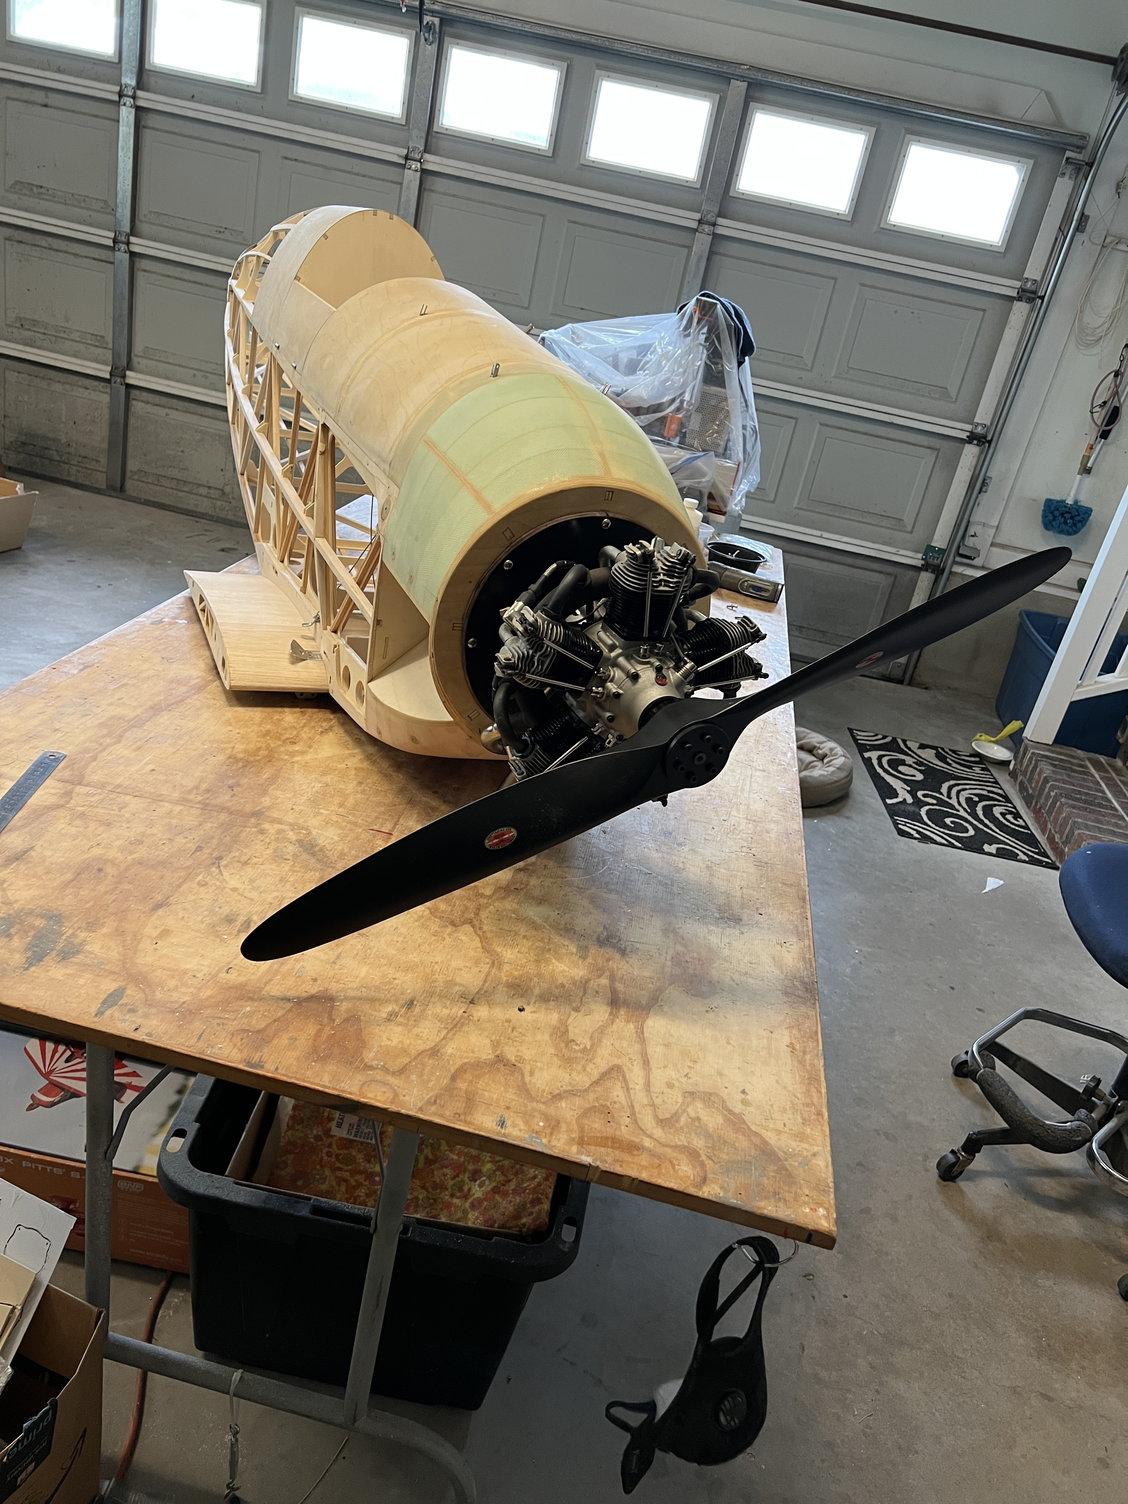
32X18 prop
Cover/paint is looming. As I said before, I'll be using Stewart systems to cover but final paint will be Klass Kote epoxy (it's more user-friendly than Stewart's final finish paint system)
This piece of material started life as a piece of high quality 7-ply plywood. But then the manufacturer took it and turned into what is best describe as a thick piece of phenolic. It was vacuum infused with a resin that looks, acts and SMELLS exactly like phenolic when you cut it (if you've ever cut phenolic you know what I'm talking about). Anyway, it's a fantastic candidate to be my thin, strong/stiff motor mount.
The only tricky part of the whole install was clearance for the 2-into-1 exhaust. The scant thickness of that mount didn't allow ANY clearance so I had to mill away most of the lower plywood ring of the fuselage front former. Structurally it's not a problem but it was quite a project. I stopped milling/sanding when I had about 3/8ths of clearance - not as much as I'd like but enough I think.
This material started out as 7-ply as you can see
Here's the motor mount. It's not the lightest choice but close to perfect, I think.
32X18 prop
Cover/paint is looming. As I said before, I'll be using Stewart systems to cover but final paint will be Klass Kote epoxy (it's more user-friendly than Stewart's final finish paint system)
Last edited by mitchilito; 08-14-2022 at 02:12 AM.
 08-14-2022, 02:10 AM
#153
JW calls for no down or side thrust and I prefer not to have any. Instead, if needed, I will add a throttle to elevator mix instead of down thrust and I prefer to fly the rudder by hand.
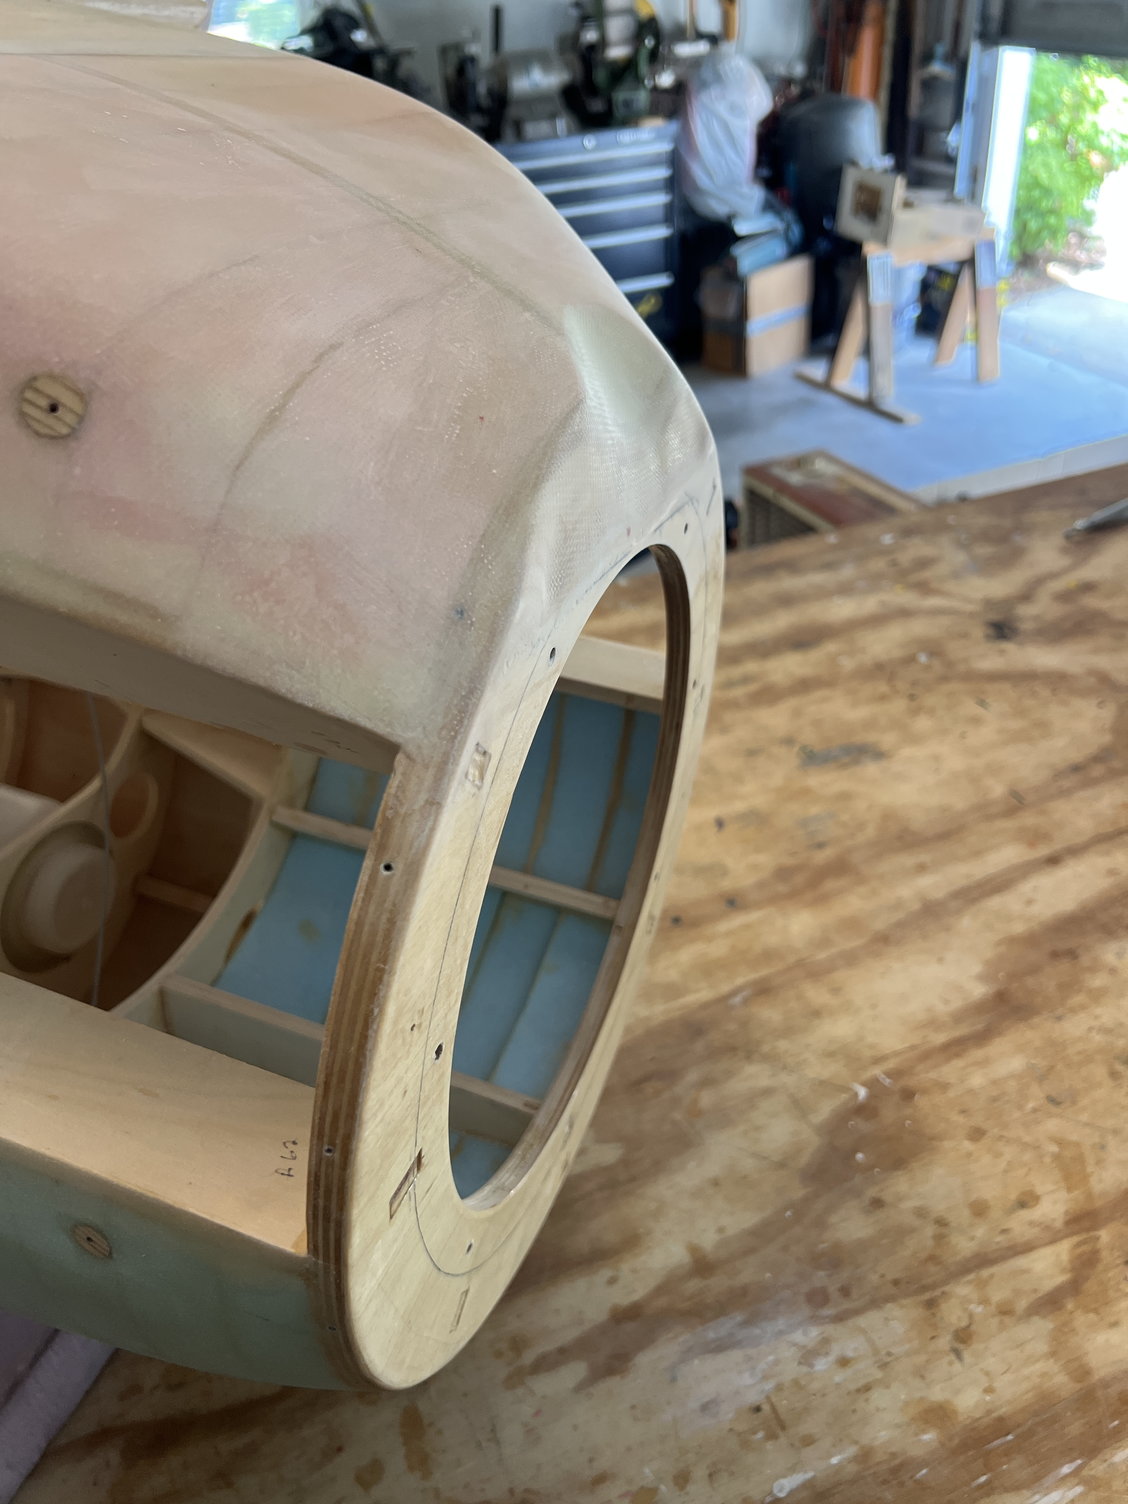
Bottom front milled away for exhaust system. I re-glassed it after milling
Bottom front milled away for exhaust system. I re-glassed it after milling
Last edited by mitchilito; 08-14-2022 at 02:26 AM.
08-14-2022, 04:43 AM
#154


That sounds good, a lot easier to mount the motor as well!
08-25-2022, 07:02 PM
#157
HI, have a couple of questions, received my kit today minus the cowl ( chasing it up) All instructions in German, no use to me, also the plan's do not appear to be full size, could you advise me of the length of the wing plan that you have and do you build directly over it? I have built a couple of 3rd scale Waco's and the plan's where a lot bigger!!
Anyway would appreciate if you could spread some light on this for me.
Regards Tmac. ( Just had another look at the plan's, they say 50%, guess I need to have them enlarged or do you just build from the gigs)
Anyway would appreciate if you could spread some light on this for me.
Regards Tmac. ( Just had another look at the plan's, they say 50%, guess I need to have them enlarged or do you just build from the gigs)
Last edited by tmac48; 08-25-2022 at 08:40 PM.
08-26-2022, 03:04 AM
#159
Now that I'm thinking about it, there's one more. place you need a full size plan to build over: the wing strut bracing rods have to be glued up over the plans.
(Tmac I tried to send you a pm. Let me know if you get it.) I'm going on record right here to vent about how much I HATE the RCU message system. For whatever reason I can't ever see my sent items (even when I filter the date range appropriately)
Last edited by mitchilito; 08-26-2022 at 03:46 AM.
08-26-2022, 05:28 AM
#160
Yes Mitch got your PM and have replied with my email. If I can't get the full size plans then I will gladly pay you for a copy, let's wait and see what JW has to say.
regards tmac48.
regards tmac48.
Last edited by tmac48; 08-26-2022 at 05:34 AM.
08-28-2022, 02:16 PM
#162
tmac48.
08-29-2022, 05:40 AM
#163
Thanks for the English instructions, still waiting to hear back from JW regarding the full size plans and the cowl and tail wheel. I must enforce some of your comments about the quality of the contents of the kit, superb!! I was up till 2am this morning sorting out a few of the items to build the centre sections, think I might start with them, would you see any complications that may occur by doing this?
tmac48.
tmac48.
NOTE: One warning to anybody building this kit: you can't always trust what JW wrote on the parts packaging: If it's marked "Fuselage" it may or may not wind up used for that. Just saying. . .. .
Last edited by mitchilito; 08-29-2022 at 05:47 AM.
08-29-2022, 05:44 AM
#164
I finished all the struts: 2 coats of Minwax Polycrylic followed by two coats of Klass Kote white primer - sanding between each of the 4 coats of course. I'm ready to glue them up and rig the entire aircraft.
Pic shows metal parts I have to prime now.
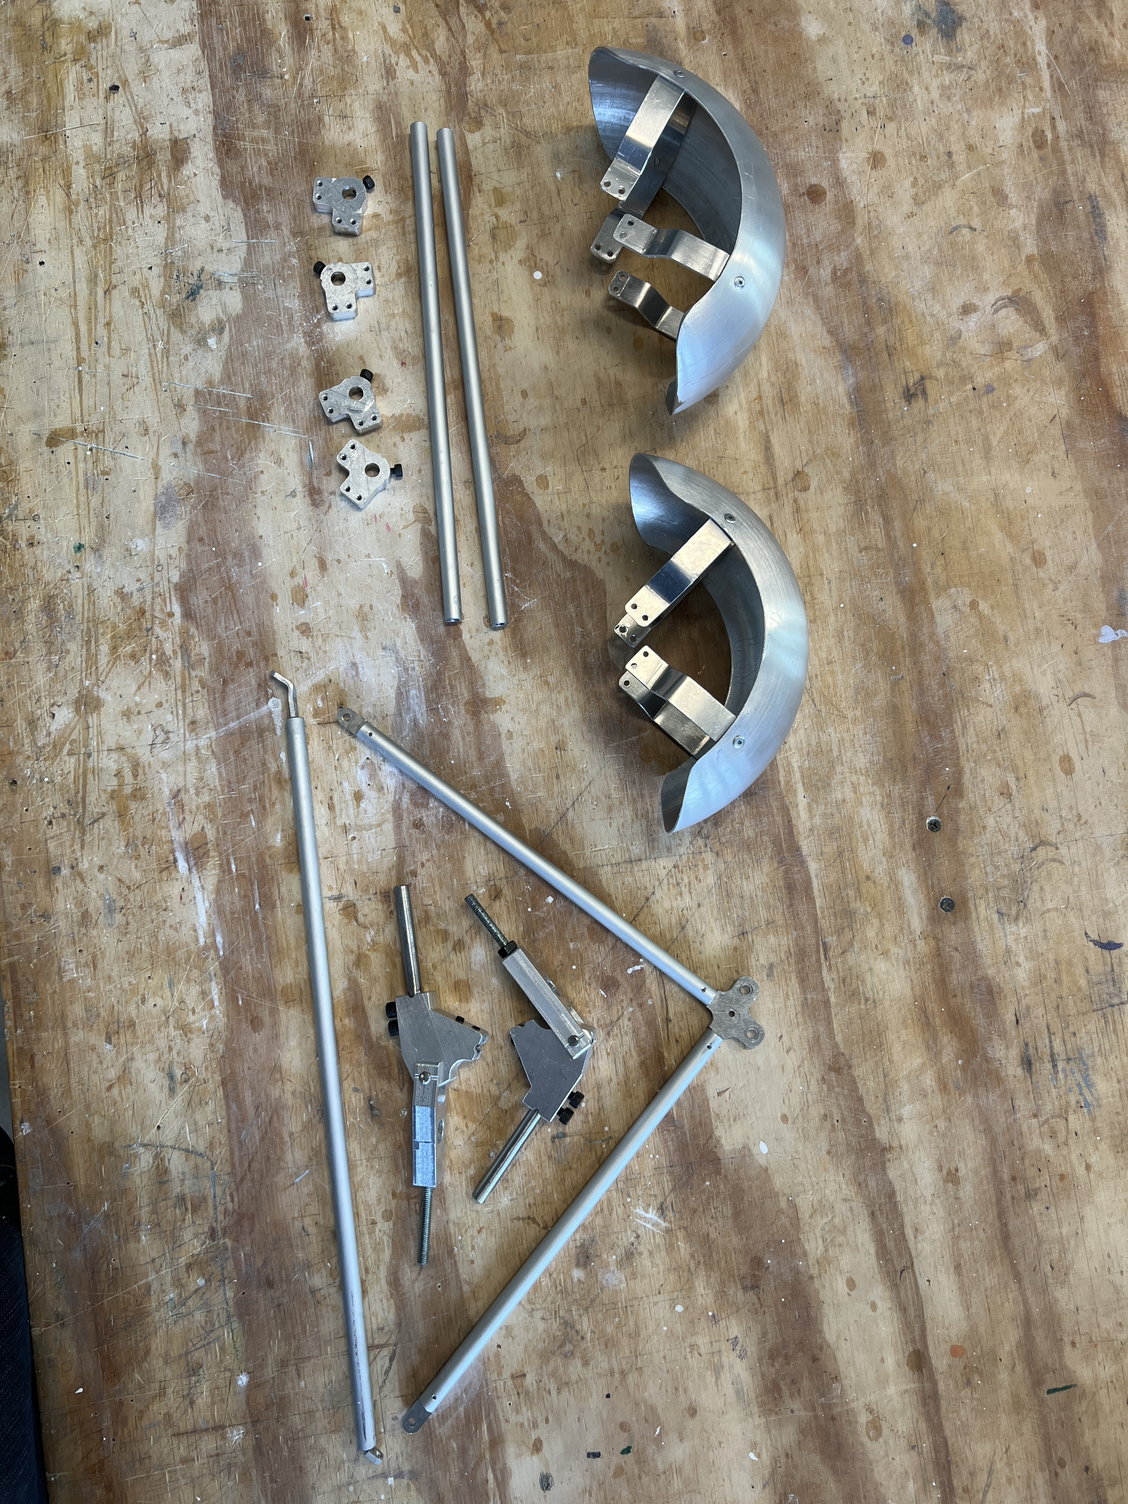
Items on top will wind up yellow, items on the bottom will be black.
Pic shows metal parts I have to prime now.
Items on top will wind up yellow, items on the bottom will be black.
The following users liked this post:
tmac48 (08-29-2022)
The following users liked this post:
tmac48 (09-04-2022)
09-05-2022, 12:21 AM
#167
On another note, I have been able to get the full size plans printed in AUS and also had the wing done in a mirror image so have a left and right to build over. Once again thank you for the offer of yours. One more thing,a quick look at the root ribs it appears that if I build the wings as the root and seconad ribs are supplied then the dihedral of all four wings will be the same when I believe the build instructions call for the top wing to be +1 1/2 and the bottom at +3 deg. Can you possible remember if you had any complications with this area?
( The four root ribs and the next four with the holes for the 12 mi aloy tubes are identical!!!) IE WILL ALL PRODUCE THE SAME DIHEDRAL.
 09-05-2022, 04:27 AM
#168
I think I had better get some sleep and carefully go over the plan again!!. I think I see where I went astray, some of the dihedral on the bottom wing is half arrived from the middle section and the top wing gets its dihedral from the wing only, is this correct? anyway will revisit it again in the morning,good night.
tmac48
tmac48
09-05-2022, 05:43 AM
#169
Terry, it’s been a long time since I built the wings but I’m pretty sure the wing panels have no dihedral built in. Pretty sure it’s all in the center sections.
BUT like I said it’s been a looooong time since I built them. . . .
The build jigs should show you tho-
BUT like I said it’s been a looooong time since I built them. . . .
The build jigs should show you tho-
Last edited by mitchilito; 09-06-2022 at 01:48 AM.
09-05-2022, 11:42 AM
#170
Tmac48(Terry Mac )
09-05-2022, 02:24 PM
#171
Well I knew a good night's sleep would do the trick!! After going over the plans again there it was in black and white. The four wings have all got 1'5 dihedral and the bottom centre section has 1'5 giving the bottom wing a total of 3 deg dihedral.
tmac48
tmac48
 Thats better Mitch .
09-08-2022, 02:44 AM
Thats better Mitch .
09-08-2022, 02:44 AM
#174
Mitch you would be kind enough to post a few pics of the upper centre wing section, need some clarification regarding the trailing edge assembly. Looks like an awful amount of sanding in the hand hold area!! Thanks in anticipation.
Last edited by tmac48; 09-08-2022 at 02:47 AM.