


Welcome to Club SAITO !
 11-01-2020, 06:54 PM

My Feedback: (1)
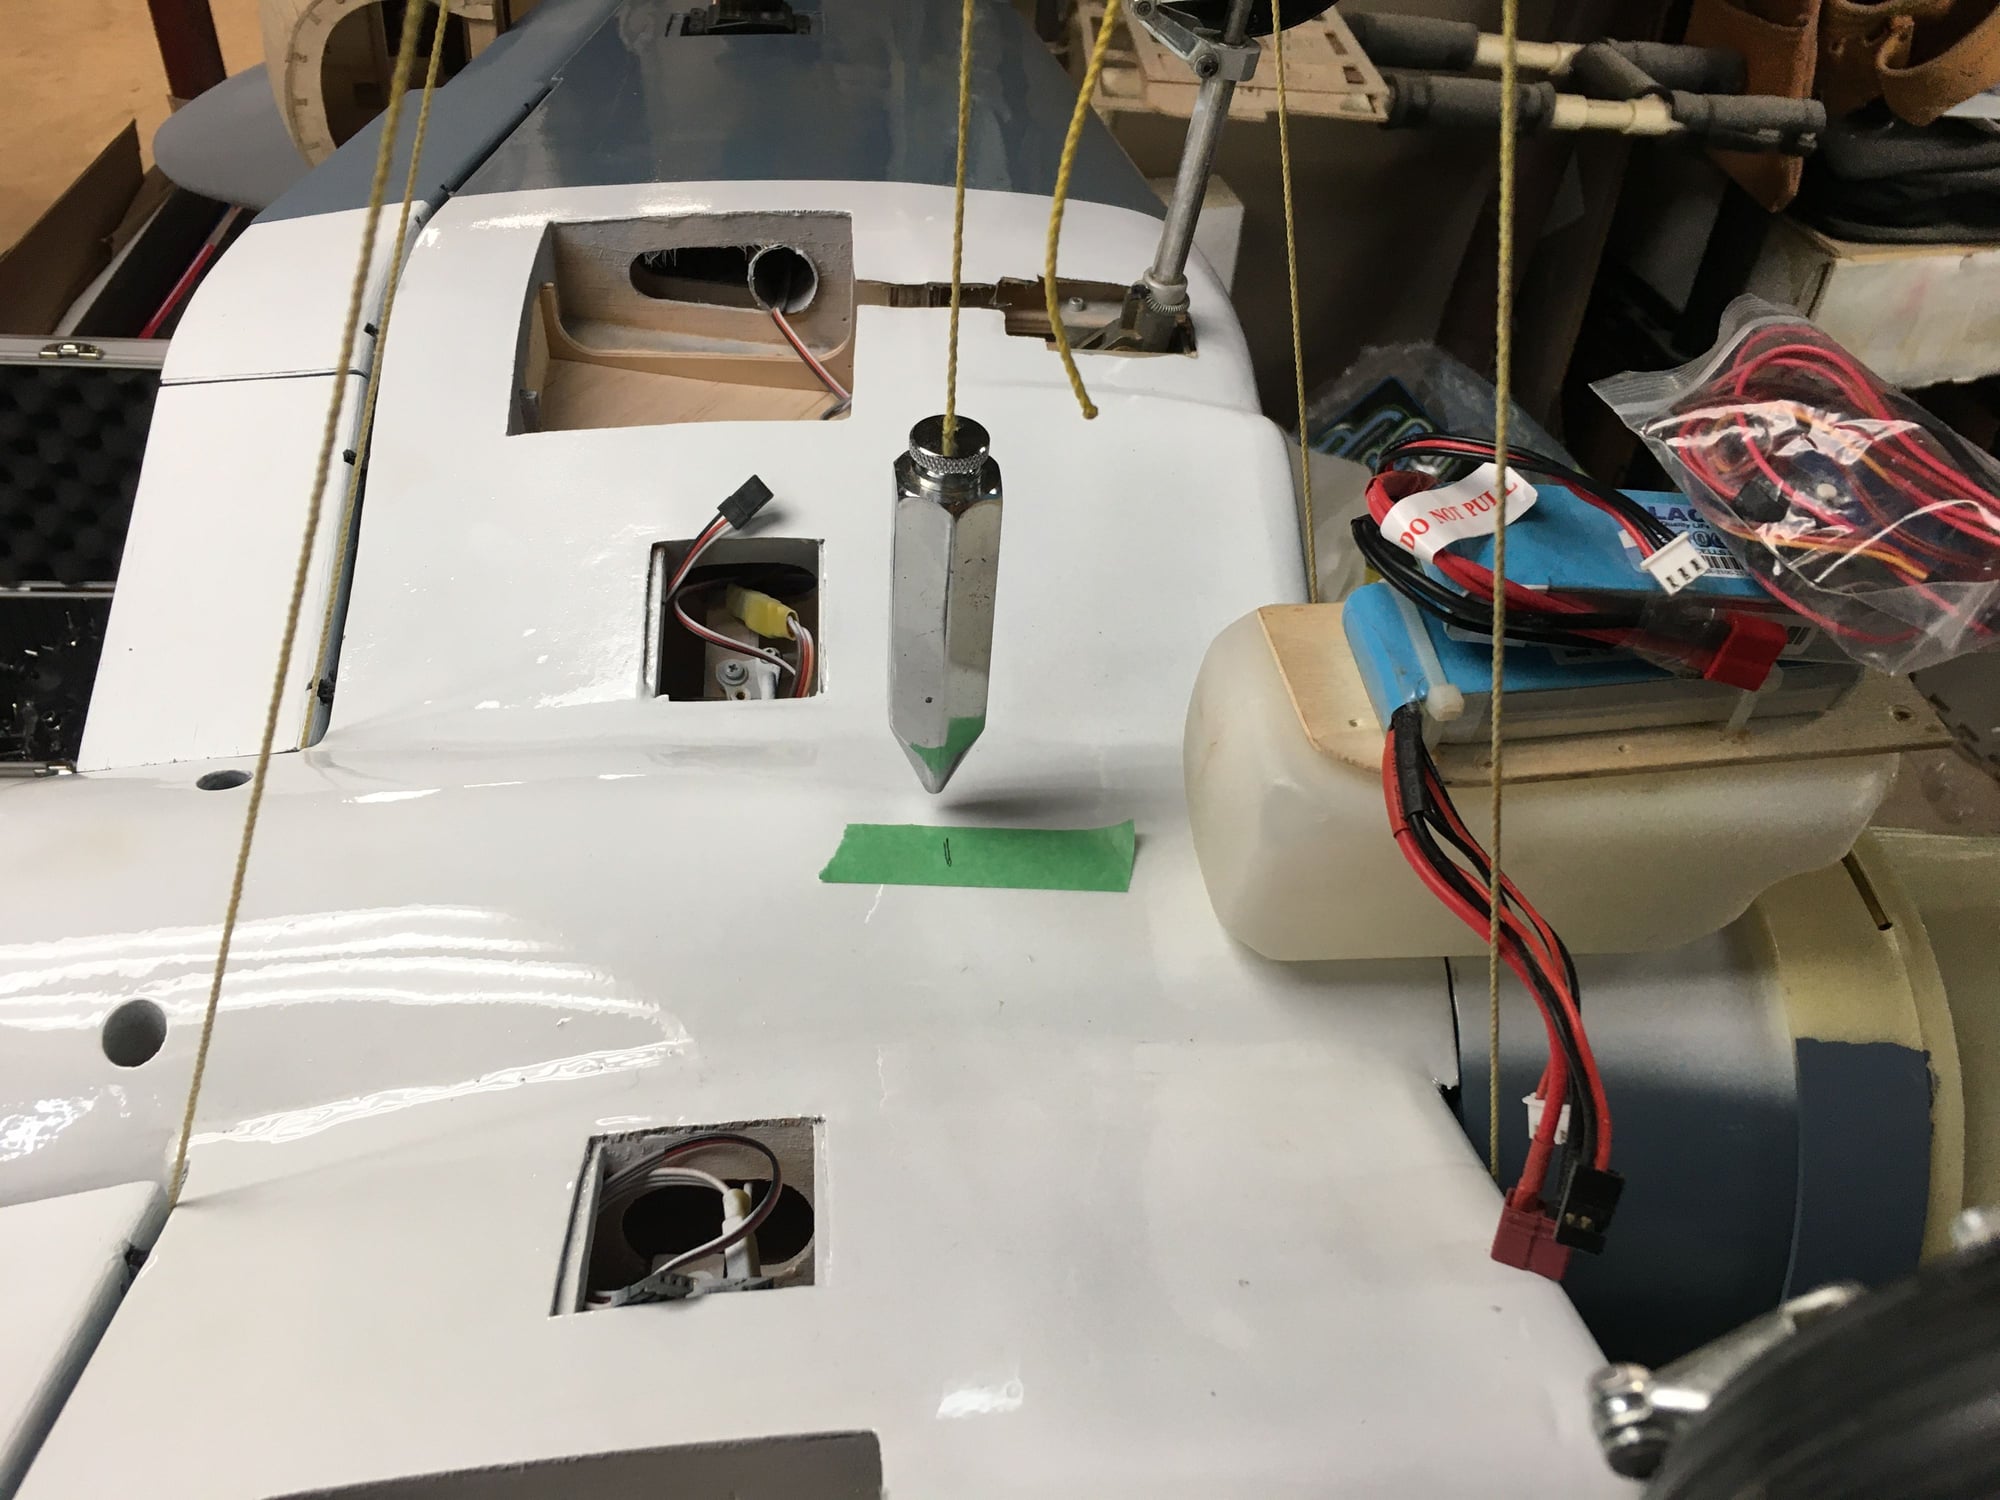
Speaking of Corsairs, I finally got the Clear coat on mine afer sitting a few years. I know a few places got a bit scarred up, but I was done tinkering trying to get it perfect only to have to wait fora decent day to spray, every time I do that, I wind up damaging it, so just said F it and did it. This is the one the 120R3 is going into.
I sprayed it out in the garage, and brought it down into my shop to cure, so it is a bit smelly in here, that with a beer and I'm feeling a bit, um, happy? I used automotive clear coat so it should be plenty fuel proof now. It's dry to the touch, but very soft and will take a few days to harden before I can handle it again. Next up is to fit the flaps and ailerons, I can air brush clear on them later, then I have to move all the motor mount T-nuts to re-center them for the Radial, and can start installing the radio gear and everything else. Spraying the clear was the biggest hold up, just finding the time when the garage is empty. Now that that is done, I can go full bore finishing it.
I sprayed it out in the garage, and brought it down into my shop to cure, so it is a bit smelly in here, that with a beer and I'm feeling a bit, um, happy? I used automotive clear coat so it should be plenty fuel proof now. It's dry to the touch, but very soft and will take a few days to harden before I can handle it again. Next up is to fit the flaps and ailerons, I can air brush clear on them later, then I have to move all the motor mount T-nuts to re-center them for the Radial, and can start installing the radio gear and everything else. Spraying the clear was the biggest hold up, just finding the time when the garage is empty. Now that that is done, I can go full bore finishing it.


Jim
 11-01-2020, 07:19 PM
Well, that is pretty much what is will be. LOL I just touched up the bare spots with Tamiya Royal Blue which is pretty close to the color I have on it already. Which just now got me thinking. I had color samples made off patches I had brought in to color match. I got to looking and found I had used Model Masters as the panel colors I believe I used Dark Sea Blue for the top color, Intermediate Blue for the sides and bottom wings. I just now found the jars. Guess I can go back and redo the patches so they match now. I can also do the canopy with the MM instead of the latex, it will cover better.
Still need a pilot though. The one I have is for a helicopter and looks like a limp wristed frenchy wearing a helmet. I need one with a scarred face and smooshed nose like Pappy Boyington for the Corsair!
Still need a pilot though. The one I have is for a helicopter and looks like a limp wristed frenchy wearing a helmet. I need one with a scarred face and smooshed nose like Pappy Boyington for the Corsair!
11-02-2020, 04:29 AM
They seem to come out of the woodwork when a nitro engine starts.
Sheech
11-02-2020, 01:10 PM
Got my overhauled 72 broken in good a couple of months ago and finally got it back on the test stand yesterday. I was going to post numbers yesterday evening but the numbers looked too good to true. Ran it again today and got the same numbers.
FA-72 (1.2 Rated HP)
Fuel: 15% nitro
Prop: APC 13X7
Temp: 56�f
Peak RPM: 9940
Idle RPM: 1850-1900
Calculated HP: 1.414 (17.8% more than advertised)
That calculated hp beats both of my FA82's in stock form. This puts the 72 on my list of top performers, along with the 50,100 and the 180.
FWIW:
Crunchie's 50 made 8.5% more than rated hp.
My 100 makes 6.6% more than rated hp.
My 180 makes a whopping 19.3% more than rated hp.
On the other hand both of my 82's made 11.6% less than rated hp. After a compression ratio increase to 11.72:1 one of my 82's now makes 2% more than rated hp. The other remains stock.
Last edited by Glowgeek; 11-03-2020 at 05:14 AM.
 11-02-2020, 03:12 PM

 11-02-2020, 04:22 PM
I will let you know, Gary, though it may be a few months. Thanks. I just finished up the clear on the ailerons and flaps, and did touch up on the spots I didn't get enough on. I used my Paasche Talon with the #3 fan tip. Almost like a mini detail gun, just minus the fan adjustments. Since the clear had two days to harden, it will take a bit of buffing to blend the edge, but the clear is still soft enough for the thinner to bite into it. I will give it a week or two before I hit it with 2K wet and buff it out. Then it is on to full blown radio and engine install. Need to go through my servo bin and see if I have enough 3010 Futabas to complete the install. I have to take out the flap servo and see what I put in there, may put a higher torque one, probably Hitec MG since it is driving all flaps. Need 4 3010 and a 3004 for the throttle. Have a servo in there now and I think it is for the tail retract, but have to rework the steering cables since I had to take the brace I had it attached to out to fit the cockpit. I may use a mini servo for that, I have a few of those laying around that will work just fine and will be over the CG. Pretty good feeling seeing a project like this coming to fruition. I can't remember if I started it in 2013 or 2014. I do know I tested out the clear coat of latex in 2014, that was when I had painted the topper to match my truck and had a little clear left in the gun. Had enough for the top of the wing and part of the fuse. Thankfully the clear I had tried to use from a spray can, Rustoleum 2X clear, did not wrinkle when I shot the 2K over it. That was my biggest concern when I sprayed it Saturday, but it came out good. Unfortunately the wing had slid down and got some marks in the paint, but I wasn't about to repaint the panels since it marked the intermediate blue and the white which would have set me back at least a month for the latex to fully cure before I could clear it again, and there were some stains on the fuse, but it should be fine, just gives it character.
OK I must be high on paint fumes and ramblin. Later
OK I must be high on paint fumes and ramblin. Later
11-03-2020, 05:23 AM
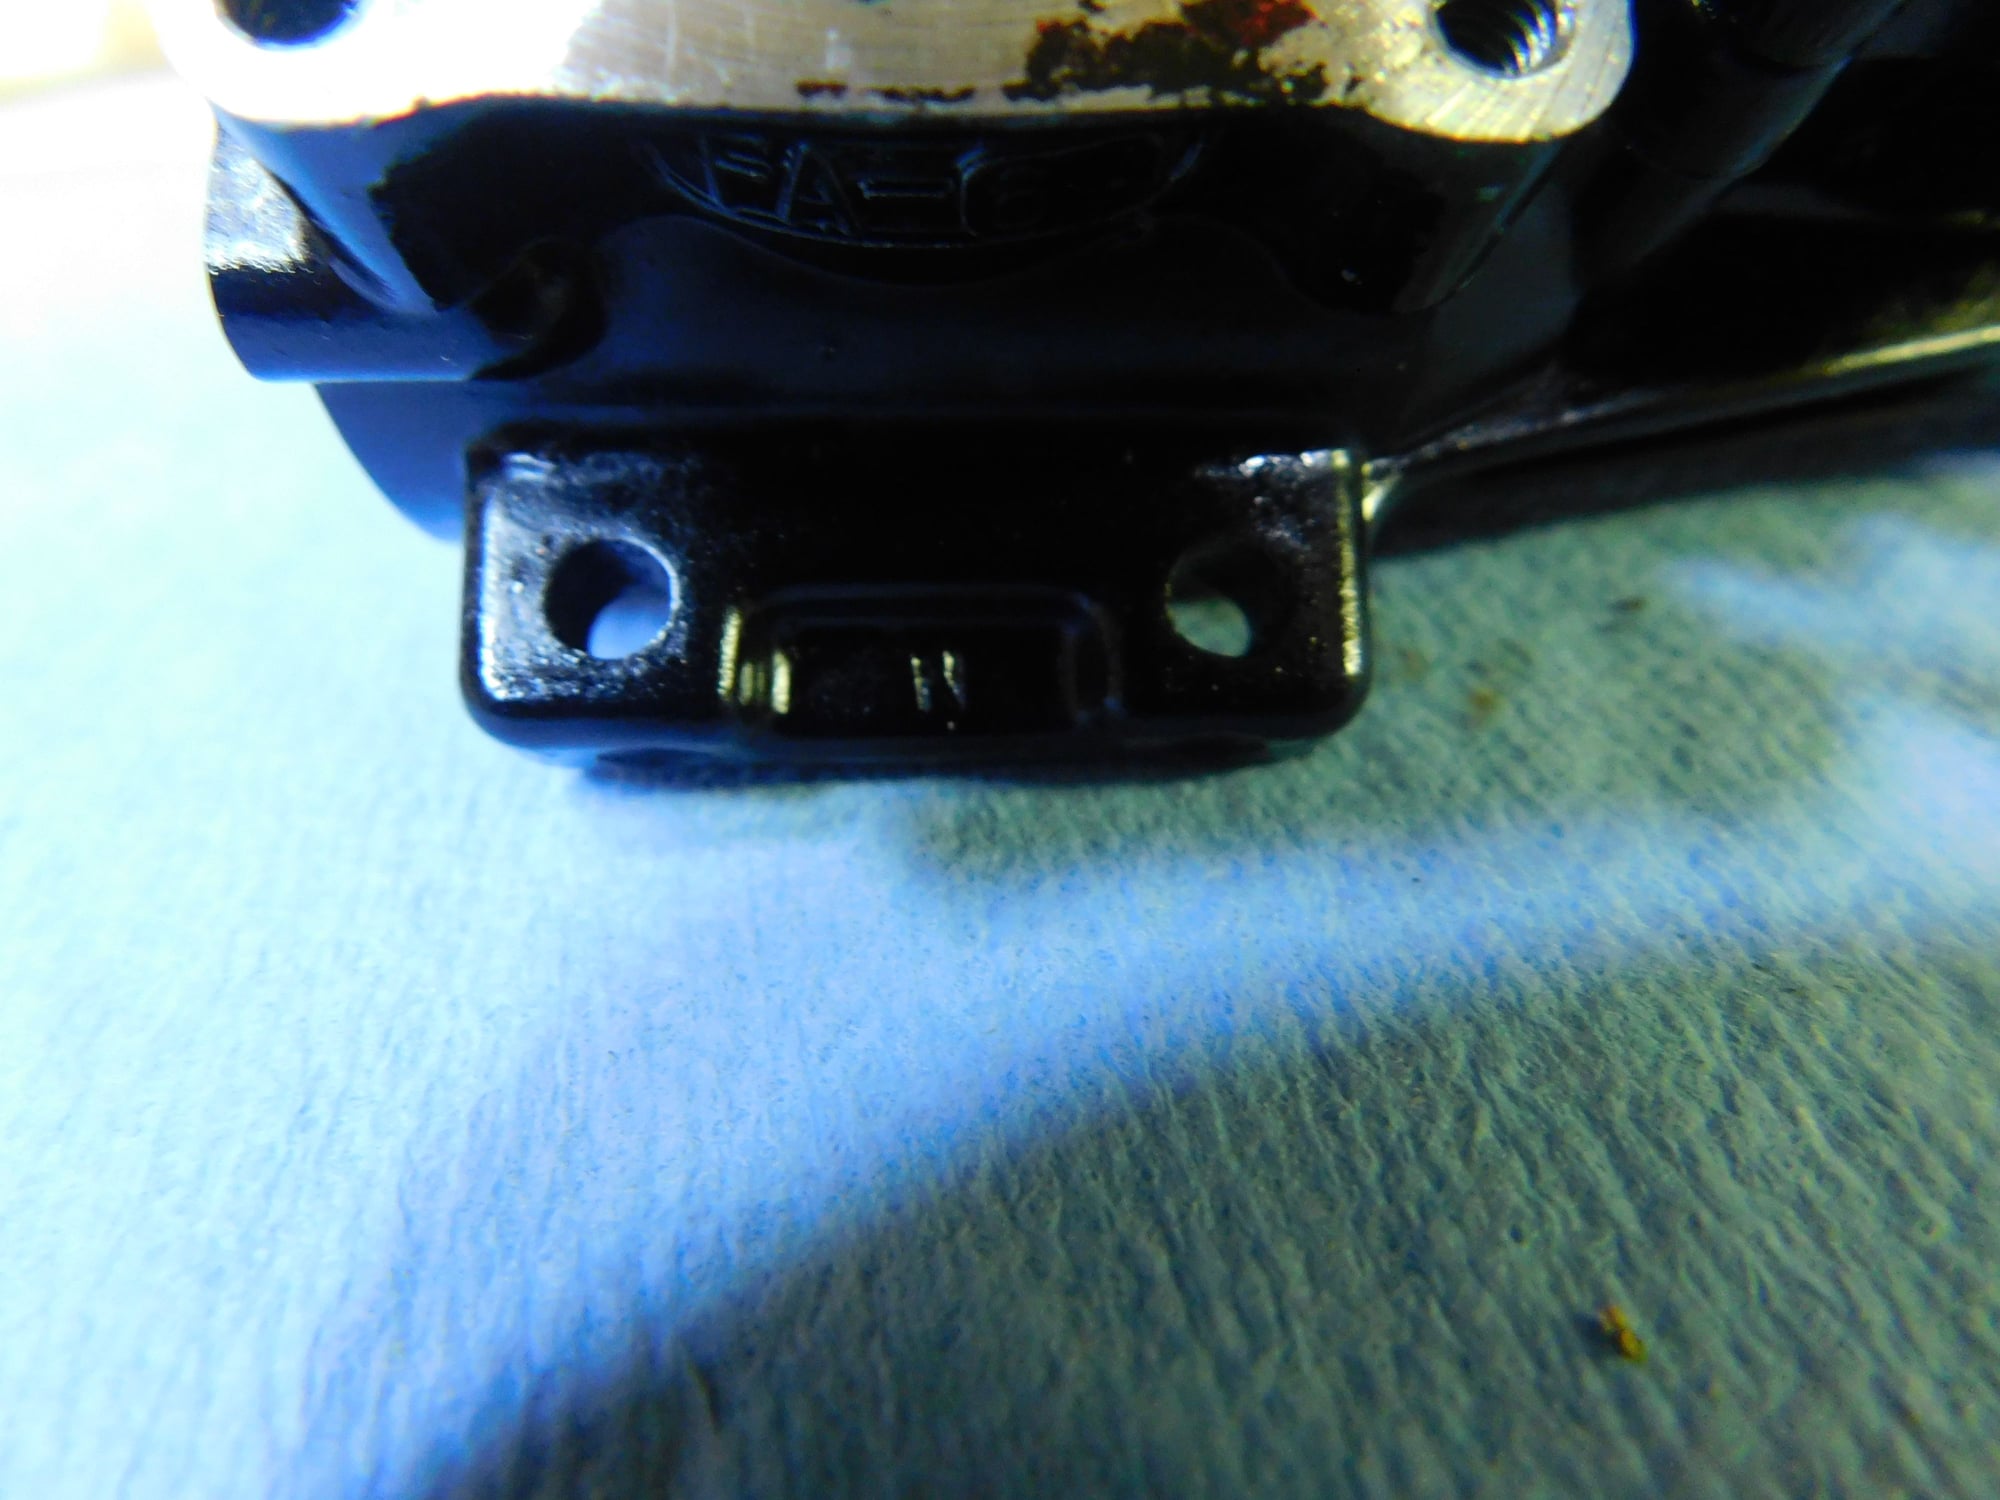
Had a nice talk with Dave yesterday, he's sending me a high compression 65. Test results coming later this week. It'll be interesting to see how tractable the engine is compared to the lower compression version I tested earlier this summer. There is an "A" stamped on the mounting lug.
11-03-2020, 05:36 AM

My Feedback: (102)

Join Date: Dec 2001
Location: Colonial Beach, VA
Posts: 20,370
Likes: 0
Received 25 Likes
on
25 Posts
Thanks for great visit, we also discussed trying to do the seemingly impossible and establish a time line for certain versions of Saito engines. Most of the first versions of certain sizes have no initial on the right lug. Then throw into the mix, buying a new crankcase, the engine will have no initial on the right lug. You can't go by engine reviews because sometimes Clarence Lee et al do not receive engines to review for 2 or 3 years after their introduction. It's a head spinner.But kinda fun.
 11-03-2020, 07:02 AM
I can almost see the results now!
LOL
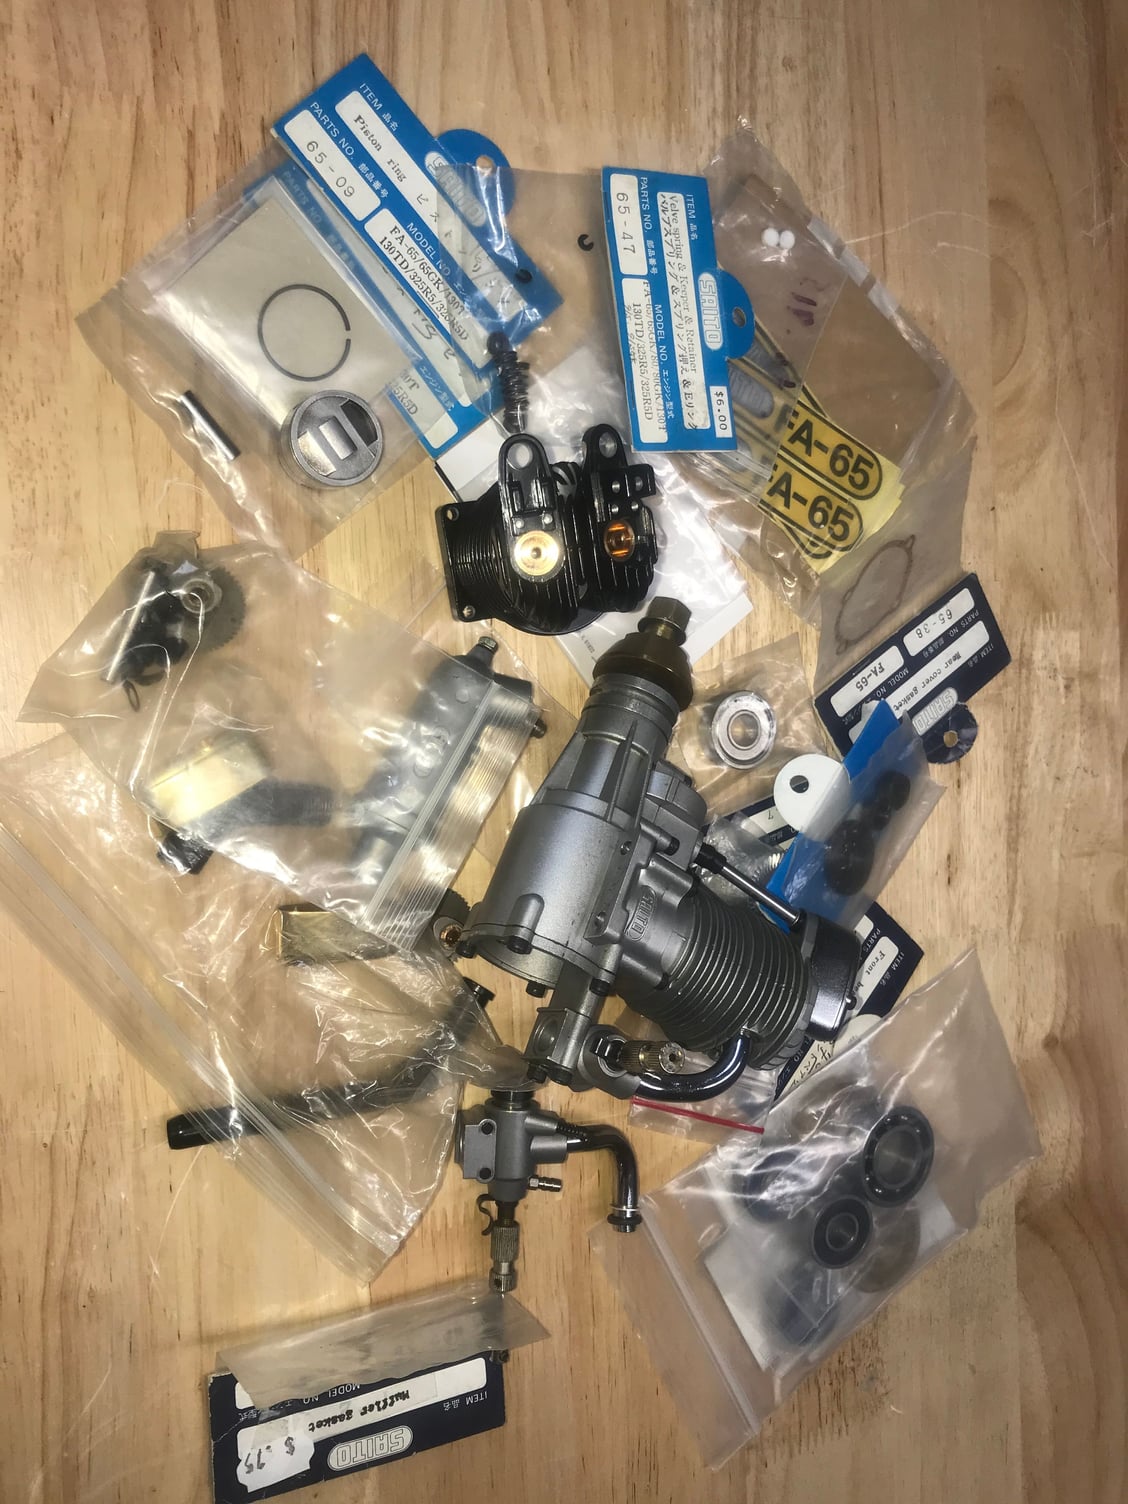
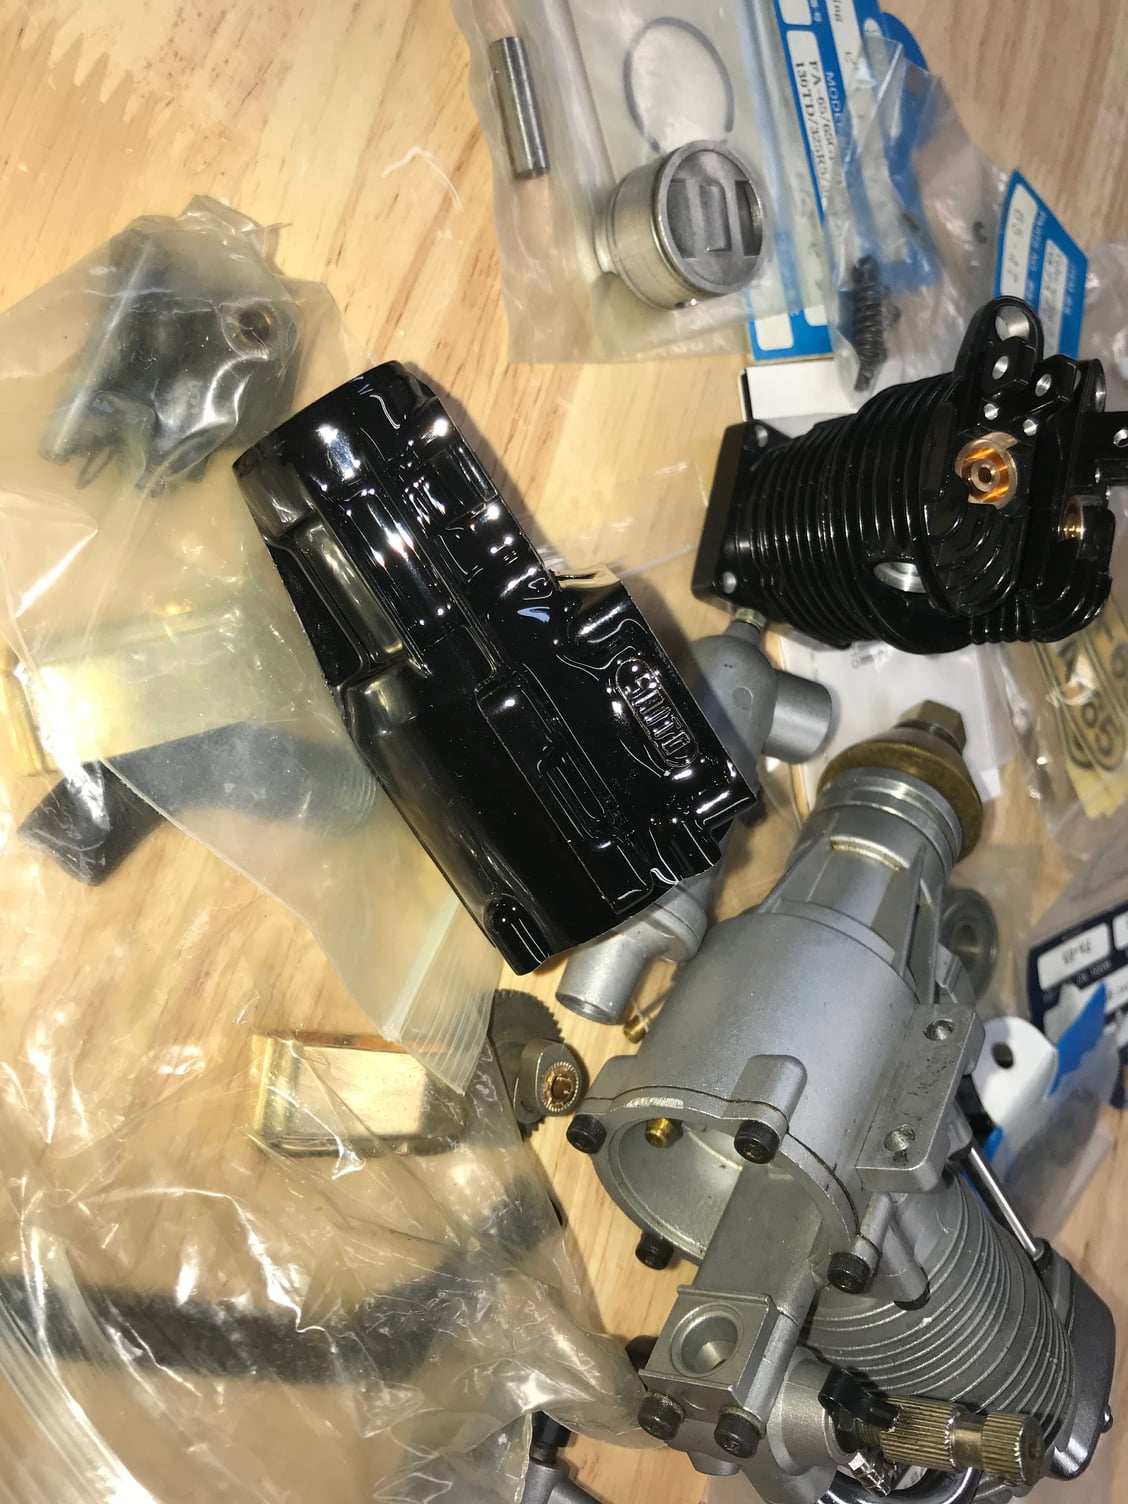
Last year I offered up a like new 65 and parts pile project at dirt cheap. Got no takers. Parts included a new case, new 325r dual plug cylinder , a pile of new bearings, gaskets, rings, pins cams lifters carb etc,
It sat around here till last Sunday when it was either do it or toss it out time.
I decided to do it. First job was to etch the case and give it a coat of gloss black Imron epoxy .
Maybe we can compare the dual plug black 65 high compression to you and Dave's perfect running very tractable HC 65.
LOL
Last year I offered up a like new 65 and parts pile project at dirt cheap. Got no takers. Parts included a new case, new 325r dual plug cylinder , a pile of new bearings, gaskets, rings, pins cams lifters carb etc,
It sat around here till last Sunday when it was either do it or toss it out time.
I decided to do it. First job was to etch the case and give it a coat of gloss black Imron epoxy .
Maybe we can compare the dual plug black 65 high compression to you and Dave's perfect running very tractable HC 65.
Last edited by Jesse Open; 11-03-2020 at 07:28 AM.
11-03-2020, 08:24 AM
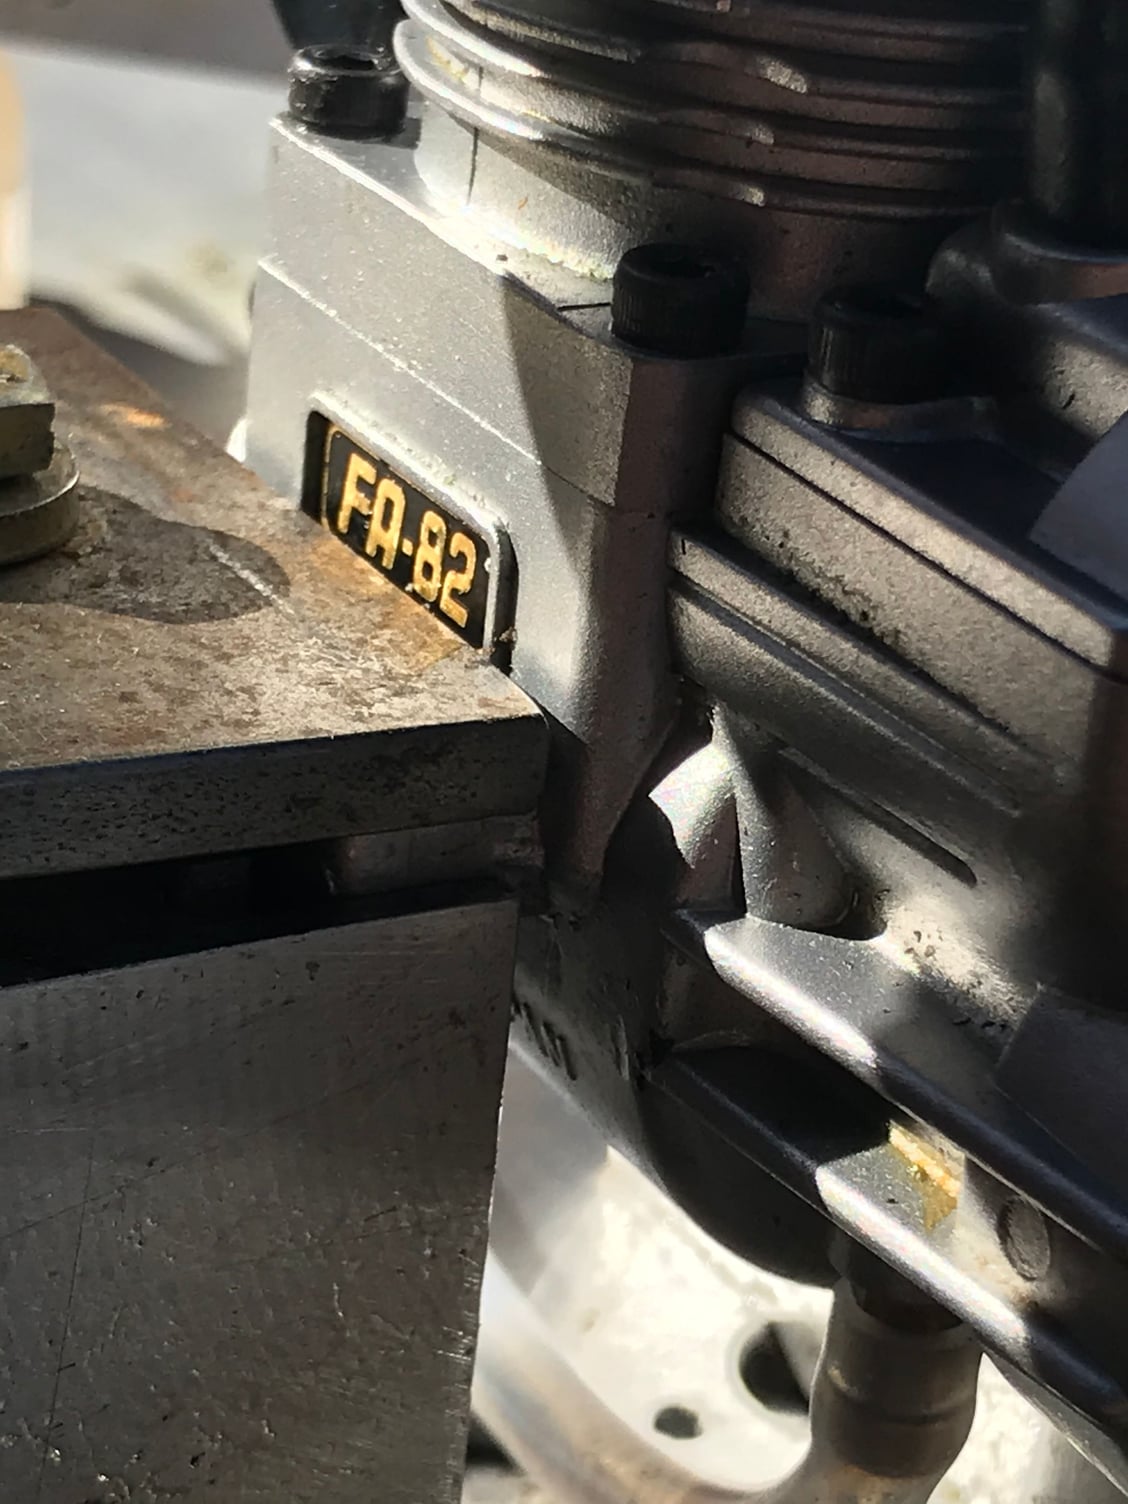
Saito FA-82B 14% nitromethane, 12% sin-thetic refer oil, 2% model engine castor oil.
Prpo is an APC (of course) 13-8.
Ambient air temp 50 degrees.
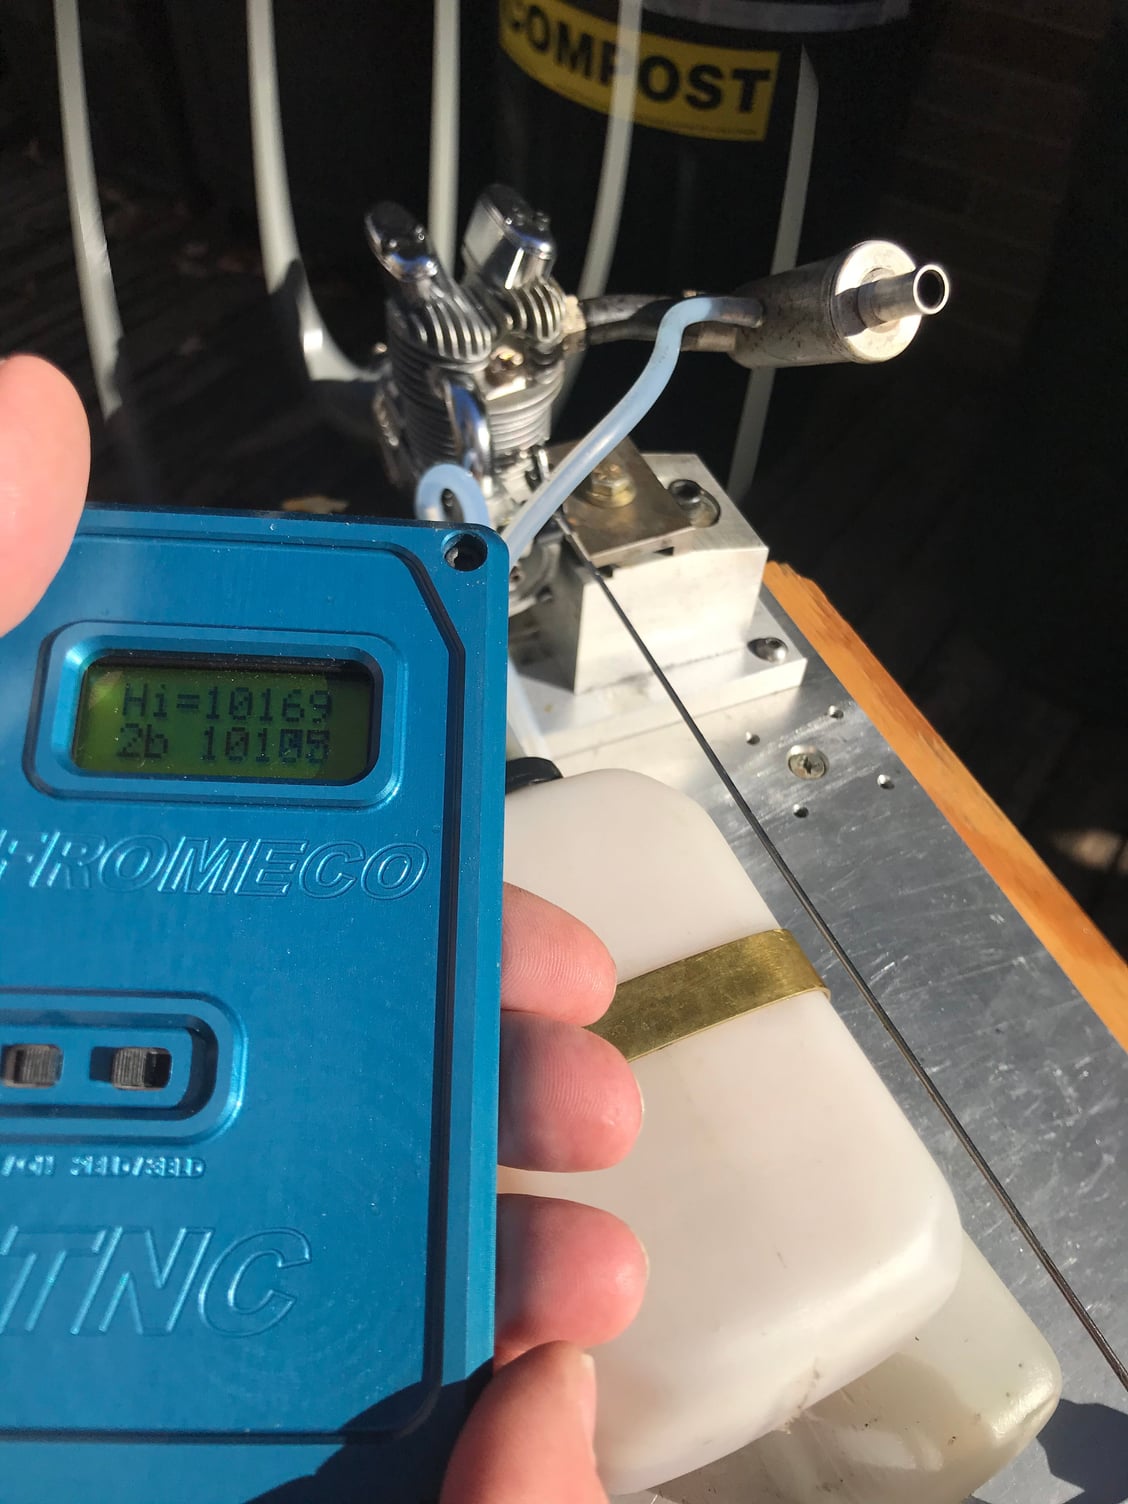
Taken today
Prpo is an APC (of course) 13-8.
Ambient air temp 50 degrees.
Taken today
Last edited by Jesse Open; 11-03-2020 at 08:27 AM.
 11-03-2020, 09:38 AM
I dont look at thiose ratings as anything but rough approximations.
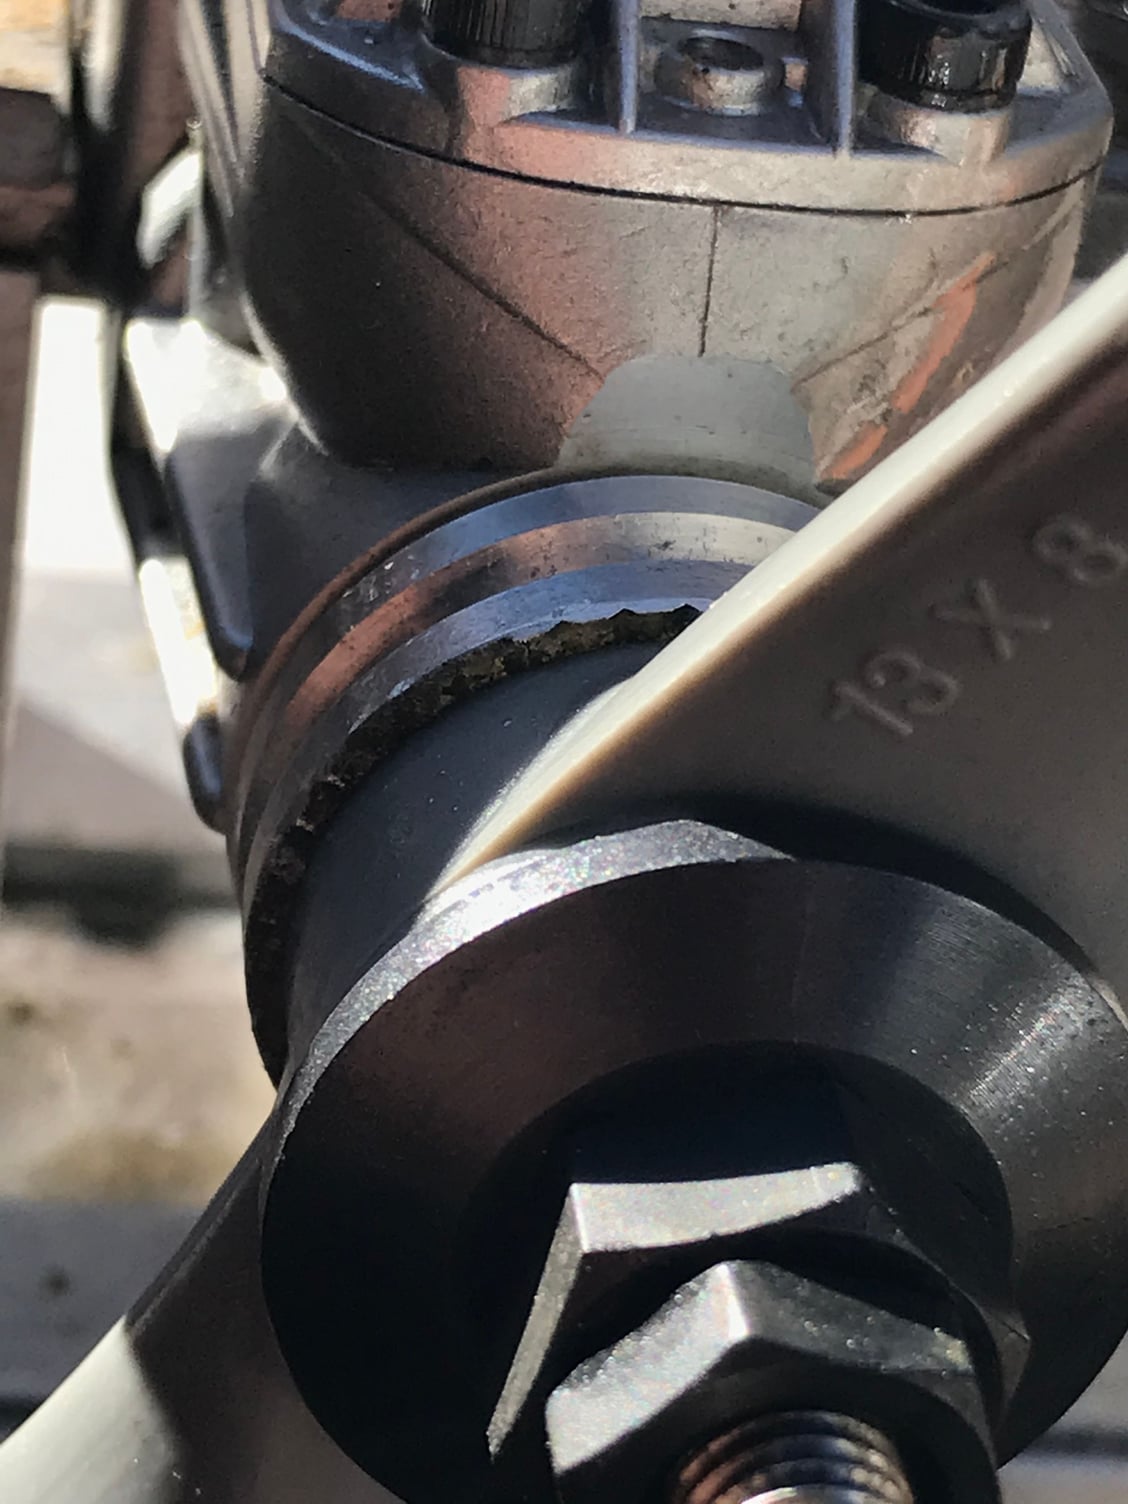
That engine has a lot of time on it. The front bearing spews loads of fuel, about time for a new one.
My older 82 A version only turns 9900 on the same stuff. Readings backed up with H9 and Hobbico Chinese instruments This is why I don't run 13-6 APC on Saito 82 engines. 9900 to 10100 is about as high as I care to see them rev on the ground.
Forgot to mention running a plain old O S "F" glow plug , nothing exotic or off the wall out of production stuff.
Break in here is a very specific ritual ; I bolt the engine on the plane l, set the carb for reliable running on the rich side and fly it.
That engine has a lot of time on it. The front bearing spews loads of fuel, about time for a new one.
My older 82 A version only turns 9900 on the same stuff. Readings backed up with H9 and Hobbico Chinese instruments
This is why I don't run 13-6 APC on Saito 82 engines. 9900 to 10100 is about as high as I care to see them rev on the ground.Forgot to mention running a plain old O S "F" glow plug , nothing exotic or off the wall out of production stuff.
Break in here is a very specific ritual ; I bolt the engine on the plane l, set the carb for reliable running on the rich side and fly it.
Last edited by Jesse Open; 11-03-2020 at 09:53 AM.
11-03-2020, 10:06 AM
My Feedback: (102)
Join Date: Dec 2001
Location: Colonial Beach, VA
Posts: 20,370
Likes: 0
Received 25 Likes
on
25 Posts
Had a nice talk with Dave yesterday, he's sending me a high compression 65. Test results coming later this week. It'll be interesting to see how tractable the engine is compared to the lower compression version I tested earlier this summer. There is an "A" stamped on the mounting lug.
Thanks Lonnie, I'm going to re-assemble the65 and run in a bit. it's rebuilt so I'll have to gentle it a bit. Maybe we learn something about the high and lower compression. If you use 15% I'll run the S&W. I think I have an APC 13 x 6.
 11-03-2020, 12:42 PM
As we discussed on the phone, I will be measuring the compression ratio on the 65 you sent me. Hopefully that will help clear up which came first, the 12.7:1 or the 10.5:1 version. If we can get Gary to measure his hotrod 65 C/R all the better.
The real question for me here is not so much which high C/R version came first but how Saito achieved two different high C/R engines. Either the combustion chambers between the two are different, the domed pistons are different between the two or one of the two reviewers on sceptreflight mis-measured the C/R.
11-03-2020, 12:58 PM
Gary, if you have time and an APC 14x6 (sport) prop I'd be interested in knowing if your 82 can spin it faster than 9250. I shy away from the APC 13x7 & 13x8 props for hp evaluation due to the scimitar blade profile.
APC makes two different 14x6 props, a sport and a pattern. The hub thickness on the sport prop is .60" where the pattern prop is .6875".
APC makes two different 14x6 props, a sport and a pattern. The hub thickness on the sport prop is .60" where the pattern prop is .6875".
11-03-2020, 01:36 PM
Gary, if you have time and an APC 14x6 (sport) prop I'd be interested in knowing if your 82 can spin it faster than 9250. I shy away from the APC 13x7 & 13x8 props for hp evaluation due to the scimitar blade profile.
APC makes two different 14x6 props, a sport and a pattern. The hub thickness on the sport prop is .60" where the pattern prop is .6875".
APC makes two different 14x6 props, a sport and a pattern. The hub thickness on the sport prop is .60" where the pattern prop is .6875".
11-03-2020, 01:59 PM
Of course advertised HP and even calculated HP and thrust numbers aren't the do all end all, just a starting point to ensure I don't underpower my airframes on the first go around.
11-03-2020, 03:15 PM
Looking forward to trying out the dual plugger HC 65. Sure wish I would have stripped the DP cylinder instead of painting the case. Painted engines aren't my cup of tea.
11-03-2020, 05:27 PM
Yep, the chipping is a turn off too. That's why I used Imron epoxy. It does fill detail but darn near totally chip, heat and chemical proof.
Last edited by Jesse Open; 11-03-2020 at 06:30 PM.