


Welcome to Club SAITO !
 01-09-2021, 09:26 AM
Why not cap and solder/braze one end, fill with sand, cap solder/braze other end end, bend and then cut ends off. Or cap and solder/braze one end shut, stand pipe up, fill with water, freeze and bend.
I'm not sure if either would work but hot sand is commonly used to bend plastic pipe for pvc structures. The bends come out looking quite nice.
I'm not sure if either would work but hot sand is commonly used to bend plastic pipe for pvc structures. The bends come out looking quite nice.


 01-09-2021, 09:45 AM
01-09-2021, 10:38 AM
01-09-2021, 09:45 AM
01-09-2021, 10:38 AM


Steel brake tubing , like annealed refrigeration copper tube is a far cry from bending 10 mm, thin wall brass tube. Or any of many other tubes. Many types of tubes, sizes, materials and shapes require different techniques, tools and skill sets. Packing sand, ice, low temp alloys "rats " and their cousins, mandrels are all options but not cure alls. There are also forms and fixtures required along the way. The low temp alloys require special handling, you dont simply melt it and dump it in. There are times you bend a bit, stop the bend to anneal, perhaps hammer out the wrinkles as you go.
Bear in mind, the long side of the radius is stretching and thinning often simply opens up if you do not or cannot move enugh metal into that area. Meanwhile the inside of the bend is compressing, often requiring tools and technique to smooth and shrink the metal.
"Cerrobend" is one brand of bending alloy you can look up. Get the REAL instructions from the people who make the stuff. Remember the stuff that worked for the guy on yuppietube may not work at all for your situation.
There is a reason Model Makers go thru apprenticeships.
Even then, spcialized jobs may require specialzed training.
If you didnt have to pack and contain the sand, probably wasnt badly needed
Last edited by Jesse Open; 01-09-2021 at 10:42 AM.
01-09-2021, 10:48 AM
And this is the place to get that help Gary.Thank you as always. Yours was the only direct answer to the query.
On a second thought and opinions are welcome.
Reassembling a FA 90 T I inadvertently left out the shim/gaskets.
The cams looked ok to run and not showing heavy wide witness paths worn in.
Would you dissemble and shim, or run it and ignore it unless it ran hot on the cam covers or poorly?
Again just opinions. Authority and credentials not required😁
01-09-2021, 02:46 PM
Got the template for the baffle done, not to find some thin plywood and cut it out. Then have to figure out what to put on it. I have a scale radial kit that I think will work well.
01-09-2021, 04:06 PM
Hyjinx,
If you get some time, try dropping in on a few of these shops. With the gift of gab you can often land a little help. It not , just pointed to the door.
Manyhttps://www.bing.com/search?q=detroi...FORM=QBLH&sp=1, many skilled tube benders in the Detroit area.
Some may be willing to help for next tto nuthin
Rolling that tubular ring is a good start
Making the head connections will require some doing as well.
01-09-2021, 04:40 PM
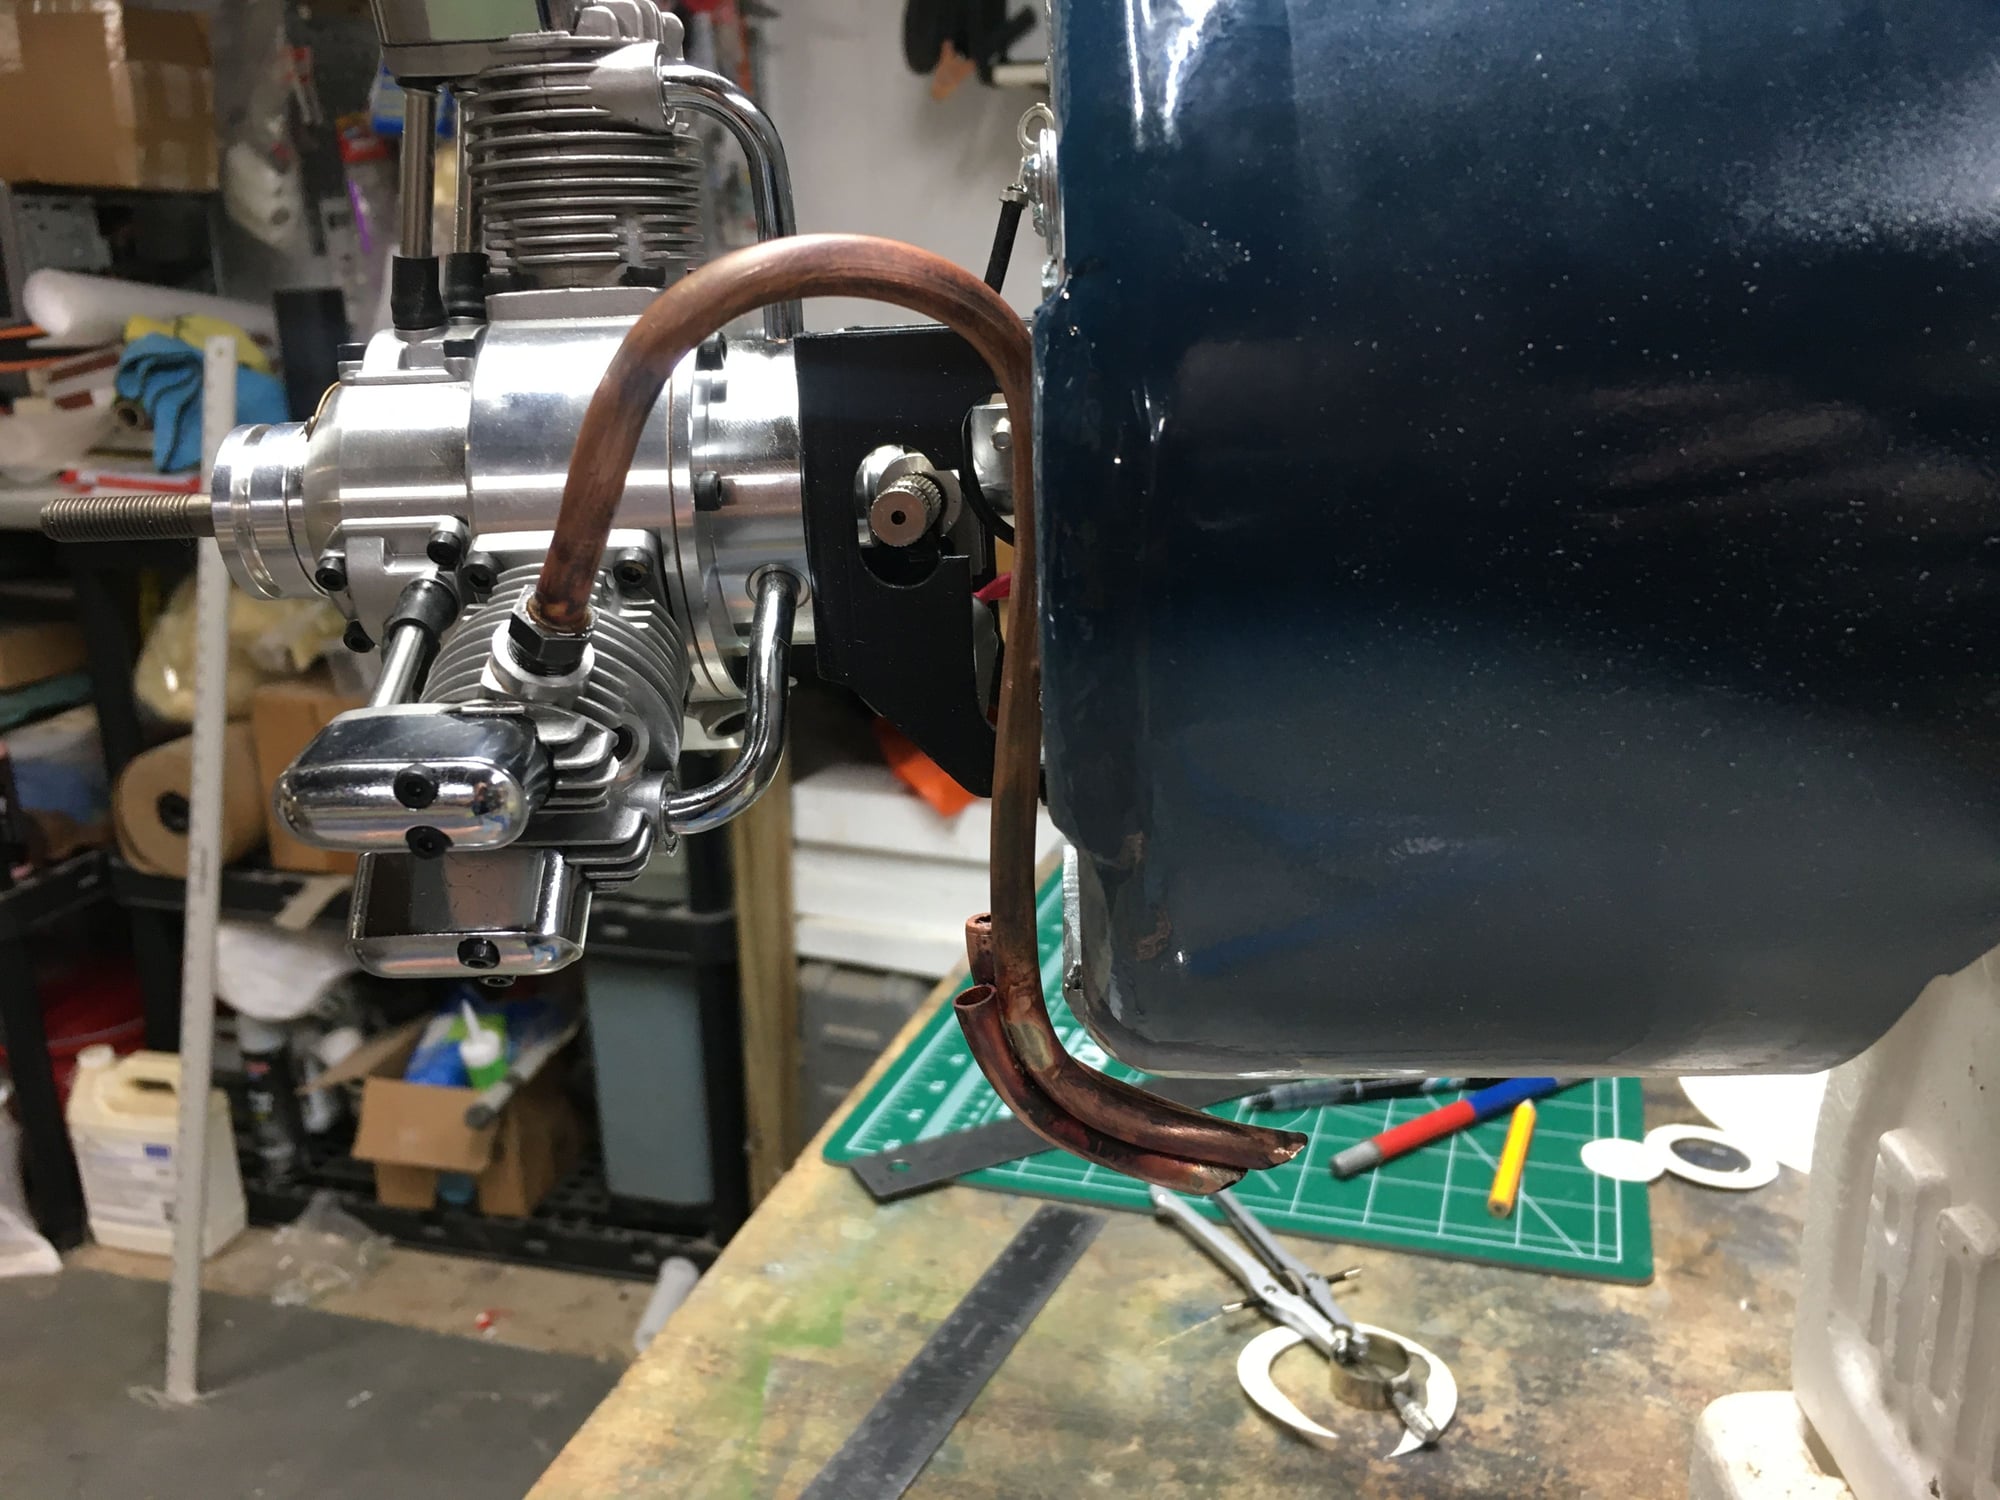
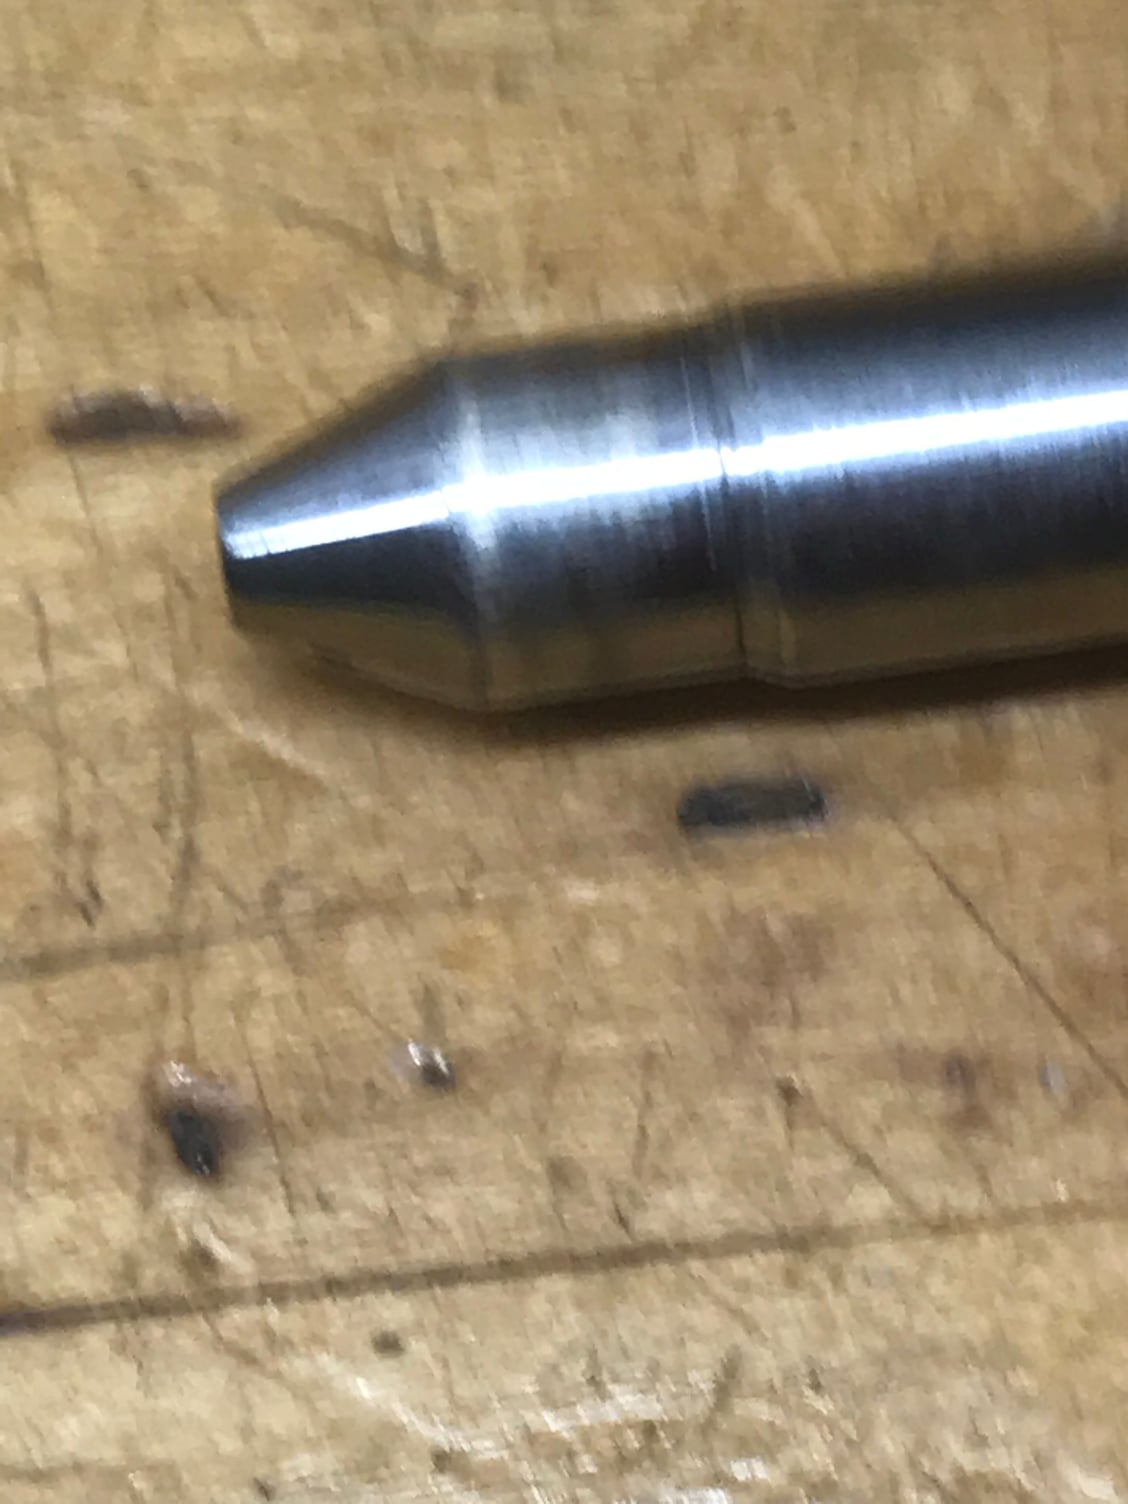
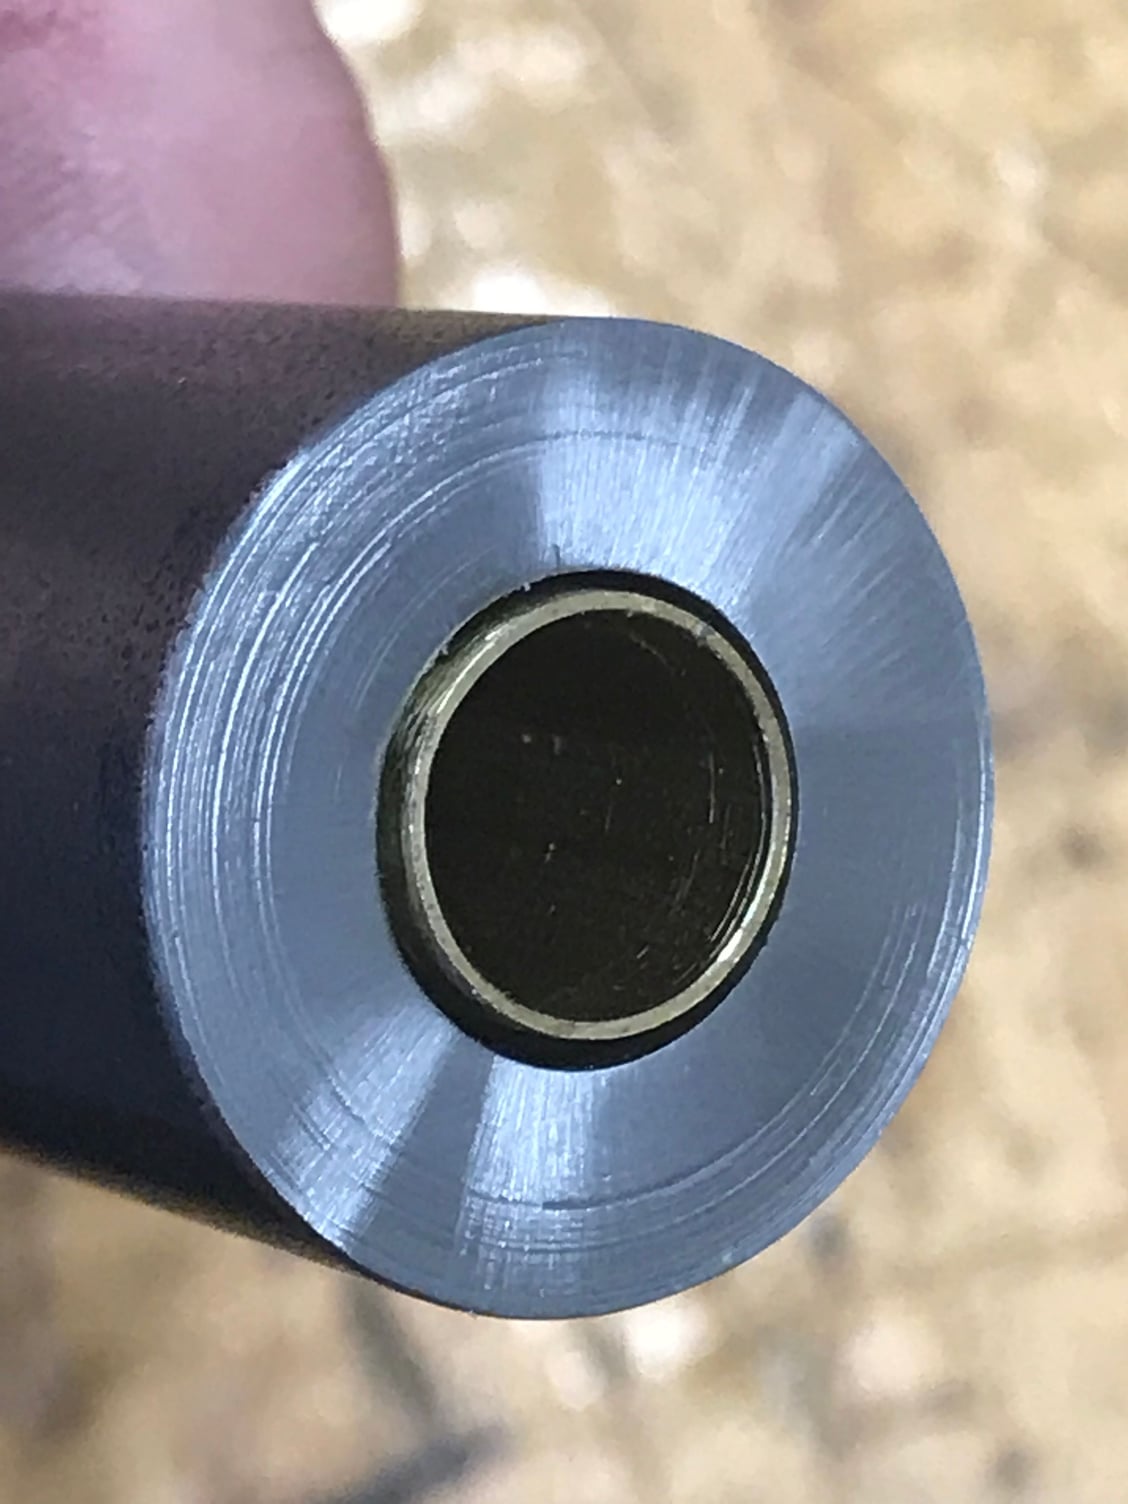
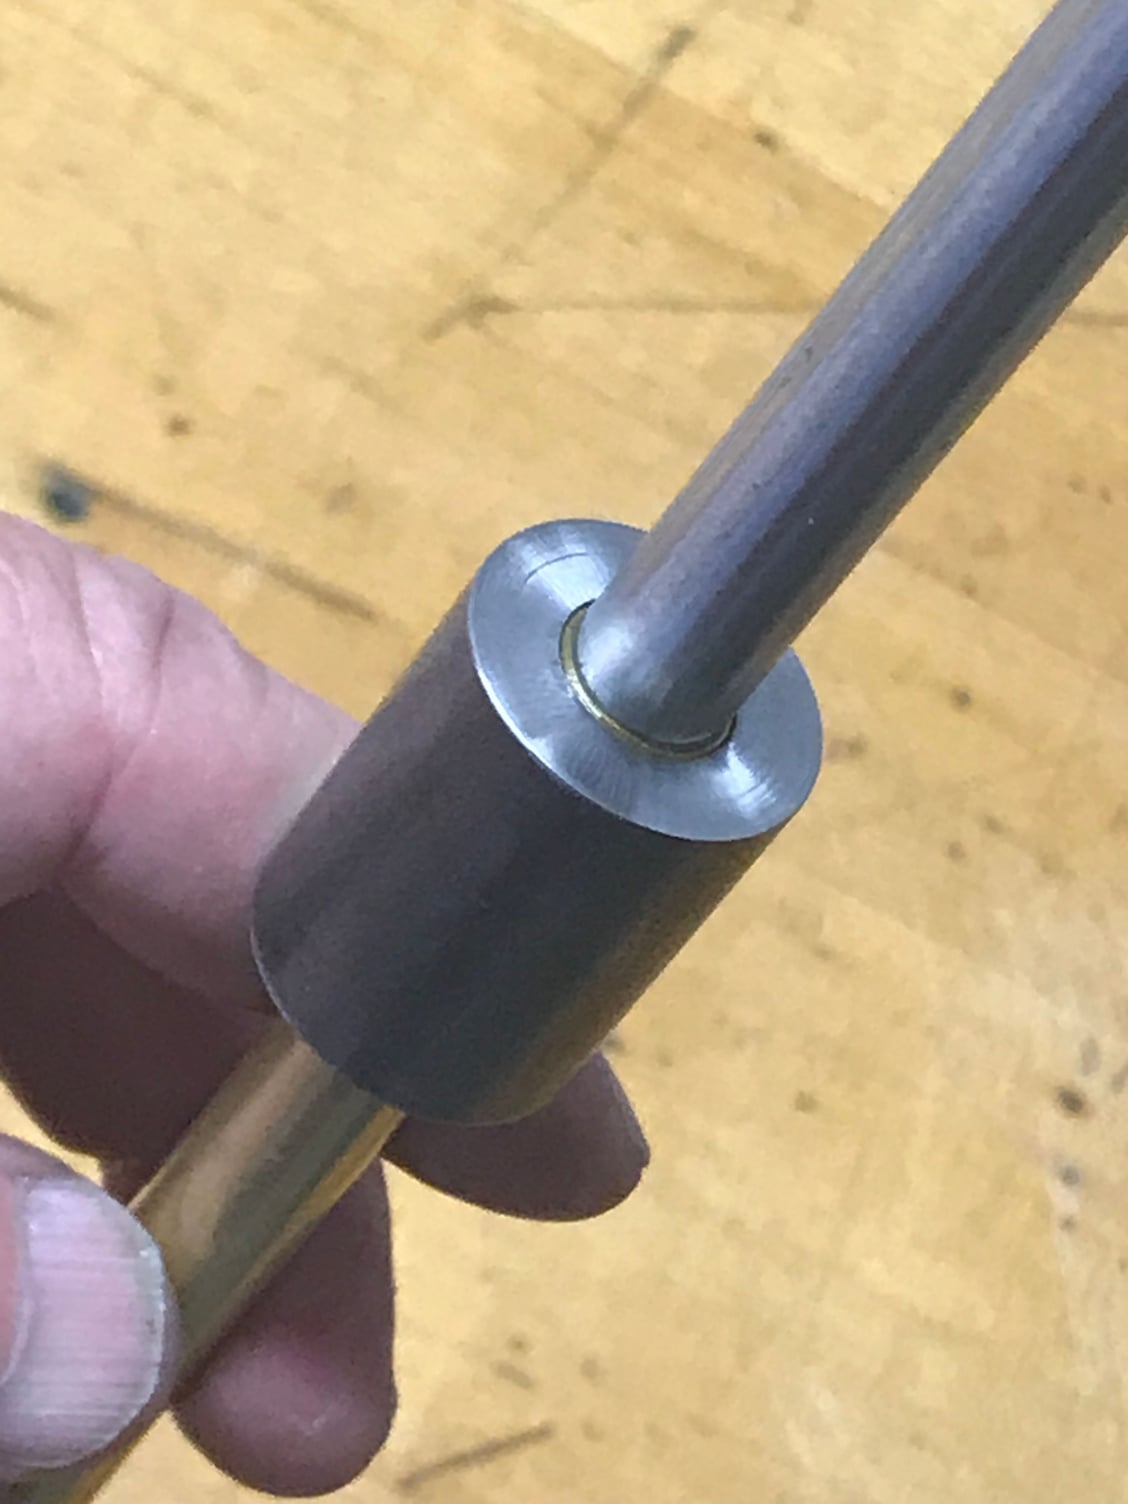
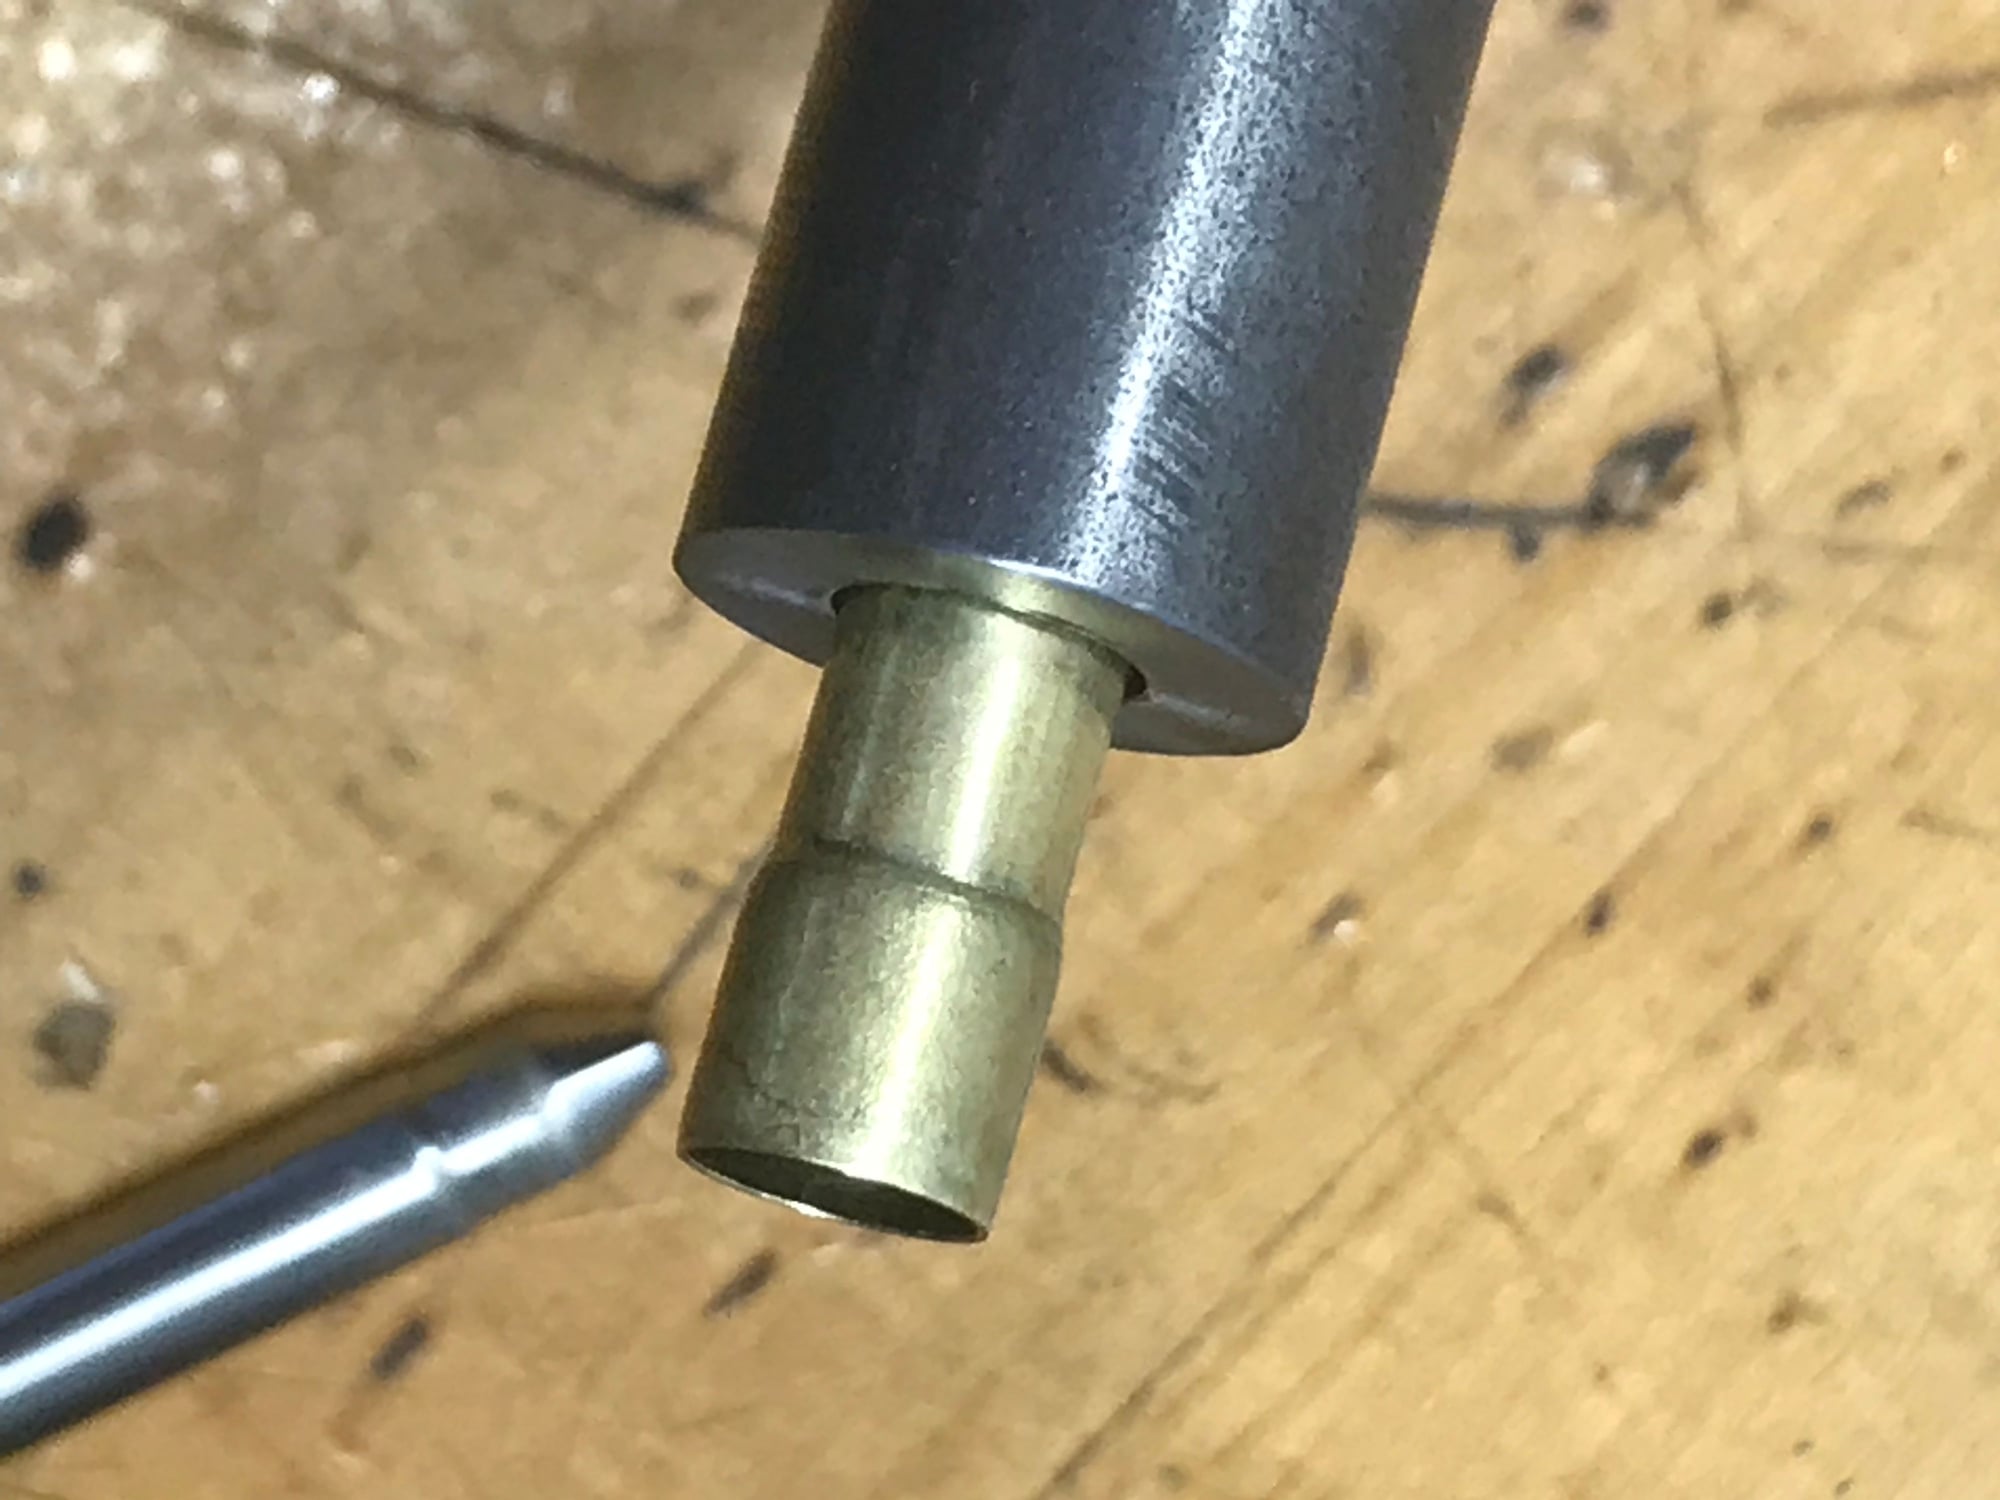
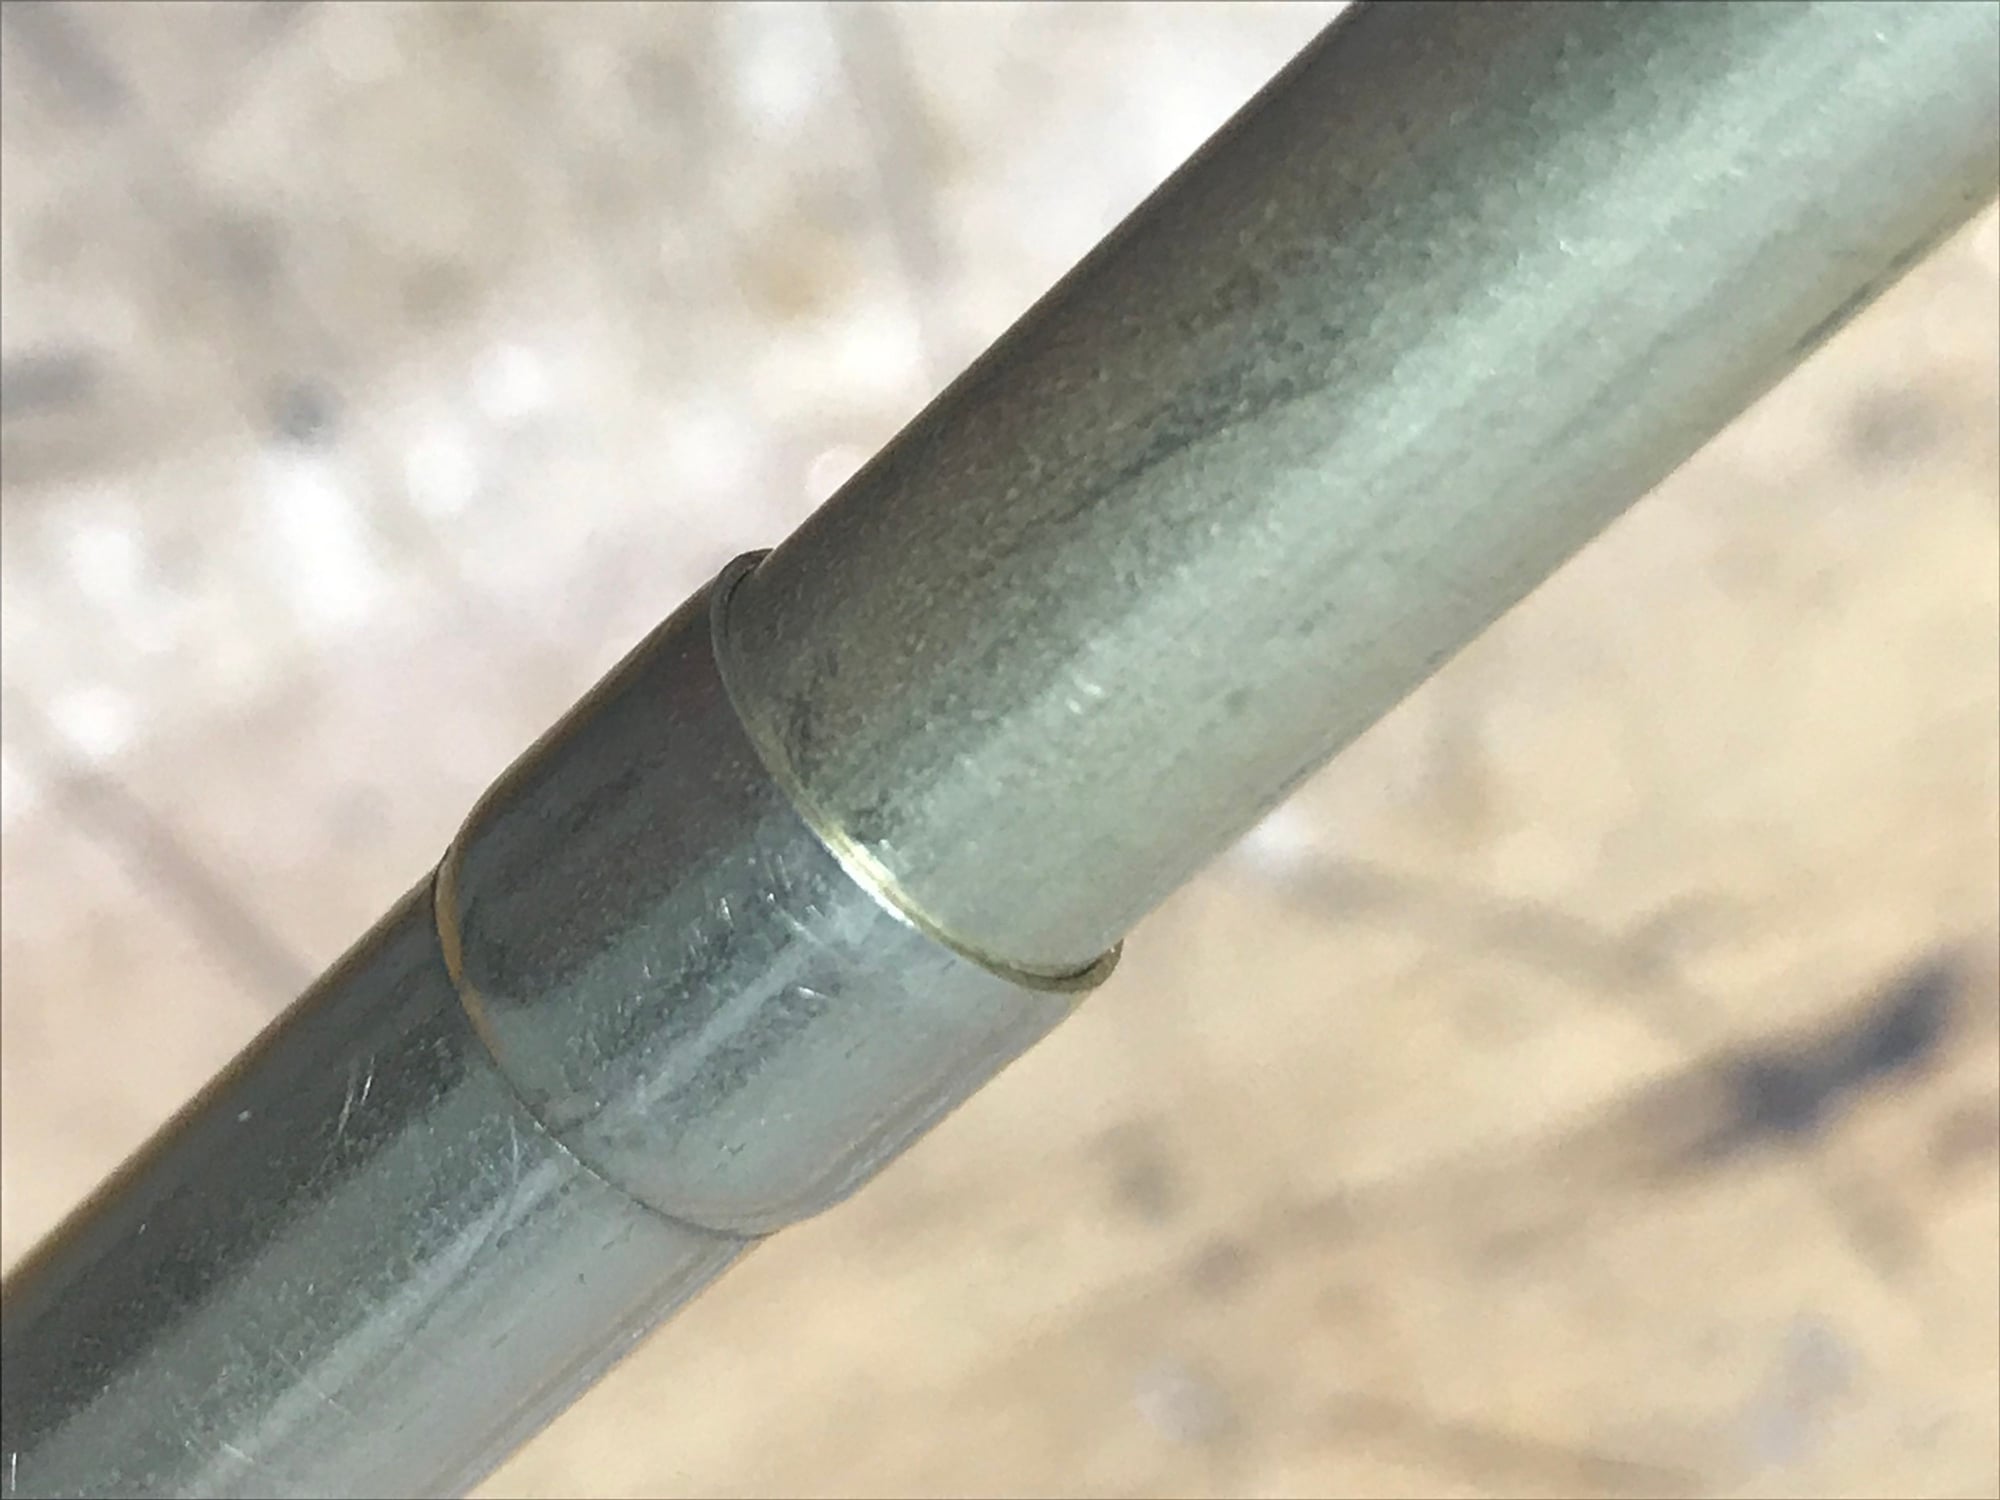
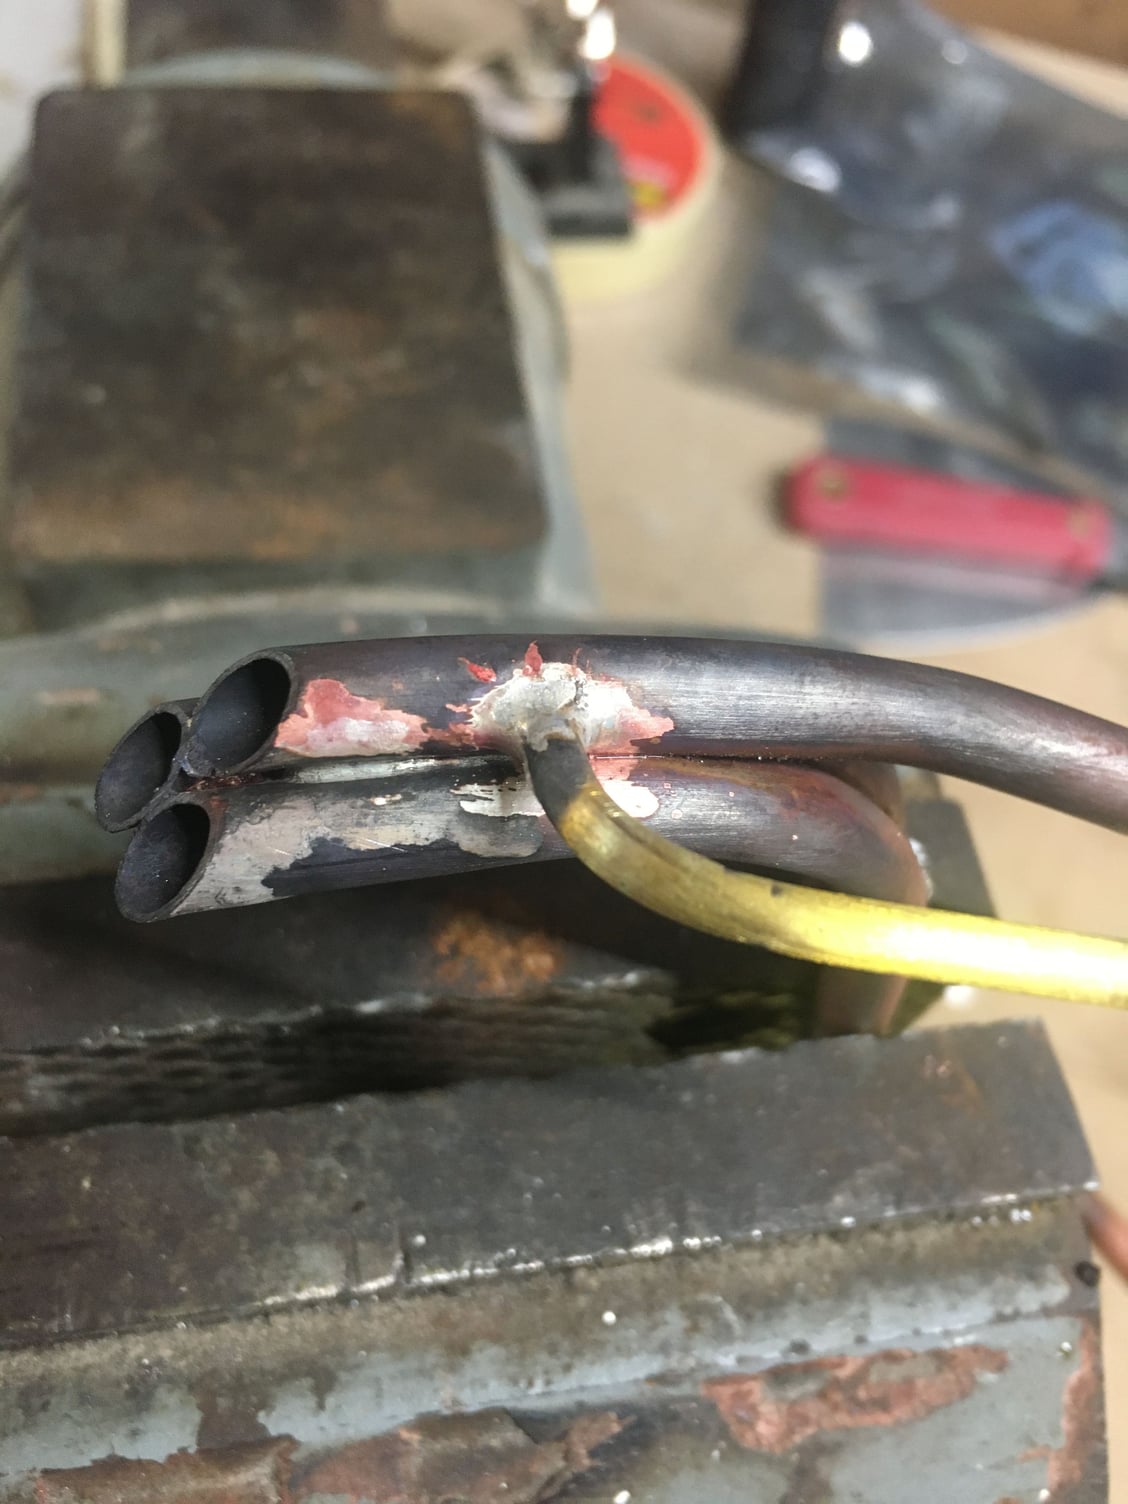
Success. Got a small coil of the 1/4� tubing, should have started with that. The 7mm tubing is a snug slip fit over the tubing. I just braze the two together, making a stronger connection ans make the pipe.
01-09-2021, 06:51 PM
Good progress!
That annealed copper refer tubeshould be a bit more workable .
Here is a small home made tool for making the sweat type slip-joint in case you are interested.:
That annealed copper refer tubeshould be a bit more workable .
Here is a small home made tool for making the sweat type slip-joint in case you are interested.:
01-10-2021, 09:27 AM
Now that's cool. Won't need it on this build, but on future builds, maybe. Thankfully the other engines I may do a custom exhaust on uses much larger, easier to fine tubing. They are also single cylinder. I'm starting the other two right now, so hopefully will post something later. Once I get the exhaust done, then I can make the cowl flaps. Been holding off on those until I got the exhaust figured out. The cowl is a two piece for those who never built the Top Flight GE Corsair. There is a cowl ring that attaches to the fuse, and the actual cowl which is glued to the cowl ring. I am going to use tiny flat head screws to secure it instead so I can keep the cowl ring intact, and be able to remove the cowl easily.
01-10-2021, 11:11 AM
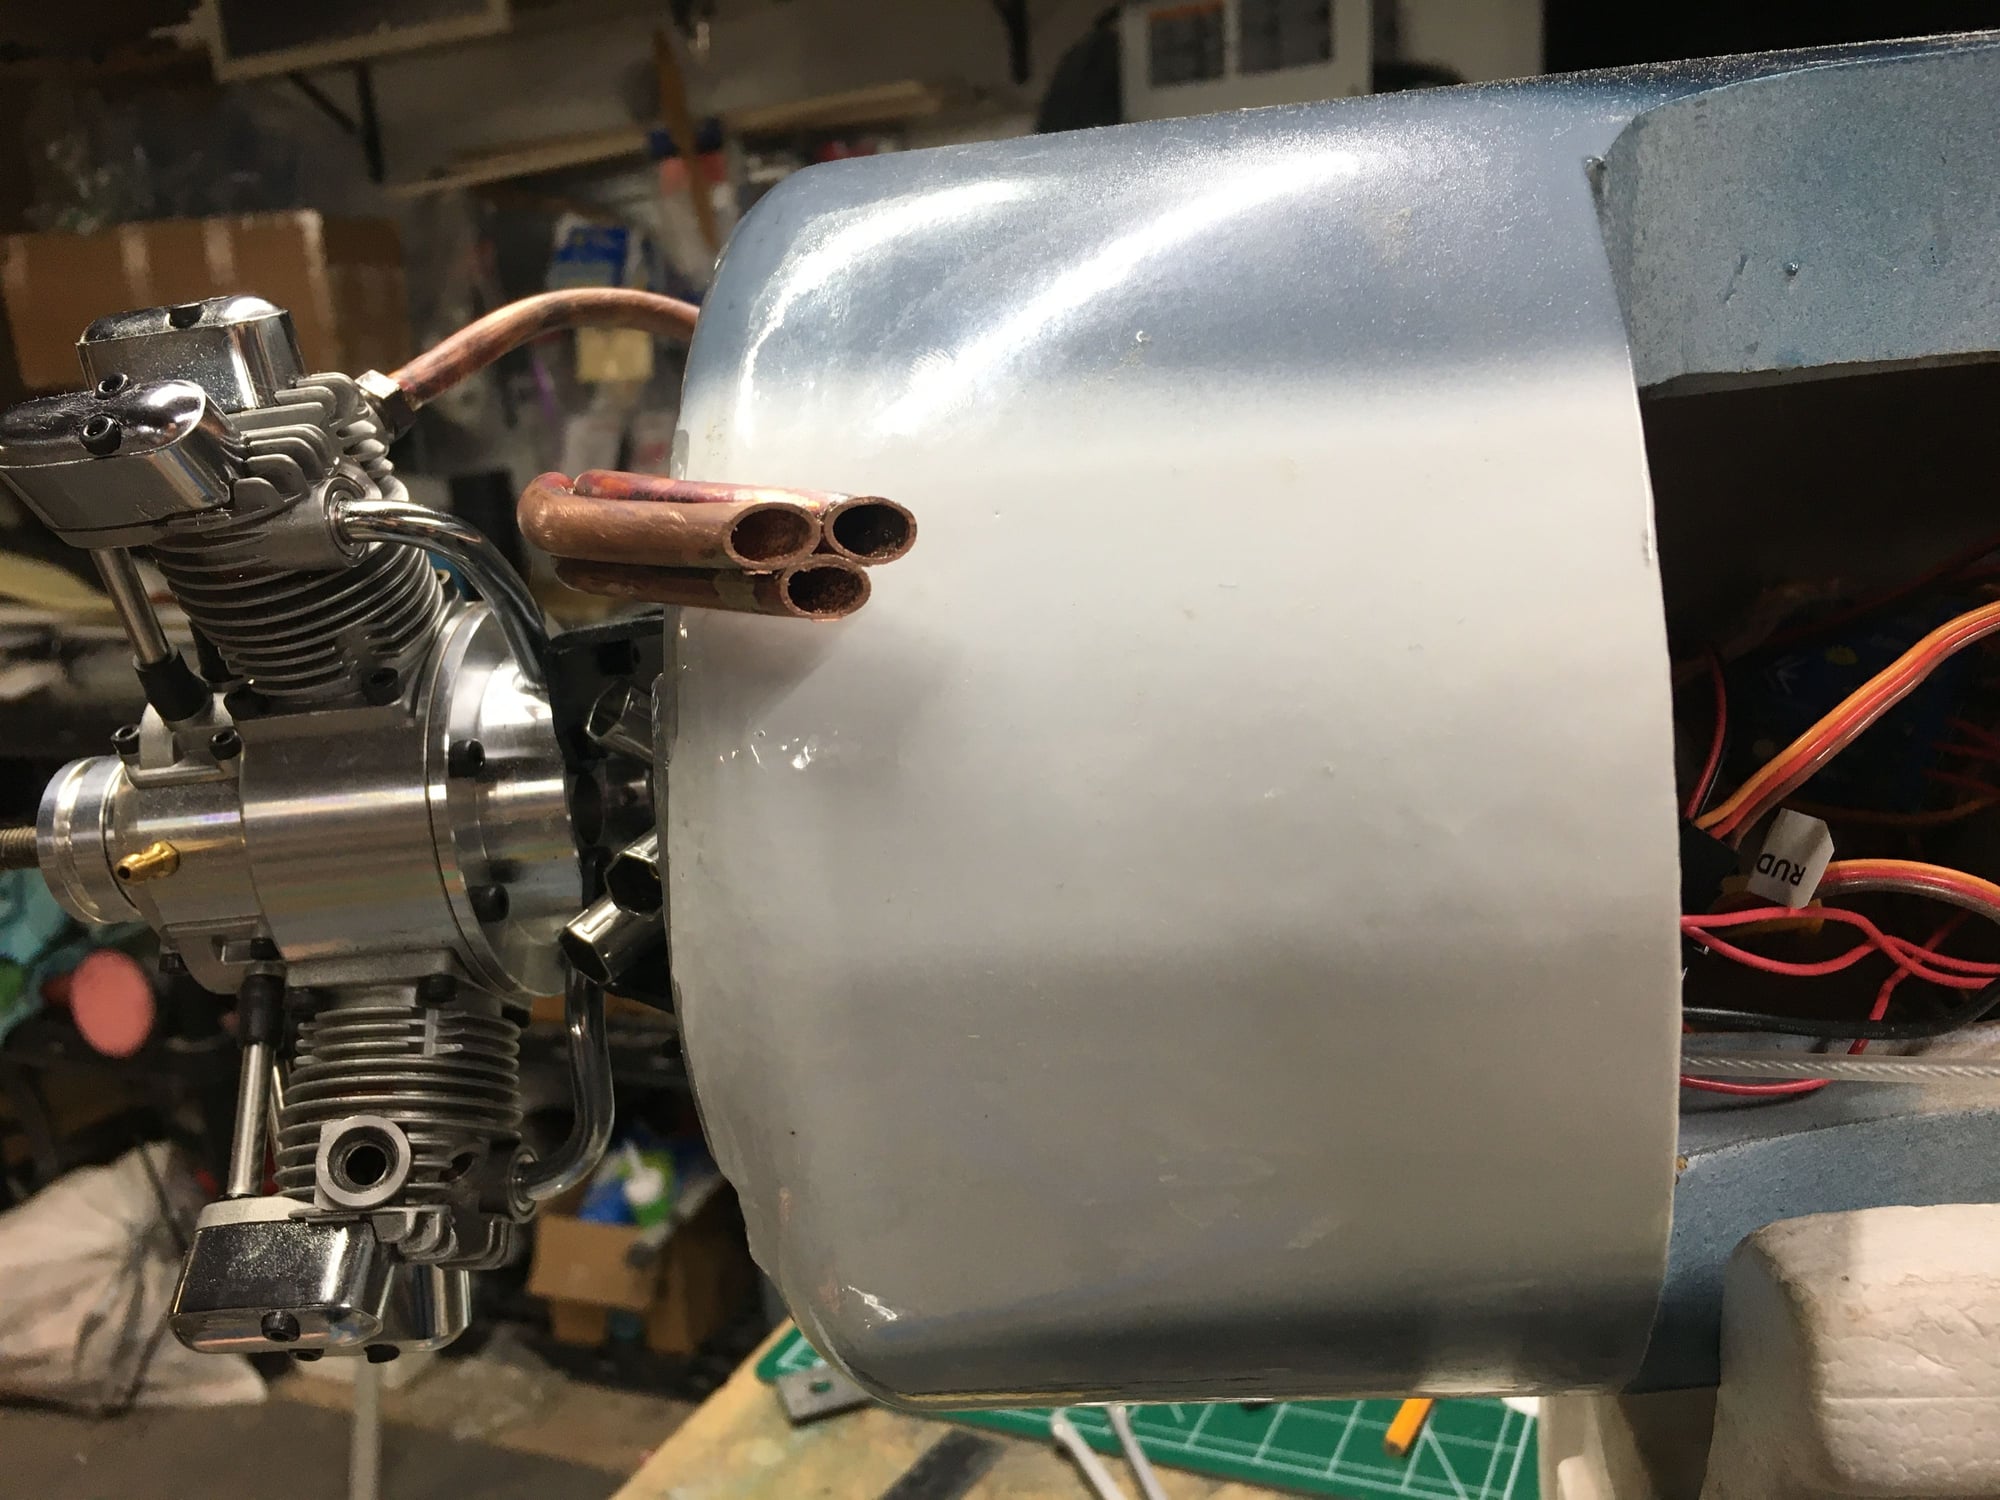
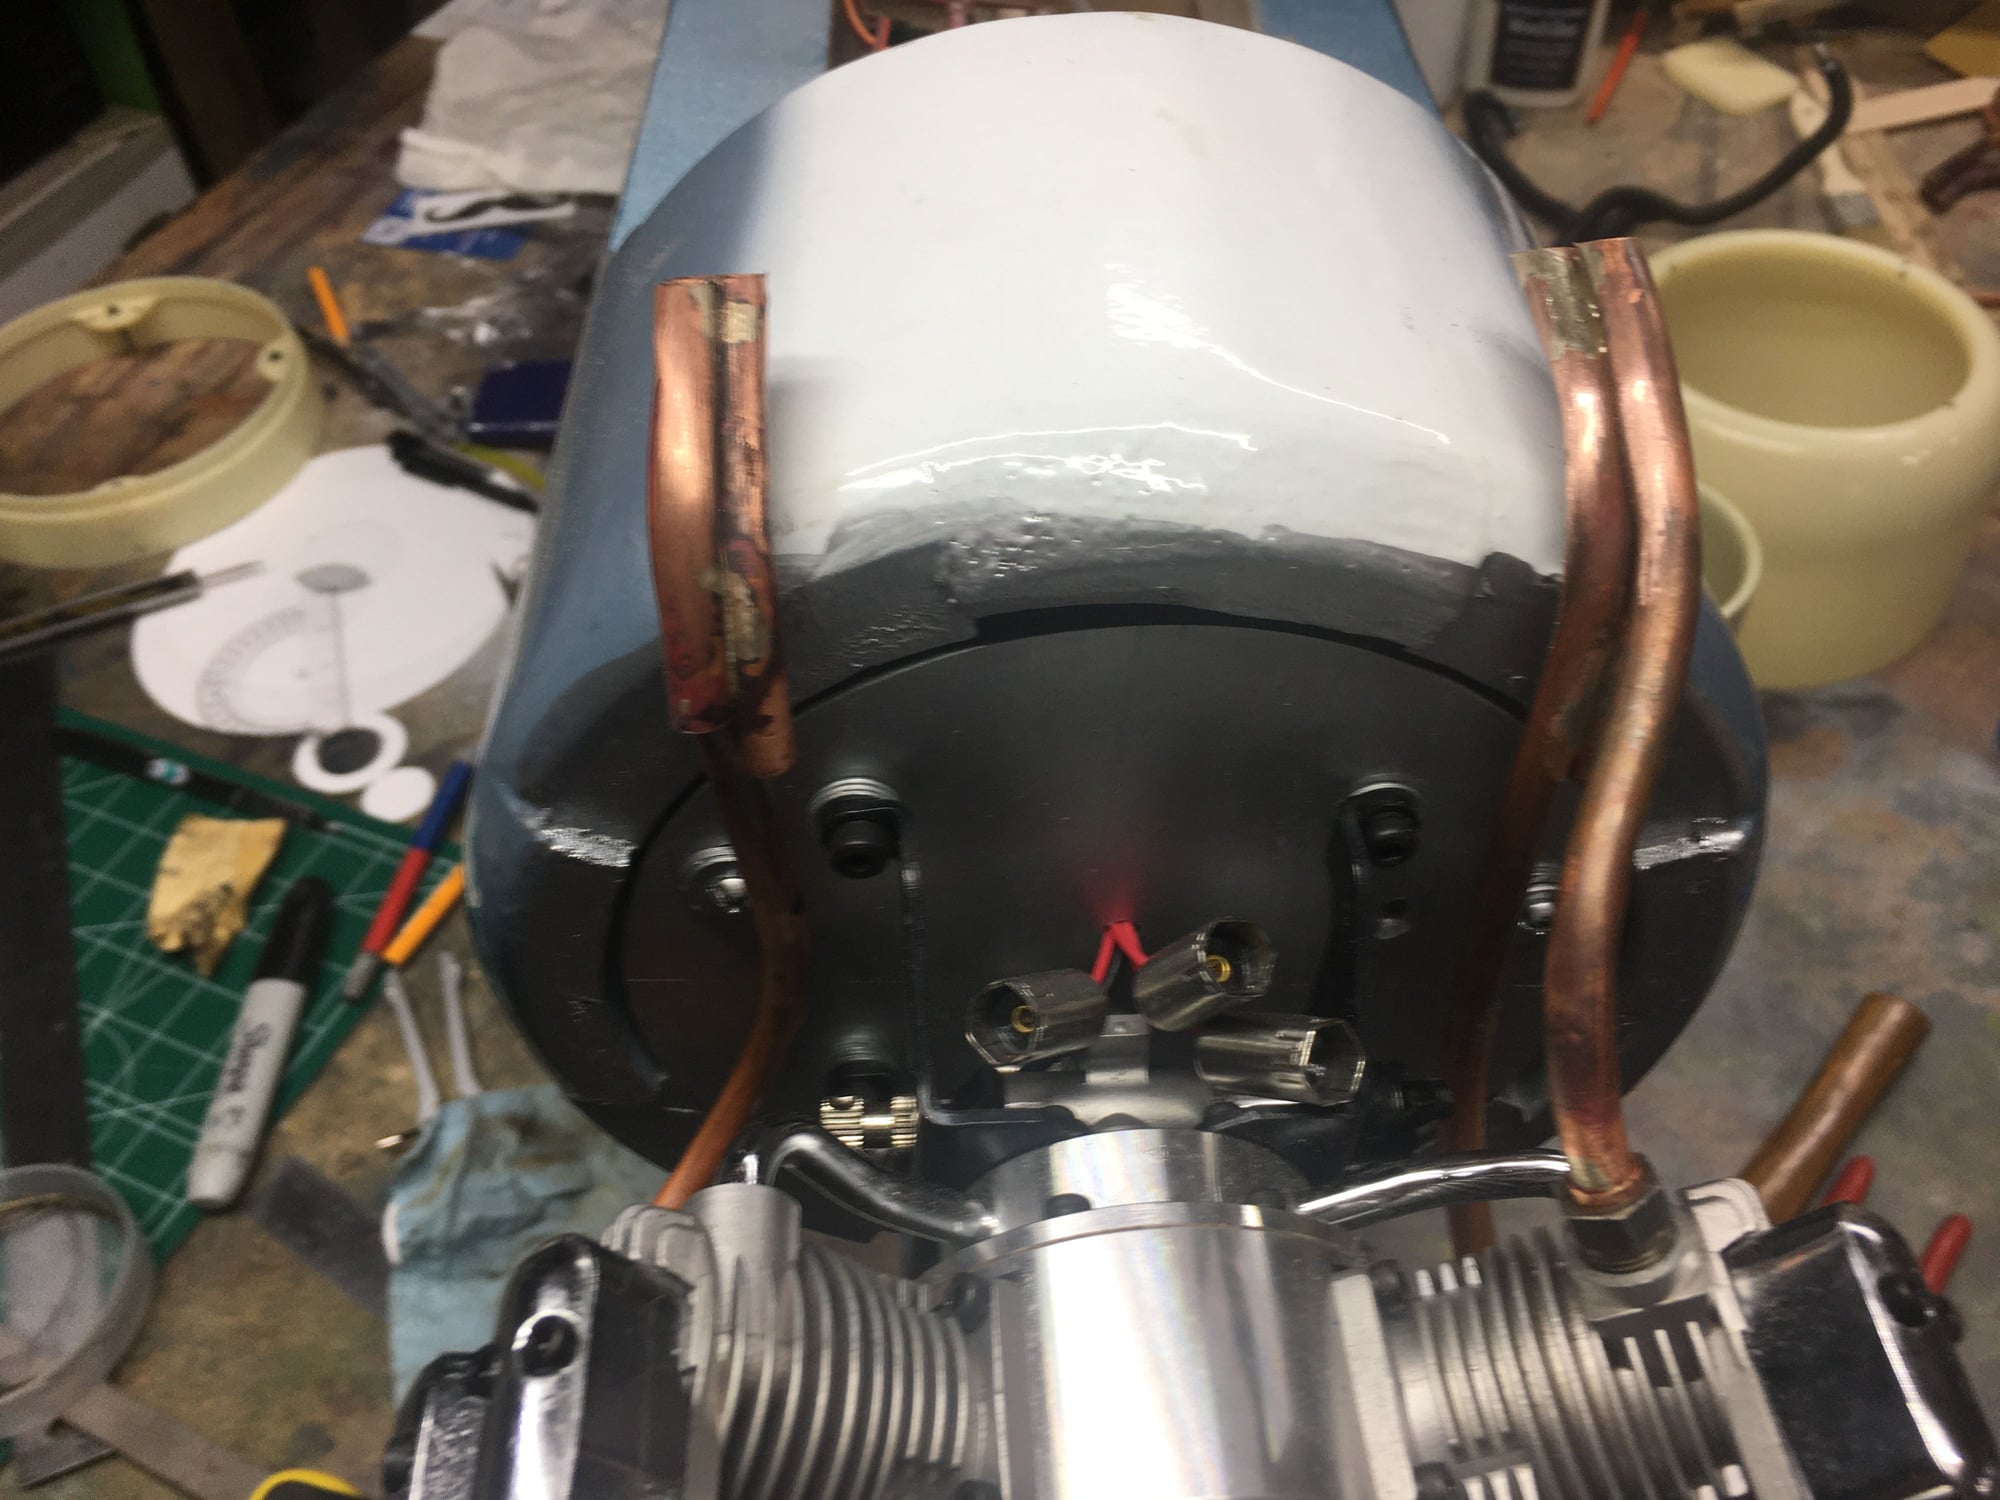
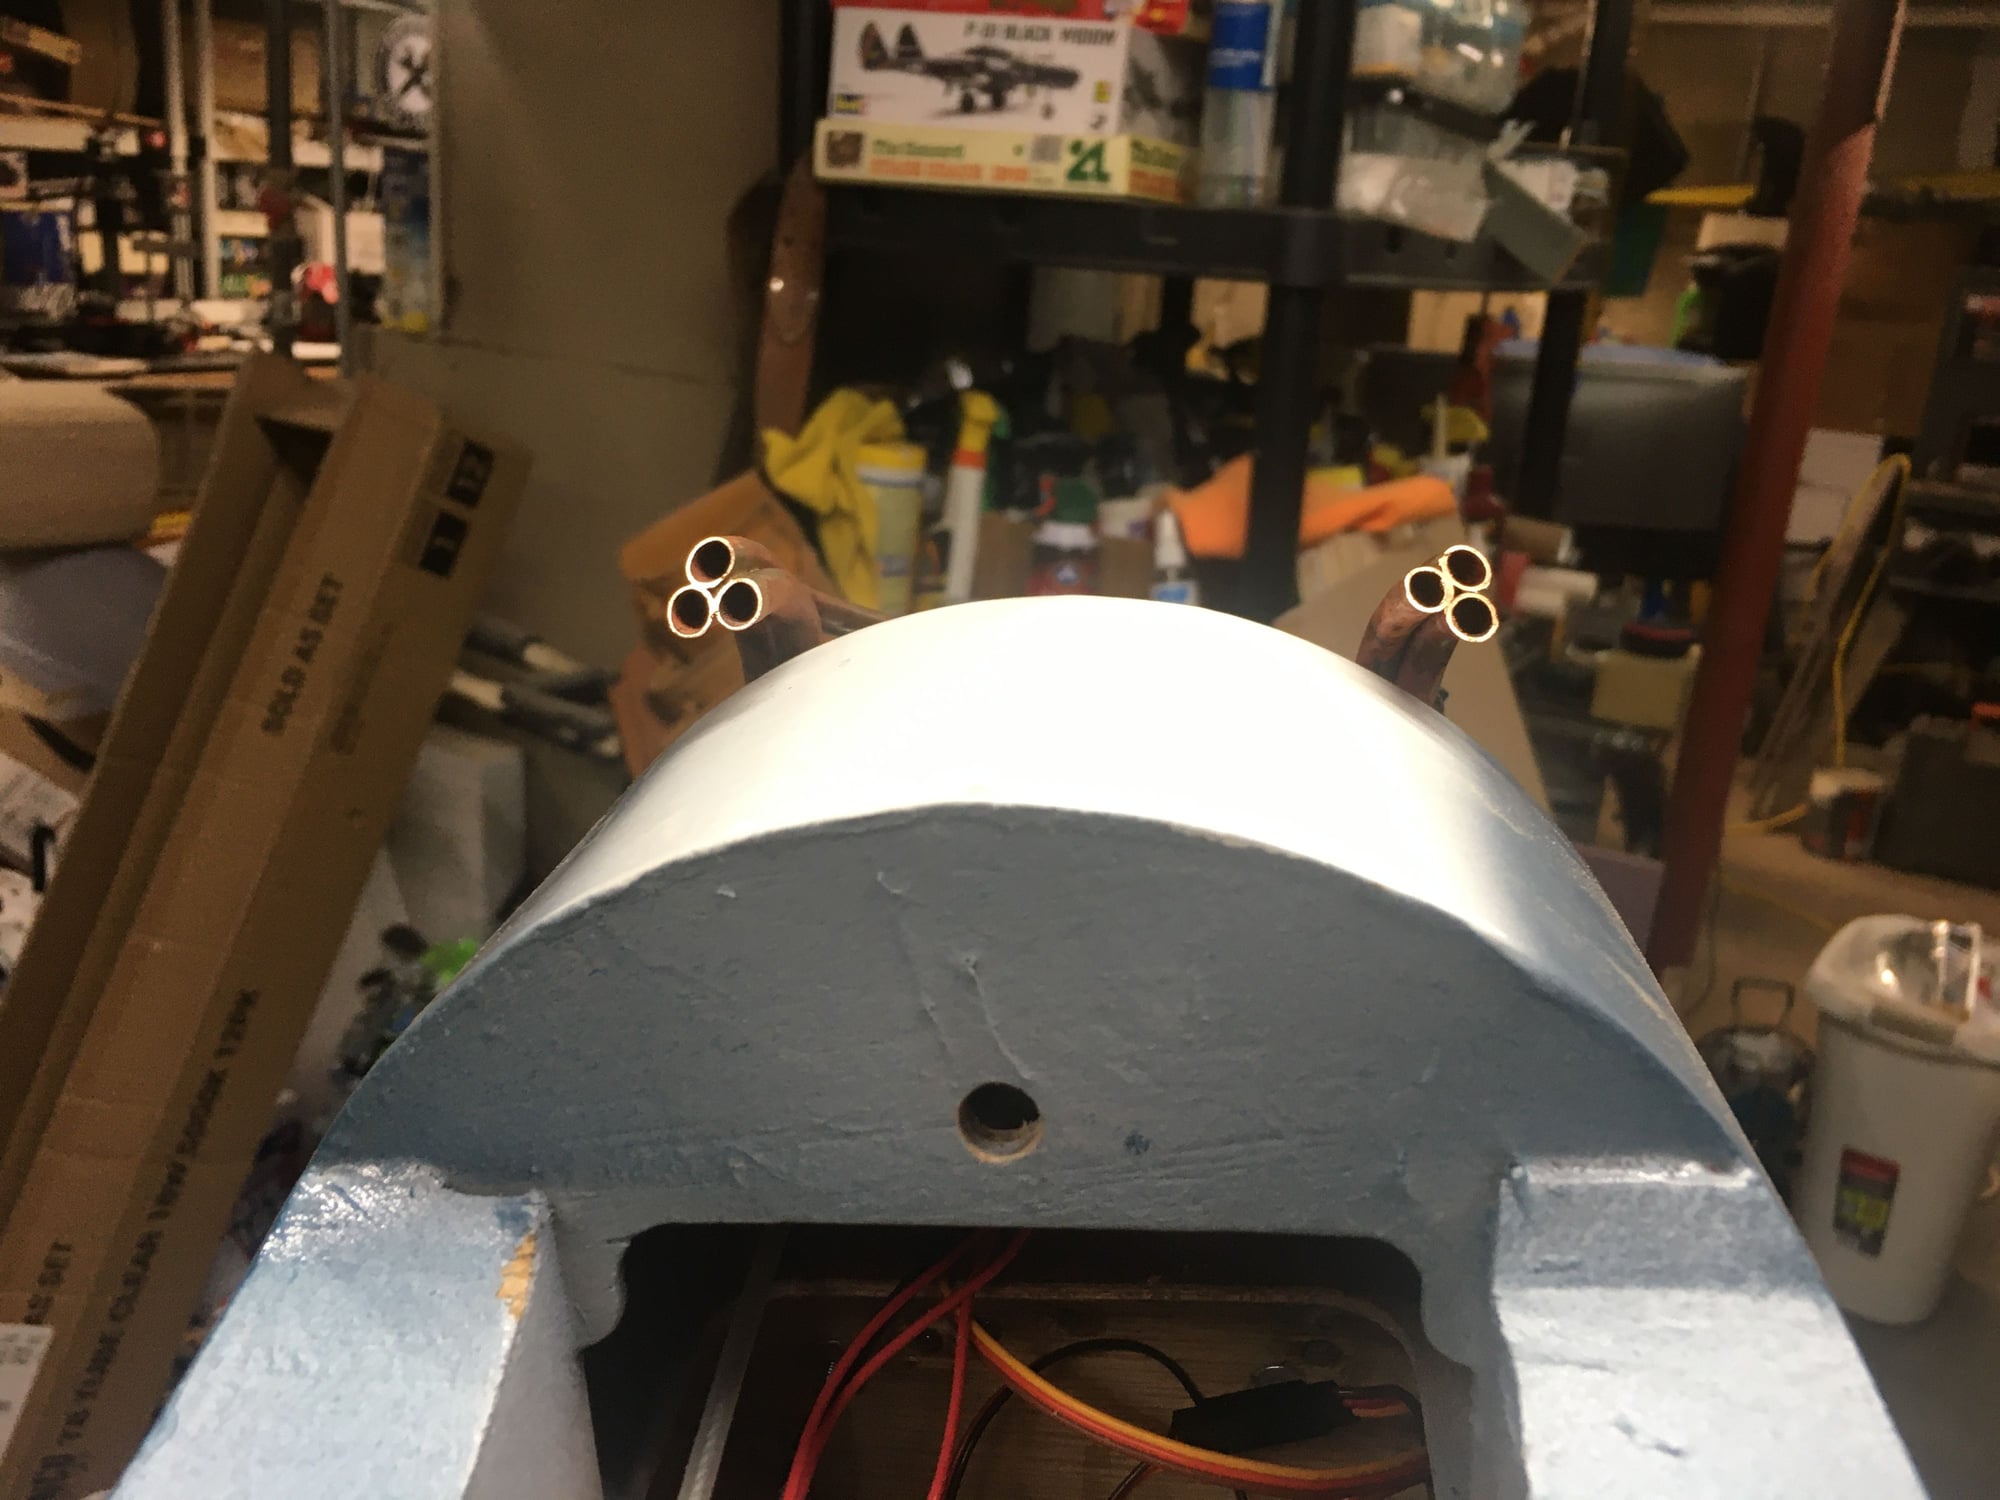
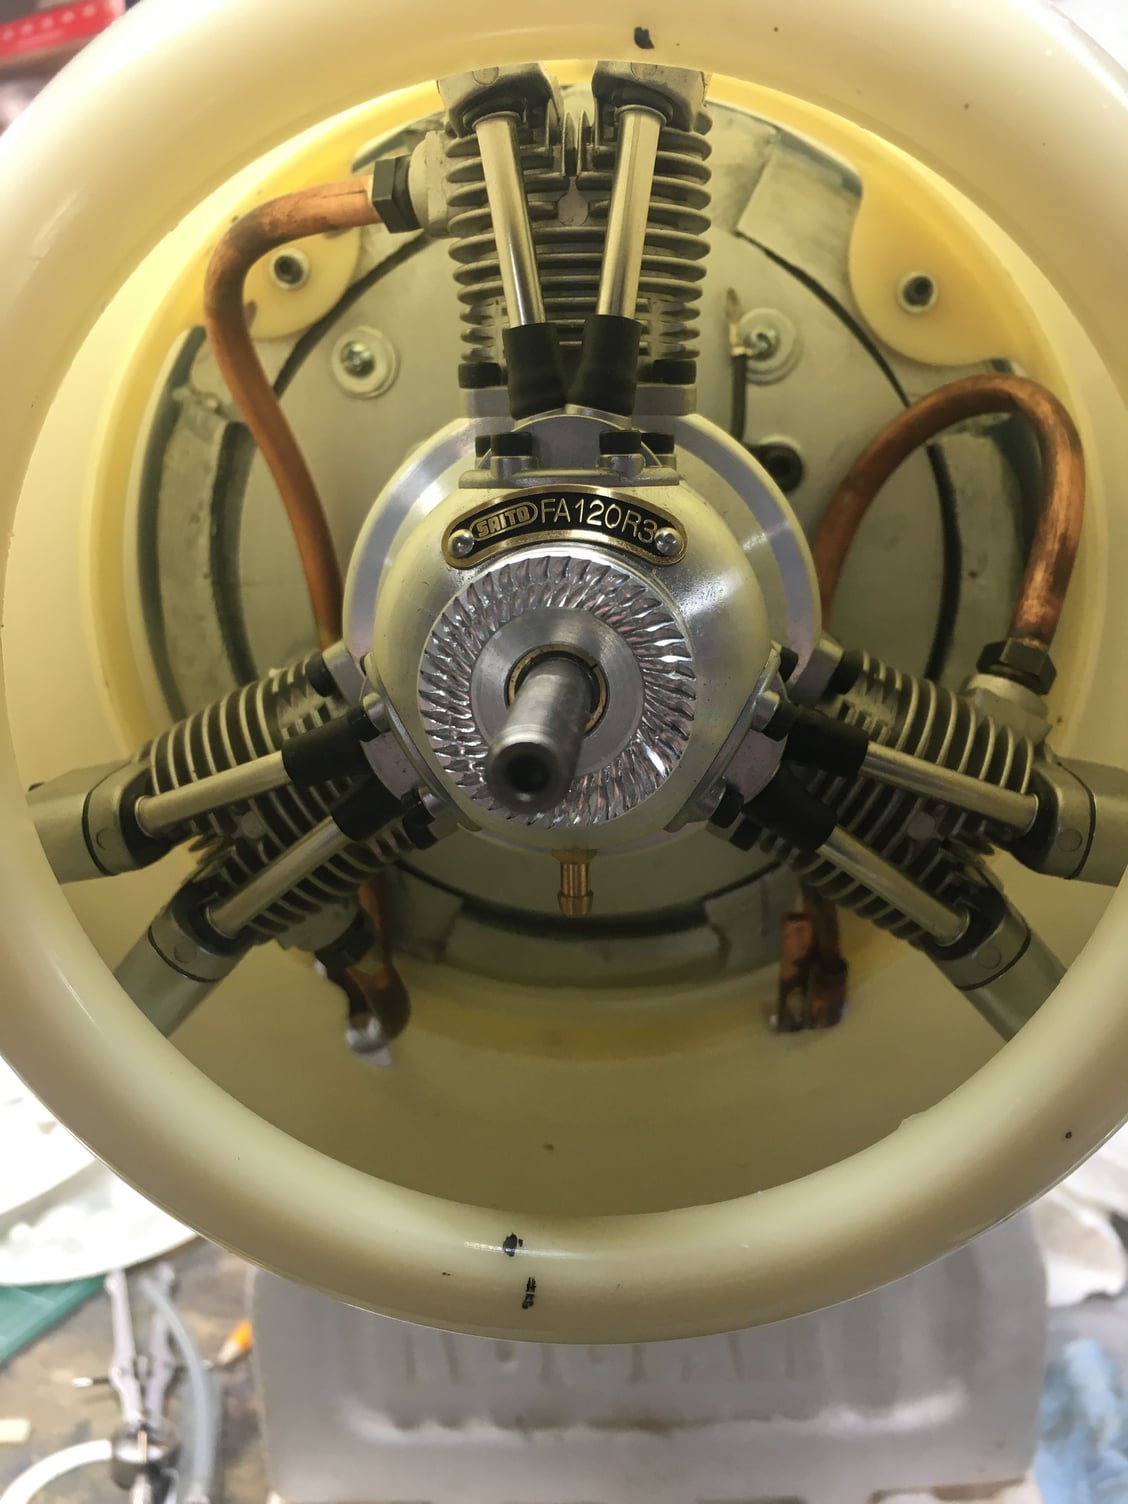
WOOT! All pipes done and look great. I still need to add a pressure tap, but thats a minor thing. The 1/4" tubing worked out perfectly. Now to fit the cowl and work on the false engine baffle.
01-10-2021, 11:56 AM
Wow, that looks great Todd, not that it looked bad before. I have no idea what scale size would be but that is a nice detail.
I'm going to run an FG21 on my TF GE Corsair and may do something similar, but with a wye pipe of course.
How is your CG coming out with the R3?
I'm going to run an FG21 on my TF GE Corsair and may do something similar, but with a wye pipe of course.
How is your CG coming out with the R3?
01-10-2021, 01:03 PM
Wow, that looks great Todd, not that it looked bad before. I have no idea what scale size would be but that is a nice detail.
I'm going to run an FG21 on my TF GE Corsair and may do something similar, but with a wye pipe of course.
How is your CG coming out with the R3?
I'm going to run an FG21 on my TF GE Corsair and may do something similar, but with a wye pipe of course.
How is your CG coming out with the R3?
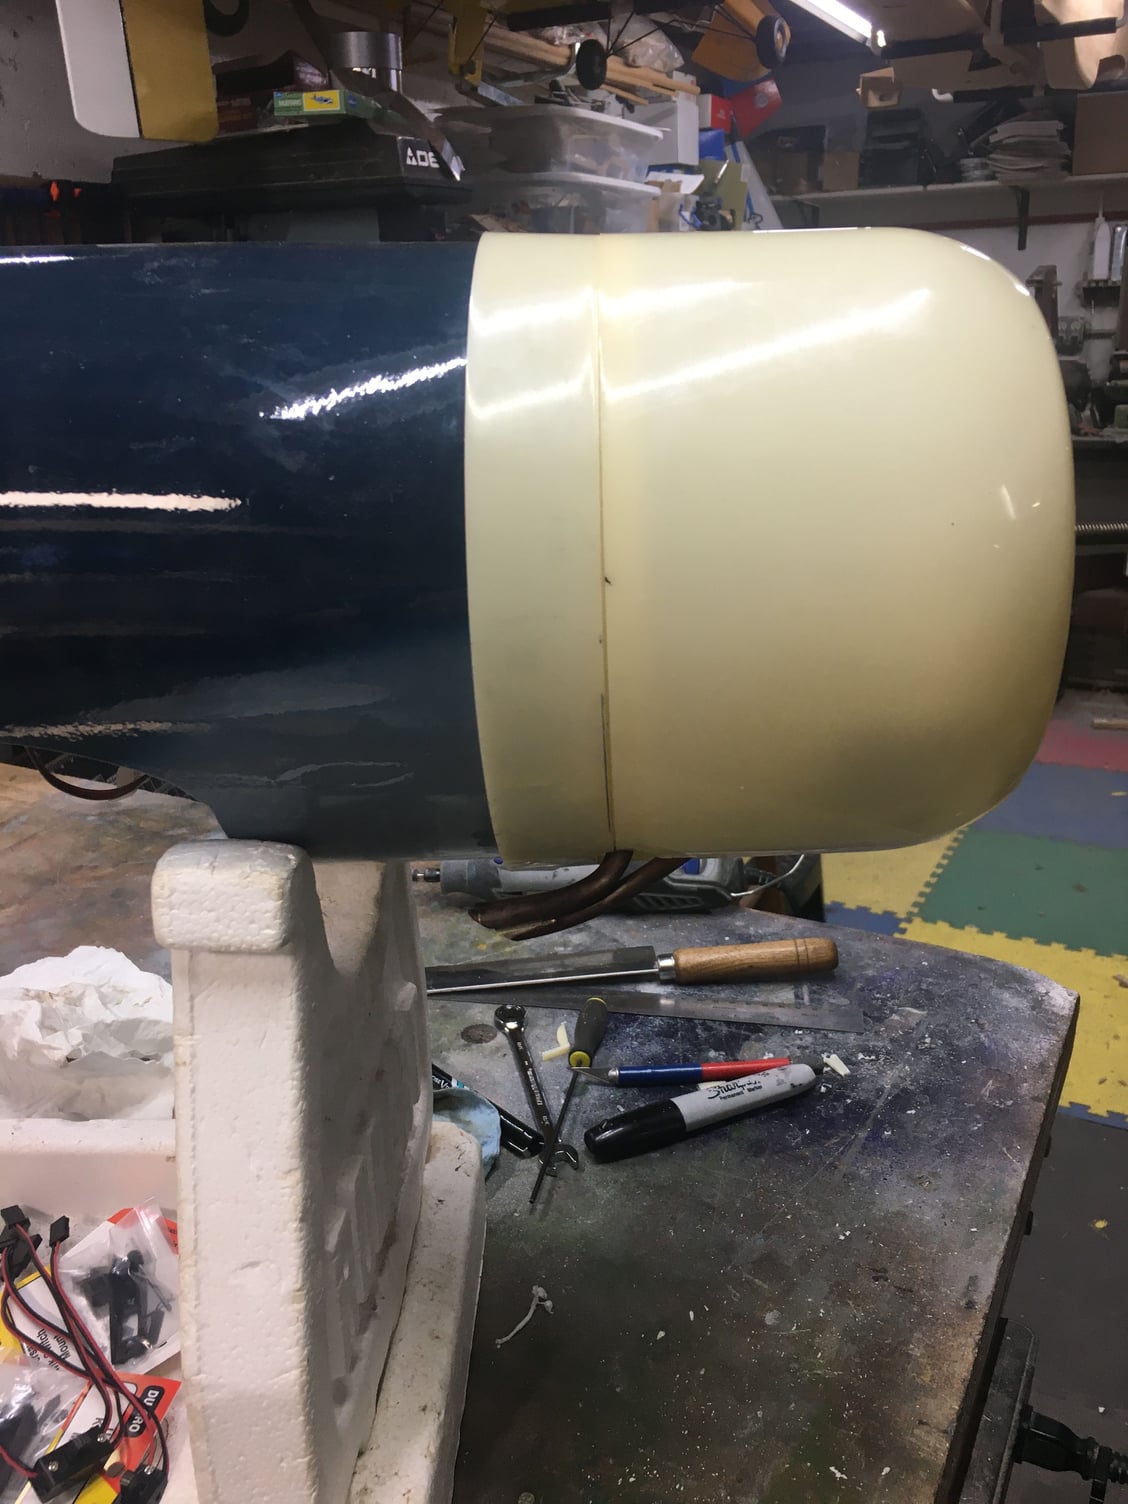
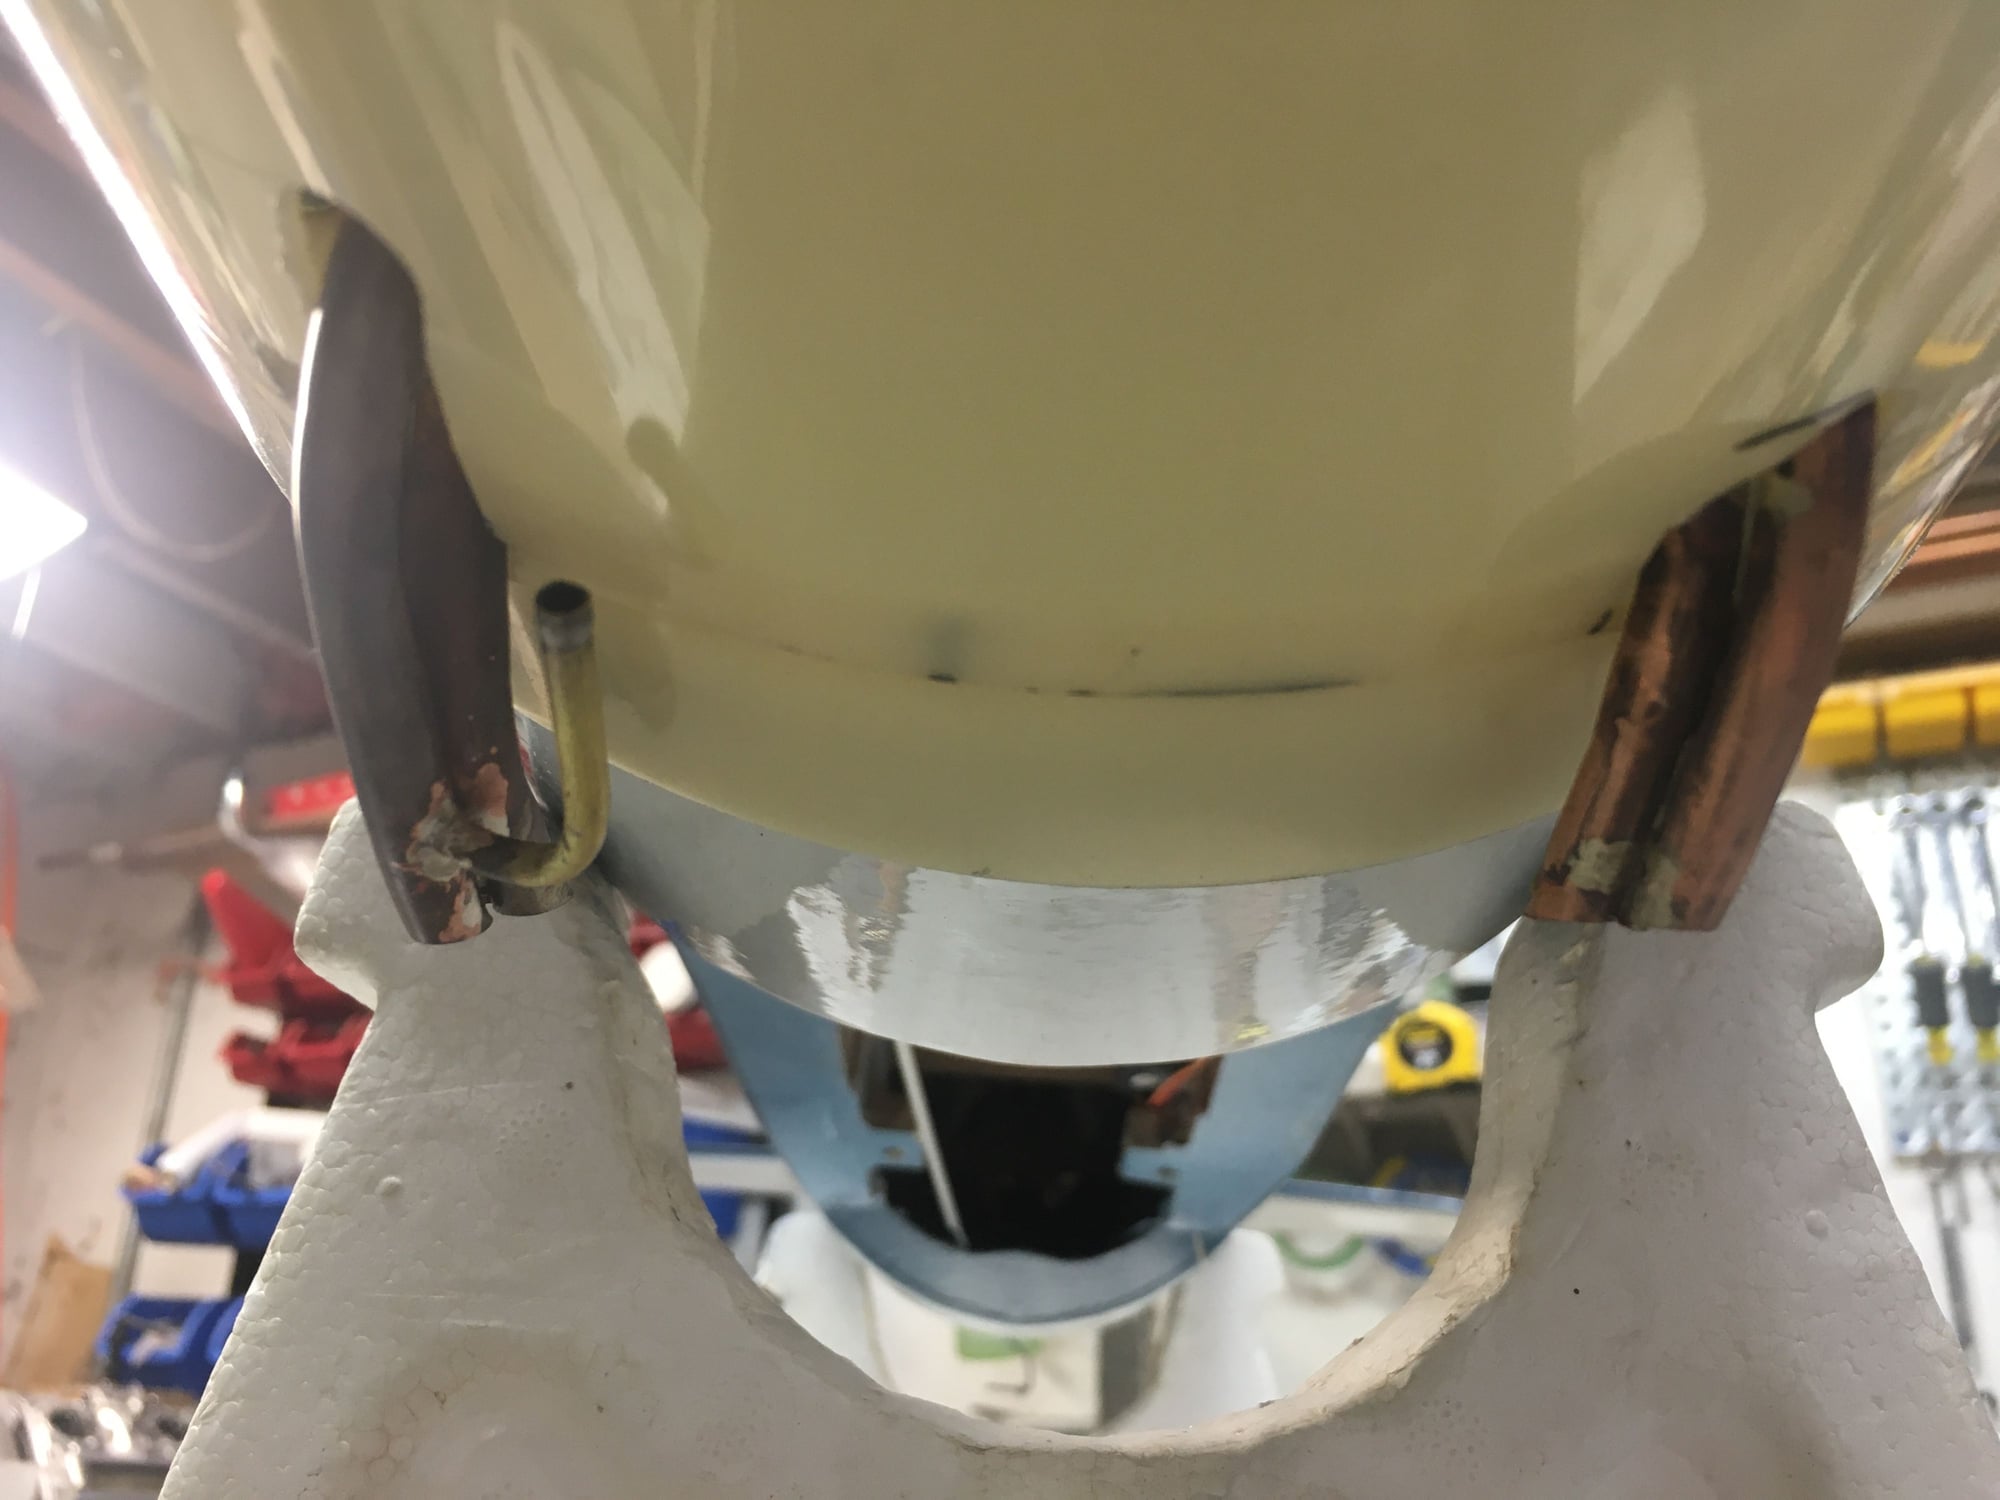
Thanks, Here is the final product, cowl has been fitted, pressure tap on, so I can now move on to hooking everything up and get the cowl completed. I should be good CG wise now, it was a bit tail heavy and had put everything up in the nose to balance. Now tht I have the pipes done, I will check balance before permanently installing the electronics.


 01-10-2021, 02:30 PM
Yep. now to find 1/8" lite ply 12" square so I can cut out the baffle. All I have is 6" wide, baffle is 6 7/8". I got my electronics locations figured out now, the glow board will attach to the top of the tank, which will have a platform attached to the bottom so that it gets secured to the tray in the fuse, and the two batteries will sit on that with the landing gear controller either on the batteries or in front/behind of them, balance will determine that. Once that is done and have the cowl flaps cut and bent open, I can paint the cowl, and clear the servo hatches for the wing and get the ailerons installed. That is pretty much all that is left besides gluing on the canopy. Need a pilot first, so now have to come up with one I like.
I will figure out what to door about gear doors later, for now I want to get it ready for flight, and if I have time after it is done before the weather is good I will work on them.
Oh, need to order the prop hub too.
I will figure out what to door about gear doors later, for now I want to get it ready for flight, and if I have time after it is done before the weather is good I will work on them.
Oh, need to order the prop hub too.
01-10-2021, 03:59 PM
Thanks Gary.
That is my ultimate plan. I smoked the bearings on a fa72 I had temp mounted on the j cub I run my 90 T on when the twin went down for bearings.
I have the parts for the twin. Was doing a quick reassembly of it and moved too fast trying to get to the fly field.
I will take it back down and replace the shims.
Pressure is off.
Thanks for opining!
01-11-2021, 03:47 AM
Senior Member

I have an FG14C that's giving me fits. Ran enough fuel to get it broke in but it's still not running right. Compression is great now, starts and idles fine, runs strong at wot but runs stupid rich from just above idle to around 4k. When I lean the lsn enough to get it smoothed out in the low rpm range the hsn will not richen at wot(A good indication that the lsn is set too lean). I've tried numerous times leaning the lsn a tiny bit at a time but in the end I get the same result. With needle settings I can get it to run fine from idle to 4K or 4K to WOT, just not both with one needle setting. Weird but a challenge to figure out. Good times.
So far I've tried the following:
Checked Cam Timing
Checked Ignition Timing
Checked valve lash
Fresh fuel
Cleaned Carb and Pump Assembly
Pump Diaphrams are good
Pump pulse port is unobstructed
Bearings are smooth and spin freely
Dave sent me a new ignition to try, hopefully that fixes it. If not it could have bad muffler bearings or be low on blinker fluid. I haven't checked those yet.")
So far I've tried the following:
Checked Cam Timing
Checked Ignition Timing
Checked valve lash
Fresh fuel
Cleaned Carb and Pump Assembly
Pump Diaphrams are good
Pump pulse port is unobstructed
Bearings are smooth and spin freely
Dave sent me a new ignition to try, hopefully that fixes it. If not it could have bad muffler bearings or be low on blinker fluid. I haven't checked those yet.
Lonnie, the ignition I sent is the stock ignition from my FG 11, I don't need it back.
