


Gilmore Red Lion Build
 11-18-2020, 04:05 PM
#626

Thread Starter

Join Date: Jul 2012
Location: Missouri
Posts: 1,127
Likes: 0
Received 0 Likes
on
0 Posts
Hi Frank
I built the horizontal and vertical stab before I started the fuse.
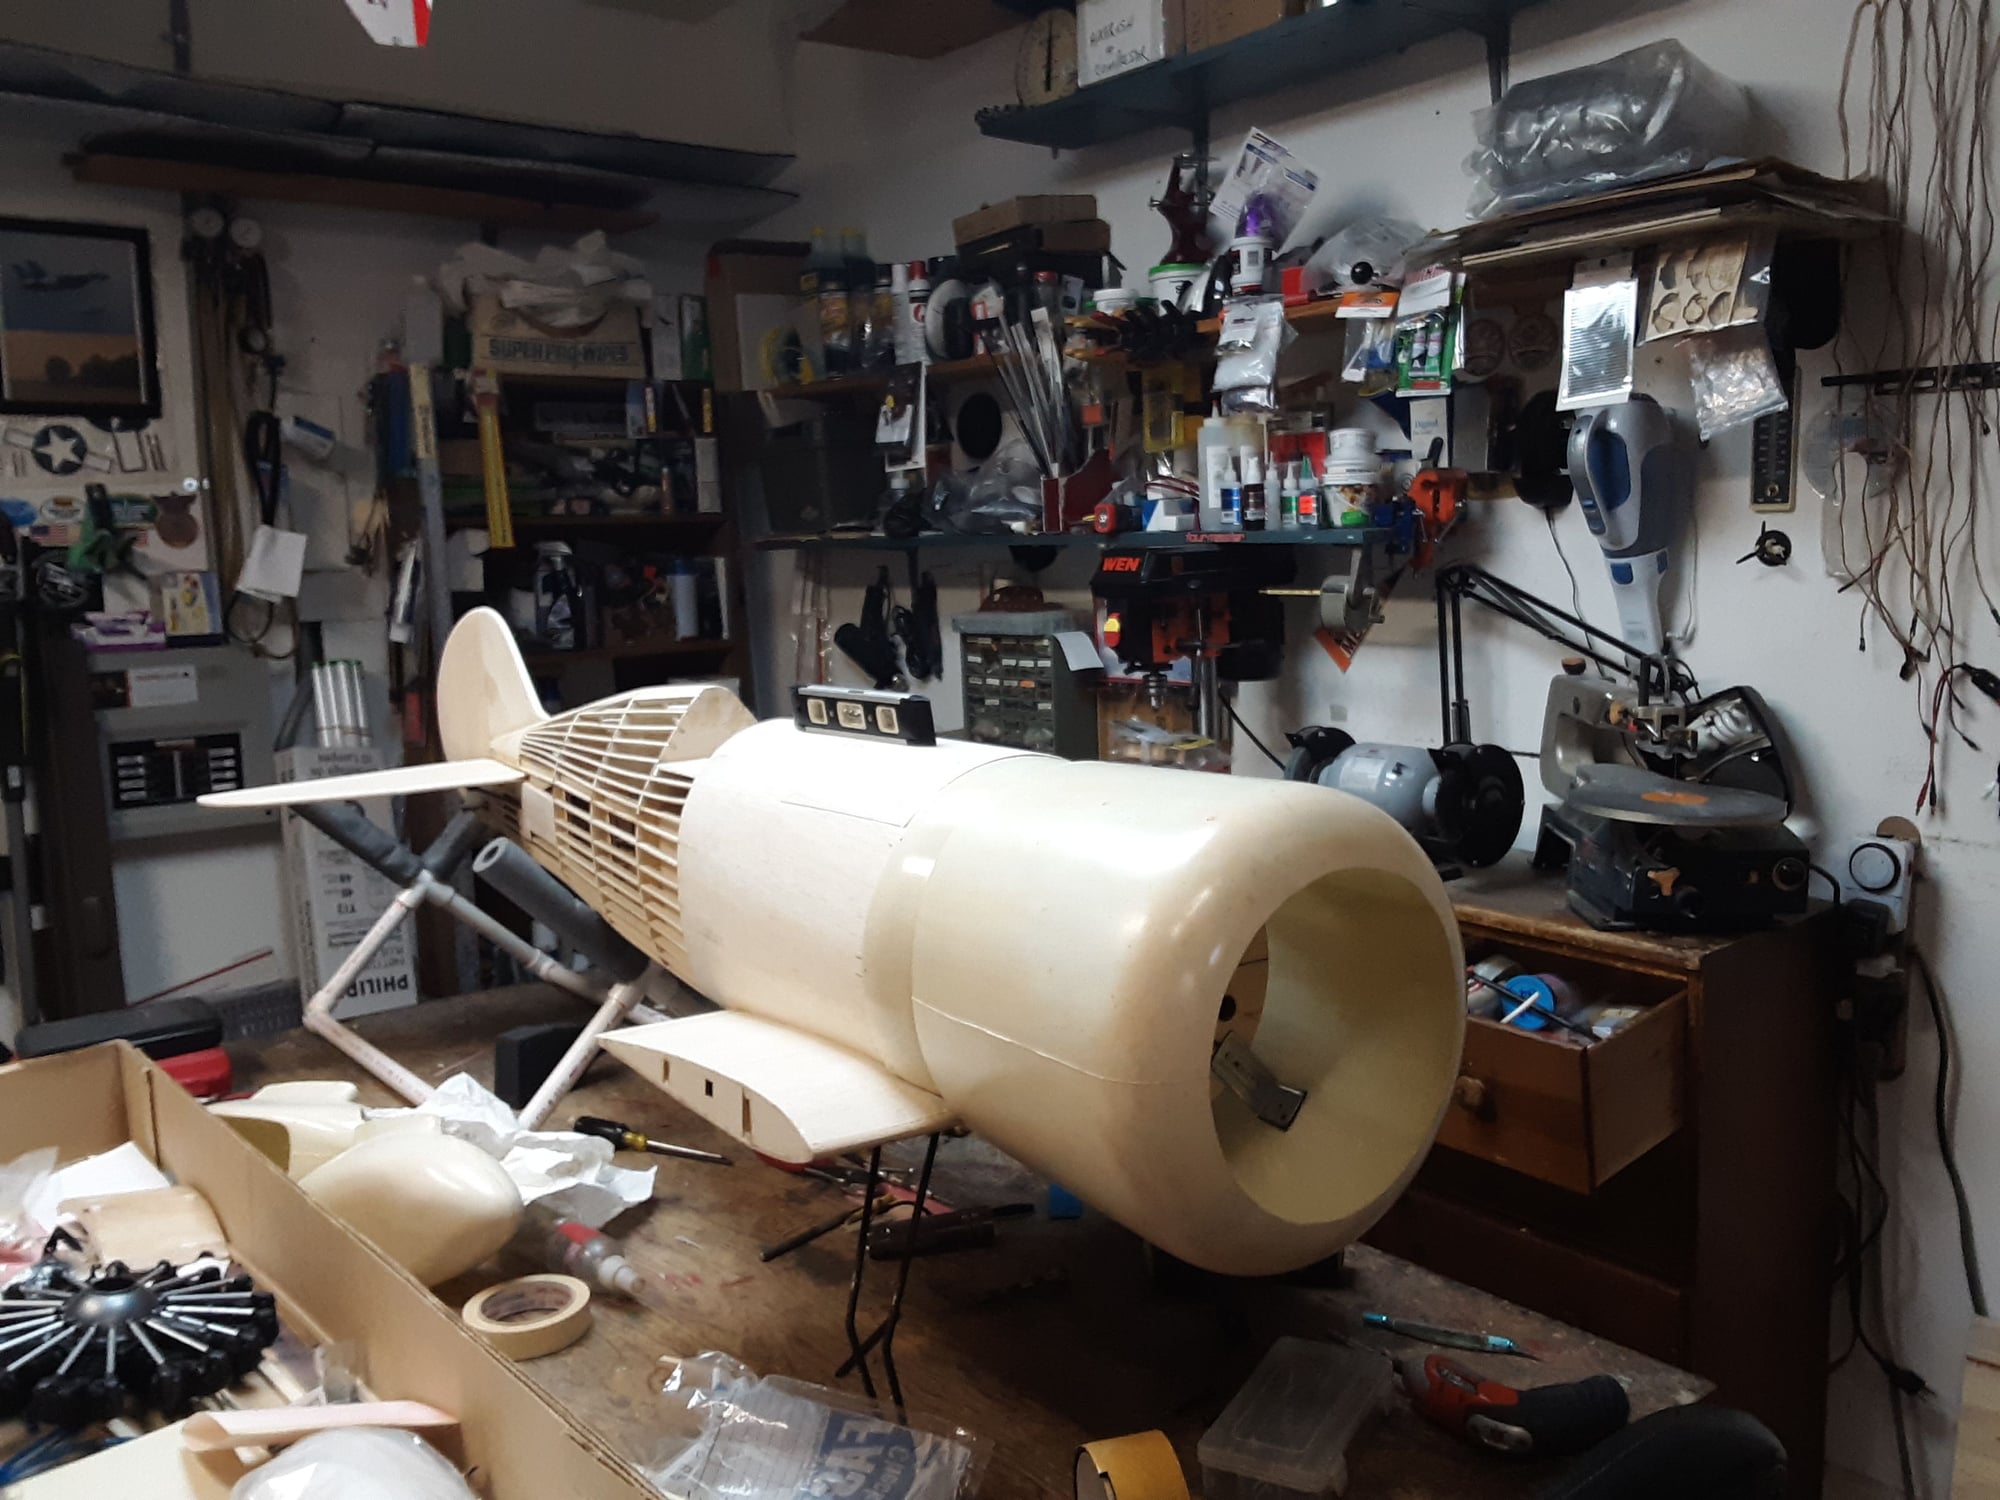
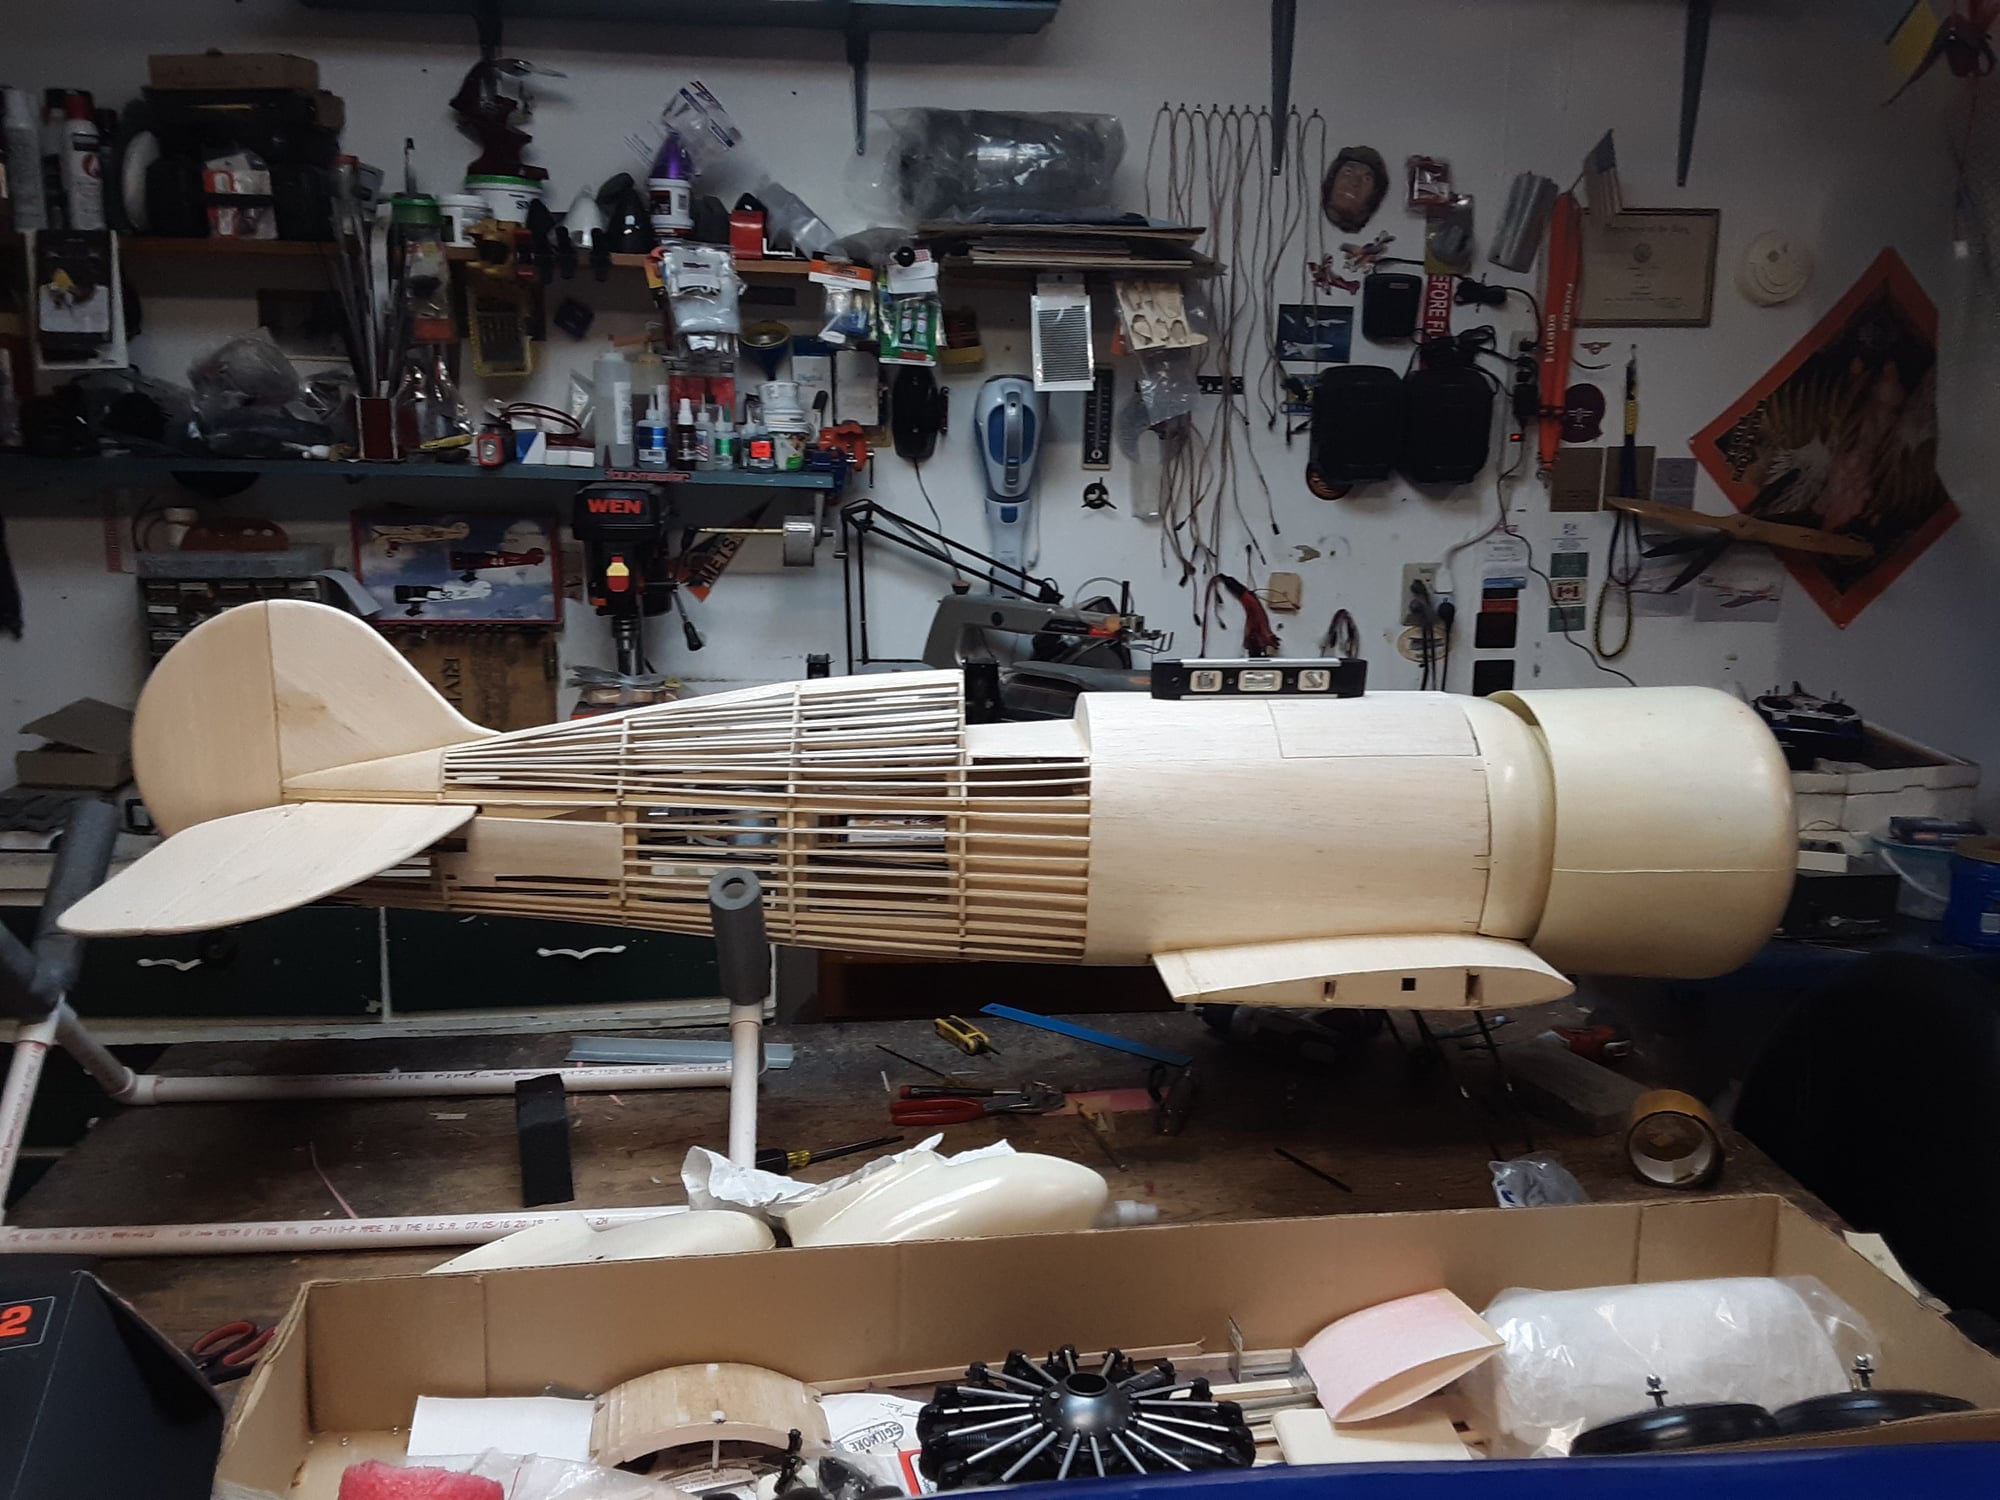
Mr. Hostetler had a substantial amount of ply behind the wing on the fuse. I started to build that way and someone pointed out that a light truss would save a lot of weight. The fuse has a lot of stringers. When the stringers are installed the fuse is very sollid.
After both truss half's were married together to make one inner fuse. I set the horizontal stab in place and began working out the linkage. Lots of room to work that up before wrapping the fuse in stringers. I basically installed all the servo's and linkage at this time.Did the same with the horizontal stab linkage. I didn't permanently mount the stabs just tacked them in place to get the geometry correct.
After the internals the former's were attached.

Then feather the vert stab in with the fuse and complete the backbone.

Then string away being mindful of symmetry and feathering into the stabilizers.
Hope that helps Frank.
Be happy to entertain any other questions you may have .
Kevin
I built the horizontal and vertical stab before I started the fuse.
Mr. Hostetler had a substantial amount of ply behind the wing on the fuse. I started to build that way and someone pointed out that a light truss would save a lot of weight. The fuse has a lot of stringers. When the stringers are installed the fuse is very sollid.
After both truss half's were married together to make one inner fuse. I set the horizontal stab in place and began working out the linkage. Lots of room to work that up before wrapping the fuse in stringers. I basically installed all the servo's and linkage at this time.Did the same with the horizontal stab linkage. I didn't permanently mount the stabs just tacked them in place to get the geometry correct.
After the internals the former's were attached.
Then feather the vert stab in with the fuse and complete the backbone.
Then string away being mindful of symmetry and feathering into the stabilizers.
Hope that helps Frank.
Be happy to entertain any other questions you may have .
Kevin
 11-18-2020, 05:06 PM
#627

My Feedback: (204)

Join Date: Jan 2002
Location: Va Beach, VA
Posts: 1,189
Likes: 0
Received 0 Likes
on
0 Posts
Hi Frank
I built the horizontal and vertical stab before I started the fuse.
Mr. Hostetler had a substantial amount of ply behind the wing on the fuse. I started to build that way and someone pointed out that a light truss would save a lot of weight. The fuse has a lot of stringers. When the stringers are installed the fuse is very sollid.
After both truss half's were married together to make one inner fuse. I set the horizontal stab in place and began working out the linkage. Lots of room to work that up before wrapping the fuse in stringers. I basically installed all the servo's and linkage at this time.Did the same with the horizontal stab linkage. I didn't permanently mount the stabs just tacked them in place to get the geometry correct.
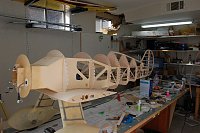
After the internals the former's were attached.
Attachment 2268684
Attachment 2268685
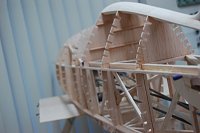
Then feather the vert stab in with the fuse and complete the backbone.
Attachment 2268686
Attachment 2268687
Then string away being mindful of symmetry and feathering into the stabilizers.
Hope that helps Frank.
Be happy to entertain any other questions you may have .
Kevin
I built the horizontal and vertical stab before I started the fuse.
Mr. Hostetler had a substantial amount of ply behind the wing on the fuse. I started to build that way and someone pointed out that a light truss would save a lot of weight. The fuse has a lot of stringers. When the stringers are installed the fuse is very sollid.
After both truss half's were married together to make one inner fuse. I set the horizontal stab in place and began working out the linkage. Lots of room to work that up before wrapping the fuse in stringers. I basically installed all the servo's and linkage at this time.Did the same with the horizontal stab linkage. I didn't permanently mount the stabs just tacked them in place to get the geometry correct.
After the internals the former's were attached.
Attachment 2268684
Attachment 2268685
Then feather the vert stab in with the fuse and complete the backbone.
Attachment 2268686
Attachment 2268687
Then string away being mindful of symmetry and feathering into the stabilizers.
Hope that helps Frank.
Be happy to entertain any other questions you may have .
Kevin
Thank you
Frank Rega
 11-19-2020, 01:30 PM
#628
Thread Starter
Join Date: Jul 2012
Location: Missouri
Posts: 1,127
Likes: 0
Received 0 Likes
on
0 Posts
Hi Frank
I misunderstood your question. I thought you were yet to begin on the fuse. You were asking about the covering. Gotcha
Lovely work by the way.
My build is yet to be completed. I stopped on it a couple of years ago because of some life changes. My fuse is waiting to be covered. I will get back to it some day soon. Probably in retirement.
As to your question. I would probably cover the bottom first, then attack the sides and ending with the top. I would see how the covering lays . You may be able to do the top and side in two pieces with a seam at the top spine of the fuse. See how the fabric drapes and let that be your guide.
Where the fabric meets the front sheathing. I would tape a line at that point and use some good body filler to make a panel line there. Sand down to the tape, remove tape and you have a nice overlay panel line.
My 2 cents. Lots of ways to skin a cat. Trust your gut.
Kevin
11-19-2020, 01:58 PM
#629
My Feedback: (204)
Join Date: Jan 2002
Location: Va Beach, VA
Posts: 1,189
Likes: 0
Received 0 Likes
on
0 Posts
Hi Frank
I misunderstood your question. I thought you were yet to begin on the fuse. You were asking about the covering. Gotcha
Lovely work by the way.
My build is yet to be completed. I stopped on it a couple of years ago because of some life changes. My fuse is waiting to be covered. I will get back to it some day soon. Probably in retirement.
As to your question. I would probably cover the bottom first, then attack the sides and ending with the top. I would see how the covering lays . You may be able to do the top and side in two pieces with a seam at the top spine of the fuse. See how the fabric drapes and let that be your guide.
Where the fabric meets the front sheathing. I would tape a line at that point and use some good body filler to make a panel line there. Sand down to the tape, remove tape and you have a nice overlay panel line.
My 2 cents. Lots of ways to skin a cat. Trust your gut.
Kevin
