


TF Beechcraft Bonanza F33A Build
 10-17-2019, 01:57 AM
#326

Thread Starter
Yes I agree! I'm sure the 1/64" was just a typo, but your idea is spot on. The entire plane EF will be clad in half ounce glass as well giving the entire skin added strength and durability...
Last edited by VincentJ; 10-17-2019 at 01:59 AM.
 10-17-2019, 03:00 AM
#328
Thread Starter

 10-17-2019, 05:43 AM
#330
Yes, it doesn�t come cheap, but then you don�t really need too much for such applications.
I first came across this technique while scratch building scale models designed by the British scale master builder David Vaughan, and after trying it I decided to utilize it often.
Waiting to see a video of the RDS in operation...
I first came across this technique while scratch building scale models designed by the British scale master builder David Vaughan, and after trying it I decided to utilize it often.
Waiting to see a video of the RDS in operation...
10-17-2019, 09:43 AM
#331
Thread Starter
Yes, it doesn’t come cheap, but then you don’t really need too much for such applications.
I first came across this technique while scratch building scale models designed by the British scale master builder David Vaughan, and after trying it I decided to utilize it often.
Waiting to see a video of the RDS in operation...
I first came across this technique while scratch building scale models designed by the British scale master builder David Vaughan, and after trying it I decided to utilize it often.
Waiting to see a video of the RDS in operation...
 10-17-2019, 07:21 PM
#332

Guys, you're just looking in the wrong places. I can get a square 61" sheet of .4mm(1/64") 3 ply plywood for $104(plus sales tax of course) from a shop in Tacoma WA, just have to drive down to get it.
Last edited by Hydro Junkie; 10-17-2019 at 07:32 PM.
10-18-2019, 04:56 AM
#333
The problem here is there aren't places carrying 1/64" like you have in Tacoma. I can get it from Aircraft Spruce but a 48" square sheet ends up at $189 with freight with the freight being 2/3 of the cost. A half sheet 24" X 48" works out to be ^4.50. I can go to Balsa USA and order a 12" X 48" sheet but with shipping and handling I'm still looking at $47.65.
 10-18-2019, 05:42 AM
#336
Well, if we�re comparing costs of ply... my LHS is only a 10 minute drive for me and sells a 48� square of 1/64� for about 130 US, but this is useless information for most of you guys since you are on the opposite side of the Atlantic and the Mediterranean 
10-18-2019, 06:35 AM
#338
At the risk of getting too off topic here...
About 4 USD for a 36� length but an additional 50% for the 48� plus you need to buy at least 10 sheets because the LHS cuts it to order. I always splice sheets when I need that length.
About 4 USD for a 36� length but an additional 50% for the 48� plus you need to buy at least 10 sheets because the LHS cuts it to order. I always splice sheets when I need that length.
10-18-2019, 10:29 AM
#343
Mike
10-18-2019, 10:38 AM
#344
Thread Starter
Builder's tip:
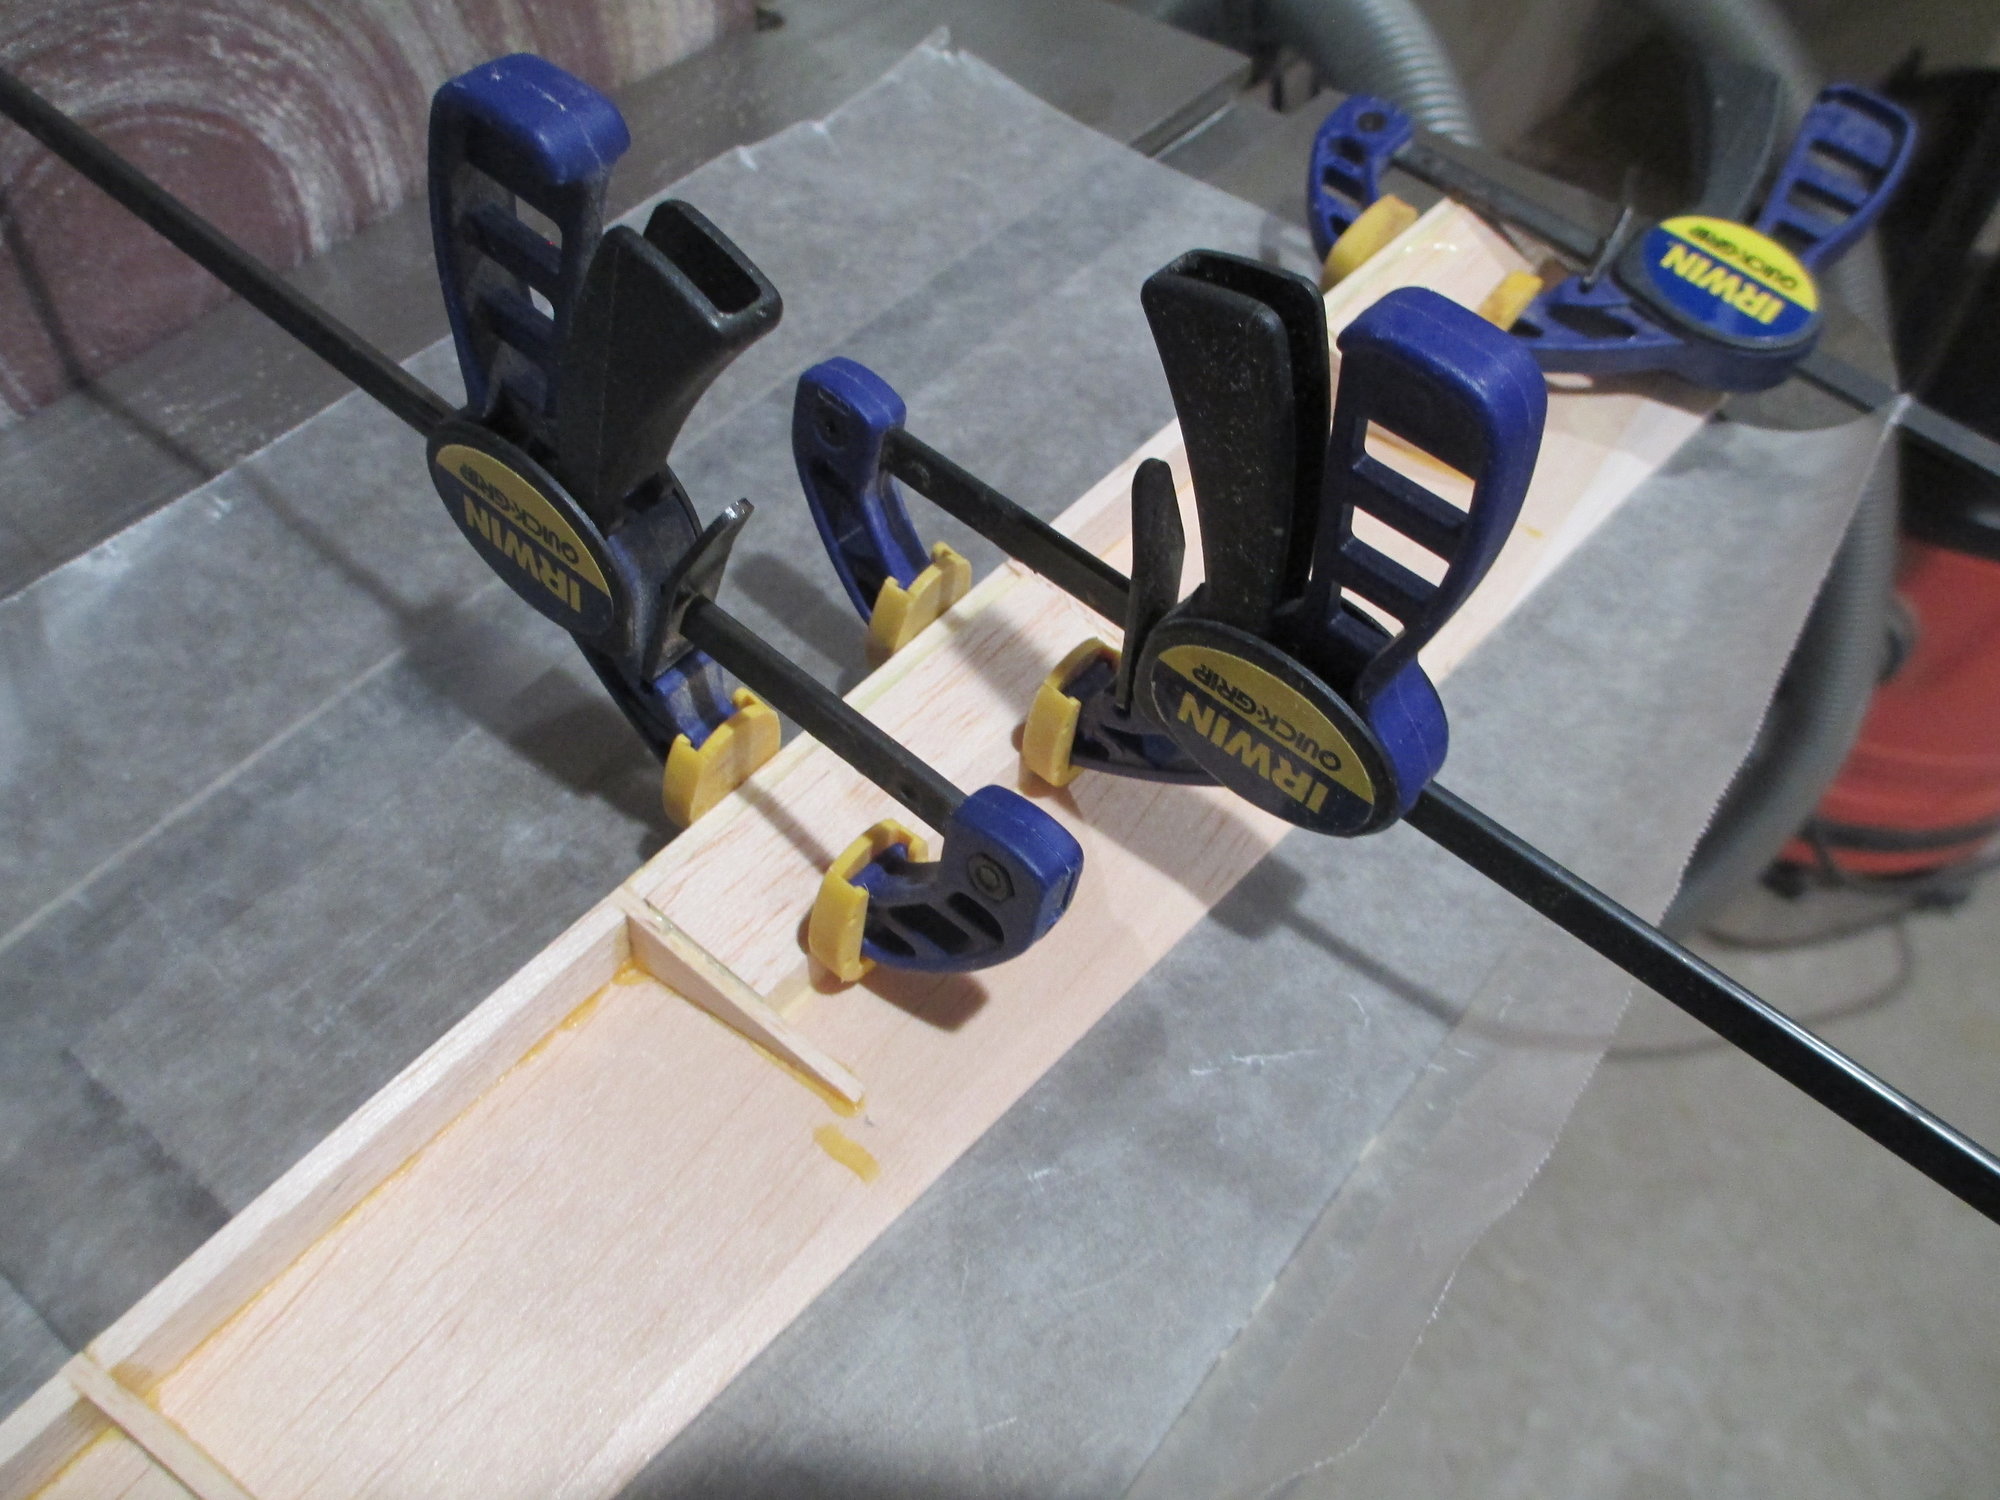
It just occurred to me that I had forgotten to mention a certain step while gluing in the remaining sheet of balsa on the aileron surface that I think you will find useful. As you know the top portion of the aileron was sheeted, but the bottom surface was left uncovered. After the hinge blocking was installed I spread Titebond glue on all of the rib surfaces in preparation of the bottom skin. I did not apply Titebond along the trailing edge of the aileron's sheeting, instead I used a thin bead of epoxy. Try this the next time you join the top and bottom TE on your aileron or flap and you will find that the epoxy will give you a very rigid edge that the Titebond glue won't be able to do.
It just occurred to me that I had forgotten to mention a certain step while gluing in the remaining sheet of balsa on the aileron surface that I think you will find useful. As you know the top portion of the aileron was sheeted, but the bottom surface was left uncovered. After the hinge blocking was installed I spread Titebond glue on all of the rib surfaces in preparation of the bottom skin. I did not apply Titebond along the trailing edge of the aileron's sheeting, instead I used a thin bead of epoxy. Try this the next time you join the top and bottom TE on your aileron or flap and you will find that the epoxy will give you a very rigid edge that the Titebond glue won't be able to do.
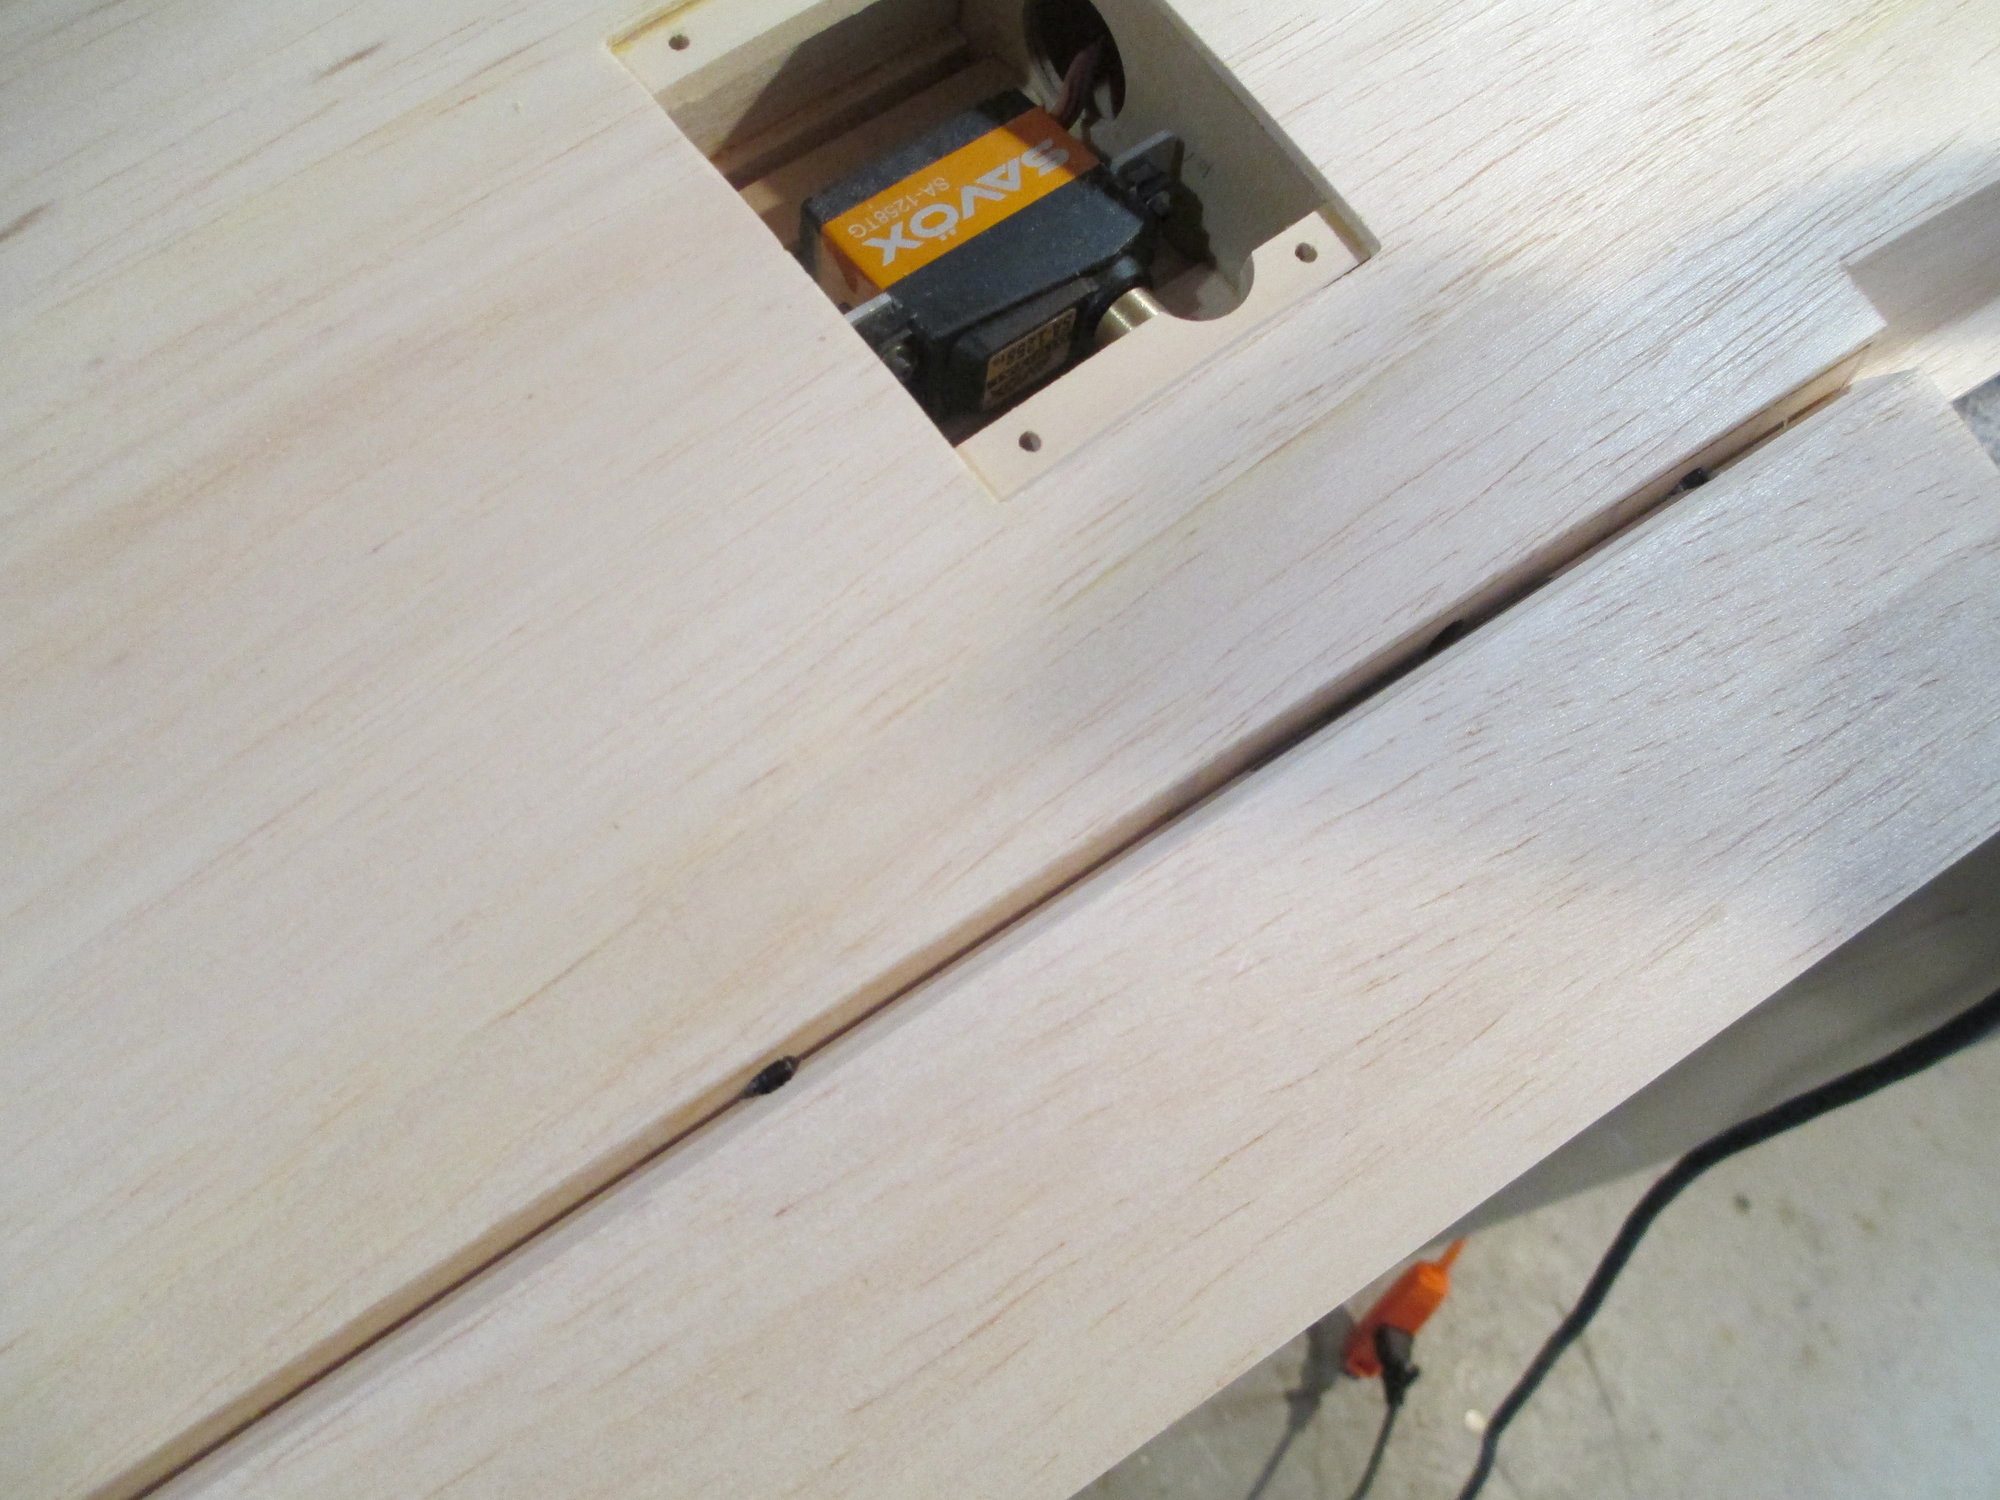
10-18-2019, 01:25 PM
#346
Thread Starter
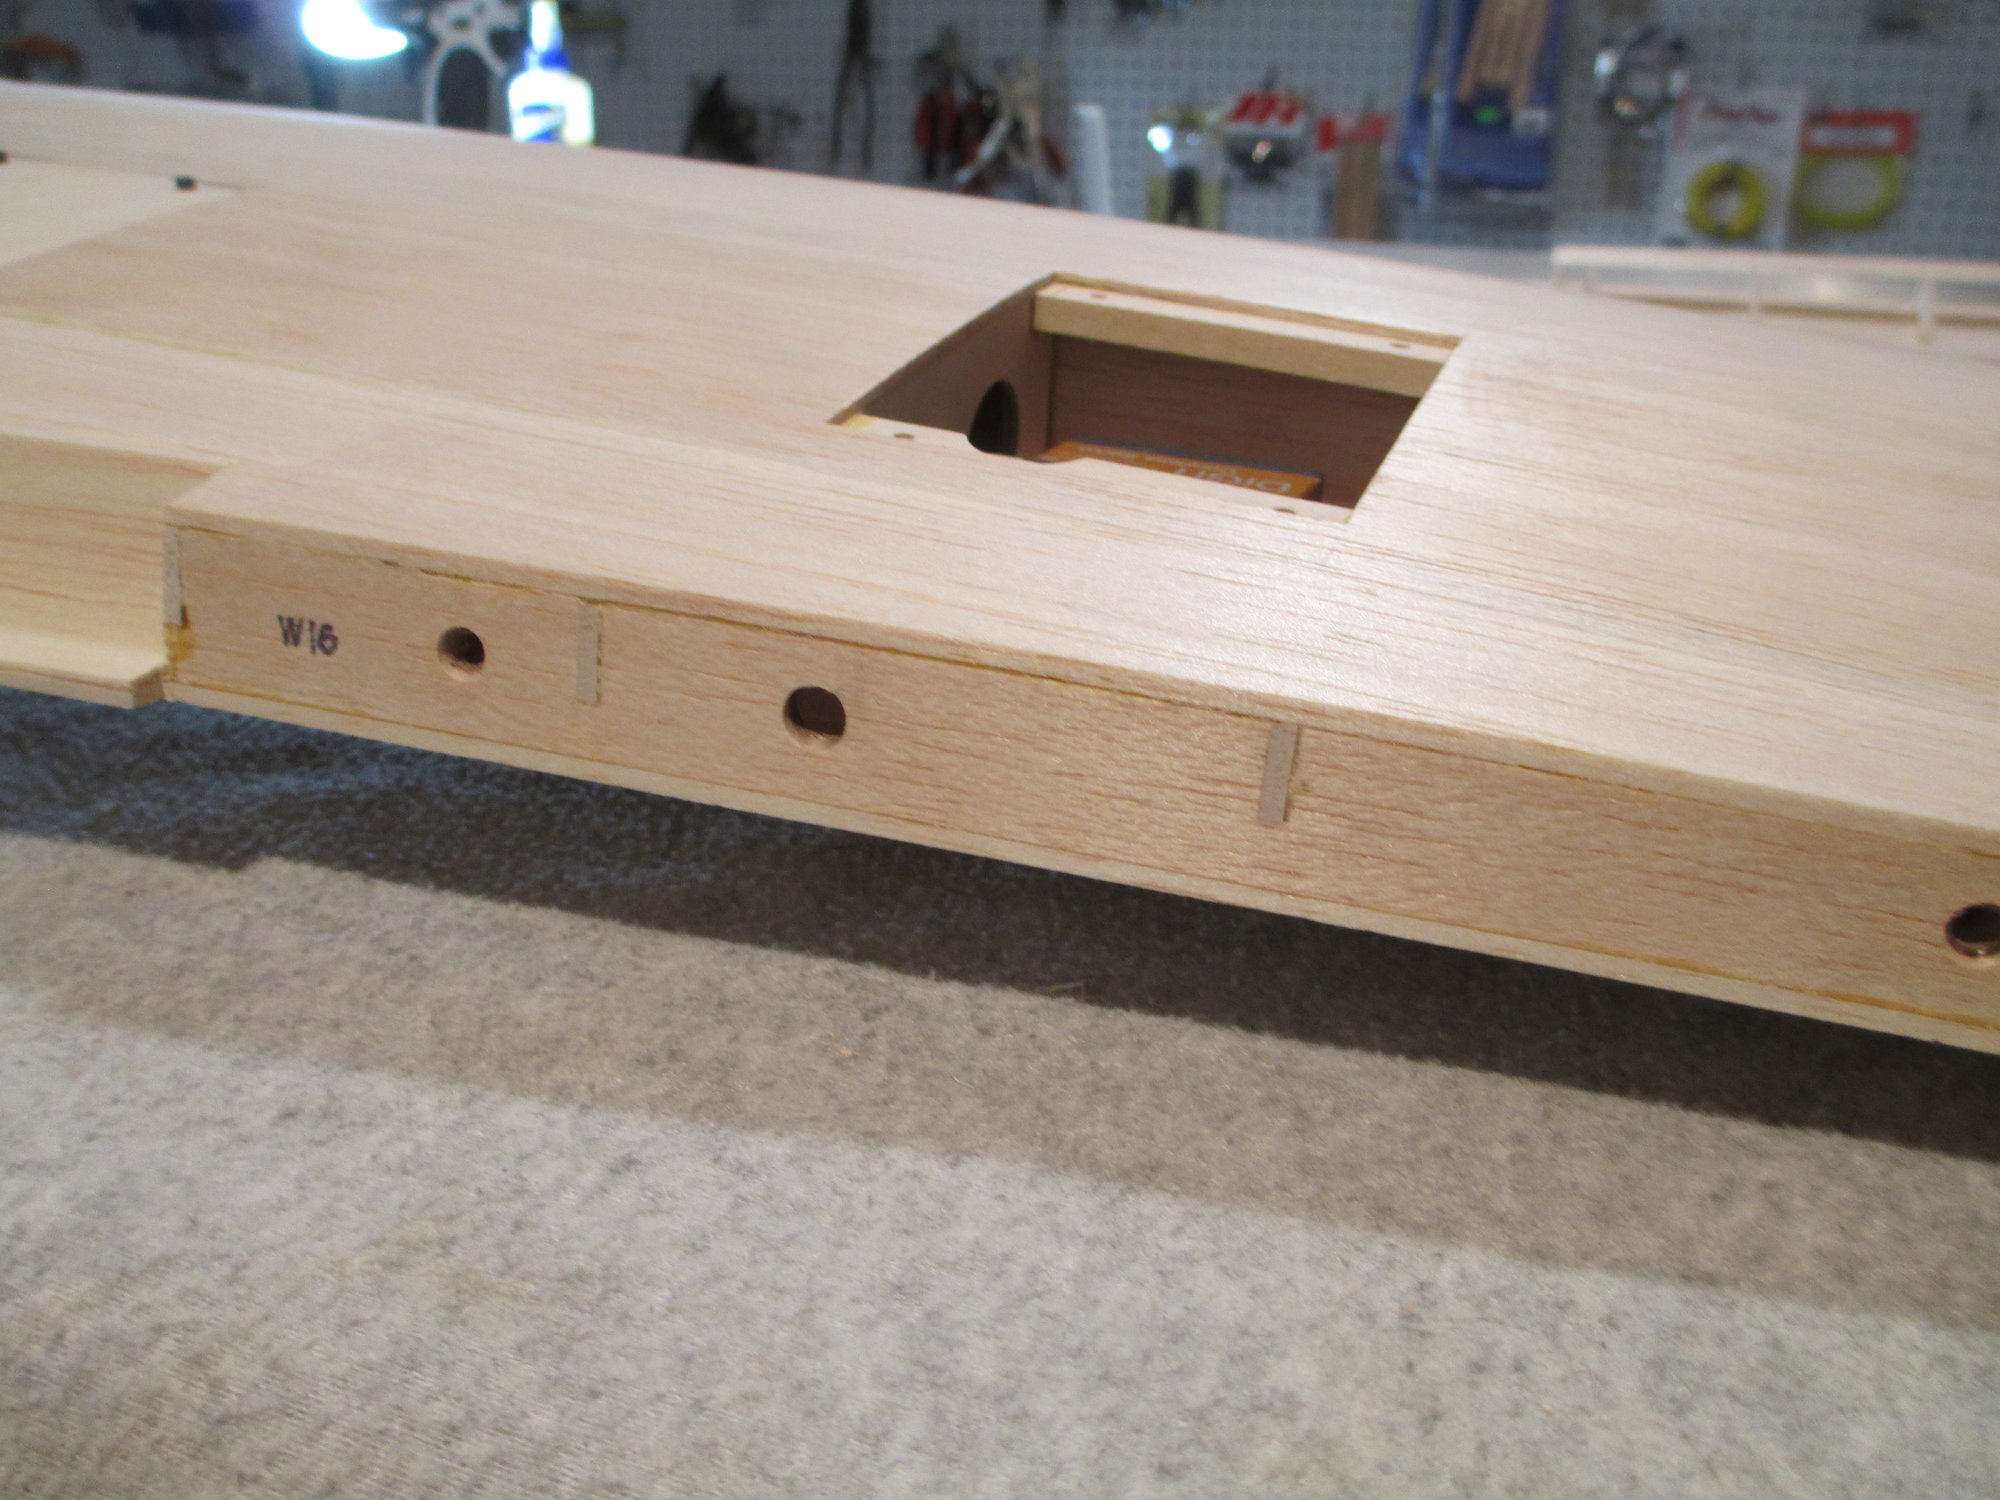
You may have been wondering how I was going to be able to install/remove the drive shaft ...note the hole directly in front of the servo hatch.

A picture is worth a thousand words...
The right aileron was cut free from the wing, the remaining hinge blocks were fitted and glued in place.
 10-19-2019, 11:26 AM
#349
Thread Starter

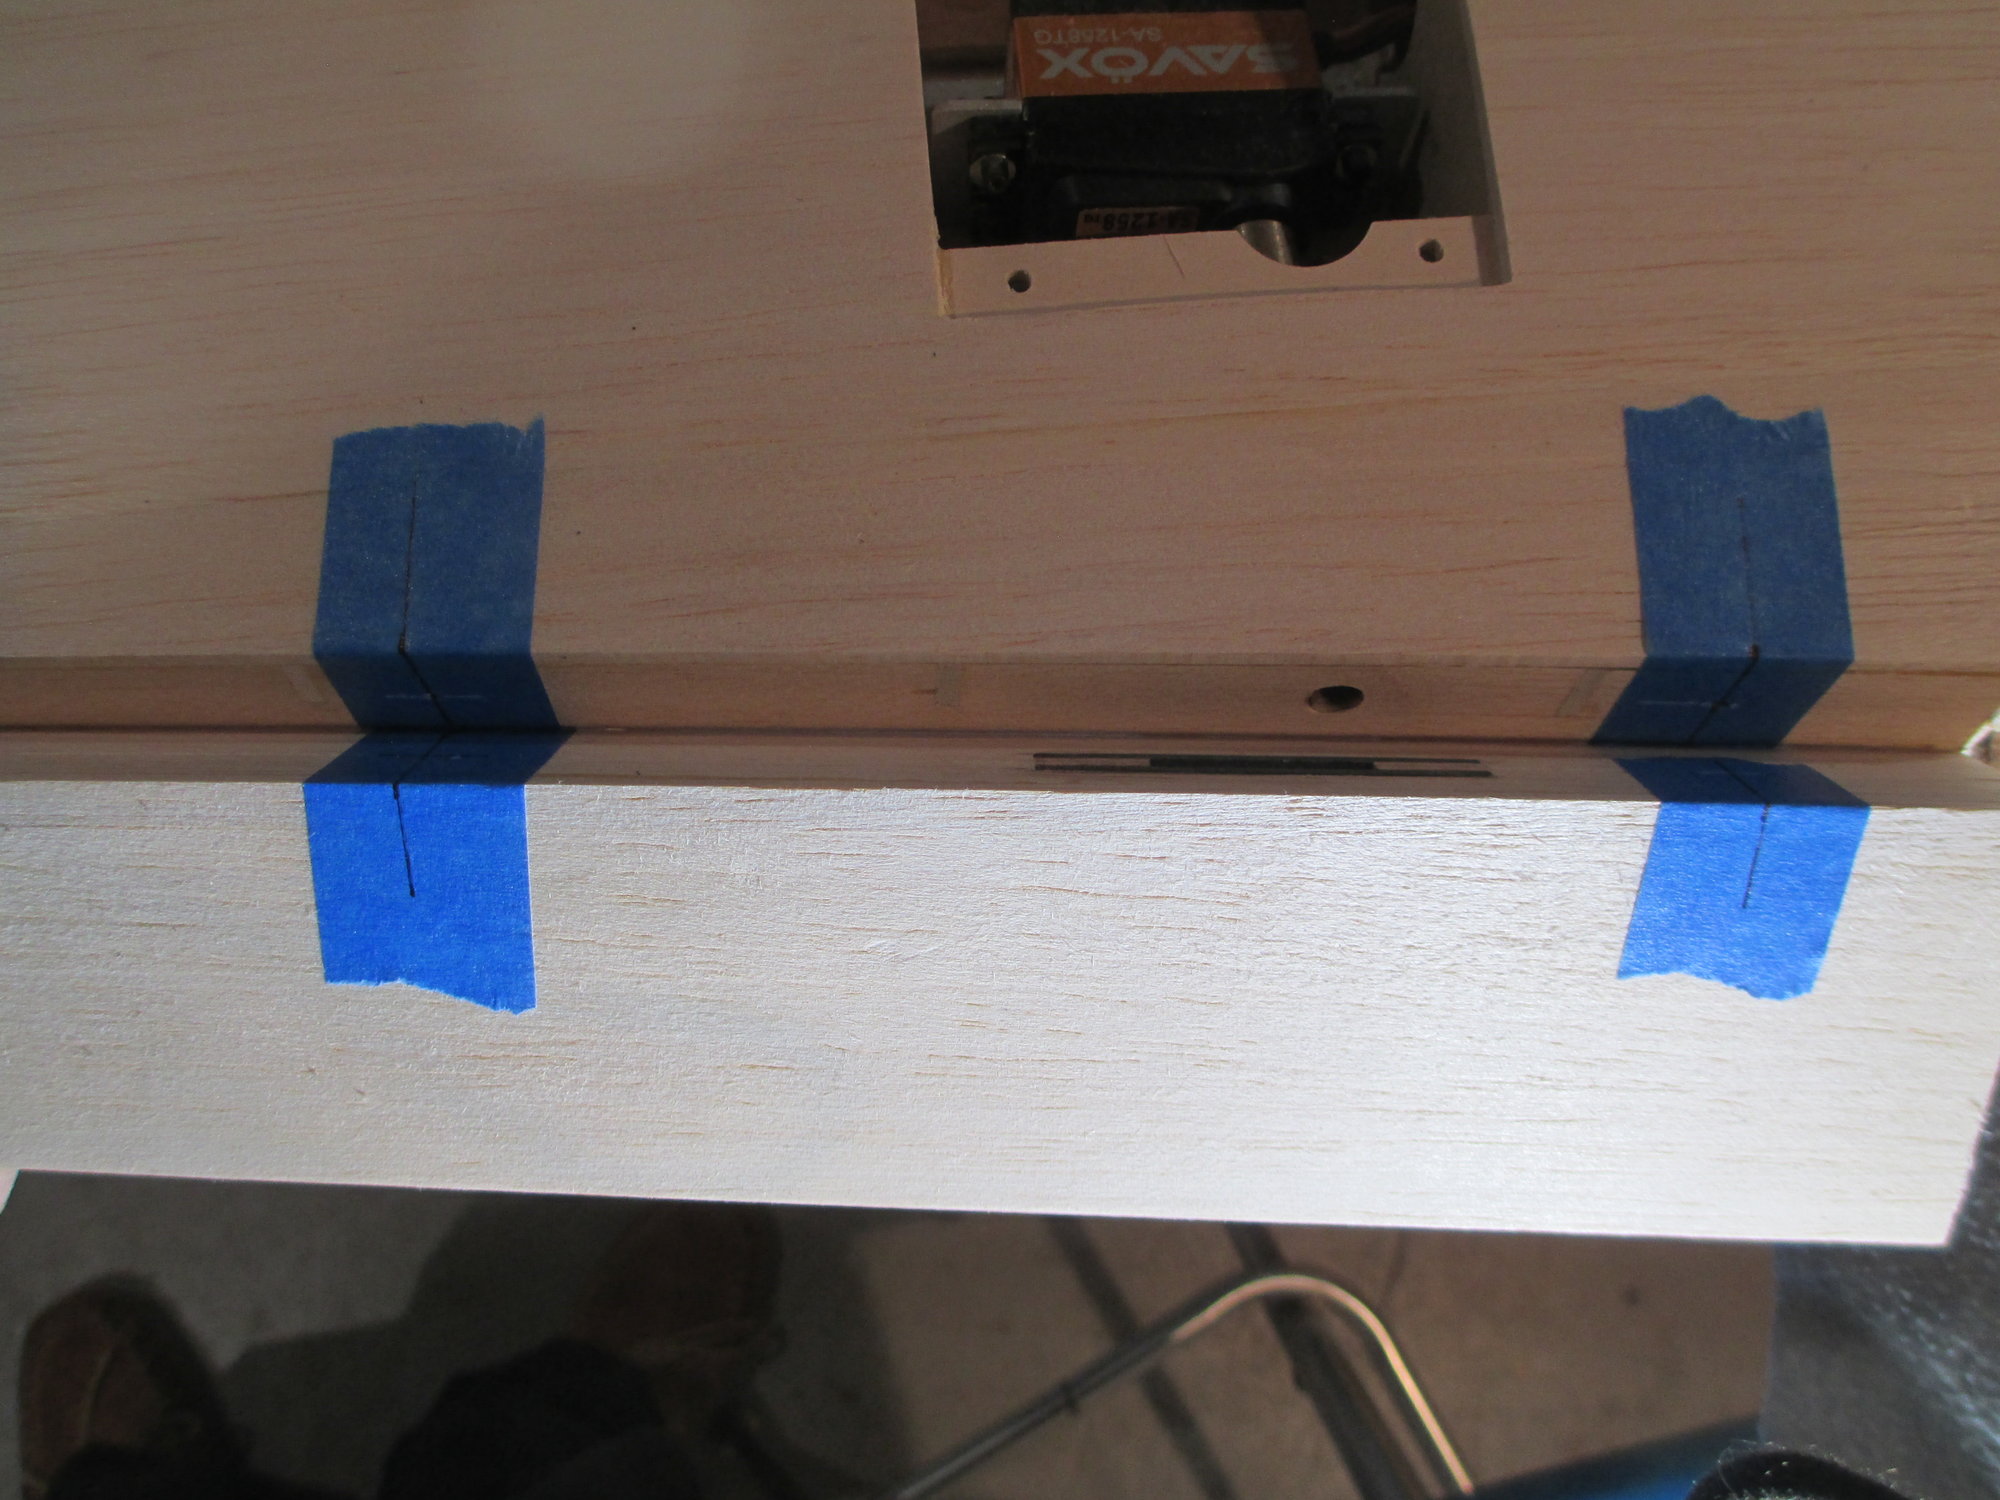
Note that I drilled for my hinges before I beveled the leading edge. One side of the bevel done.
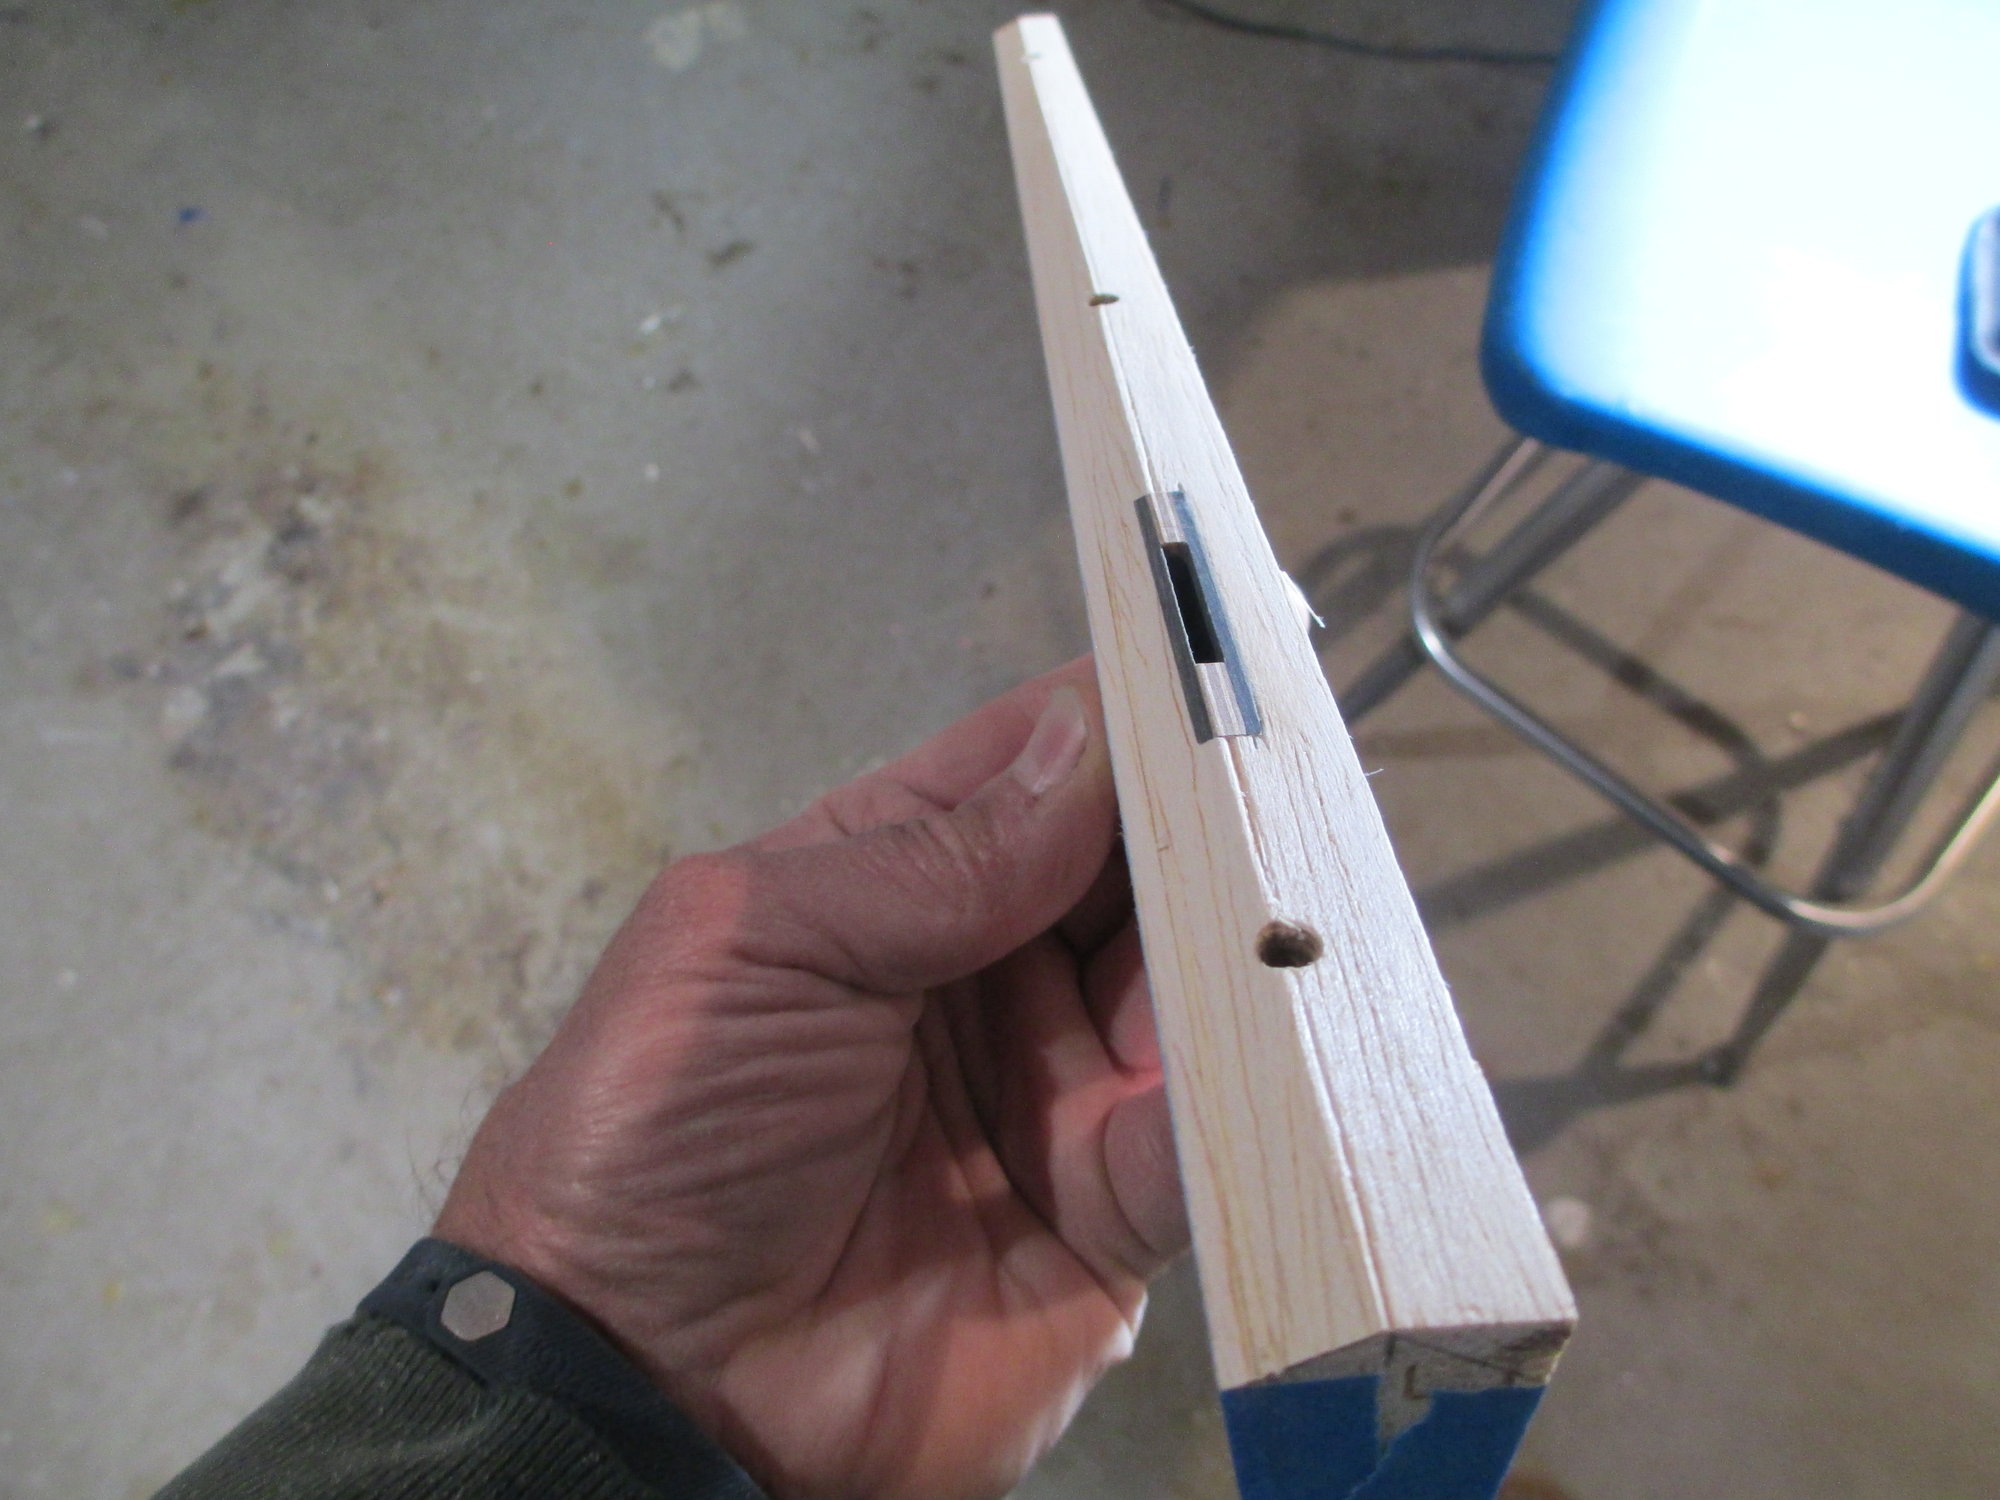
You can see my scribe line that guides me.
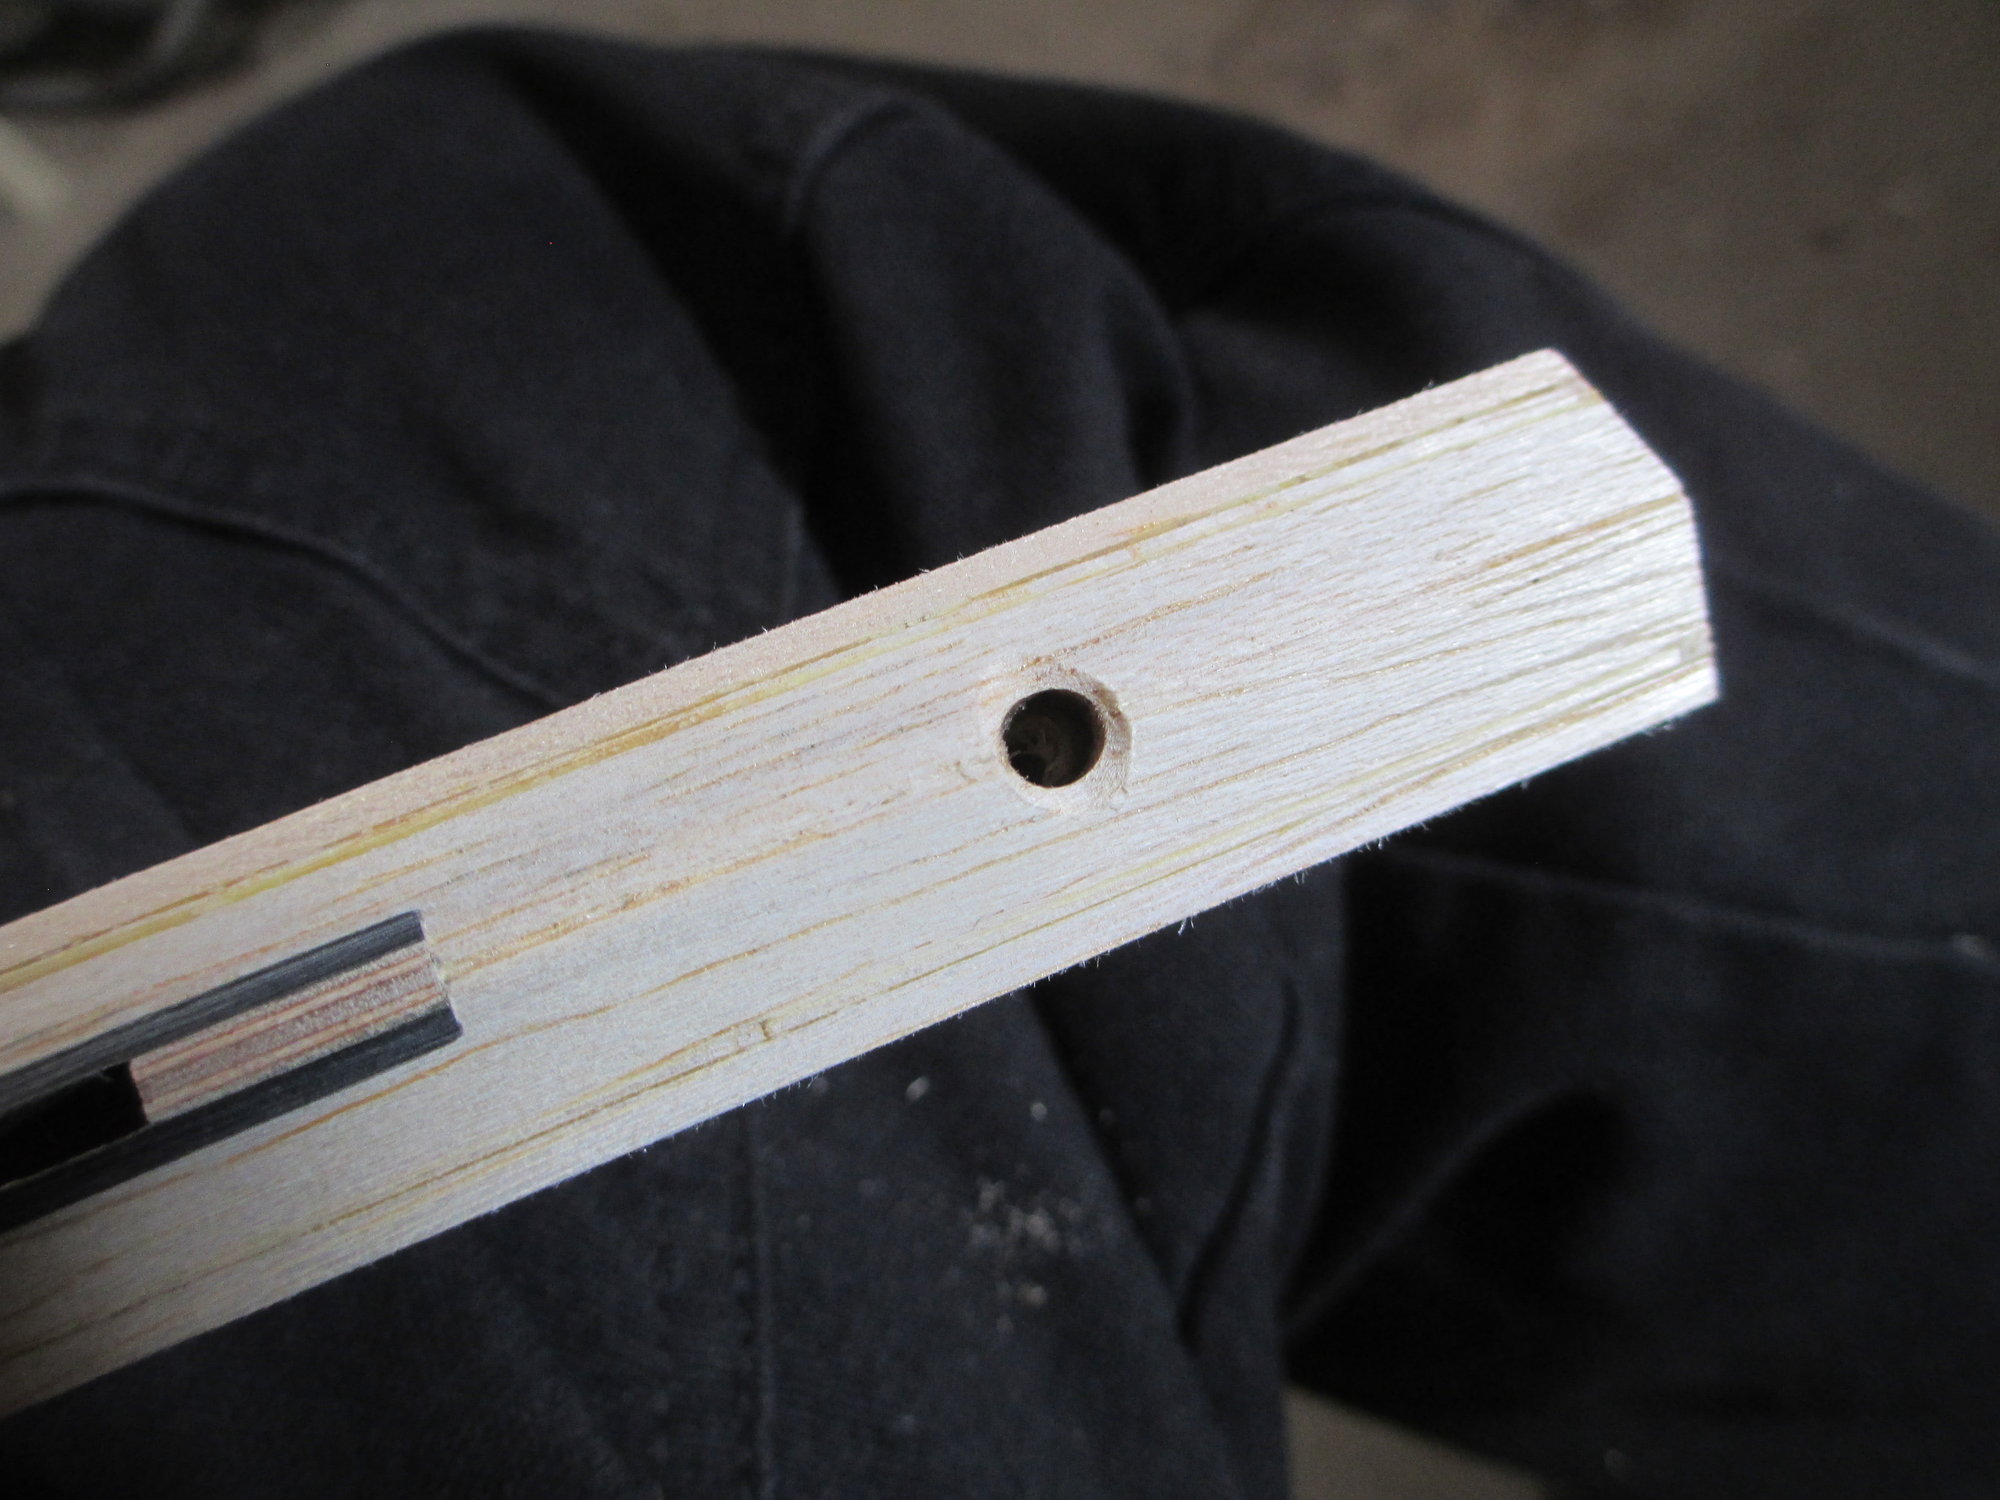
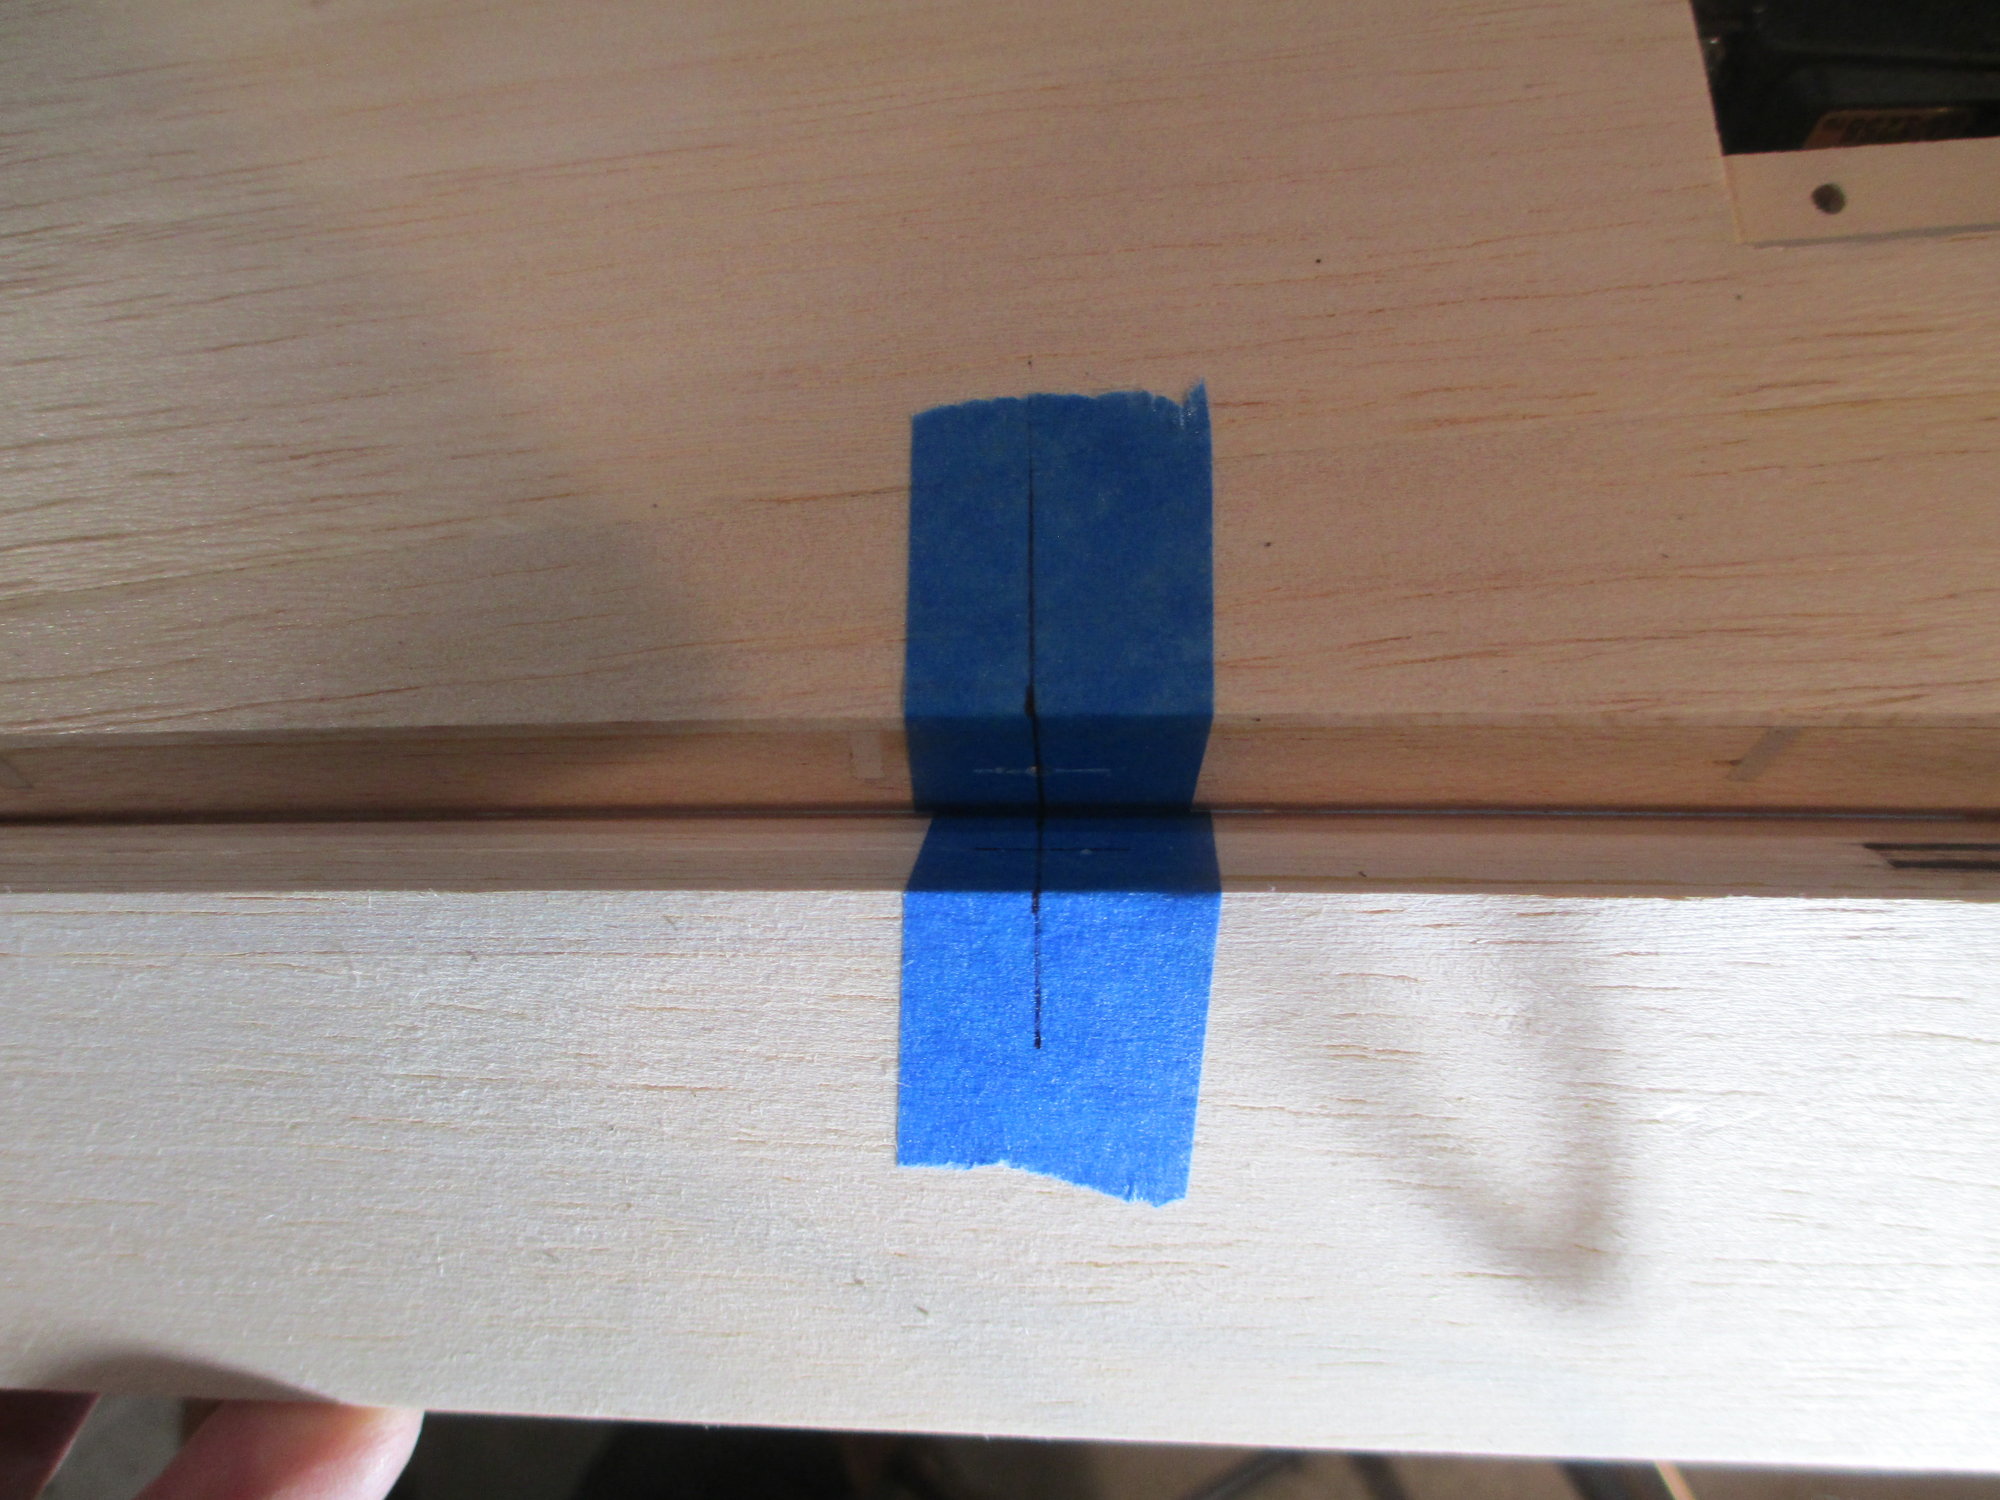
Hinge hole detail.
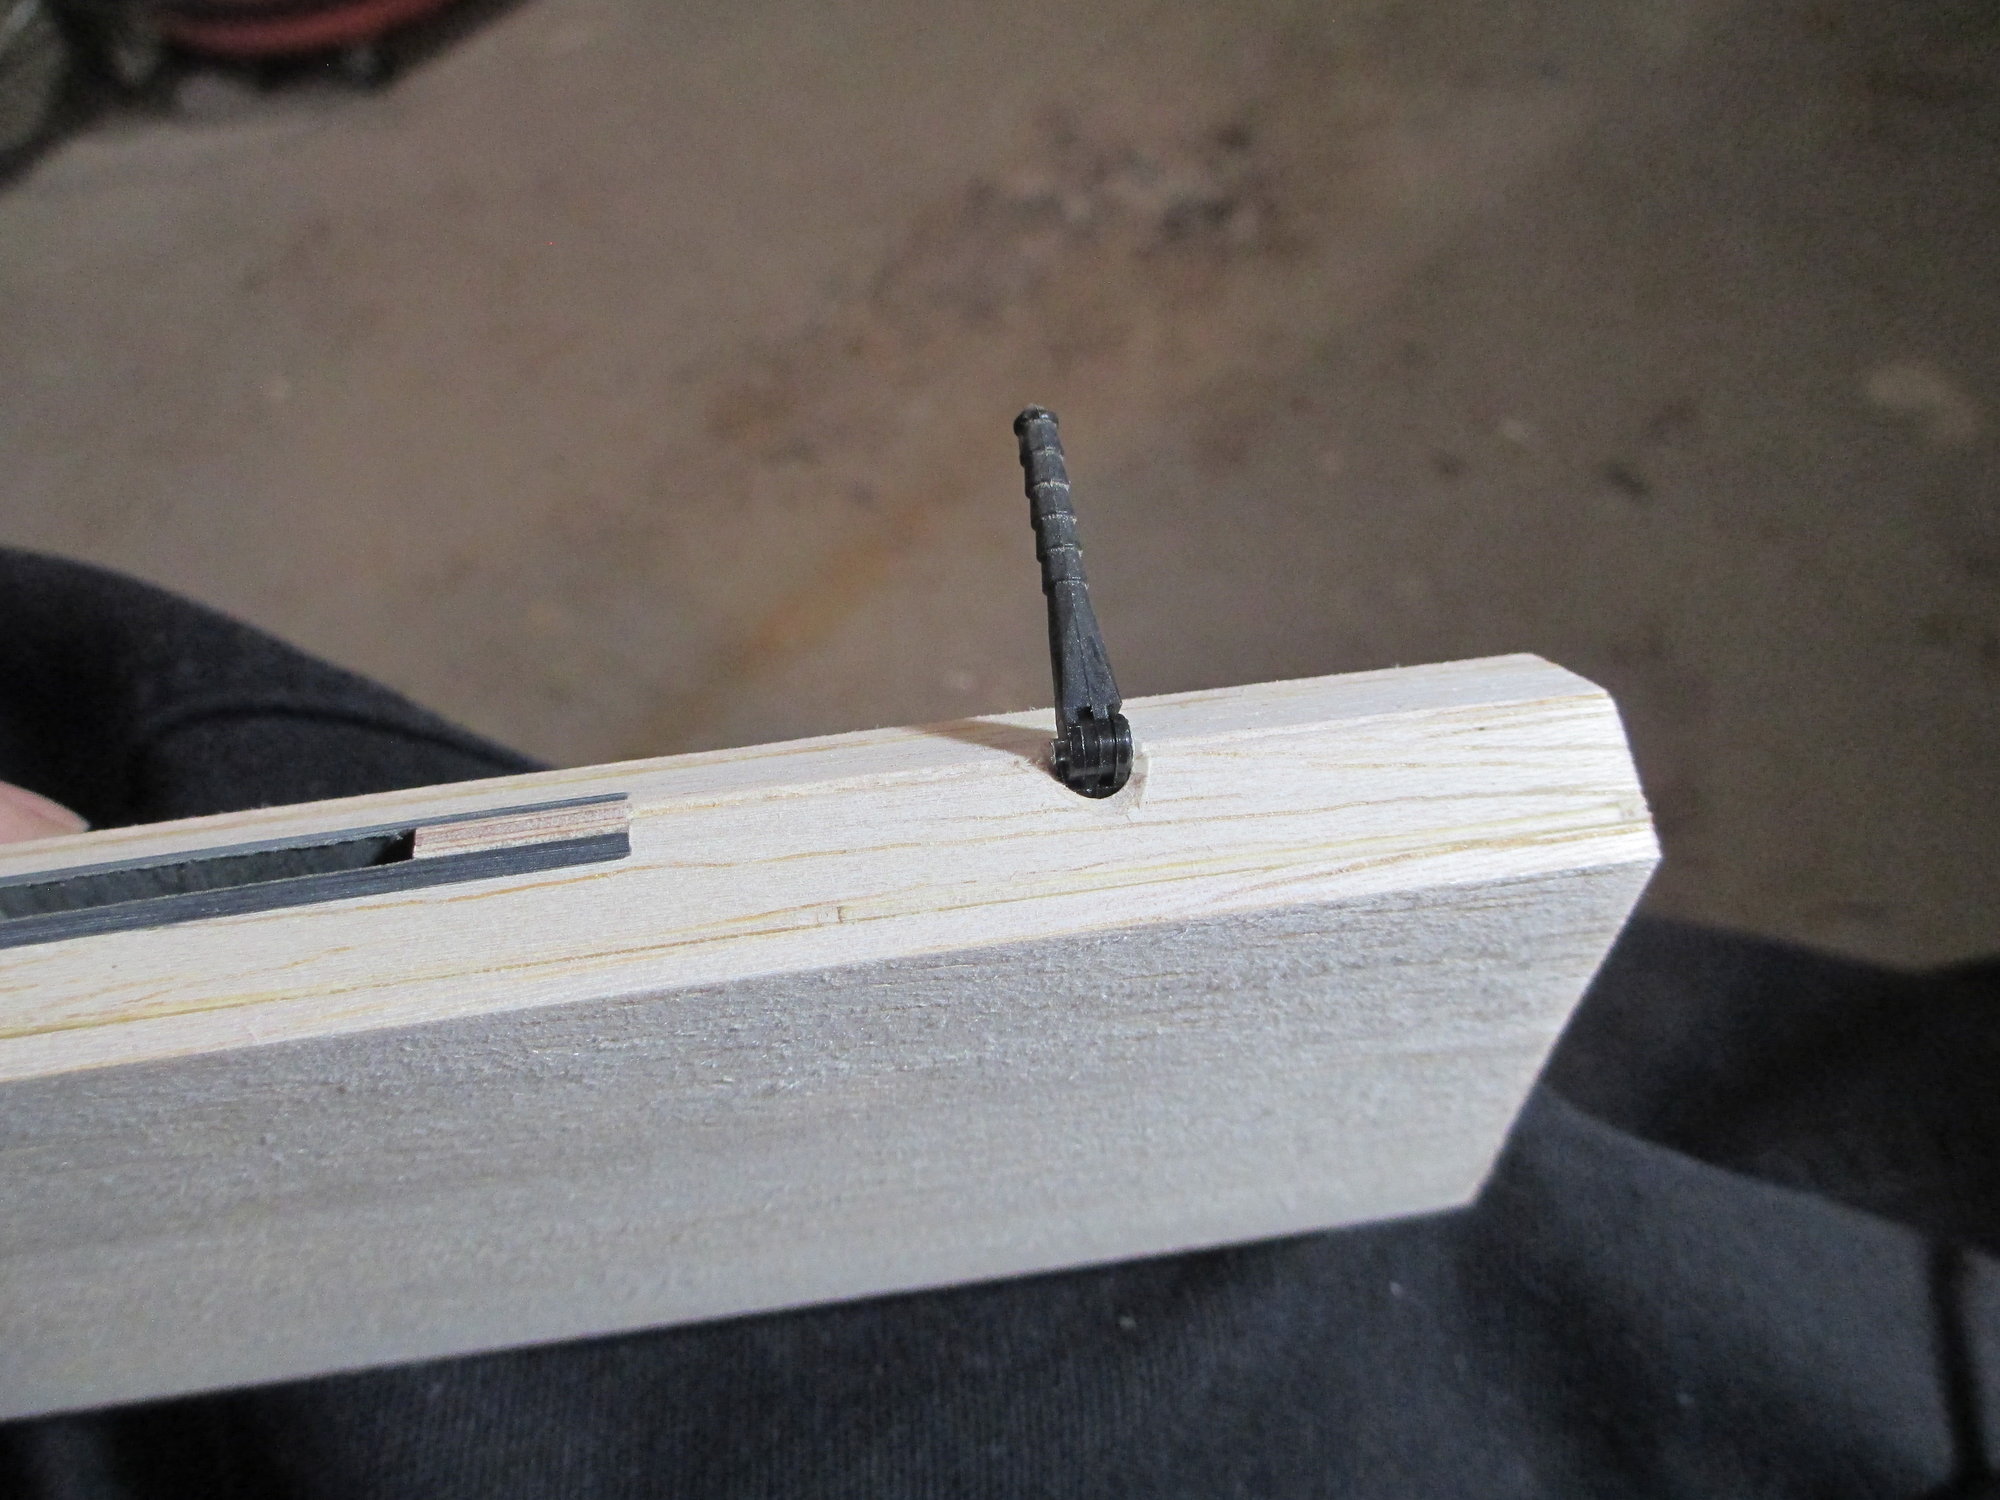
Hinge pin fully seated.
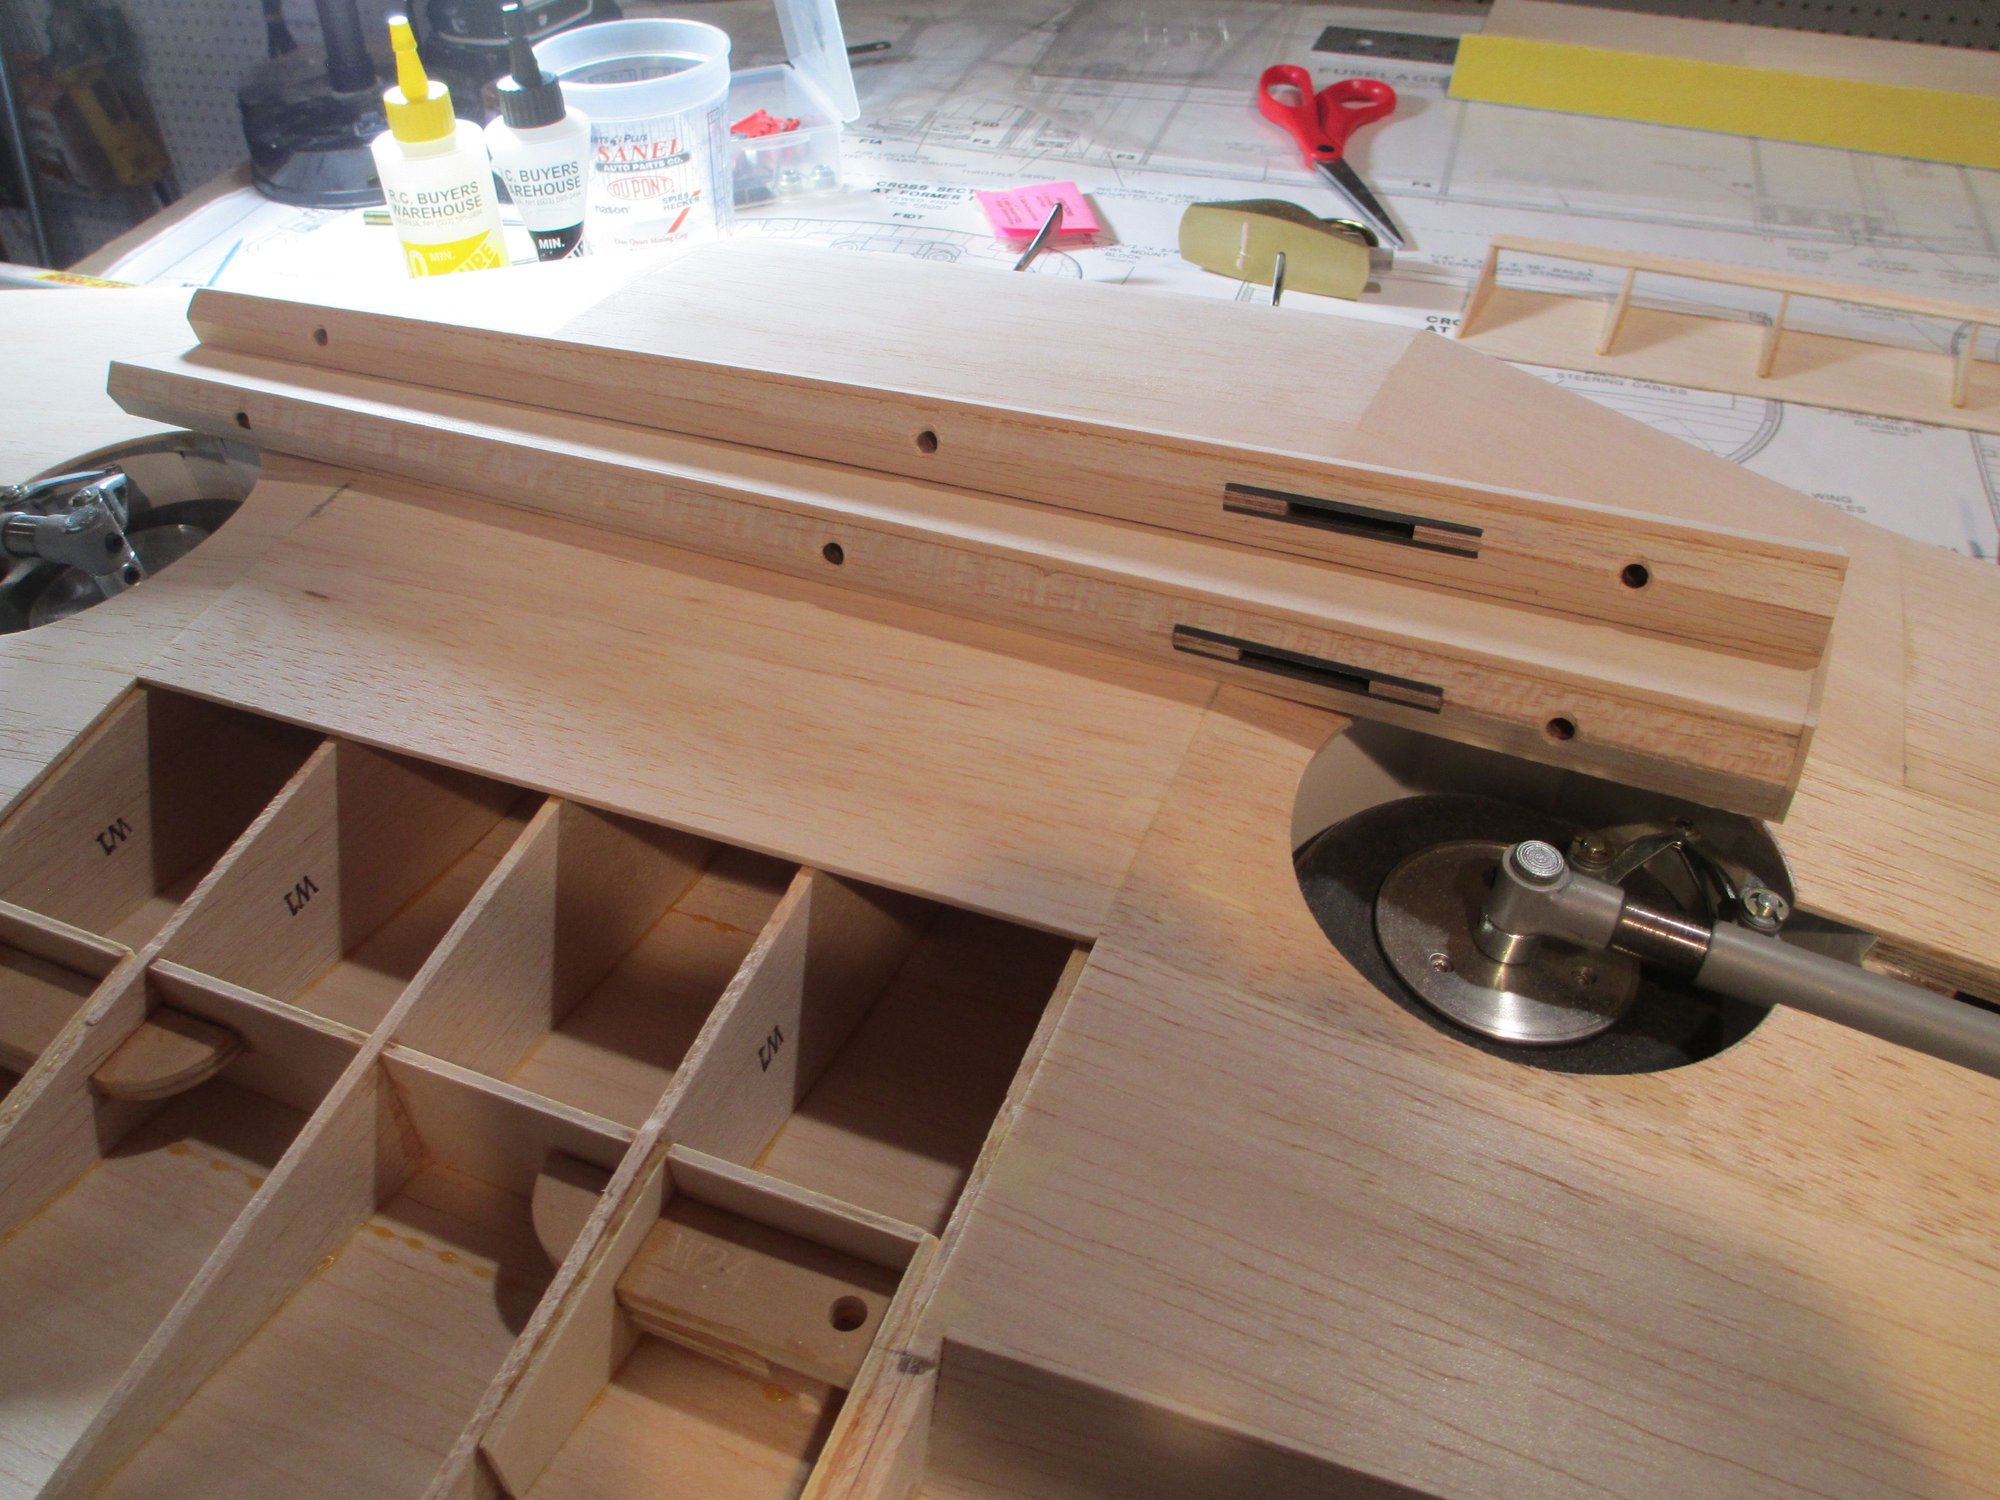
Finally, both ailerons are done. That was a bit of work!
Nice tight hinge line gap.