


TF Beechcraft Bonanza F33A Build
 12-17-2019, 01:58 PM
#576

Thread Starter


 12-22-2019, 12:25 PM
#579
Thread Starter
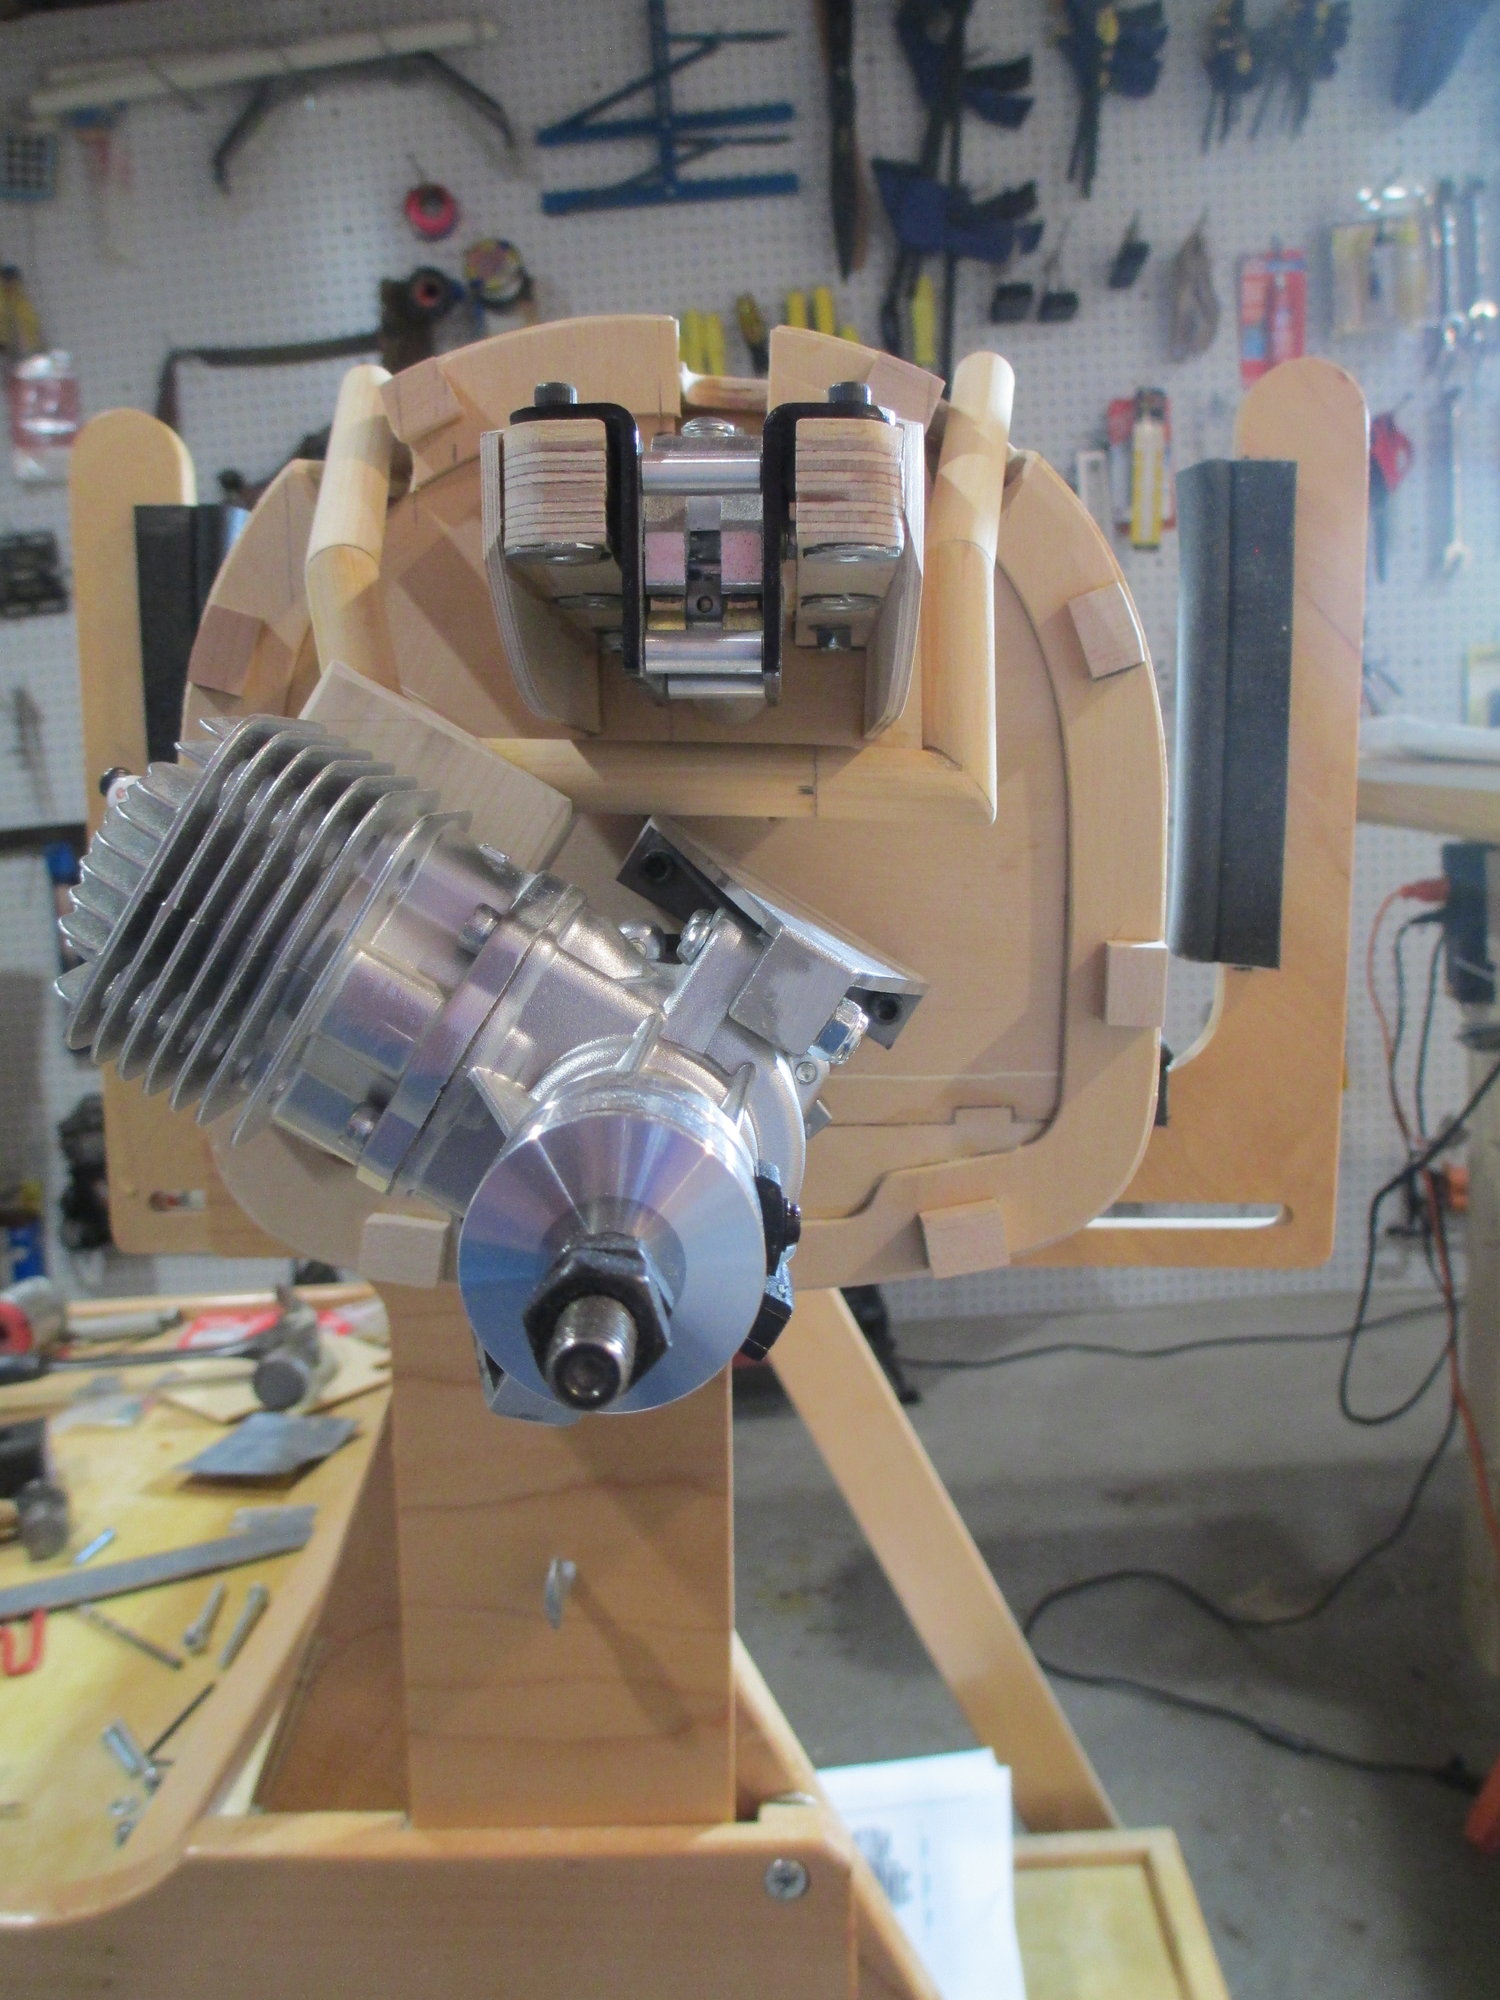
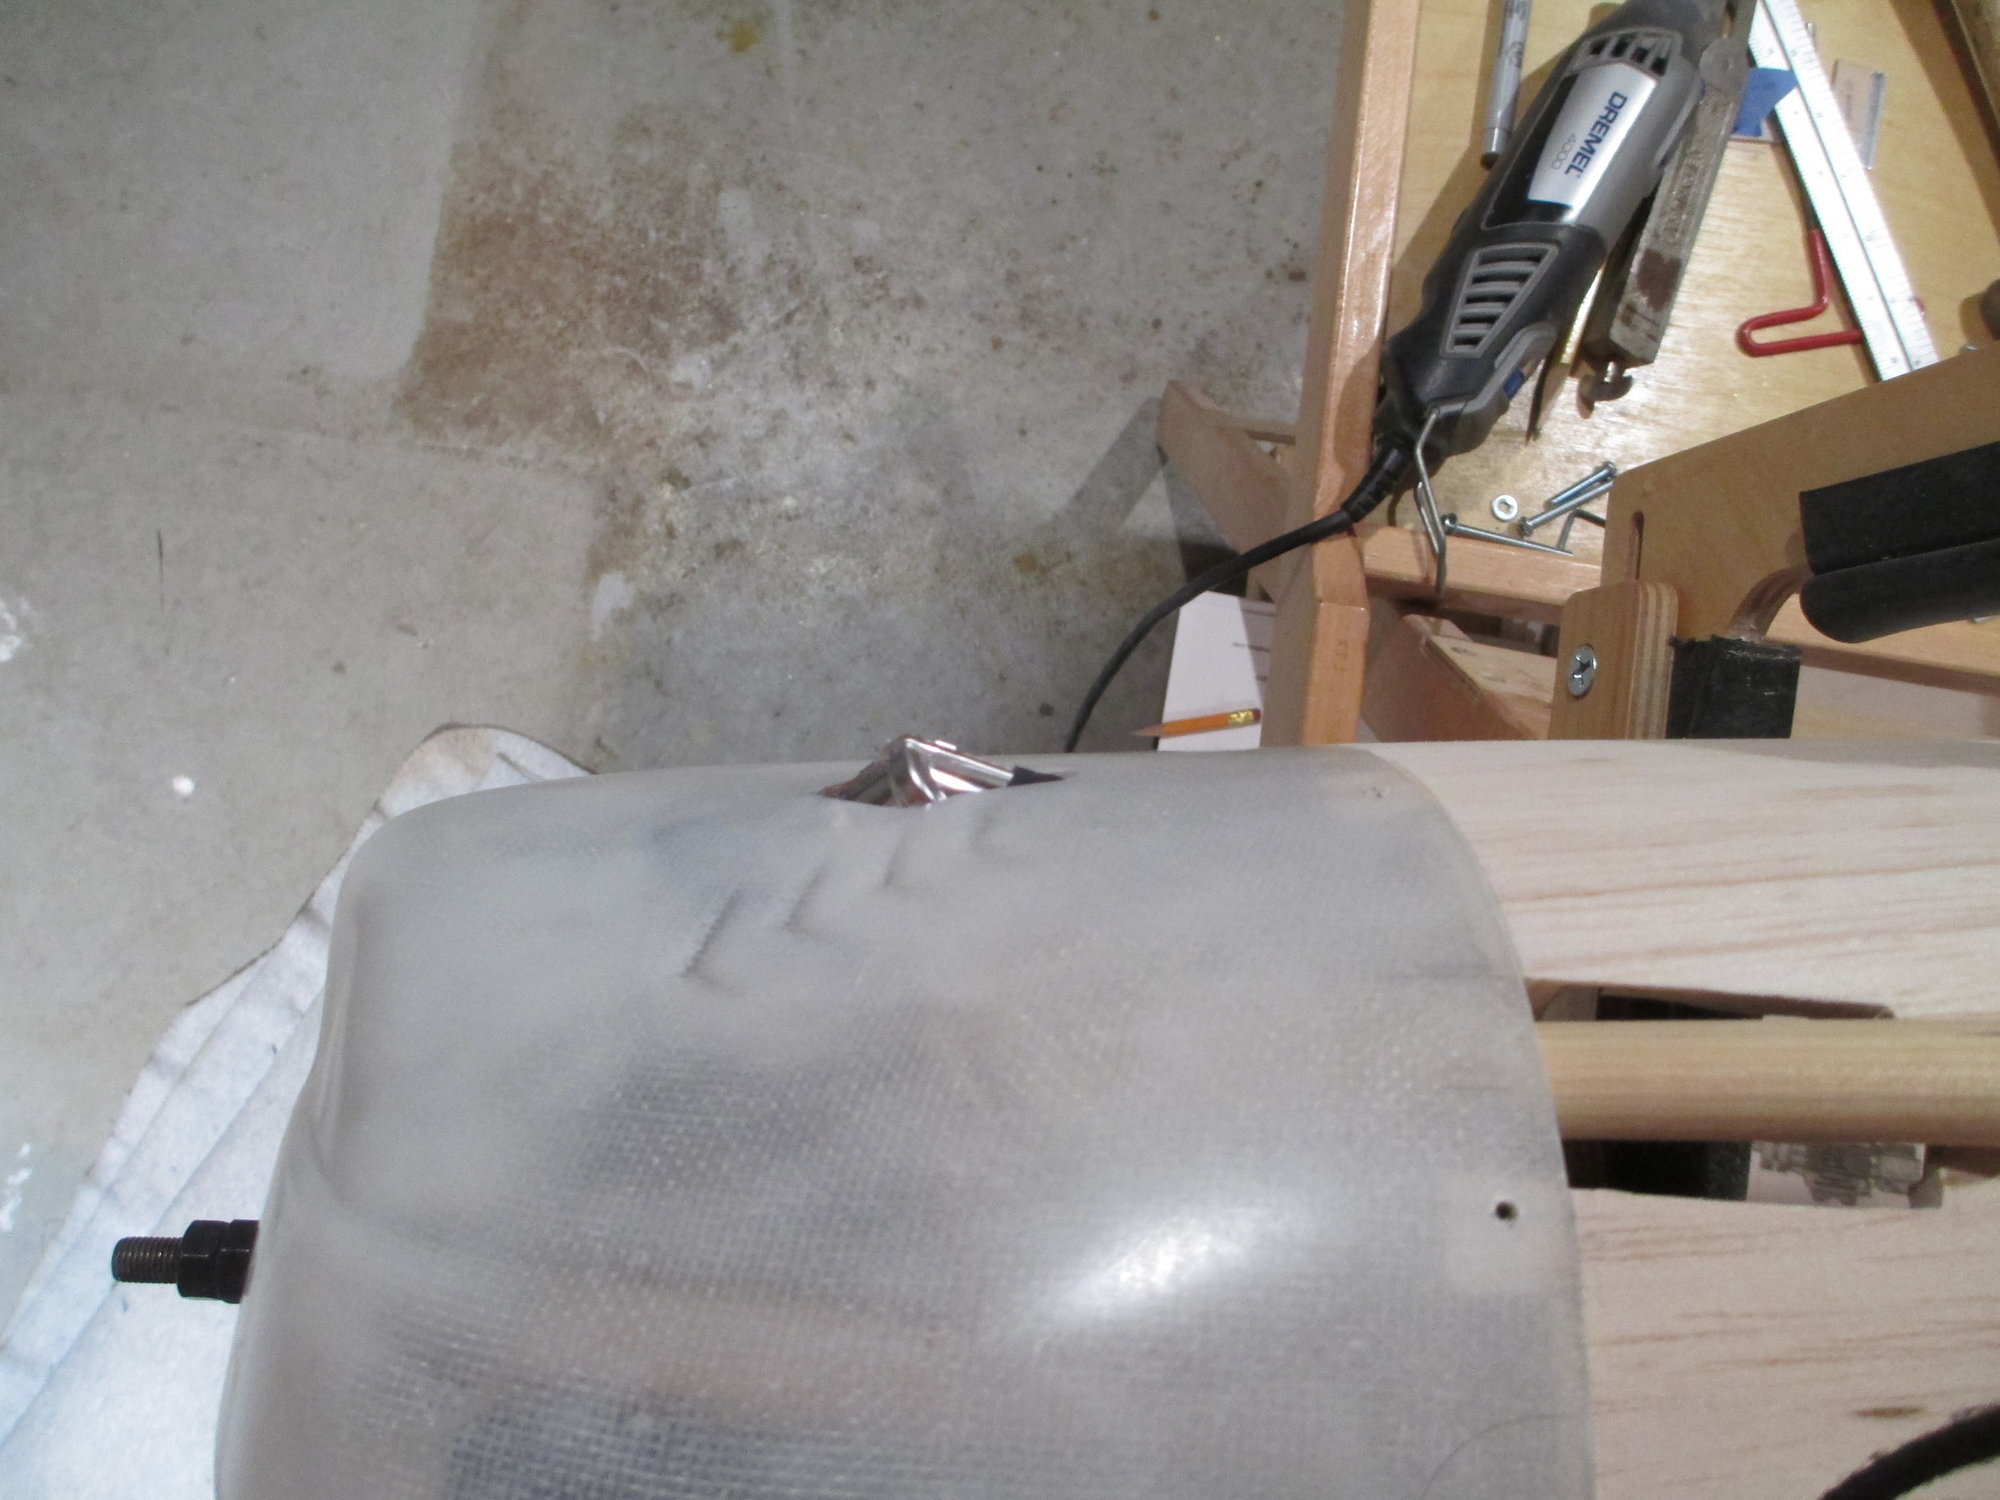
For the past two days I have been busy designing and building an exhaust system for this project. The exhaust I came up with will simulate the full scale version. The exhaust exits the fuse in the correct location, and the area surrounding the exhaust will allow air from the cowl to exit, helping to keep the engine cool.
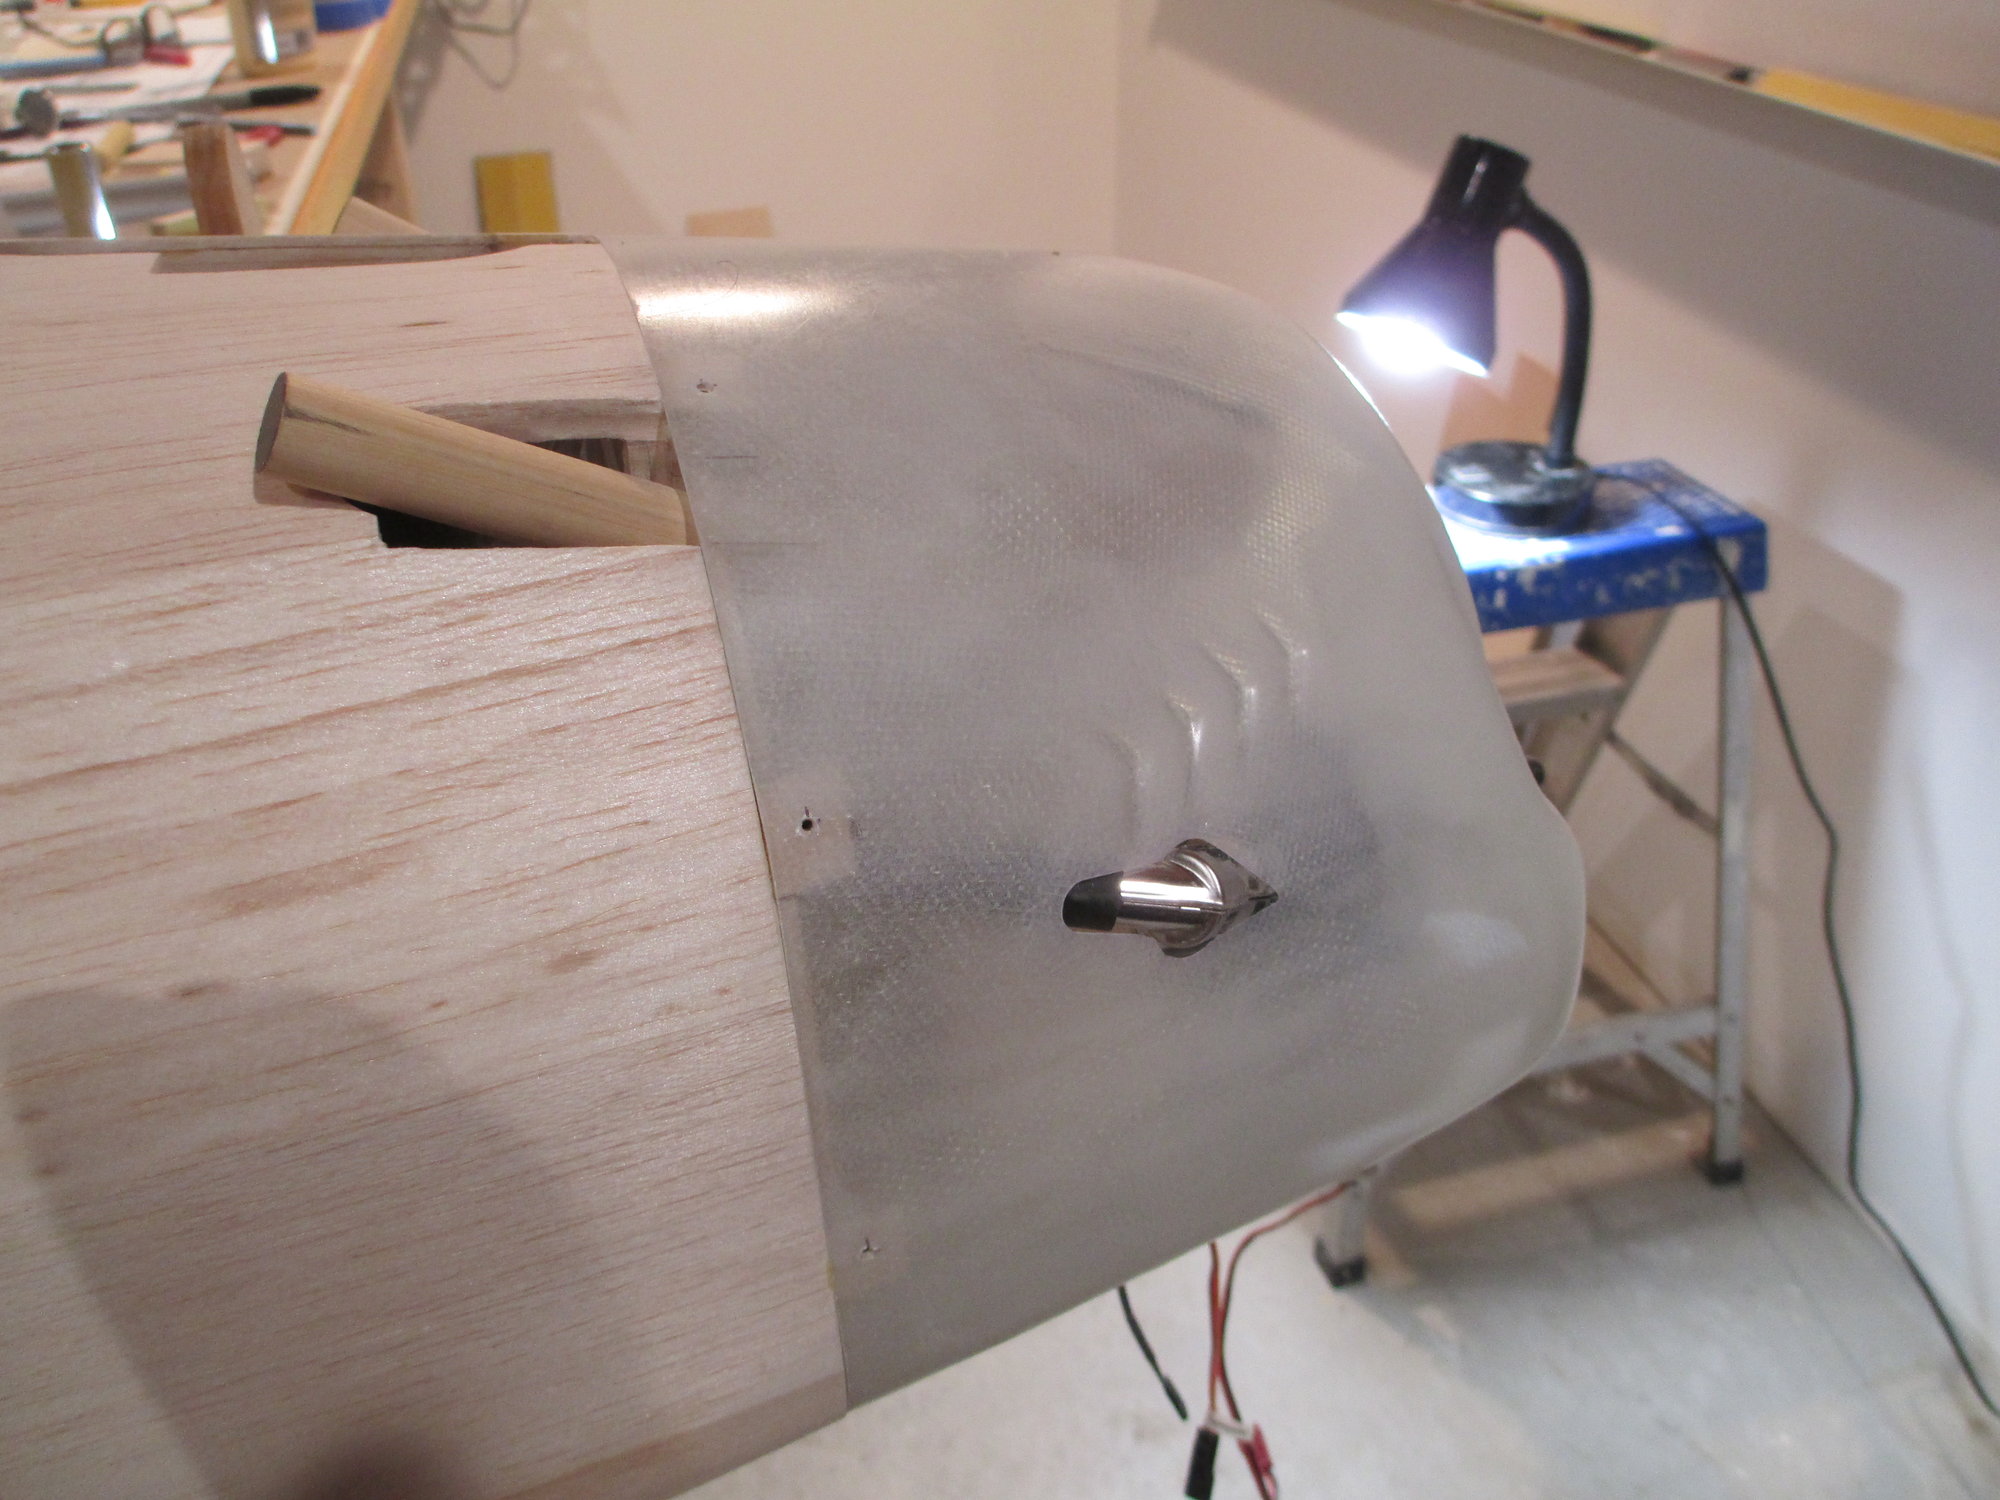
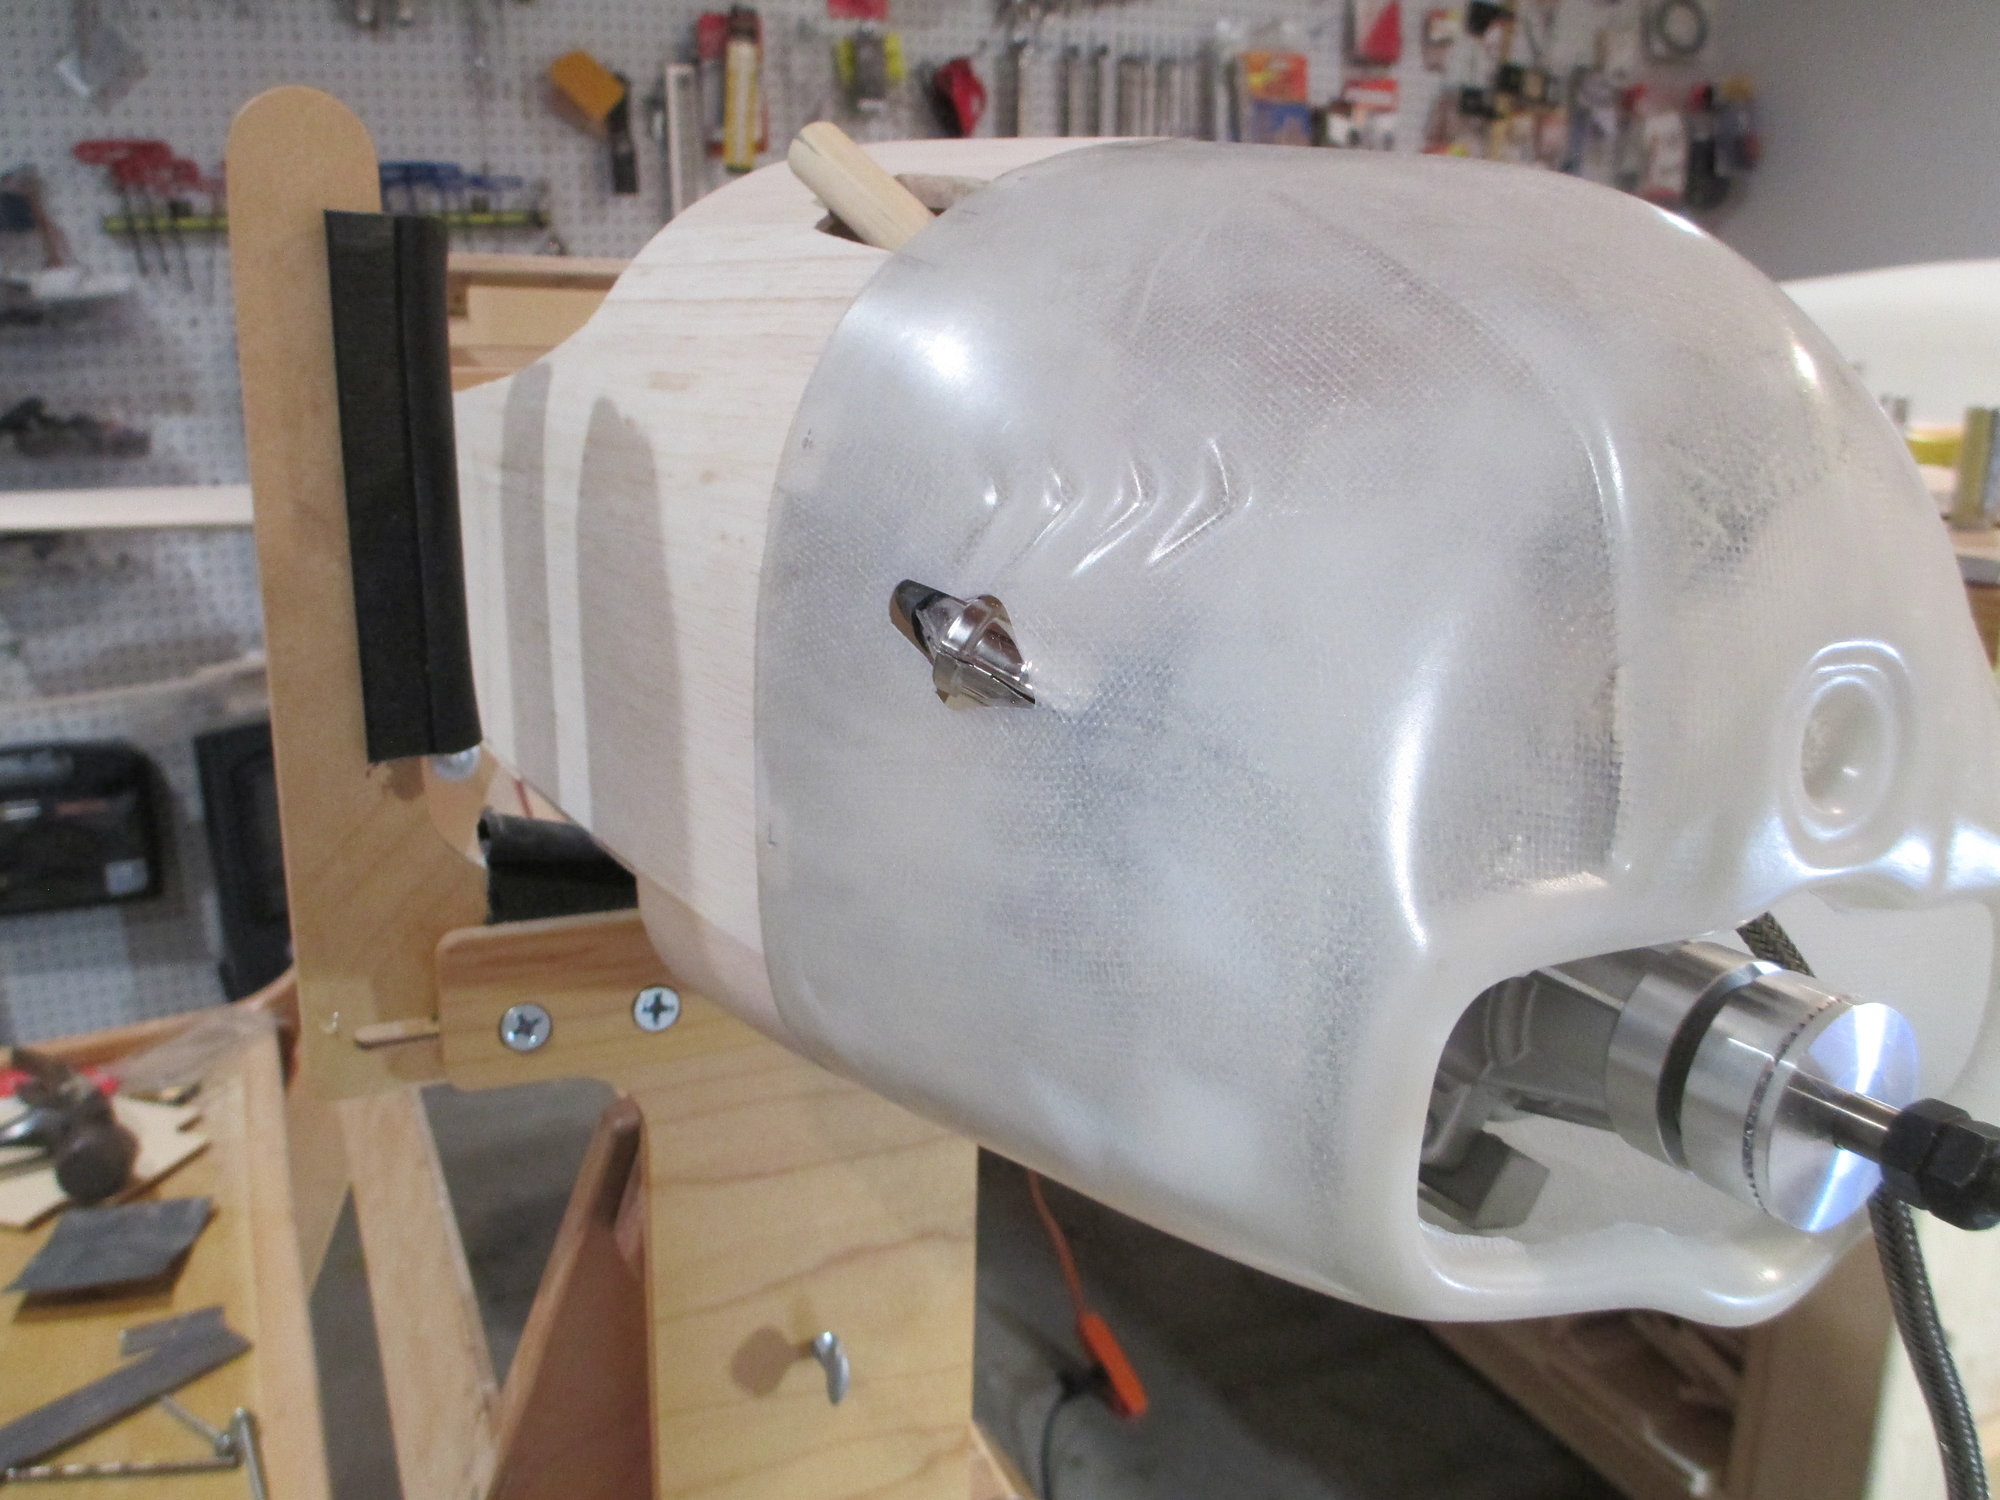
I contacted Al Young at JTEC Radiowave and asked if they could build me a custom exhaust for this project. I was instructed to take photos and measurements along with creating a sketch of the exhaust I was looking to have built. I decided that it would be best if I made an exact mock-up out of wood to send to them. I'm hoping that by having this wooden exhaust as a model, it will ensure a perfect fit once built.
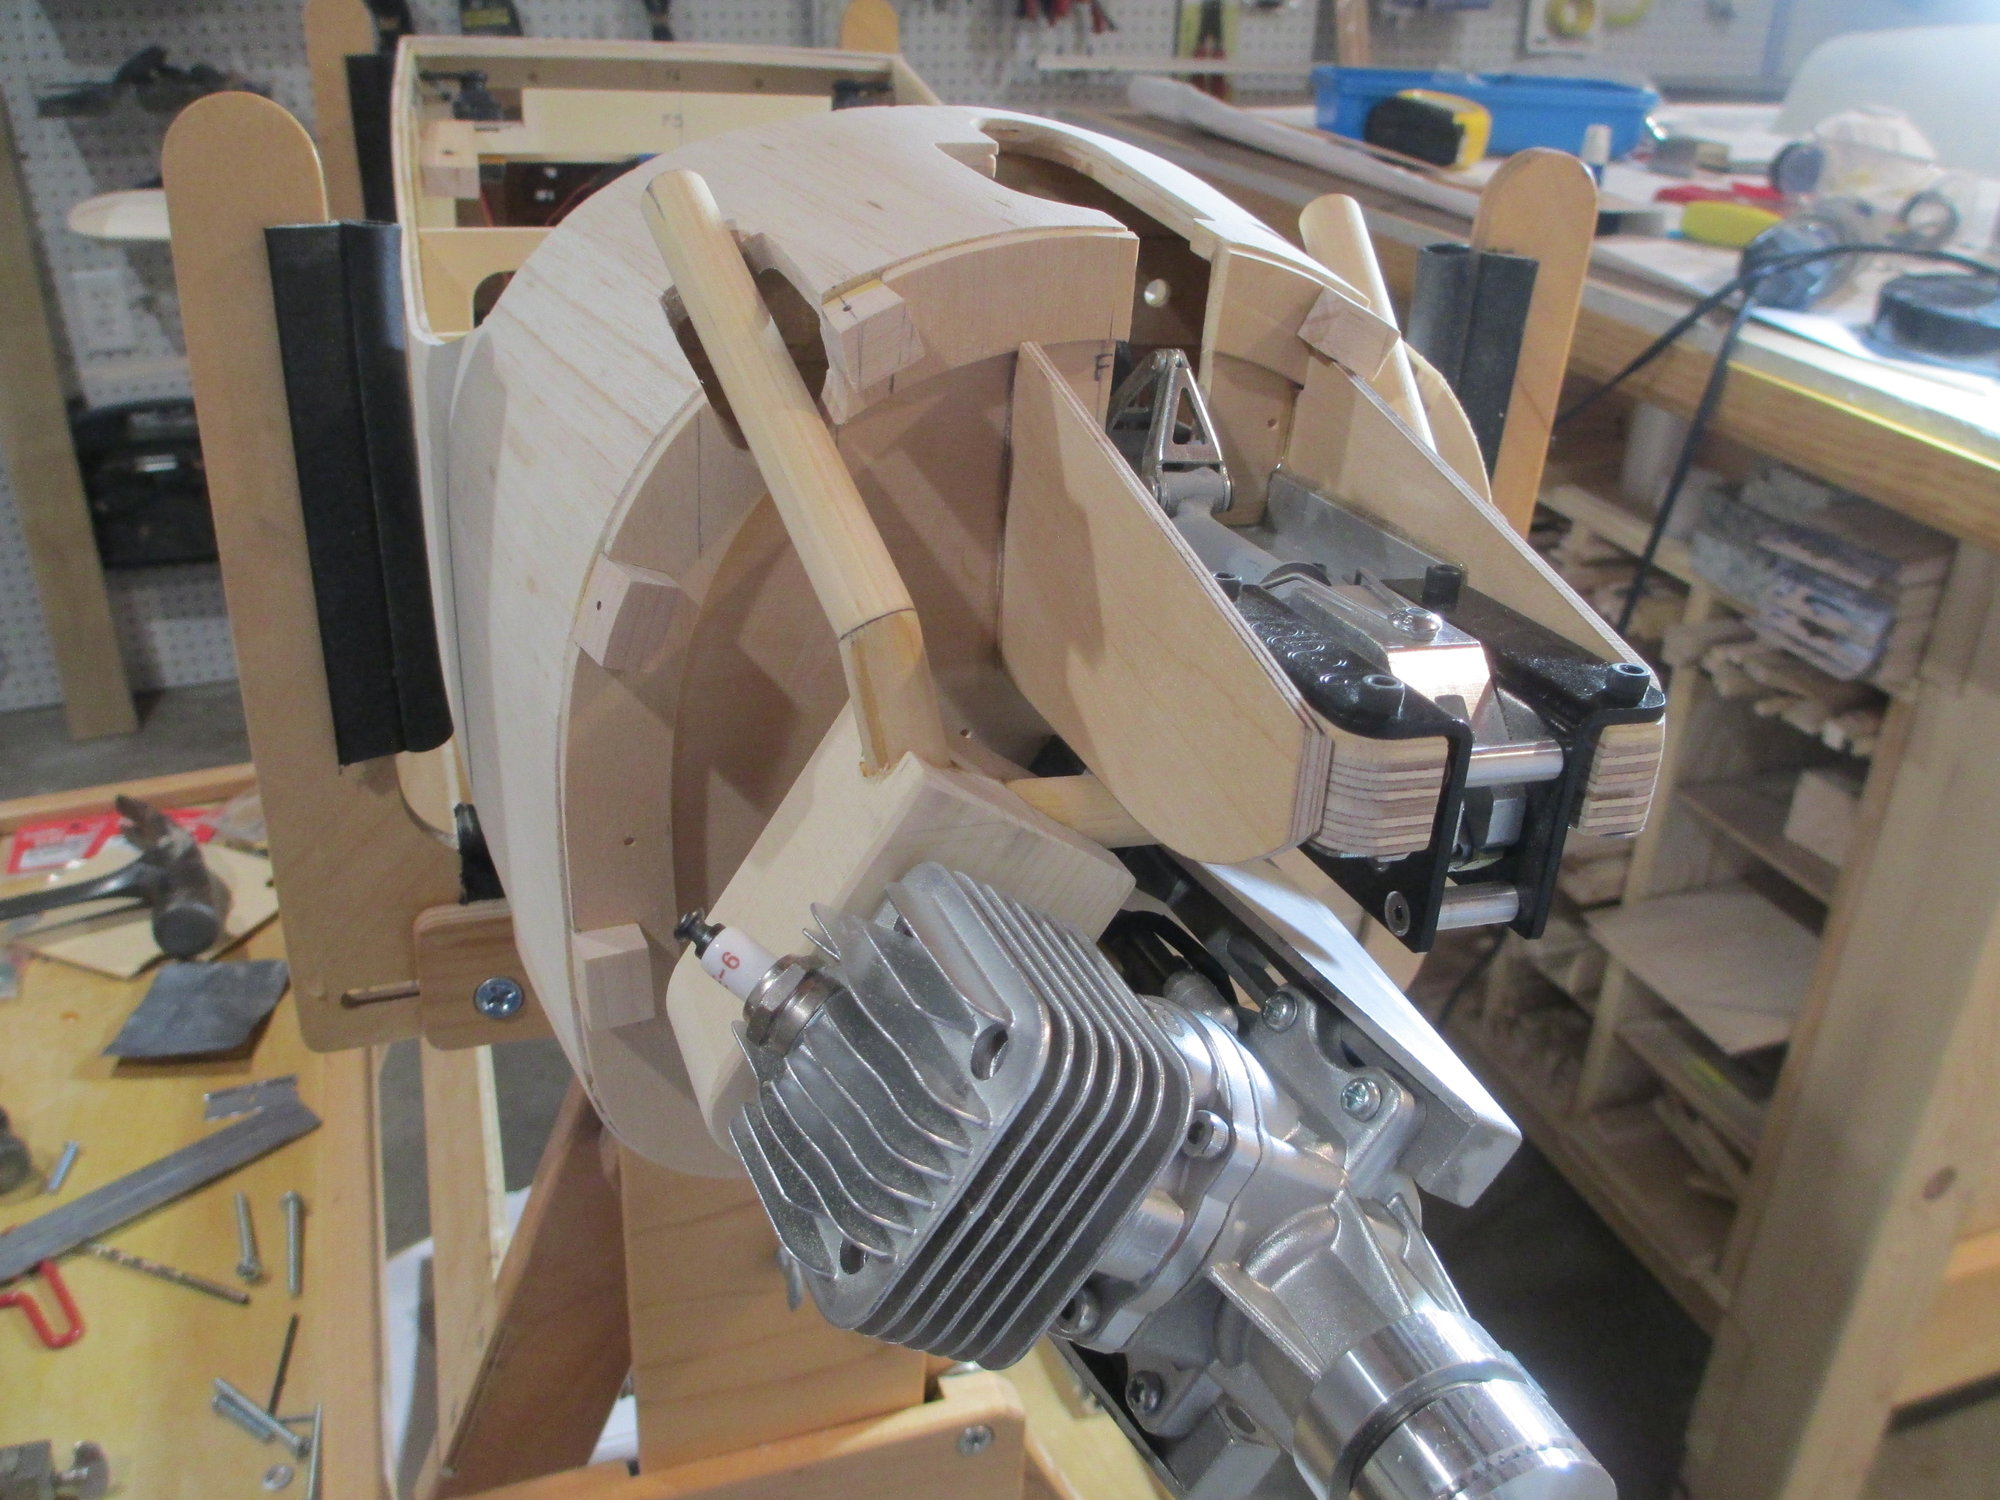

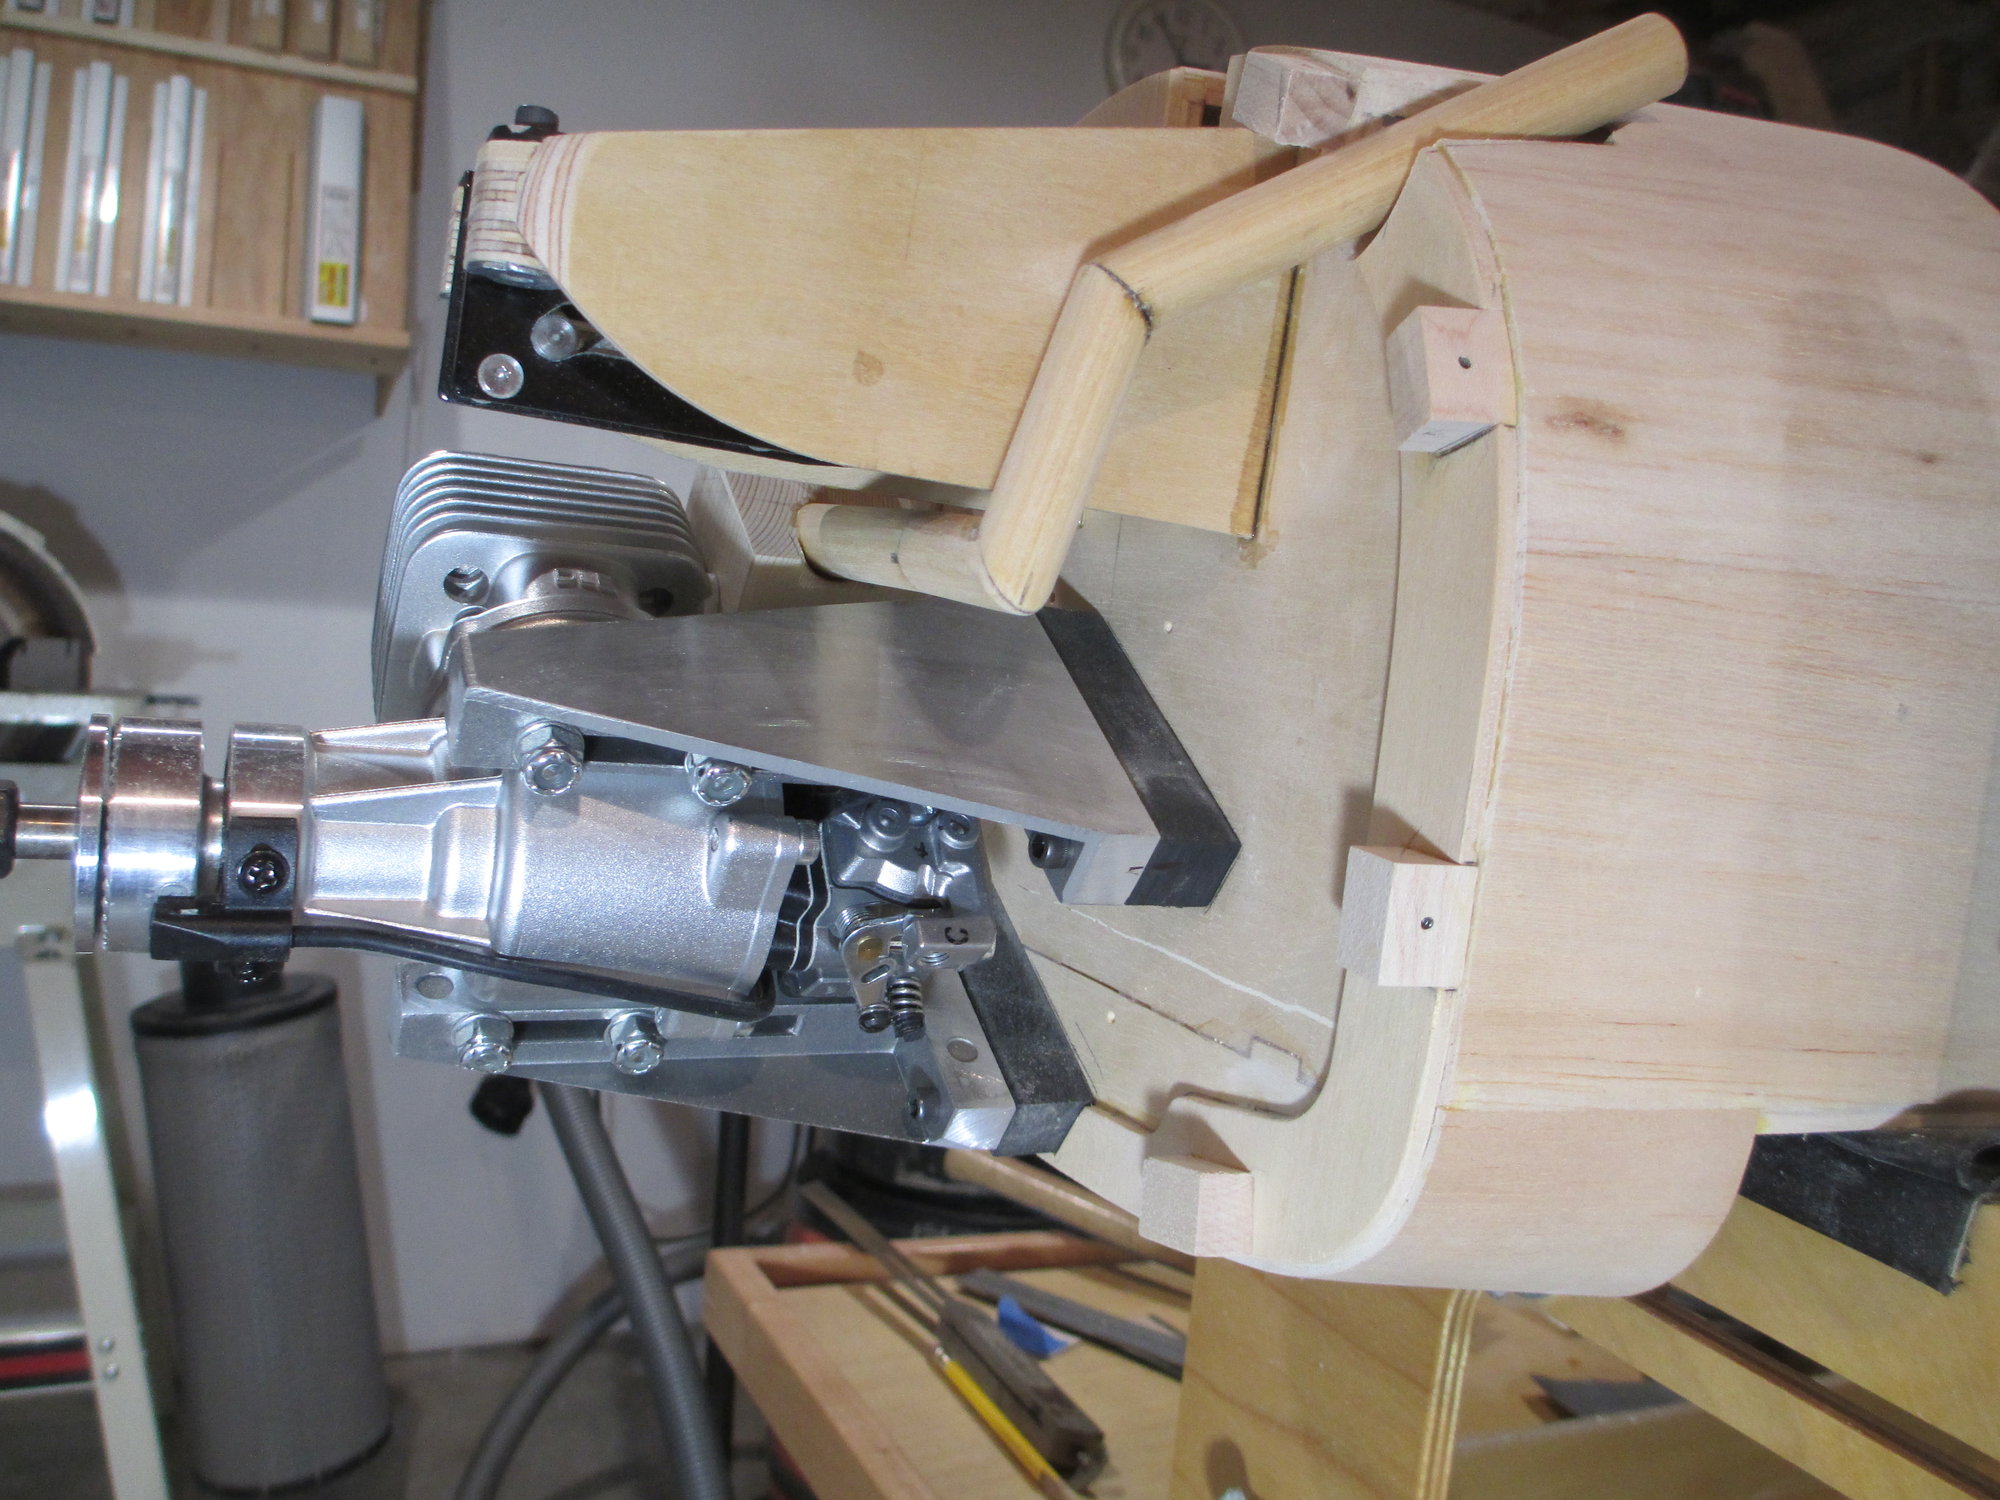


I contacted Al Young at JTEC Radiowave and asked if they could build me a custom exhaust for this project. I was instructed to take photos and measurements along with creating a sketch of the exhaust I was looking to have built. I decided that it would be best if I made an exact mock-up out of wood to send to them. I'm hoping that by having this wooden exhaust as a model, it will ensure a perfect fit once built.
Last edited by VincentJ; 12-23-2019 at 05:30 AM.

 12-22-2019, 05:43 PM
#582
Thread Starter
l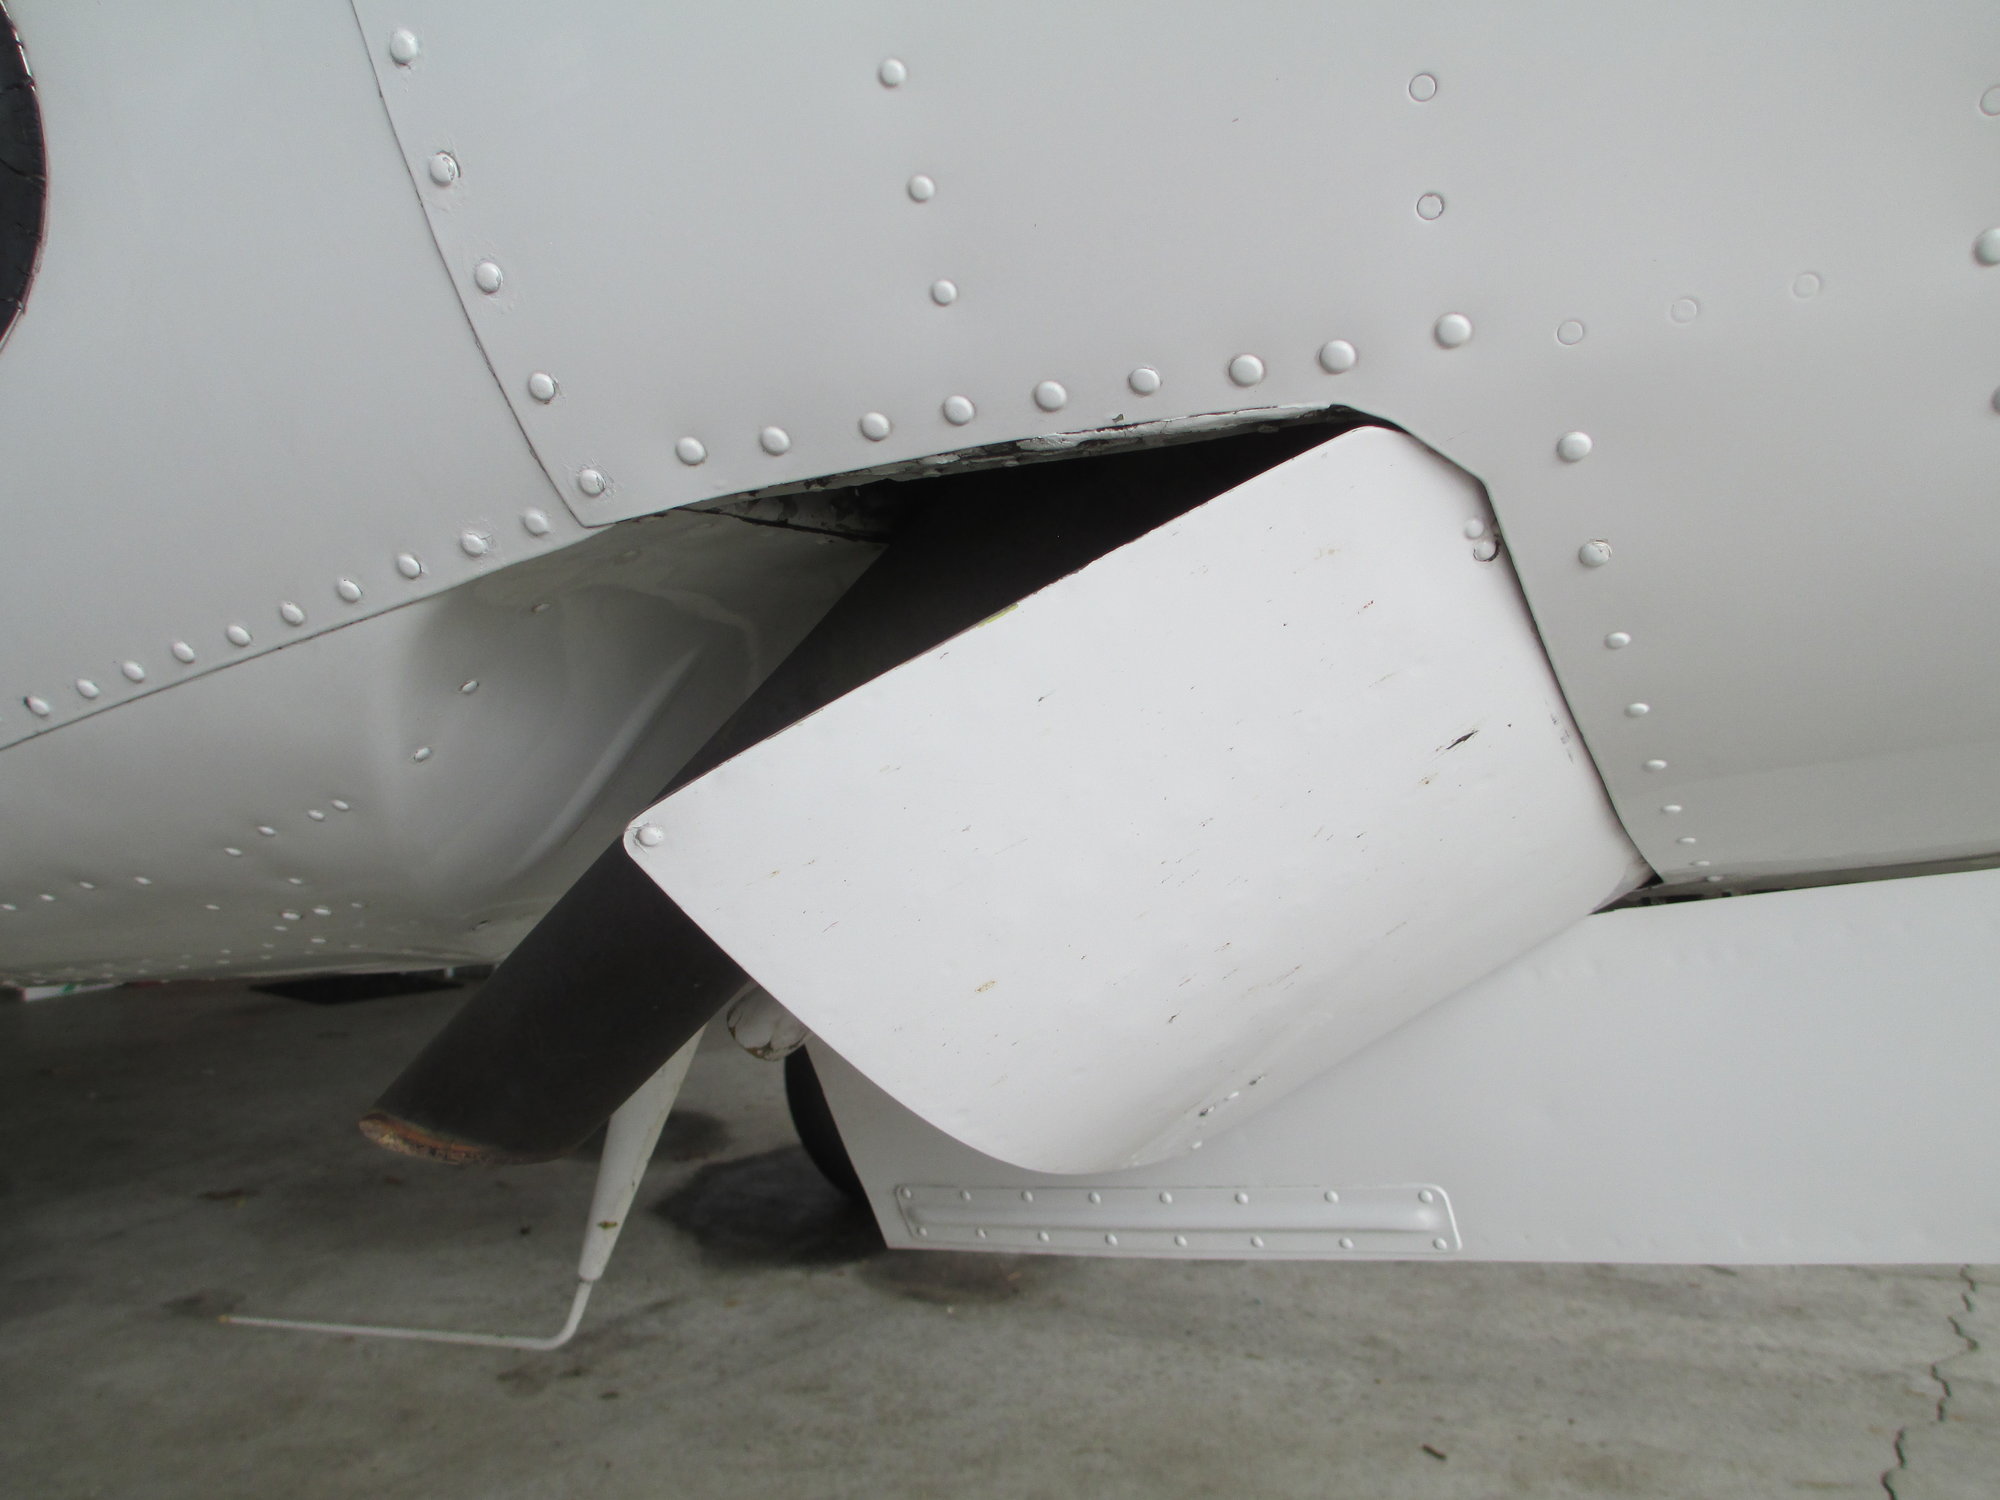
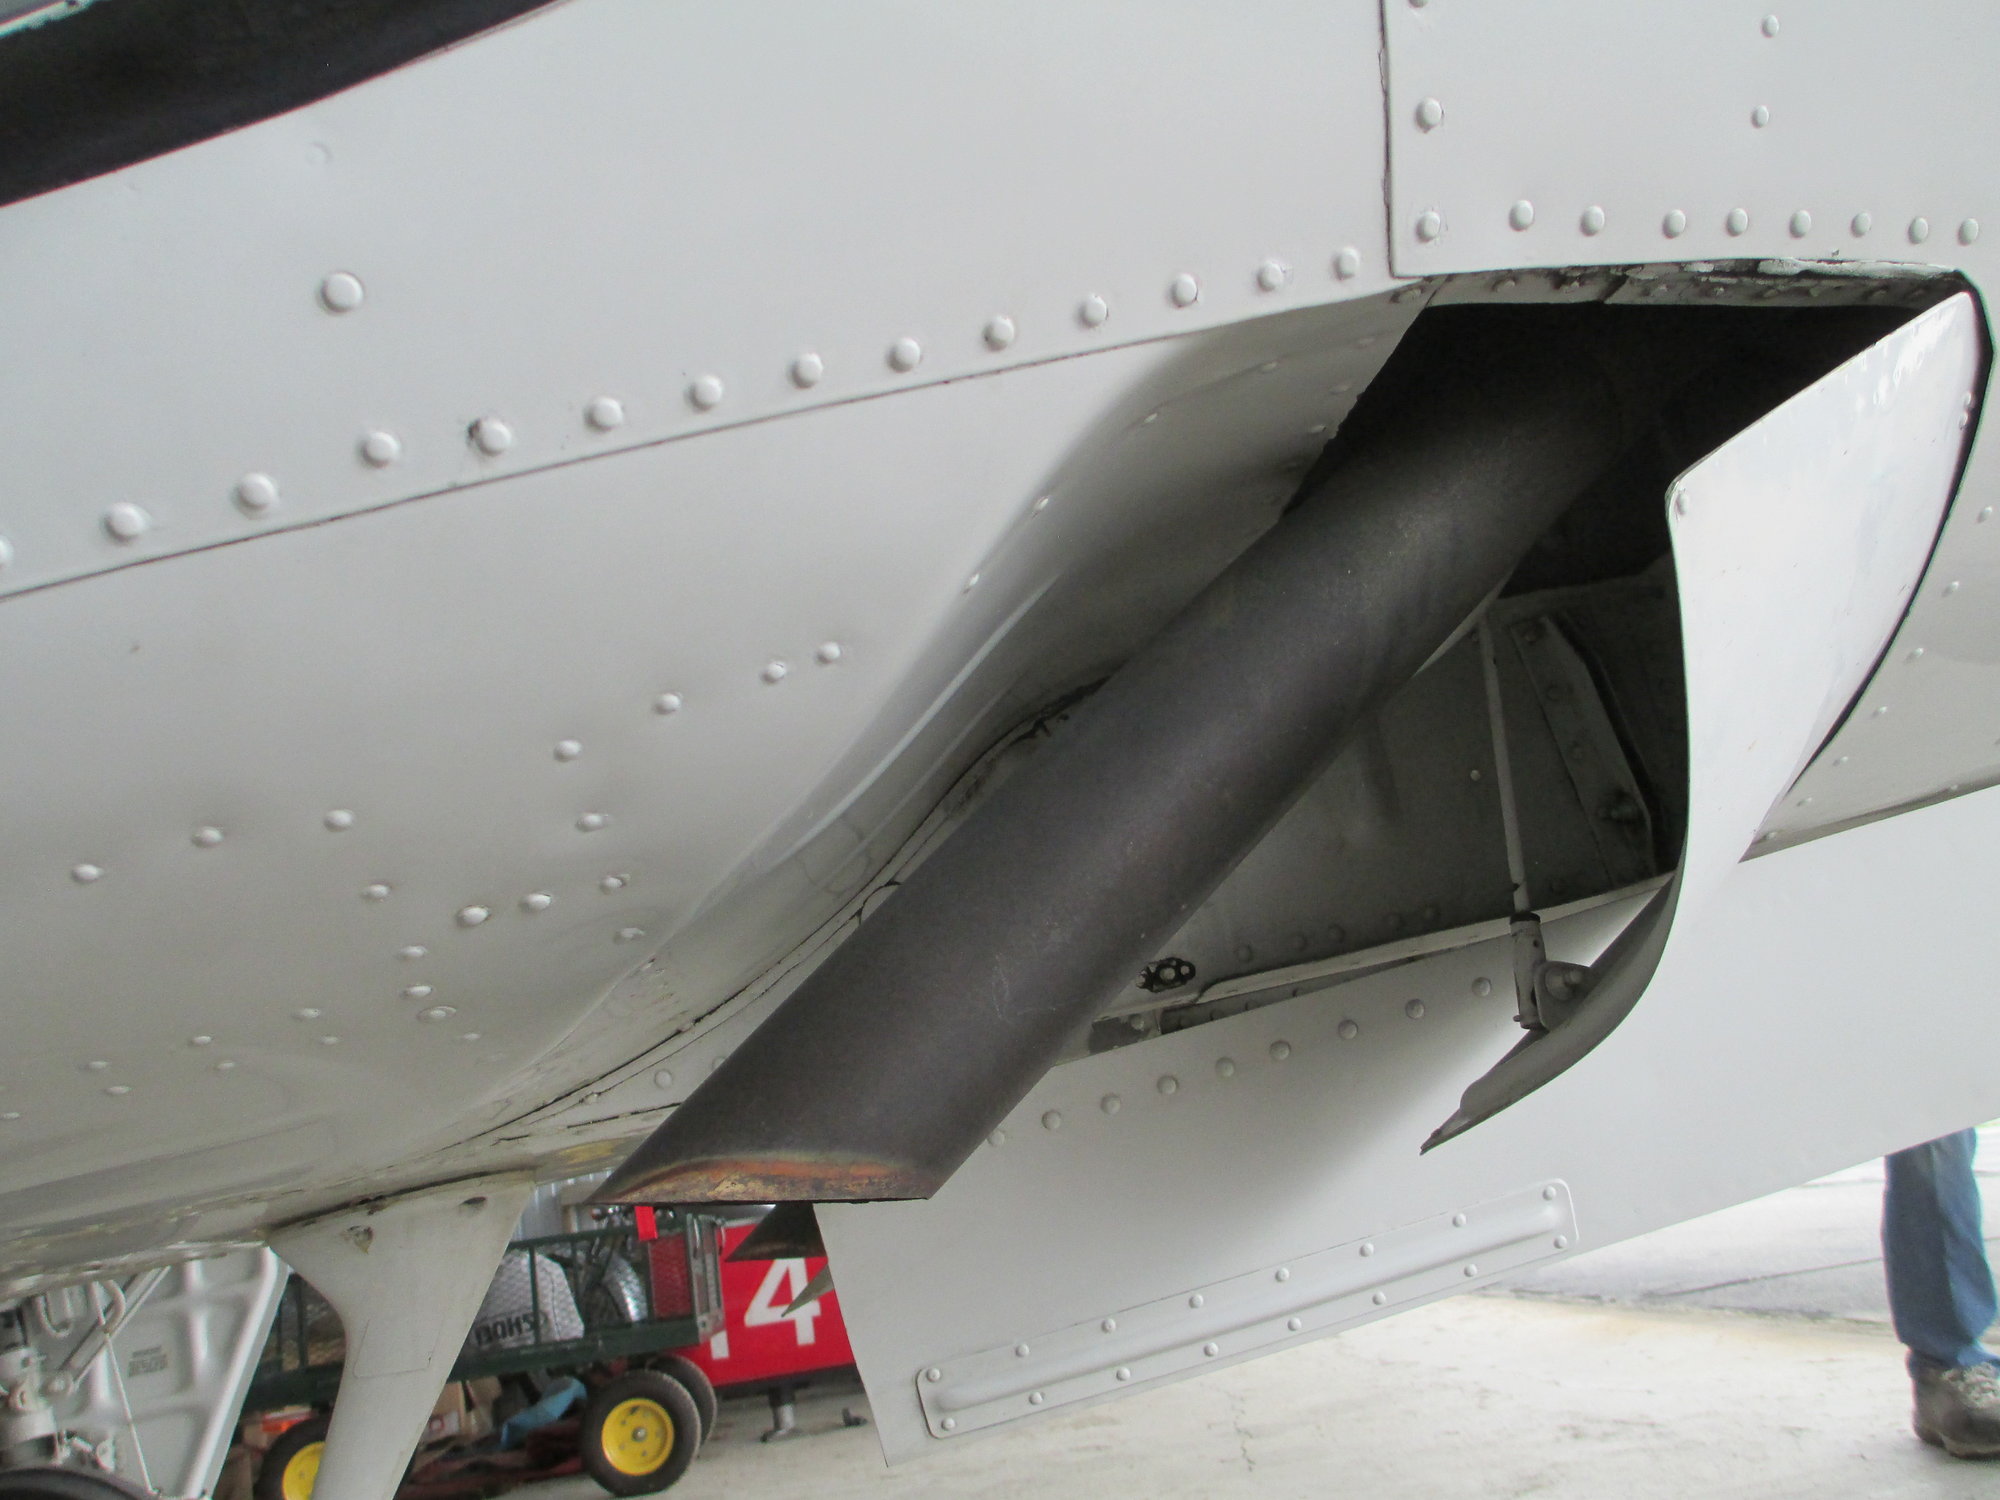
Yes, you are correct. I will be enlarging the areas around each pipe and creating the flaps shown above as soon as I have the permanent exhaust as well as making the side vents on the cowl operational.
Yes, you are correct. I will be enlarging the areas around each pipe and creating the flaps shown above as soon as I have the permanent exhaust as well as making the side vents on the cowl operational.
Last edited by VincentJ; 12-23-2019 at 01:46 AM.
12-22-2019, 09:48 PM
#584
The rule of thumb for adequate cooling is to have the exit area at least 3 times larger than the entrance, but this works only if there is minimal resistance to the airflow.
Otherwise the external airflow will completely bypass the cowl, even if the �eye sees� entry and exit openings.
From the pics it seems to me there may be a lot of resistance to cooling air flow.
If you intend to actually fly this model, I would suggest to consider internal baffles and additional cooling exits.
Also keep in mind those gas engines produce more heat than their glow equivalents, plus the hot exhaust within the cowl will certainly not help cooling, and you�ll probably get a lot of hot air trapped under the top of the cowl.
(I guess you can see I�m used to flying in a rather hot climate ).
).
Otherwise the external airflow will completely bypass the cowl, even if the �eye sees� entry and exit openings.
From the pics it seems to me there may be a lot of resistance to cooling air flow.
If you intend to actually fly this model, I would suggest to consider internal baffles and additional cooling exits.
Also keep in mind those gas engines produce more heat than their glow equivalents, plus the hot exhaust within the cowl will certainly not help cooling, and you�ll probably get a lot of hot air trapped under the top of the cowl.
(I guess you can see I�m used to flying in a rather hot climate
).
12-23-2019, 01:40 AM
#585
Thread Starter
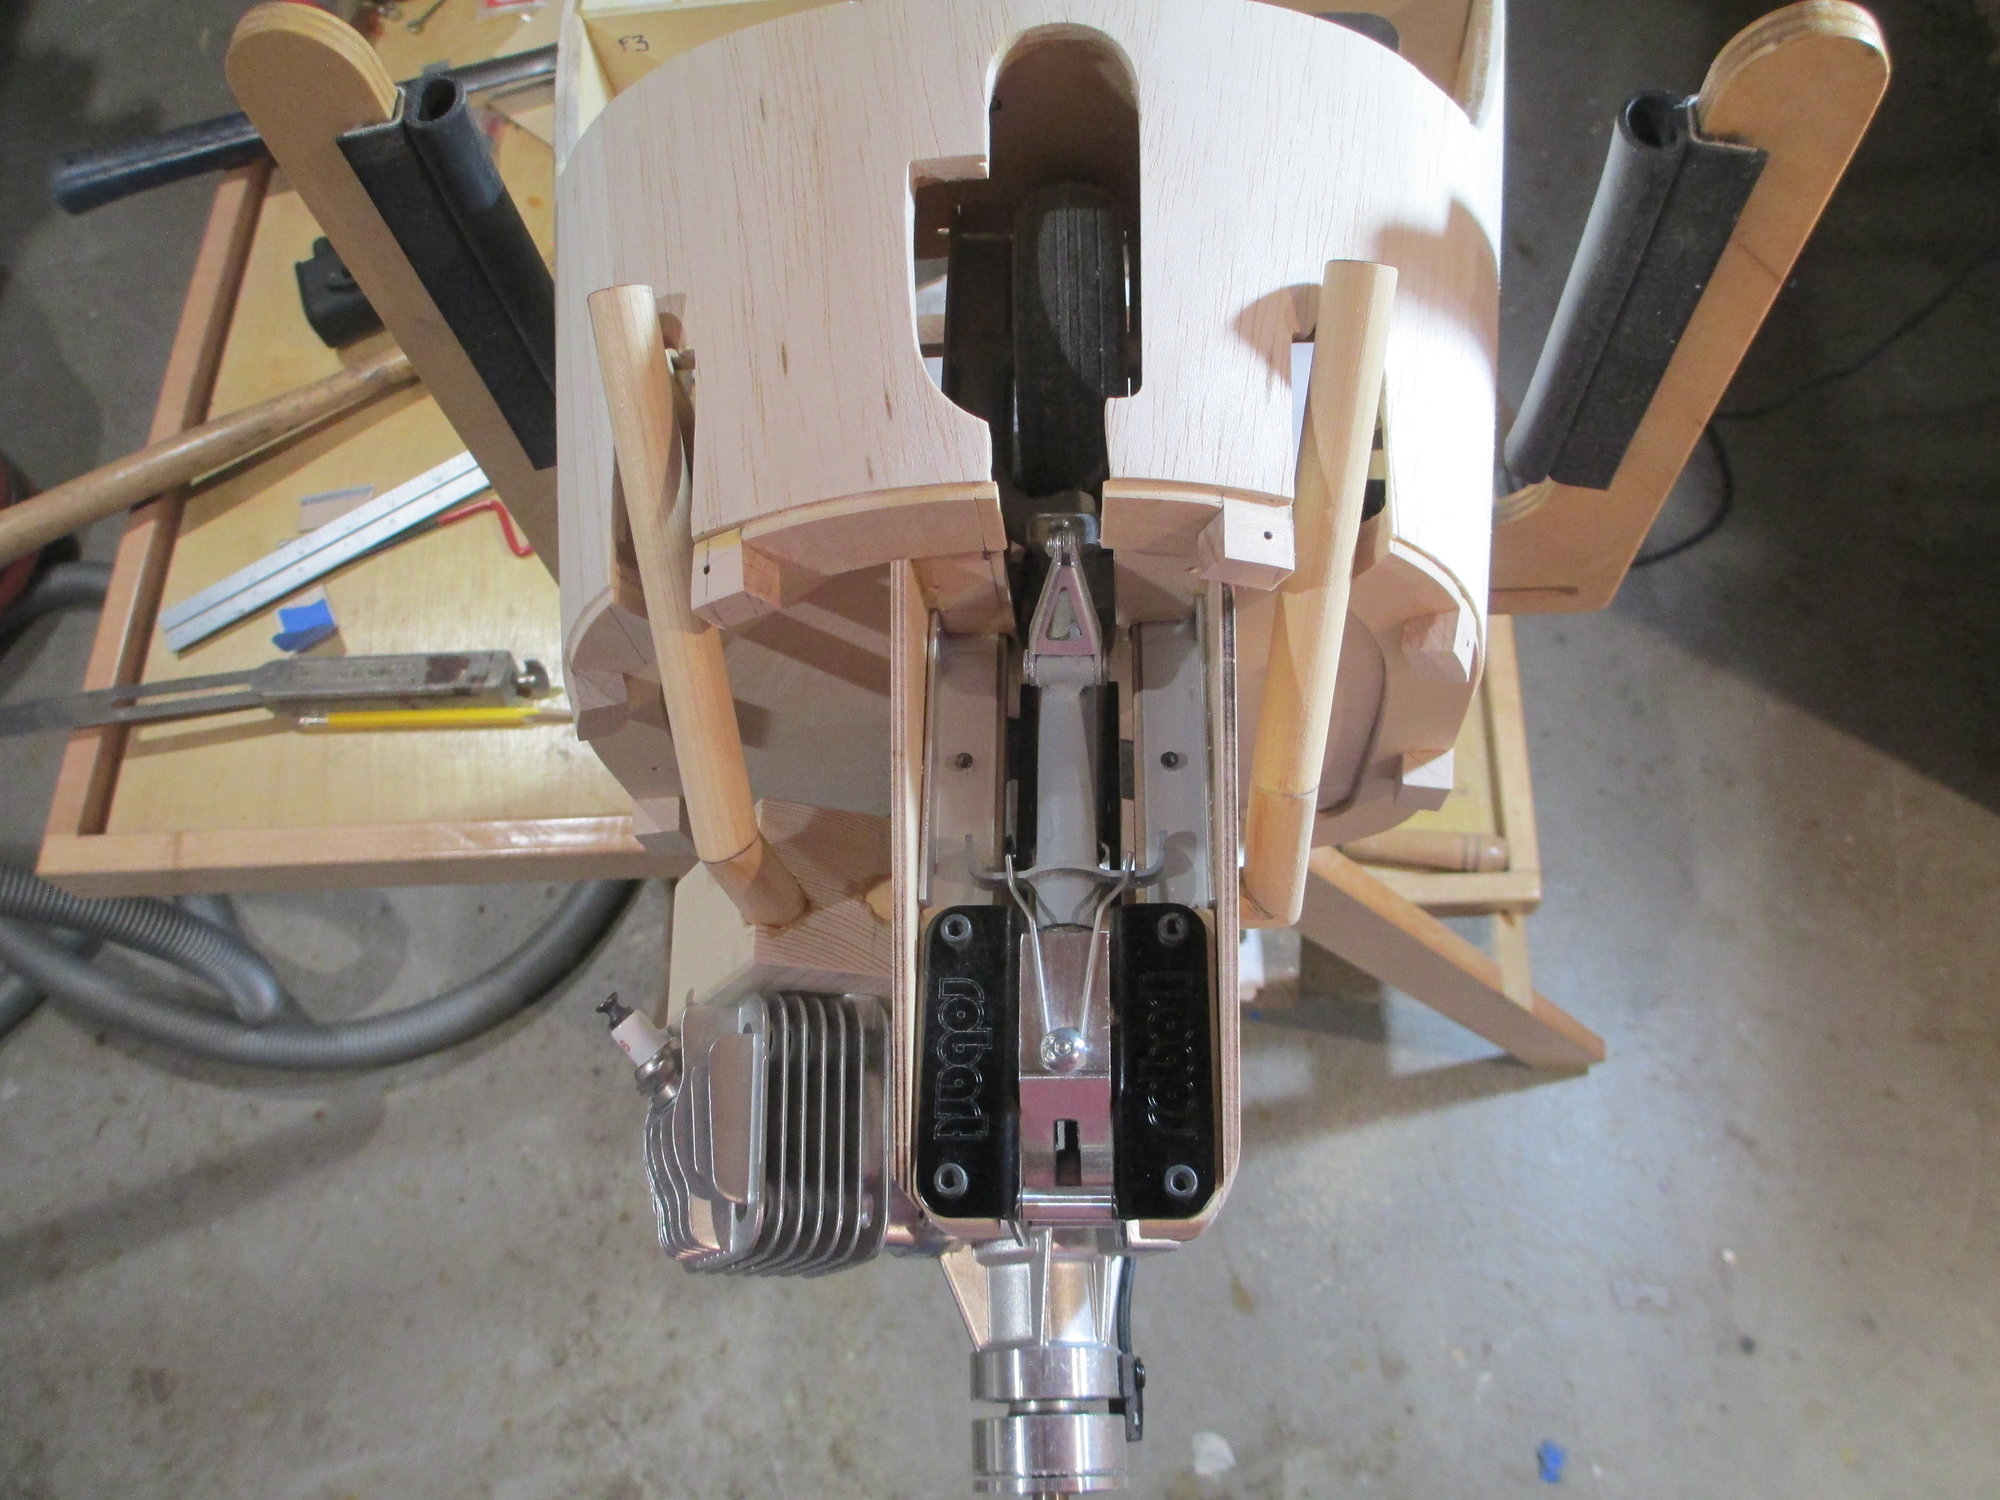
 I'll be boxing and shipping my wooden exhaust.
Last edited by VincentJ; 12-23-2019 at 04:33 AM.
12-23-2019, 04:43 AM
#586
Thread Starter
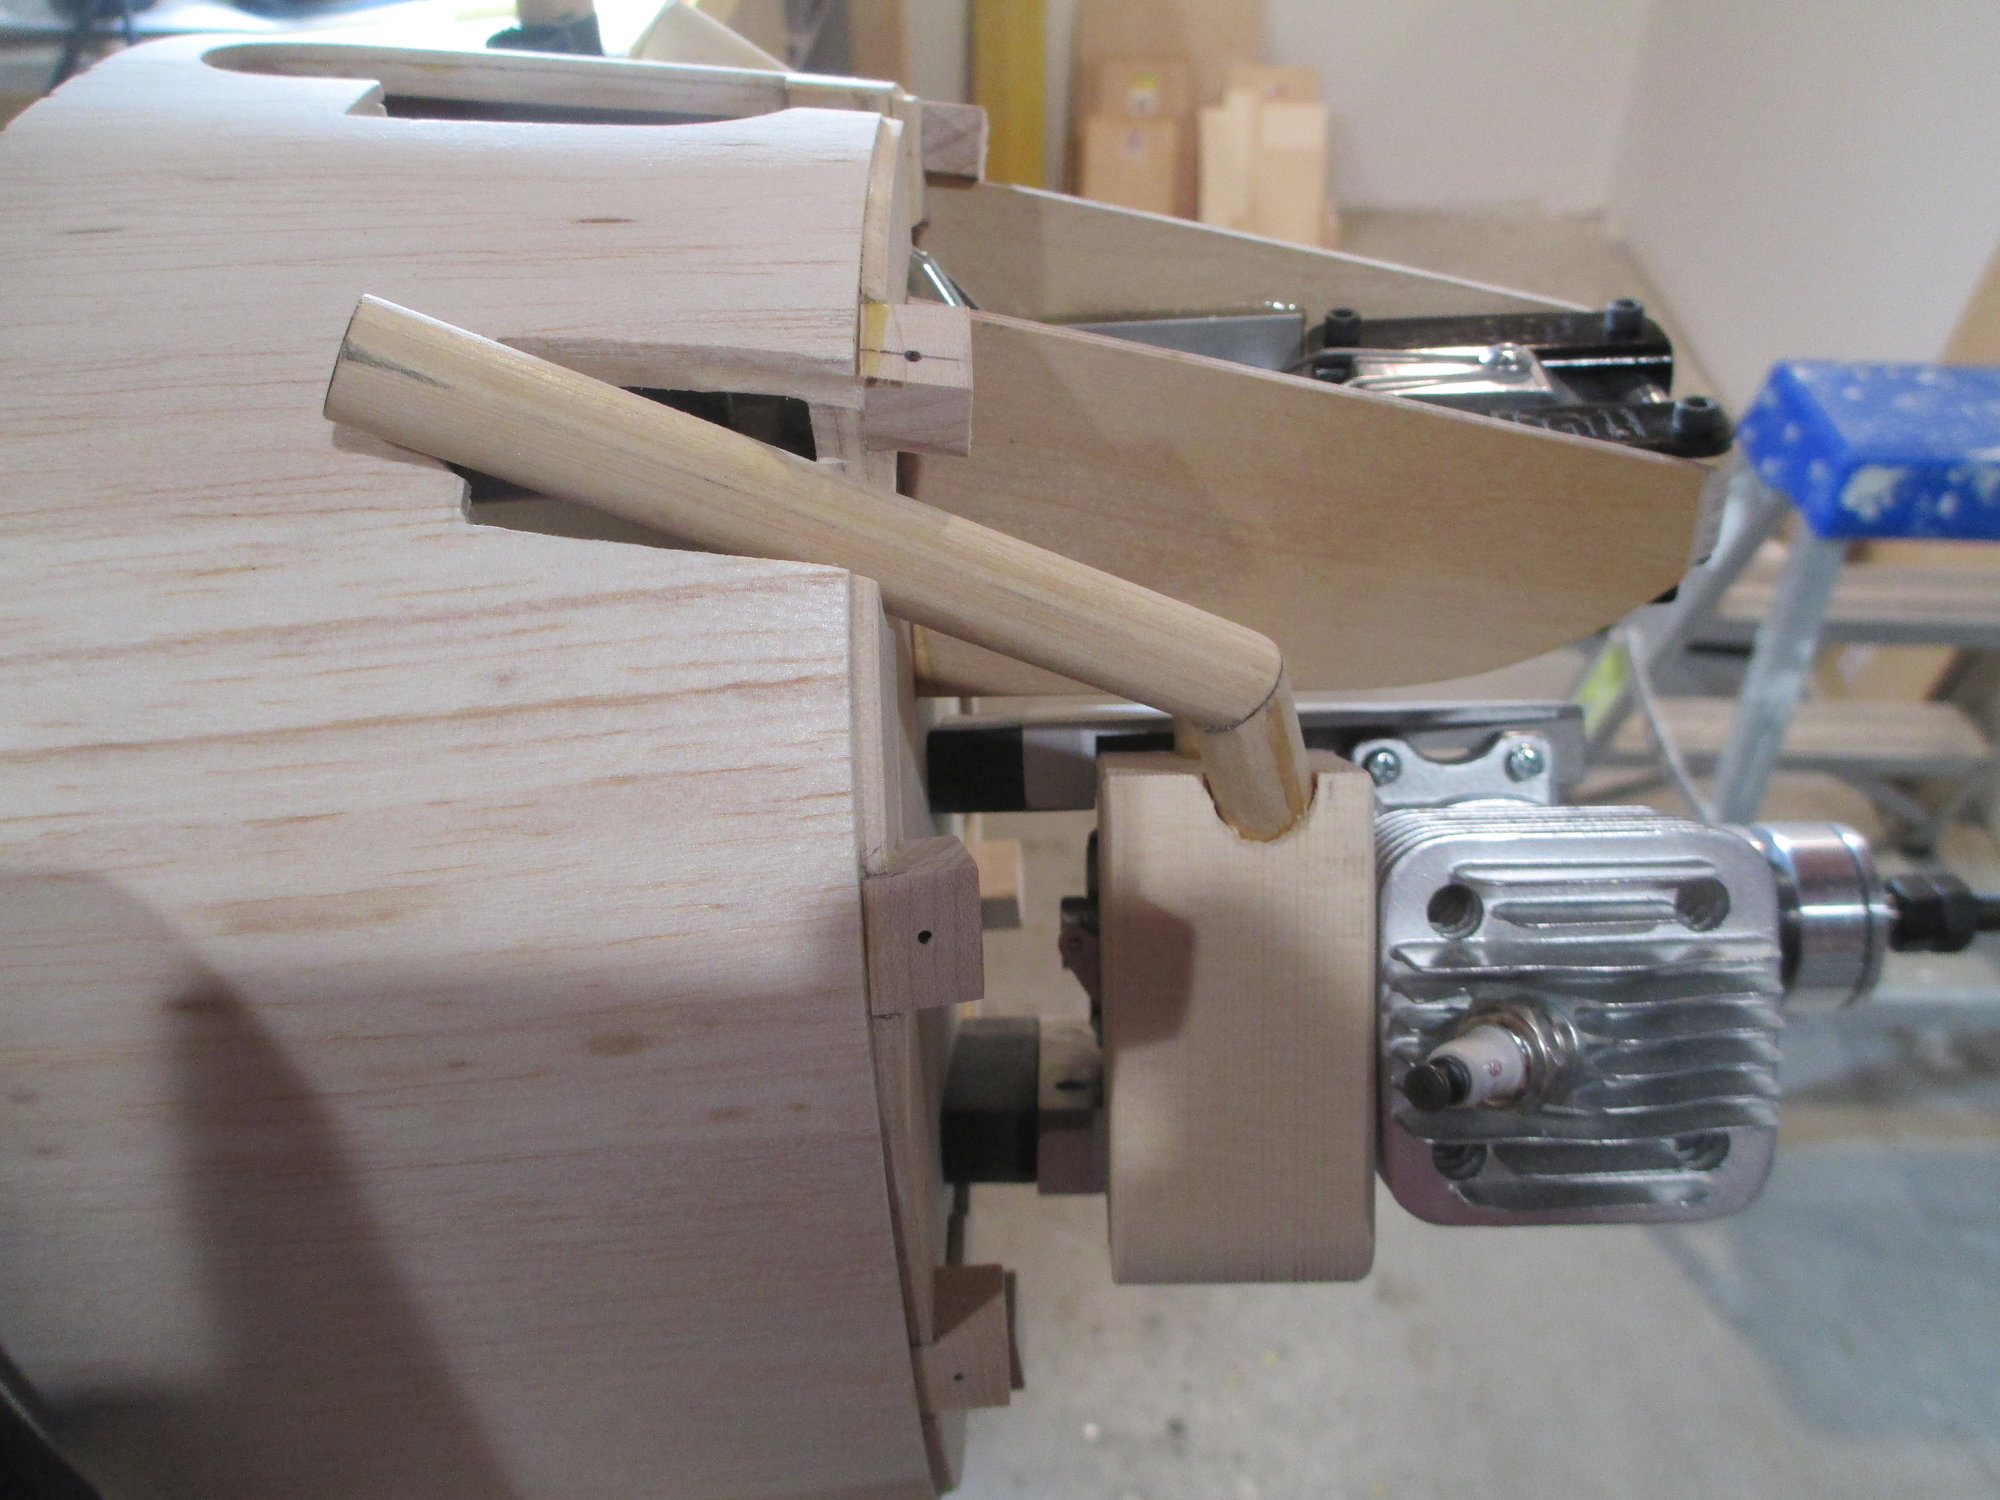
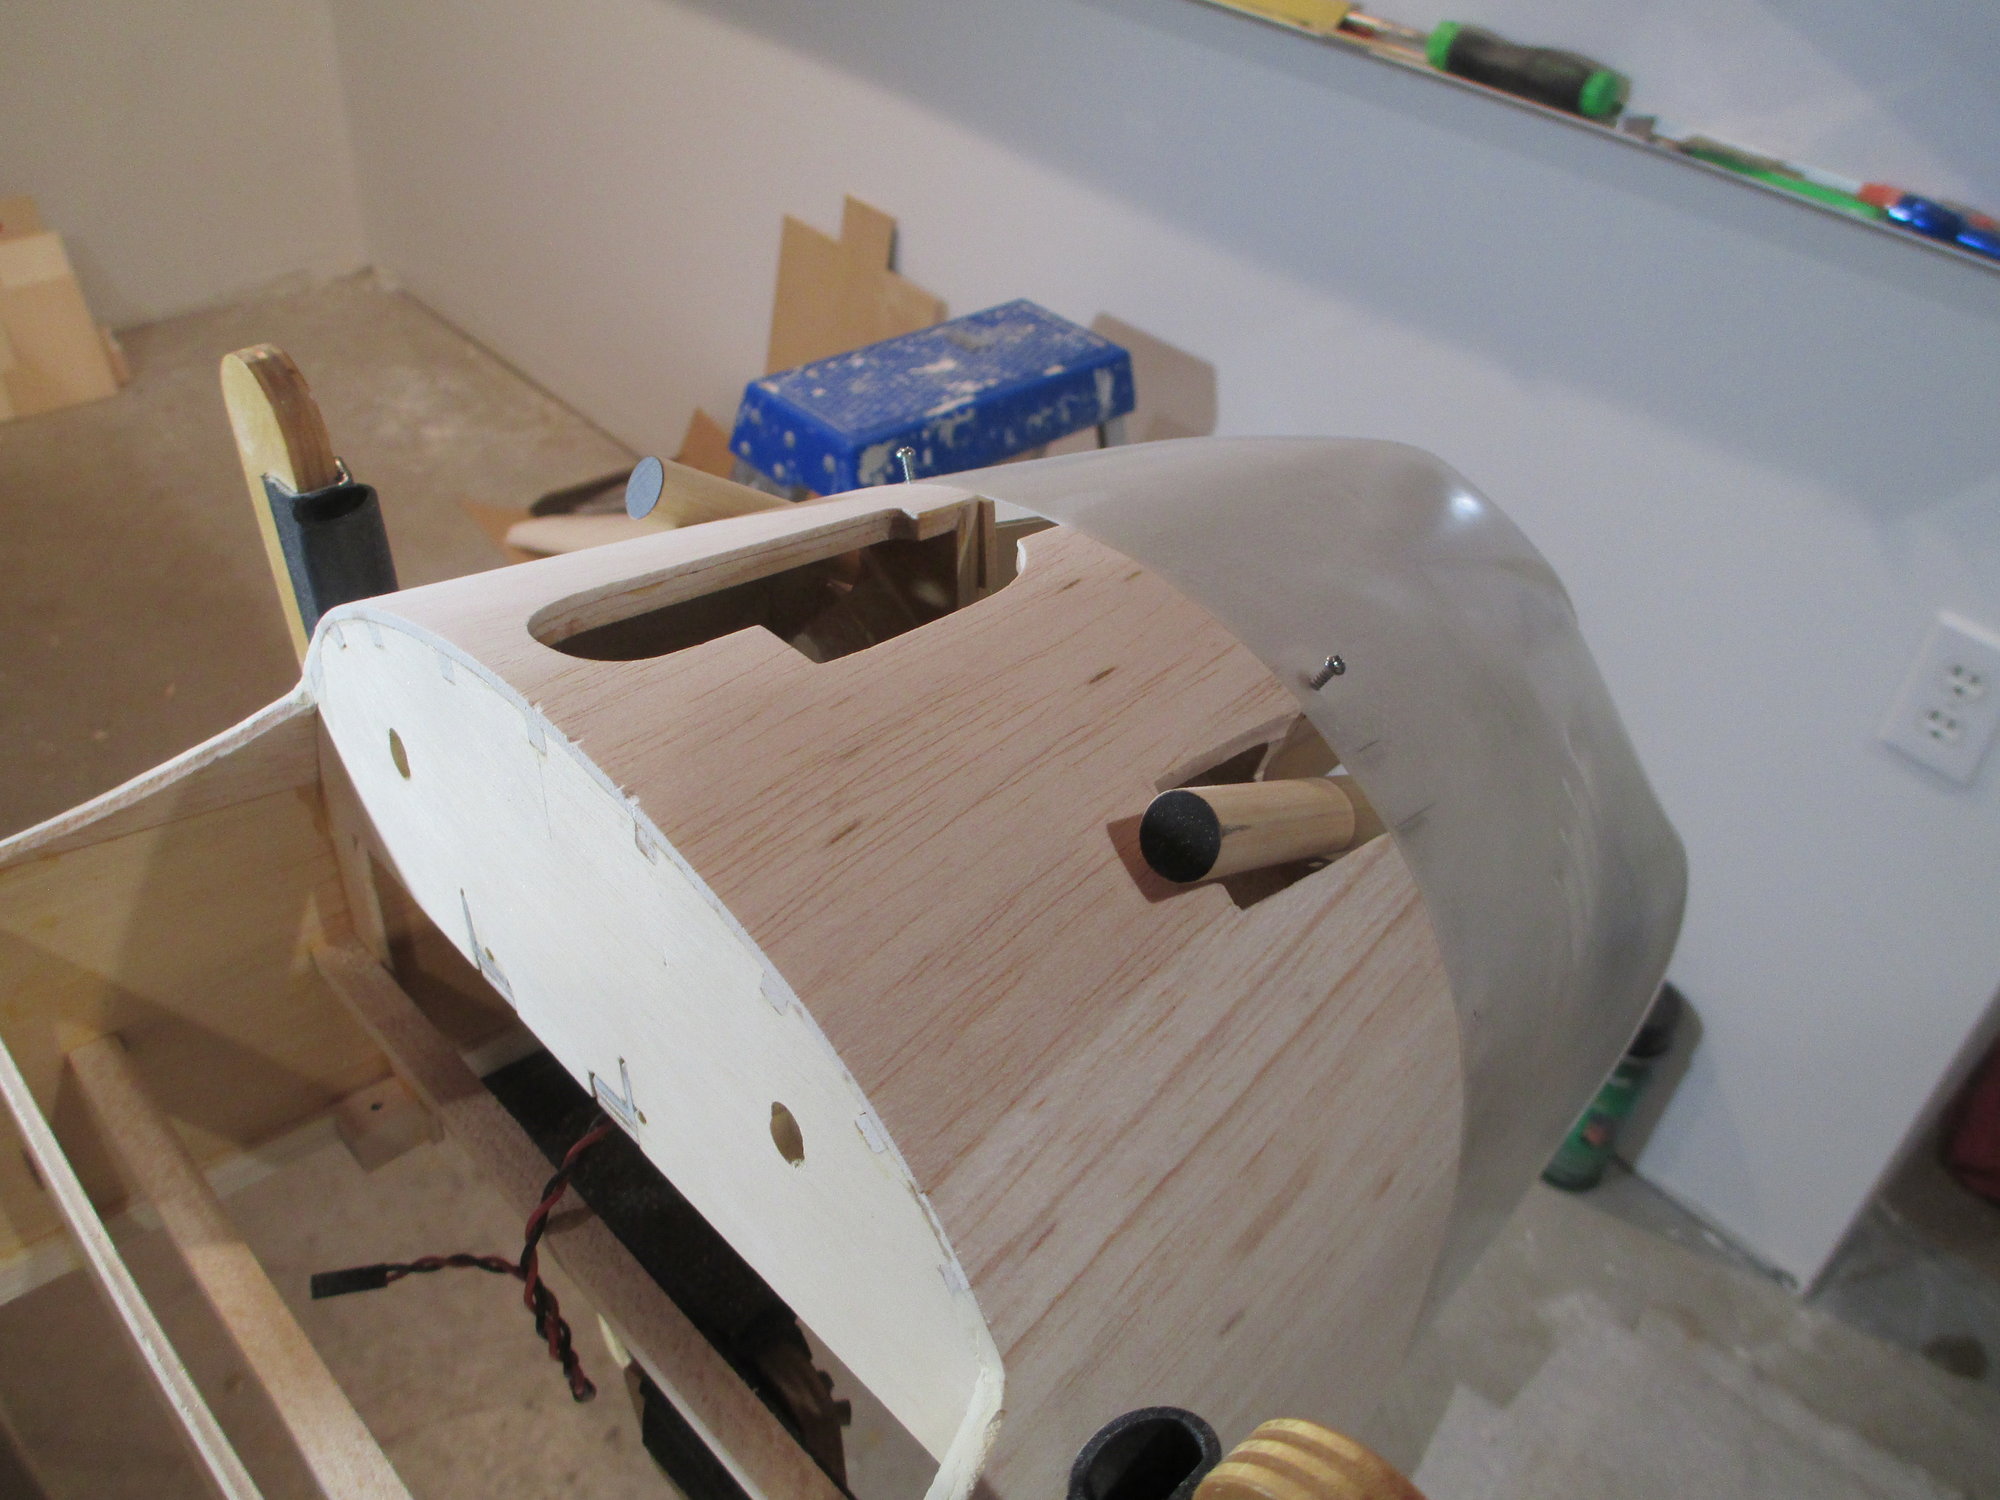
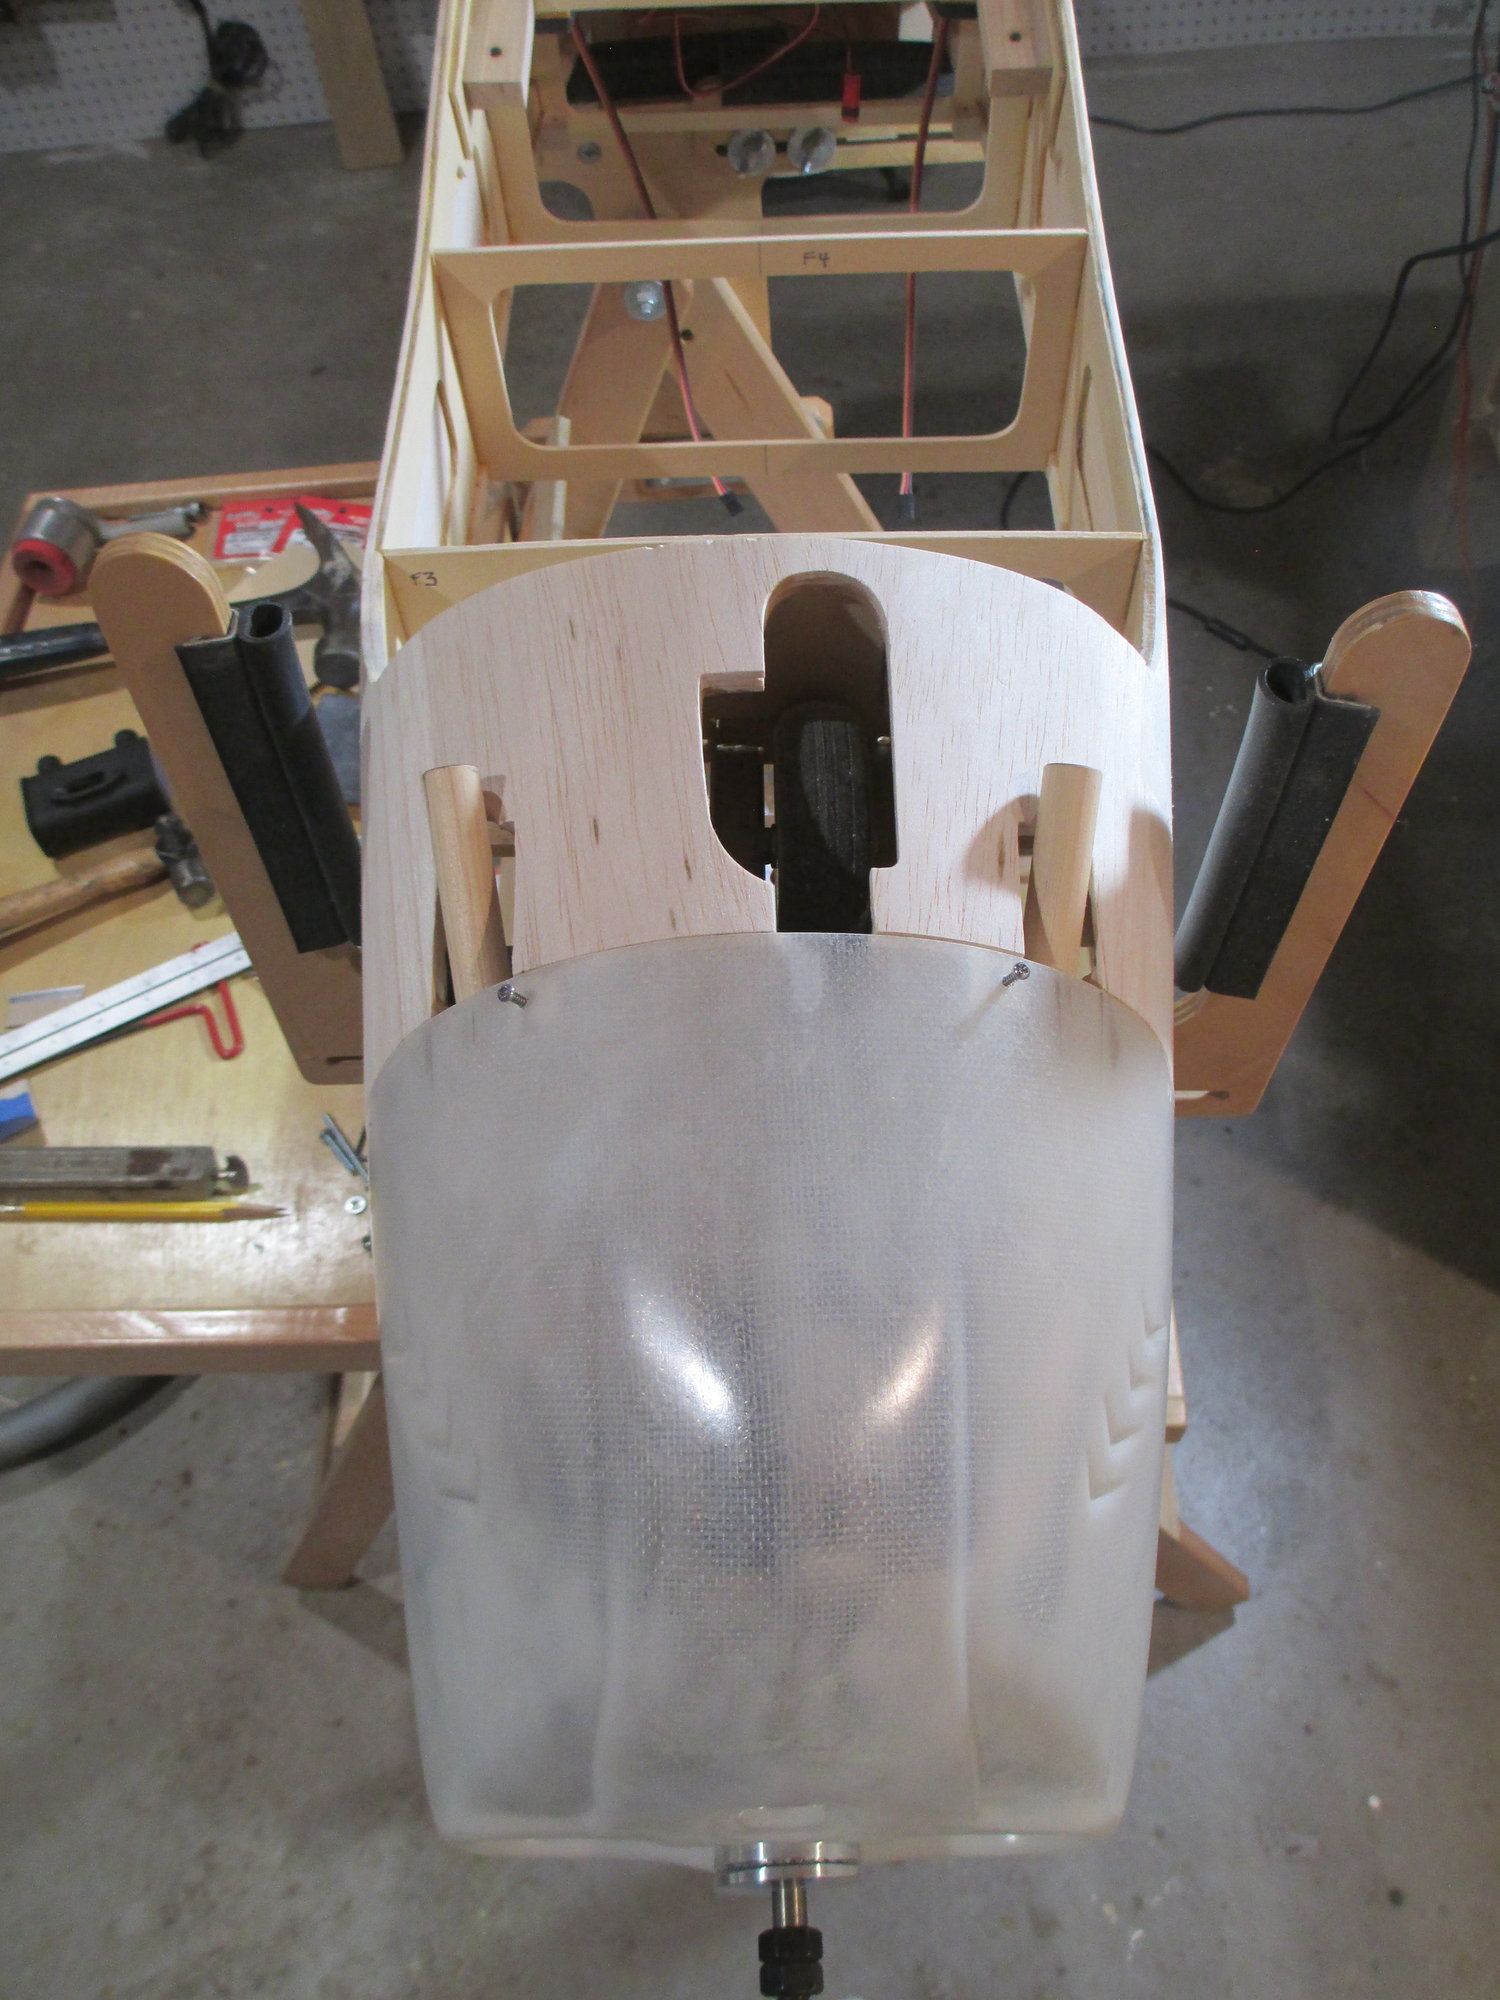
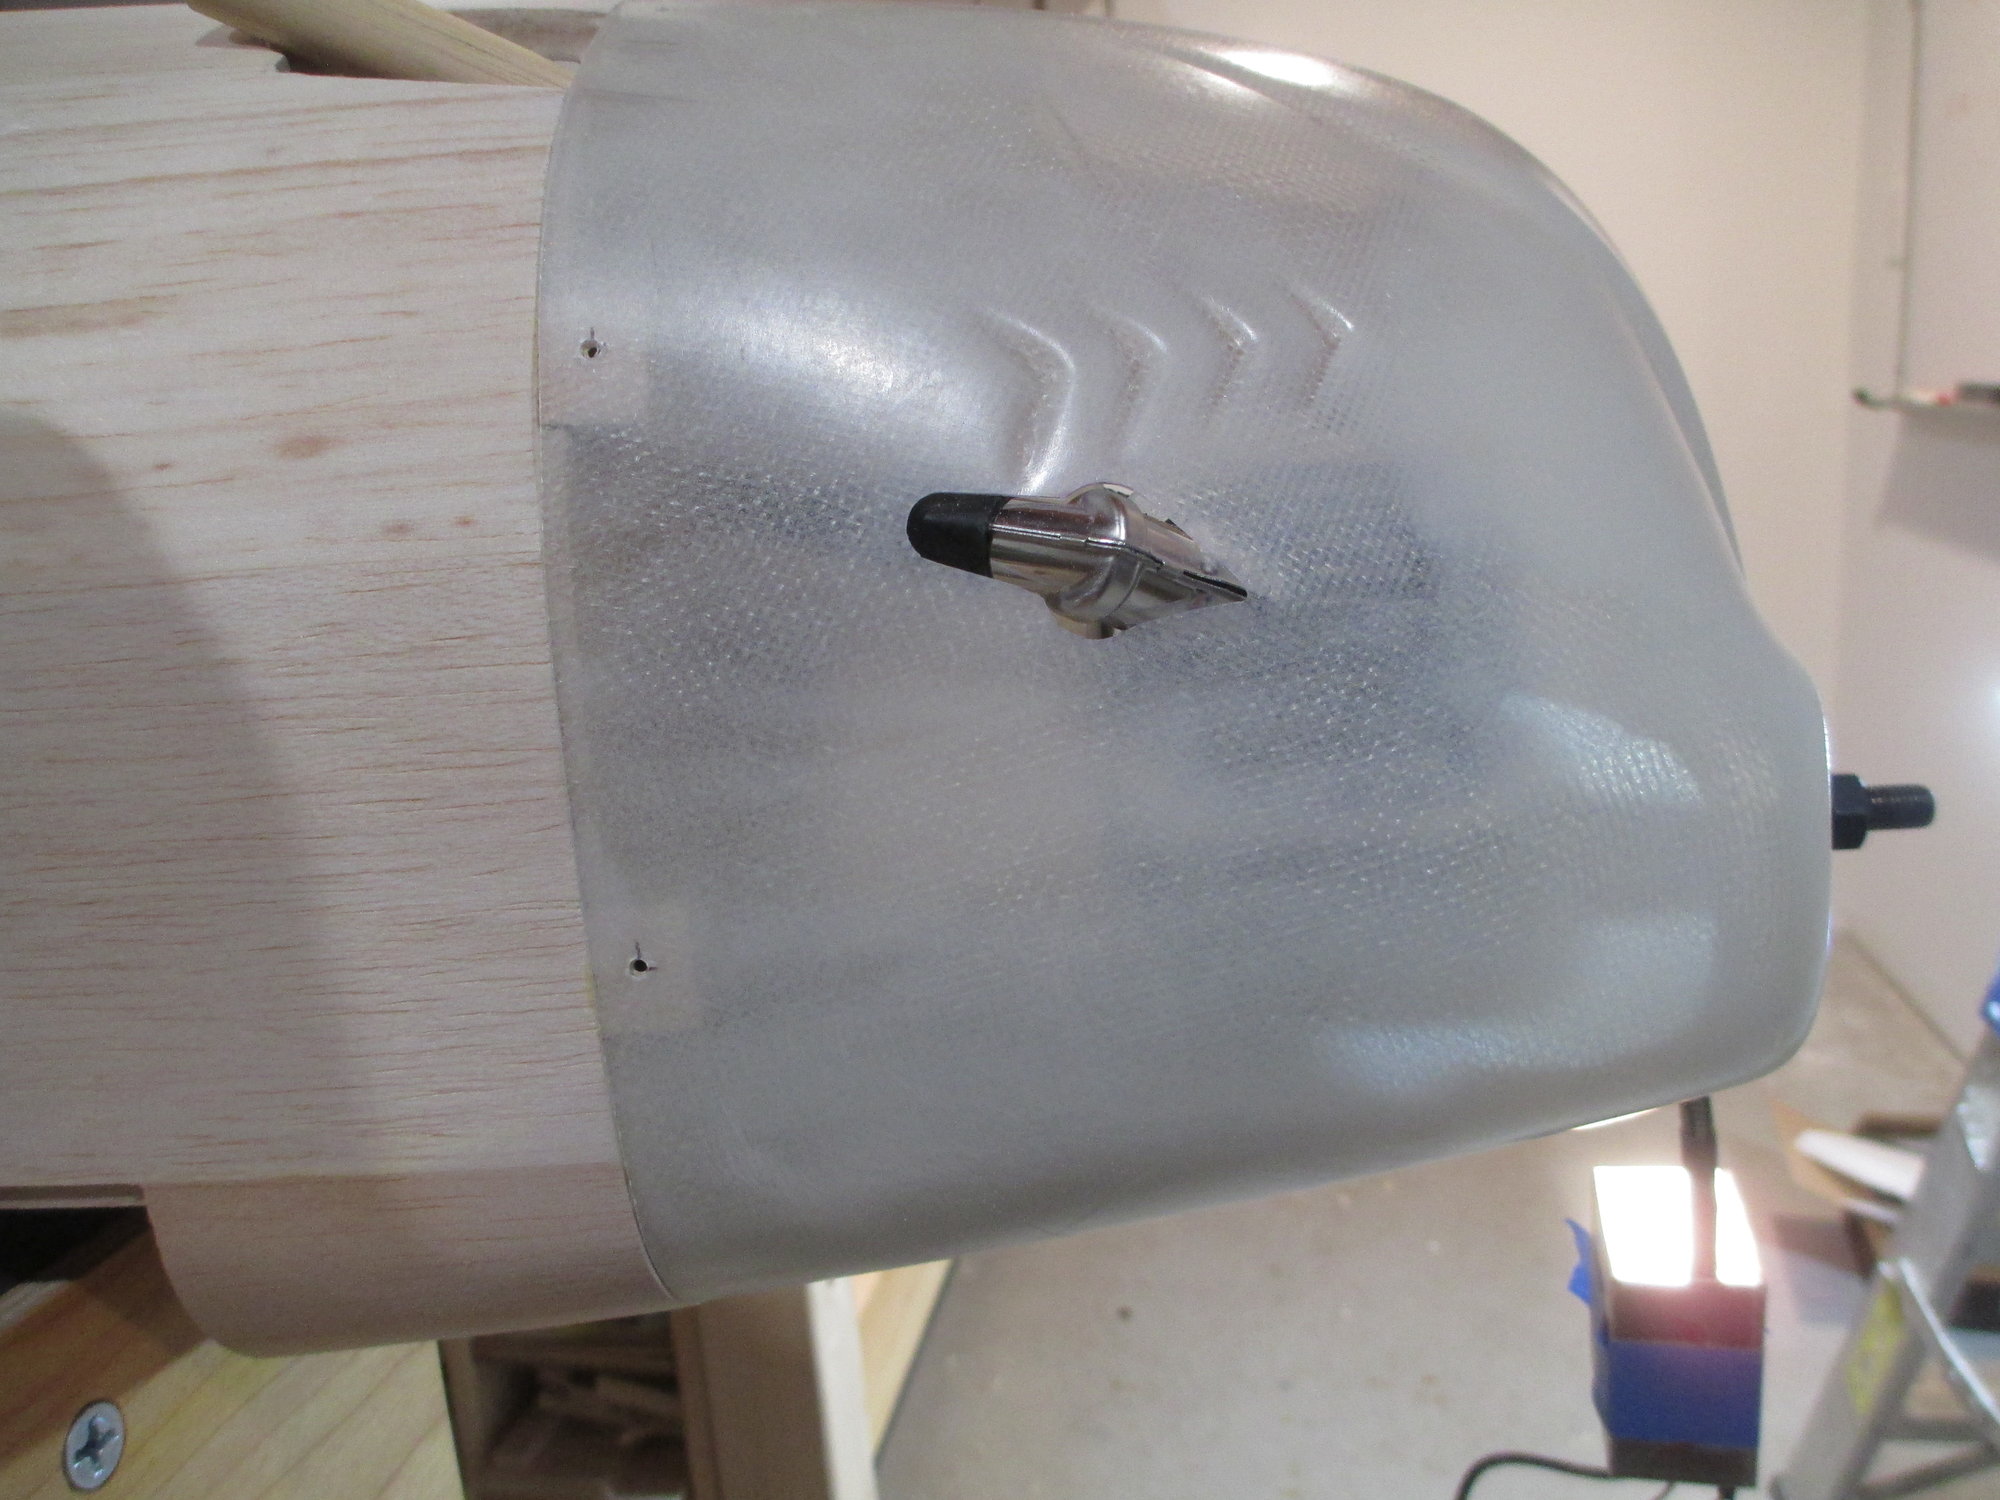
The cowl has been accommodated to fit the spark plug connector. I have been trying to be transparent throughout this build thread showing in it in its rawest form without staging anything to make it look better than it really is. So, I'm not sure whether fitting this gas engine in the confines of this cowl represents a success or failure on my part, individually you can be the judge.
12-23-2019, 05:52 AM
#587
I would count fitting the engine in the confines of this cowl as a success. You have to make one small accommodation for the plug wire that is much. It look neat and planned out and not like an after thought. My Cub has part of the Saito rocker covers peaking out for the same reason I like the way it came out oo. Maybe having them in the airflow will pull some heat of the engine, I hope.
12-23-2019, 01:06 PM
#588
Thread Starter
The wooden exhaust has been carefully boxed and shipped to JTECH. I will keep you informed as to the process and progress made...
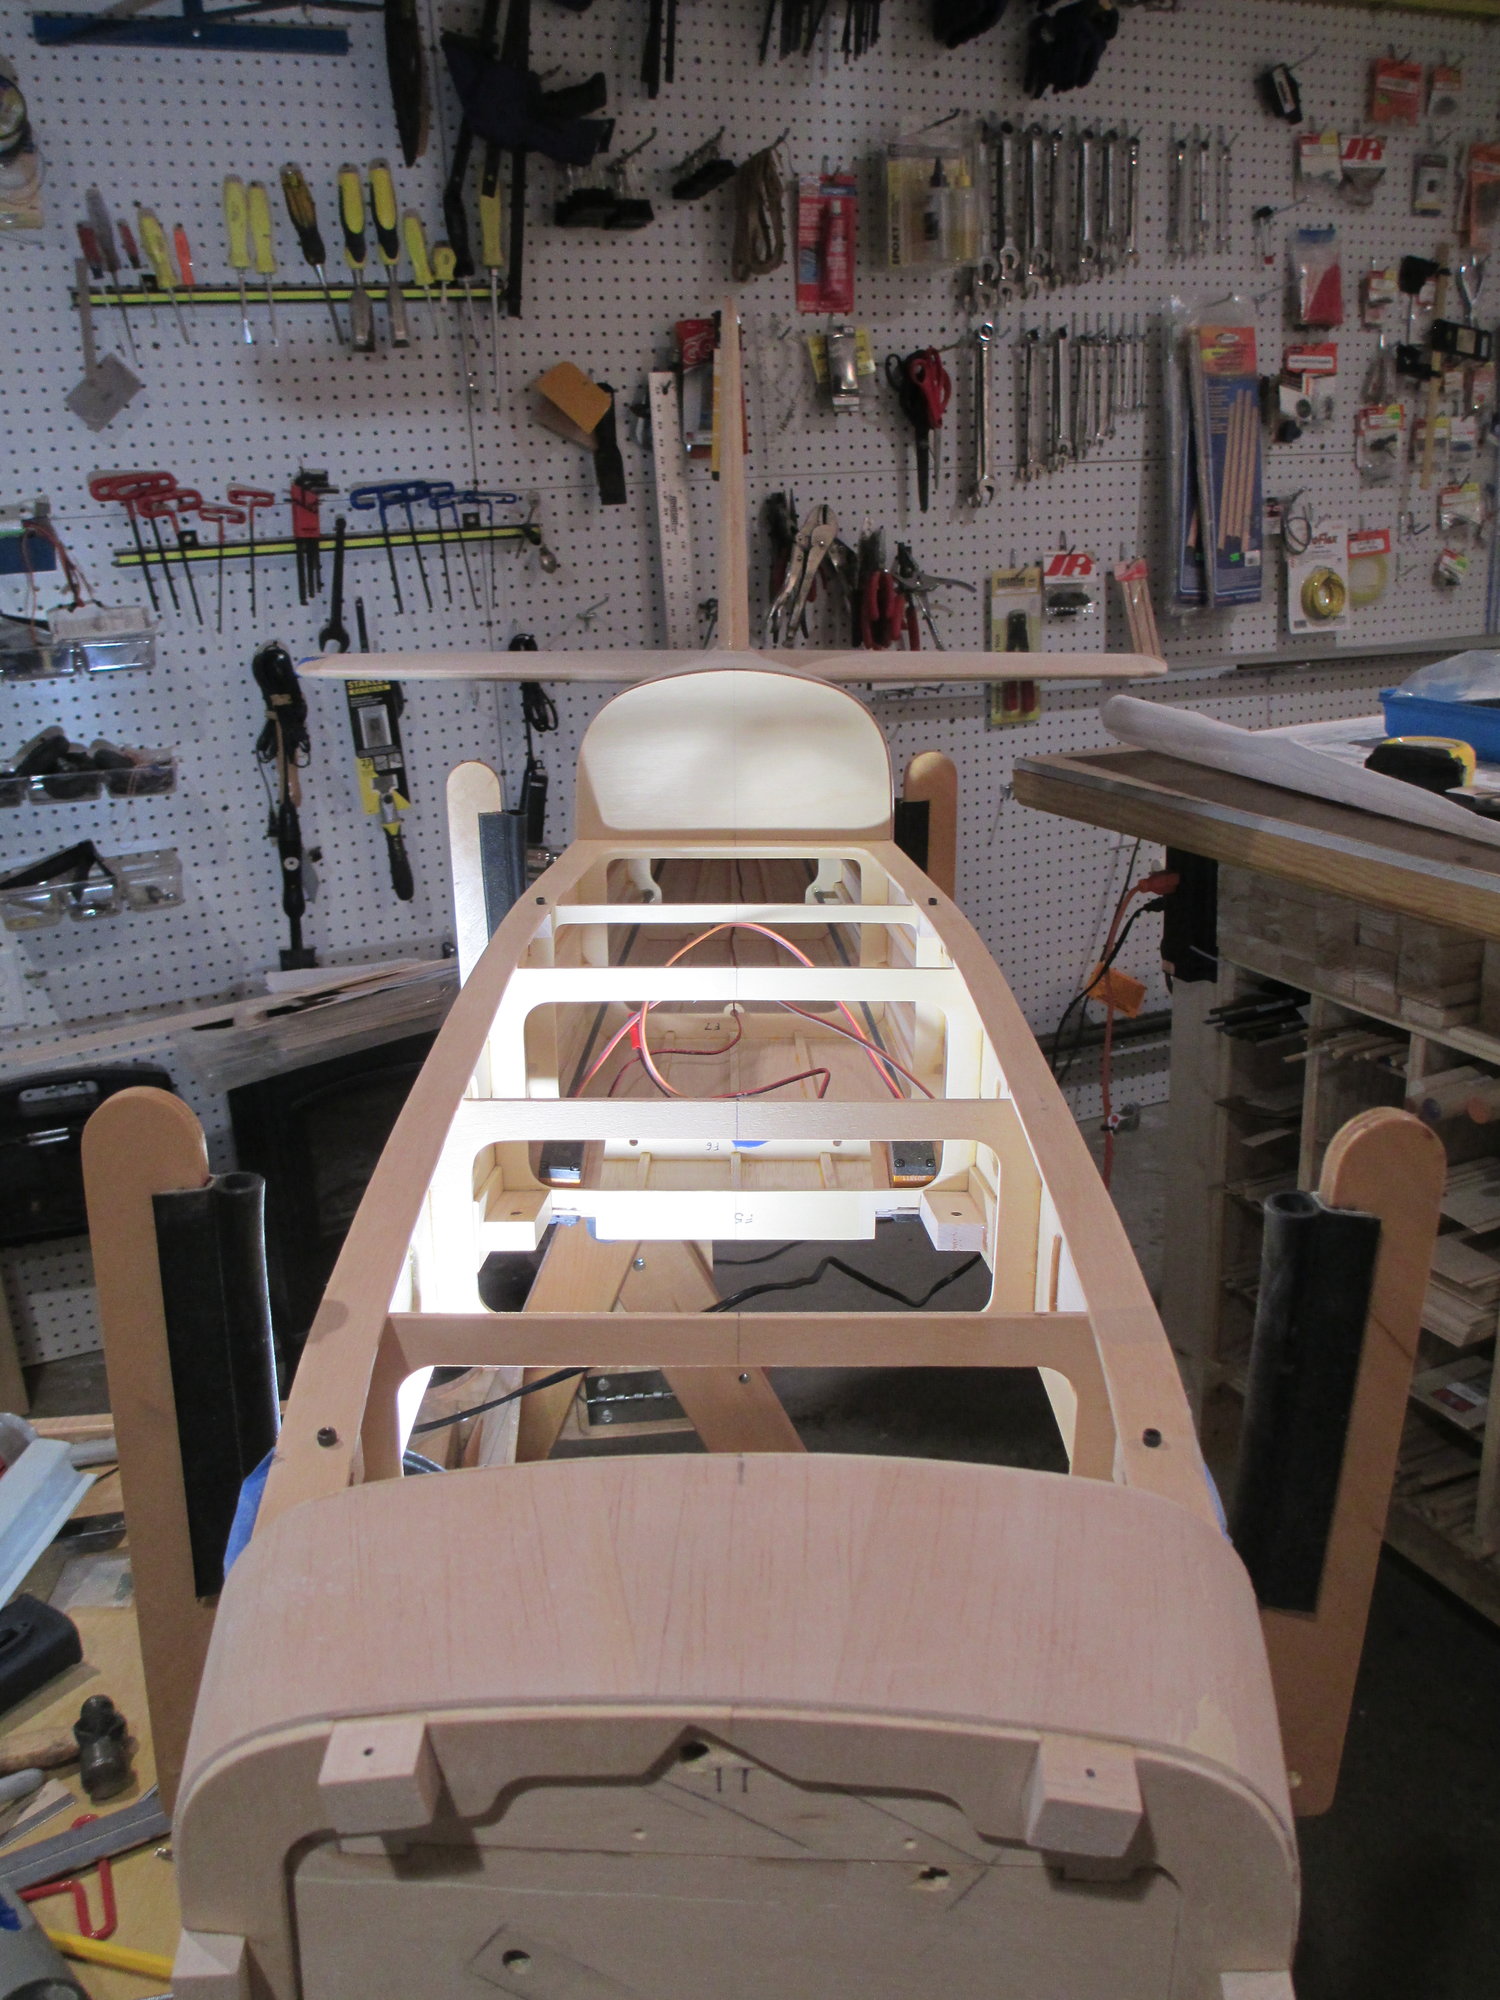
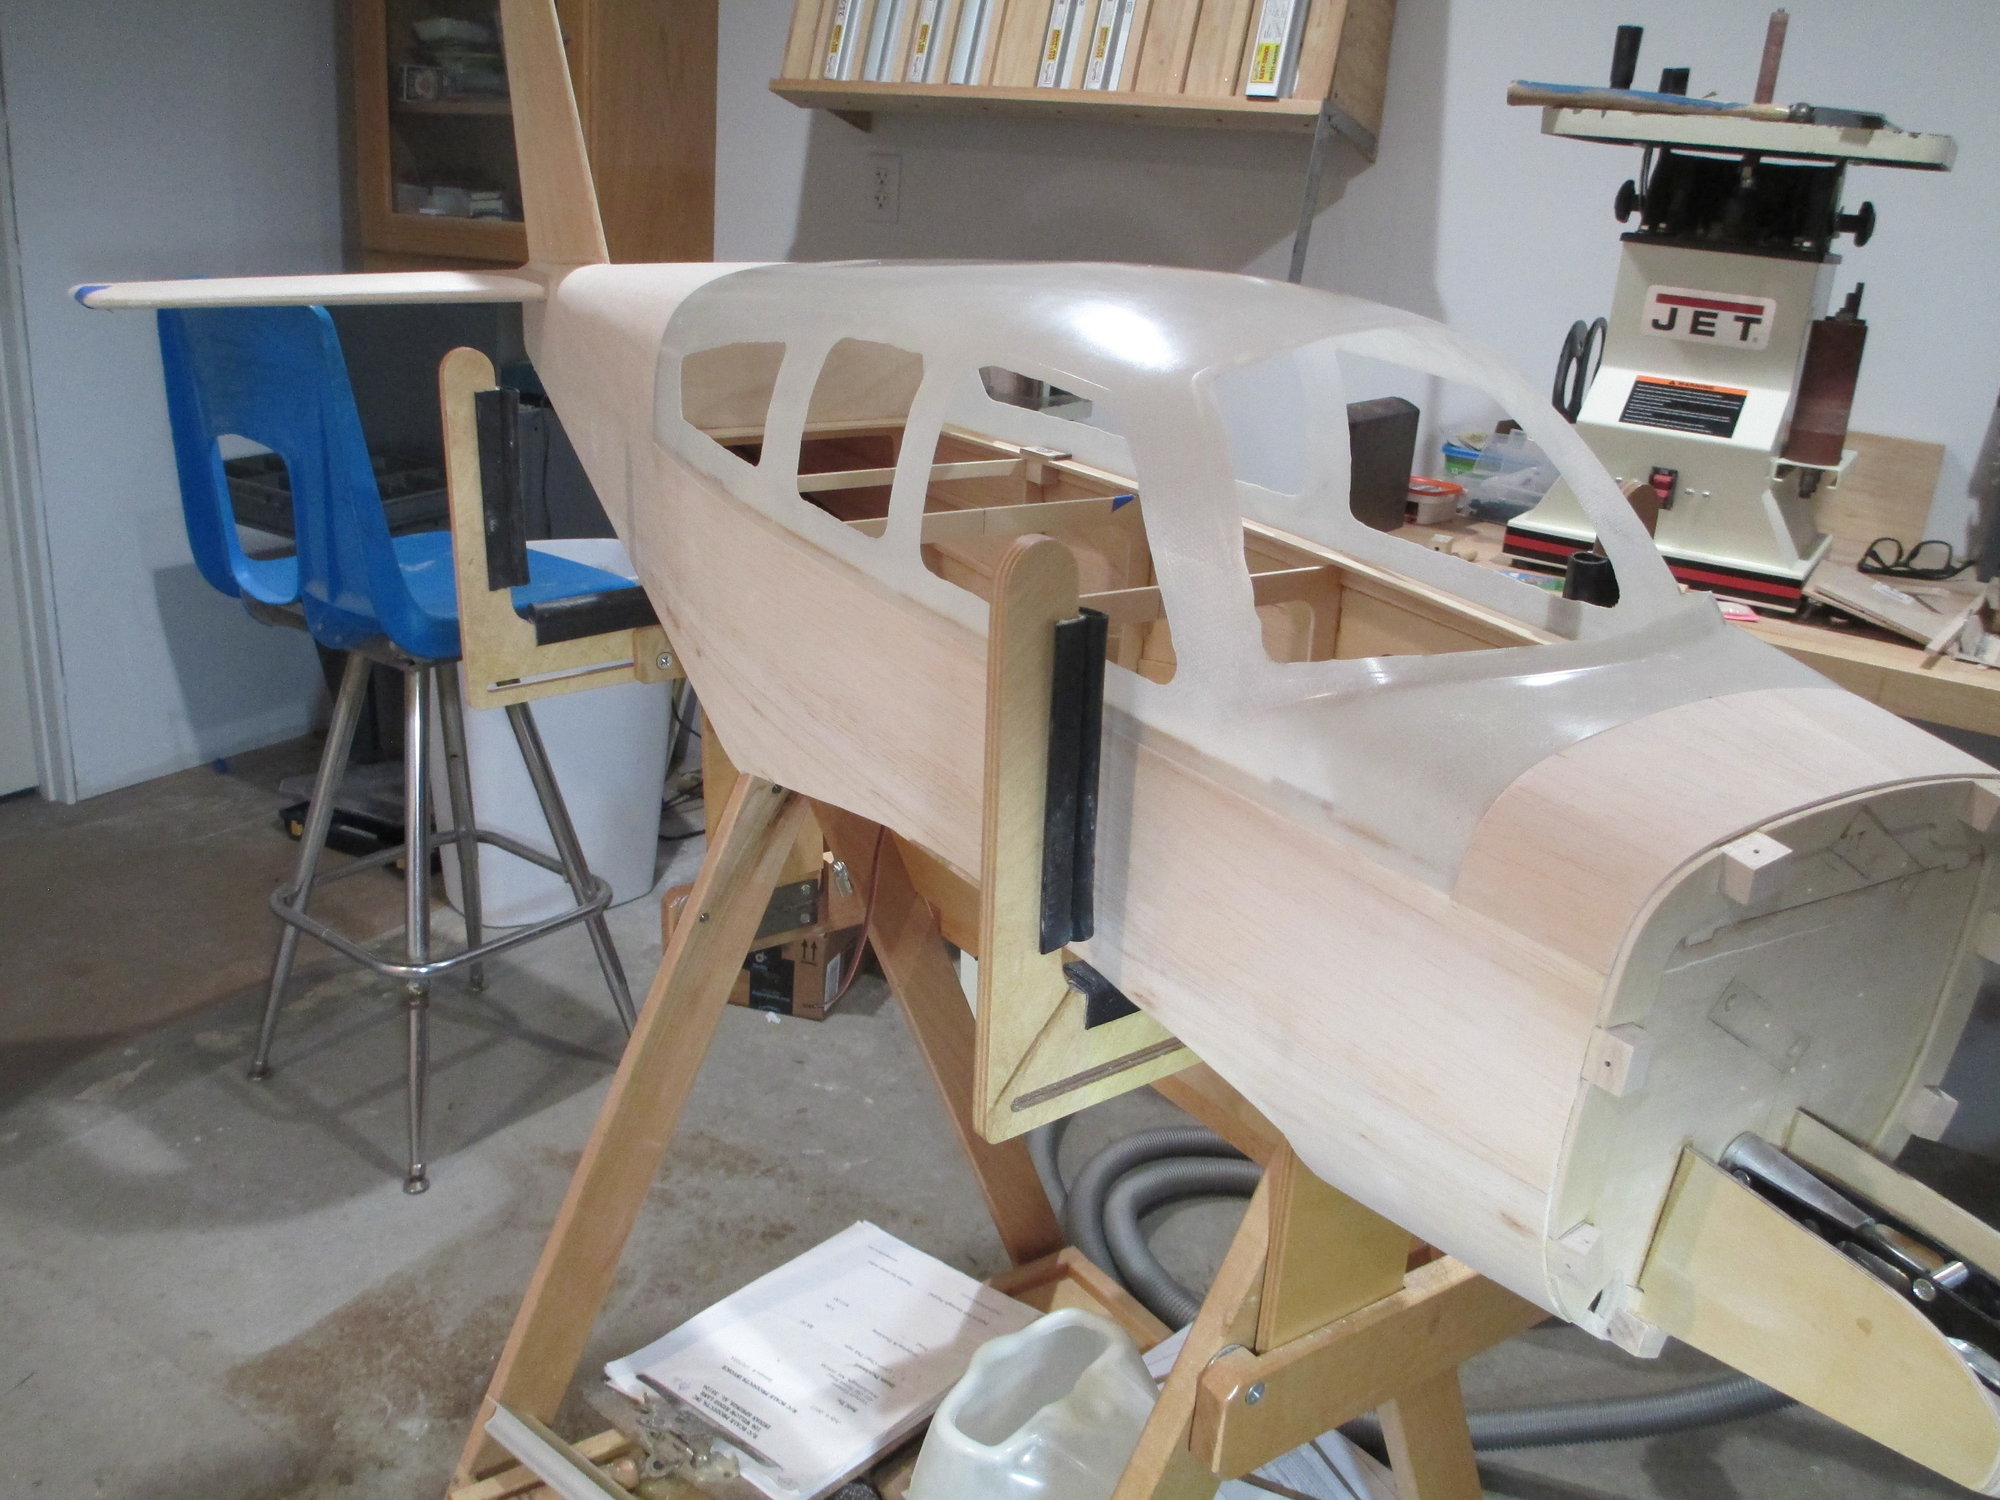
Center lines were extended to the tops of the front fuse sheeting and rear turtle deck. This will aid in keeping the canopy centered while installing/removing it during the stages of fitment.

The center lines were marked on the front and rear of the canopy as well. Now comes the task of measuring and sanding the canopy to fit the confines of the crutch.
Center lines were extended to the tops of the front fuse sheeting and rear turtle deck. This will aid in keeping the canopy centered while installing/removing it during the stages of fitment.
The center lines were marked on the front and rear of the canopy as well. Now comes the task of measuring and sanding the canopy to fit the confines of the crutch.
Last edited by VincentJ; 12-24-2019 at 01:14 AM.
12-23-2019, 08:08 PM
#591


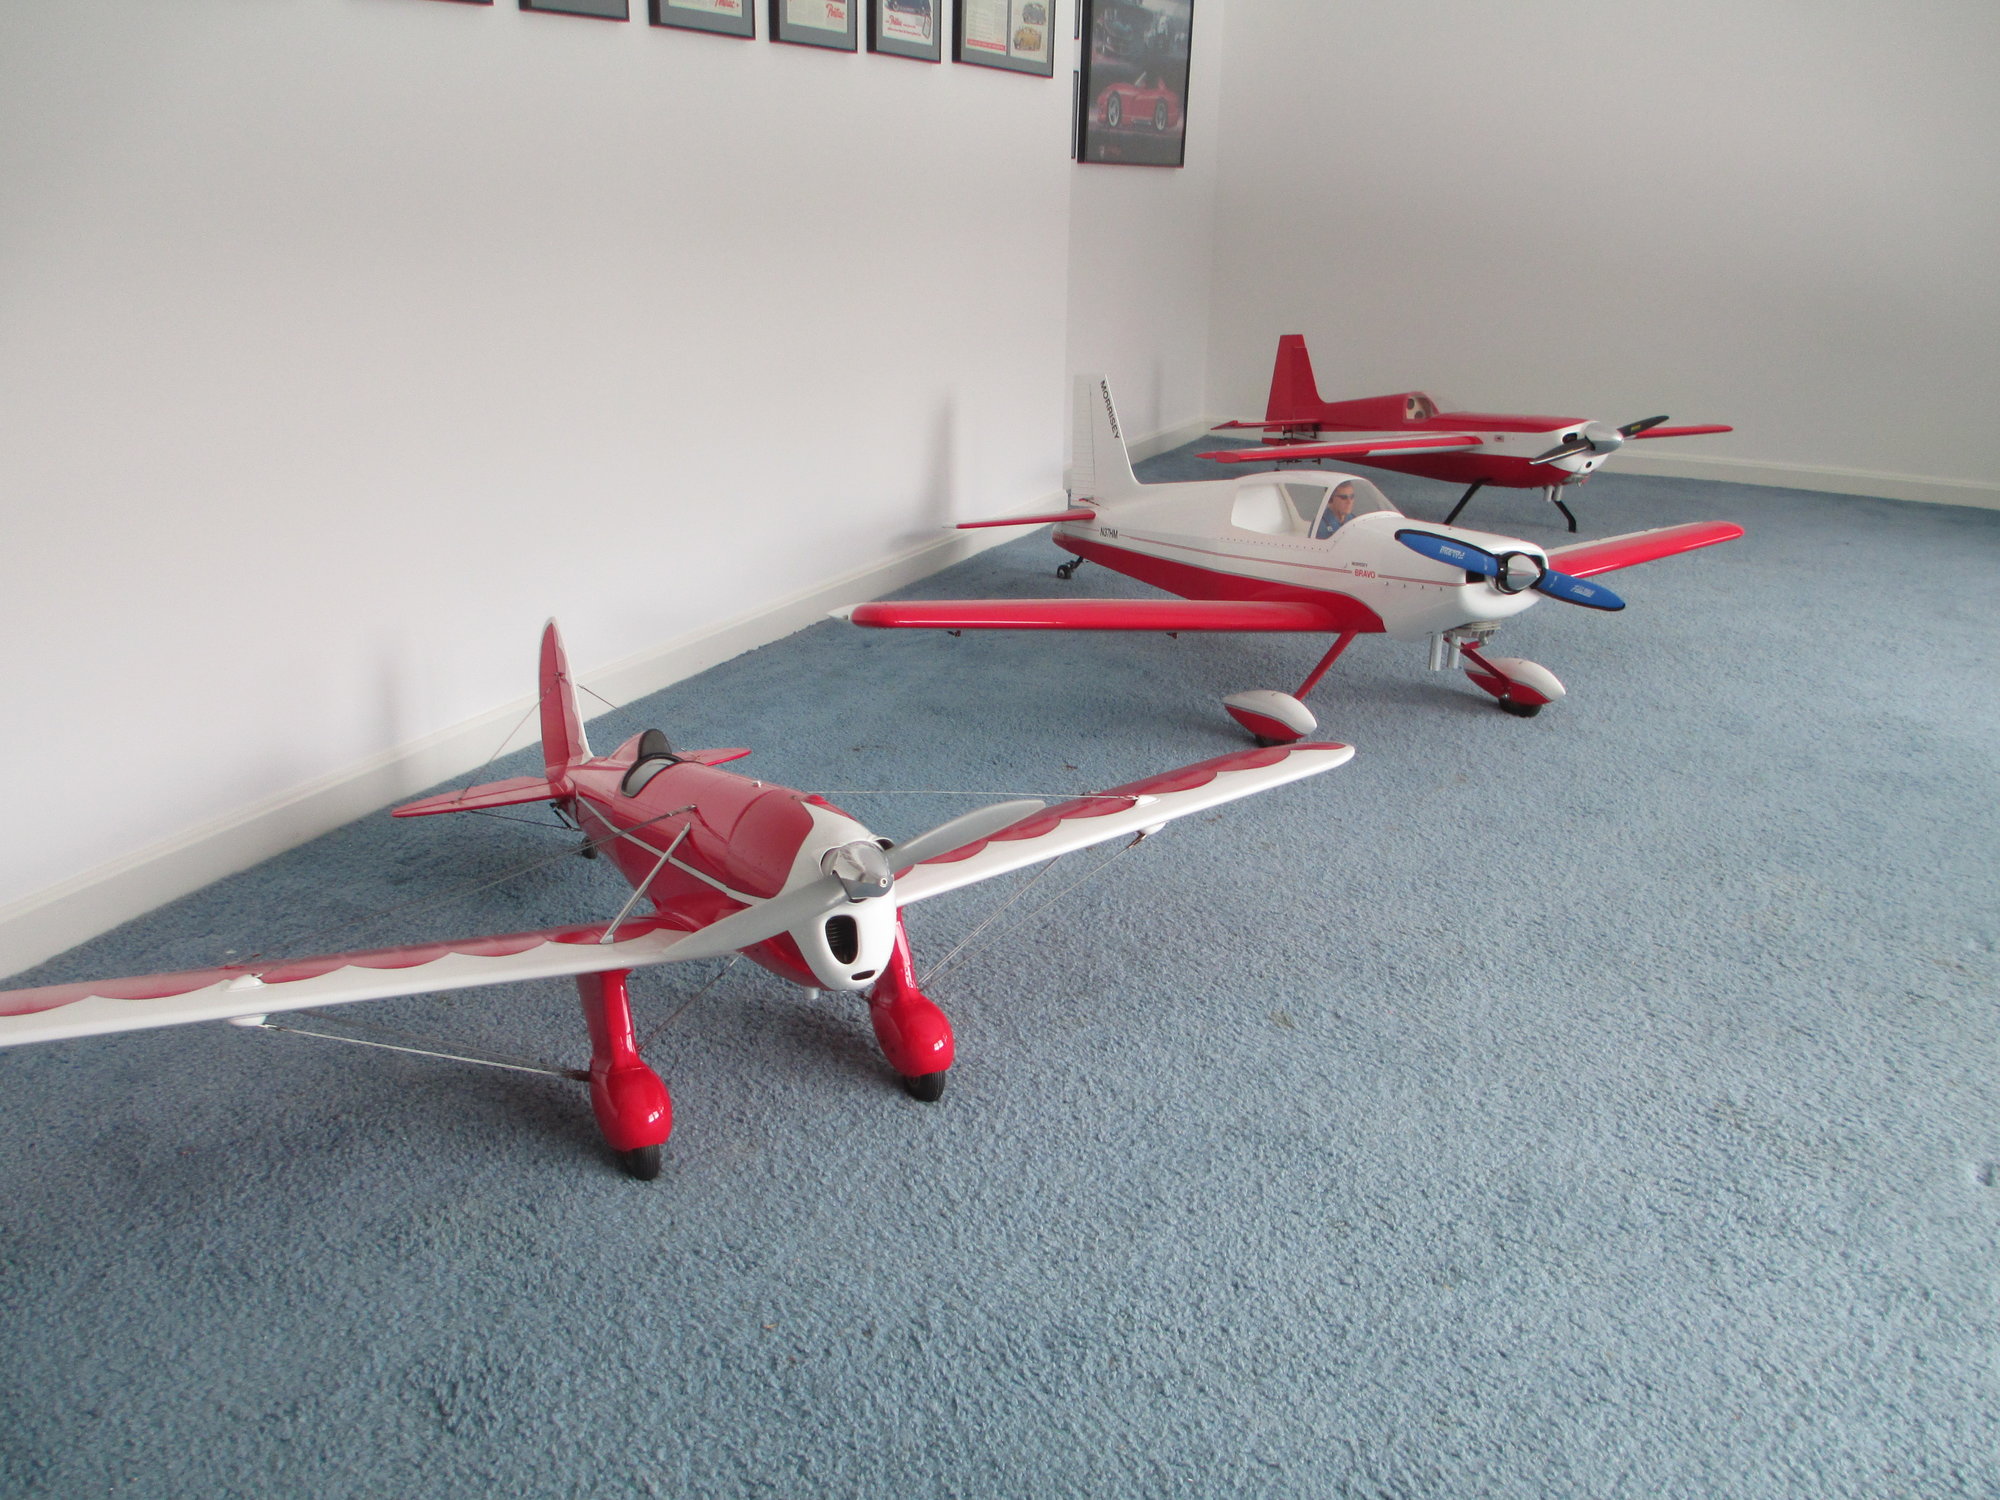
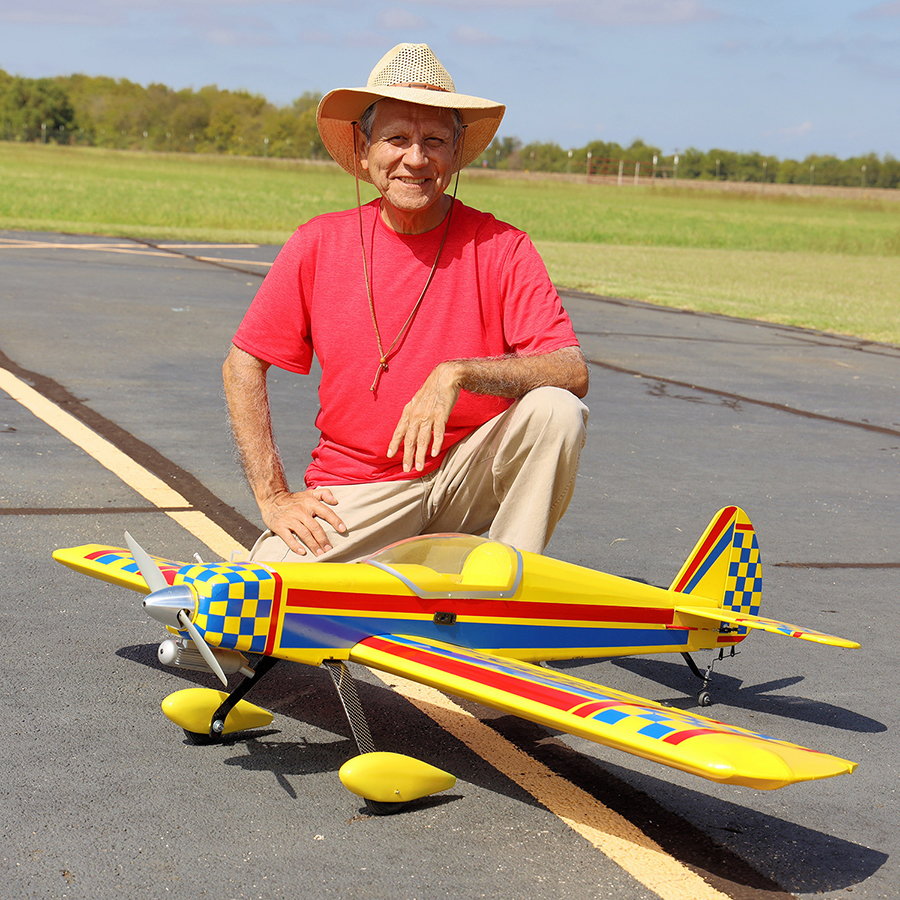
In response to your well wishings about from my hangar to yours... here's my response... my plane to yours.
Sorry, no hangar. But at least you no longer have to imagine what SA Flyer looks like.
Here's wishing you a good rest of the year and a happy new year's day.
Sorry, no hangar. But at least you no longer have to imagine what SA Flyer looks like.
Here's wishing you a good rest of the year and a happy new year's day.
12-24-2019, 07:16 AM
#595
Thread Starter
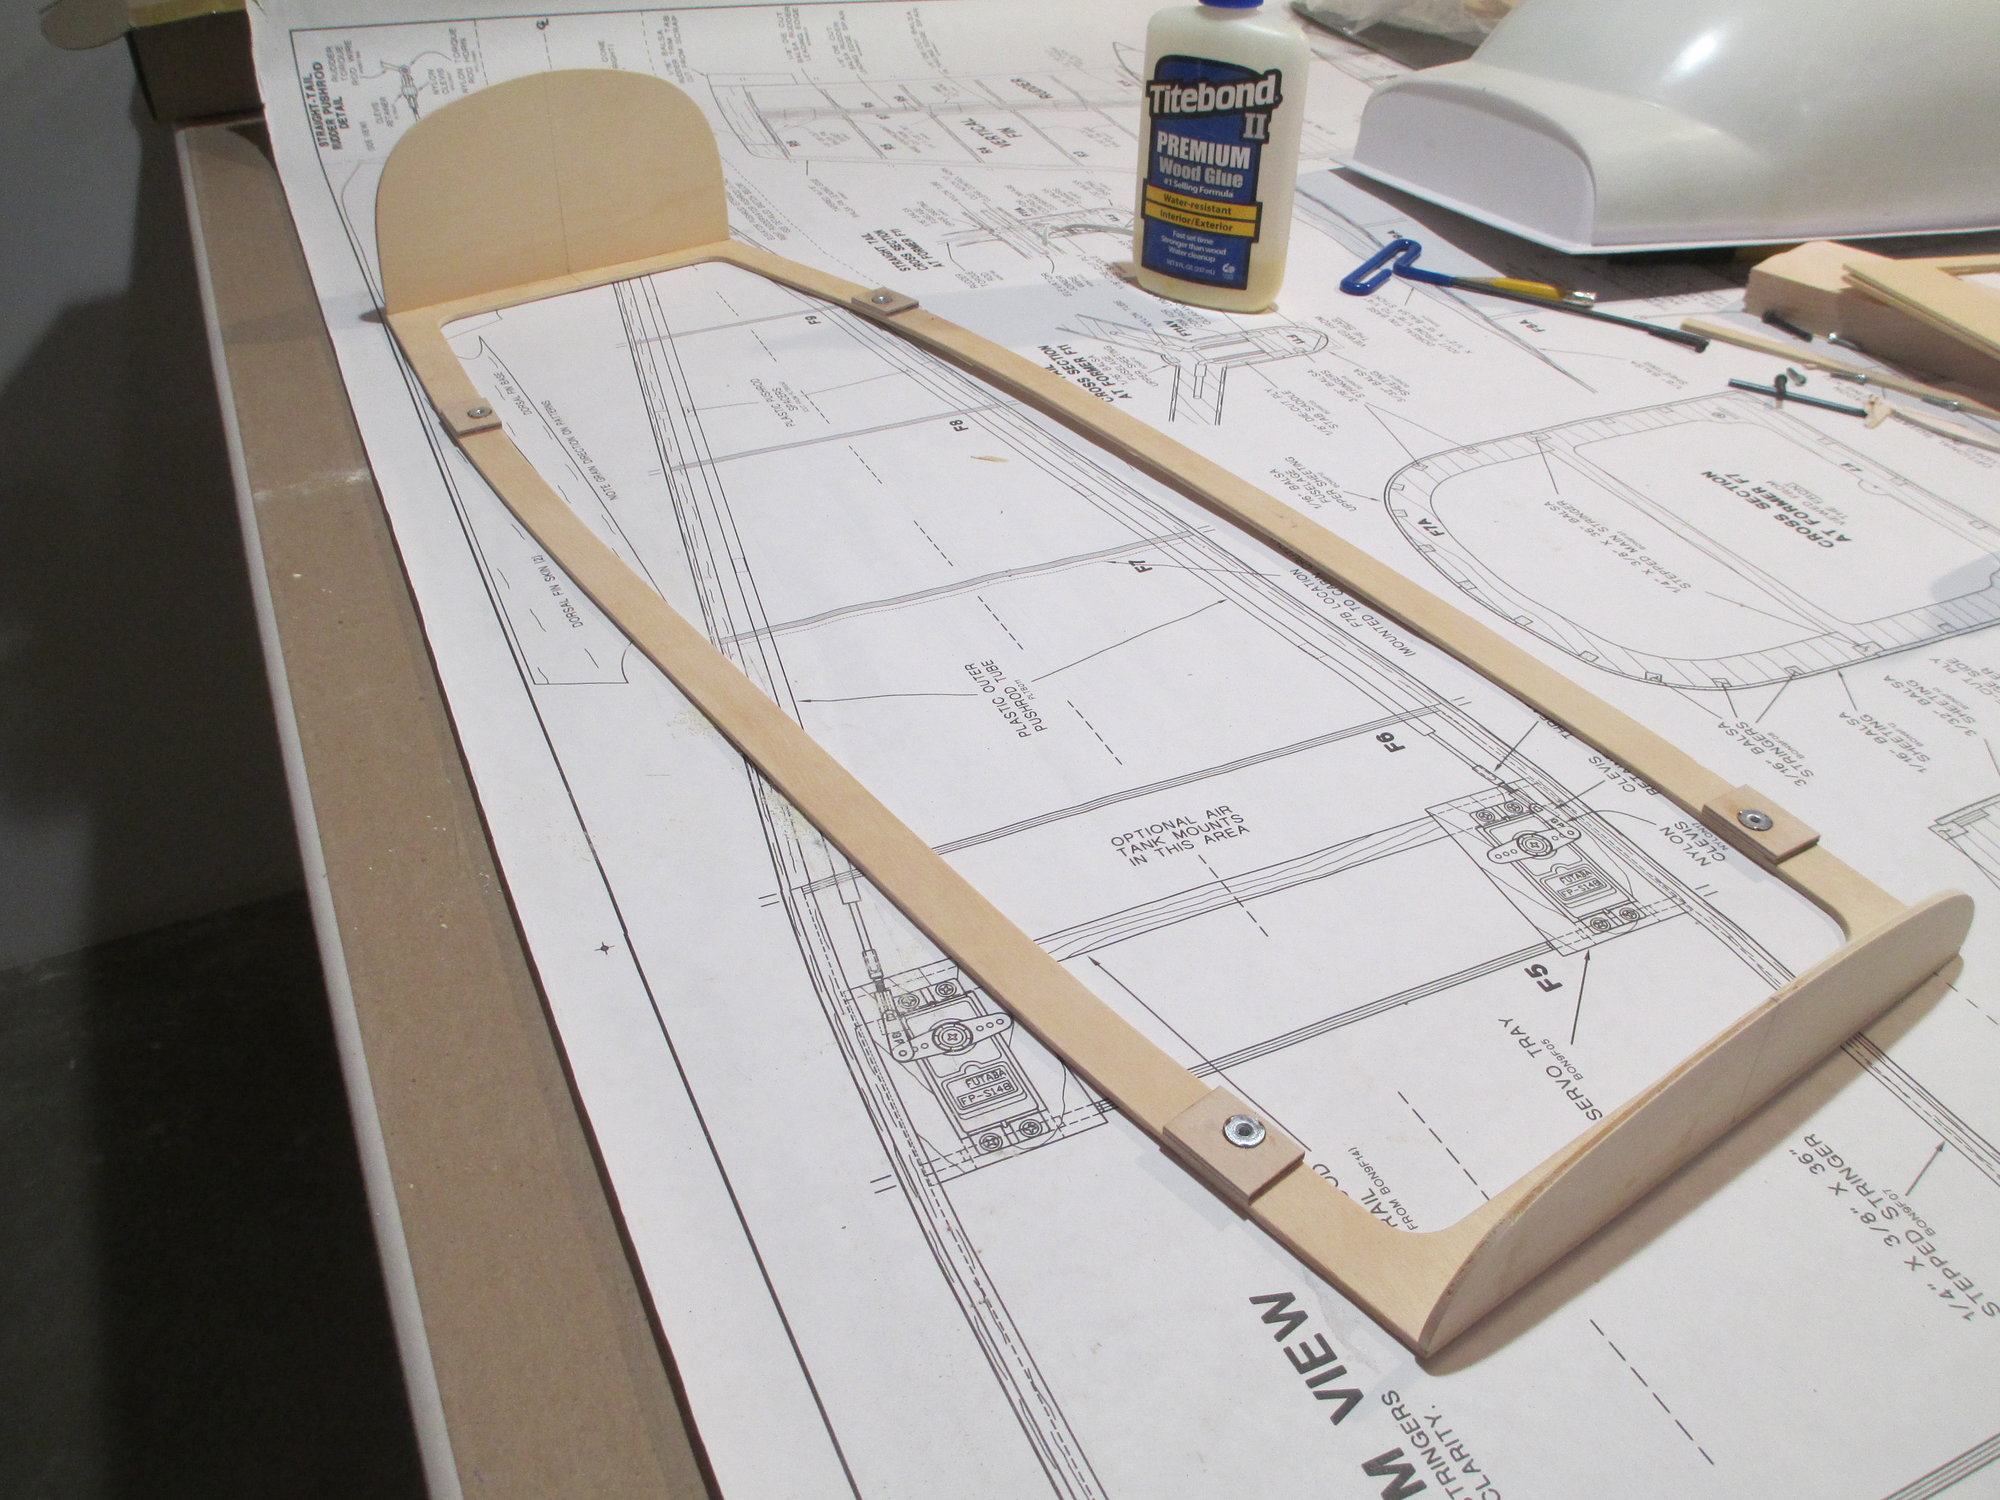
This is the framework that will support the canopy. There are four 4-40 cap head screws that will secure the crutch to the fuselage.
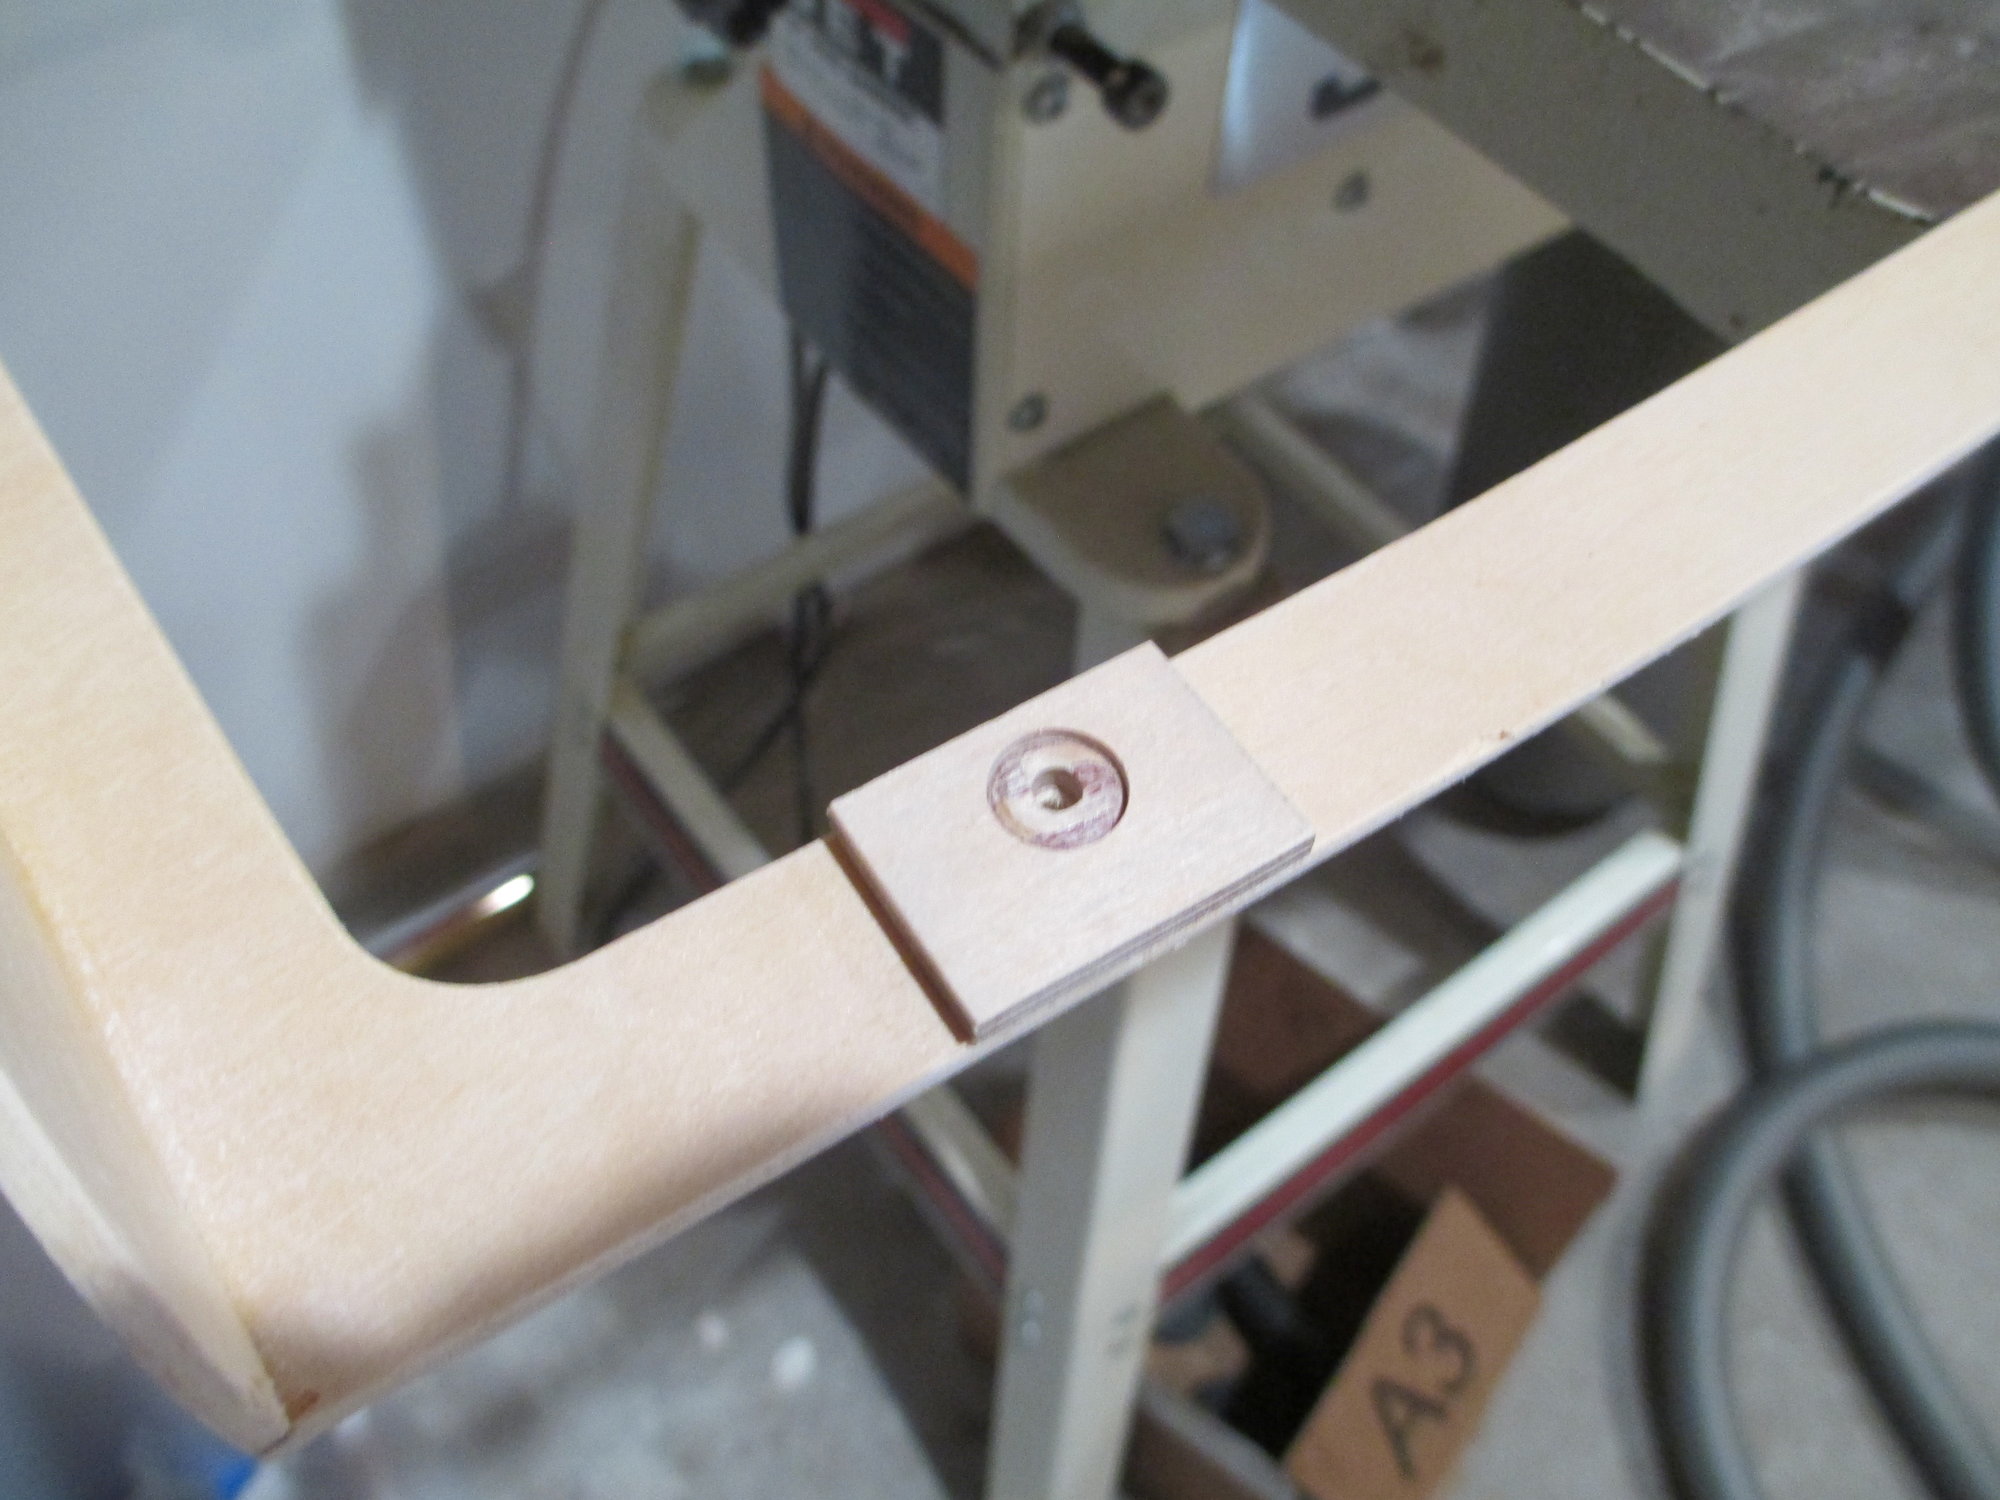
I decided to make the blind nuts flush.
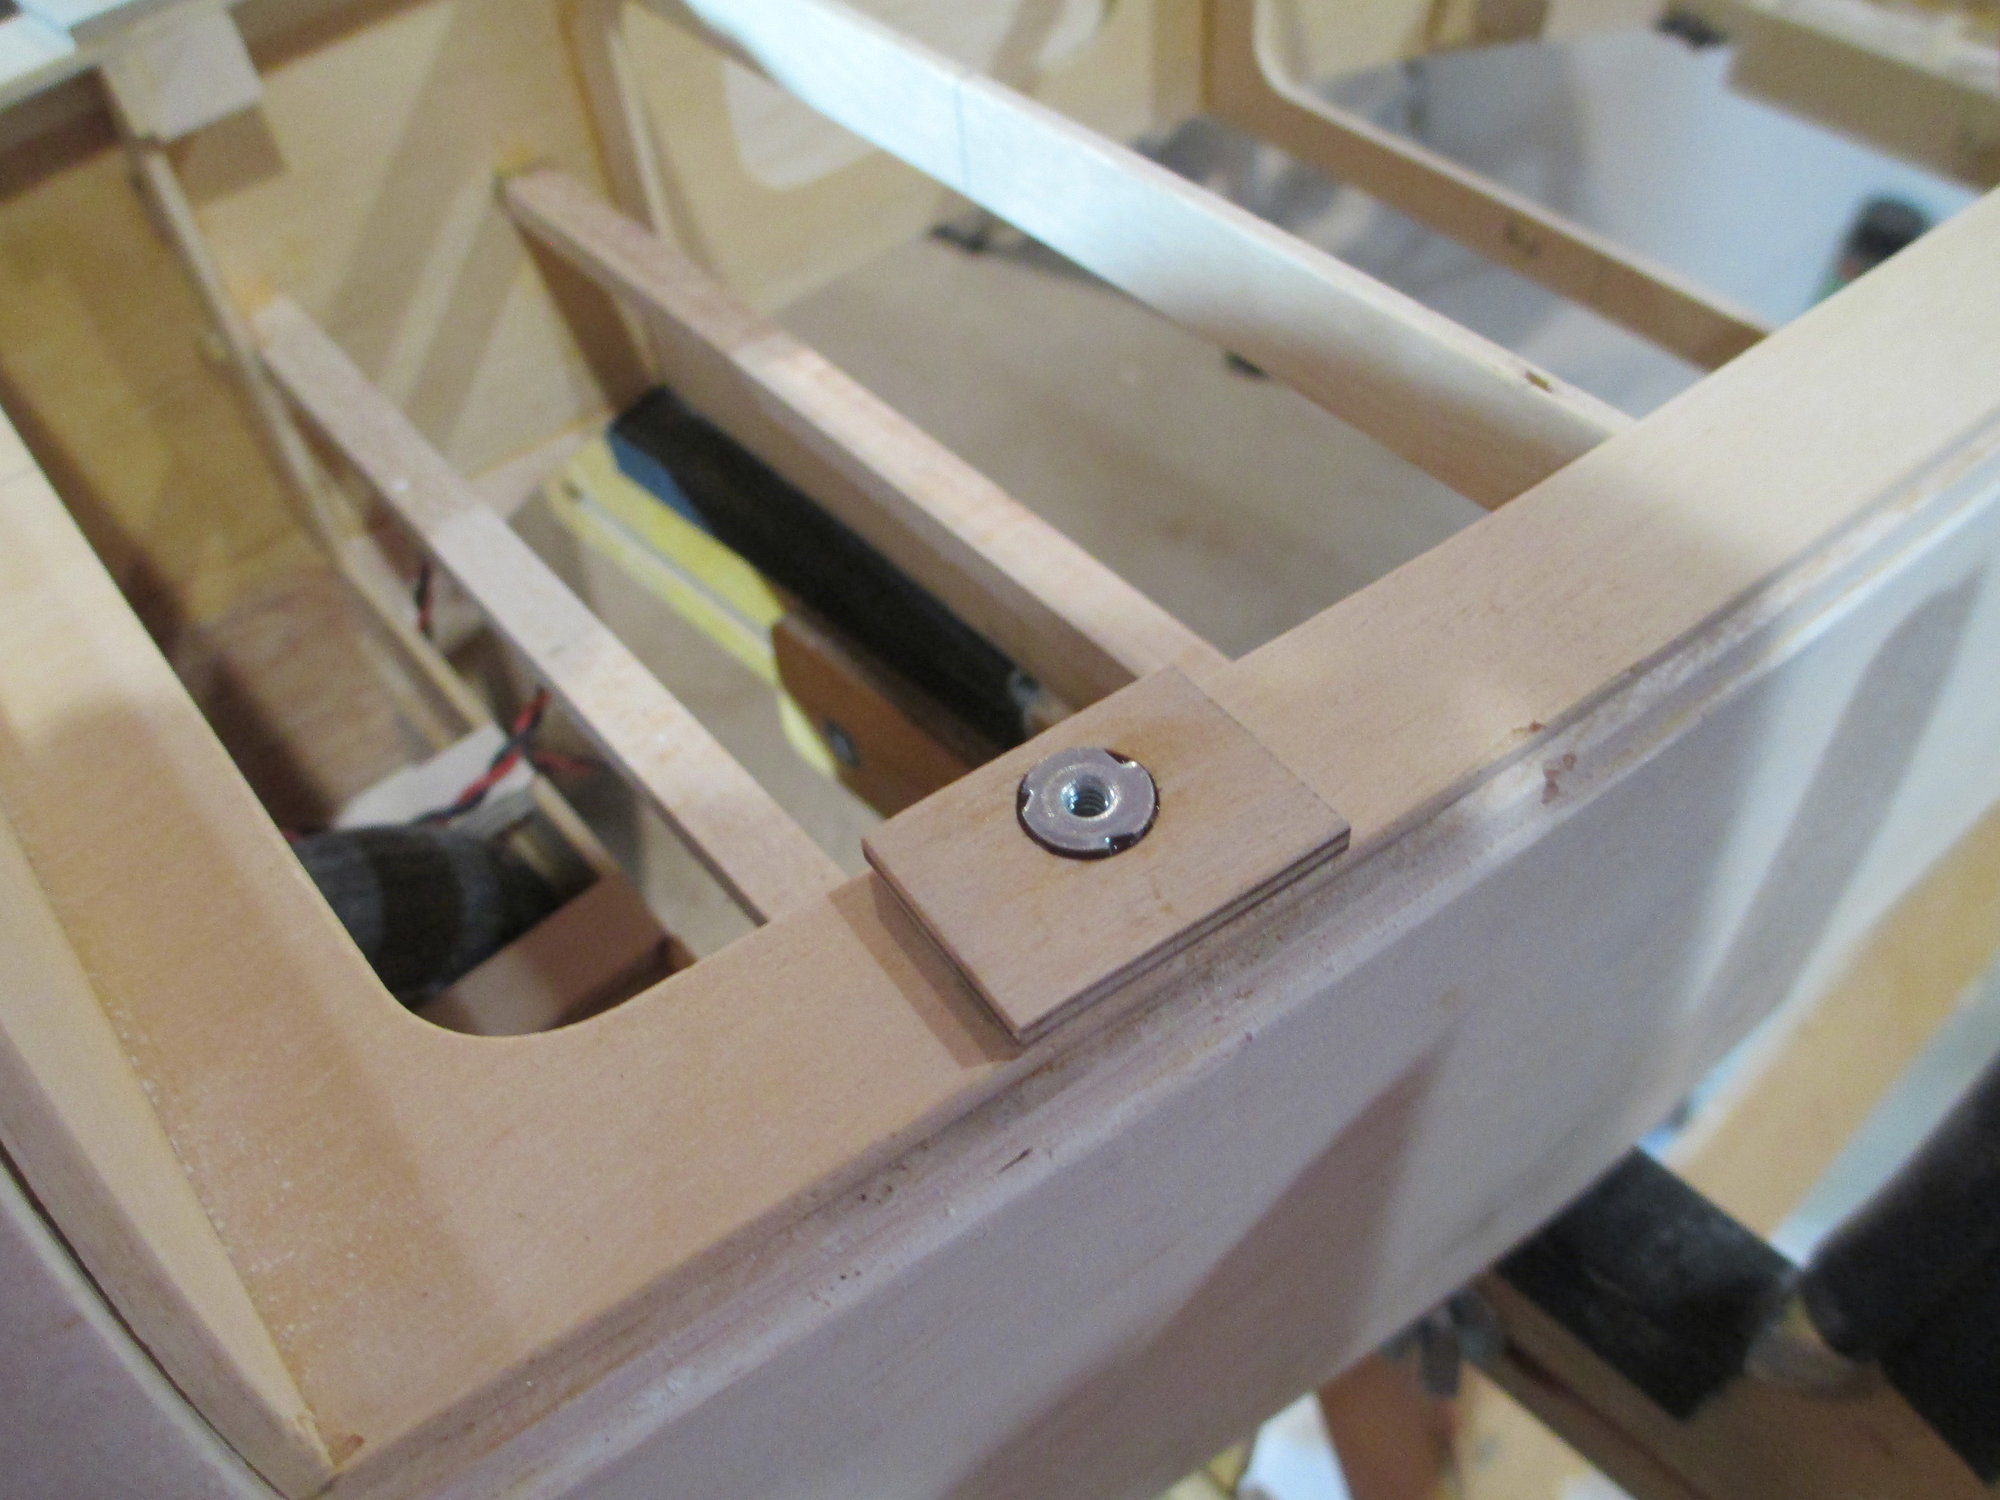
Epoxy was spread under each blind nut before pressing into place.
12-24-2019, 09:11 AM
#596
My yellow plane is a Super Sportster 61. It started out as a short kit, and it ended up closely resembling the original. Its nose is not the slender, pointy one found on the plans.
There were several botch-ups on my part as the last kit I built was over 15 years ago. I incorporated a few mods taken from Vincent’s 4Star build earlier this year. Like extra turtle deck stringers, laying the aileron servos on their sides, 4-40 hardware, graph tech gear, and the use of Titebond instead of CA glues. Cutting out and applying all those checkerboards was harder than the stars Vincent did. The plane is a looker.
Obviously, it is not a competition plane, and neither am I a competitor. With its OS 61FX, it does everything the original sport design did. Its flight and landing characteristics are easily handled by someone with slower reflexes yet provide a lot of fun and satisfaction for me... and for my onlookers.
This was a very interesting build. Each night, I went to bed looking forward to the next day’s session. After this great experience, I am thinking of building another one. But with fewer mistakes, of course.
12-25-2019, 03:36 AM
#597
Thread Starter
Well, I think it came out great Lupe! You should be very proud of your accomplishments, I'm sure it flies as good as it looks too. I know what you mean about going to bed looking forward to the next day's build session, it's all very exciting. I'm often working in my workshop at 3:00 A.M.!
12-25-2019, 03:27 PM
#598
Thread Starter
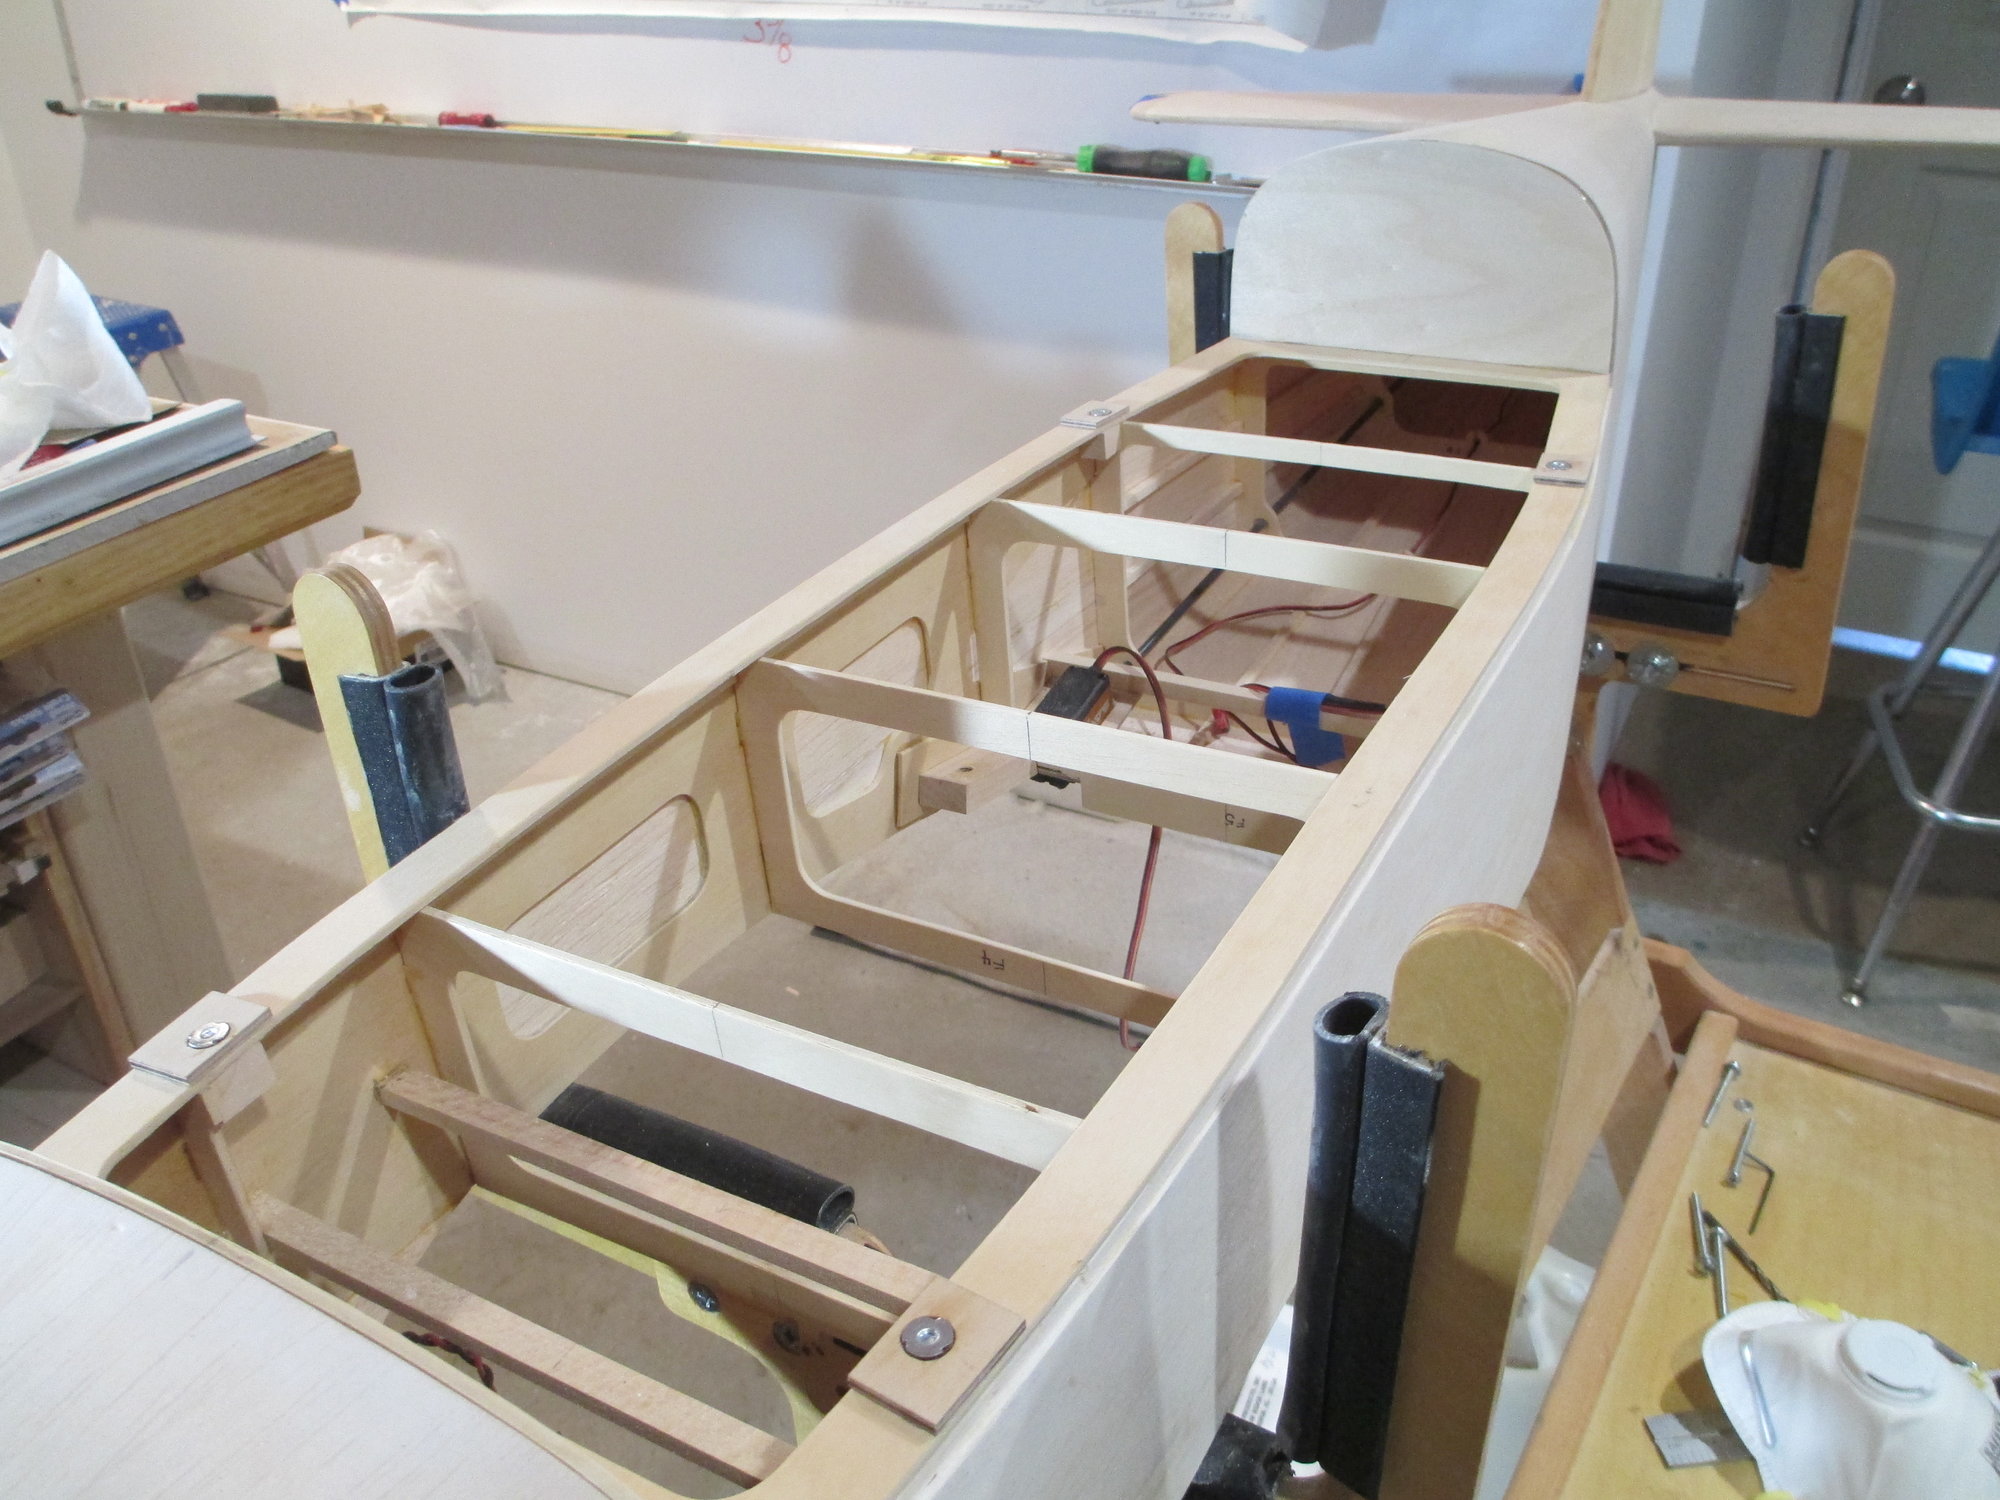
The crutch is secured in place with four 4-40 cap head screws.
The canopy was sanded to fit and the windows were roughly cut out using a Dremel tool. I won't lie, fitting the canopy perfectly was a bear of a job. It required sanding, installing the canopy and checking for fit, removing the canopy ...you get the idea. This went on for most of the day!

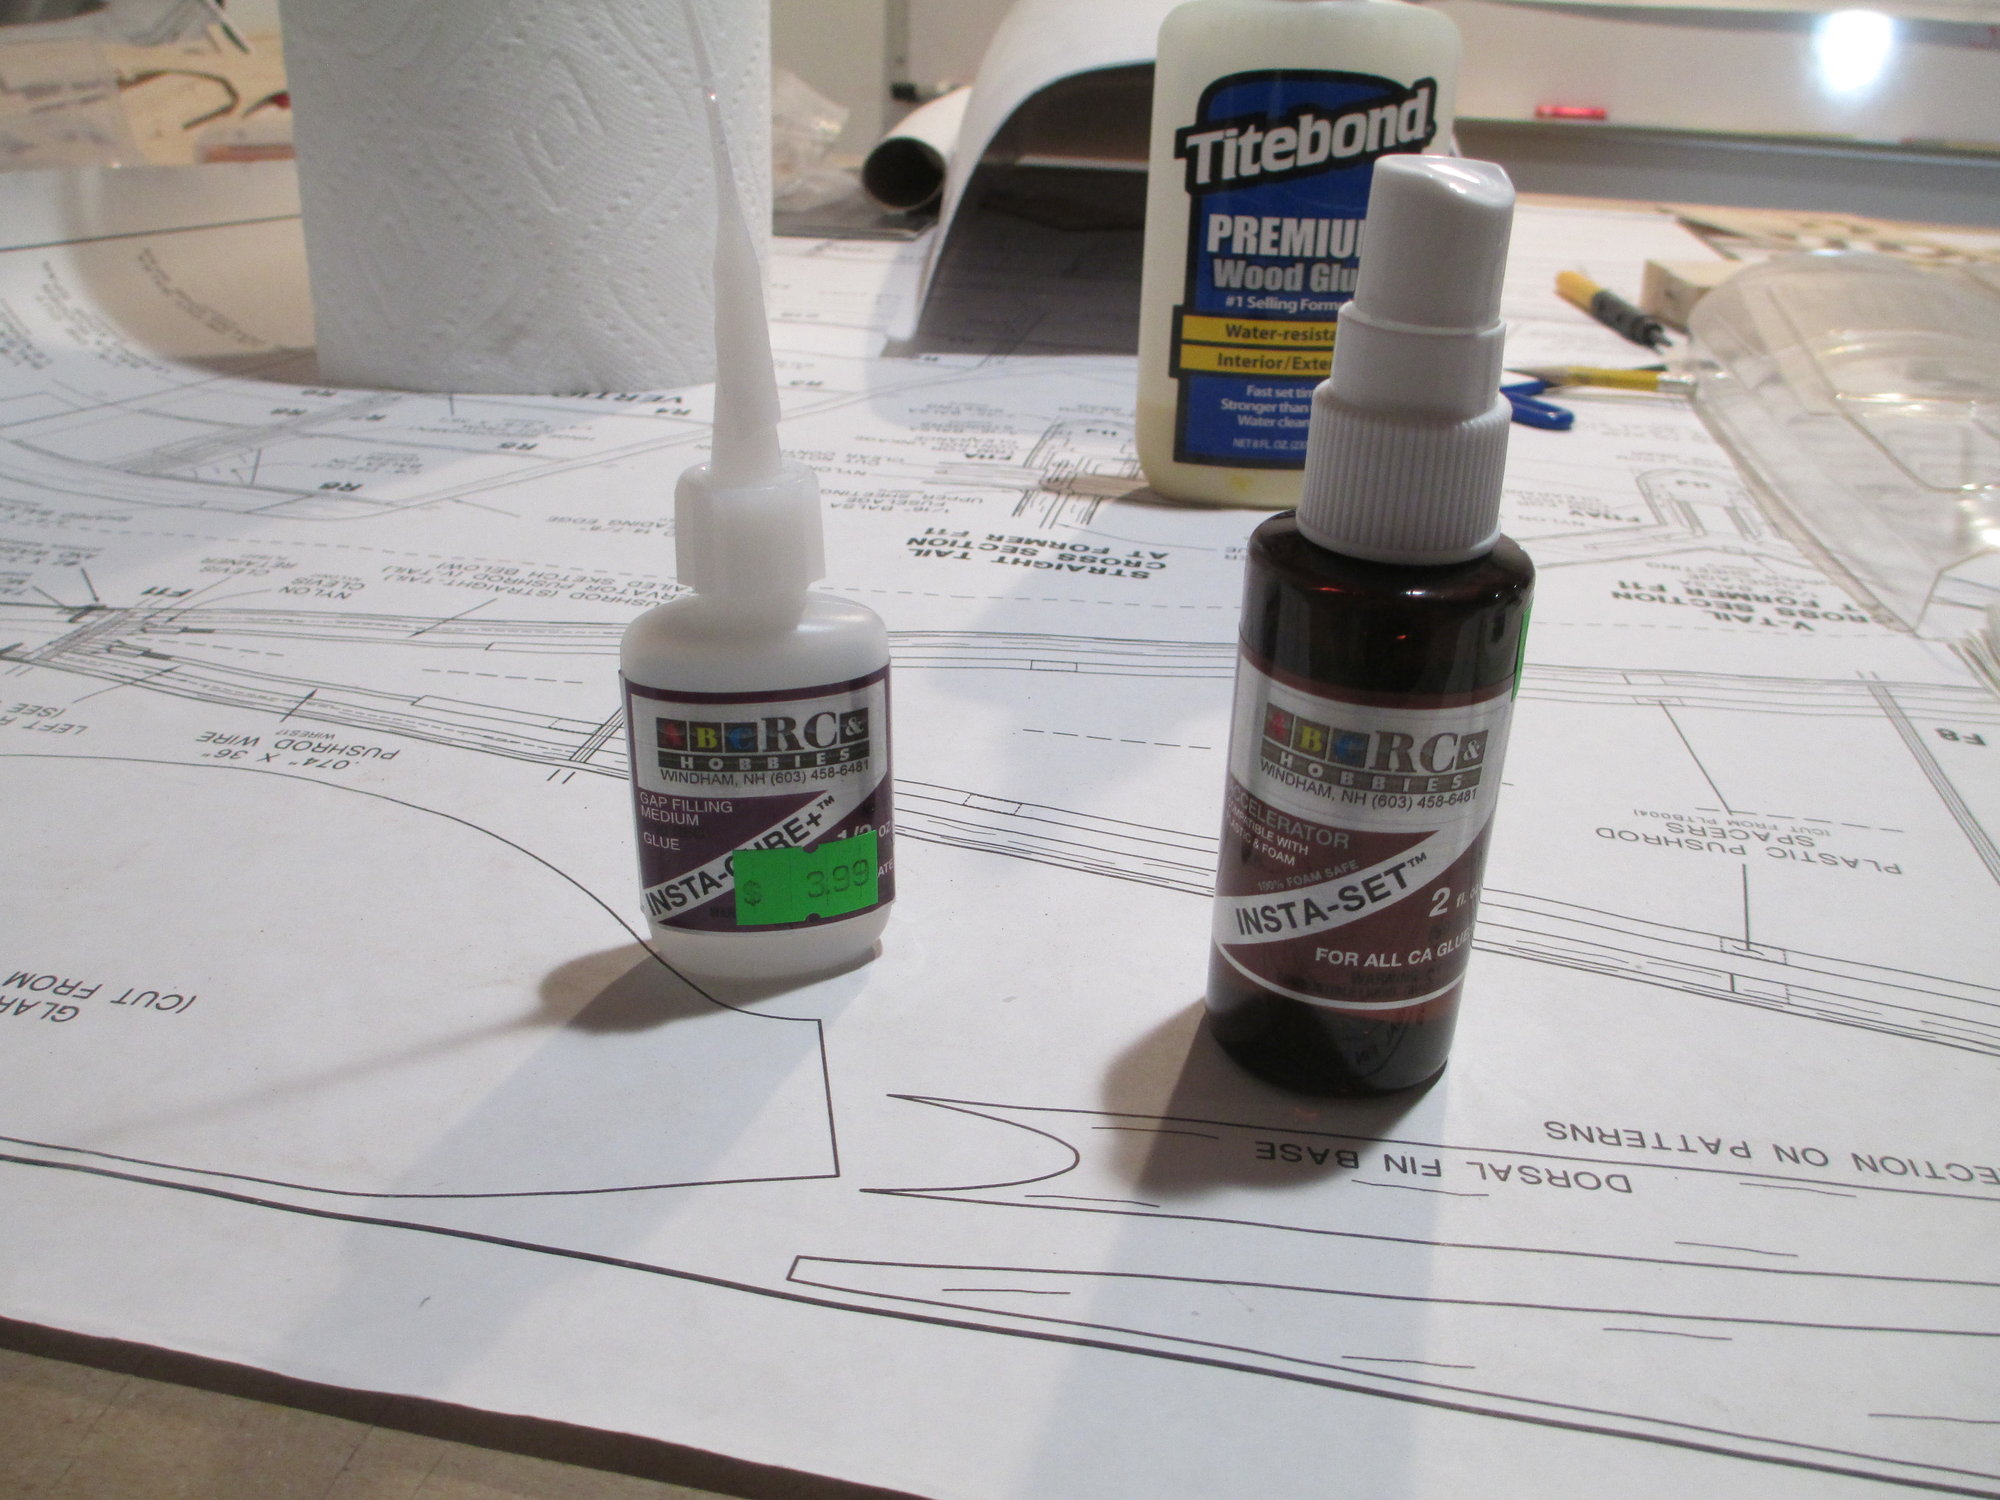
I'm not one to advocate CA, but in this case it was the best way to secure the canopy to the crutch. Medium CA along with an accelerator was used. INSTA-SET™ is a catalyst which acts as an accelerator that allows CA's to quickly cure.
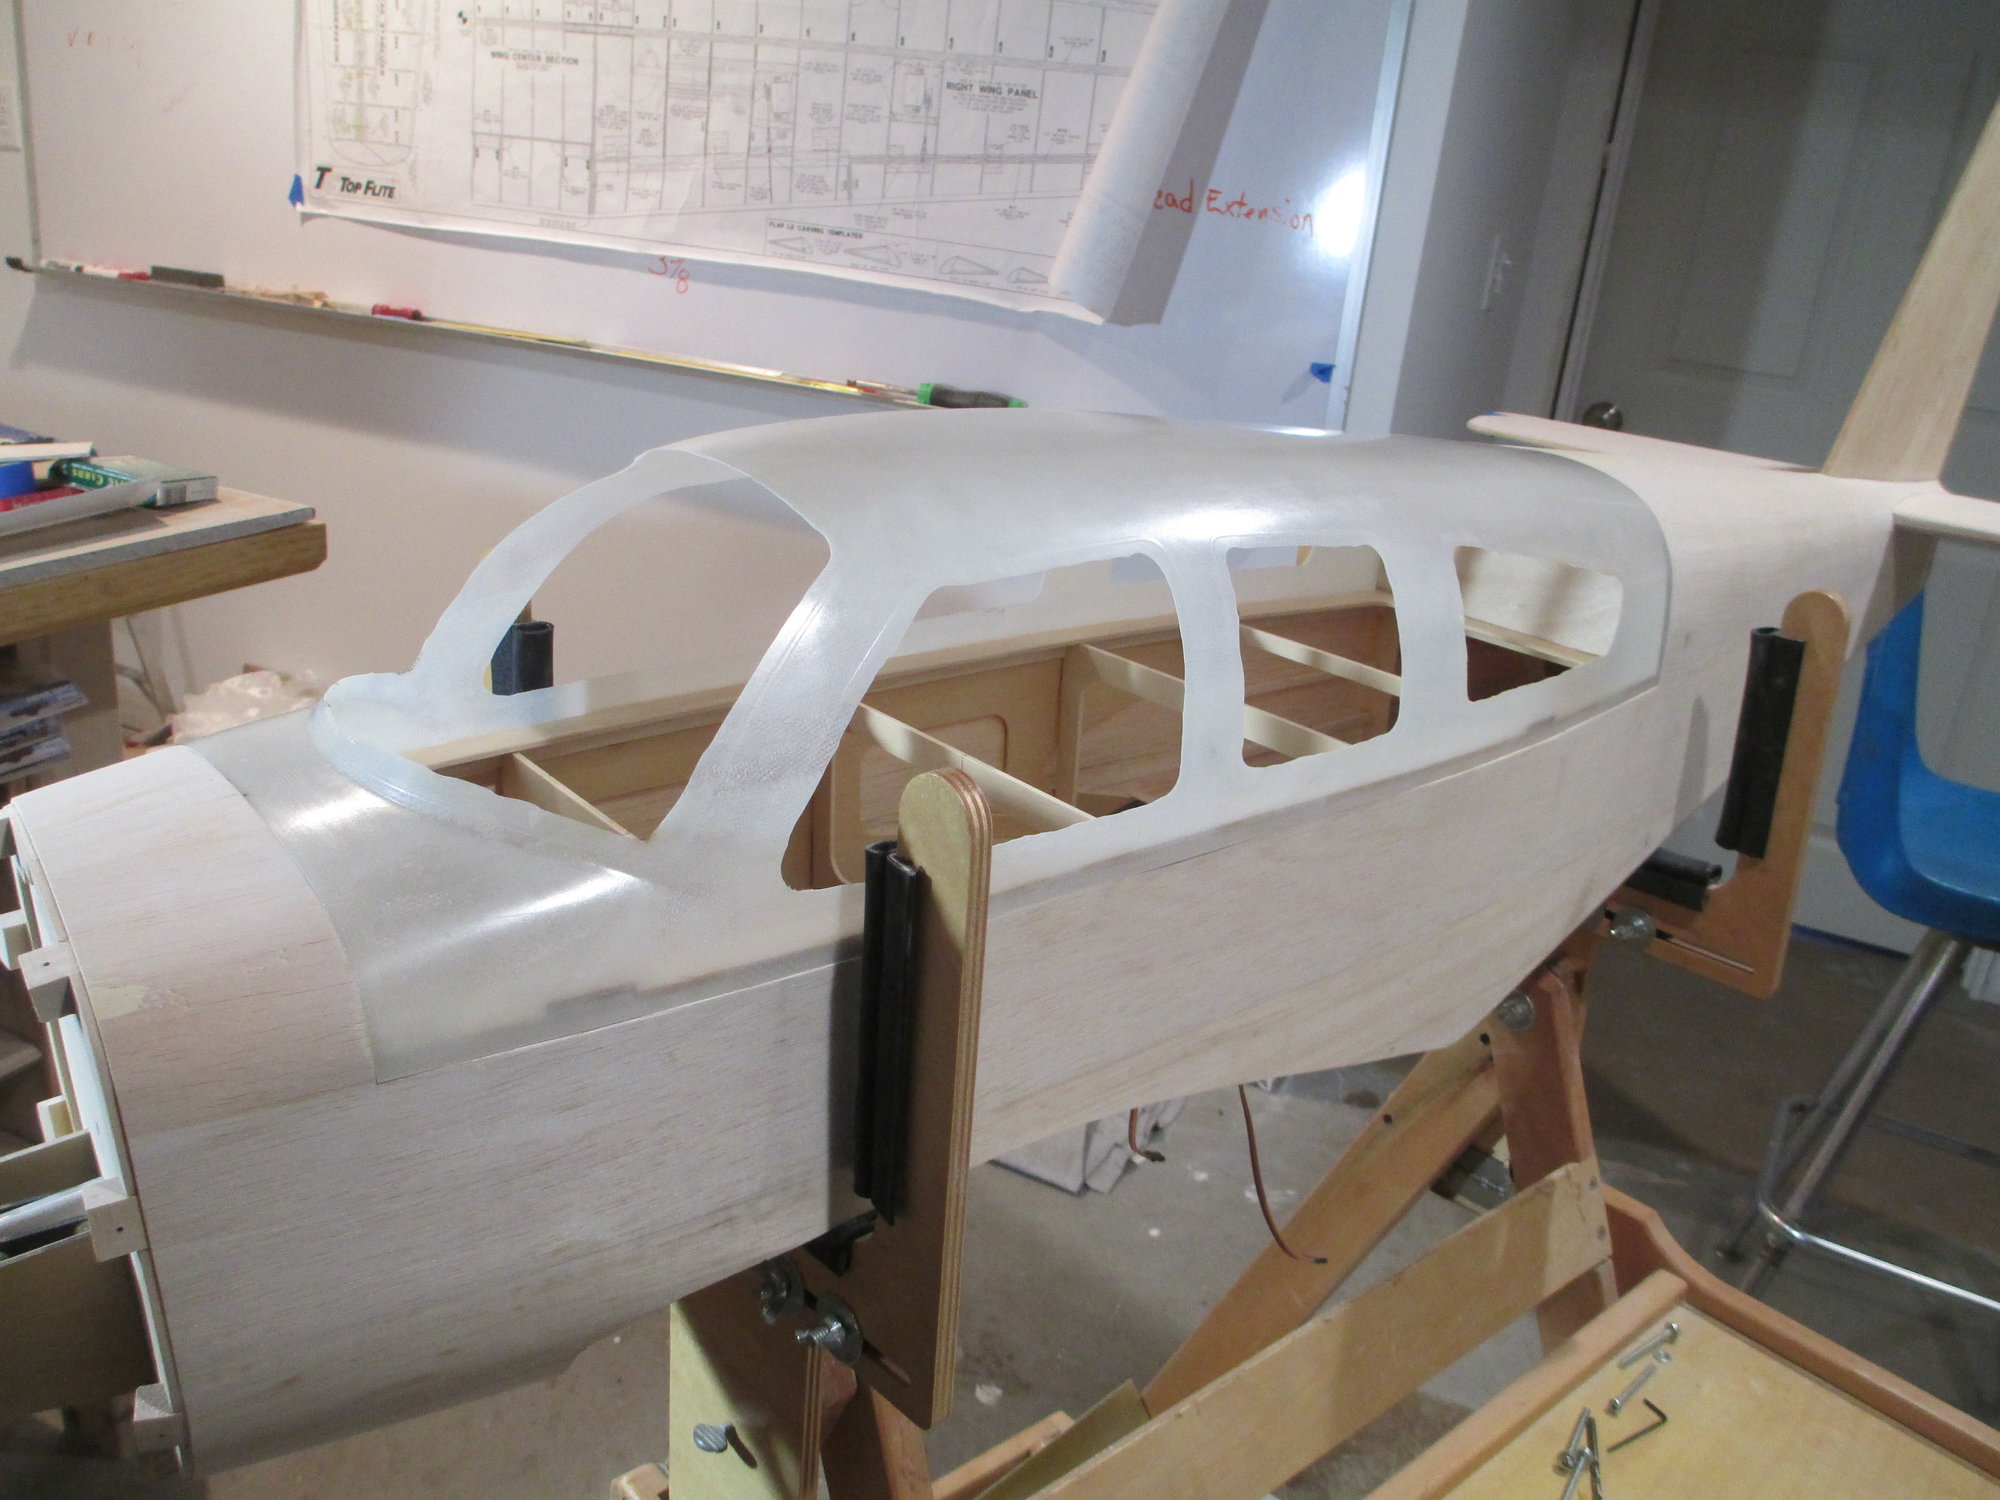
The windows removed allowed easy access to apply the CA and spray the accelerator.
Last edited by VincentJ; 12-25-2019 at 03:35 PM.
12-25-2019, 05:27 PM
#600
The next challenge will be fitting the plastic windshield/windows without warping the fiberglass canopy. I have in the past used small screws but had problems with the lexan cracking around the screw holes. What I found to work best was using masking tape to secure the " glass " to the frame on the outside, trial fit to make sure the frame didn't distort and then run a 1/8" bead of shoo goo or E6000 adhesive on the joint line.