


Sig Four Star 20 Super Sportster Build
 01-12-2022, 07:17 PM
#26


You are most welcome. I have to be careful of the ammonia method with asthma. Well ventilated work area.
After the move and I get setup to build again I intend to build a steam box. Can be fairly simple. Just a ply box with nails horizonal to hold the wood off the bottom. Supply steam.
The wing is looking good. Will enjoy seeing the progress.
Ken
After the move and I get setup to build again I intend to build a steam box. Can be fairly simple. Just a ply box with nails horizonal to hold the wood off the bottom. Supply steam.
The wing is looking good. Will enjoy seeing the progress.
Ken
 01-13-2022, 08:06 AM
#27
Senior Member
Thread Starter
Ive read about iron on fabrics and been near models that have it, but never tried it myself. Always used Ultracote or Monokote til I switched to the cheaper Hobbyking covering. Some day I do want to try fabric covering but it'll have to be something big and amazing. I do admire the look and appreciate the time and detail to make it happen. Flying artwork in my mind
01-13-2022, 10:23 AM
#28
I have actually heard good things about the Hobbyking covering. There is another source for a similar covering that I ran across a week or two ago. Appears to be essential if not the same stuff for about the price. I will have to hunt it up later.A guy built a 200% Kadet Senior and covered with it.
I have a control line Bi Plane I started a number of years ago then moved during the build and never got back to it. I suspect on the 10 acres in Missouri I will find a spot to fly it on. Or a bit of chain saw work can make a place. Will need the fire wood any way. I will cover the bipe with Hobbyking covering.
I have used the iron fabric once. There was nothing wrong with it. Just a bit heavier than non iron on. But I found I simply preferred to dope my fabric down old school. There is also SIG STIX-IT Heat-Activated Covering Adhesive. Smells as bad as dopeing and will fry just as many brain cells with out proper ventilation. I will likely just stay with dope adhering my fabric. Familiar process and no added expense.
You don't have to wait to do a big and amazing plane for fabric. I have used silk on as small as a .20 sized plane. The same size as you are building. Just can't get carried away with trying to achieve an out of this world finish. The weight gain can get there in a hurry. And before I used silk I used tissue or maybe more correctly silk span (?) and dope.
Ken
01-13-2022, 09:22 PM
#29
01-19-2022, 05:54 PM
#30
Senior Member
Thread Starter
Ive been busy this week with the snow but got time today to get a little done.
The other half of the under wing sheeting is in place and drying. I plan to work on this build Saturday quite a bit so I figured get the long drying part out of my hair.
01-27-2022, 03:34 AM
#31
Senior Member
Thread Starter
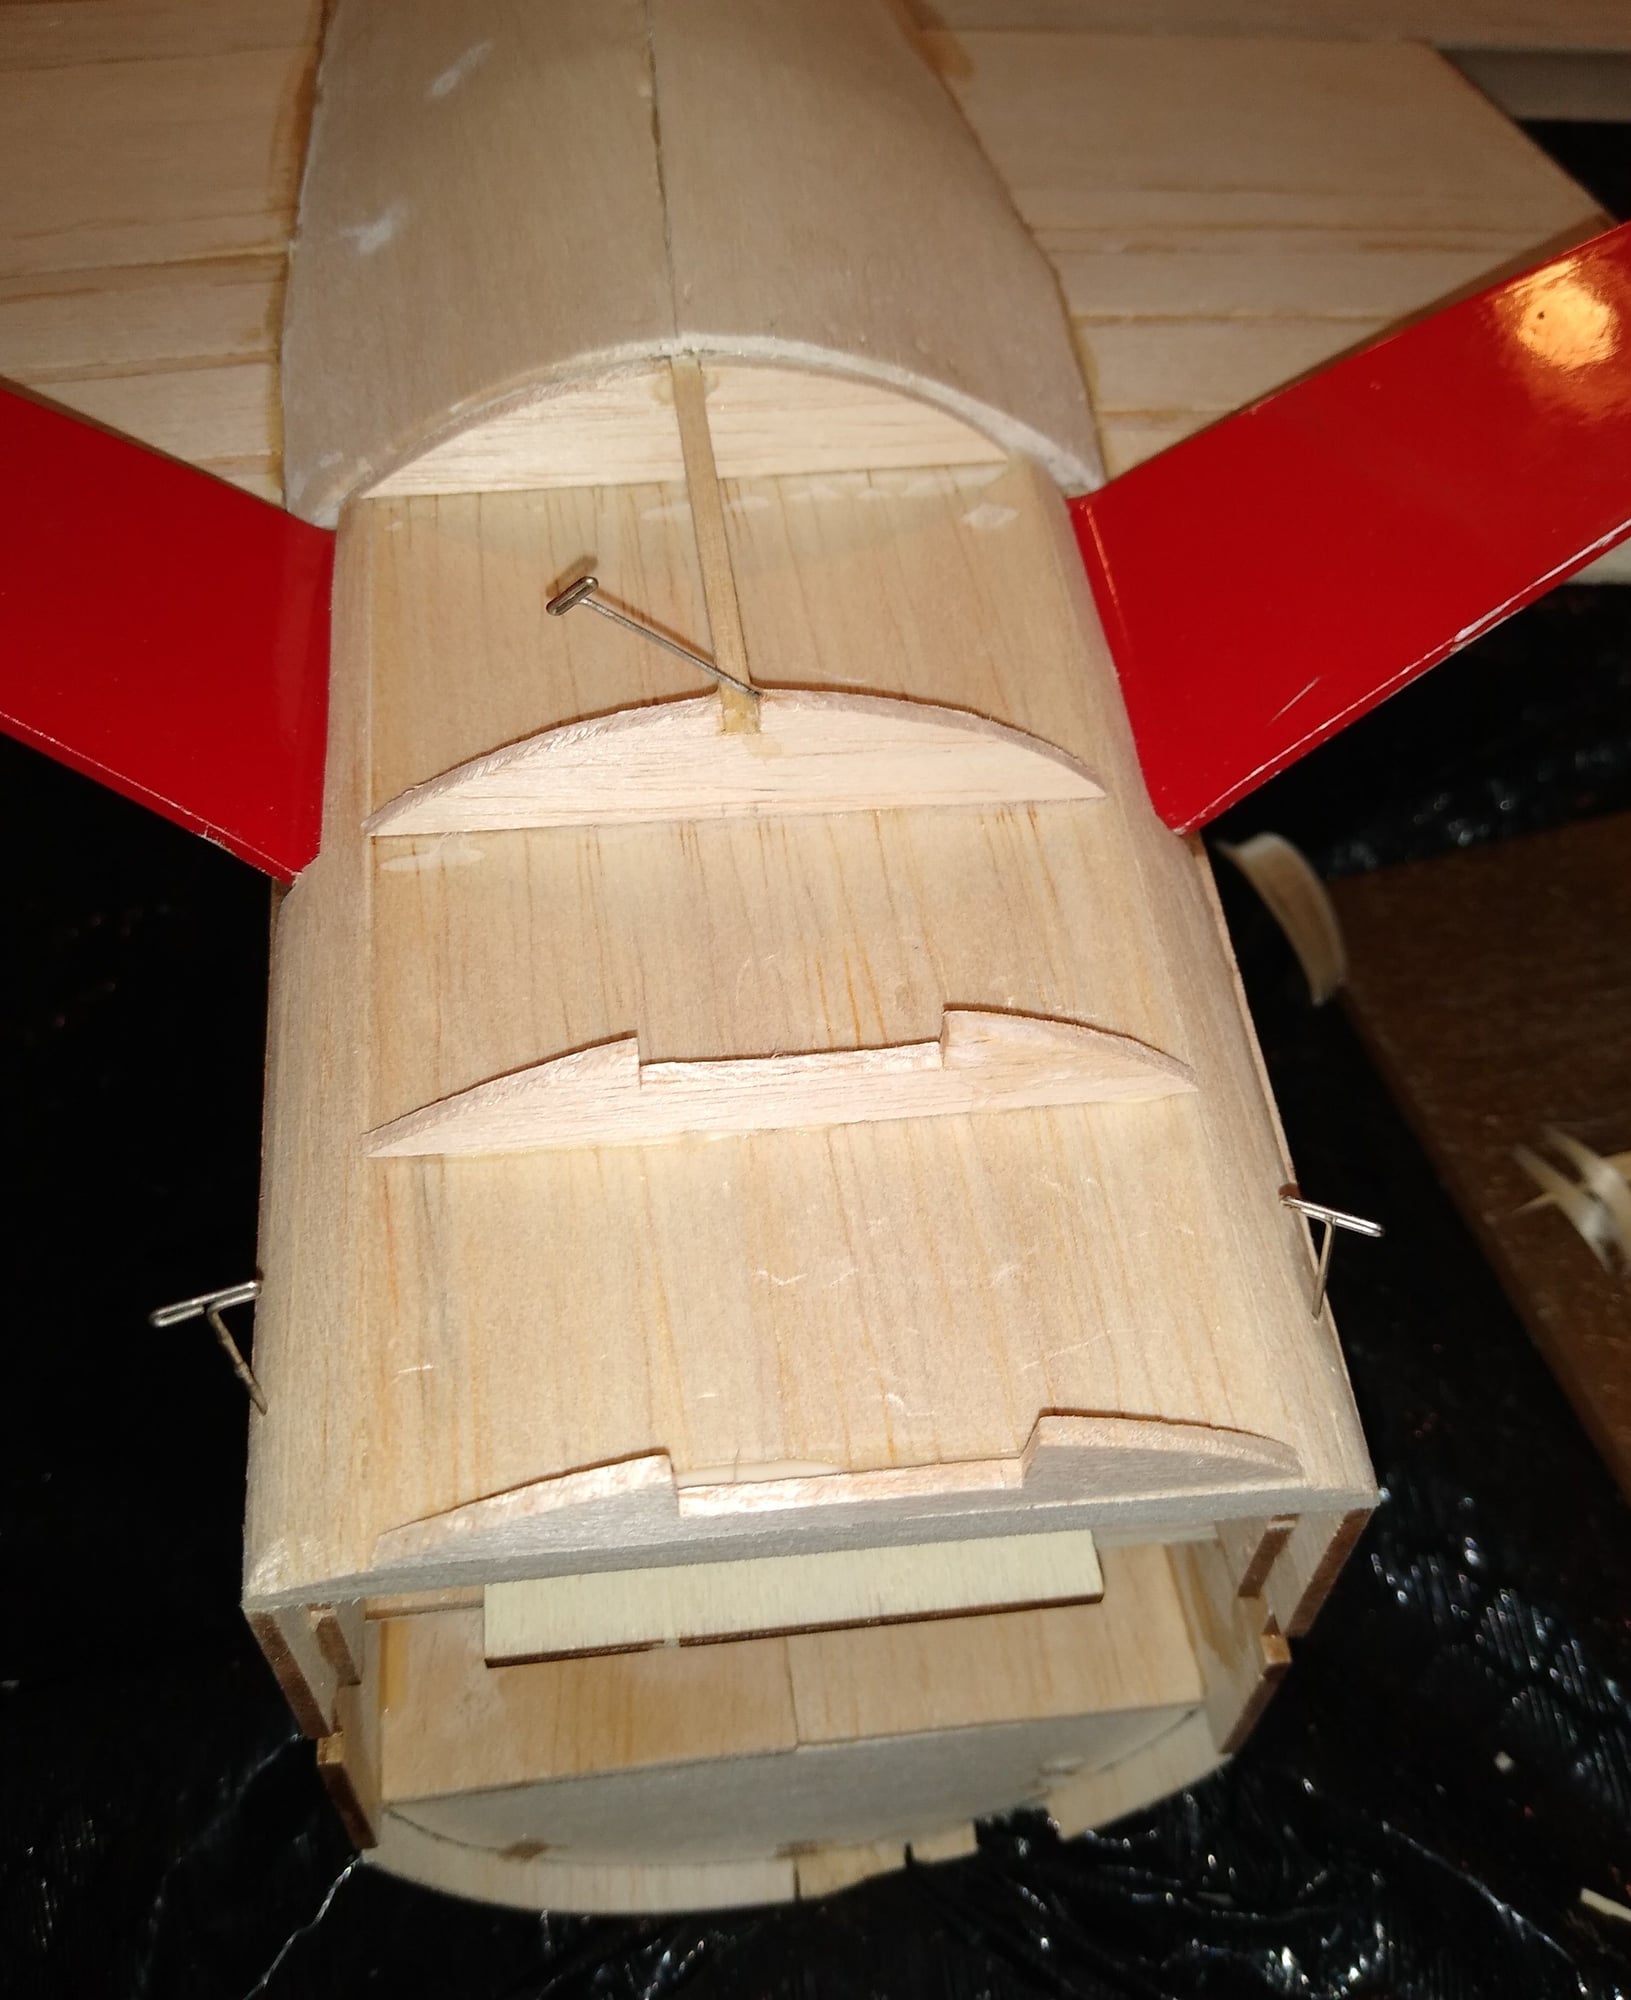
In order to make the battery hatch the main gear had to be mounted. With that done I decided why not temporarily attach the tail wheel. It sits a little taller than I like in the back so I'll probably bend the tail wire on final assembly.
The 4 hatch base sheets are glued together for proper thickness to go over the landing gear and hold the magnets also. Saturday the curved part and air duct will be added l. The duct will provide exit air since the ESC will sit low in the cowling. That's it for now!
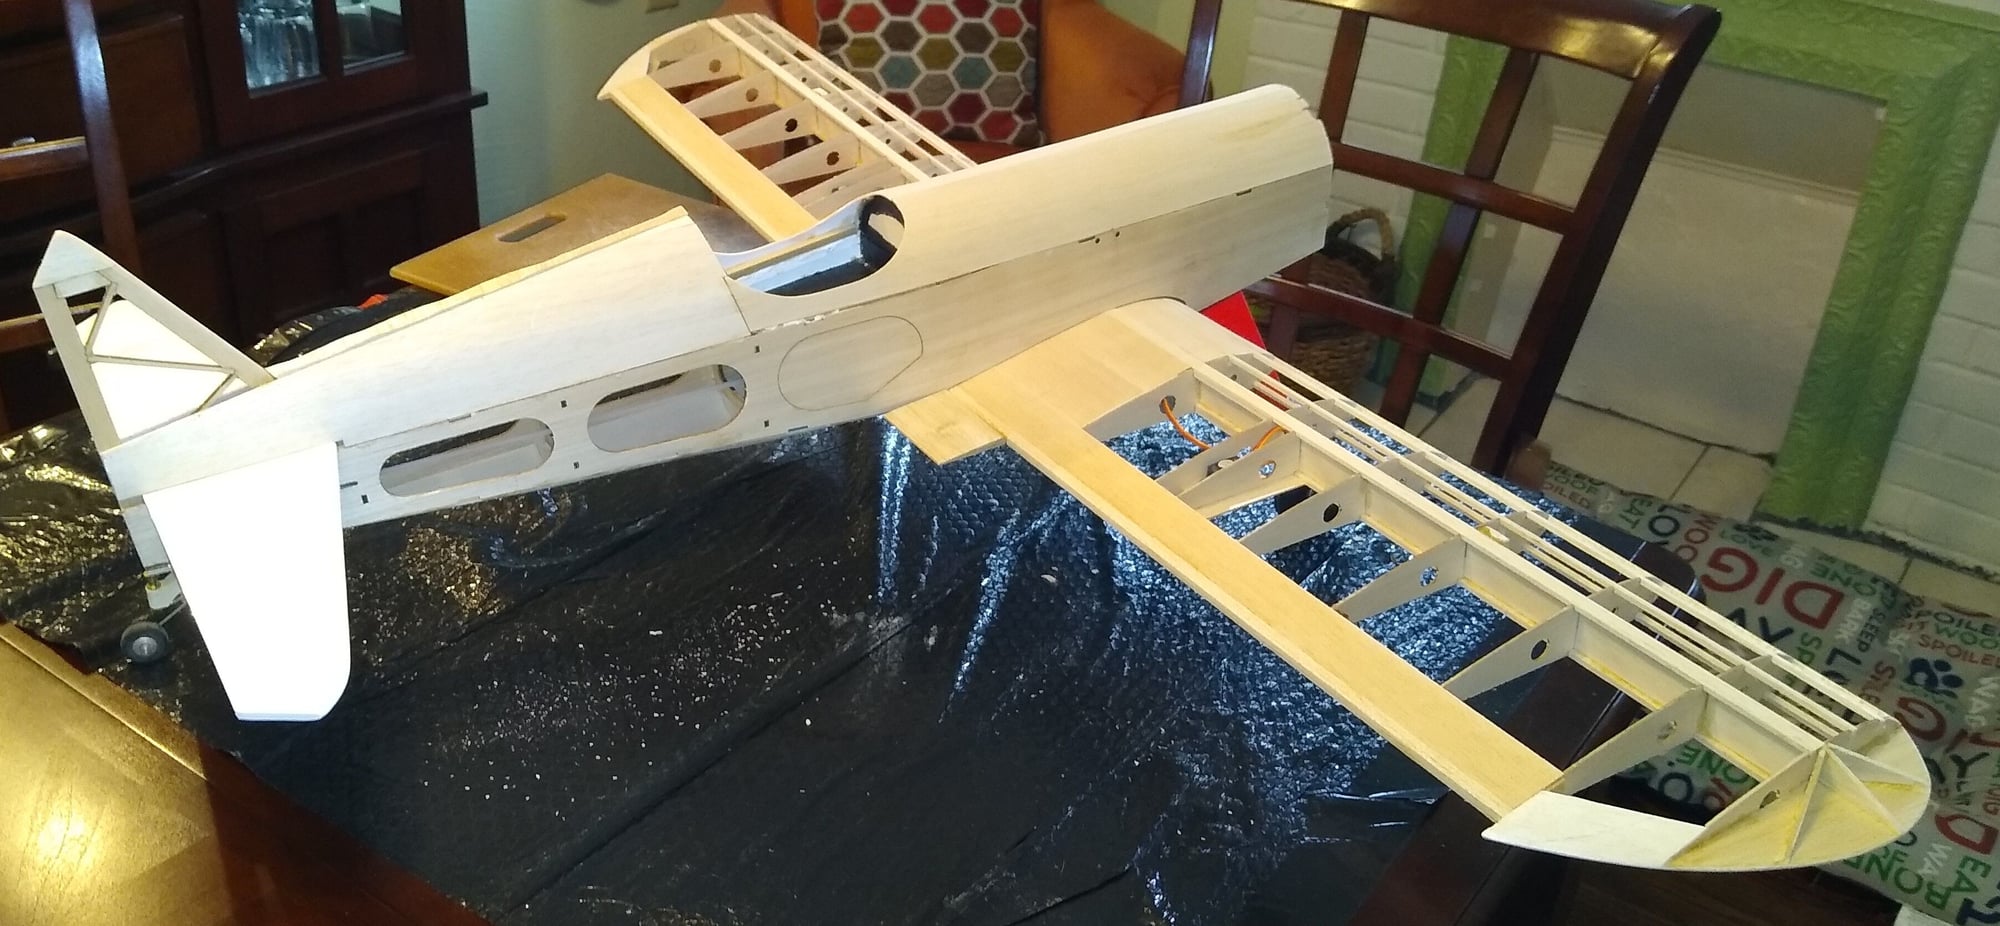

The 4 hatch base sheets are glued together for proper thickness to go over the landing gear and hold the magnets also. Saturday the curved part and air duct will be added l. The duct will provide exit air since the ESC will sit low in the cowling. That's it for now!
01-27-2022, 07:24 AM
#32
it looks real good assembled. The first time a plane is assembled , even if just pinned together is always that special moment for me.
Nothing wrong with a tail wheel being a bit tall other than aesthetics. Often a plane can be a bit squirrely if the angle it sits at on the ground is to tail low. And then bending the tail wheel tames it. but also the sometimes a plane is just gin to squirrel.
I don't think a S.S. will squirrel from any tail wheel height though.
Ken
01-27-2022, 10:15 AM
#33
Senior Member
Thread Starter
I agree, seeing the "big picture" come together is a wonderful thing. That's one of the best parts of the build for me.
I'll see how it looks and taxis at the field before making a final decision on tail wheel height. I don't expect any annoying found habits from it- fuselage is long enough to keep it straight. I've build some very short coupled fuselages with let's say obnoxious taxiing traits. Speaking of ground handling I'm still on the fence over wheel pants.
Do I think they'll really make it look stunning? Absolutely
Do I think the grass field I fly from will eventually destroy them?
Most Likely
So the question is do I take the time and effort to make glass pants to donate to the grass gods in the name of aesthetics? I'll keep pondering that question for now.
01-27-2022, 11:06 AM
#34
I agree with your approach to the tail and I'm with on wheel pants.
I think I will have a paved runway after we move. A very small club flies from from a small country airport and it is paved. It will be the closest club to me.
The shortest coupled rc plane I had was a .35 sized control line Satan combat plane. I converted it to rc. Kept the same lengths on everything. Had 2 tail wheels at the ends of the booms. It was super squirrely on the ground. I did manage to reduce the squirrel by raising the tail wheels to an almost ugly height. And sometimes in the air. Had an absolutely vicious stall. Snap roll into an inverted flat spin. That would kill the engine and then there was no recovery. Fortunately downward vertical velocity was low enough to be minimaly damaging at the ground the air interface (crash).
Ken
01-27-2022, 11:55 AM
#35
Senior Member
Thread Starter
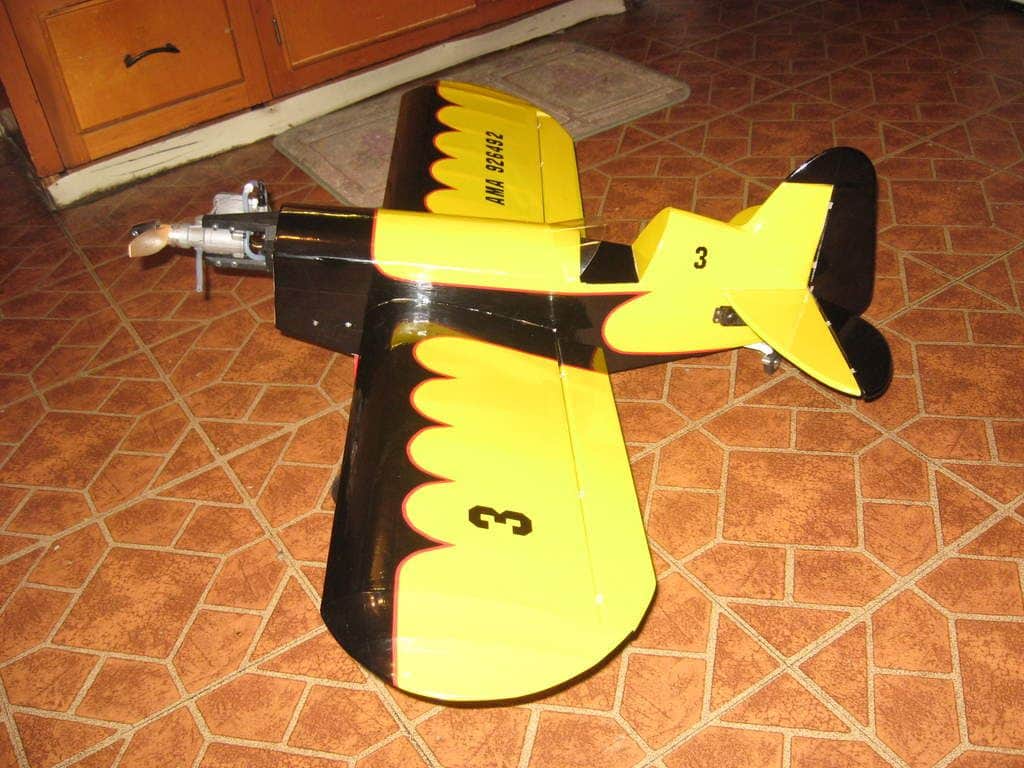
Here's my shortest and heaviest nightmare of an airplane hahaha. Basically was a Cartoon version of the Gee Bee Model D. 45" WS 29" L with a Magnum 52 4 stroke. Weighed 4.5# dry
") Was a hoot to fly but the speed envelope was narrow and only successfully landed it once...rest were semi controlled crashes
Was a hoot to fly but the speed envelope was narrow and only successfully landed it once...rest were semi controlled crashes Needless to say it didn't survive long.
 RC Satan sounds like equal mayhem and fun. Pretty sure RC wasn't the intention Mr Goldberg had when designing that line but it really isn't far off from the Sig Wonder. The joys of pushing the envelope and thumb abilities.
01-27-2022, 12:58 PM
#36
Once I figured it out it was not to hard to fly, unless the engine died. You really had to keep the nose down and make a fast approach. It would seem ok on a normal approach , but before the runway threshold would snap onto it back in a flat spin. Engine on, just hold a bit of throttle. But would go full on squirrel once the tail wheels came down. Lots of laughs.
I don't have any pics of it. Do have a few pics of a control line plane I built and use the same paint scheme. I will dig that up later.
I don't have any pics of it. Do have a few pics of a control line plane I built and use the same paint scheme. I will dig that up later.
01-27-2022, 06:10 PM
#38
After we move I am hoping that there is a big enough area to make a CL circle. I could also fly small RC electrics from the circle. If you can basically fly in your own back ward why not?
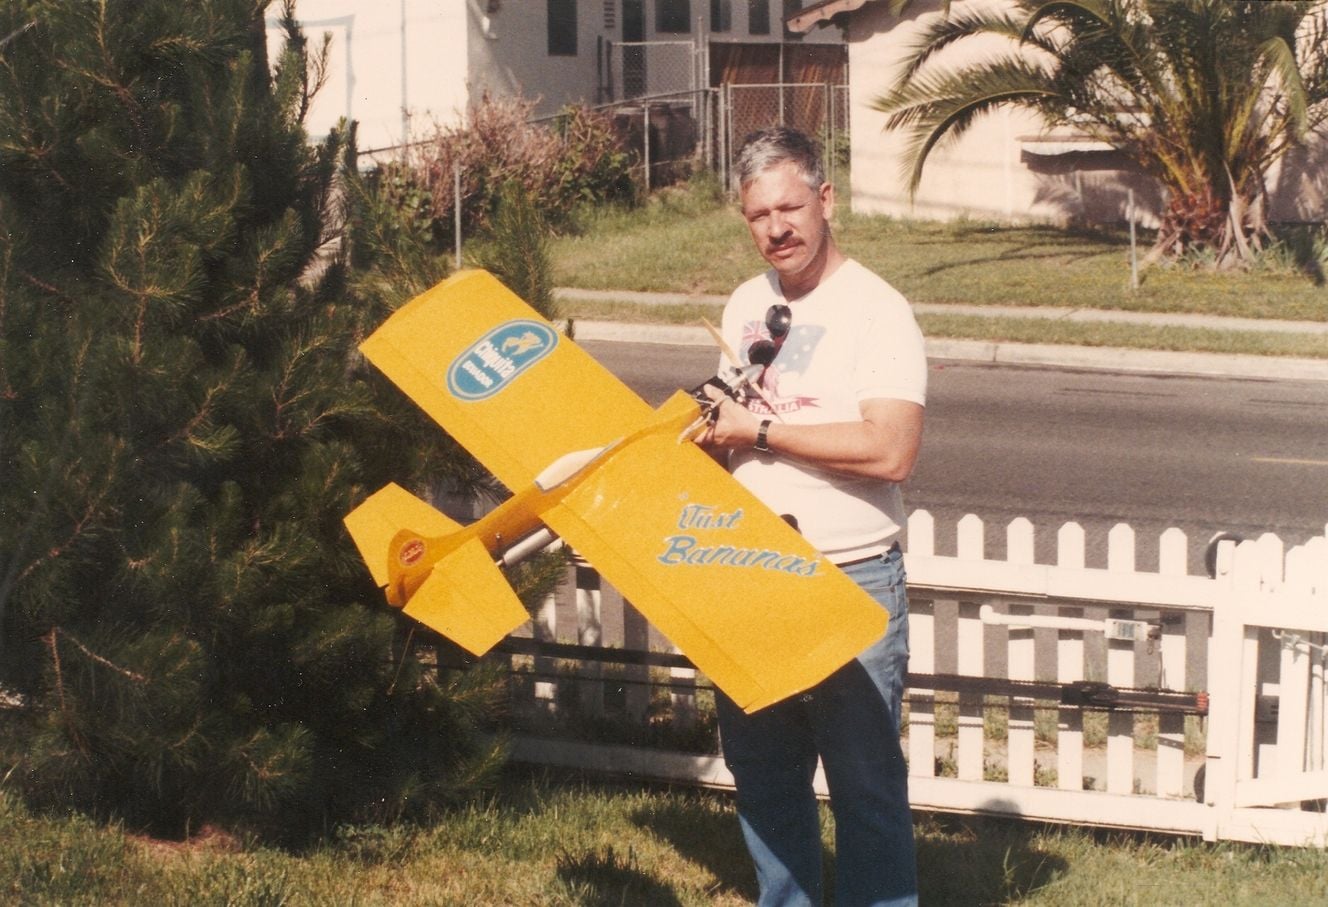
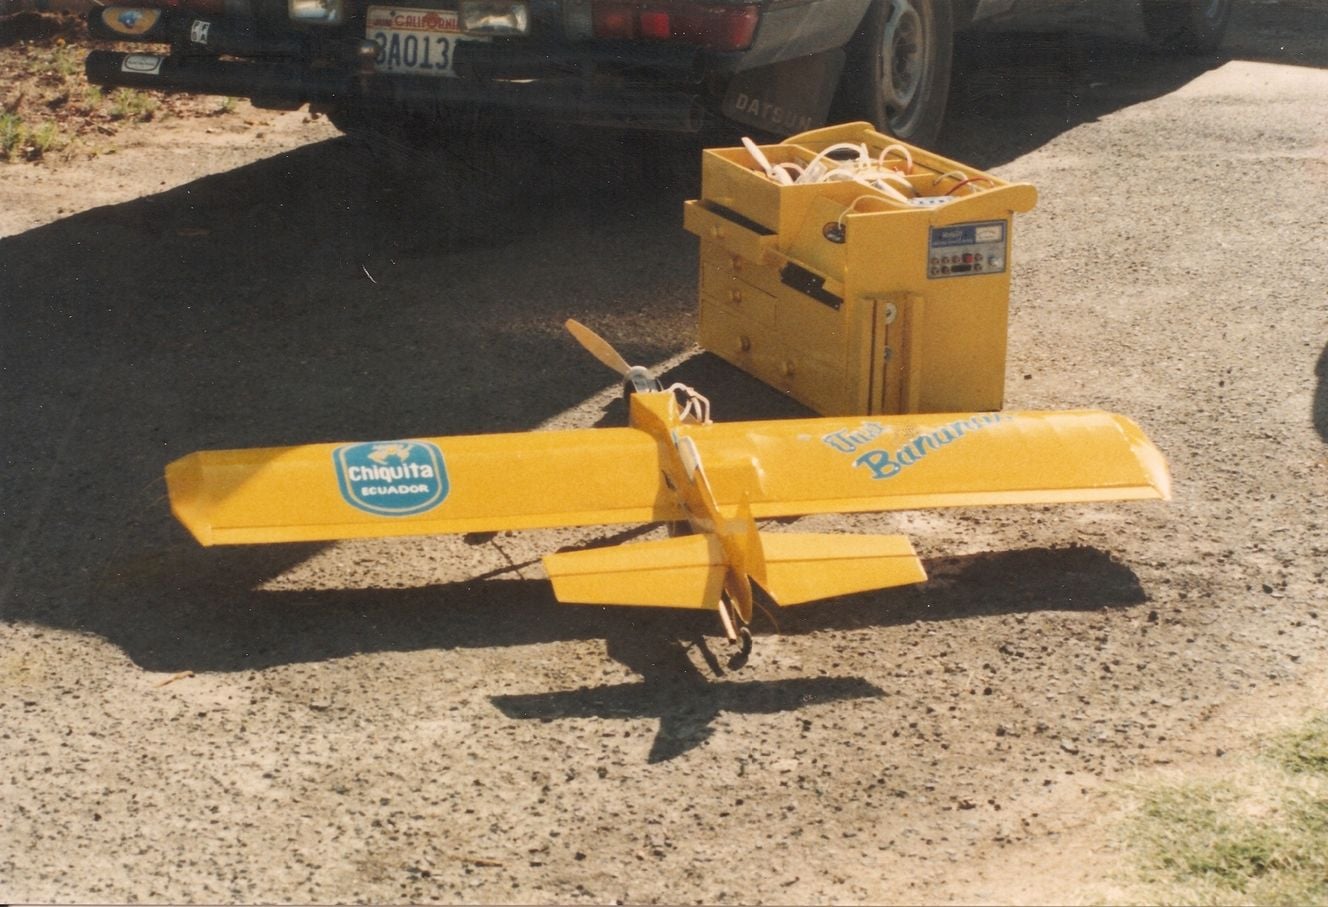
This is the CL plane I copied the paint scheme from. It is a stretched Magician with a piped .60 for power. Pulled like a mule.
I copied the paint scheme and only changed the name to Just Bananas 2.
Ken
I will try to post pics in a new post as I keep getting the same error. Now I am so pissed that my stubborn is going full tilt.
01-27-2022, 07:36 PM
#39

This is a section of covering I saved from the Satan. Looks like I used a different blue on the 2 planes
MANY LBS less
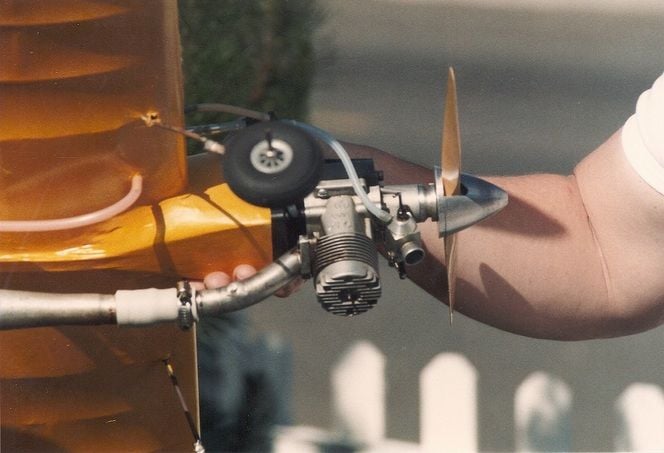
I still have the engine I need to repair the crank, A small bend from the planes last flight. It would be great in my fiberglass Dirty Birdie. Breath some fire into the plane
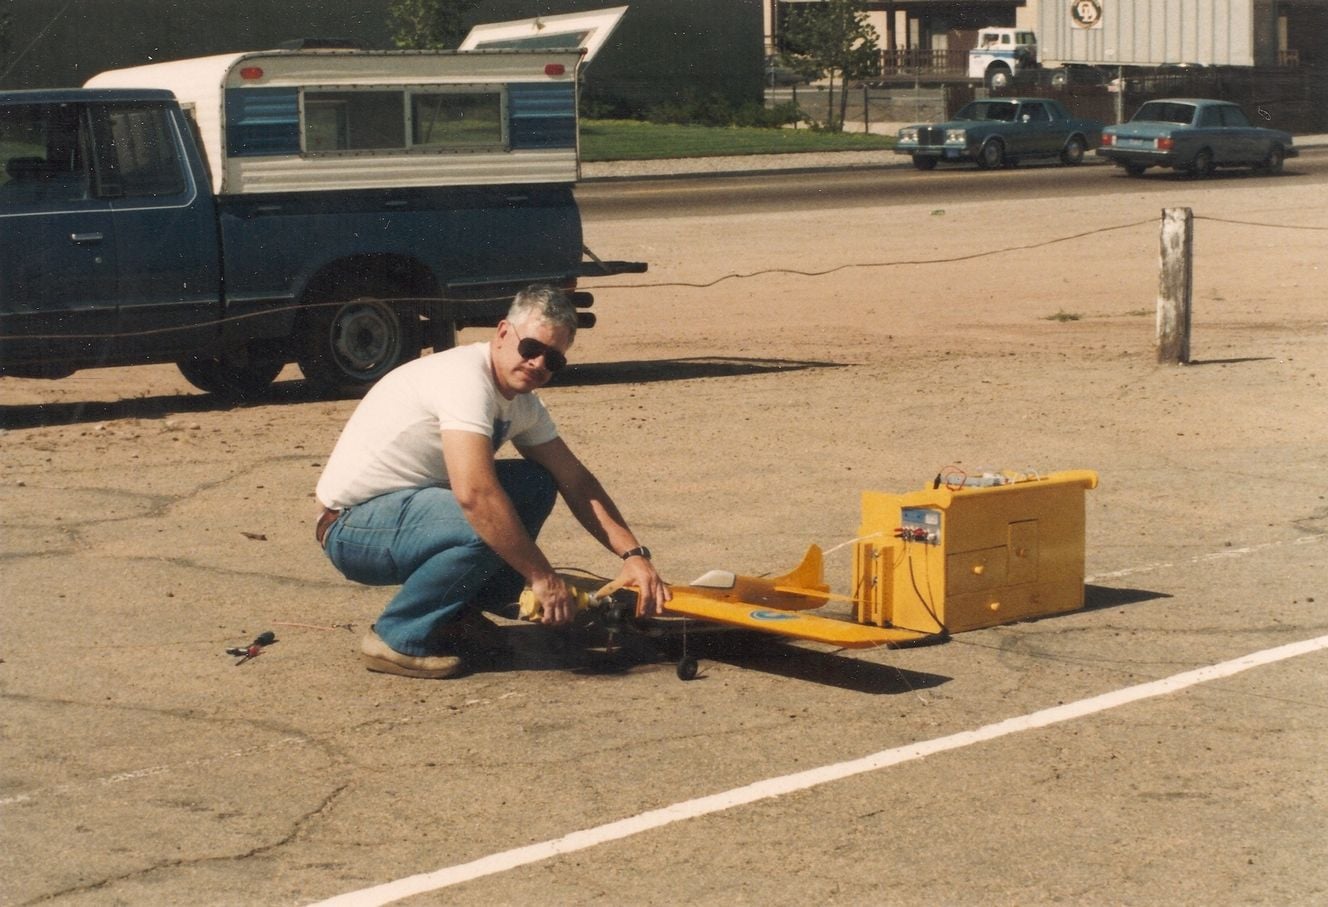
My flight box was also a stooge for flying by myself
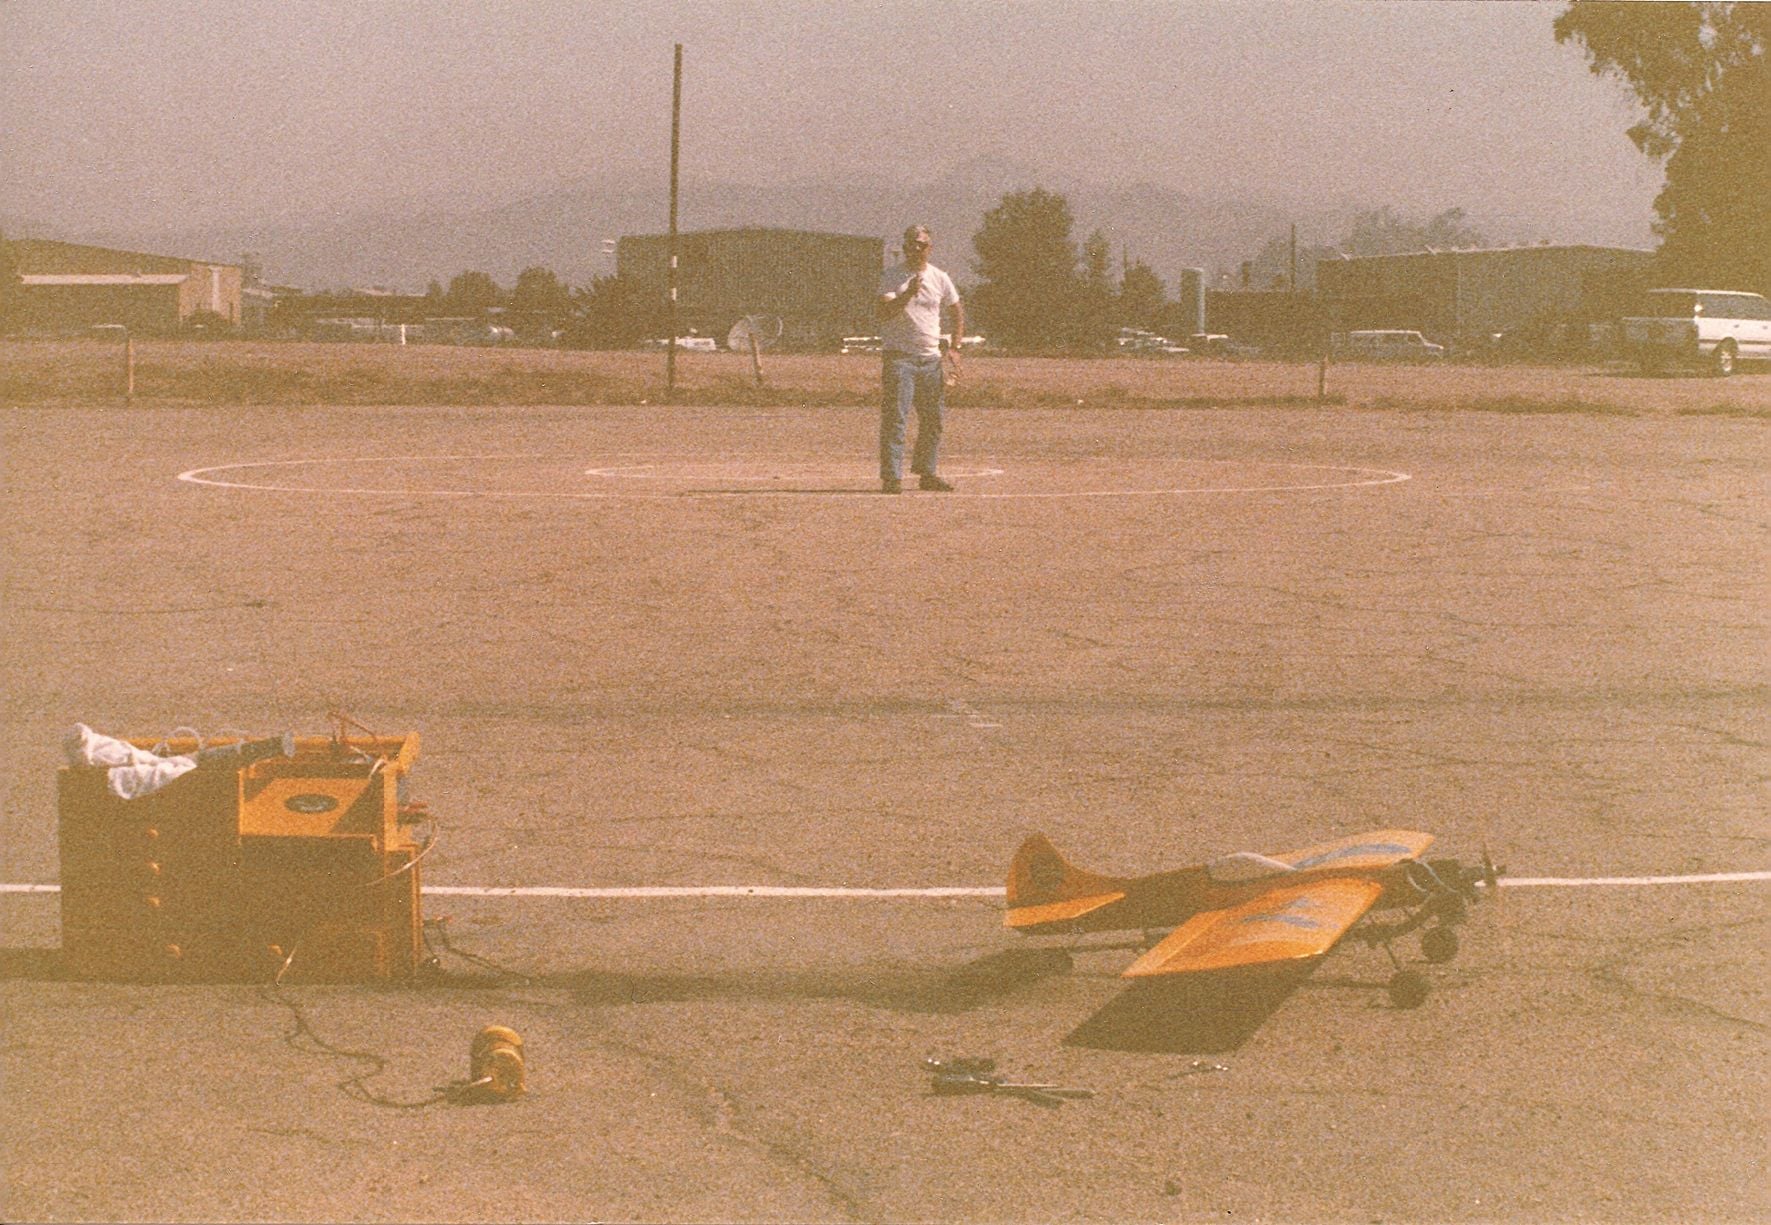
I have no idea what I ever did with that flight box but the more I look at the more I think I want to build another
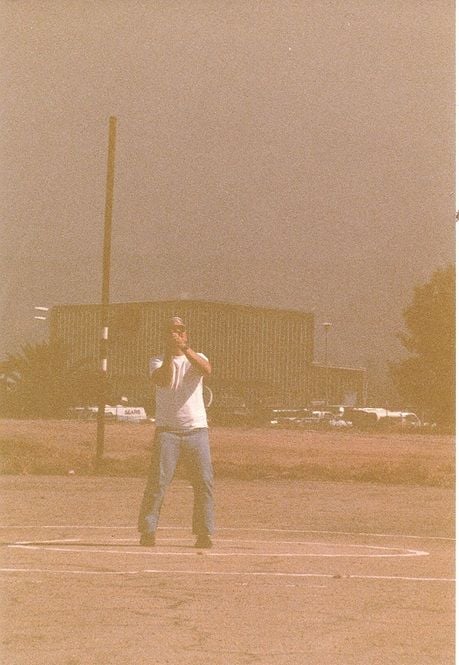
2 fisted flying I could fly it just one hand but two was easier
After flight I am beat
The following users liked this post:
capt1597 (01-28-2022)
01-28-2022, 05:09 AM
#40
Senior Member
Thread Starter
I understand your pain, I haven't been on here long but have had lots of issues putting up pictures during the course of the build log. Often it takes several tries to get it past 50% uploaded because it stalls and fails at that point I chalk it up to sometimes you have to deal with the querks of the site being used. Either way I'm running a parallel build log on the other site
I chalk it up to sometimes you have to deal with the querks of the site being used. Either way I'm running a parallel build log on the other site
01-28-2022, 05:28 AM
#41
Senior Member
Thread Starter
I see you got the pictures up, very nice! CL is one aspect of the hobby I never tried. It looks like it takes a lot more skills than one would expect kinda like trimming a FF aircraft. Very nice looking bird hopefully your new location will accommodate an in house flying circle, fingers crossed for ya!
01-28-2022, 07:43 AM
#42
I have been on this site a long time. They seem to make it worse and harder to use as time goes on. Starting around 2010 it seemed they would add features that only made things harder over all. It was the premiere site back then, I know of a number of guys that have left for frustration they have on here. I'll stick it out as there are a lot of guys on this site I follow. And some existing threads that deserve to continue.
I am 69. I started in control line, then built my first radio, a Heathkit 8 channel single stick and was hooked on RC Had to teach myself how to fly RC with a .049 powered glider. I went back to control line in the mid '80s in a small way, but then found a local RC club that I liked and and built a bird while on deployment during the first gulf war. My ship was anchored in the middle of the mine field off of Kuwait city. Then I was hard back into RC and never touched control line till around 2013 or 2014. I built a little .10 powered trainer with a radio in it for throttle control as I was not to certain I could go a full engine run with out getting dizzy. My first flight my body and I just was not ready. Not enough fluids on a hot and humid day. Not pretty. Then I started the CL bi plane and carved out some ribs for a bigger CL plane, all while building RC planes. I will stay with the radio for throttle on CL for several reason.
To get any plane RC, FF, CL to fly at a high performance level takes a lot of trimming, And and a well designed plane to start with. I have not found any type more difficult than the other, just different. I am never really try to get to acceptable level of tuning for competition. Just good all a round flying. The only time I ever competed was in RC fun flies, and when I was a kid flying with my buds. We flew some CL combat against each other but couldn't really afford the level of destruction inherent in combat.
I will sit back now and watch your build.
Ken
The following users liked this post:
capt1597 (01-28-2022)
01-29-2022, 12:03 PM
#43
Senior Member
Thread Starter
I enjoy the side conversations, fills the time between days I get to actually work on the build. Good conversation is always fun in my book

Formers are cut and in the proper locations. Once the glue dries I'll cut the front duct a little deeper but wanted to keep more material to ensure squareness for now. Later on I'll cut the duct pieces and hatch sheeting. I was going to power through this part with CA but I'm out and didn't know, so titebond it is. Because of that the hatch is all I'll get done today but that's ok no rush I have all winter.
 01-29-2022, 02:10 PM
#45
Senior Member
Thread Starter
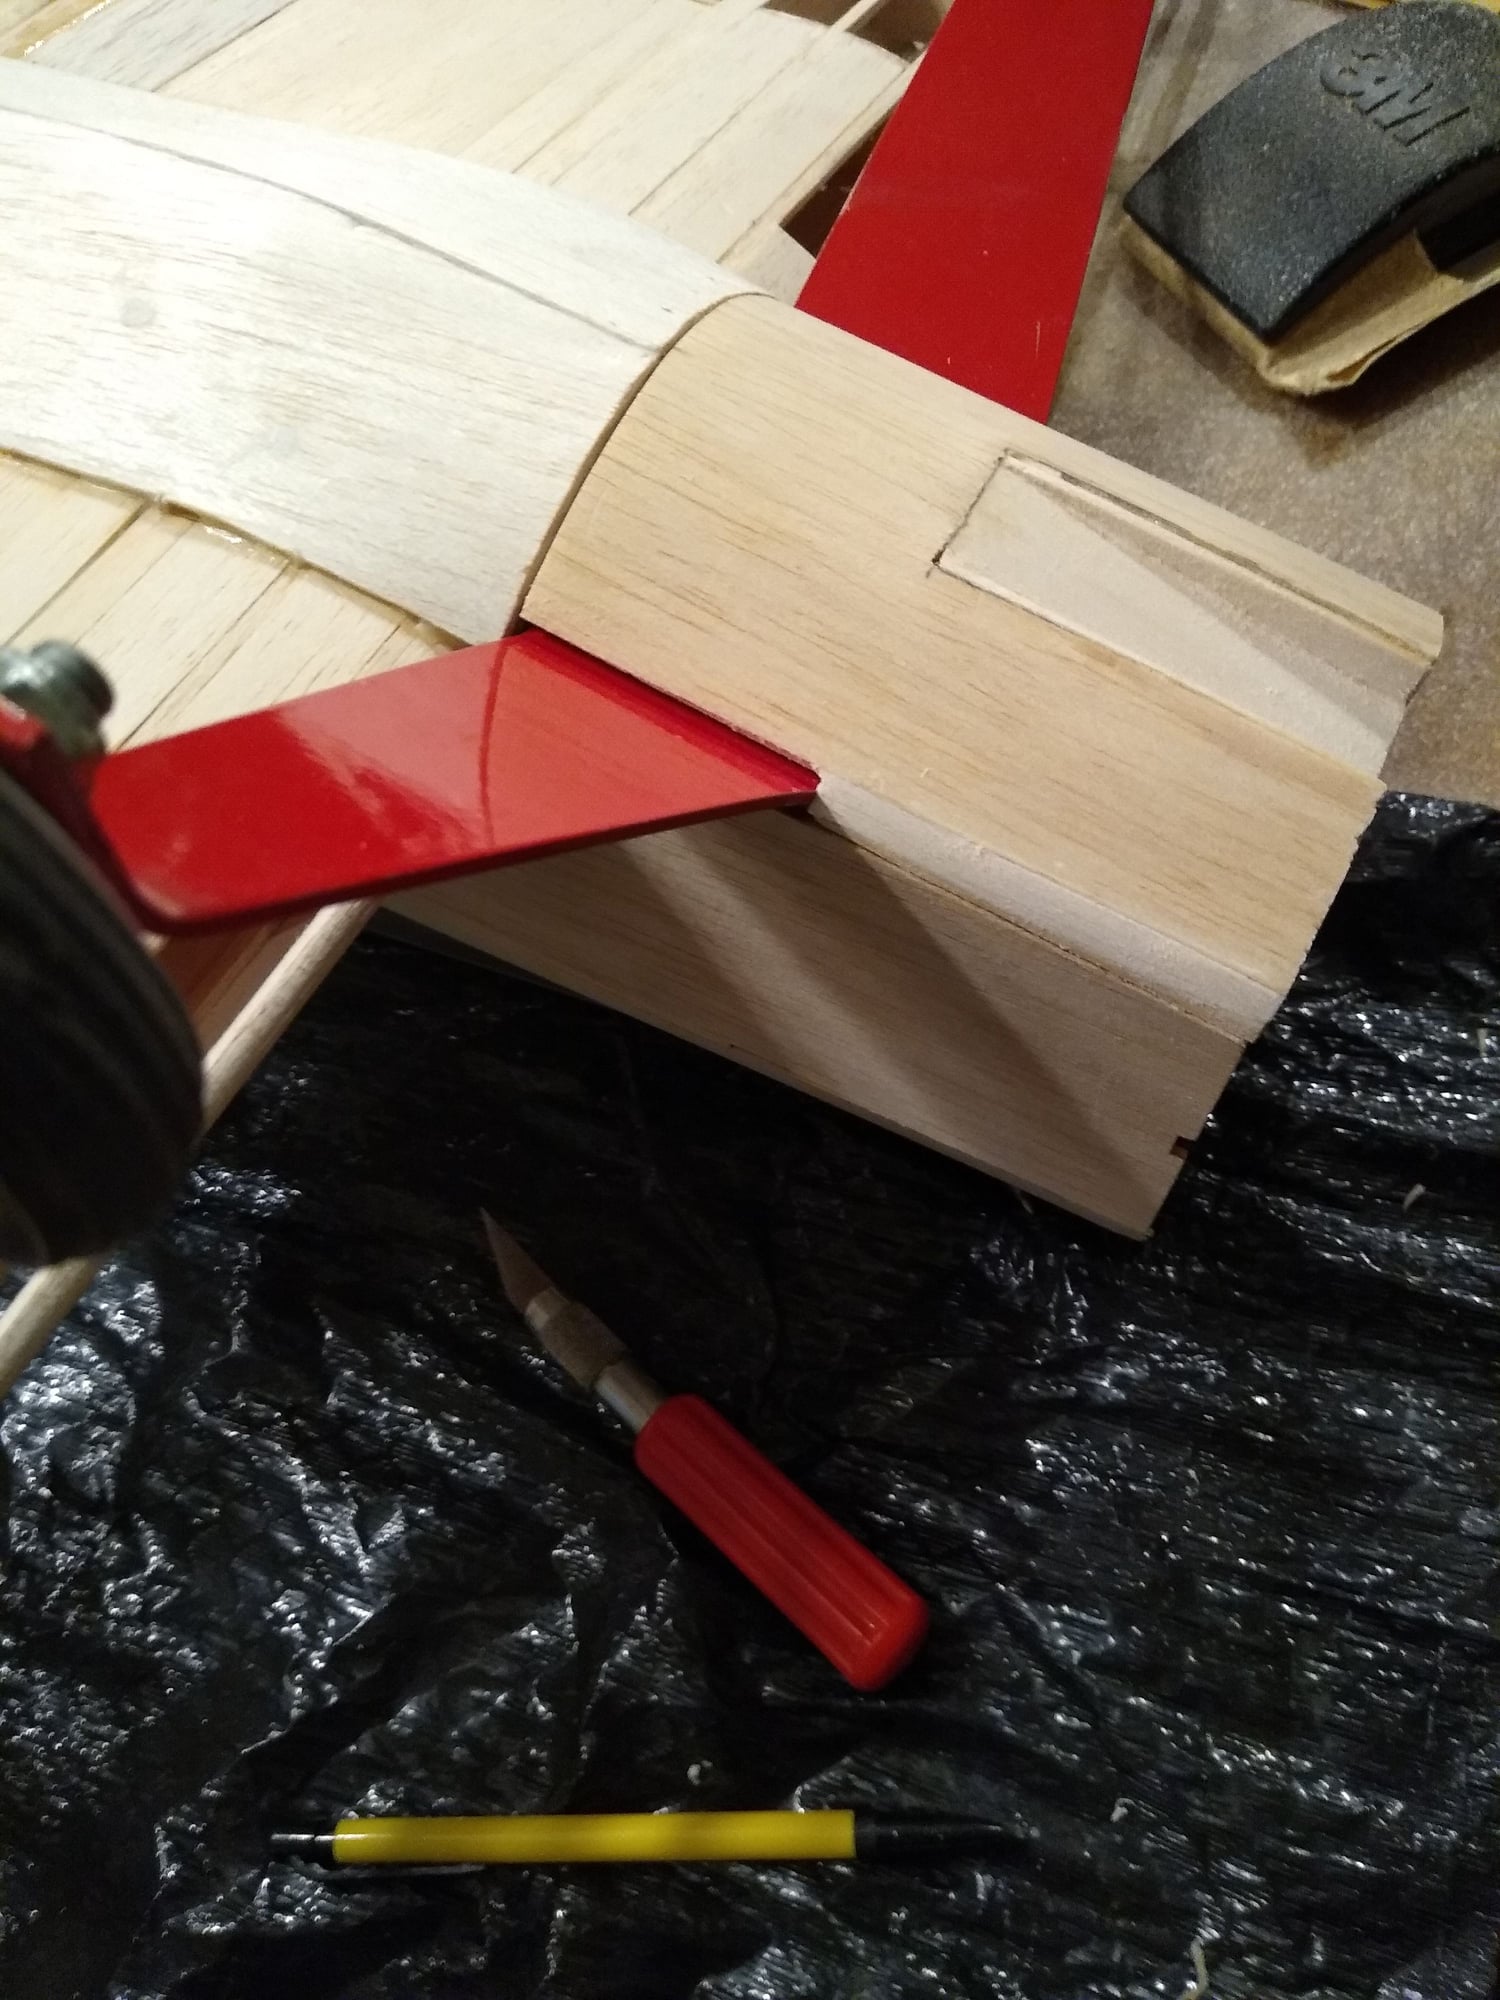
Found some CA in my flight box from last season. Time to use it up and replace with new anyway so I made a rear air vent. It's under the right horizontal stab and all I did was cut 3 side, score the 4th and push in. Once I glued against the other inside wall I made 2 triangles from 1/16 balsa to fill the gaps...done! Thinking about the wing fillets that should be the next project. Last task will be the elevator and rudder then a lot of sanding. That all will be next time though.
01-29-2022, 03:29 PM
#46
Progress looking good. Glad you didn't mind the off topic conversation.
We maybe moving pretty soon it looks like. The squatter on the property has been the hold up stopping escrow from going forward. He is being dealt with and assisted to move his trailer off the property. Helped in a nice way, not sarcastically.
Ken
We maybe moving pretty soon it looks like. The squatter on the property has been the hold up stopping escrow from going forward. He is being dealt with and assisted to move his trailer off the property. Helped in a nice way, not sarcastically.
Ken
01-29-2022, 03:45 PM
#47
Senior Member
Thread Starter
Progress looking good. Glad you didn't mind the off topic conversation.
We maybe moving pretty soon it looks like. The squatter on the property has been the hold up stopping escrow from going forward. He is being dealt with and assisted to move his trailer off the property. Helped in a nice way, not sarcastically.
Ken
We maybe moving pretty soon it looks like. The squatter on the property has been the hold up stopping escrow from going forward. He is being dealt with and assisted to move his trailer off the property. Helped in a nice way, not sarcastically.
Ken
Yes things are speeding up now that the belly pan is all finished, that addition really cranked on the build hours. Worth it, but time consuming
Once I get it mostly covered and the cowl plug made that'll be it for a while. I'm short a motor, red Ultracote, and a receiver to finish. The build outgrew the original motor I had and I refuse to use anything but a 12" prop because it'll just look good.Til funds get to a better spot I'll have to bench this build which is ok. I have an unopened Sig Riser kit collecting dust that I want to do something fun with. Thinking making either a powered glider version of a Sig Rascal out of the kit or a powered glider Ugly Stick. Haven't decided yet but I'll use the original motor and landing gear from this build on that.
01-29-2022, 07:13 PM
#48
Senior Member
Thread Starter
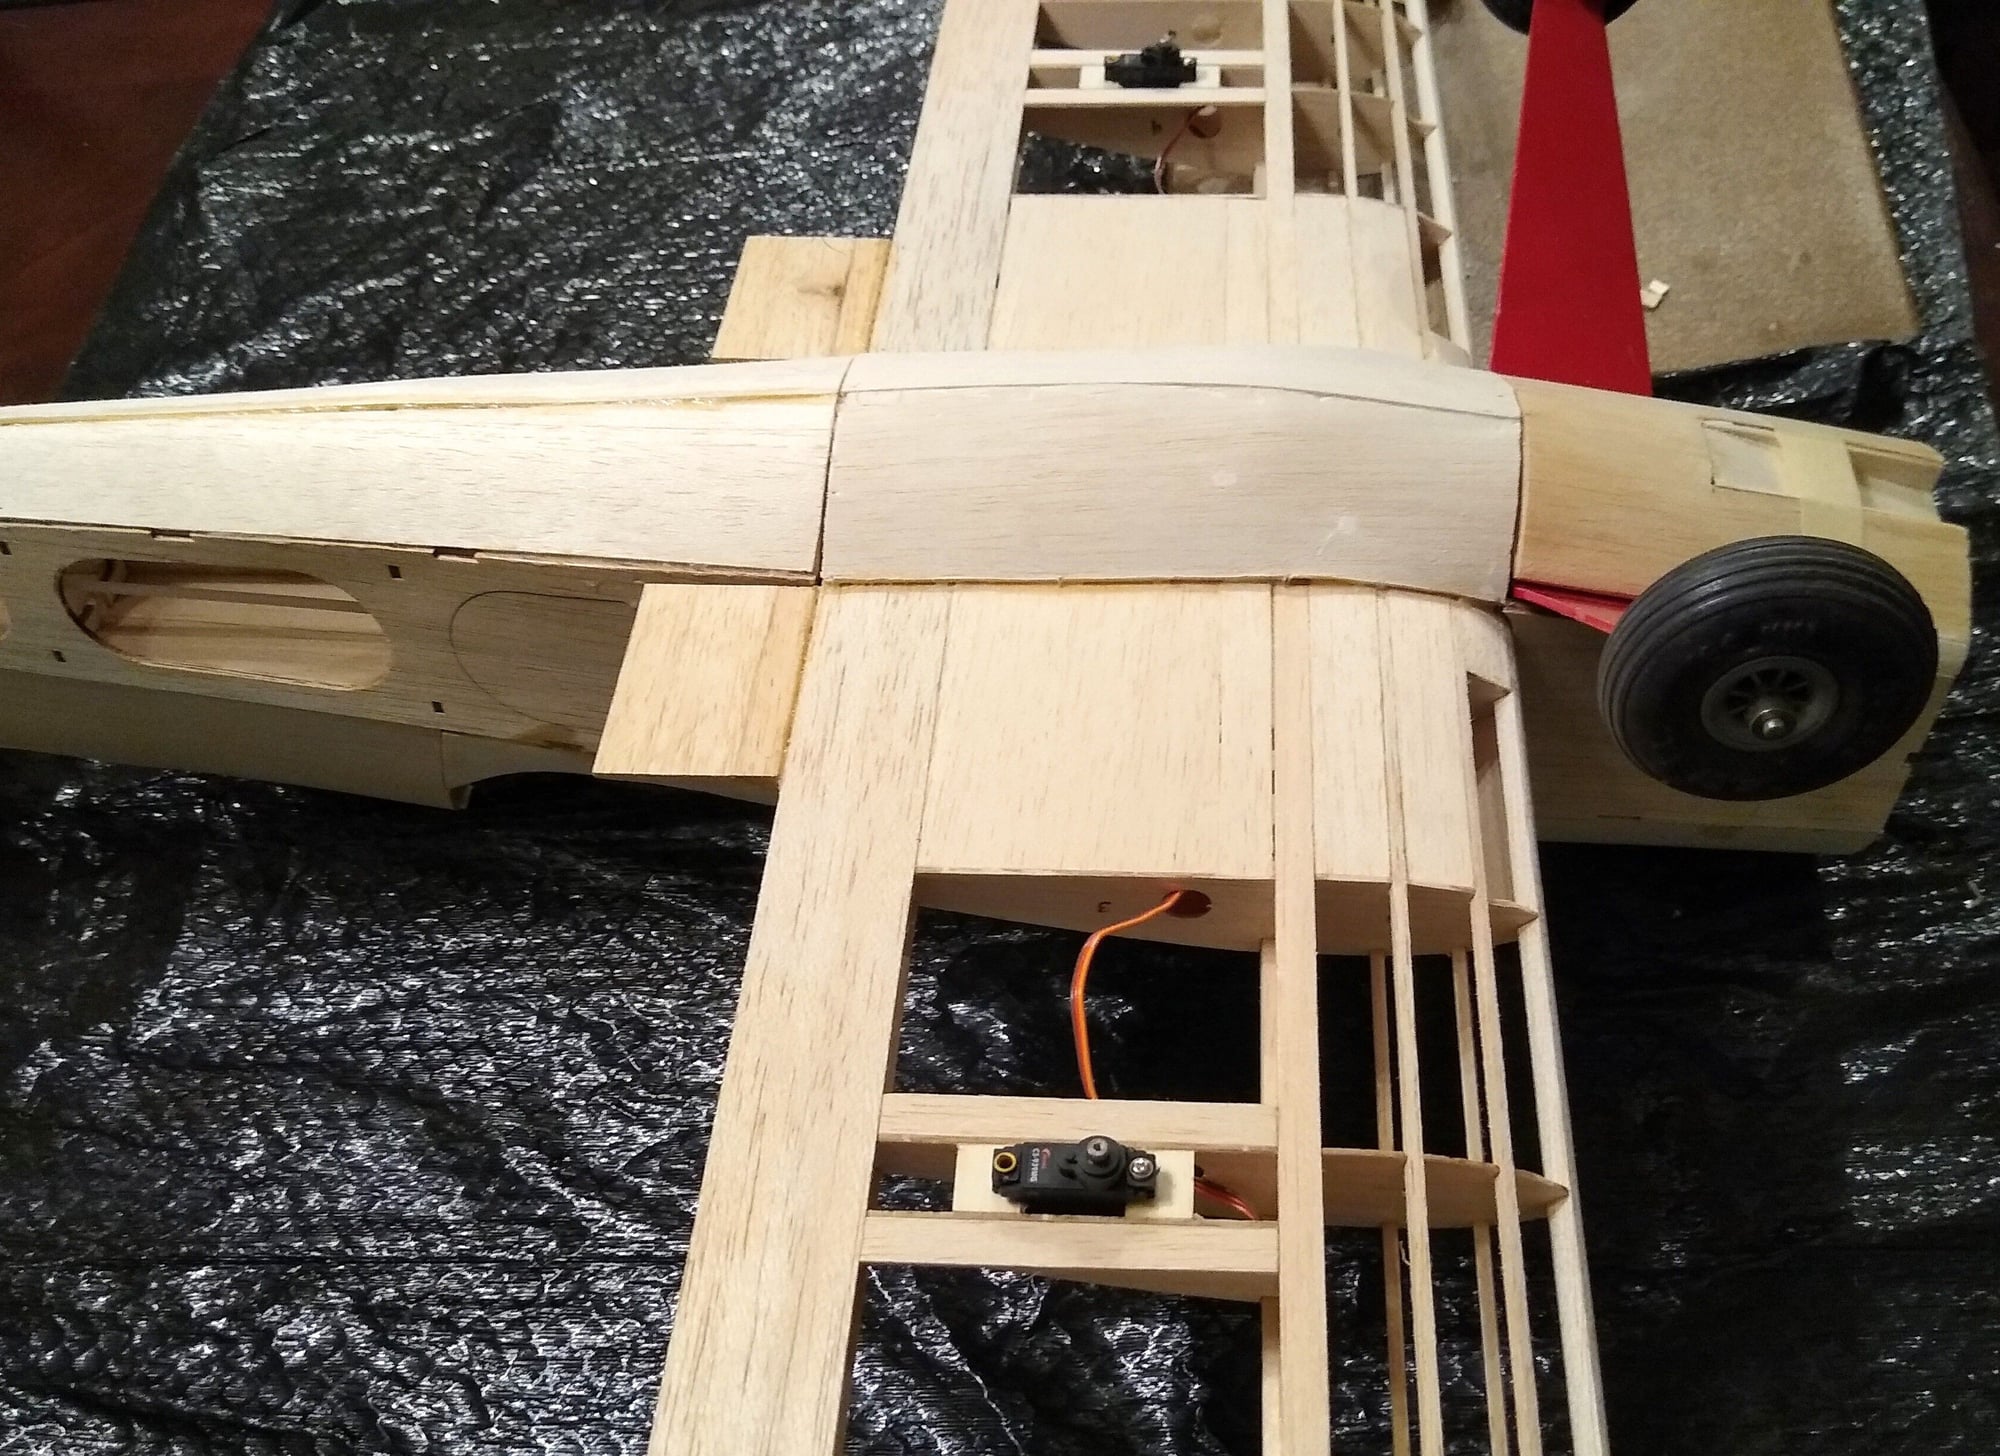
after some trimming and rough sanding it's taking shape! I'll leave the blending to when I go over the whole airframe with my palm sander. I'm glad the bottom is done and also happy how it turned out.
01-29-2022, 09:00 PM
#49
Well if you do another build thread , post a link. I'll follow along.
Oh boy do I understand about funds. My wife and I are both on fixed incomes. I have had to pause a build for lack of money, and then resume it. The big pitts I have been collecting parts for several years now.
Ken
Oh boy do I understand about funds. My wife and I are both on fixed incomes. I have had to pause a build for lack of money, and then resume it. The big pitts I have been collecting parts for several years now.
Ken
02-12-2022, 08:19 PM
#50
Senior Member
Thread Starter
It would seem fate wants me to finish this build before moving onto another. I lucked into an Amazon gift card so with that I ordered the motor and a roll of appropriate solid red covering! I received the motor today and it looks like it'll be a good fit up front. I'm going to use the ring shaped motor mount spacers that came with the kit to push the motor out for the look I want. Since I have everything I'll need minus warm weather to make a cowl it's time to get on this project. I'll get on it in the morning