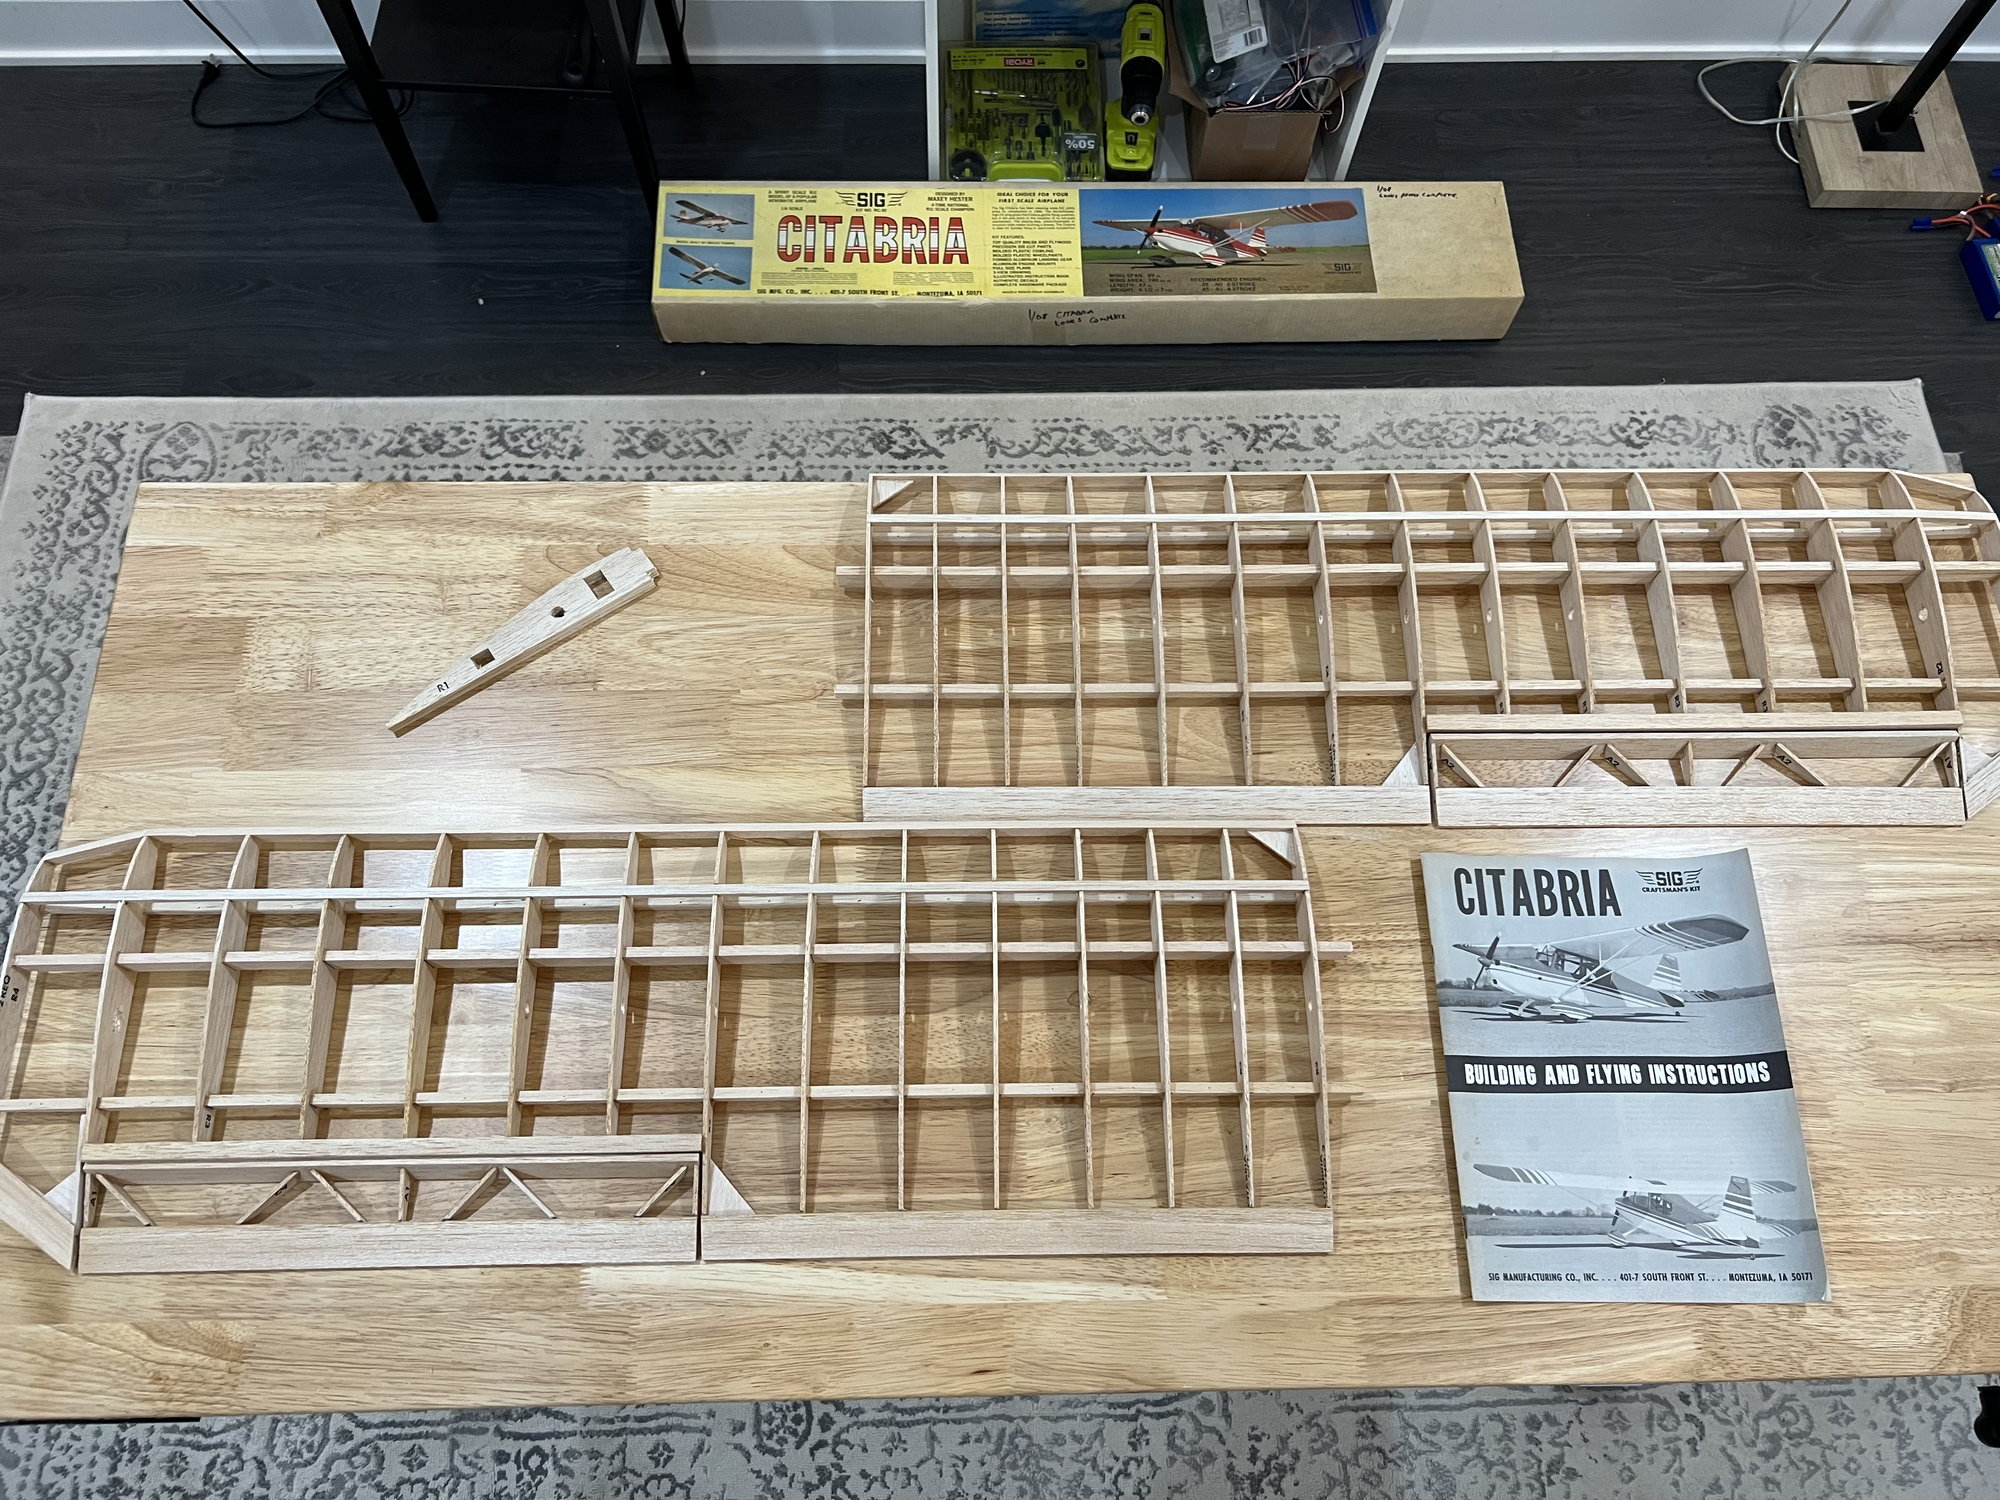
Sig Citabria Build
 06-09-2023, 10:04 AM
#1


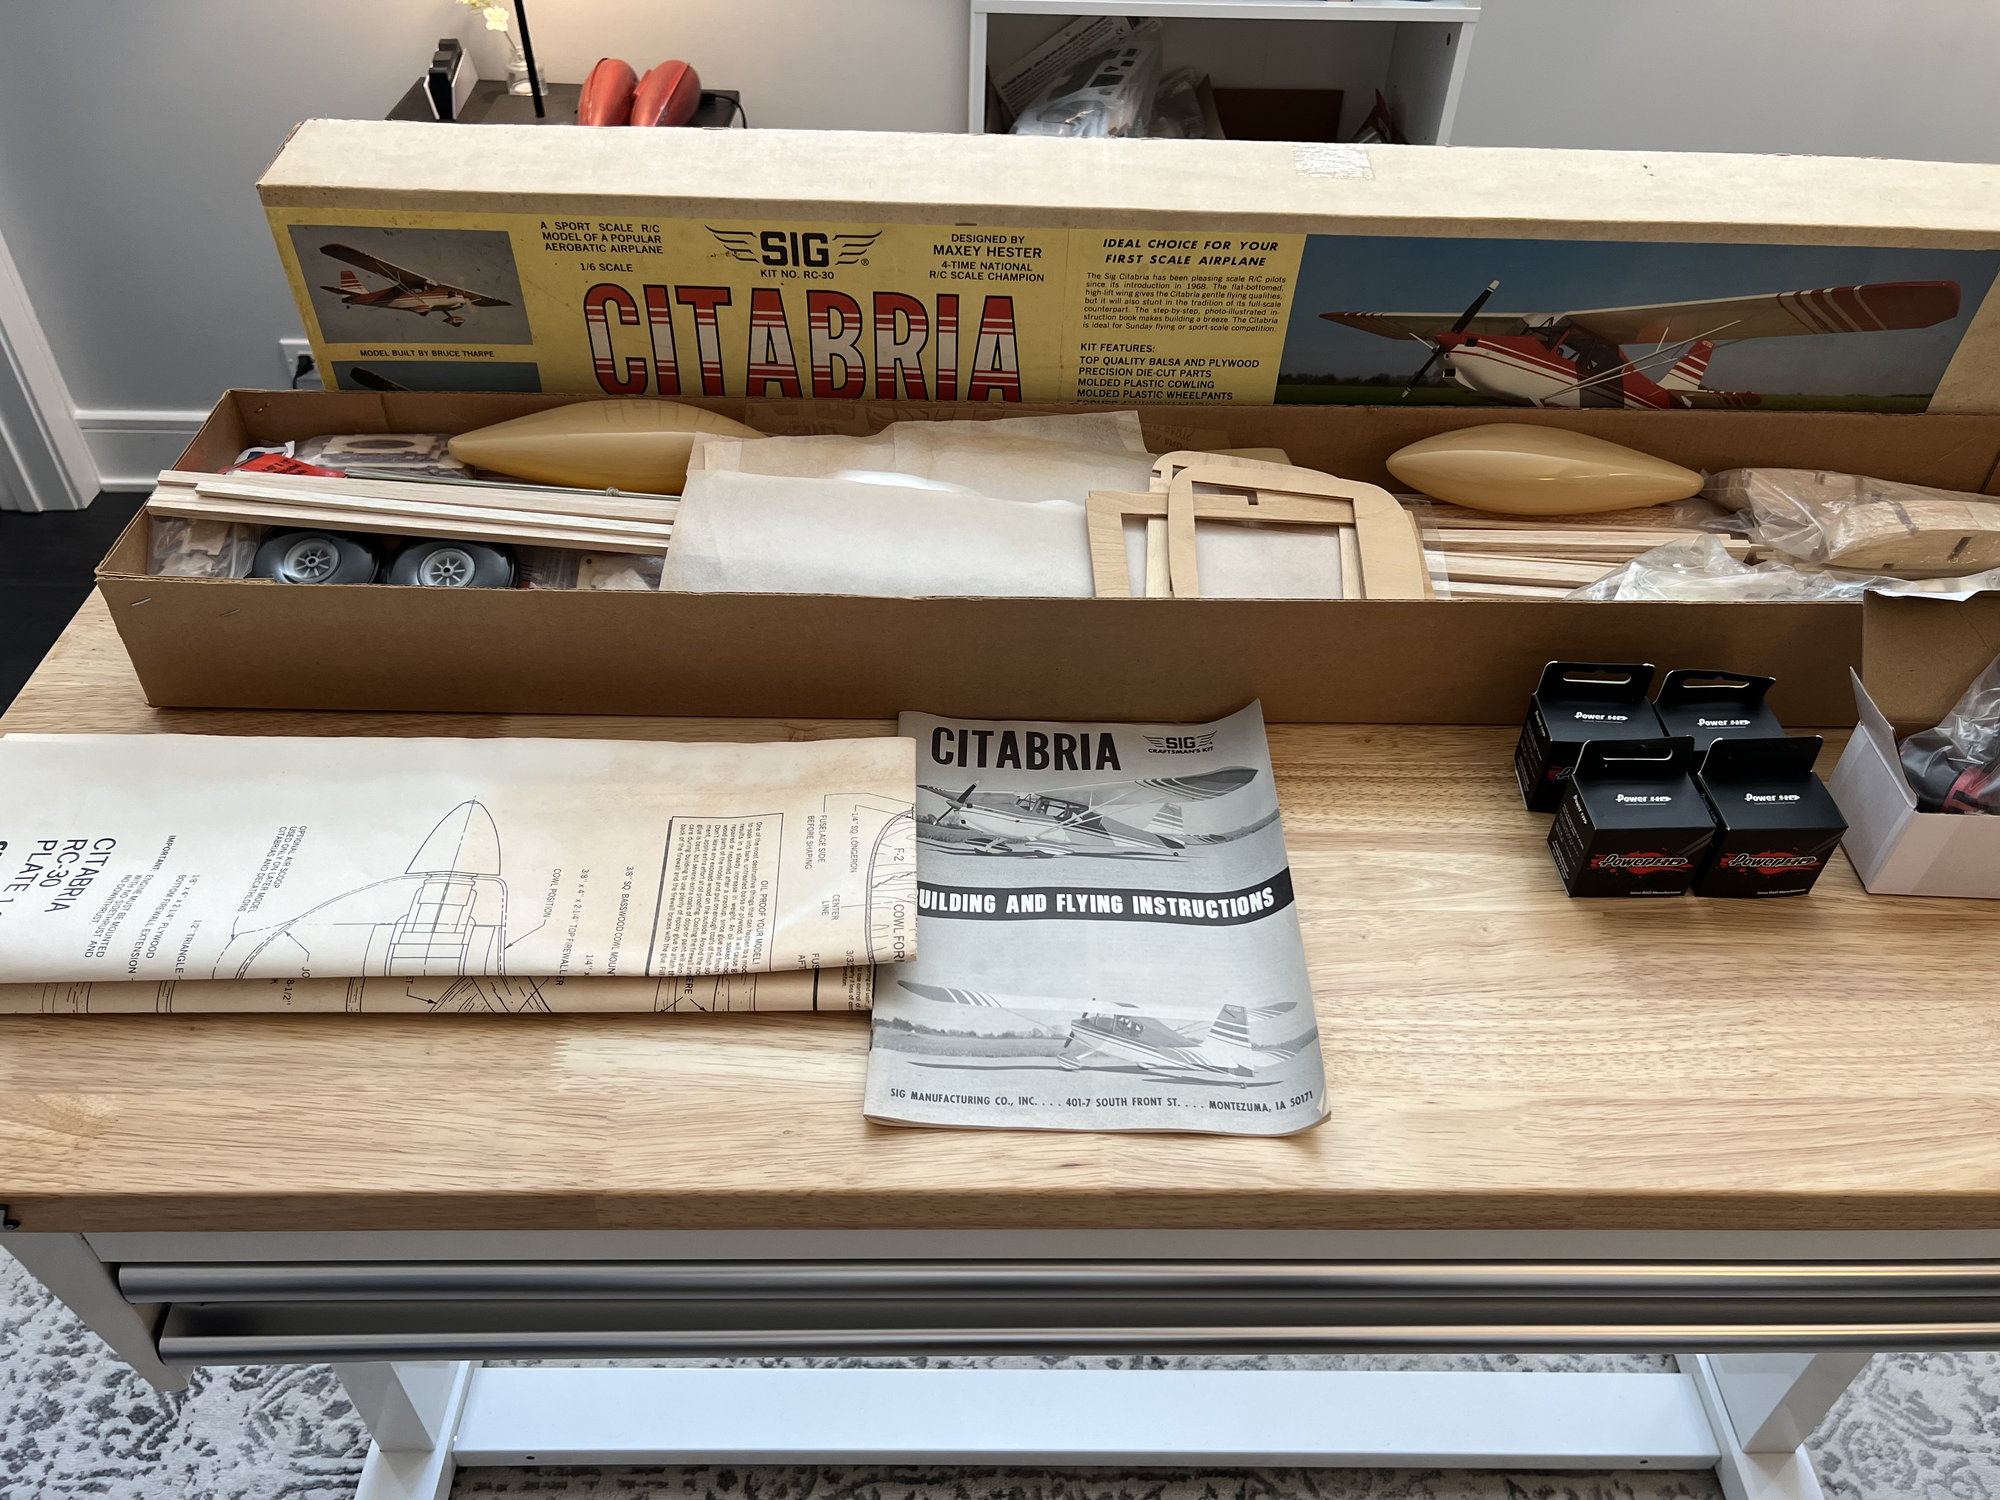
Leaving the warbird scene for a little bit so I can start on a GA build. This will be my first Sig kit. I'm planning on converting it to electric.
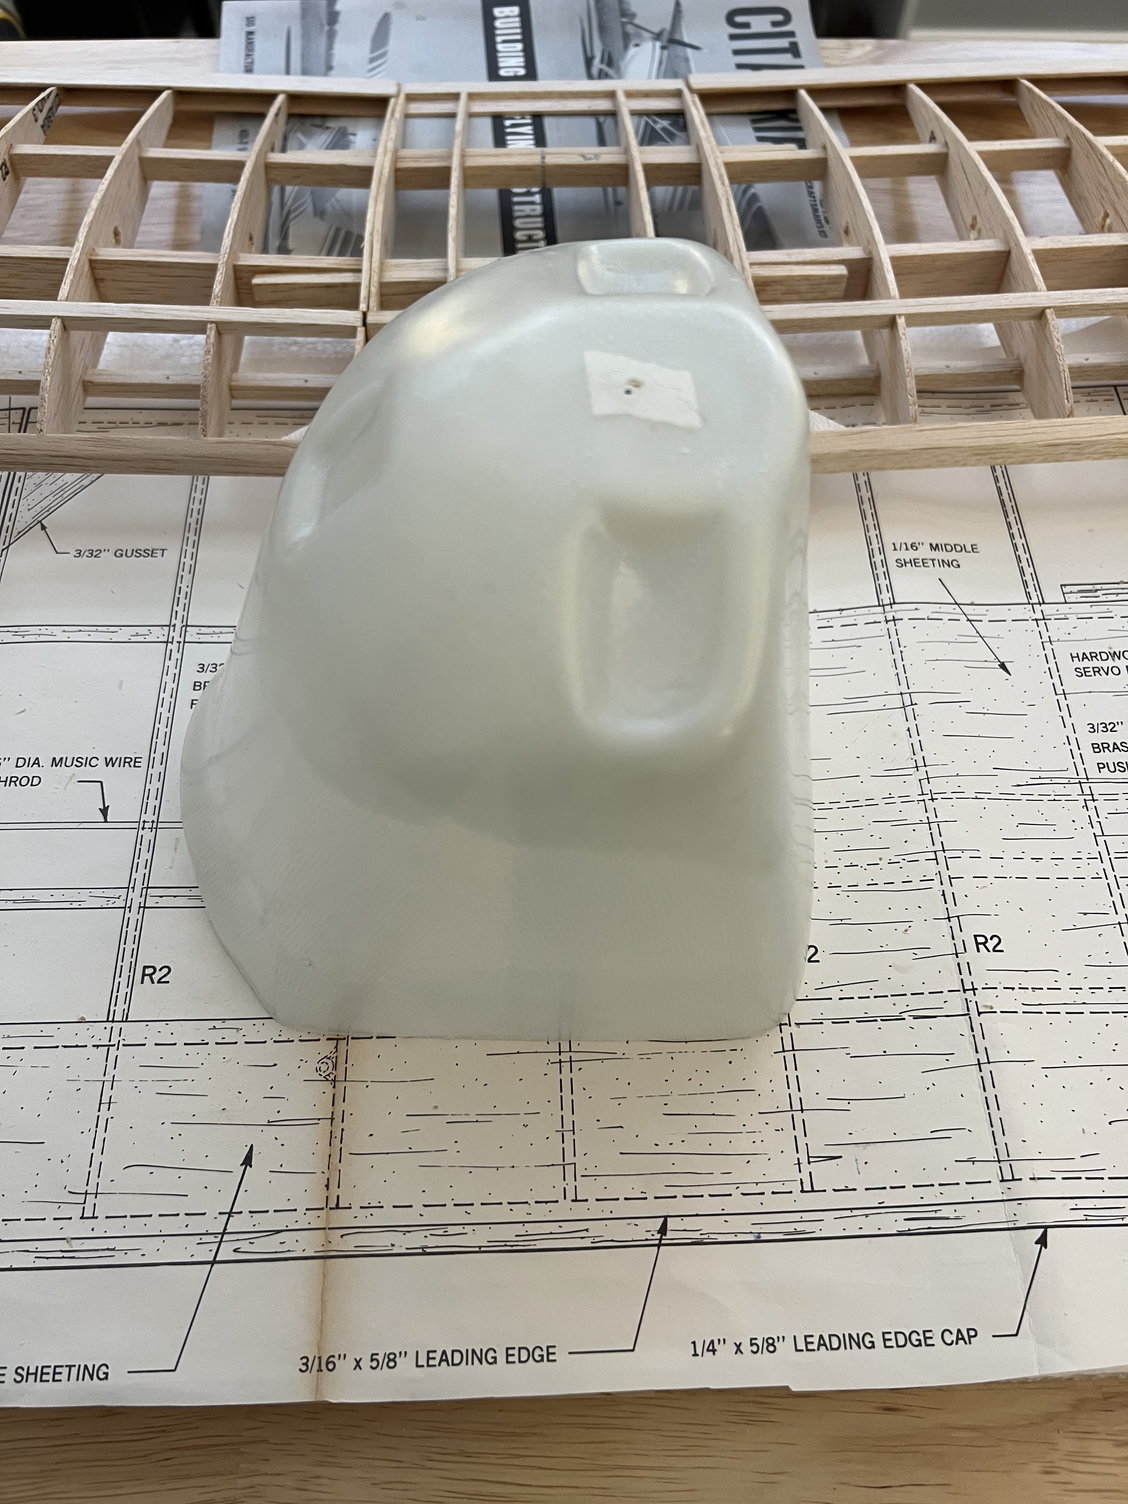
I ordered the cowl from Fiberglass Specialties to make the building process a little easier.
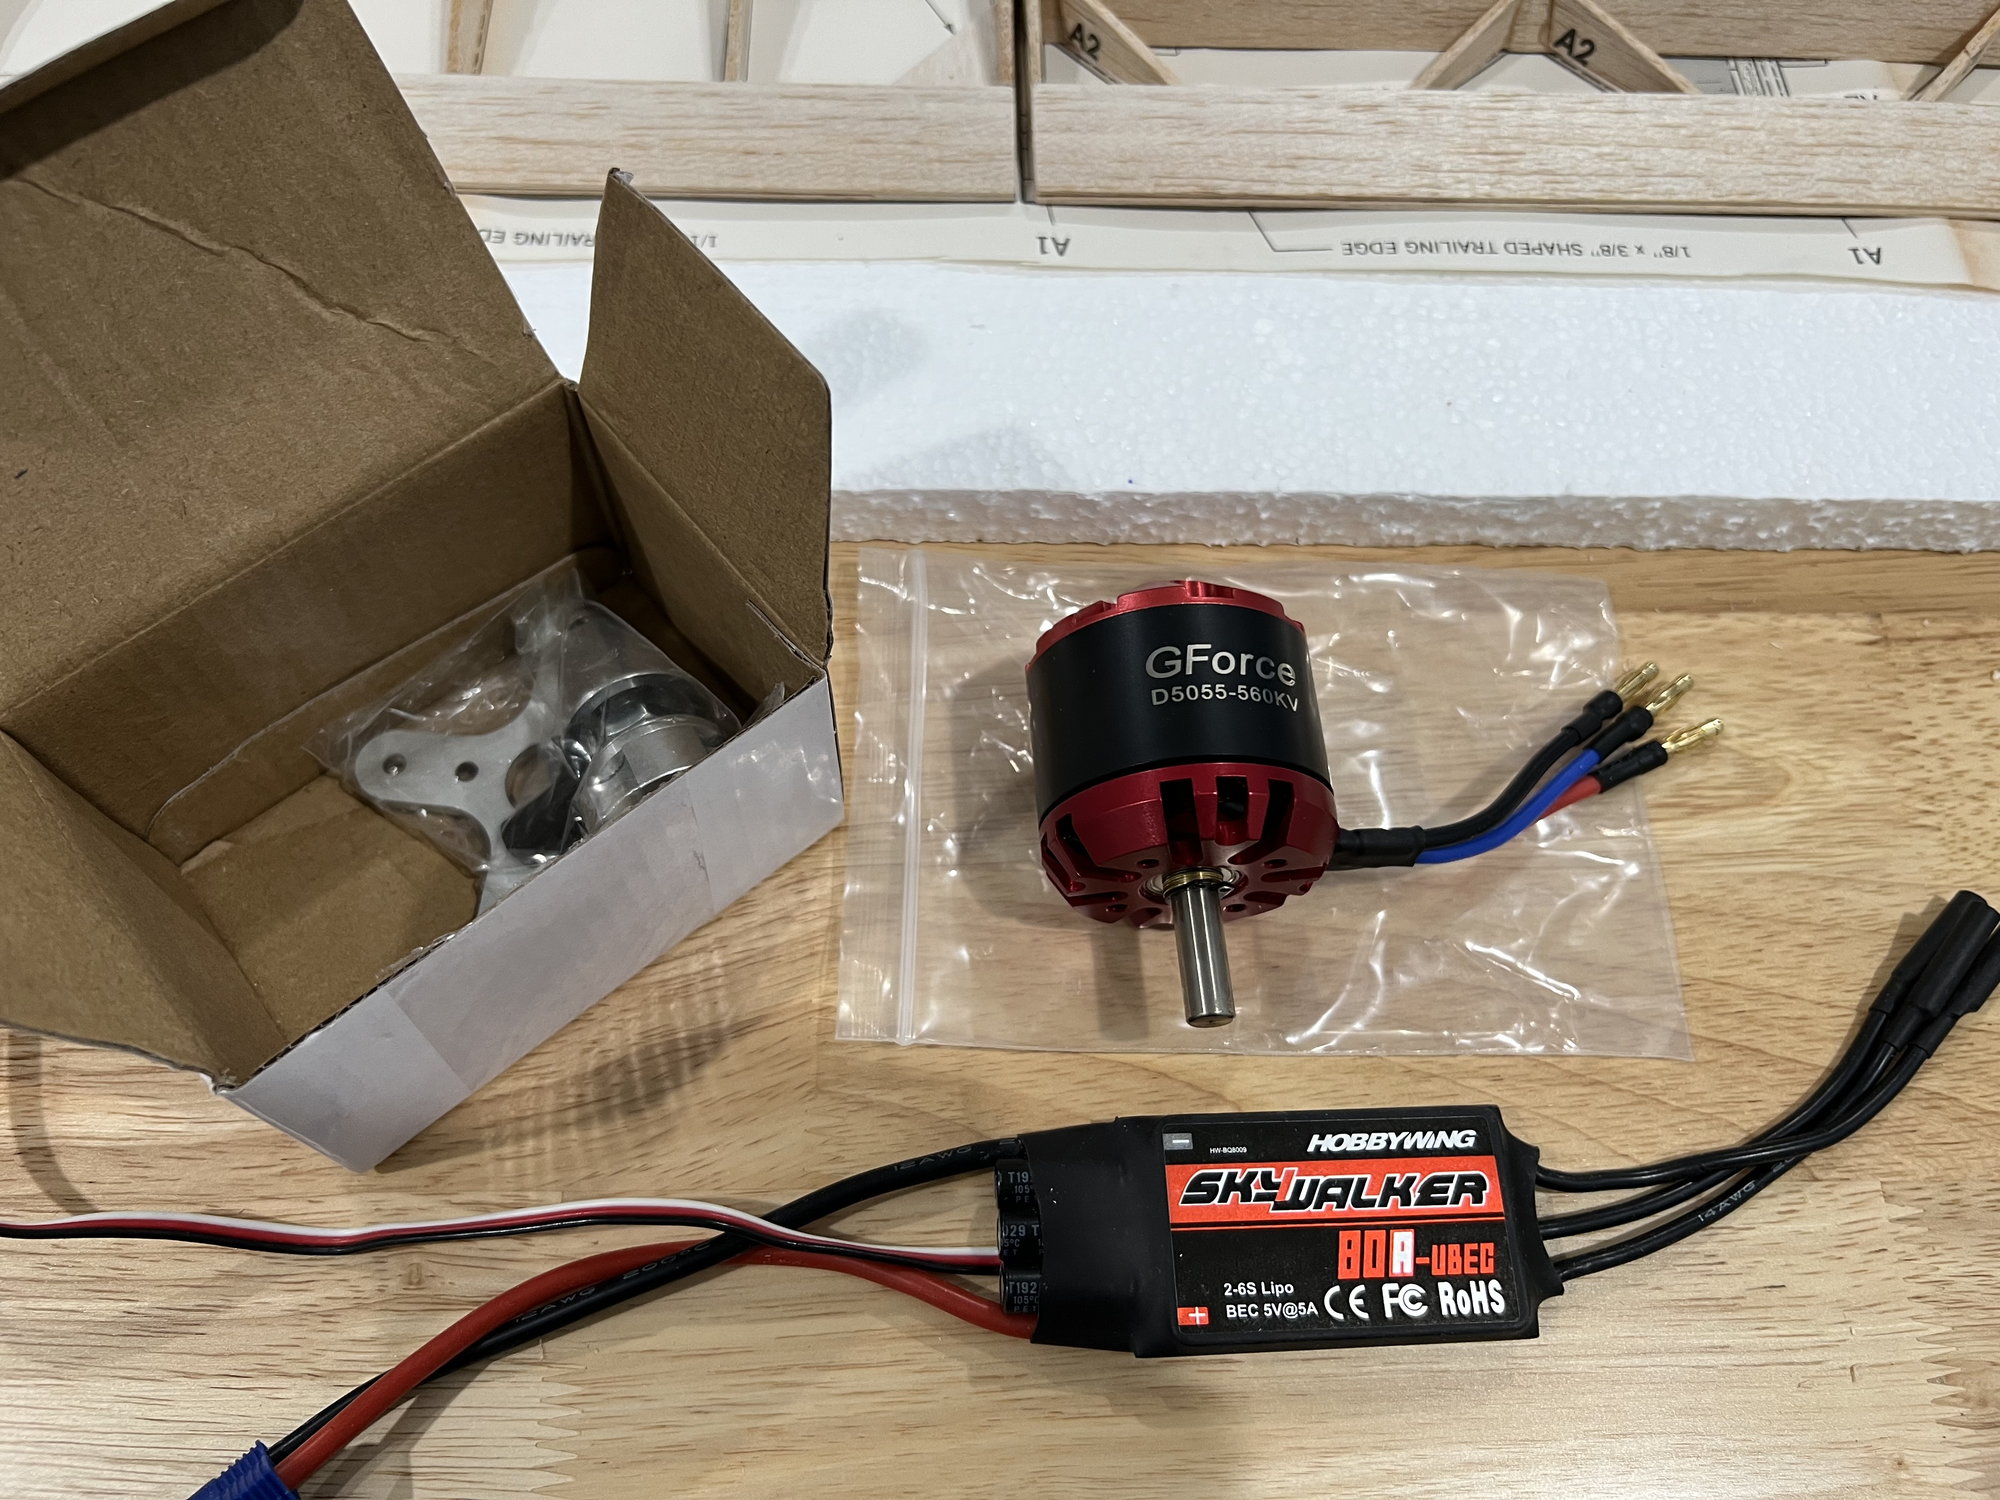
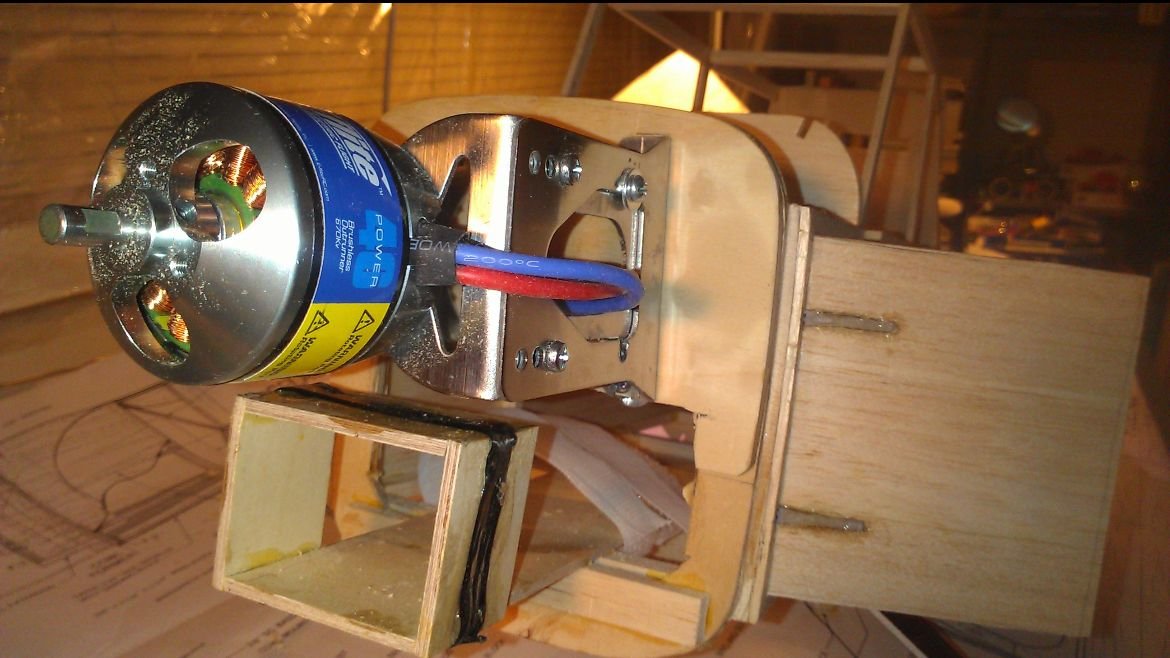
It will be powered by a Gforce 46 with 4 standard servos and an 80 amp ESC all from Valuehobby.
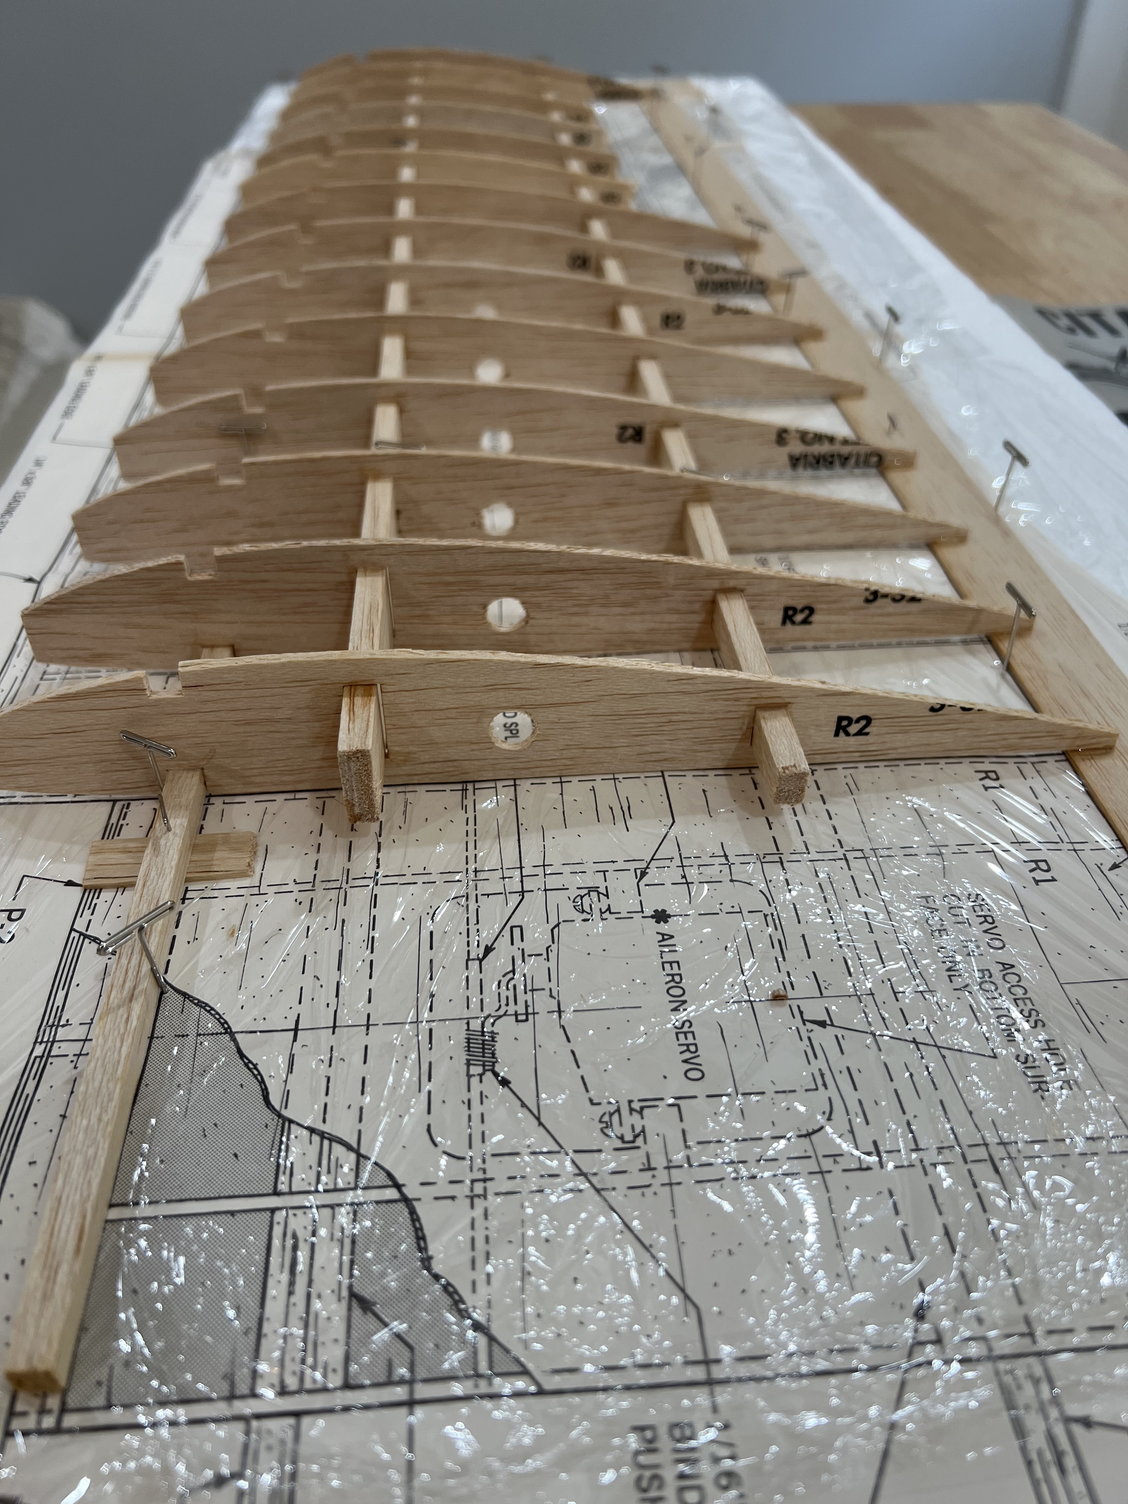
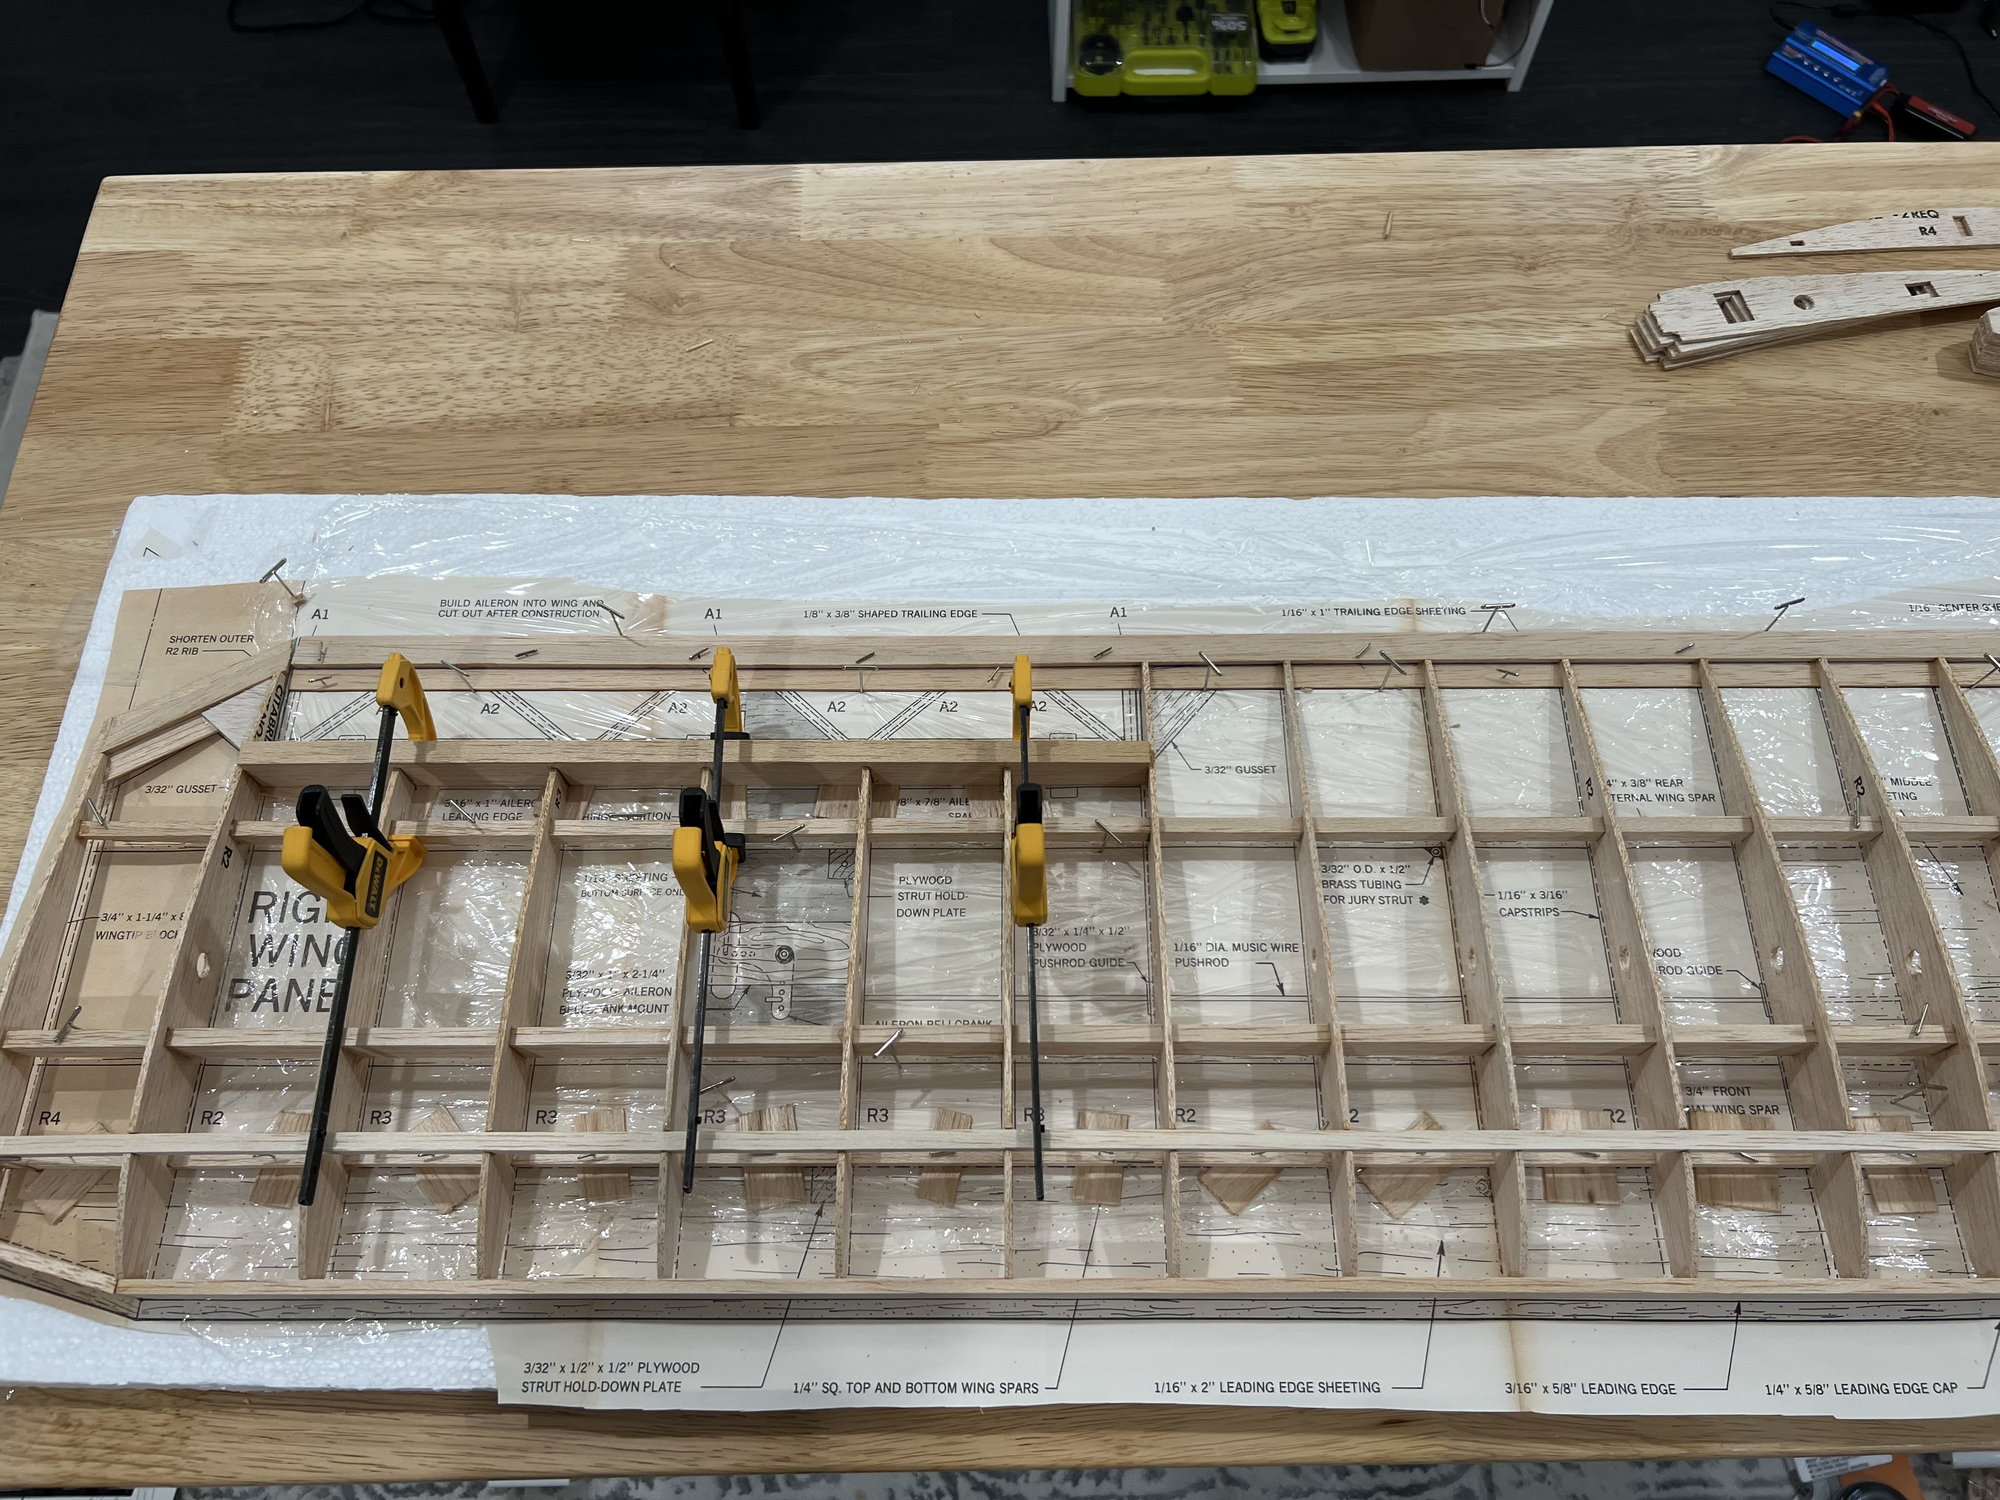
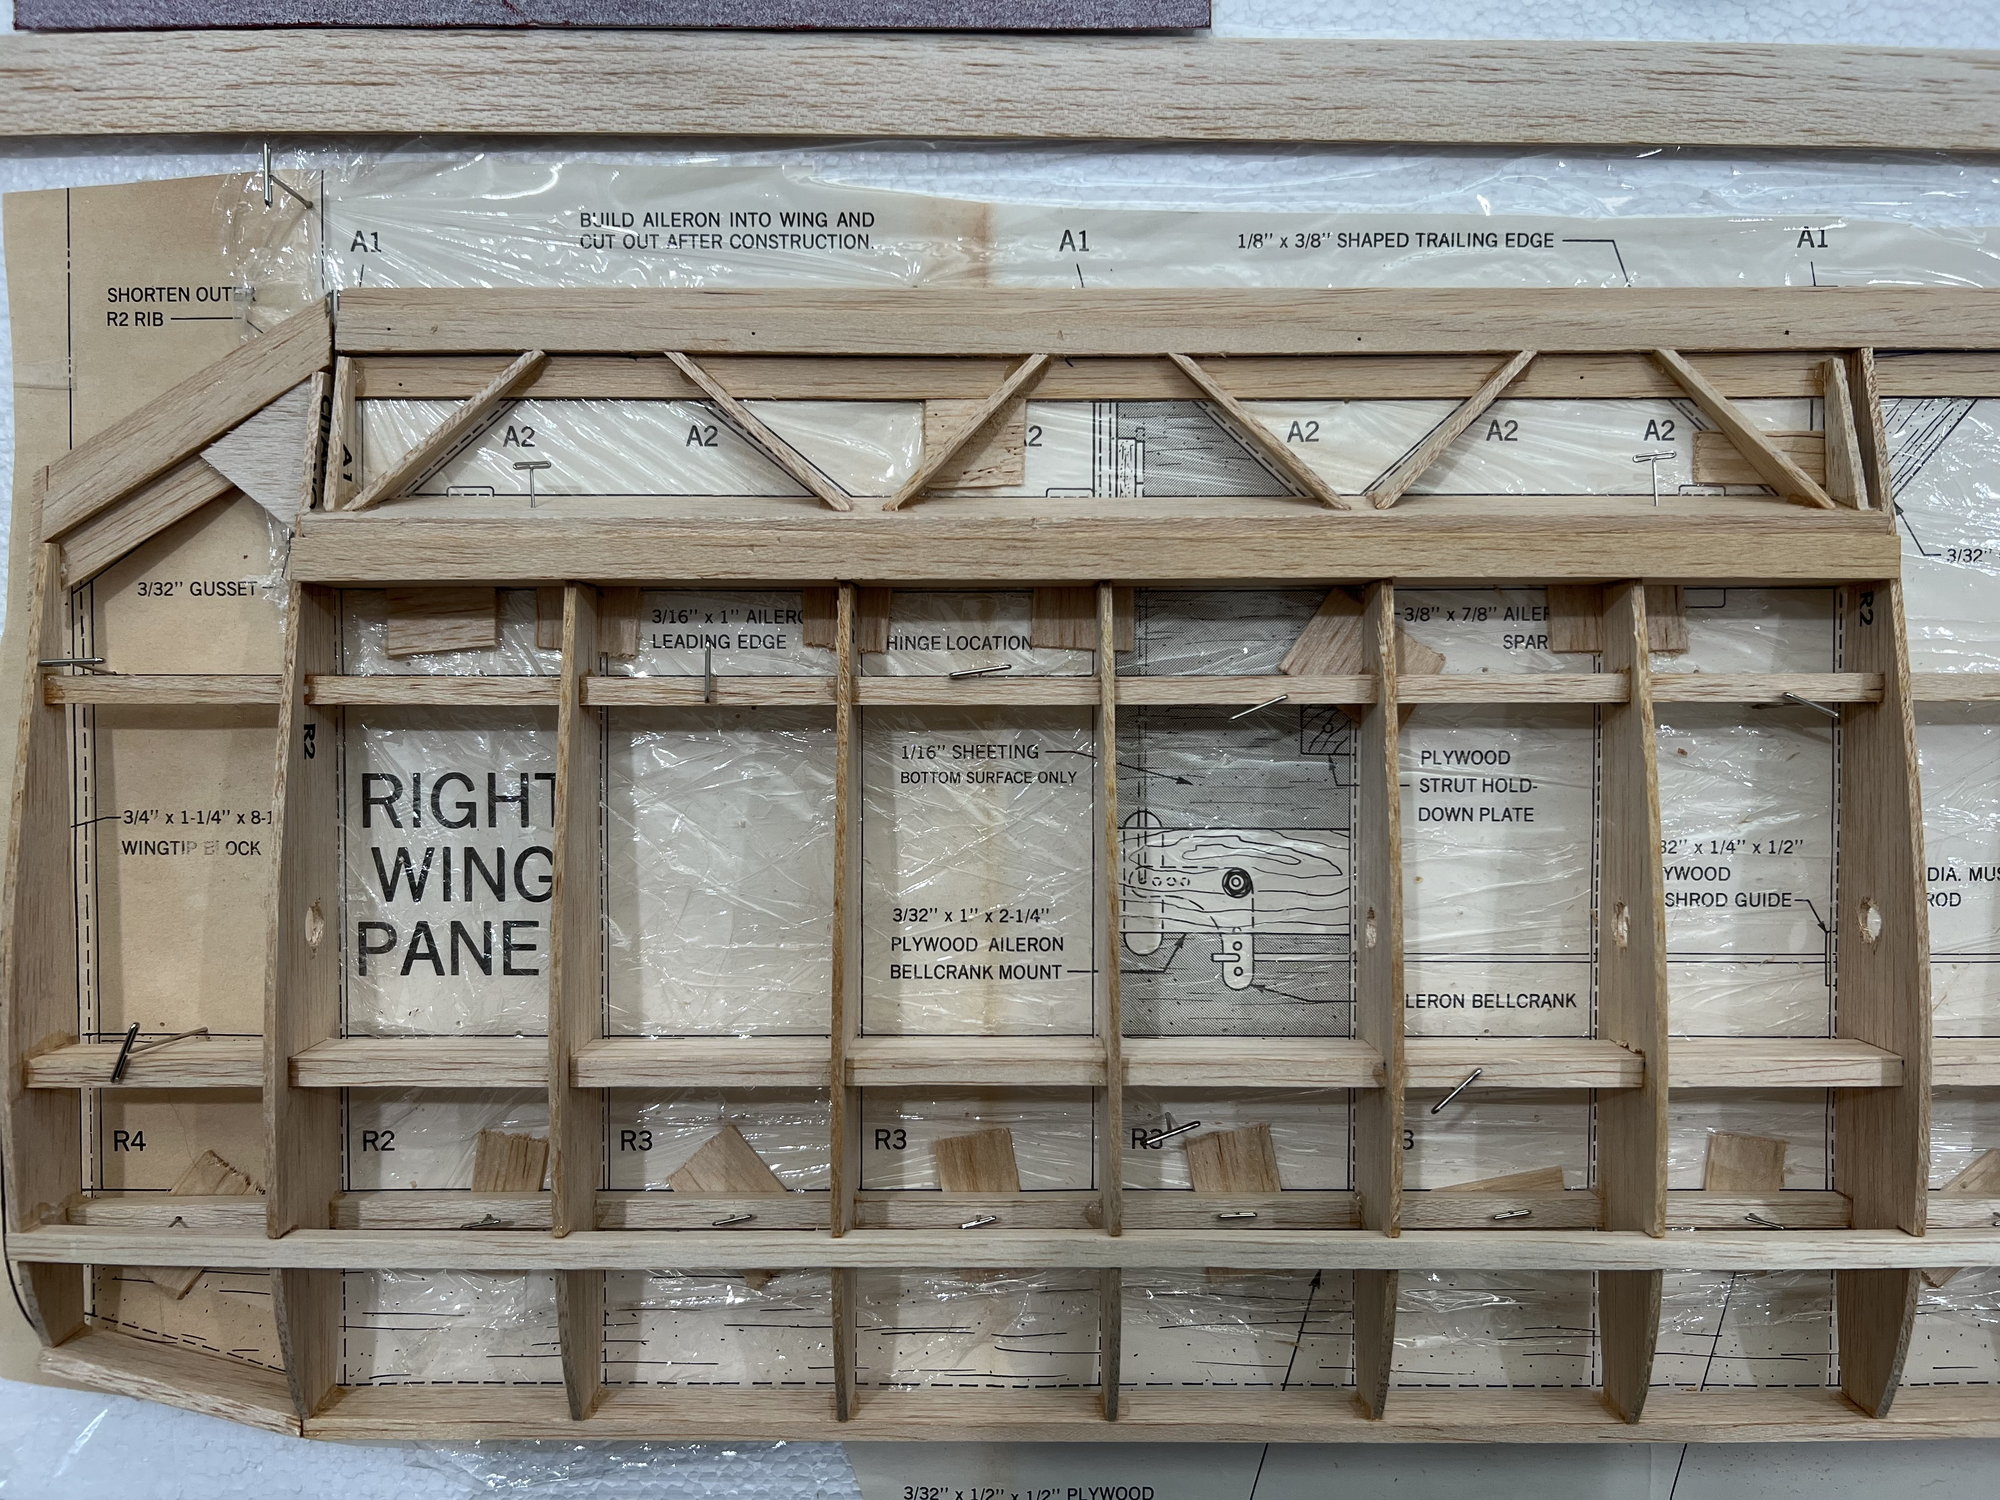
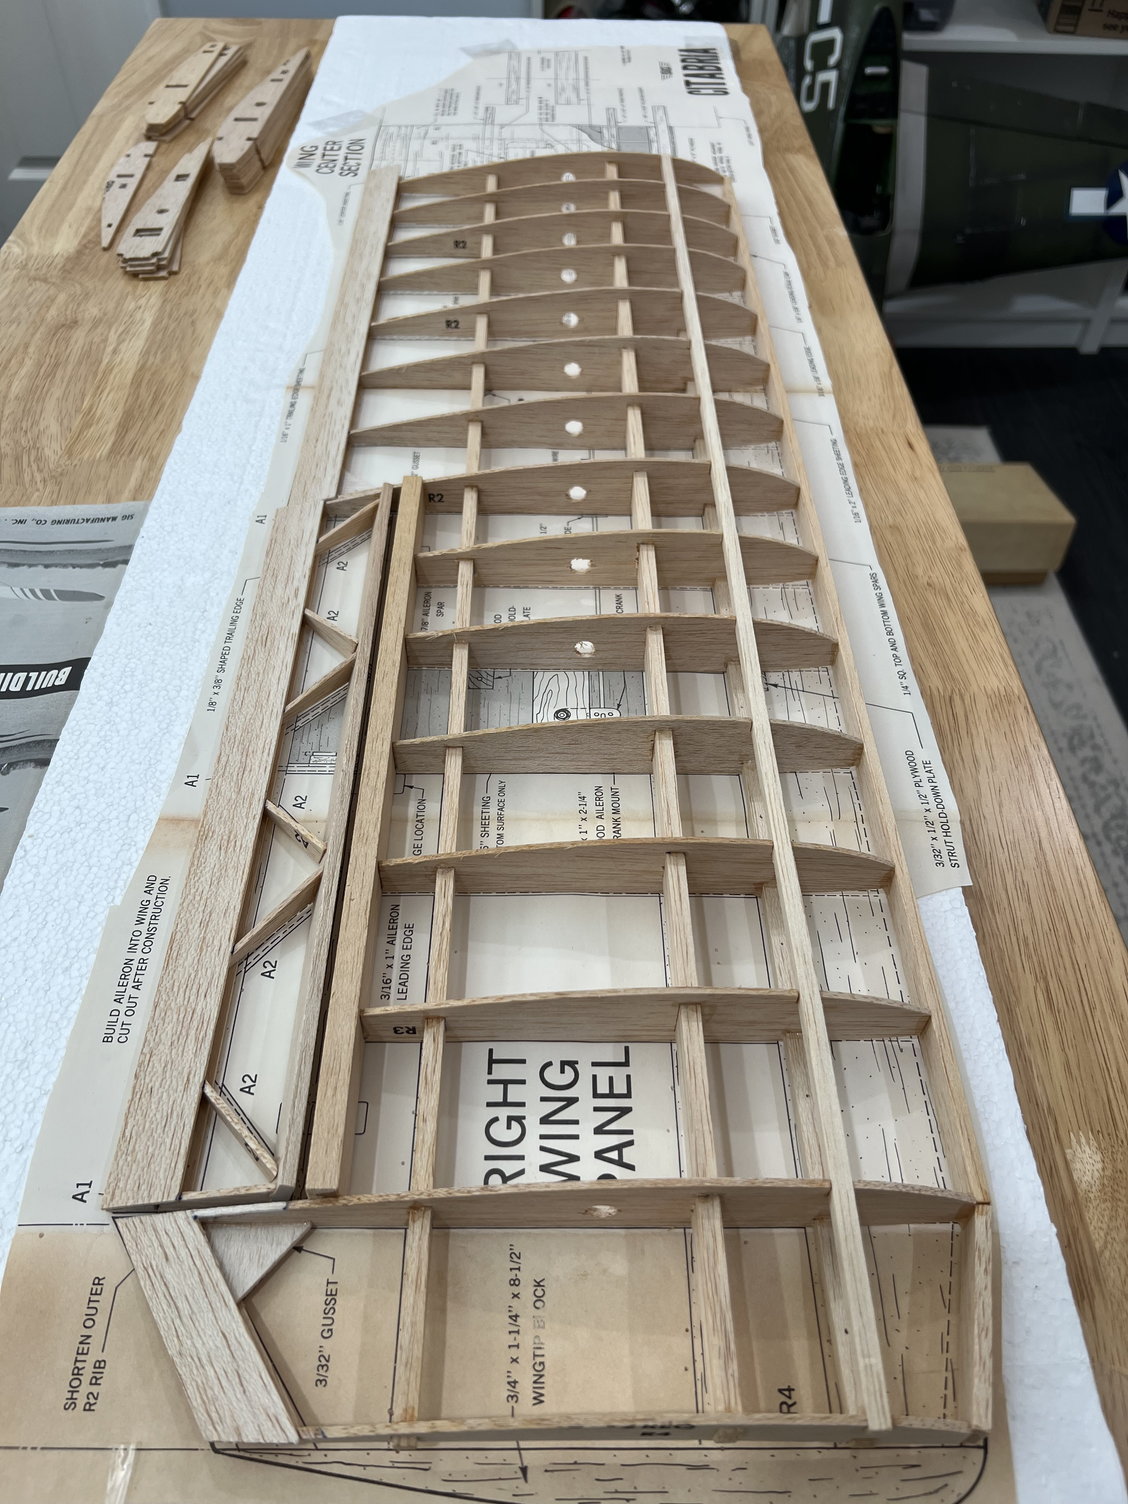
I will be building this per plans so nothing special here. Just a nice, clean and fun build.
I ordered the cowl from Fiberglass Specialties to make the building process a little easier.
It will be powered by a Gforce 46 with 4 standard servos and an 80 amp ESC all from Valuehobby.
I will be building this per plans so nothing special here. Just a nice, clean and fun build.

 06-10-2023, 03:22 AM
#3

I'll be along for the ride...
I have one of these kits on the shelf waiting on me...
Twp servos for the ailerons certainly simplify the set up from crafting the linkage all the way through creating differential movement.
I'll be interested to see and hear your review/opinion on the cowl from Fiberglass Specialties.
What will you be covering it with?
 06-10-2023, 03:45 AM
#4


I did a build on one of these a few years ago,, Mine is also EP and has some Mods,,, might be some tips here to consider https://www.rcgroups.com/forums/show...Champion-Scout
good luck
good luck
06-10-2023, 05:01 AM
#5
I'll be along for the ride...
I have one of these kits on the shelf waiting on me...
Twp servos for the ailerons certainly simplify the set up from crafting the linkage all the way through creating differential movement.
I'll be interested to see and hear your review/opinion on the cowl from Fiberglass Specialties.
What will you be covering it with?
I have one of these kits on the shelf waiting on me...
Twp servos for the ailerons certainly simplify the set up from crafting the linkage all the way through creating differential movement.
I'll be interested to see and hear your review/opinion on the cowl from Fiberglass Specialties.
What will you be covering it with?
06-10-2023, 05:03 AM
#6
I did a build on one of these a few years ago,, Mine is also EP and has some Mods,,, might be some tips here to consider https://www.rcgroups.com/forums/show...Champion-Scout
good luck
good luck
Question: how did you make access to the battery hatch? I'm thinking of making a side hatch just after the cowl for battery access. I haven't planned it out yet until I start the fuse.
06-10-2023, 05:12 AM
#7
 I started to write more there and stopped short.
What I meant was, what type of covering will you use? Iron on shrink film (plastic) or simulated iron on cloth or actual cloth
 06-11-2023, 03:14 AM
#10

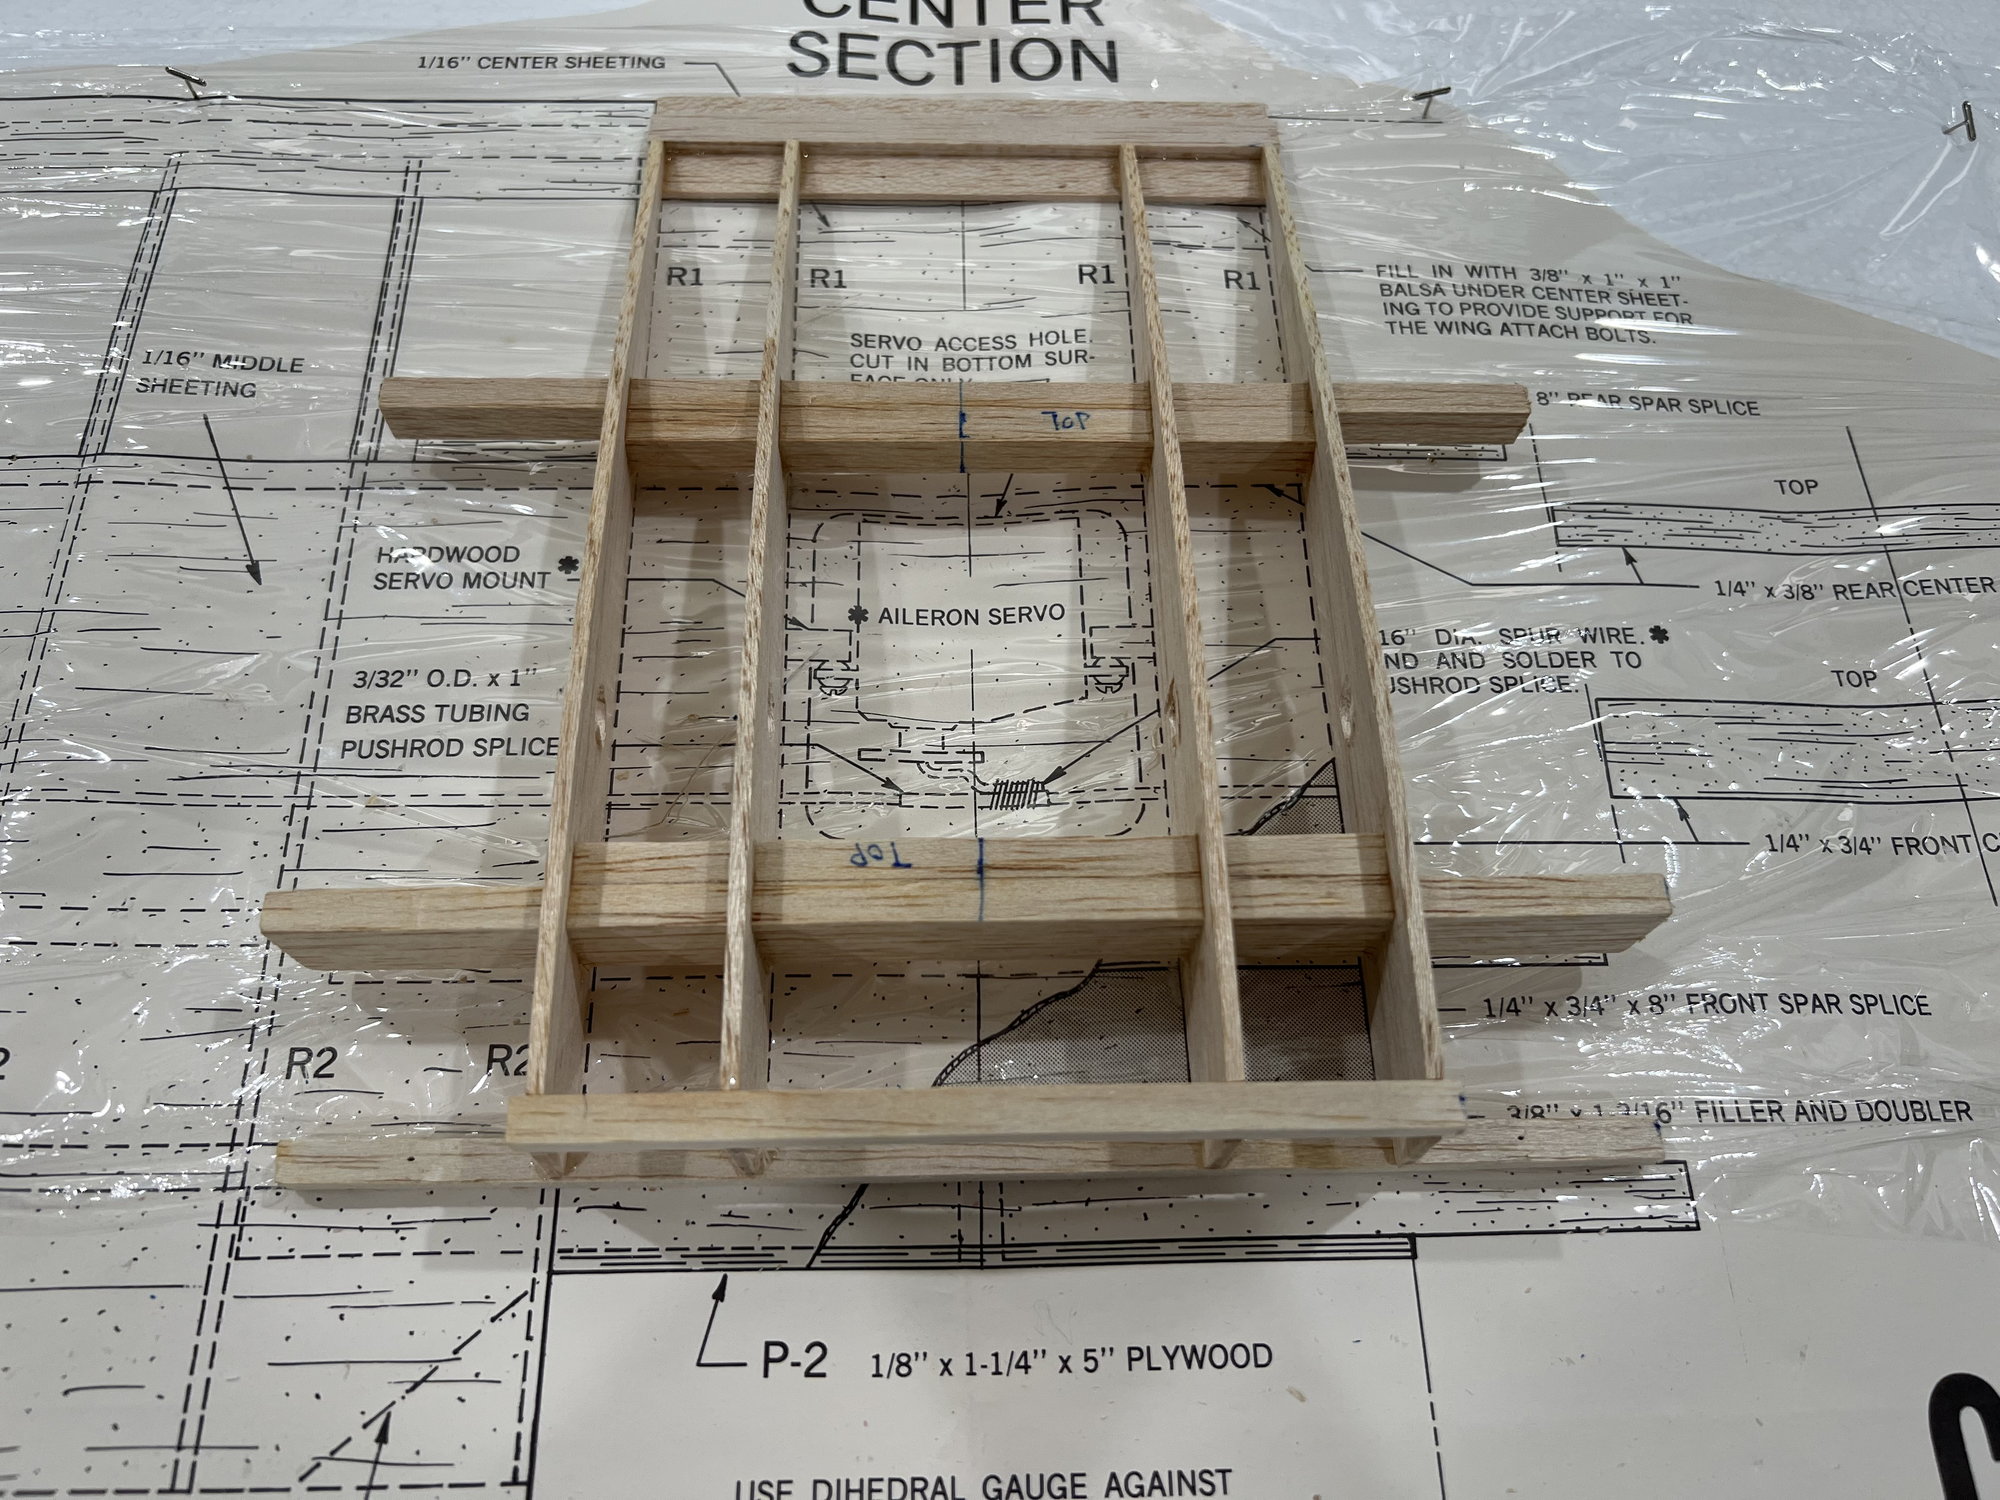
This is a nice choice and ends up being a nice airplane when finished, also your workmanship is excellent. I did one of these probably 40 years ago but still remember it. You will have a weird wire assembly built into the cabin front that holds the wing on. It's sure nice to see one of these being built. What type of power are you using on it? Good job BTW!
06-11-2023, 05:14 AM
#11
This is a nice choice and ends up being a nice airplane when finished, also your workmanship is excellent. I did one of these probably 40 years ago but still remember it. You will have a weird wire assembly built into the cabin front that holds the wing on. It's sure nice to see one of these being built. What type of power are you using on it? Good job BTW!
 06-11-2023, 08:36 AM
#12
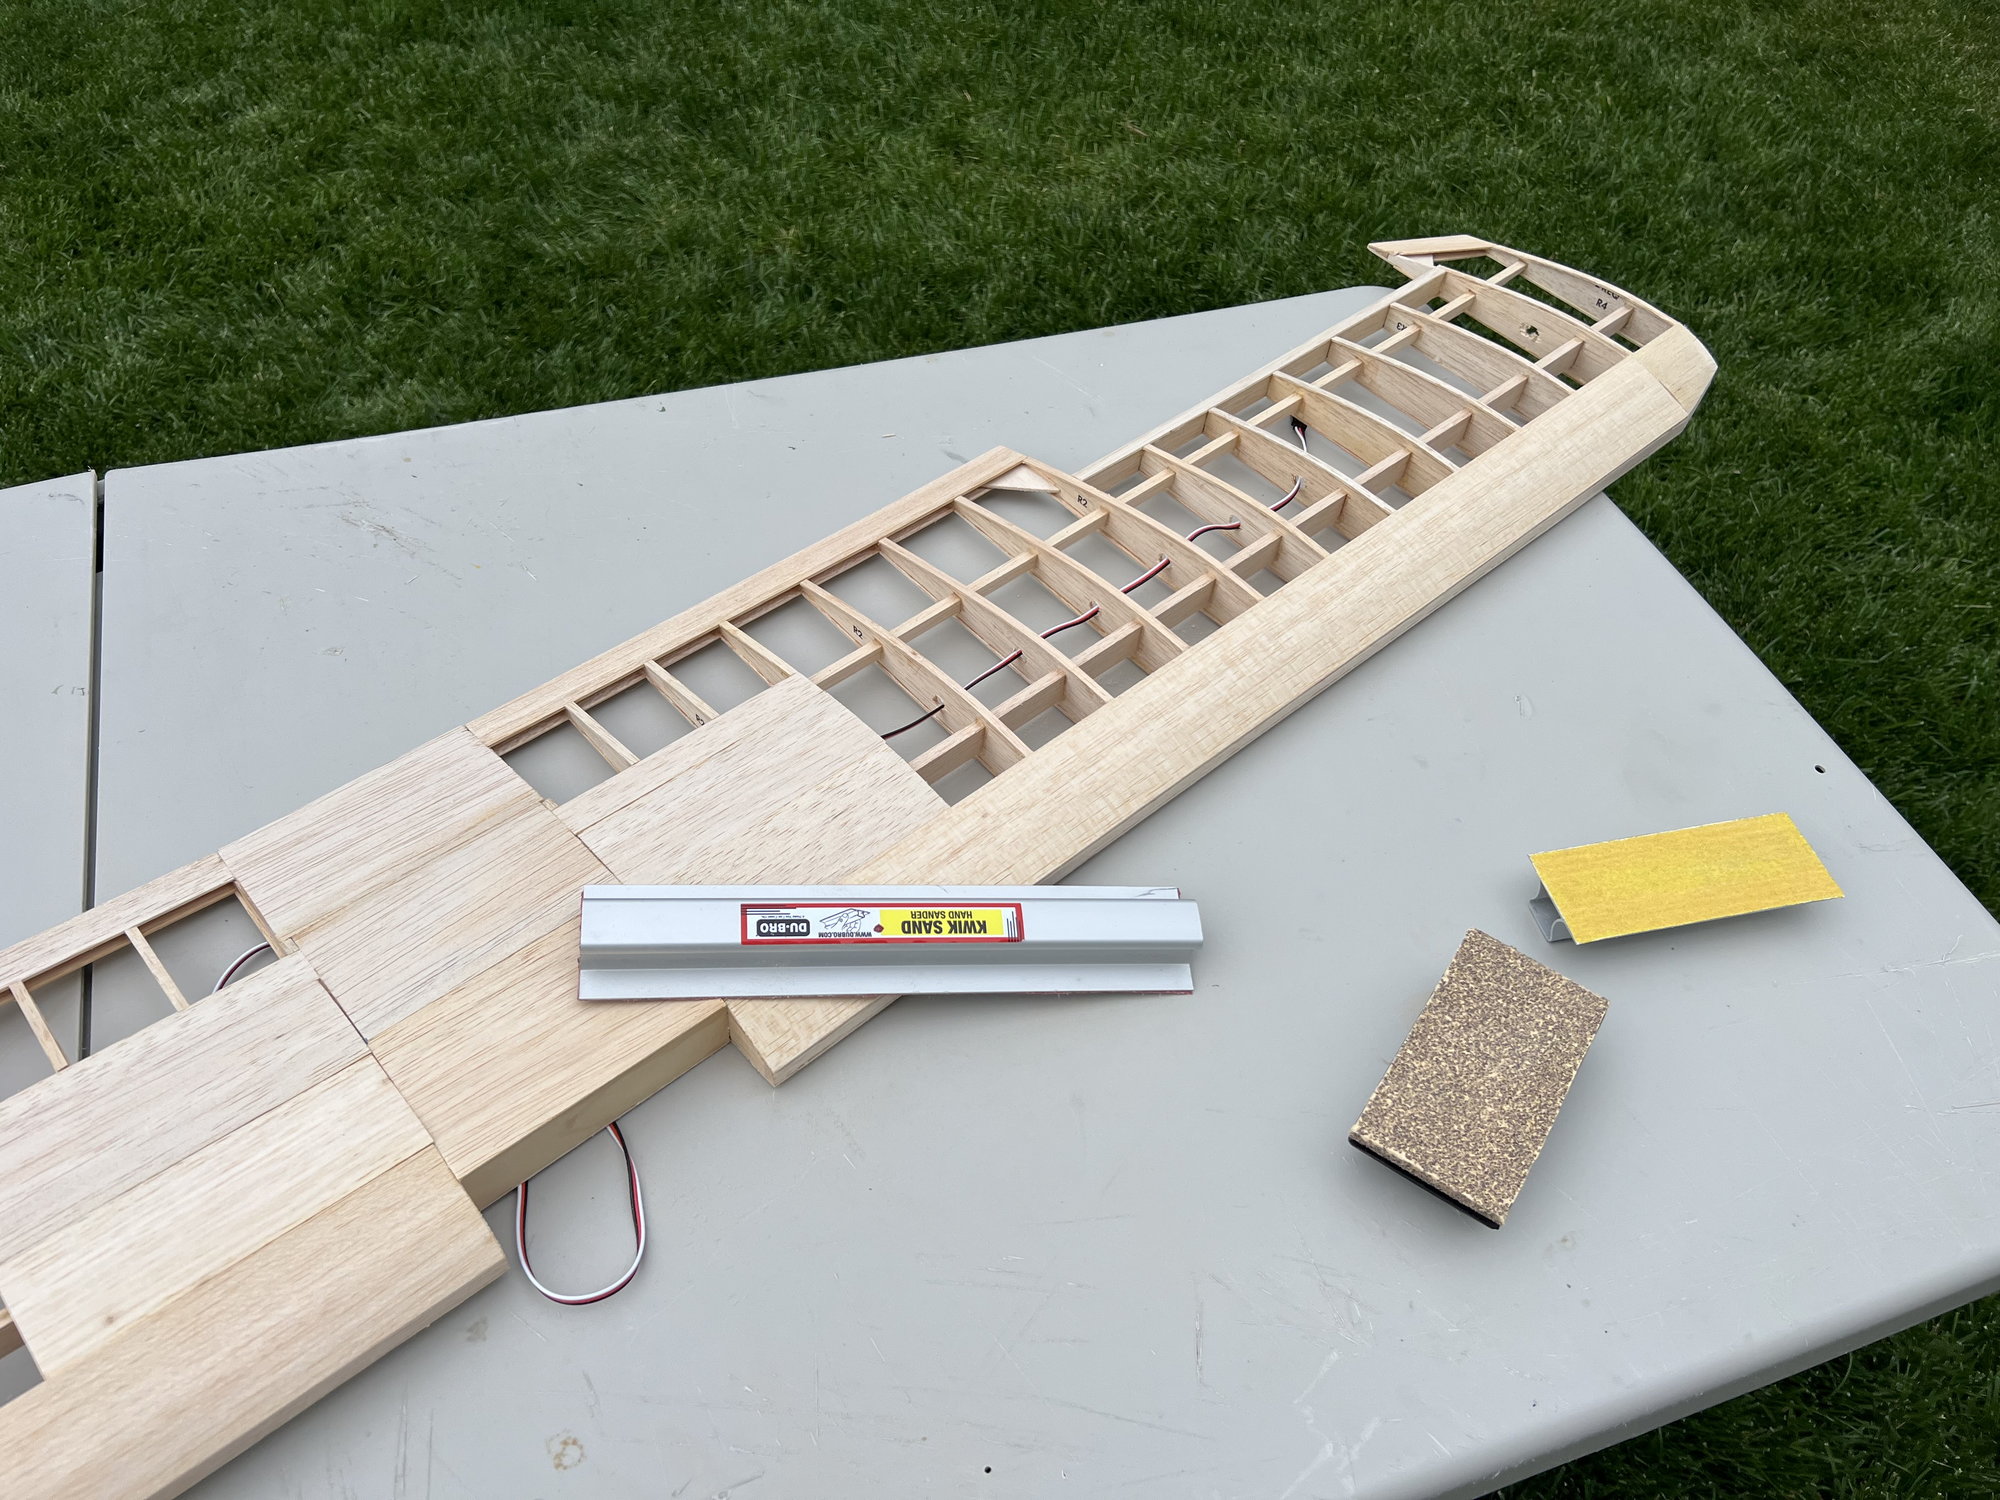
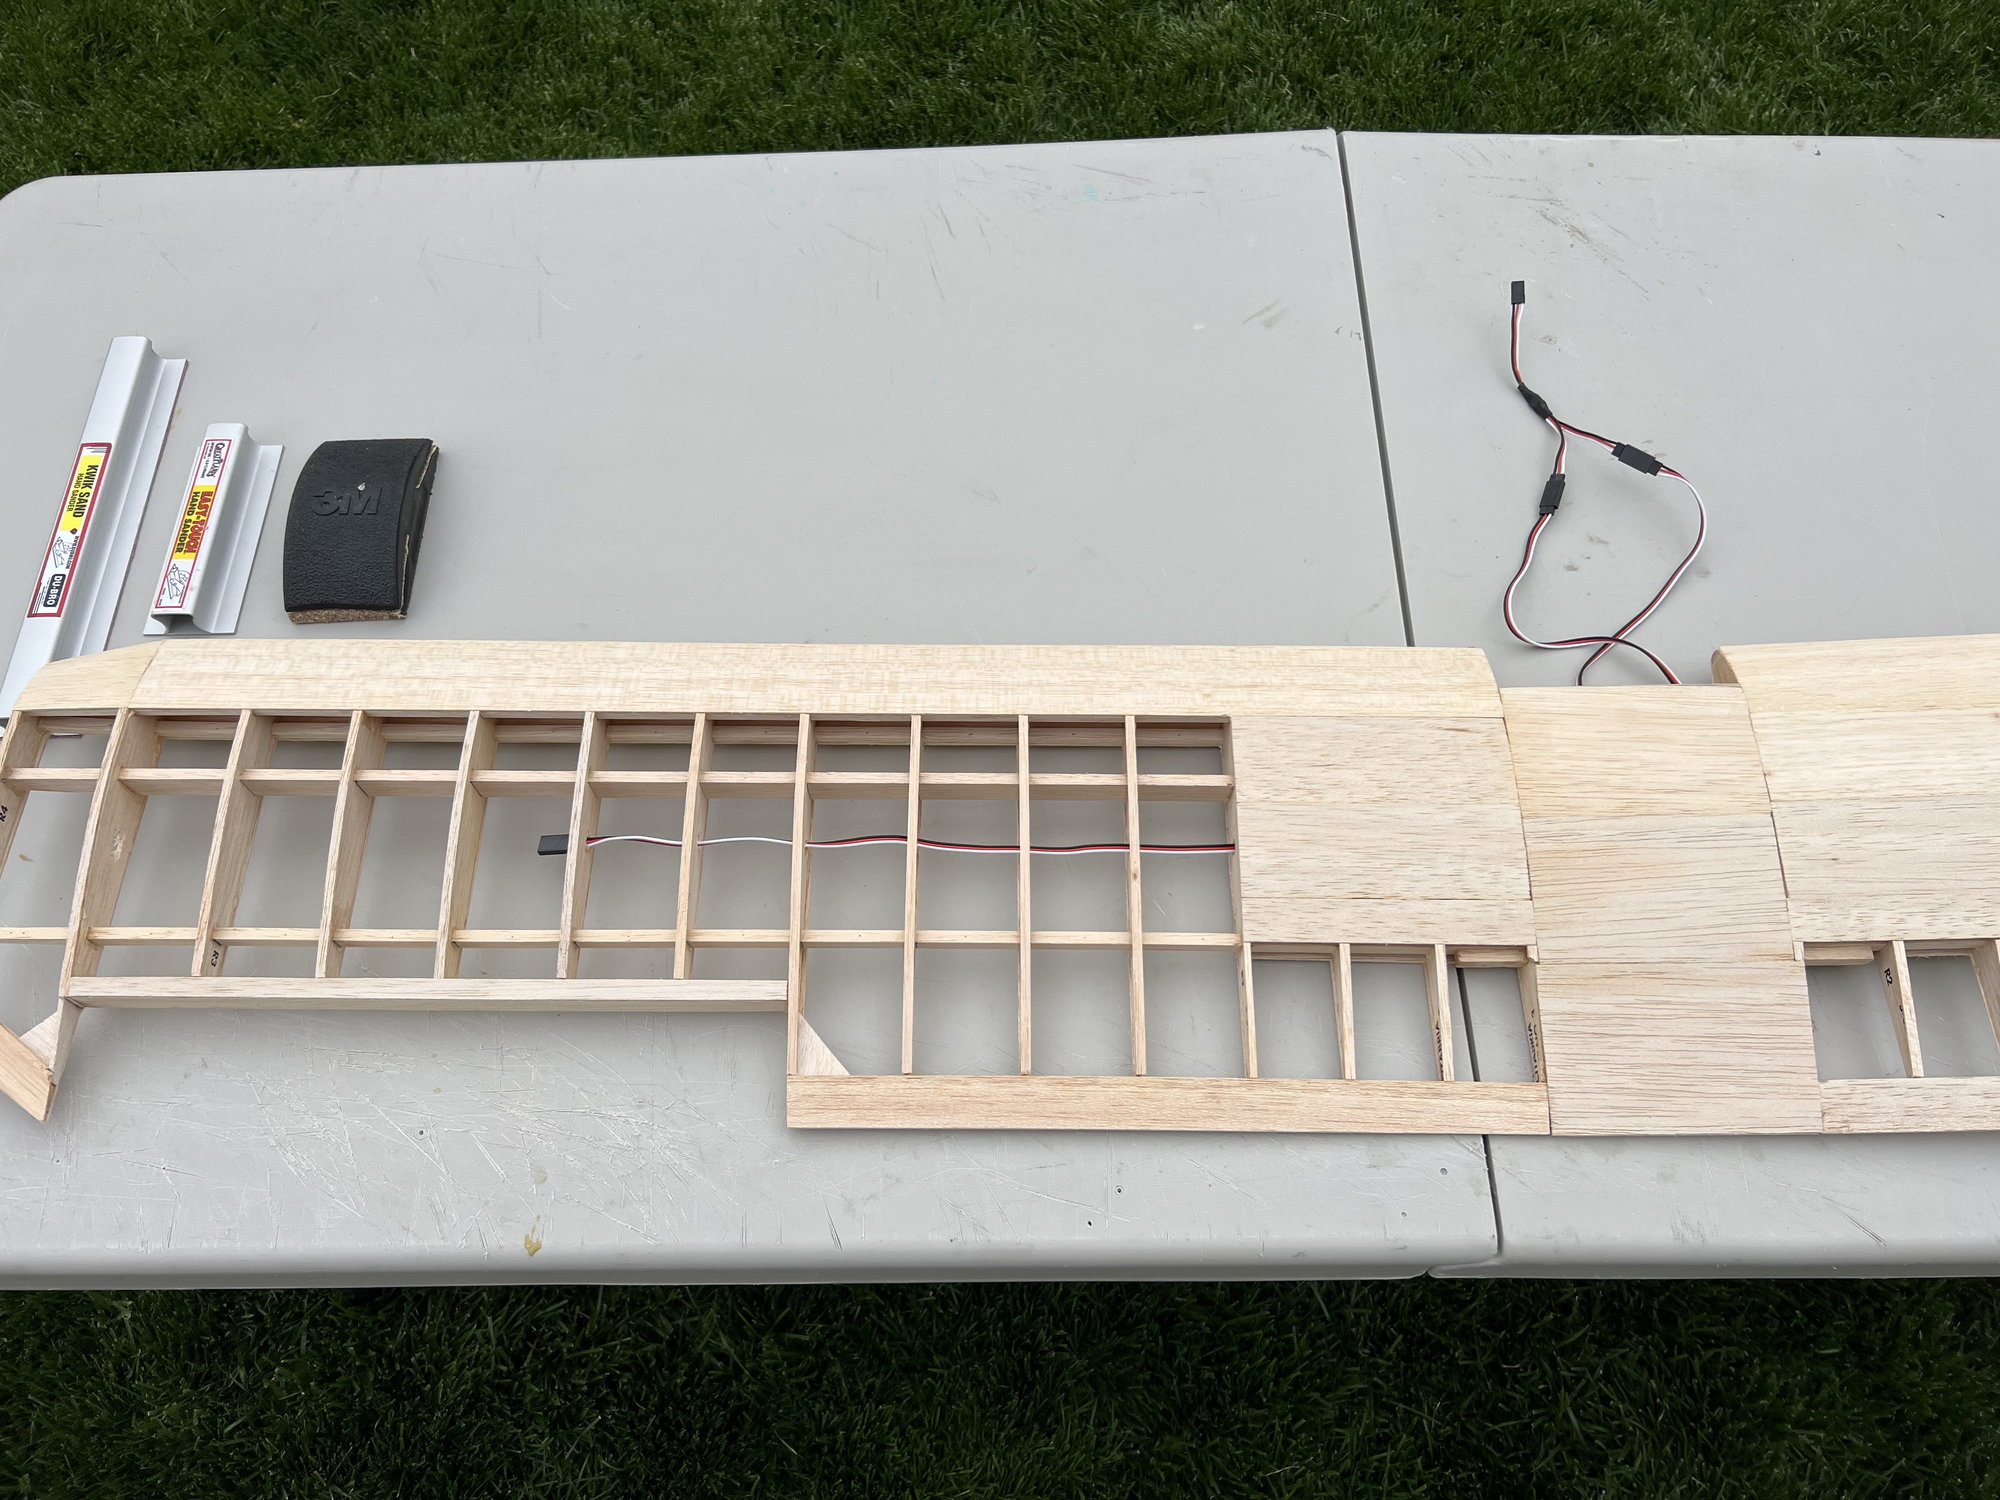
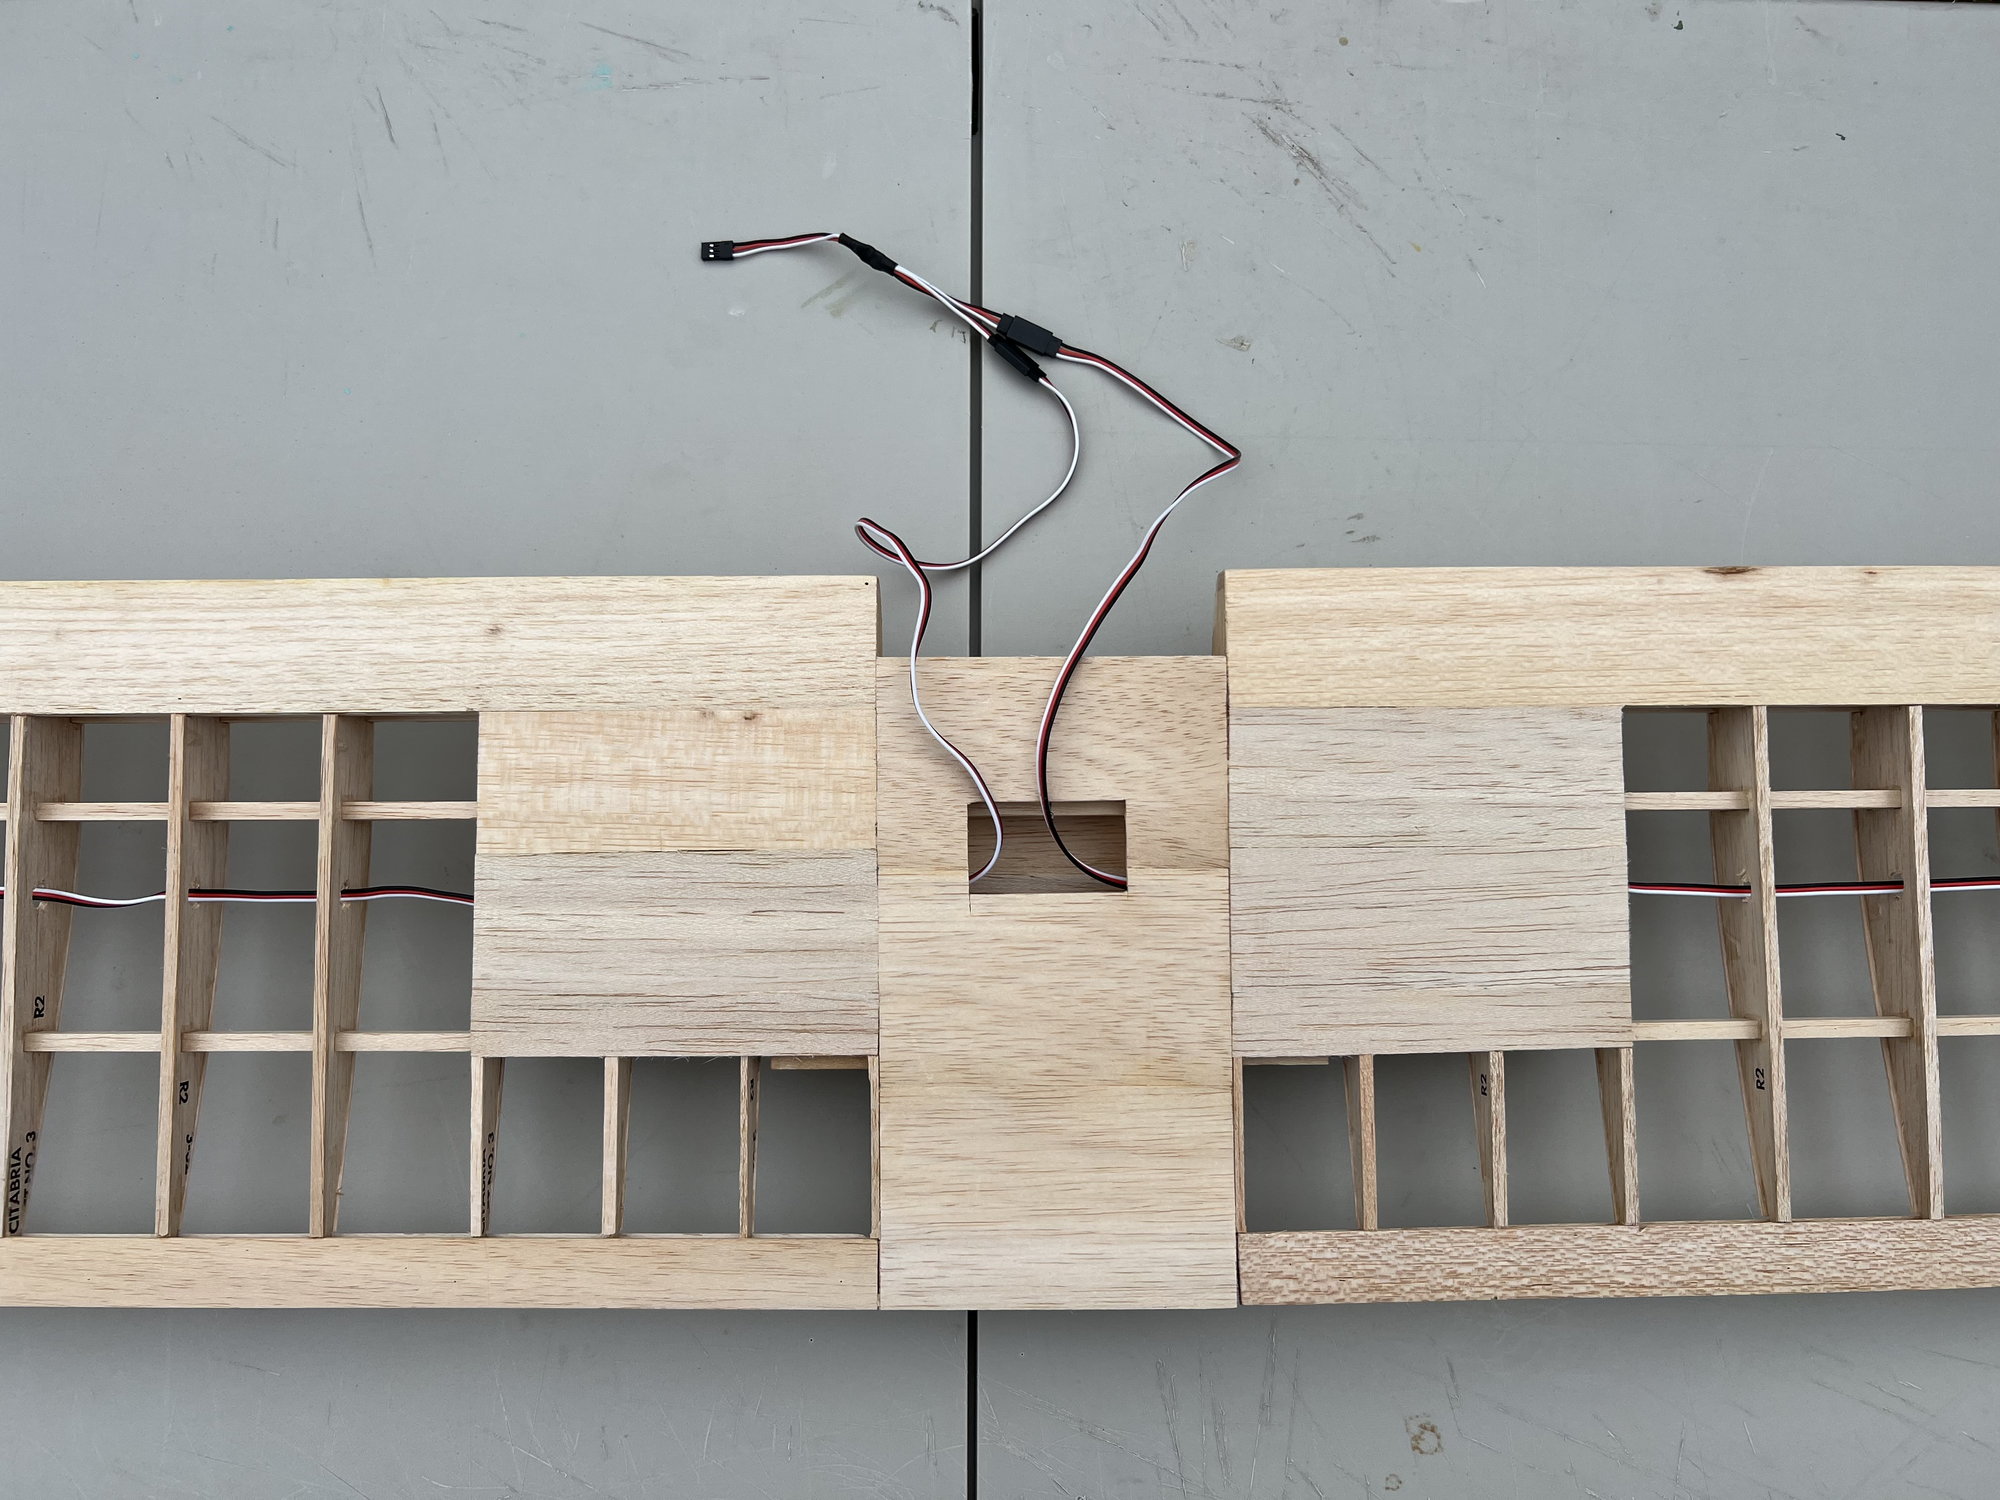
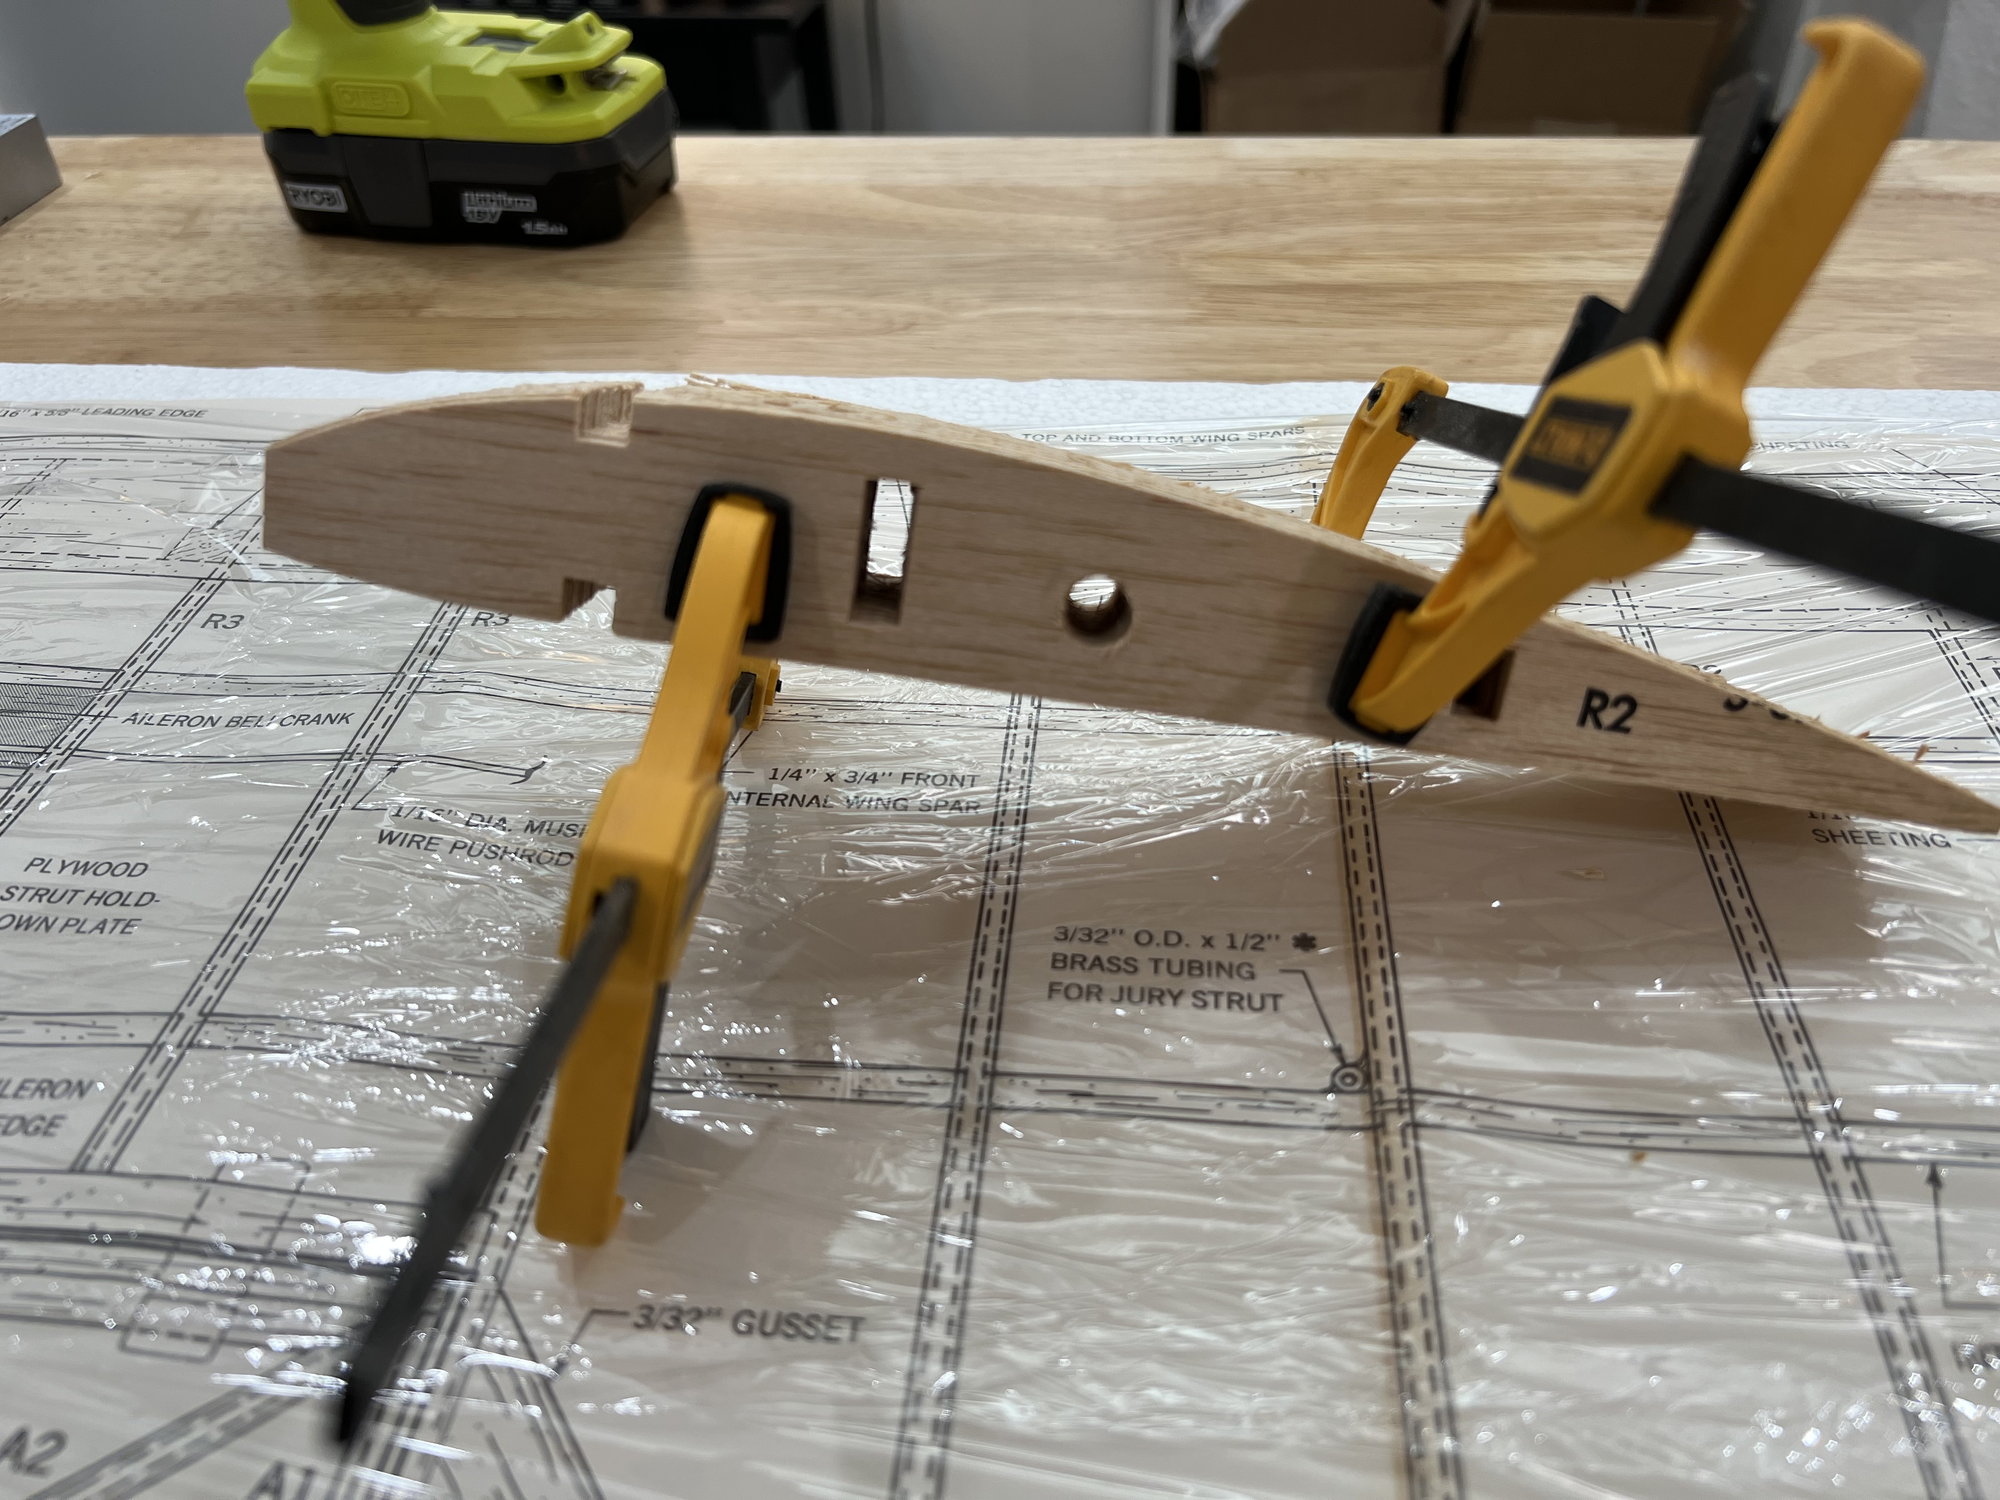
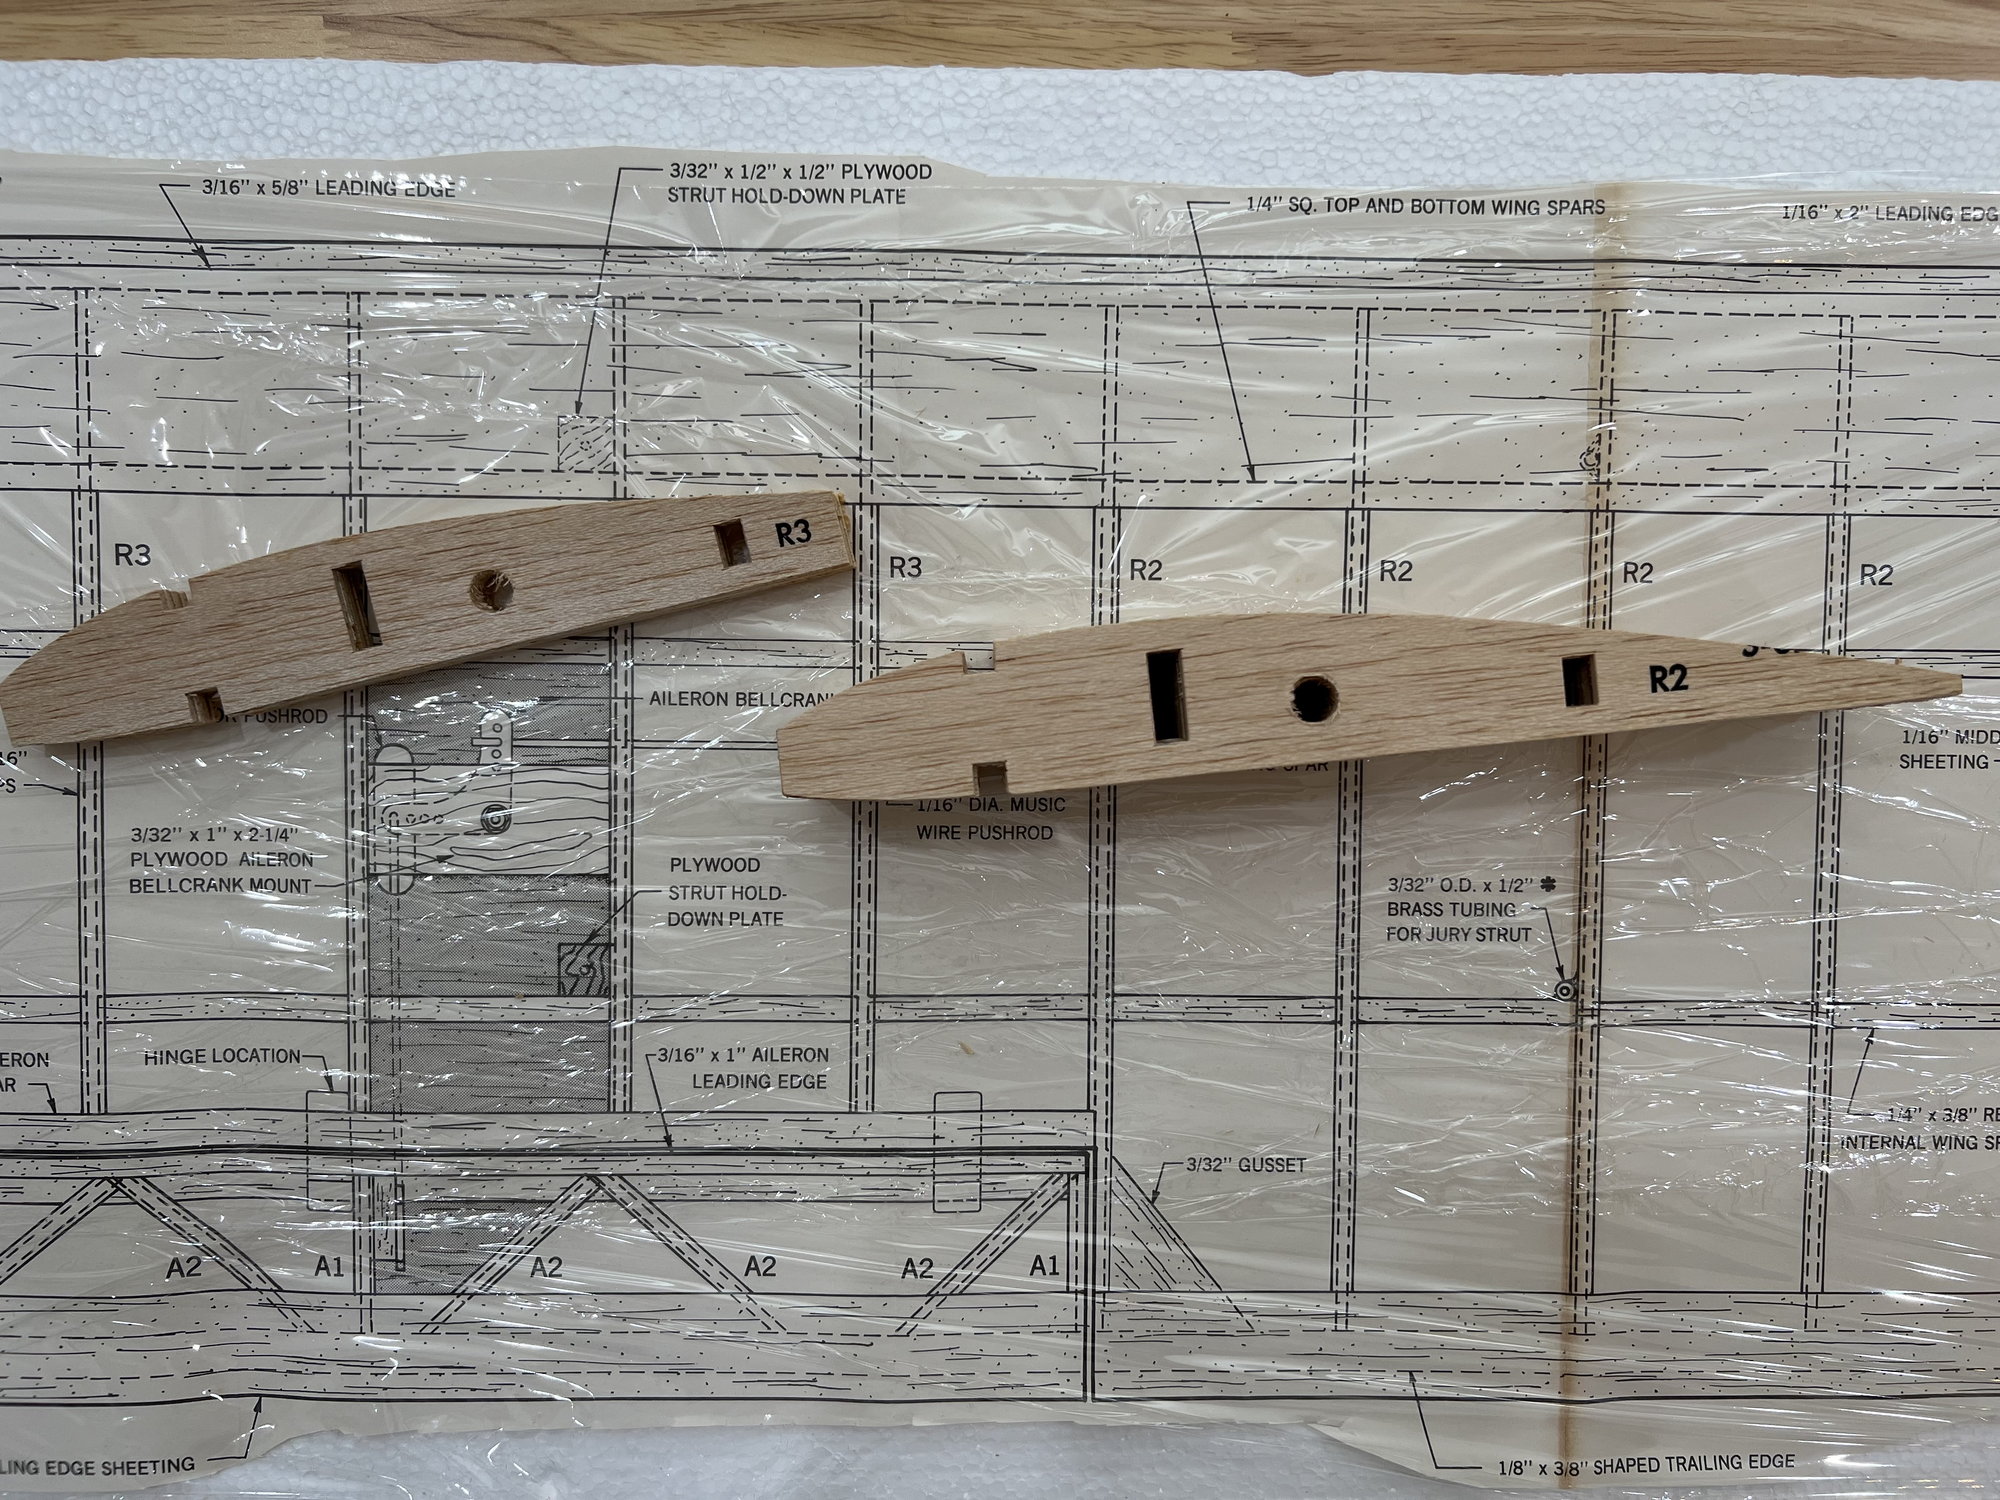
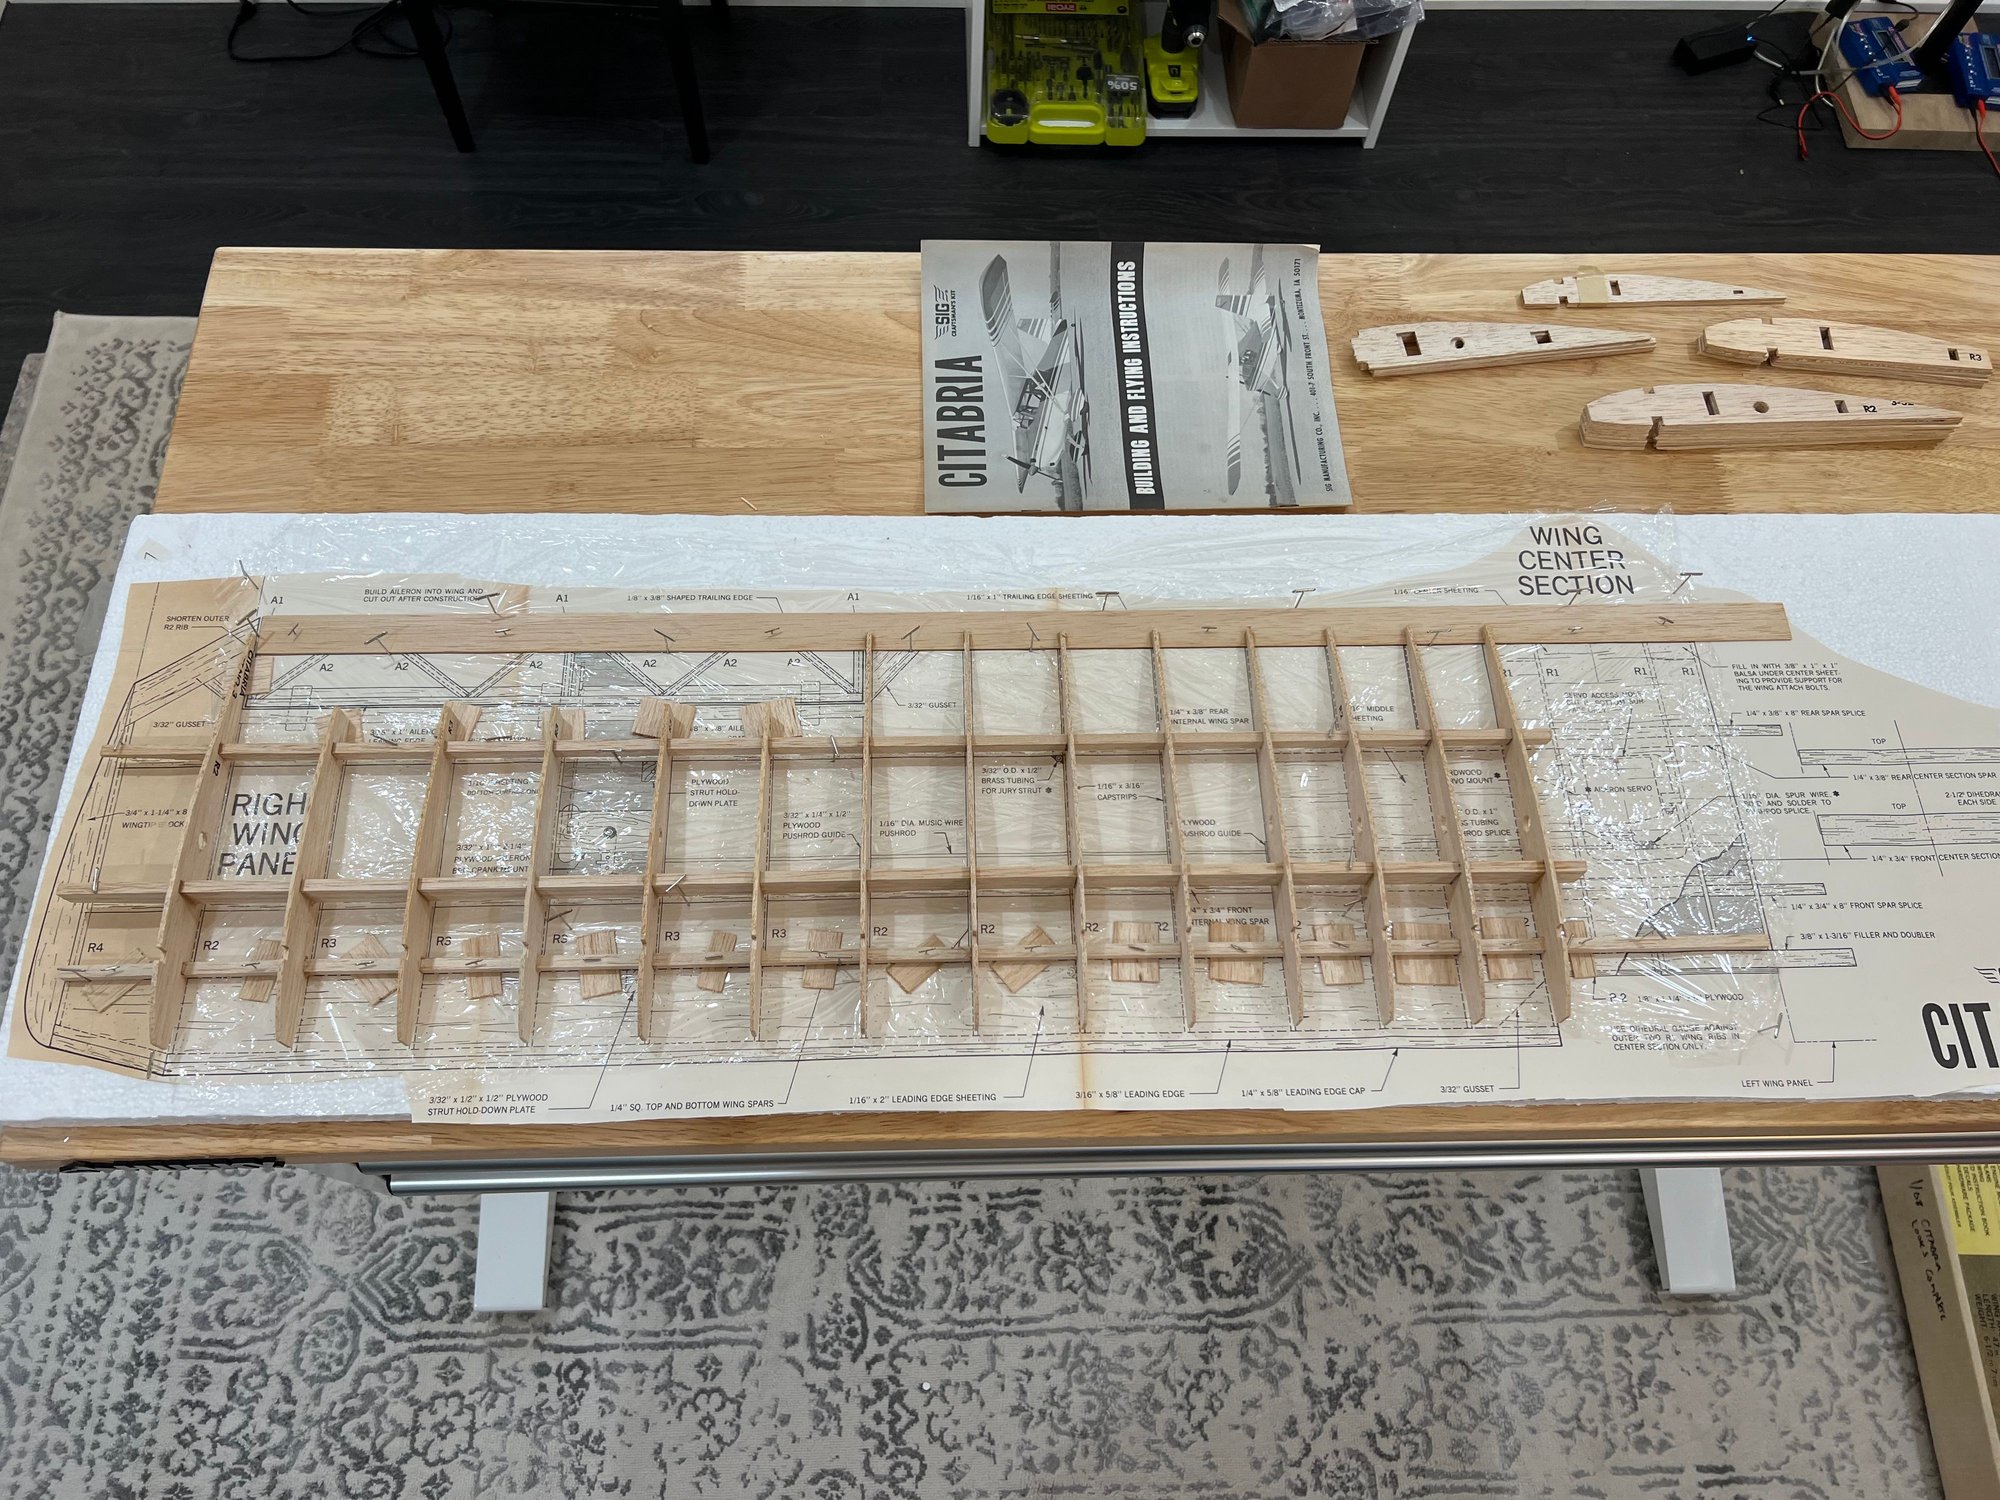
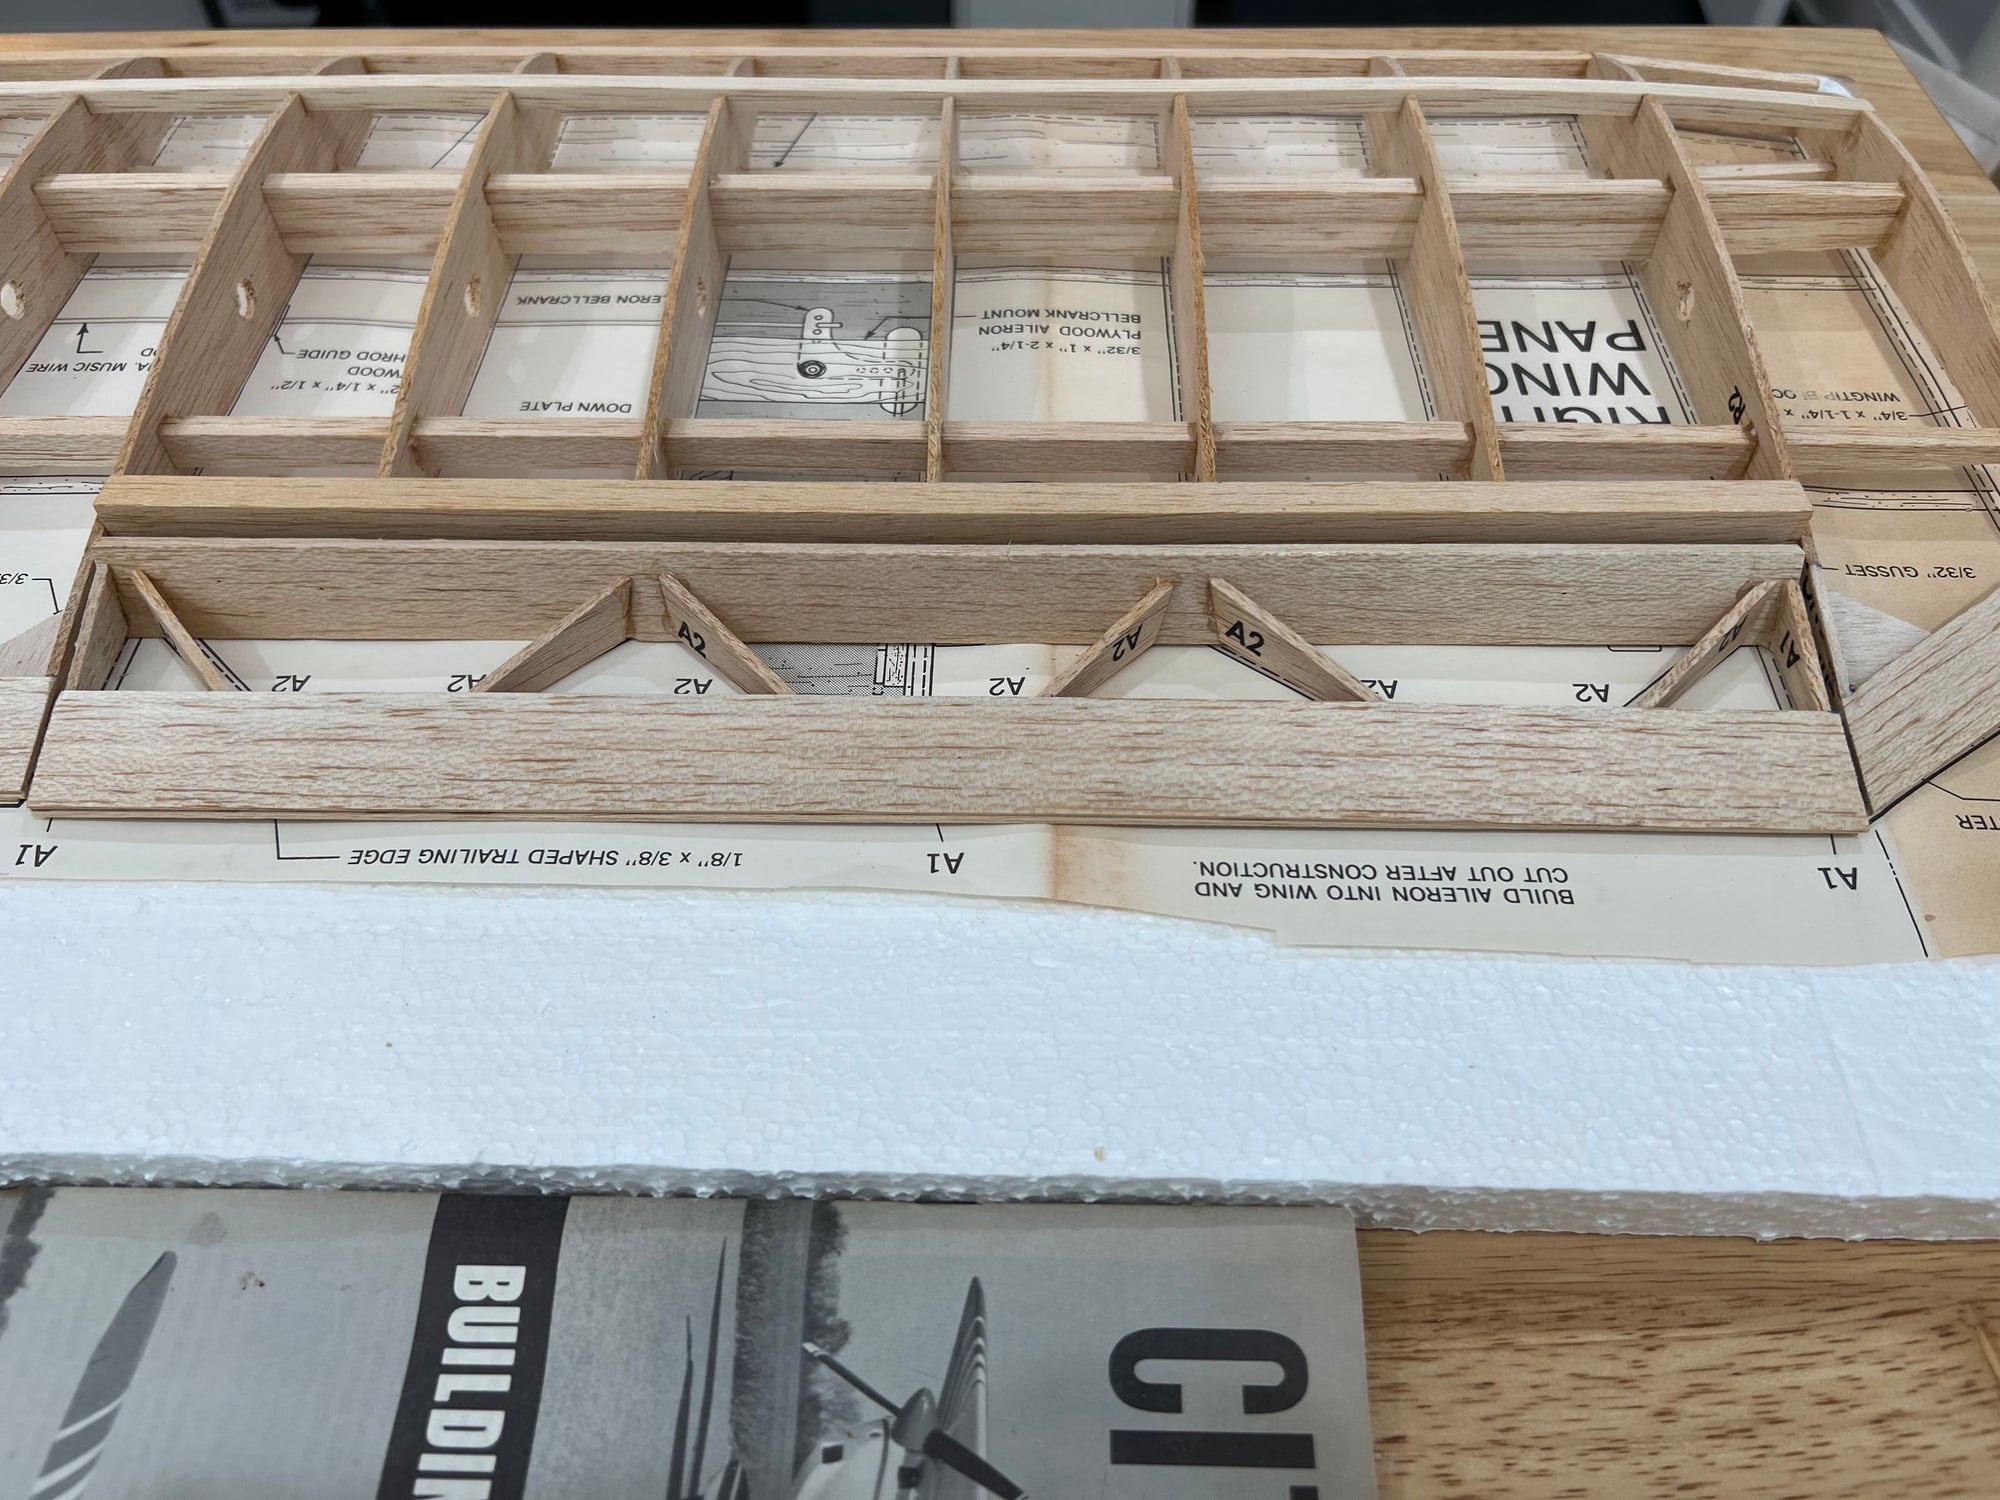
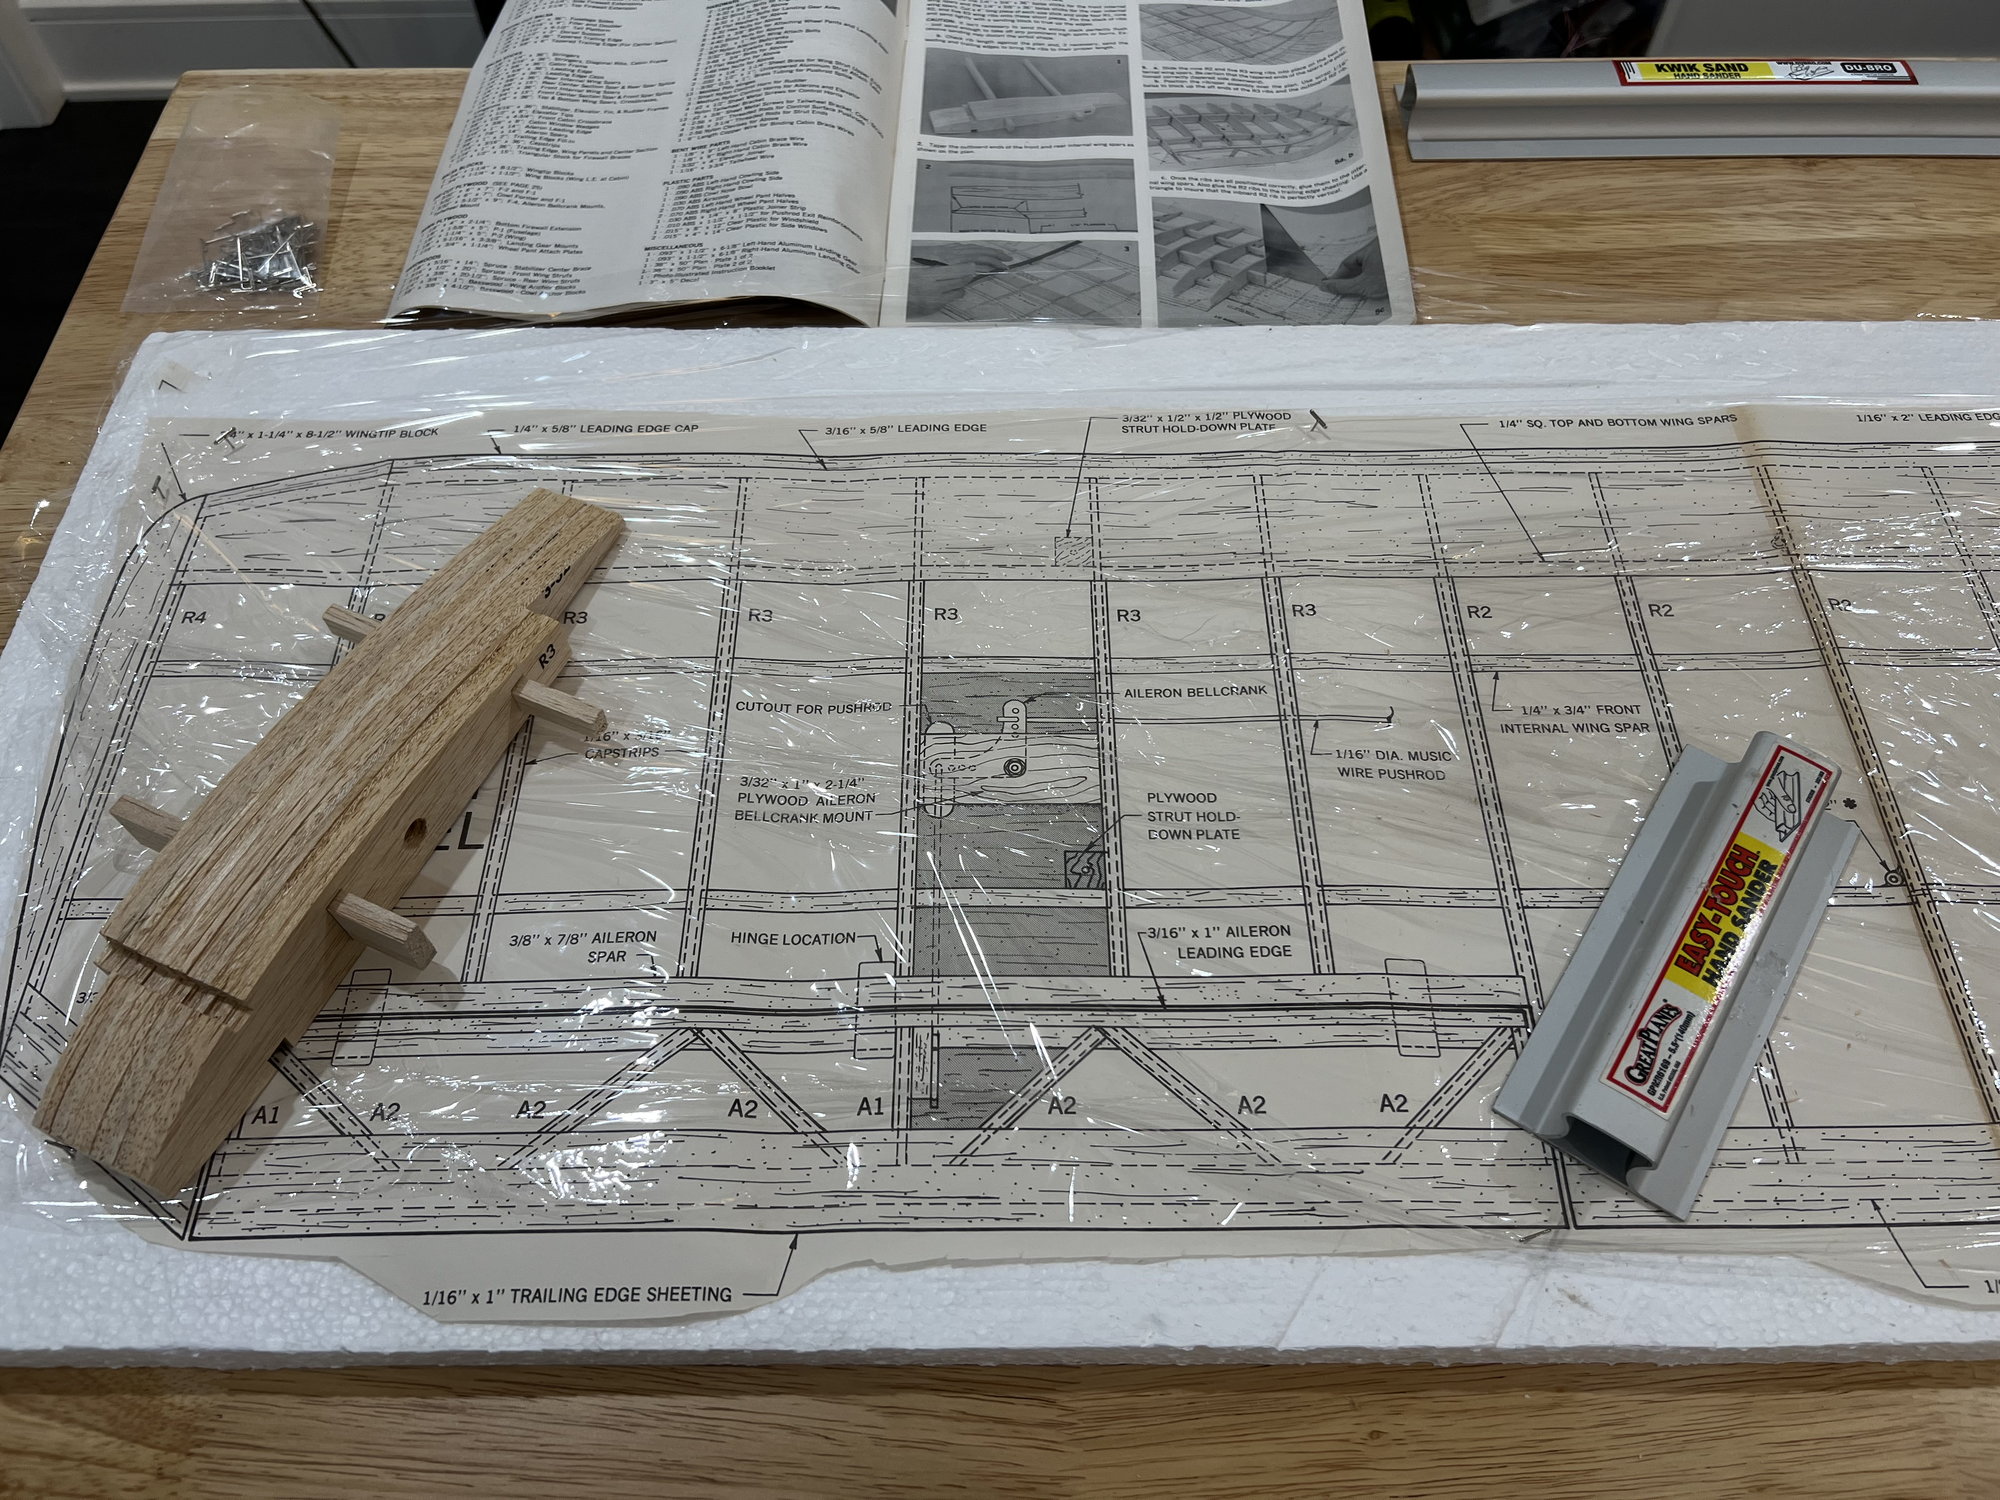
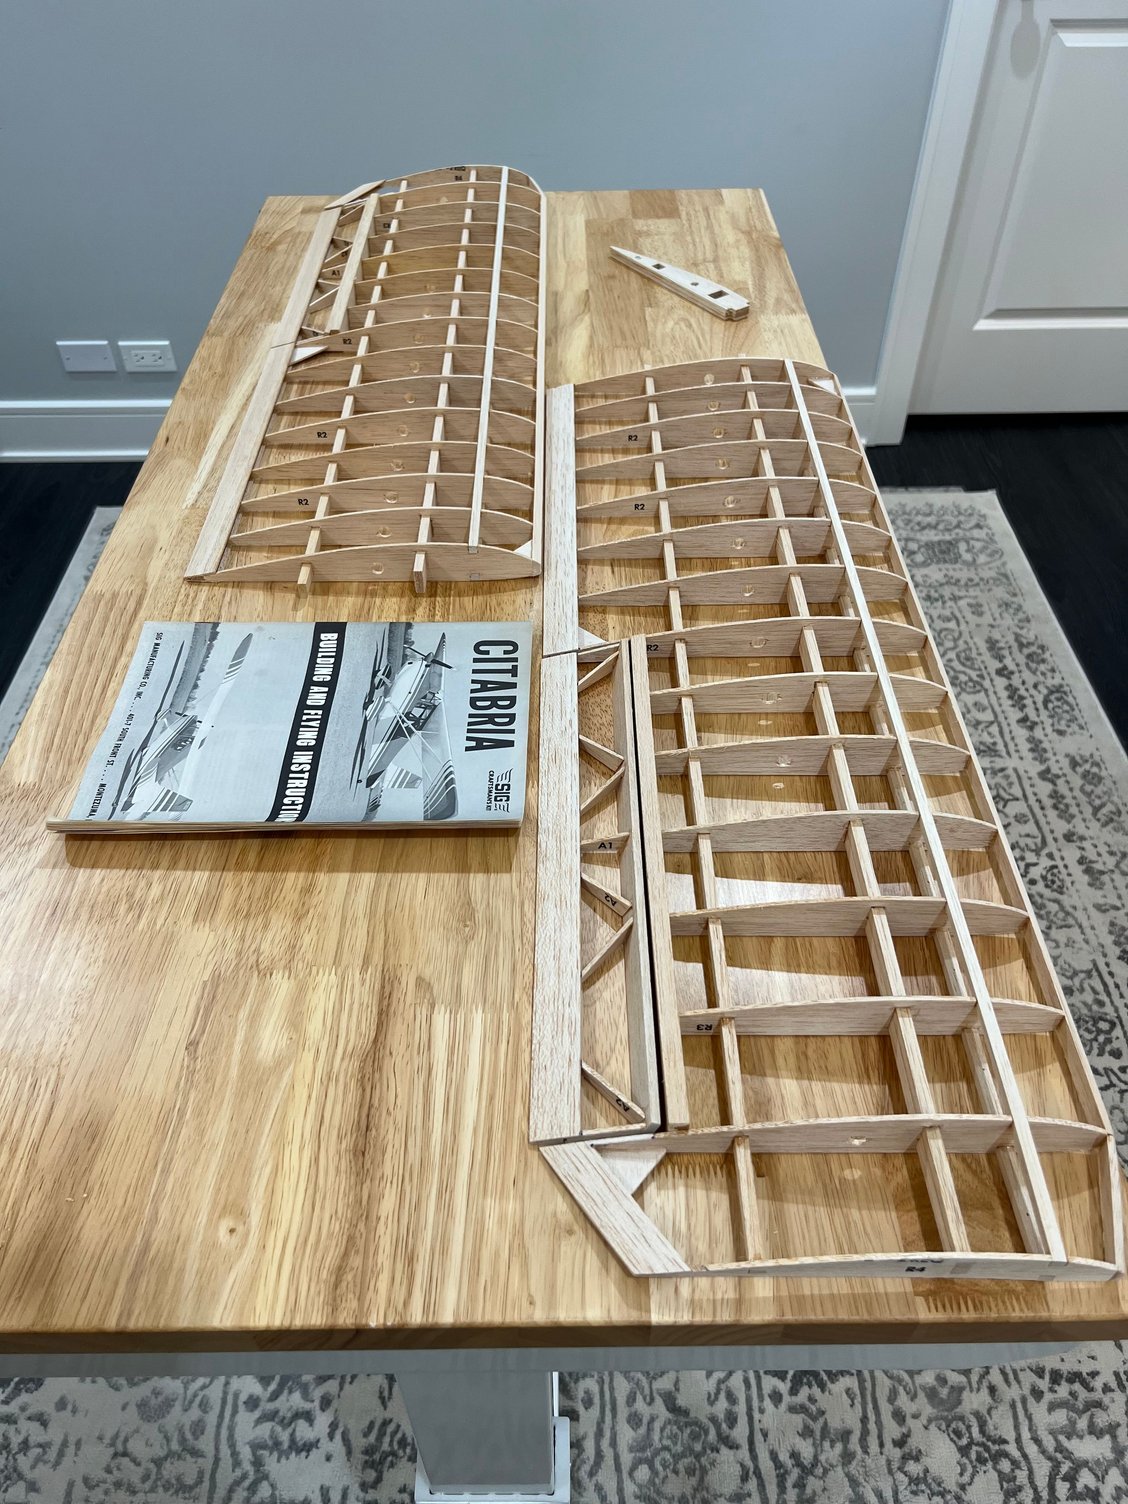
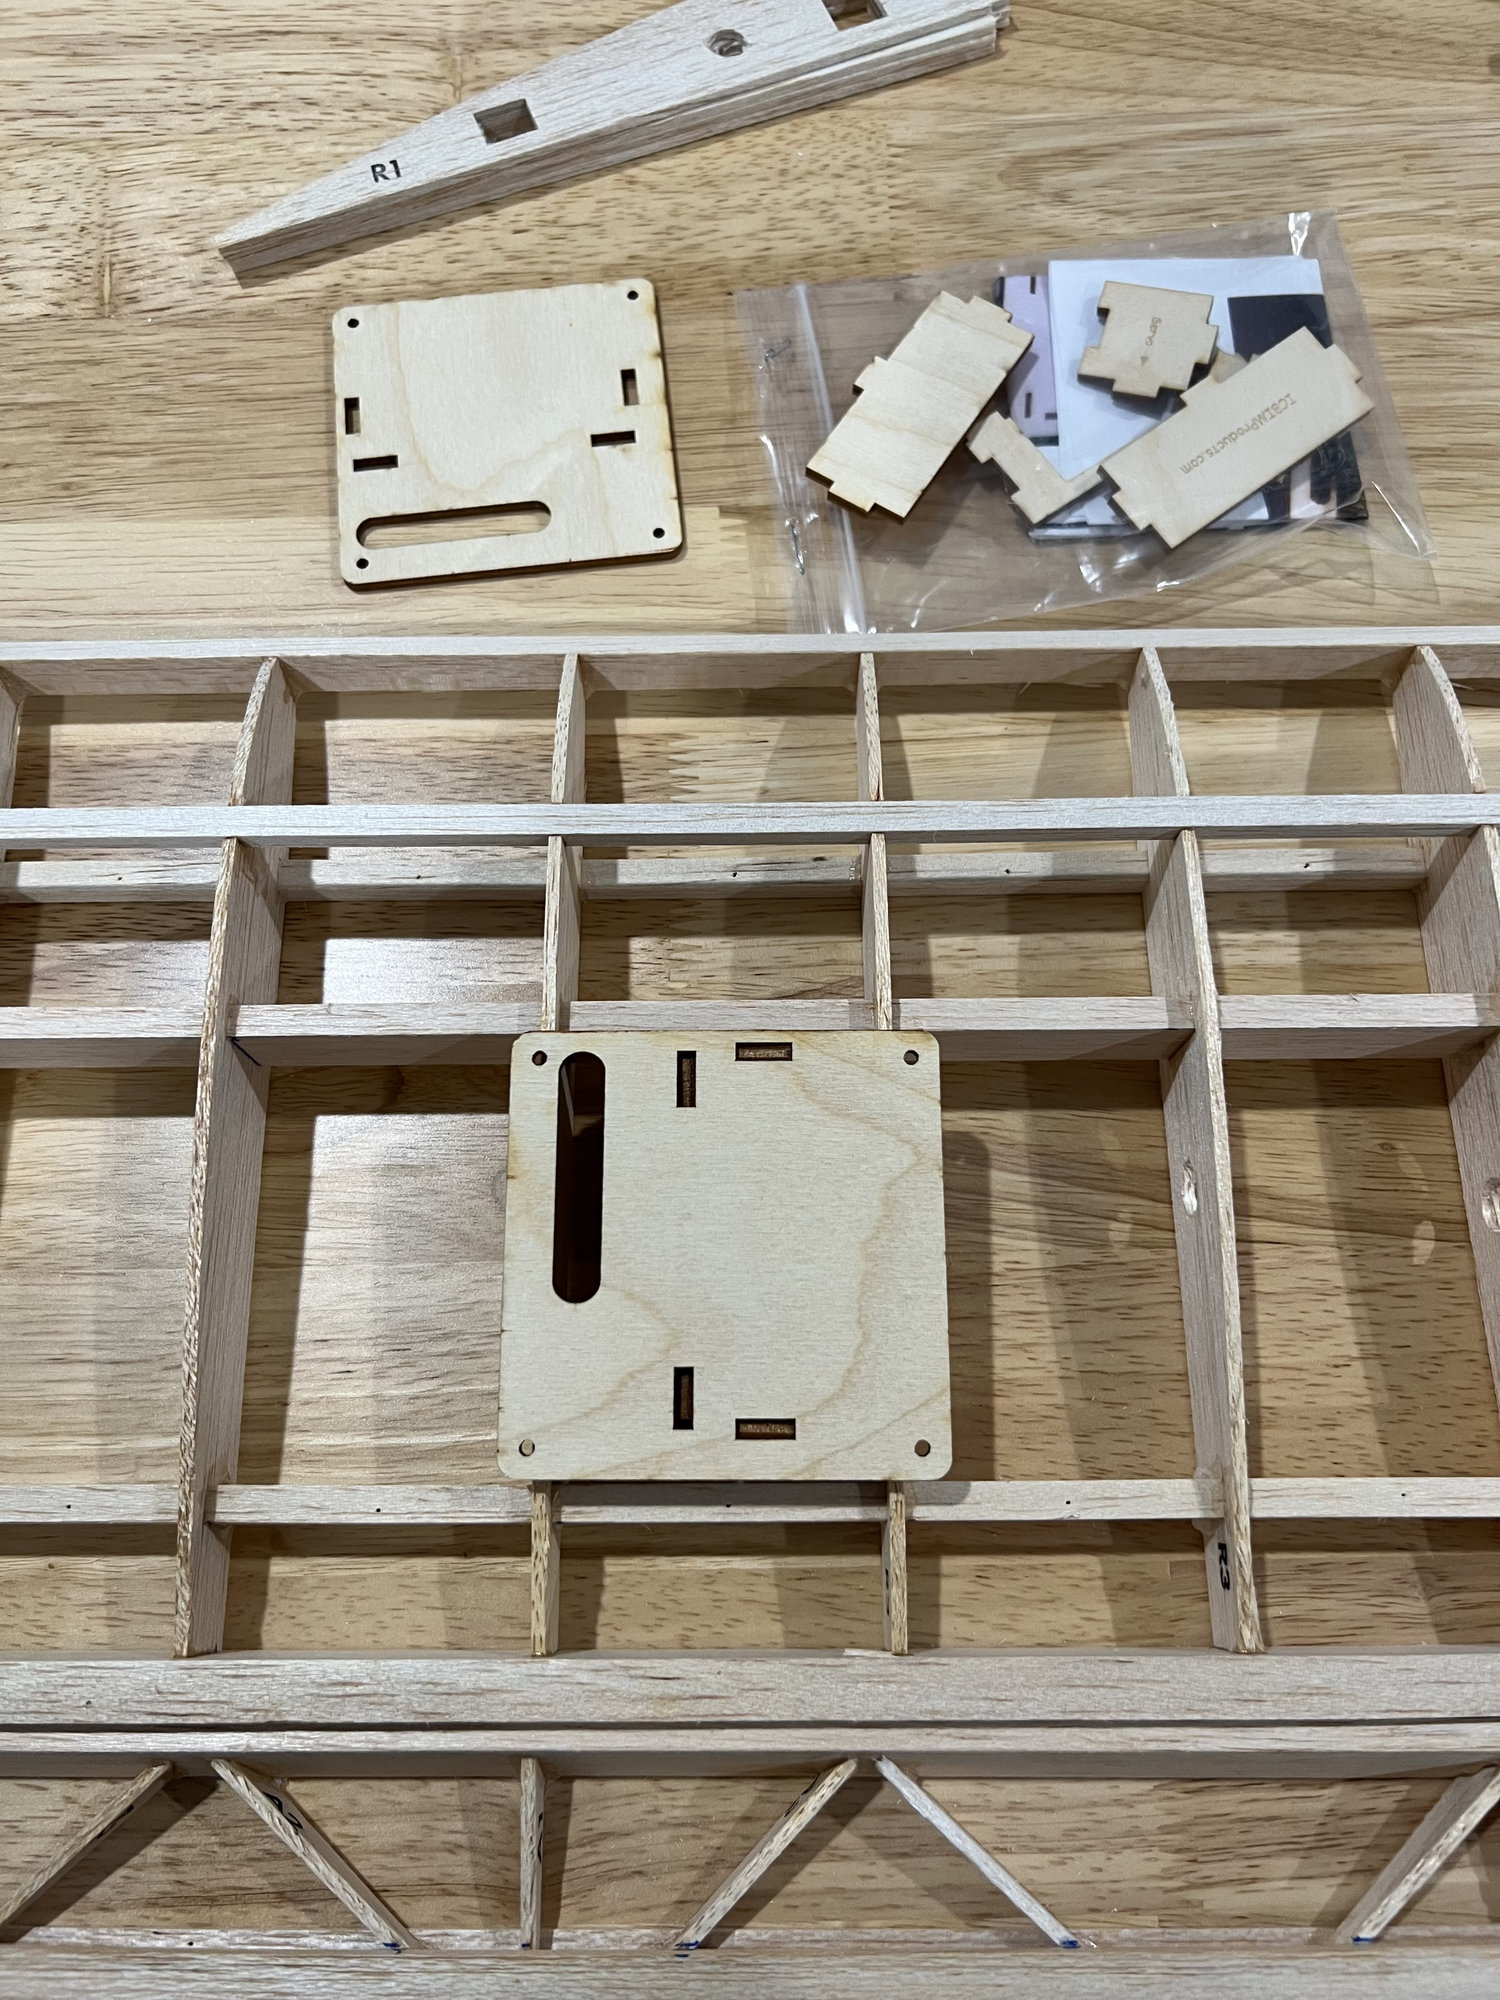
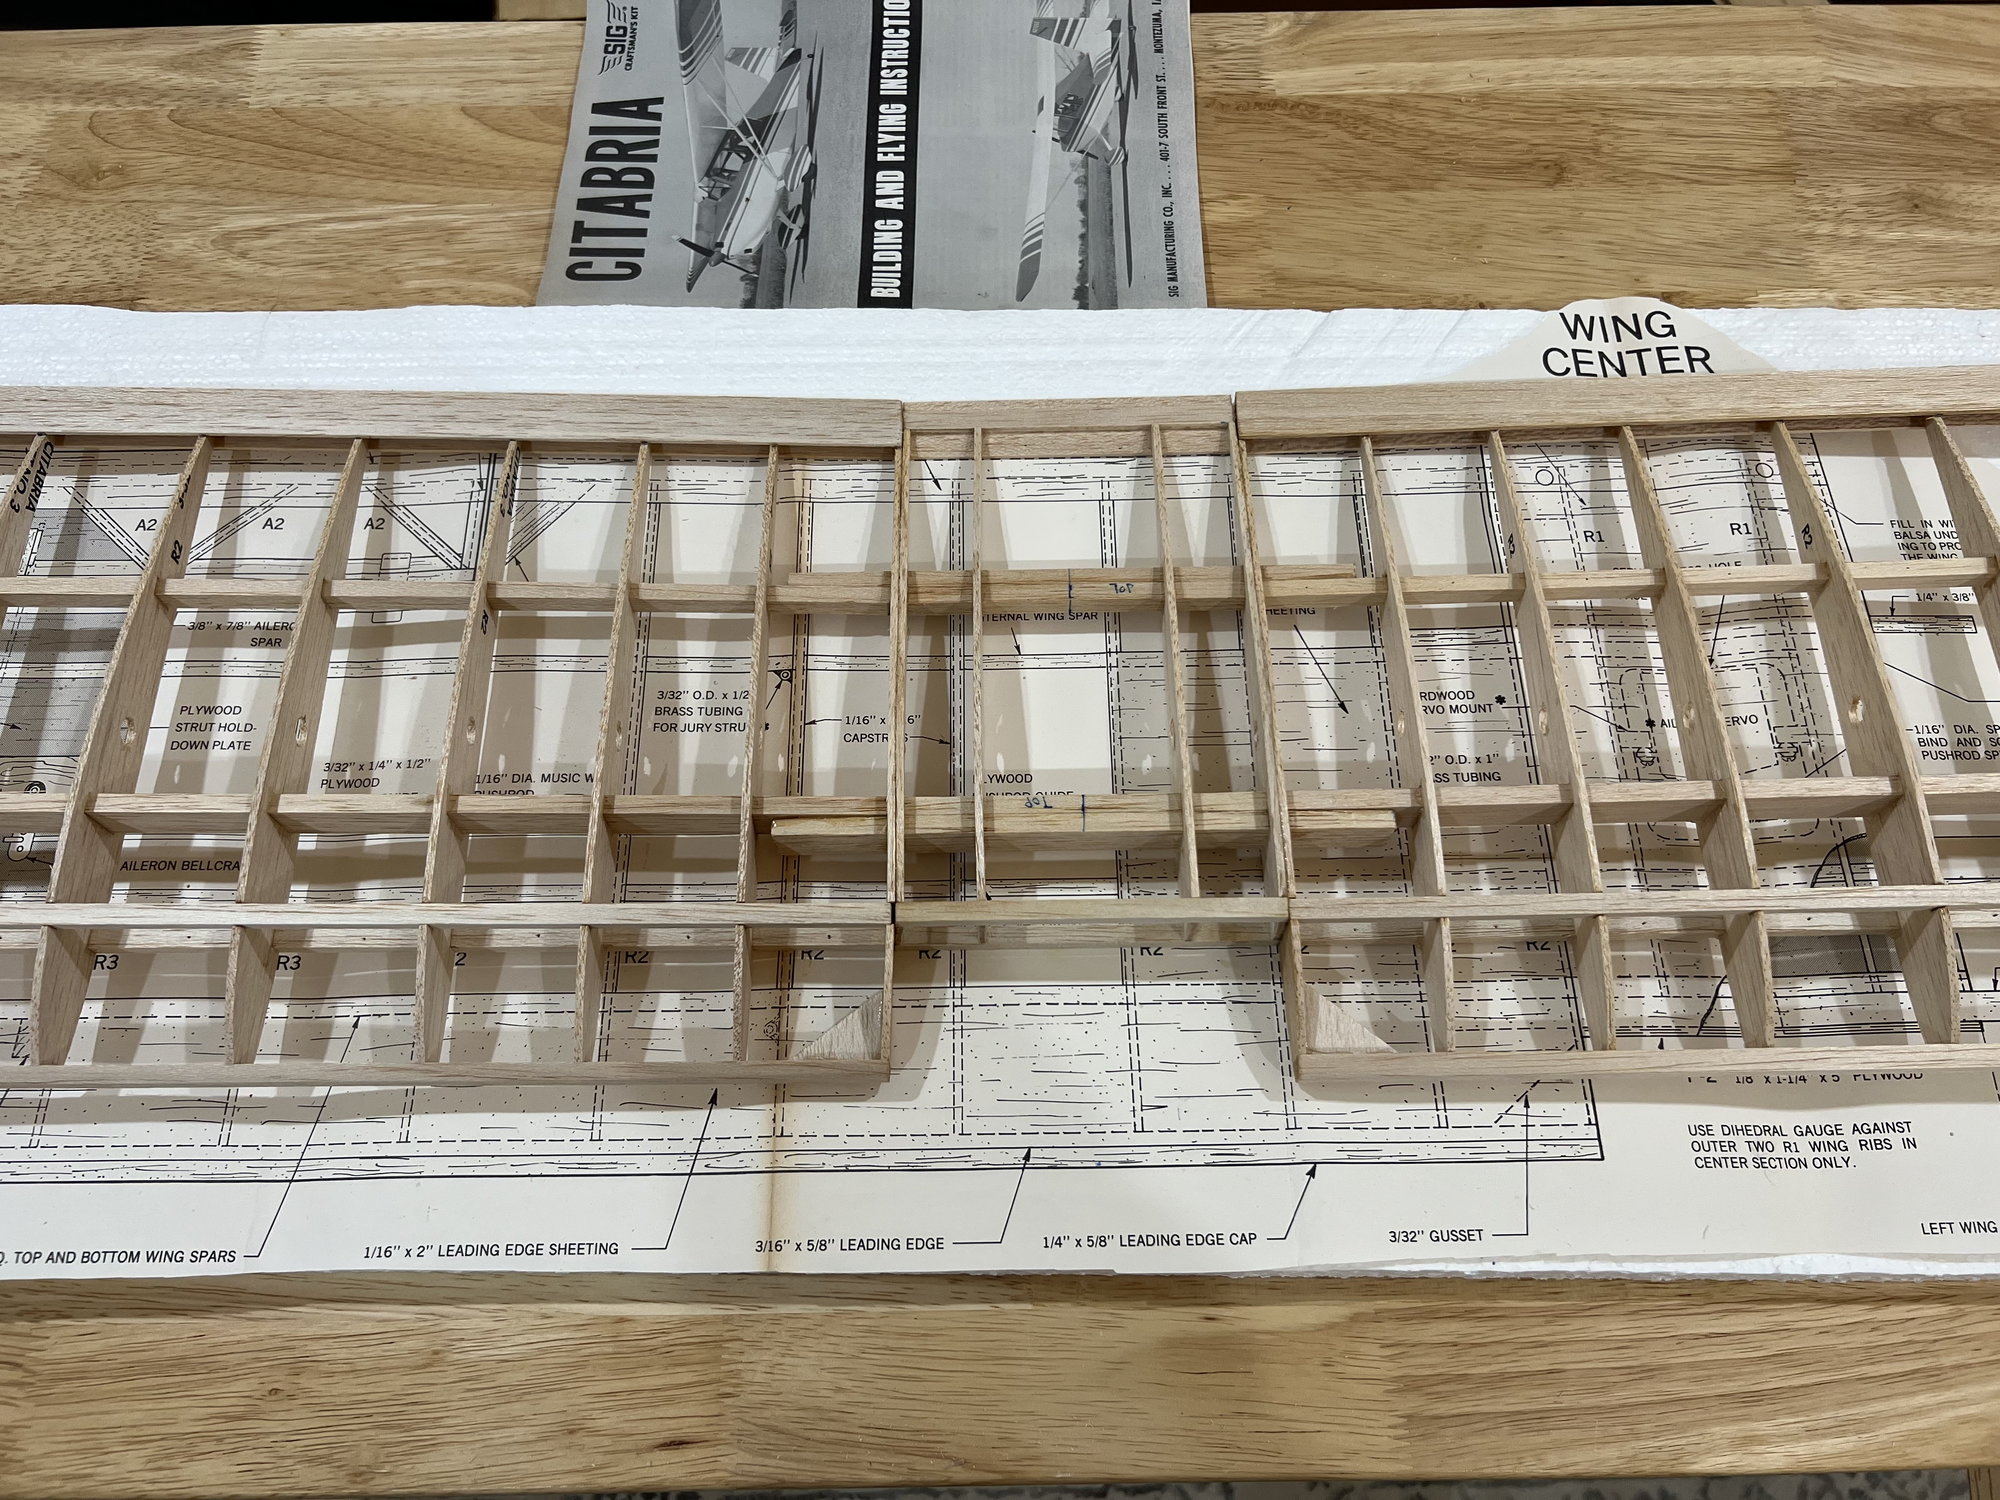
On to the left wing. I won't bore you with that since its the same construction as the right wing which I already posted.
opps! Always inspect your wood, folks! This would of not been good. Good thing I have spare balsa laying around. That seems to be the only piece of wood that came from the kit like that.
opps! Always inspect your wood, folks! This would of not been good. Good thing I have spare balsa laying around. That seems to be the only piece of wood that came from the kit like that.
 06-12-2023, 04:52 AM
#15
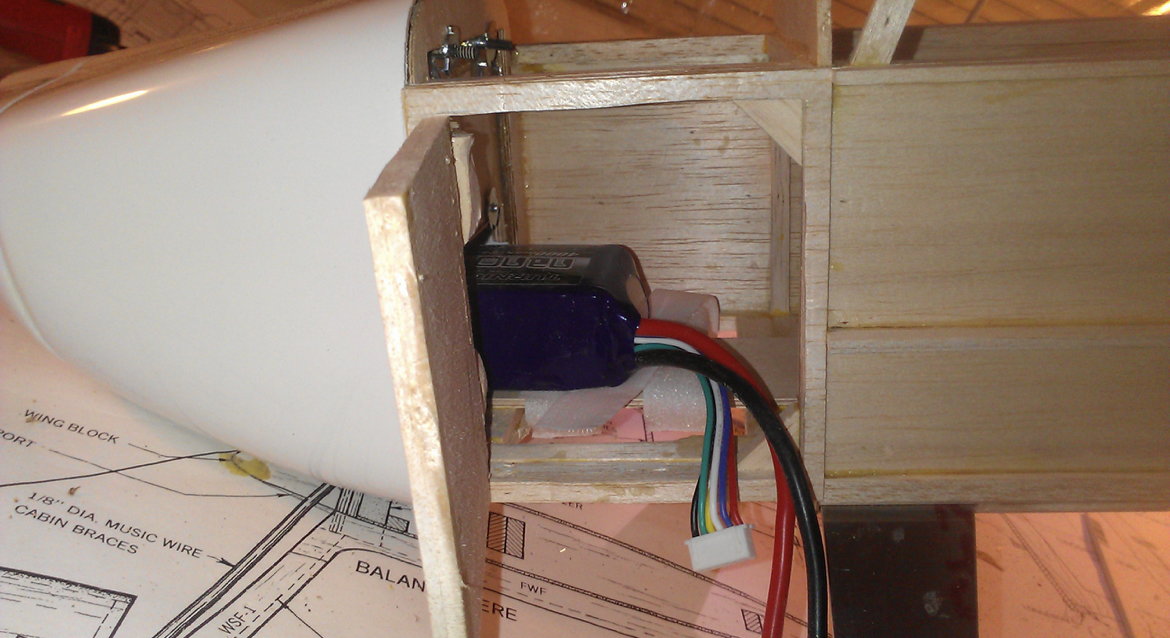
Also, I made a tray that secures the pack to the bottom of the fuse
Those spars must have come from the same batch as mine,, LOL
good luck
06-12-2023, 07:12 AM
#16
No hatch, Couldn't figure a way that would look good, It's kind of a pain to remove the pack, but I can charge by removing the prop and cowl,, not ideal,, but easier than removing wing/struts etc.
Also, I made a tray that secures the pack to the bottom of the fuse
Those spars must have come from the same batch as mine,, LOL
good luck
Also, I made a tray that secures the pack to the bottom of the fuse
Those spars must have come from the same batch as mine,, LOL
good luck
I found this on another forum and might incorporate the battery hatch idea:
 06-16-2023, 04:09 AM
#19
I added a few pics to my RCG blog page that show my battery install, I don't want to dump pics on your build thread,,, if interested,, https://www.rcgroups.com/forums/show...g#post27938176