


topflite elder 40 build


 01-16-2009, 09:08 PM
#52

Thread Starter
My Feedback: (153)

Join Date: Oct 2007
Location: greenville,
MS
Posts: 433
Likes: 0
Received 0 Likes
on
0 Posts
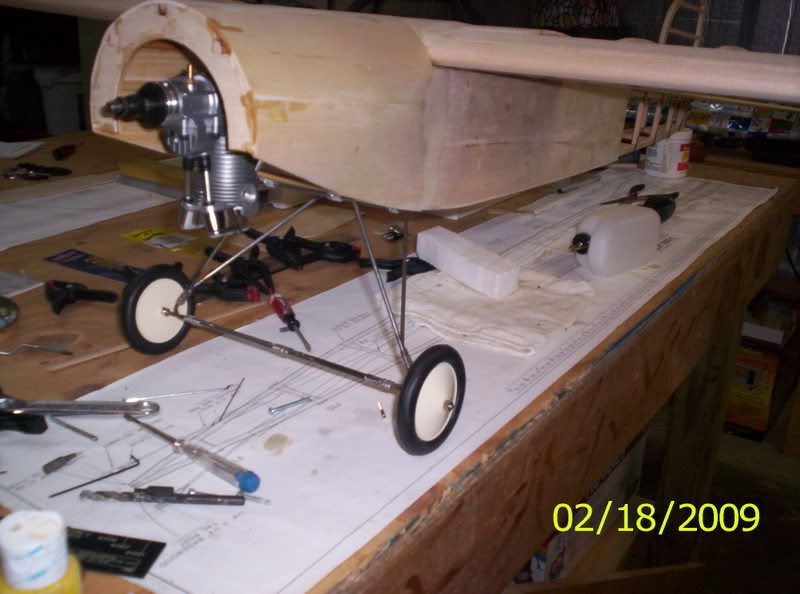
very nice, looks great!! im still waitingon my wire wheels on backorder. im working on the engine mounting and working out the throttle linkage now. hang with me guys!!!
01-19-2009, 02:29 PM
#53
Senior Member
Join Date: Jun 2004
Location: Antwerp, BELGIUM
Posts: 113
Likes: 0
Received 0 Likes
on
0 Posts
Hey,
The temp is finally getting better, still cold, but I can reasonably heat my shop .
.
Got back on the Elder, did some work on the fuse.
I had to go to the store to get some more clamps
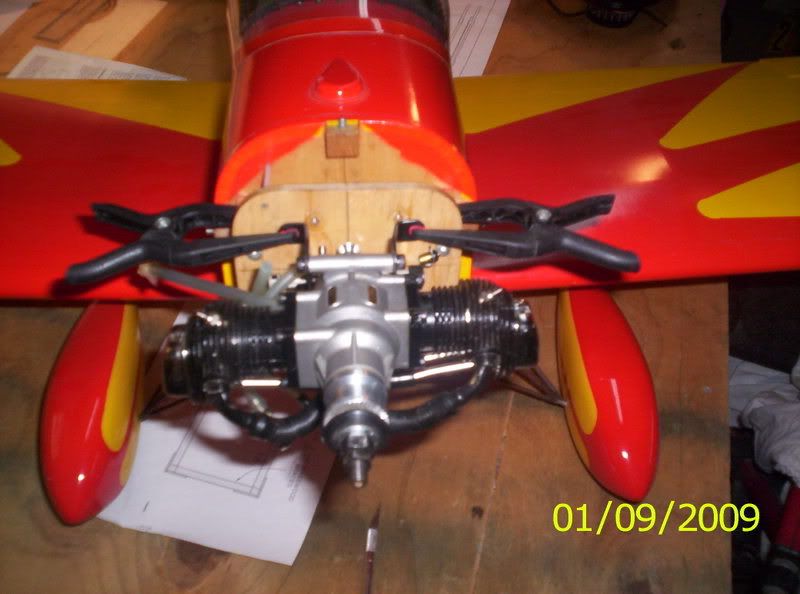
Here's my engine, the OS 56 fs
Balsa dust, CA in the air, ya gotta love it!
Phil
The temp is finally getting better, still cold, but I can reasonably heat my shop
.Got back on the Elder, did some work on the fuse.
I had to go to the store to get some more clamps
Here's my engine, the OS 56 fs
Balsa dust, CA in the air, ya gotta love it!
Phil
01-23-2009, 05:01 AM
#55
Senior Member
Join Date: Jun 2004
Location: Antwerp, BELGIUM
Posts: 113
Likes: 0
Received 0 Likes
on
0 Posts
Hey,
I did some more work yesterday-evening.
Reinforced the firewall with some tri-stock, glued the LG-plates and sheeted the bottom of the fuse.
When I removed the clamps after gluing the left side of the fuse, I noticed that both sides hadn't bend in equally. The left side bended a little more then the right. Altough I was verry carefull lining it up...
I tried to get it equal with the bottom sheeting, it helped, now it's still just a fraction.
I'm gonna try to compensate it when I glue the tail together...
mistermnkim, did you have the same problem? How did you do it?
Phil

 01-23-2009, 05:37 PM
#57
Thread Starter
My Feedback: (153)
Join Date: Oct 2007
Location: greenville,
MS
Posts: 433
Likes: 0
Received 0 Likes
on
0 Posts
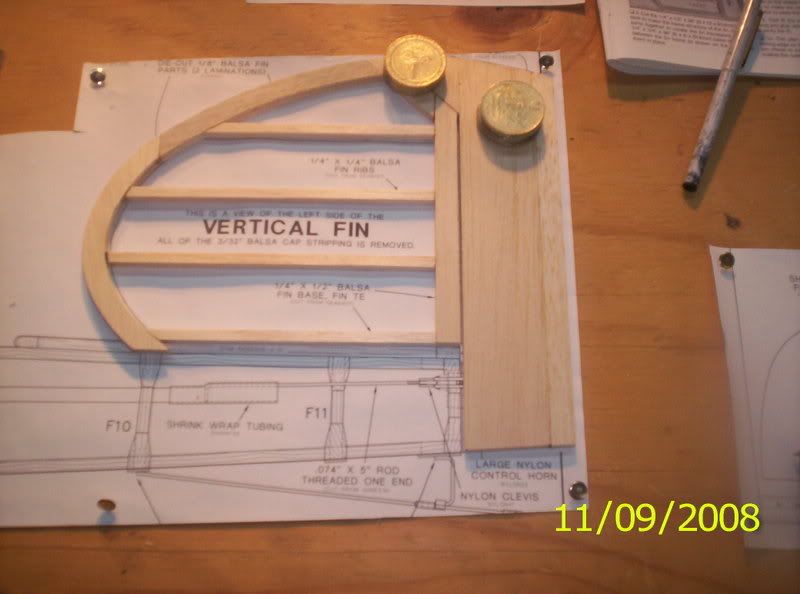
lol now thats funny!! we have several casinos around here those are old coins from slot machines!! the new slots dont use coins and guess what? they want let me cash those in. lol
01-23-2009, 07:45 PM
#58
Hi
great thread guys .............. the pictures are great . its very interesting , that there is a Saito-56 and an OS-56 , keep up the good work
Michel
great thread guys .............. the pictures are great . its very interesting , that there is a Saito-56 and an OS-56 , keep up the good work
Michel
01-24-2009, 04:17 PM
#59
Thread Starter
My Feedback: (153)
Join Date: Oct 2007
Location: greenville,
MS
Posts: 433
Likes: 0
Received 0 Likes
on
0 Posts
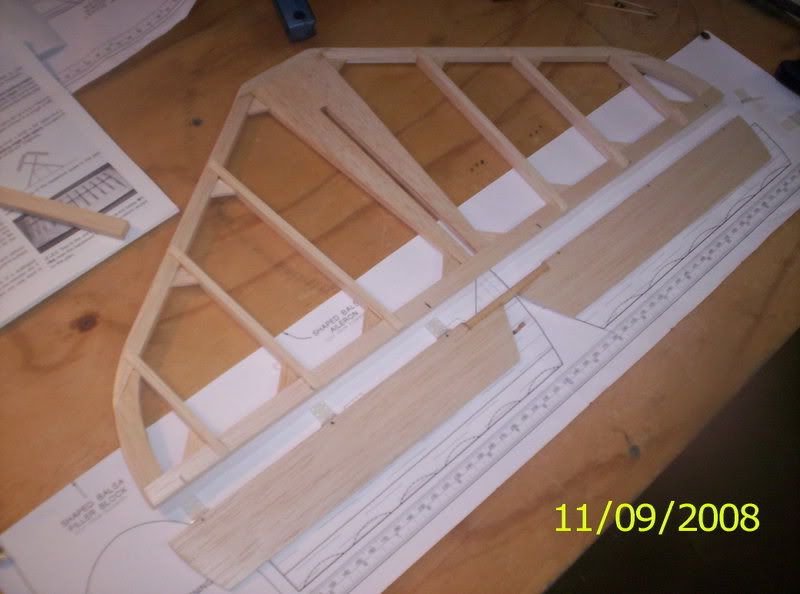
thanks alot!! its been fun so far but covering right around the corner!!! lol i did a little today with the throttle servo also posting a pic of my spacewalker im working on!
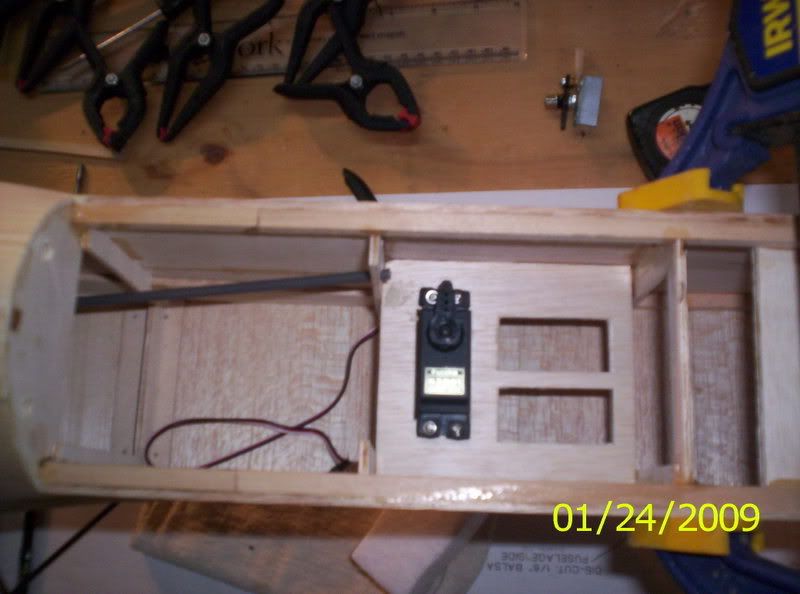
this is my radio for the elder
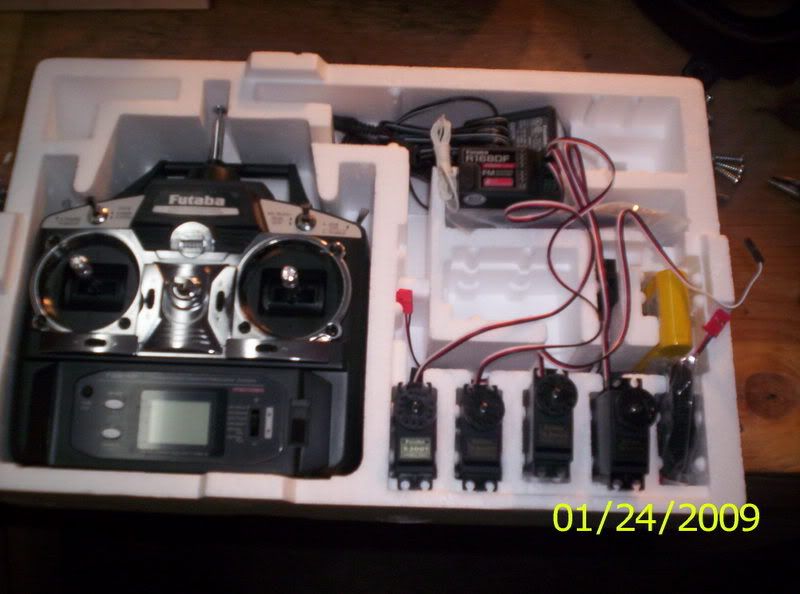
this is my radio for the elder
01-27-2009, 07:50 AM
#60
Senior Member
Join Date: Jun 2004
Location: Antwerp, BELGIUM
Posts: 113
Likes: 0
Received 0 Likes
on
0 Posts
Hey,
I have all the cross braces on the tail glued in place and started the gussets.
I keep the fuse pined to the board untill all the bottem-gussets are in place, in the hope that the slight bend of the fuse will disappear... We'll see.
I'll try to post some pictures this evening.
Phil
I have all the cross braces on the tail glued in place and started the gussets.
I keep the fuse pined to the board untill all the bottem-gussets are in place, in the hope that the slight bend of the fuse will disappear... We'll see.
I'll try to post some pictures this evening.
Phil
02-05-2009, 10:51 PM
#65

My Feedback: (70)
Join Date: Apr 2005
Location: st louis,
MO
Posts: 45
Likes: 0
Received 0 Likes
on
0 Posts
Hi guys This has been an interesting forum. I have been flying one of the original Elders for many years. This 51 inch wingspan plane is from around 1996. Powered by an O S 20 4cycle. Same vintage. It putters around like 1914 and sounds real good. Just right for a 78 year old. The only change was more rudder area. Made it much more pleasent to fly. Enjoy Lou
02-06-2009, 05:10 AM
#66
Senior Member
Join Date: Jun 2004
Location: Antwerp, BELGIUM
Posts: 113
Likes: 0
Received 0 Likes
on
0 Posts
Hey,
I have only two more gussets to go, finaly...
This weekend I hope to get a lot done, then I will post some pics!
Calmat, although I'm gonna go with the traditional color scheme, I like yours to.
I was concerned about the small rudder, but decided to build per plan, we'll see how it goes.
Phil
I have only two more gussets to go, finaly...
This weekend I hope to get a lot done, then I will post some pics!
Calmat, although I'm gonna go with the traditional color scheme, I like yours to.
I was concerned about the small rudder, but decided to build per plan, we'll see how it goes.
Phil
02-09-2009, 10:03 AM
#67
Senior Member
Join Date: Jun 2004
Location: Antwerp, BELGIUM
Posts: 113
Likes: 0
Received 0 Likes
on
0 Posts
Hey,
Over the weekend I glued the 2 remaining gussets, finaly...
Still have to do quite a bite of sanding, to get the excess of epoxy off...
I glued the top sheeting and after it had fully dried I removed the top of the formers 3 en 4 per manual.
When I cut the first former the fuse sprung open 2/16". Every glue joint was still OK, the fuse just widend a bit aft of the firewall and in front of the top sheeting. Did this happen to yours??
Then I skipped a few steps in the manuel and started the landing gear and tail skid. The manuel has you sheet the cowl first, I prefered to do it now so I could still put the fuse flat on the table.
In the hardware that comes with the kit is some verry good iron-wire in which the solder flows easily and strong.
On the downside, there was only enough for about 2 joints, so I used some spare iron-wire of the same thickness. When I tried to solder that, the solder wouldn't flow in. I had to use a flame-torch and a lot of Flux to make it work (and the skills of a good friend [8D]). But after a bit of hassle, it resulted in a verry strong joint. I just got to sand a bit and then paint. I think I will use black automotive 2-part epoxy paint, with a layer of silver metalic underneath to give it a wheaterd look.
This weekend I ordered the whireweels from Top Flite and the Standard Pilot and Vickers-gun from Williams Bros. It should arrive in about 5 weeks, hope to have the Elder in the covering-stage by then.
On to the cowl-sheeting, should be interesting...
Phil
02-15-2009, 11:33 AM
#70
Thread Starter
My Feedback: (153)
Join Date: Oct 2007
Location: greenville,
MS
Posts: 433
Likes: 0
Received 0 Likes
on
0 Posts
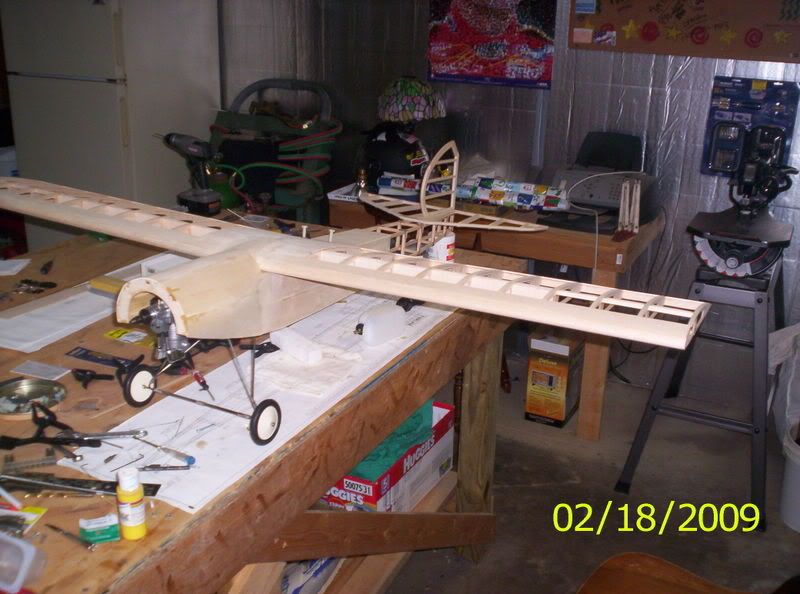
looks great phil!! i canceled my order with tower for the wire wheels, went with another vintage type will post pics later. mark
 02-20-2009, 04:57 AM
#74
Senior Member
Join Date: Jun 2004
Location: Antwerp, BELGIUM
Posts: 113
Likes: 0
Received 0 Likes
on
0 Posts
Hey,
It's looking real good. I see you have your fuel tank out, how did you make it removable?
Now that you are going again, I'm slowing down.
Also due to work...
In the last 2 weeks I glued 3 little pieces... but hey, every piece counts
Hope to get the pace up soon.
Phil
It's looking real good. I see you have your fuel tank out, how did you make it removable?
Now that you are going again, I'm slowing down.
Also due to work...
In the last 2 weeks I glued 3 little pieces... but hey, every piece counts
Hope to get the pace up soon.
Phil
02-27-2009, 03:37 AM
#75
Senior Member
Join Date: Jun 2004
Location: Antwerp, BELGIUM
Posts: 113
Likes: 0
Received 0 Likes
on
0 Posts
Hey,
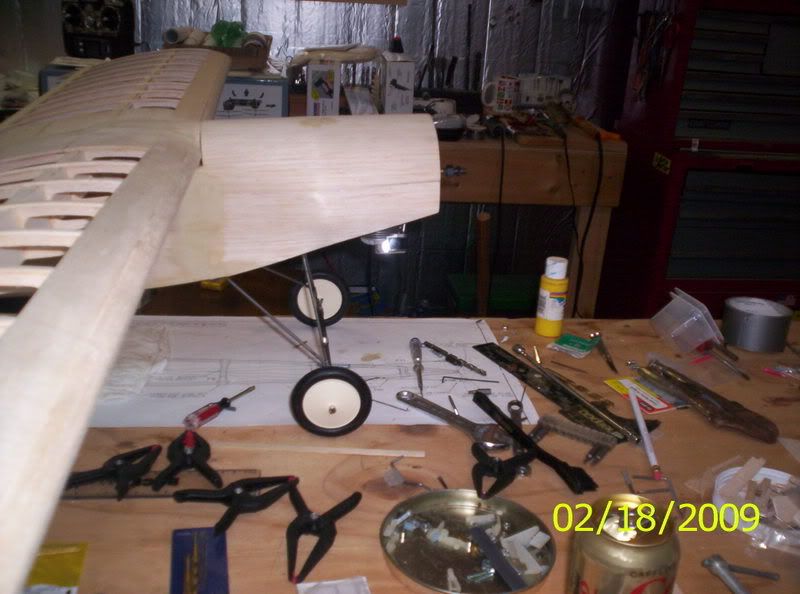
Finally I had some time to work on the Elder [8D]
I sanded the LG and tailskid and painted them black.
Then I started the cowl, this looked difficult, but if you whet the balsa sheets and let it soak for about 10 minutes, it is doable.
I used rubber bands to hold everything in place while drying.
Now I'm back working on the wing. When dry-fitting the wing, I noticed that the left wing was higher then the right wing.
Didn't measure yet, but I gues I will have to work on the wing-saddle to get it correct. I heard epoxy mixed with micro-balloons does the best job for that. Never worked with it... Any advice?
Here are some pics
Phil