


Sig Morrisey Bravo Build
 06-04-2010, 08:28 PM
#1

Thread Starter
Join Date: Sep 2007
Location: Haltom,
TX
Posts: 1,181
Likes: 0
Received 0 Likes
on
0 Posts
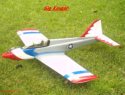
Well I just wanted to show you guys the progress of my Bravo build. I have been busy flying and working on the road but hope to be finished by August. We will see. Here are some pictures. By the way I am using a Turnigy 52cc engine for power.
Glenn
Glenn
 06-04-2010, 09:55 PM
#2
My Feedback: (33)
Join Date: Aug 2002
Location: Texas, TX
Posts: 1,147
Likes: 0
Received 0 Likes
on
0 Posts
Great job so far' also looking forward to more updates as you can add them.
I sold a built one last year or so, but quickly became sorry I let it go.
Dan
I sold a built one last year or so, but quickly became sorry I let it go.
Dan
06-04-2010, 10:37 PM
#3
Thread Starter
Join Date: Sep 2007
Location: Haltom,
TX
Posts: 1,181
Likes: 0
Received 0 Likes
on
0 Posts
Sorry to hear that. I was at a local RC flying field and got to talking with a gentleman and we started discussing planes that we always wanted to build. I stated that I wanted to always build the Morrisey Bravo and the Mr. Mulligan. The gentleman had just come back from an estate sale and allowed me to purchase this plane from him, new in the box. I am so glad I finally got to get one of these planes. I am enjoying the build and can't wait to see her fly. The Turnigy 52cc is producing good power on my test bench. With a Champion DJ7 plug With just barely tuning the needles I am idling about 1350 to 1400 reliably. I am seeing 7500 RPM on the high side but have not tuned the high side to get peak RPM.
The 52cc from Turnigy I have been told puts out the power of about a 40cc so I am right in the ball park for just a little extra power if I need it.
I am running Ryobi 2 cycle mix at 32:1, I am currently using a Zinger 20x6 propellor as well. I will probably maiden her with this setup and adjust accordingly.
I might be interested in selling her but it would take someone to make a good offer and I will not let her go until she is finished being built.
Glenn
06-04-2010, 10:57 PM
#4
My Feedback: (33)
Join Date: Aug 2002
Location: Texas, TX
Posts: 1,147
Likes: 0
Received 0 Likes
on
0 Posts
It sounds like a good setup, should get great results from the turnigy along with the overall design of the bravo.
the one I had was already built by another party, he had set it up for a 2300 or 2500 and said it handled well.
I did not get a chance to get it back in the air so I cant help on details, but its a plane that I wanted to build for a long time as well.
Watching kit prices run 300 plus keeps me wanting and not building, one day the deal will come along or pay will go back up.
What scheme are you going to use on yours ?
06-04-2010, 11:14 PM
#5
Thread Starter
Join Date: Sep 2007
Location: Haltom,
TX
Posts: 1,181
Likes: 0
Received 0 Likes
on
0 Posts
I think I am going to be a little different than the norm. However I have not firmly decided yet, but am leaning to (if I can find it) a pearl orange on the bottom with a white or blacktop with black and grey stripes on the sides.If I cant find what I am looking forthen I will have to see what is available. i know that I do not want thestandard scheme.
I builtan RV-8A full size and like the flexibility of choosing a scheme that is different.
Still trying to decide (I havetime lol).
Glenn
I builtan RV-8A full size and like the flexibility of choosing a scheme that is different.
Still trying to decide (I havetime lol).
Glenn
06-05-2010, 09:35 AM
#8
My Feedback: (33)
Join Date: Aug 2002
Location: Texas, TX
Posts: 1,147
Likes: 0
Received 0 Likes
on
0 Posts
I can't answer that one, he was from the local area around Dallas or nearby.
He had been wanting one for a while also, that was back in 08 when he came out and picked it up.
He had been wanting one for a while also, that was back in 08 when he came out and picked it up.
07-01-2010, 01:39 PM
#10
Join Date: Jan 2003
Location: Ovilla,
TX
Posts: 257
Likes: 0
Received 0 Likes
on
0 Posts
I painted mine with auto paint, Chrysler Prower purple & pearl white. I never liked the canopy so I moved the instrument panel back and cut the canopy short and painted the canopy to look like a single seater. I fly it with a Saito 300 twin. Flies beautifully, also havs flaps which adds to the enjoyment. It's been over 10 years now, that I've been flying this aircraft. till one of my favorites. I wish Sig would release another run.
07-06-2010, 08:37 AM
#12
Senior Member

Join Date: Jun 2009
Location: Douglassville,
PA
Posts: 311
Likes: 0
Received 0 Likes
on
0 Posts
I mounted my servos yesterday but having second thoughts on the pushrods. I built them years ago as the plans call for but I don't like them being un-supported. I'm waiting on a couple batteries for the receiver and ignition and should be here today, then I will make ply trays to secure them in.
07-09-2010, 03:08 AM
#14
Junior Member
Join Date: Oct 2007
Location: Christchurch, NEW ZEALAND
Posts: 1
Likes: 0
Received 0 Likes
on
0 Posts
Hi Guys
I also have a Bravo down under in New Zealand, currently in the process of a rebuild after an aileron problem, but is nearly finished. I am running a twin battery seup with 1100 Mah NiCds, hooked up to a Smartfly batshare and hextronic 12k servos all around. Plane also has flaps. Parts are hard to get I think SIG only have a few canopys left, otherwise fibreglass specialties and TNT landing gear are the best bets for replacement parts.
The engine is a 60cc conversion of unknown origin but goes well with a 20x8 prop. I have included a pic prior to the rebuild
Grahame
08-09-2010, 09:01 AM
#15

My Feedback: (53)
Scooped up a framed and partially covered Bravo from California last week. Should be here via Grayhound mid next week, after being shipped early next week.
Planning on installing a DLE-55, Hitec 5645MG servos, Spektrum receiver. I've converted all of my gassers and 4-strokers to LiFe batteries this year and really like how they perform, for both receiver and ingnition.
Still looking for a good color combination. Possibly the original "scheme," but done in blue and white or cream and blue.
Any thoughts??
08-09-2010, 09:55 AM
#16
Thread Starter
Join Date: Sep 2007
Location: Haltom,
TX
Posts: 1,181
Likes: 0
Received 0 Likes
on
0 Posts
Sadly I am putting mine up on the universe for sale. I need the money for another project. Great airplane and wish I could finish her. We will see how it goes.
08-09-2010, 09:27 PM
#18
Thread Starter
Join Date: Sep 2007
Location: Haltom,
TX
Posts: 1,181
Likes: 0
Received 0 Likes
on
0 Posts
If you look at the first post in this thread you will see my plane. (I started this thread). It currently is about 70% complete. Wing is done minus the ailerons being mounted. The tail wheel bracket is about to be installed. It needs the finishing touches. I have the original box, canopy, etc. If no one wants it then I will finish the build this winter.
Glenn
Glenn
08-10-2010, 11:06 AM
#19
My Feedback: (53)
Glenn,
Went back to the beginning and looked at your photos. Looks like you've made good progress. Should be a fine flying ship when finished. Your price is excellent! If I want to build a second one, I'll definately consider yours, though I live in Michigan and looks like you'd prefer not to ship.
Went back to the beginning and looked at your photos. Looks like you've made good progress. Should be a fine flying ship when finished. Your price is excellent! If I want to build a second one, I'll definately consider yours, though I live in Michigan and looks like you'd prefer not to ship.
08-26-2010, 11:38 AM
#20
My Feedback: (53)
Some general questions for Bravo owners:
Just picked one up on RC Universe, partially covered (wing/stab/rudder/elevator). The wood structure on the fuselage is all open and needs some slight repairing and covering. The wood has actually darkened with age, but it looks like some epoxy was used. Need to replace a couple of stringers, then use some Titebond to make sure the rest are all good and tight.
What's everyone's experience with power on this bird. I have a nice-running Fuji 43. It's a heavy engine, and I'd assume that this bird needs some weight out front. Thought of putting in a DL-50, but don't want to over-power it.
Has anyone needed to add any significant weight to the nose or tail (of course, depends on the engine)? The Fuji weighs about 4.3 lbs with muffler. Anyone mounted rudder/elevator servos in the aft end of the fuselage?
I've used some Hitec 564 MG's on a 43cc GP 25% Yak, with some Spektrum 821's on some others. Though the control surfaces aren't overly large on this ship, should I still go with the 133-165 oz/in servos?
Thanks for your input.
 08-30-2010, 07:01 AM
#22
My Feedback: (53)
Thanks Tom.
I'm thinking the Fuji should be just about right, considering power and weight. Mine will also be build pretty much according to plans, though I'm considering adding flaps...just not sure yet.
I wasn't all that keen on the 1/4" ply firewall, so I added another 1/4" plywood firewall on top of the existing one, then thinned out some 30-minute epoxy and painted the firewall and surrounding structure (under the cowled area) with the mixture. I'm going to use a pull-pull arrangement on the rudder and nosewheel. I'll probably use a 3/16" carbon-fiber rod on the elevator with 4/40 titanium ends and a Du-Bro 4/40 ball-link. I'd like to see if I can come out of the rear fiberglass tail-cone and hide most of the linkage that way.
08-30-2010, 08:30 AM
#24
My Feedback: (53)
Tom,
That sounds great. Fuji is not the most powerful engine, but I've had good experience with the 34 and 43 EI.
I meant "tailwheel" on my last post. Would be sacrilege to put a nosewheel on this ship. It's nice to have that open structure in the rear so that you can try some different things. I wanted to avoid having any servos sticking out of the rear of the fuselage...just wouldn't look right. Besides, like most larger scale airplanes, you tend to need the weight to be up-front.
Do you have any photos of your Bravo?
Thanks
08-30-2010, 10:13 AM
#25
Sorry, no pics. The PC crashed, with no backup.
Mine is done in the traditional scheme, but in blue and cream, with red trim.
Although pull-pull, I ditched Sig's metal wire, for the tail wheel. I used weed trimmer line in it's place. I found that I was getting RF, using the Sig wire.
Mine is done in the traditional scheme, but in blue and cream, with red trim.
Although pull-pull, I ditched Sig's metal wire, for the tail wheel. I used weed trimmer line in it's place. I found that I was getting RF, using the Sig wire.