


Marutaka/ Royal Zero 62
 04-17-2012, 01:09 PM
I should say that I've been following the build thread here, where chistech is charting a build by Gerry Dupont of a Rufe from a Zeke Kit, and its proving very helpful and informative.
Well here is my kit. For those unfamiliar with these, its a real forest of wood!
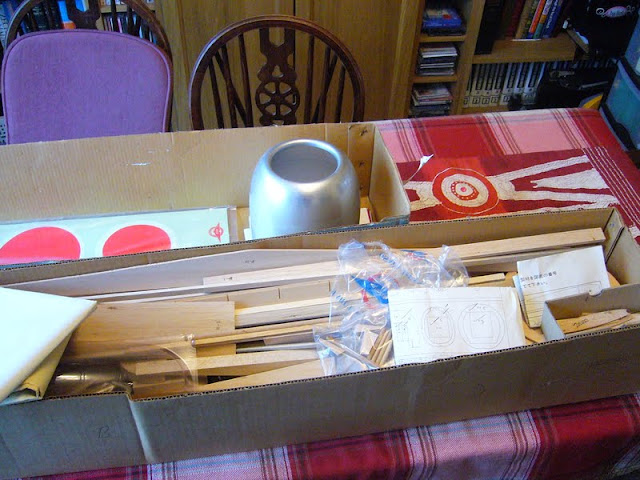
I've started by tracing the stabiliser onto grease-proof paper ready for the building board, and then the parts are laid out on the building board. I've simply drawn around each of the parts on a piece of scrap paper. If I ever need parts for a repair, then I have a pattern to follow.

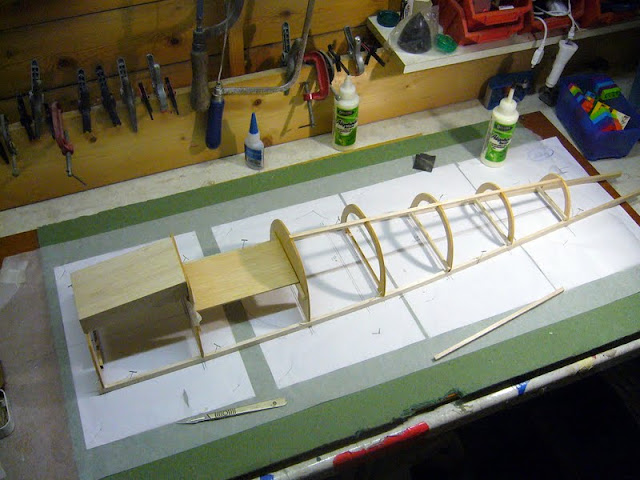
The first job really is to mark centre lines on the leading edges, the trailing edge, and each of the ribs. The trailing edge is pinned to the board, and the leading edges are chocked up so that their centreline is level with the centreline of the trailing edge.

I decided which side was up on each of the ribs. (Mine don’t appear to be symmetrical) And fitted them using the Lego blocks to make little jigs, and wedges cut from scraps of Depron to shim up the ribs so that the centre lines of the ribs match those of the trailing and leading edges.

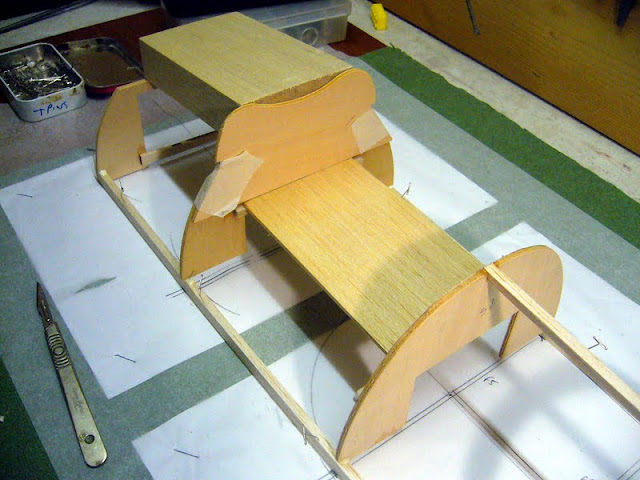
I sheeted the stabiliser using individual sheets. I know that some prefer to join their sheets on a flat surface and then cover. My previous build was a Spitfire, and I decided to join the individual sheets on the wing because I had read horror stories of wings warping when you try and affix a large flat sheet of balsa over the very compound curve on the Spitfire wing.
I use contact adhesive for the join between the sheet and the frame, and aliphatic resin for the joins between sheets.
I then glued in scraps of balsa for the Robart style hinges that I will fit later. (I remembered to mark the hinge positions on the trailing edge!

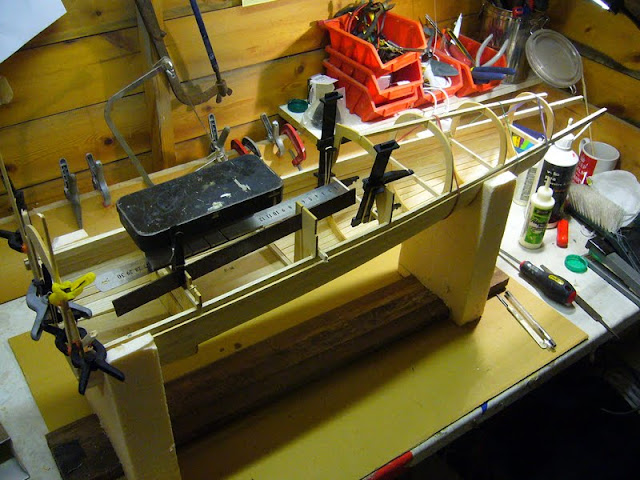
Here is the stabiliser with the tips attached sanded. Next job to finish off the elevators.

 04-17-2012, 06:17 PM
 04-17-2012, 07:45 PM
 04-22-2012, 11:59 AM
Again I'm working on top of a tracing of the plan

Looking nice and straight so far!

 04-25-2012, 11:55 AM
There are a few very small gaps that I can see when I hold the half up to the light. I had wondered about smearing a little polyeurethane glue on the inside where I can see light so that its foaming action would fill the "cracks" Anyone have any thoughts on this?

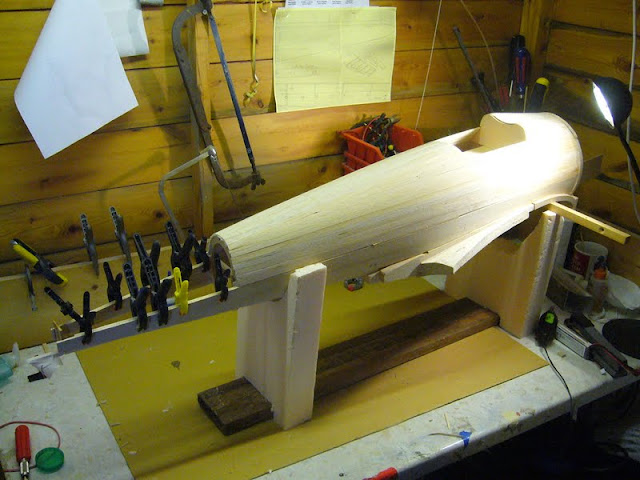
The next job is to finish shaping the nose blocks, and then I need to make a cradle to hold this half of the fuselage while I complete the other half.
04-25-2012, 07:06 PM
04-27-2012, 01:04 PM
I've made a bit of progress this evening....
The first job tonight was to build a cradle out of some foam and a piece of scrap wood. I hope I've managed to make it so that the fuselage will fit in it with the canopy in place. If so it will be useful all through the build!

Formers in place and drying. Everything at the moment looks to be straight which is the main thing!

The next job, as mentioned is reinforcing ply plates and to try and work out how the rest of the fuselage goes together. I may need to build the wings before I finish the fuselage. I'm not sure at the moment! Some head scratching over the plan to come!
My retracts have arrived from HobbyKing this week so if I have to, I can get on with the wing.
05-03-2012, 11:40 AM
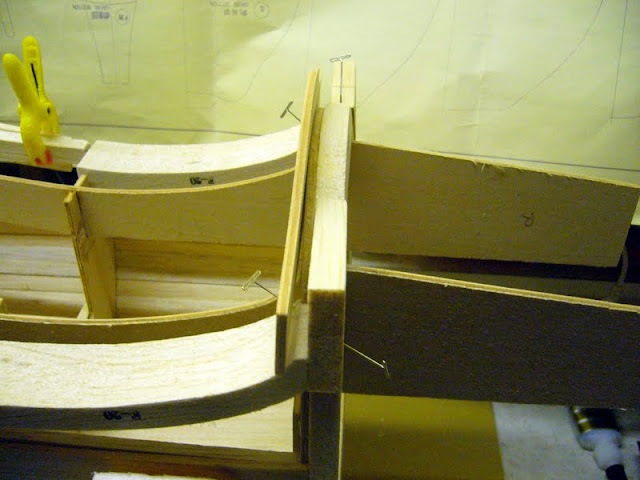
I've reinforced the join in the formers

After a great deal of head scratching and fiddling I'm confident that these pieces are all in the right place. I include a labelled picture to save anyone else building one of these a bit of time. The parts needed a little trimming, but not too much:


THe only bit that looks a bit odd is this one. If anyone has built one of these, does this go here? It's W25 and is shown on the fuselage assembly diagram. I doesn't seem to fit neatly. I may wait untill after I've built the wing, and I should be able to work it out then!

 05-03-2012, 11:43 AM
[img]webkit-fake-url://85C6CE9B-0E4E-4B61-8C62-D2A6CD14AF96/imagejpeg[/img]
05-11-2012, 09:35 AM
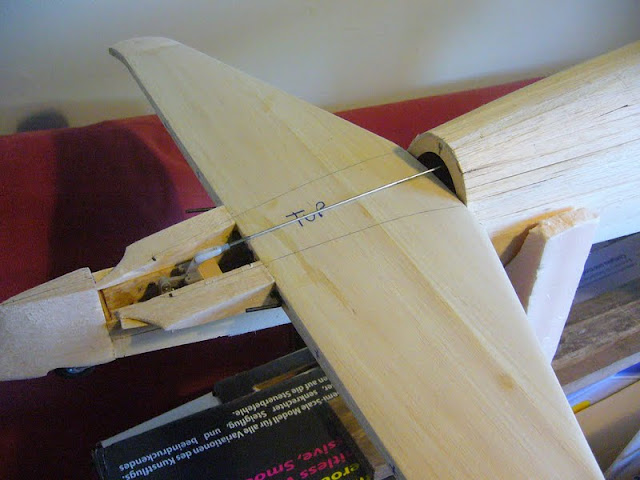
I picked up a laser level the other day. Here I am using it to fit the horizontal stabiliser. I'm then going to build up to the vertical stabiliser before attempting to fit the retractable tail unit that arrived the other day. Here I've taken over the dining room table for the fit. (I had better not get glue on the table cloth!)
I've pushed a pin into the centre line behind the cocpit. This gives me a point so that I can measure to the ends of the stabiliser and make sure that it is fitted square.
Dont forget to fit the elevator joiner before you fix the 'fishtails' on the rear of the Stabiliser. [I wonder if you can guess how I know about that?]
 05-13-2012, 07:09 AM
 06-23-2012, 07:44 AM
I've had a go at one of the wings. I always trace my plans onto grease-proof paper. I used to work in a drawing office, and this comes very naturally to me and makes building the second wing relatiely easy. I just turn my tracing over.
I decided to glue depth tabs on the ribs to help with alignment. They are tacked in place with the tiniest amount of cyano.

The ribs were then assembled over the spar. The ribs had been cut for retracts, servo leads and split flaps before assembly. I used packing under the outer ribs to add a small amount of washout. I also measure the height of the trailing edge of the ribs and mark it on my traced plan. When I come to build the other wing I will aim to get the heights of the respective ribs to correspond.

I'm using these servo holders which were successful on my Spitfire. I purchased three sets for the Spitfire which enabled me to fit a pair for the ailerons and two RH units for the flaps - which makes setting up the radio easier! That means that there are two LH holders for the flaps on the Zero! You can see the flap spar in place here. Again I'm using the system I came up with to add split flaps to my Spitfire. More details in another place about half way down the page. It's worked well and makes an astonishing difference to the Spitfire's landing speed.
 07-06-2012, 12:42 PM
I'm currently taking a longer term view on the Zero, which I will hope to finish over the winter. However I have done a few bits...
Here is the current state of the fuselage....

Elevator push rod and actuating arm are in place.

Retractable tail wheel shoehorned into place and working nicely. I'm very pleased with that! It wont be steering, I have it on a sprung castor.

All the balsa for the wing fillet is in place. I will build the wing and then sand all this to shape. This should help if I have to 'fudge' the fit a bit.
Actuator for the tailwheel in place. The base of the vertical stab is hollowed out to allow controll rods to pass through here. My current plan for operating the rudder is a piece of control rod bent to shape and epoxied into the bottom of the rudder complete with a ball link to make a control horn inside the base of the vertical stab. I think it will work! It will be nice to keep everything hidden!
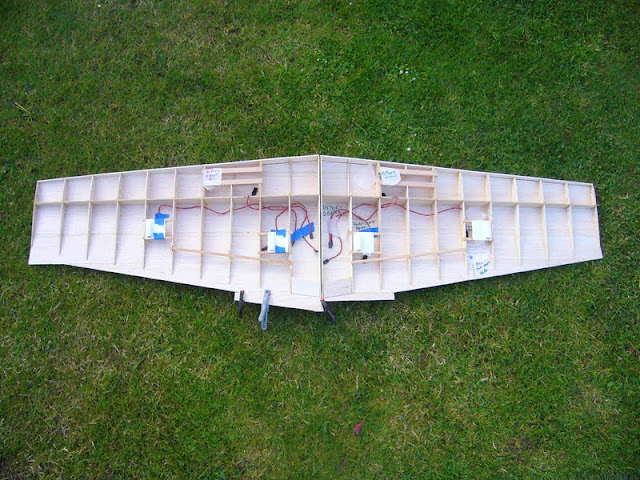
As the current plan is to sand and shape the wing fillet to suit the wing when that is built. I have made a start on both wings, which are framed, ahd have received their top skin. I've then been fiddling around putting in a trailing edge spar for the split flaps that I am adding. I've put in rails for my retract units and servo holders for aileron servos and flaps, and... the extension leads are in. A few jobs to be done before skinning the bottom, mainly fitting the aileron leading edge and traling edge. I also have to come up with an alternative way of fixing a wing dowl or dowls as the ones on the plan pass right through the wheel bays.
Hopefully I'll be back with more news before too long.
09-27-2012, 05:49 AM
could I be cheeky and ask what's the span of you're plane?
many thanks
Scott.
 09-27-2012, 01:13 PM
10-12-2012, 04:58 PM
10-13-2012, 05:43 PM
10-25-2012, 09:08 AM
09-27-2012, 01:13 PM
10-12-2012, 04:58 PM
10-13-2012, 05:43 PM
10-25-2012, 09:08 AM
The first job was to do everything inside the wings that I won't be able to do when they are sheeted. I spent a whole day just fiddling around, sorting out the aileron frames, fitting the retracts and joining the wings together.
There is a video update on that here:
[youtube]http://www.youtube.com/watch?v=zFyX7T-gitg&feature=plcp[/youtube]
Having got that far, I realised that it was still not time to sheet the bottom of the wing! I decided that I needed to get the wing to sit nicely on the fuselage so that I can drill the wing locating pins with the wing in position.


...So I've spent an hour or so sanding the bottom of the wing fairings so that the wing sits nicely on the supporting framework. I used the pice of wood that glues on to the front of the wing as a template in order to indicate how much material needed to be sanded away.

These kits are real Balsa basher's kits aren't they?!
I think I am nearly at the point where I can drill the locating pins and then sheet the bottom of the wing.

