


The Sandman cometh..... ( AKA *** is a Holden HX Sandman Overlander....?!! )

 04-21-2014, 07:19 PM
#52

Thread Starter
Join Date: Jan 2004
Location: Queens,
NY
Posts: 559
Likes: 0
Received 0 Likes
on
0 Posts
Yes, I have a more detailed build thread on scale4x4rc! Here's a link to it!
http://www.scale4x4rc.org/forums/showthread.php?t=76901
I do plan to have a shaggin' wagon version of it... Thinking about making the shag interior, couches etc removable, so I don't permanently cover up the stock detail..! Hopefully it will work out.....lol!
thanks for the interest!
http://www.scale4x4rc.org/forums/showthread.php?t=76901
I do plan to have a shaggin' wagon version of it... Thinking about making the shag interior, couches etc removable, so I don't permanently cover up the stock detail..! Hopefully it will work out.....lol!
thanks for the interest!
05-11-2014, 07:51 AM
#53
Thread Starter
Join Date: Jan 2004
Location: Queens,
NY
Posts: 559
Likes: 0
Received 0 Likes
on
0 Posts
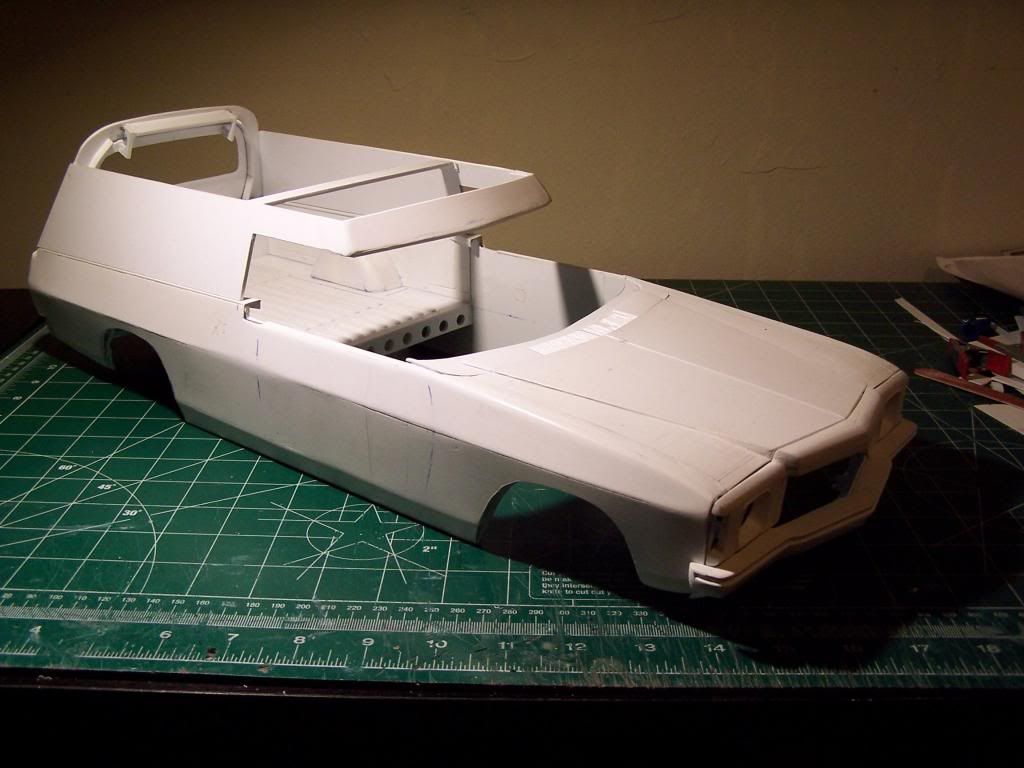
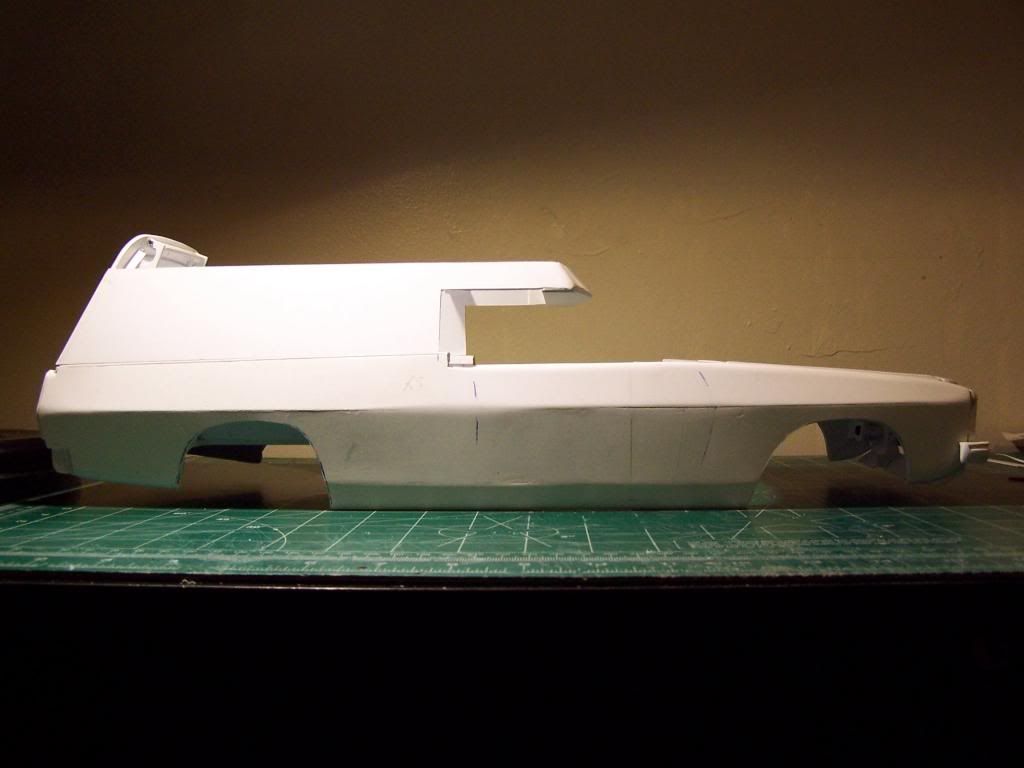
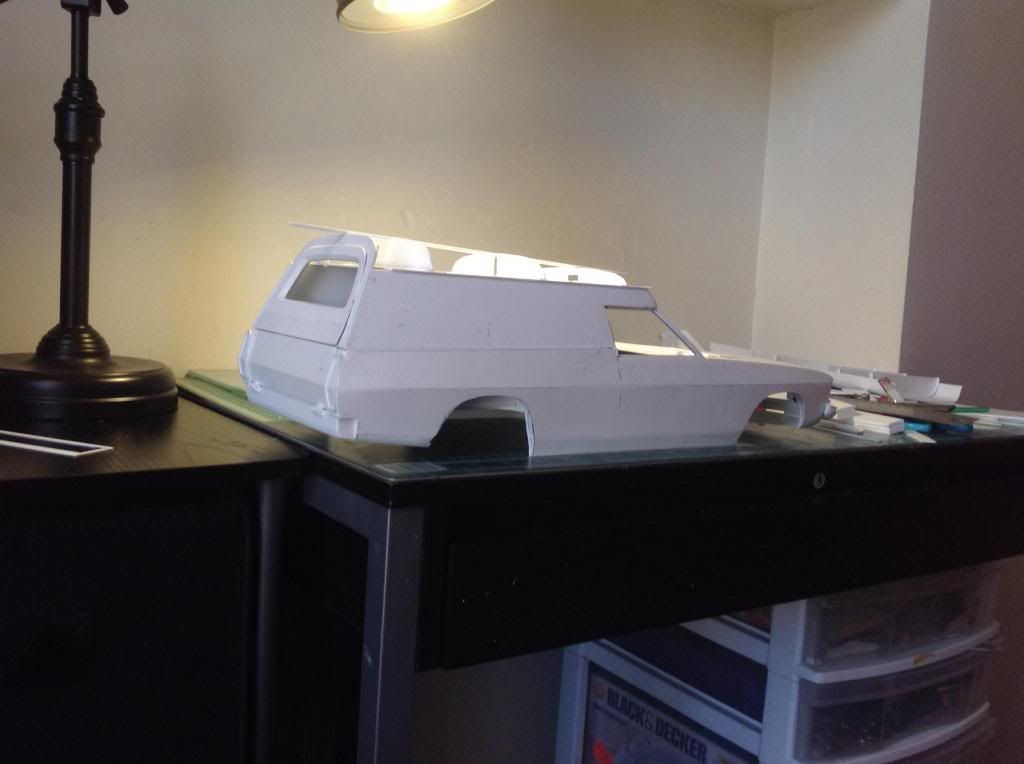
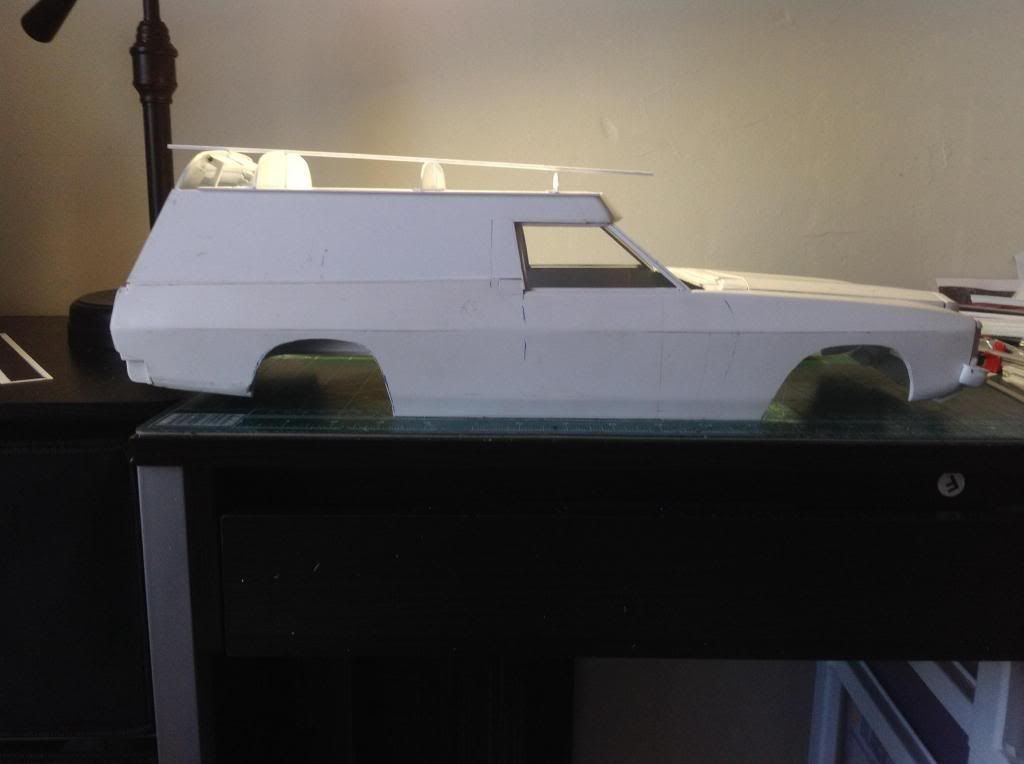
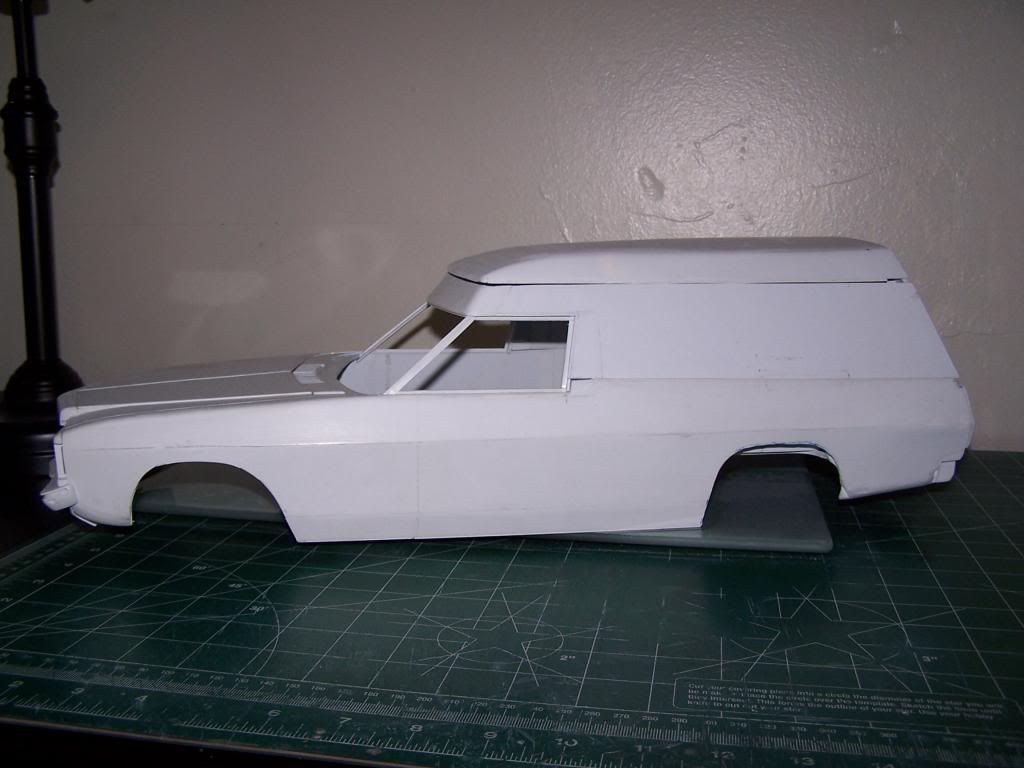
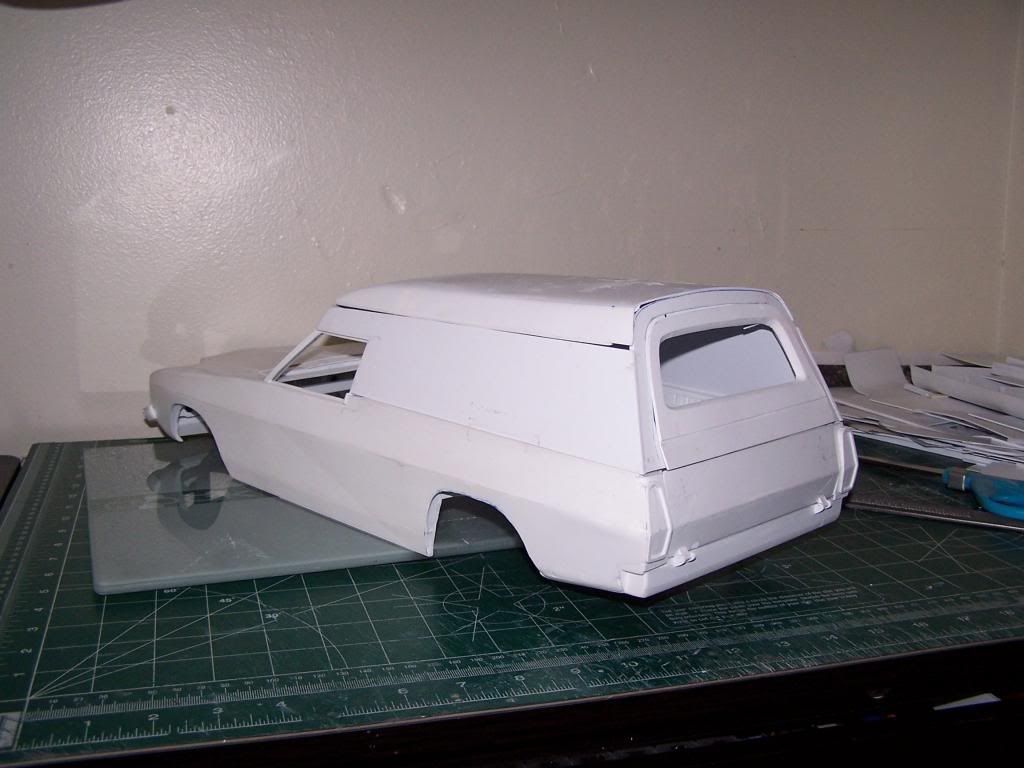
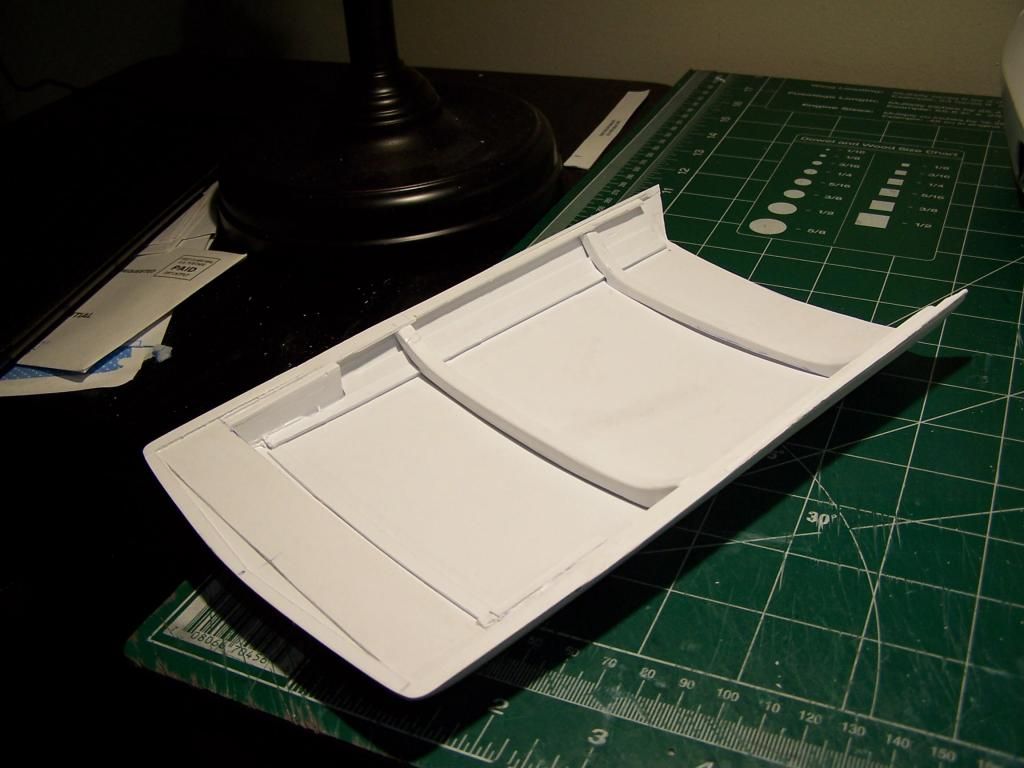
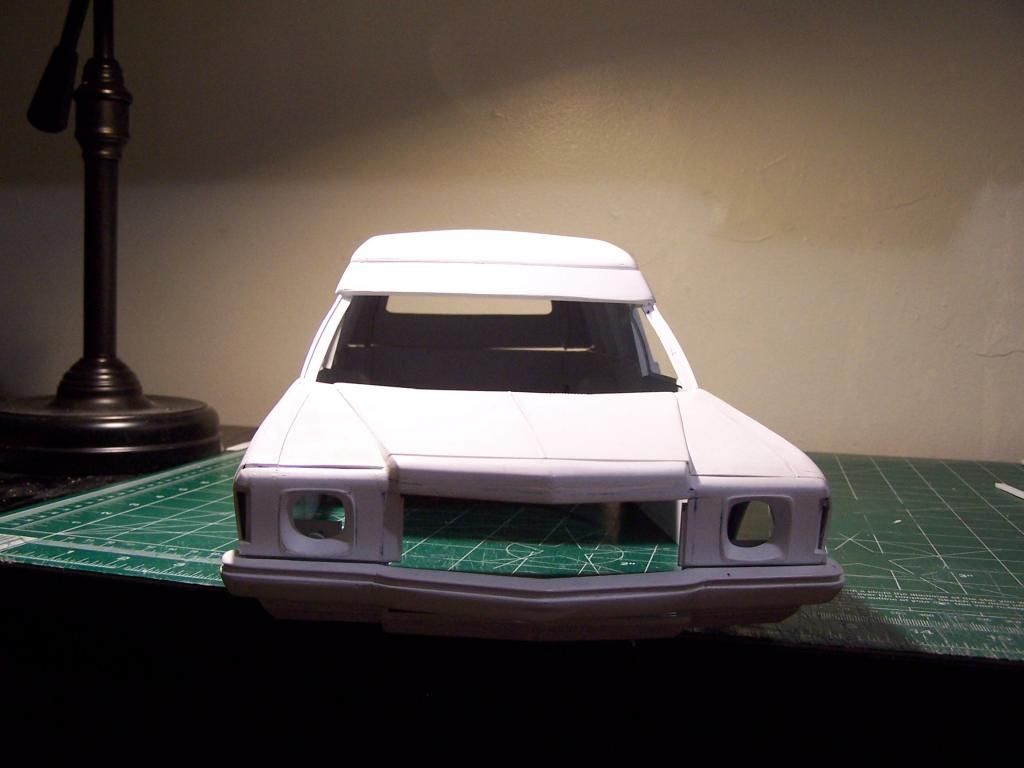
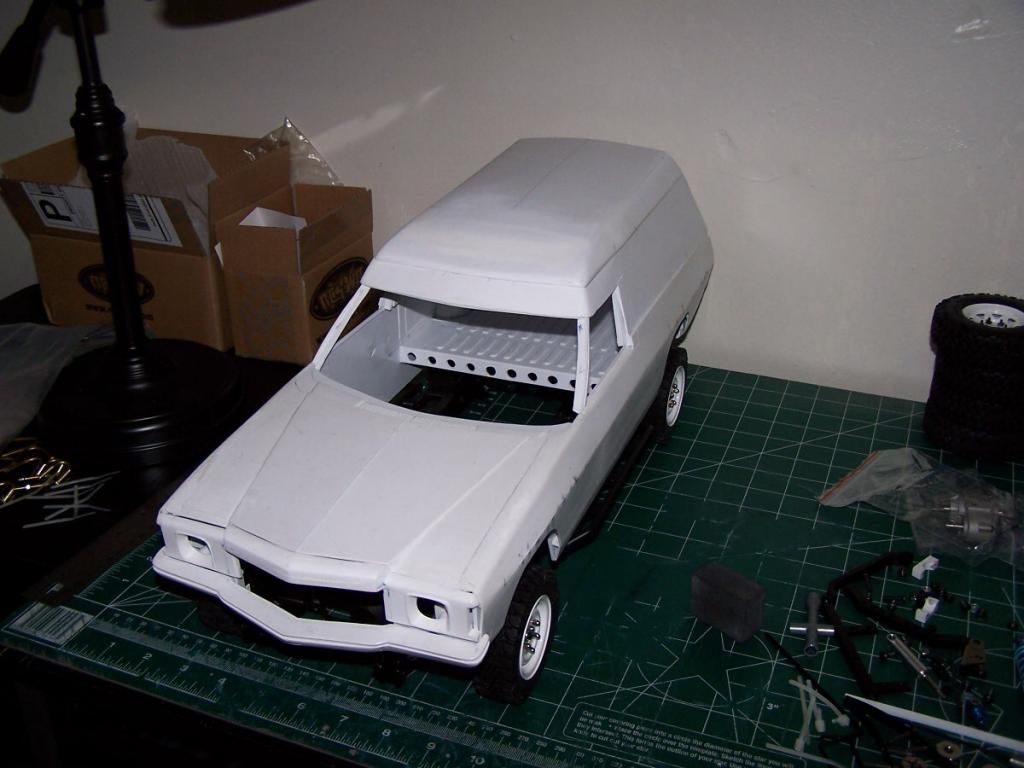
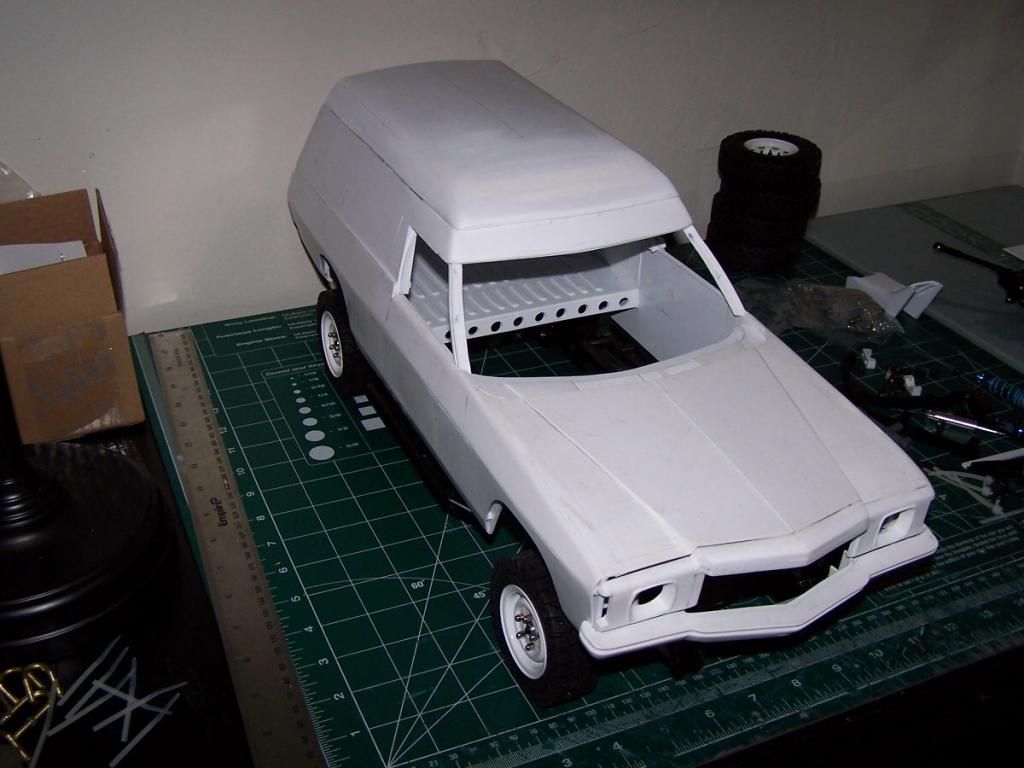
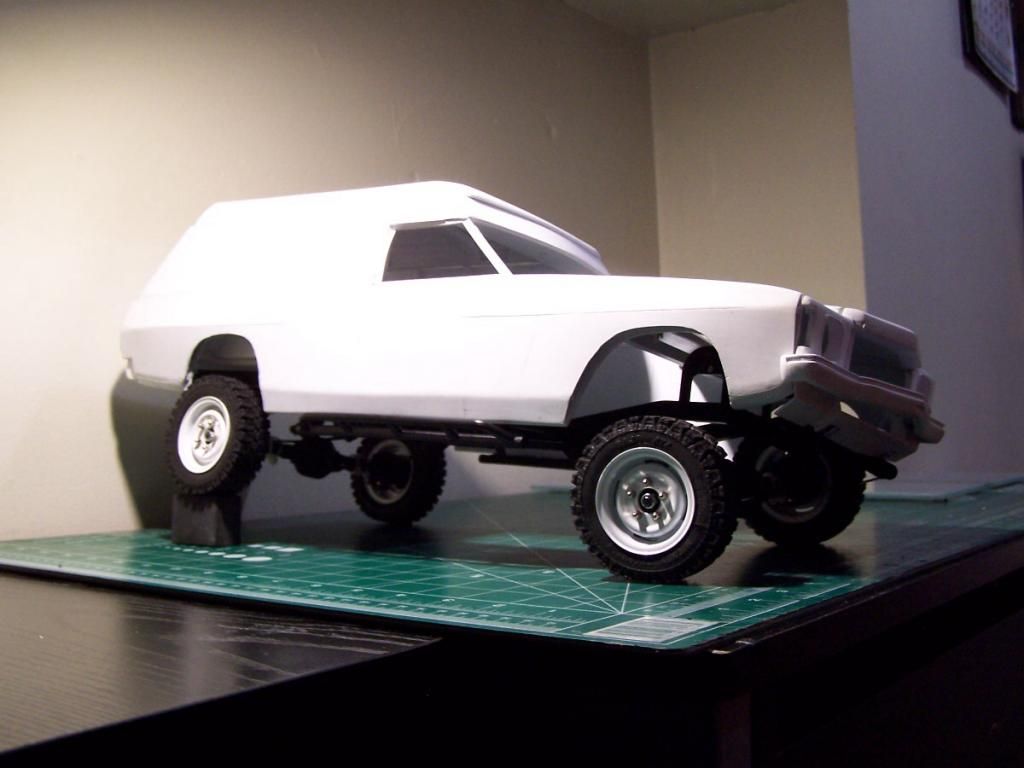
Hey guys.... Another small update!
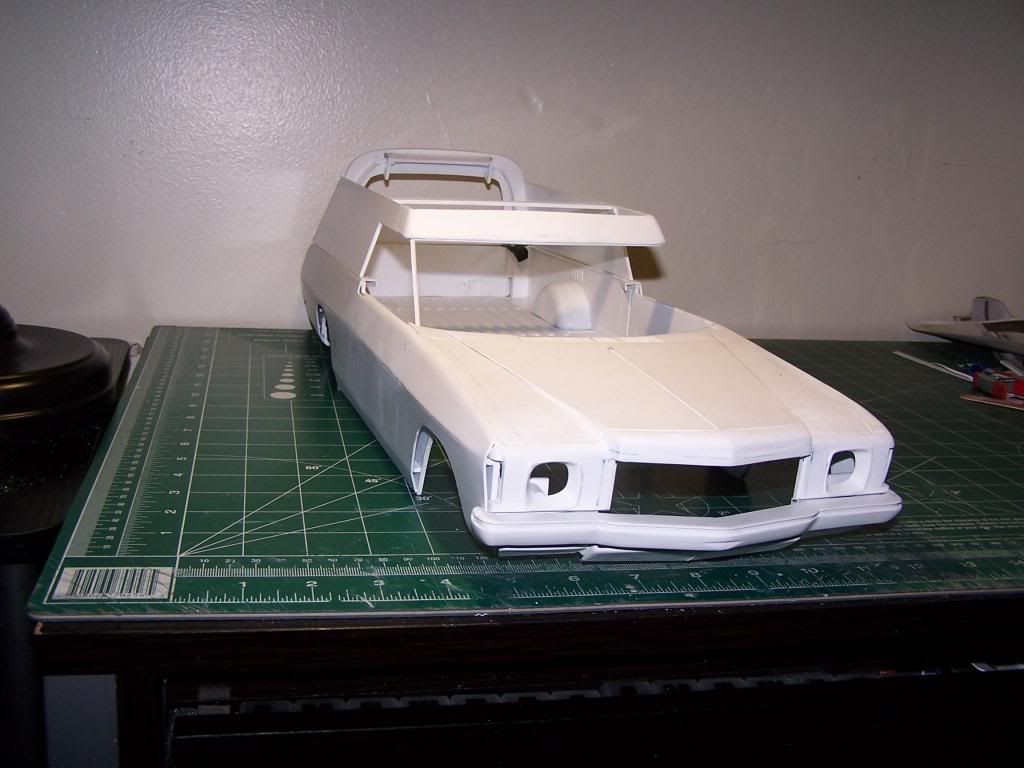
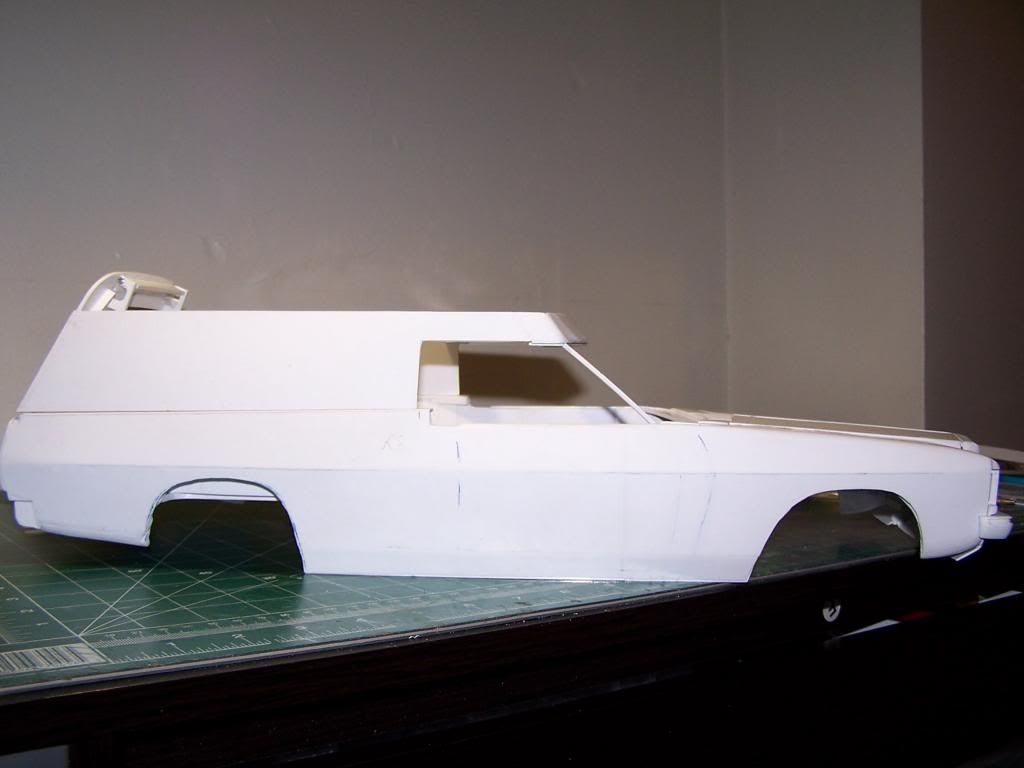
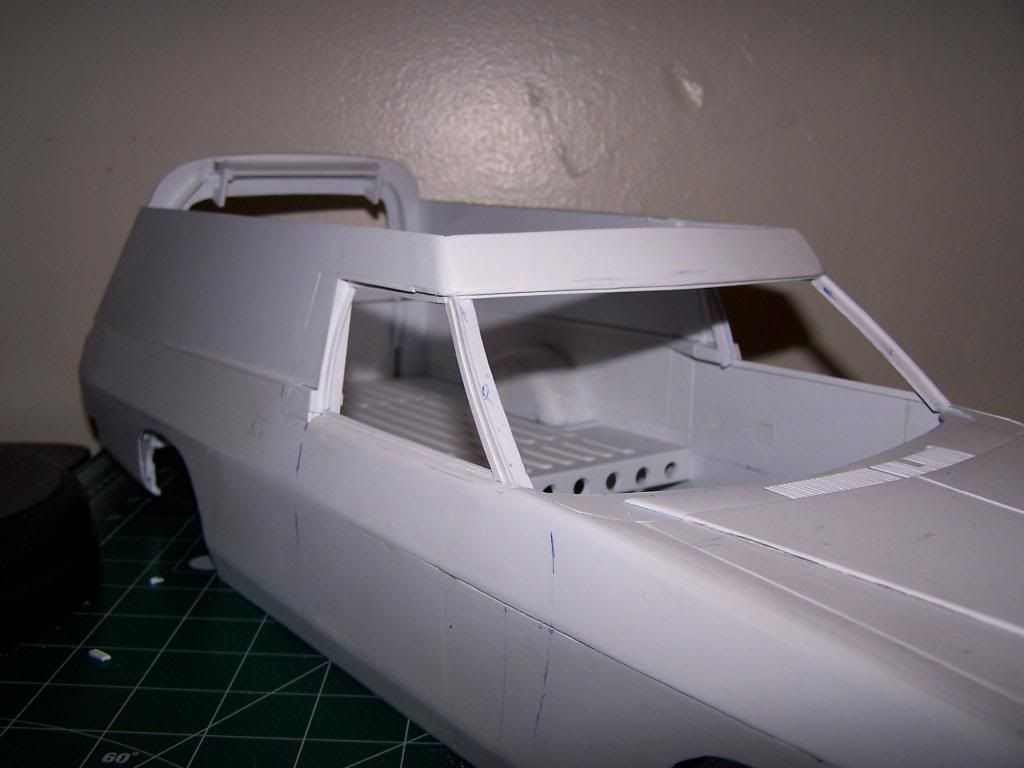
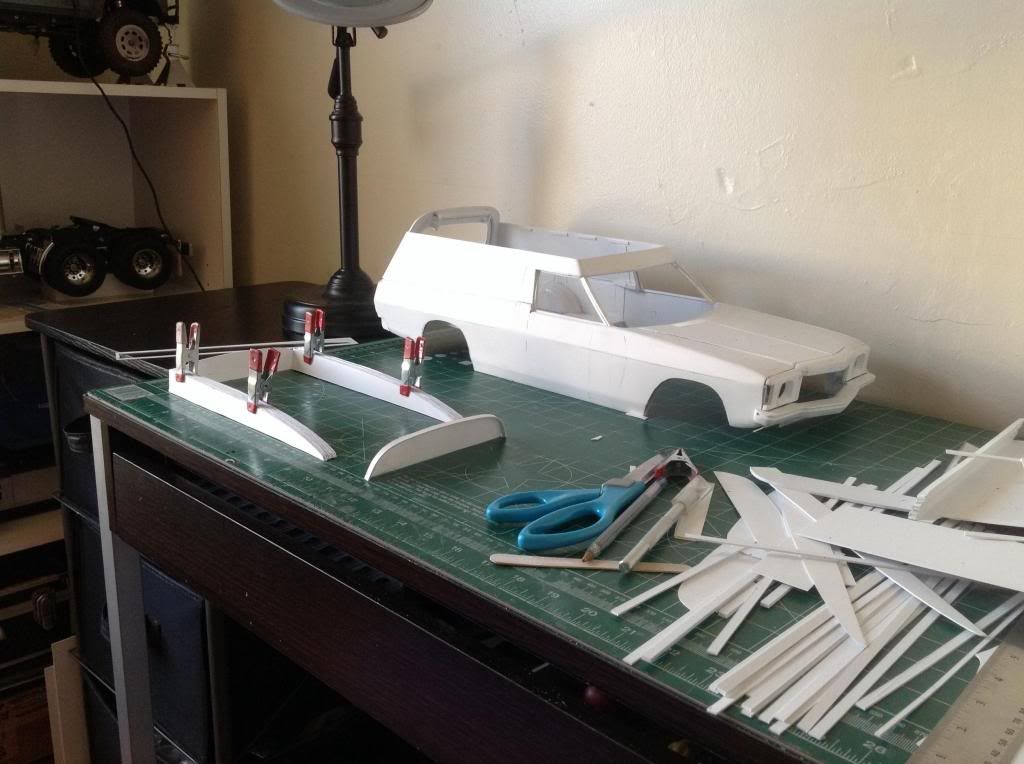
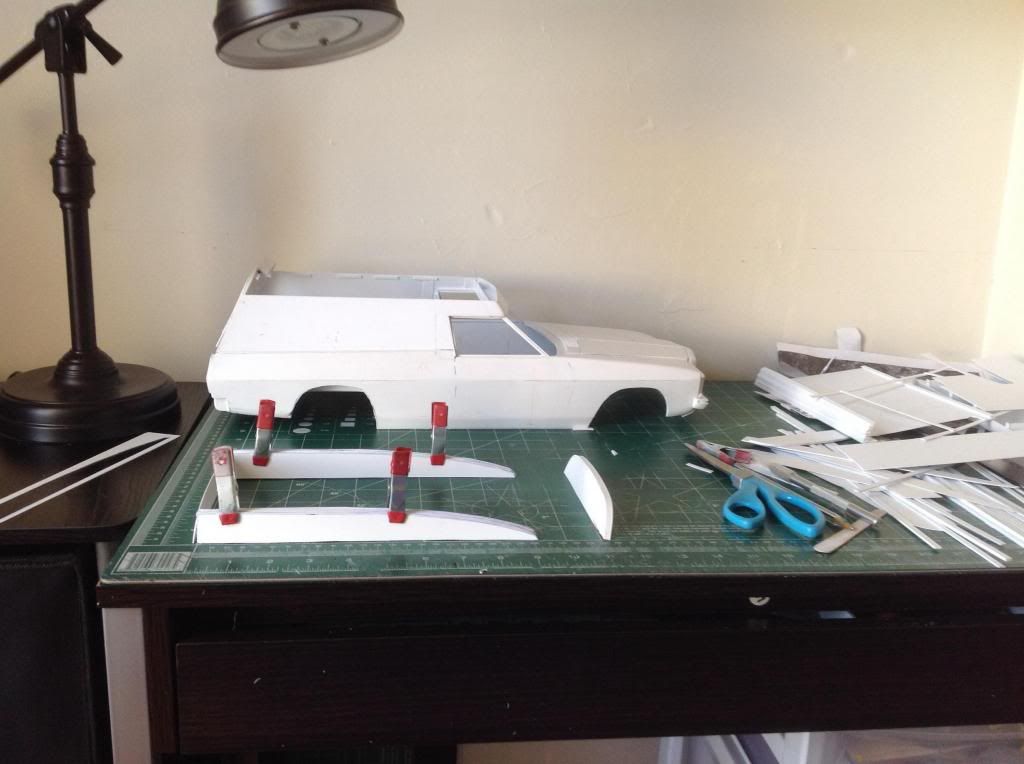
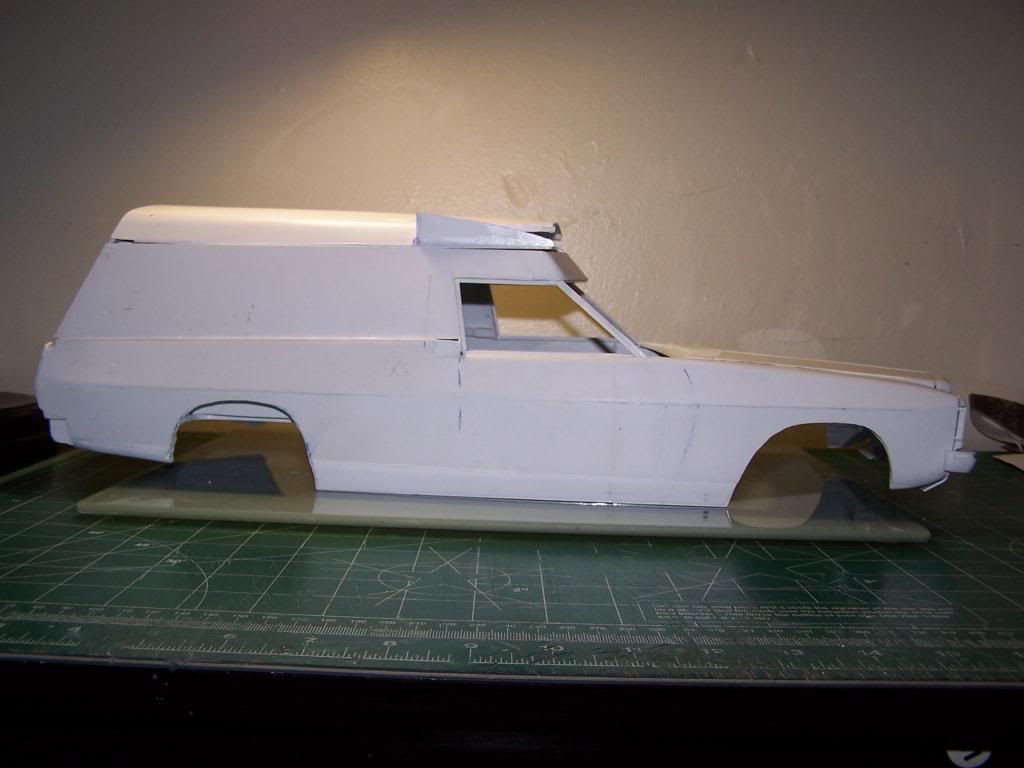
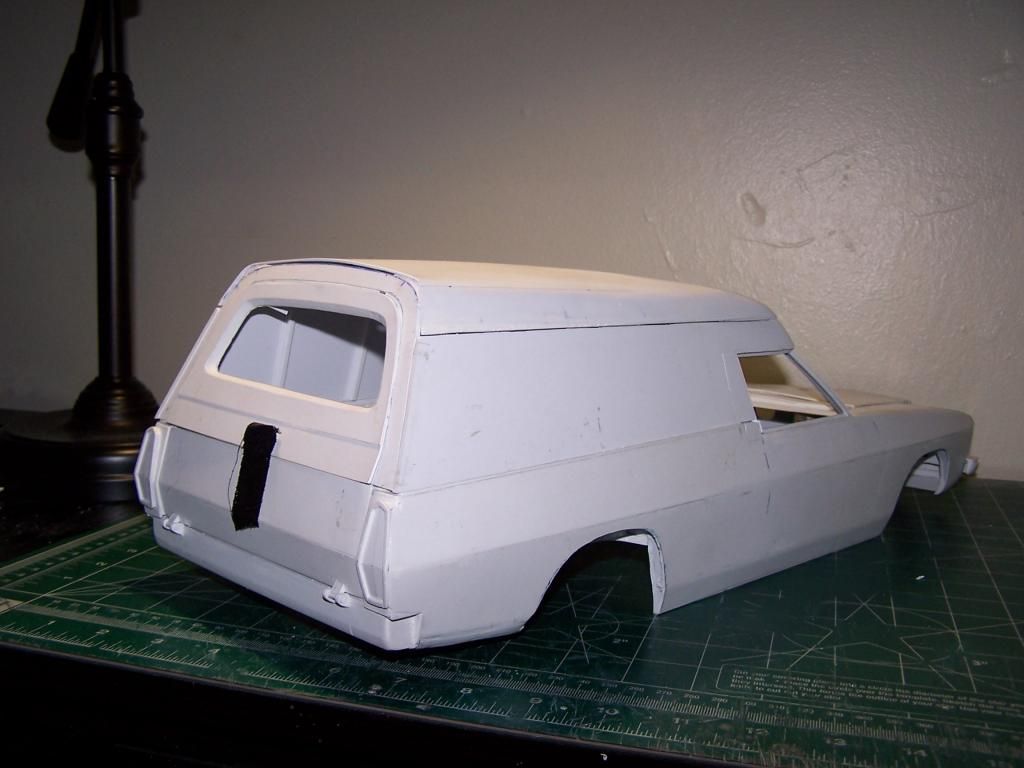
Got the front part of the roof done...but before I do the top, I need to make sure the front pillars that support the windscreen is at the correct angle. Looking at it on the workbench I felt that it was sloped too much, but looking at the pics it seems fine.
Ohh..that's not the actual pillar in the pics, it's just a scrap strip I used for a guide to see how it looks...
I still need to extend the side panels down to the door line.
Still no real plan on how to build the roof. will be trying to build it off the car as I don't want to mess up the body at this stage. The top assembly that I have done so far is just resting on the body in the pics.
Anywho some pics....


 05-16-2014, 08:28 AM
#54
Thread Starter
Join Date: Jan 2004
Location: Queens,
NY
Posts: 559
Likes: 0
Received 0 Likes
on
0 Posts
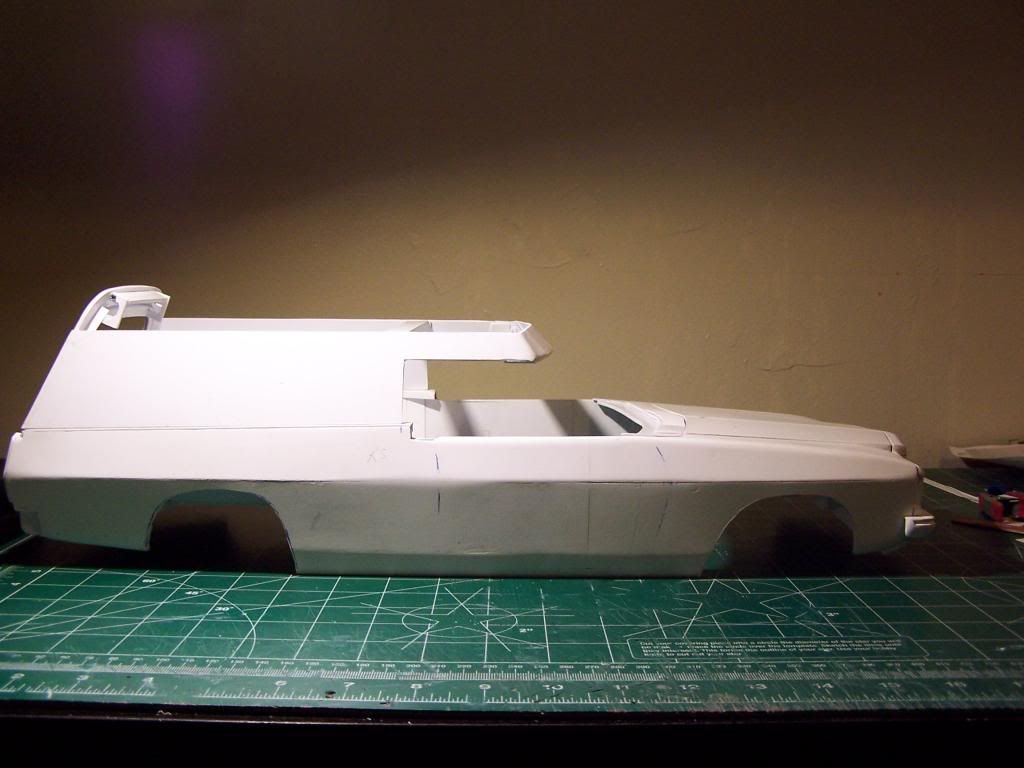
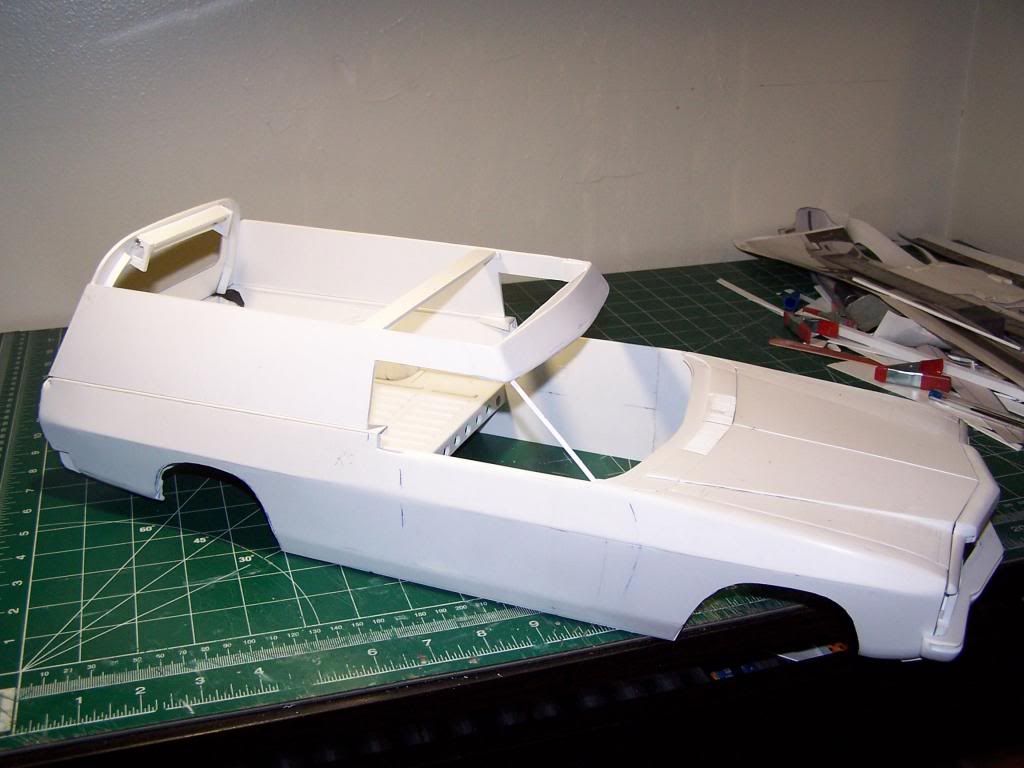
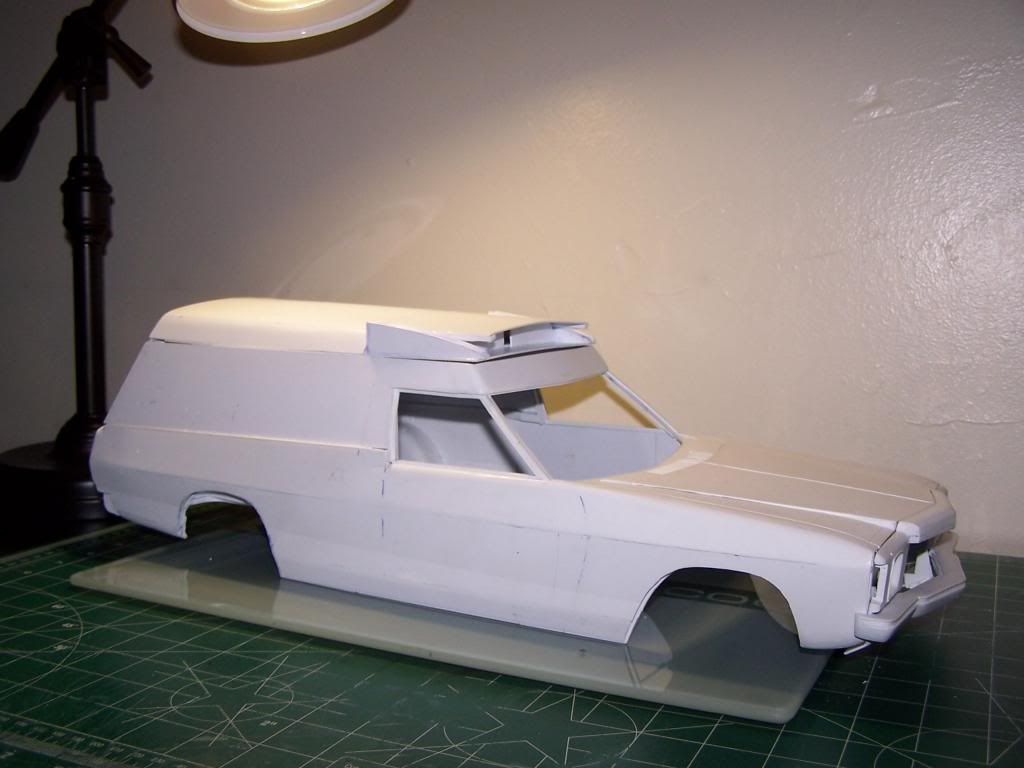
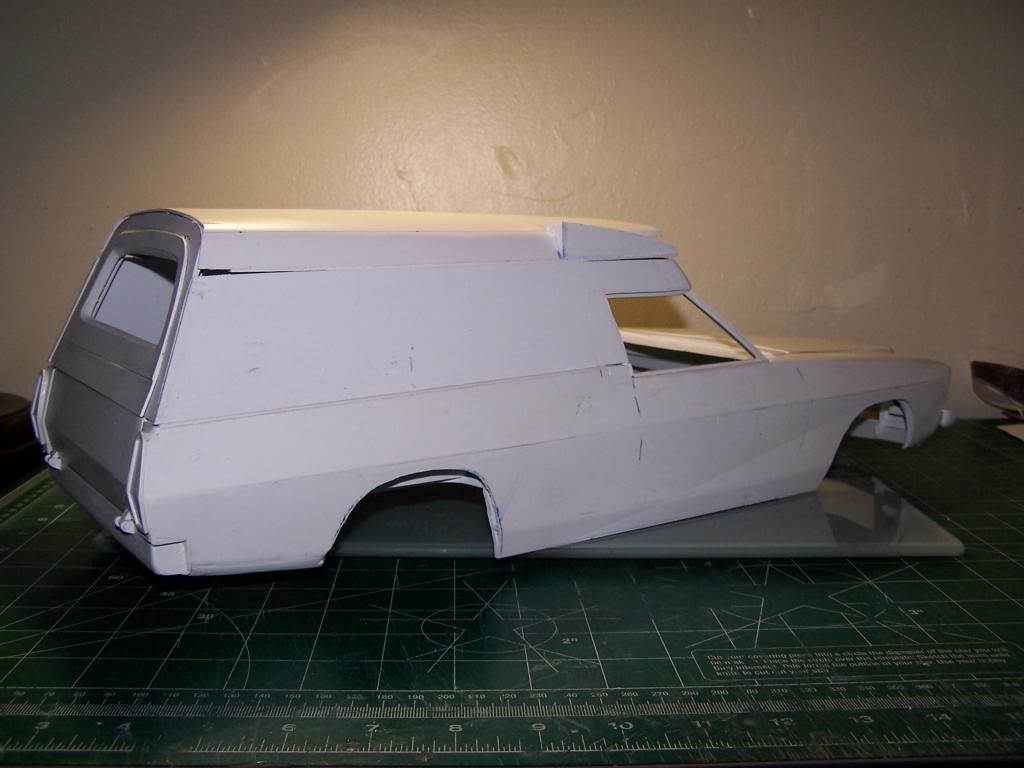
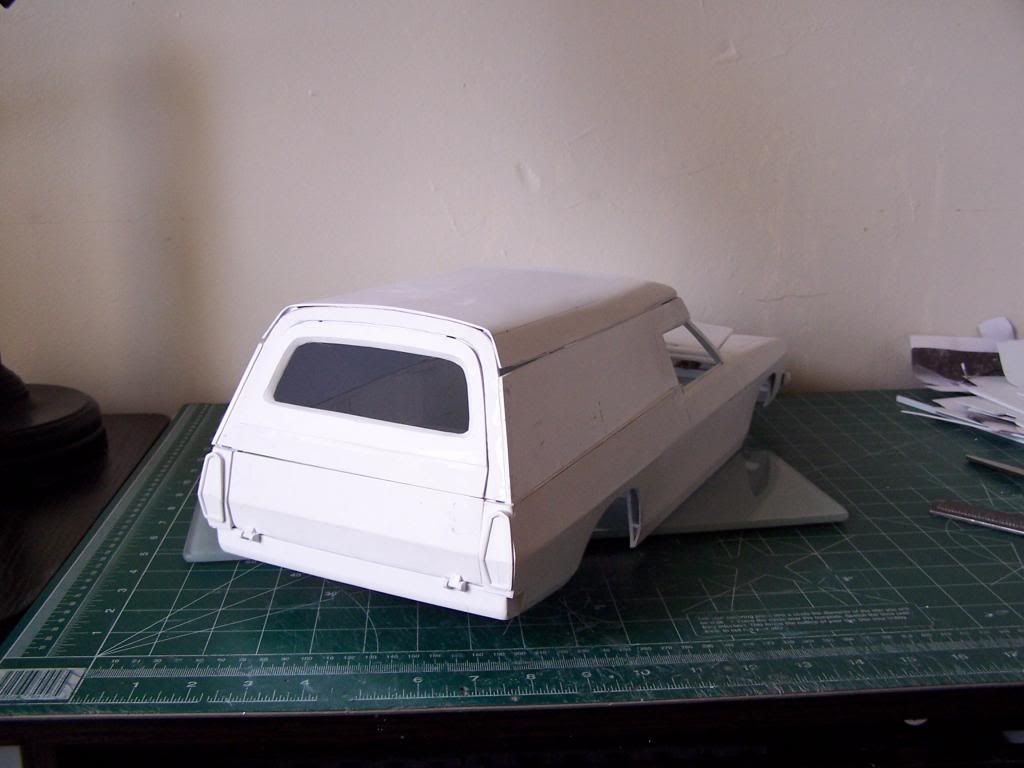
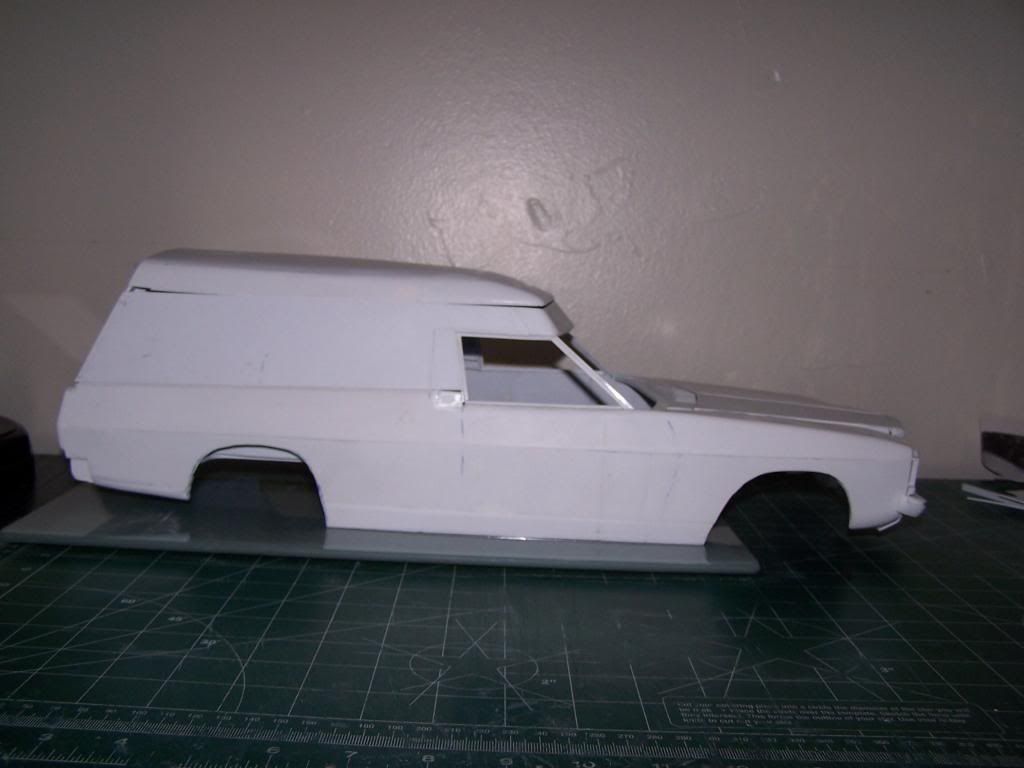
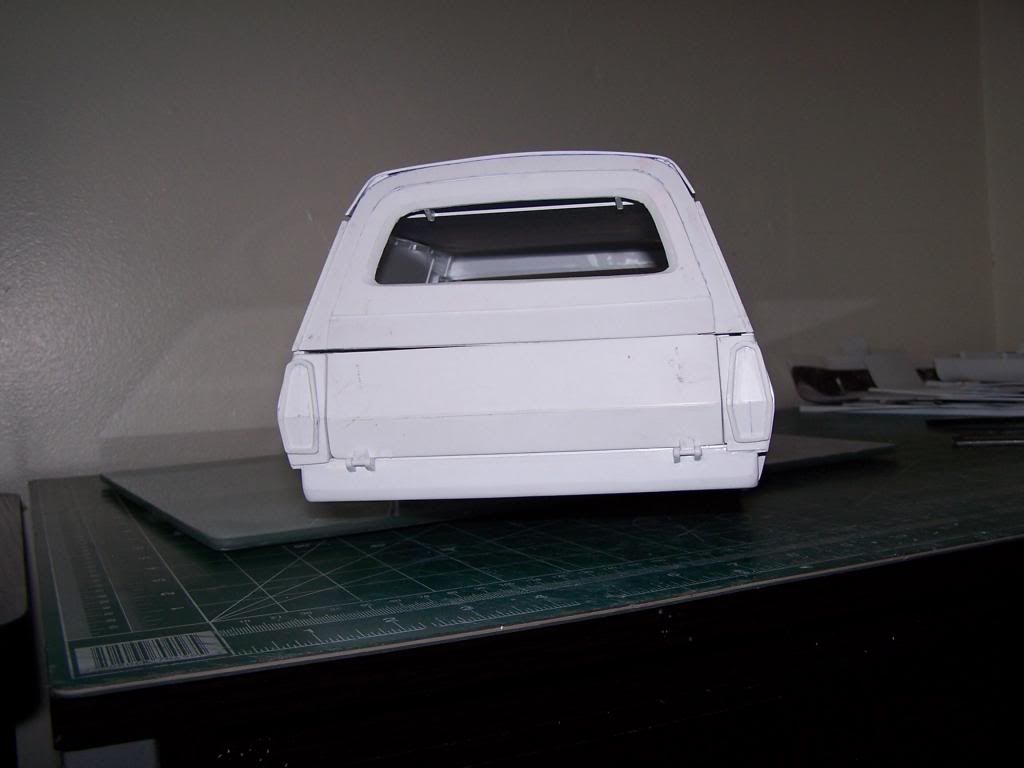
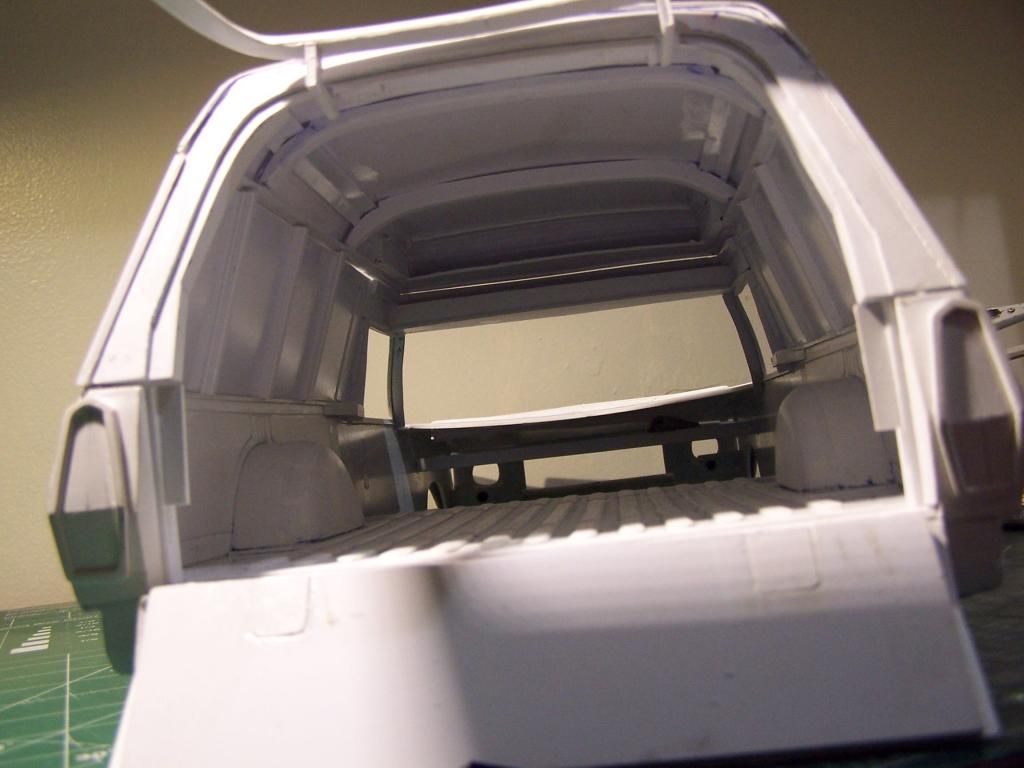
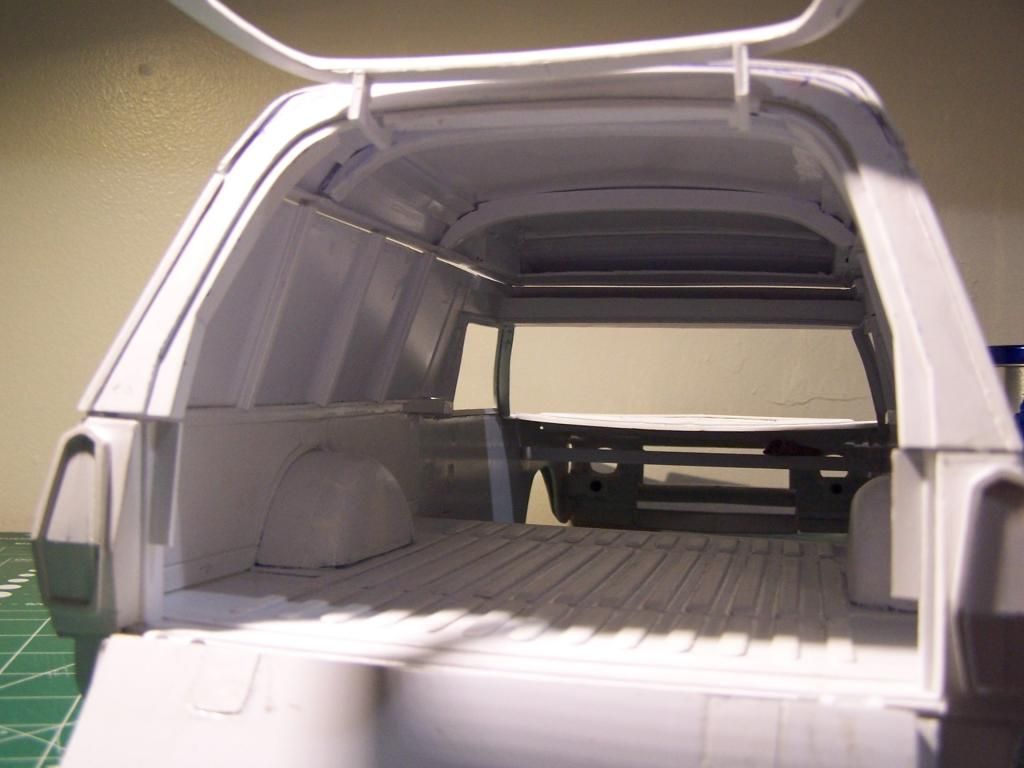
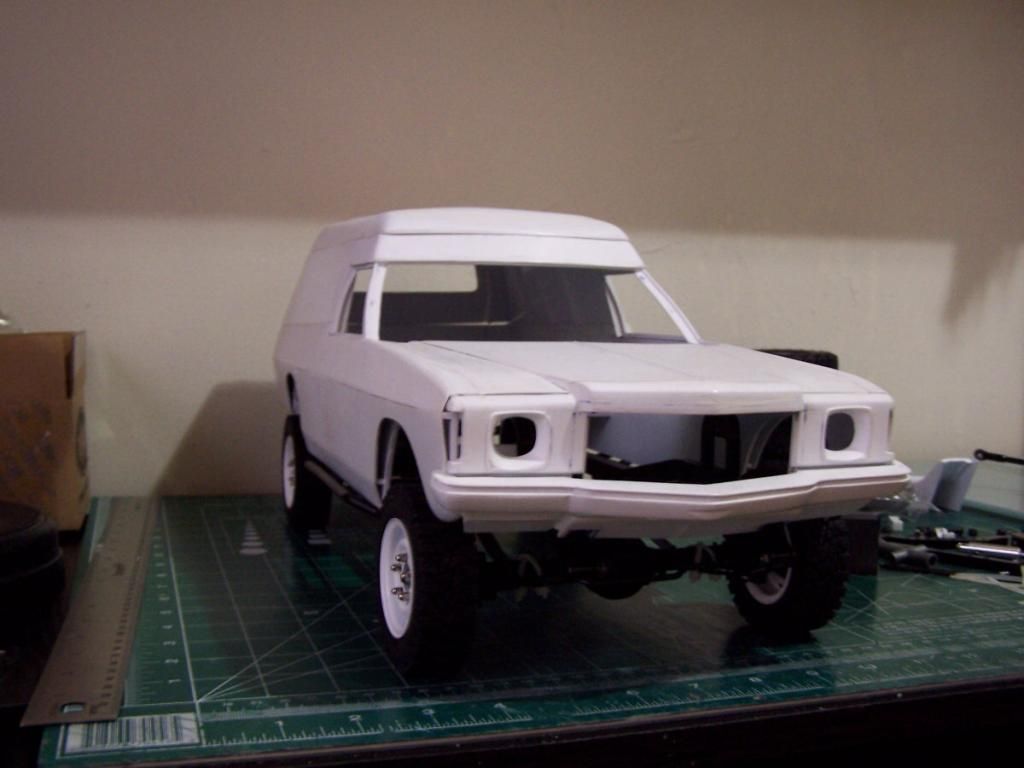
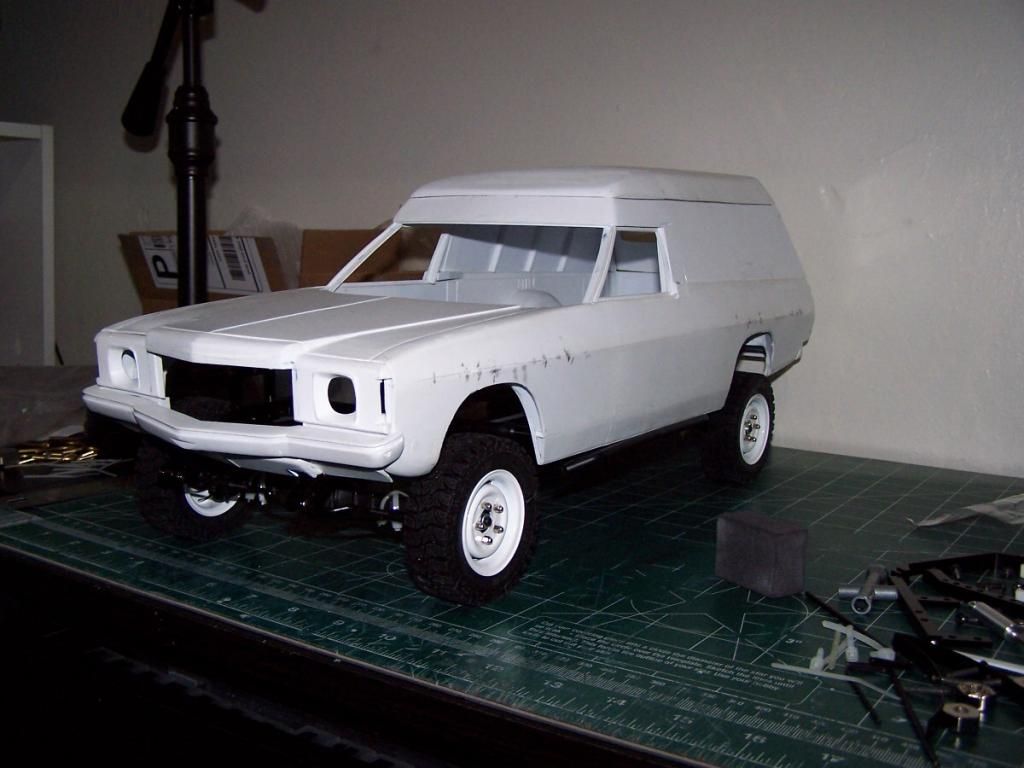
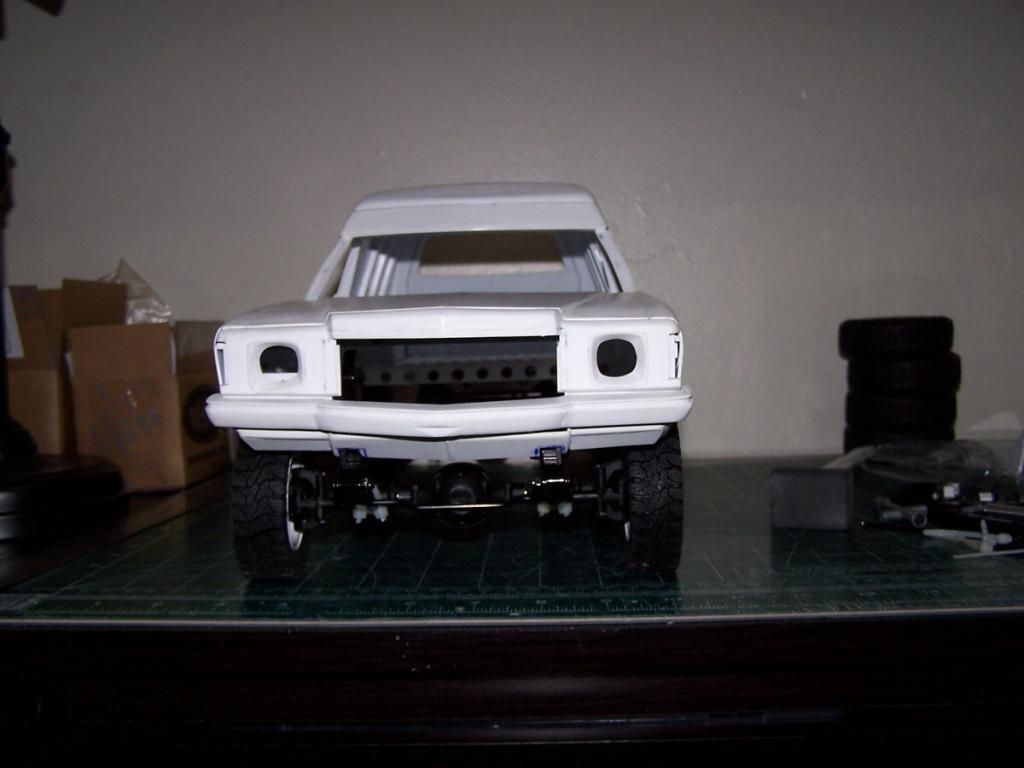
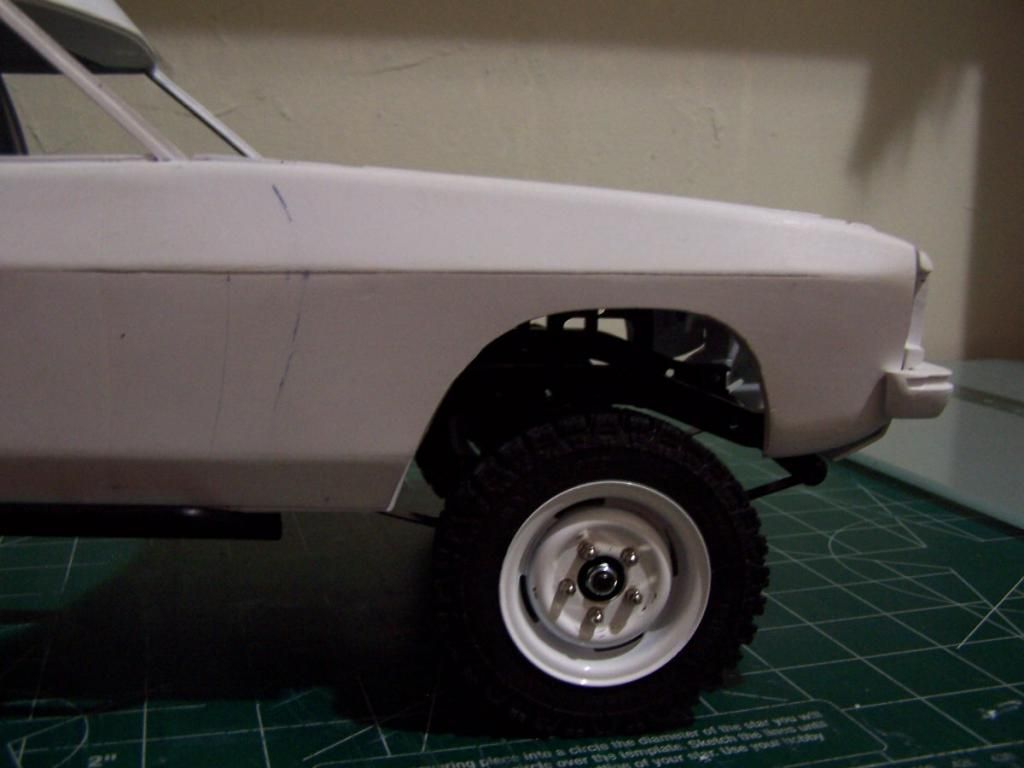
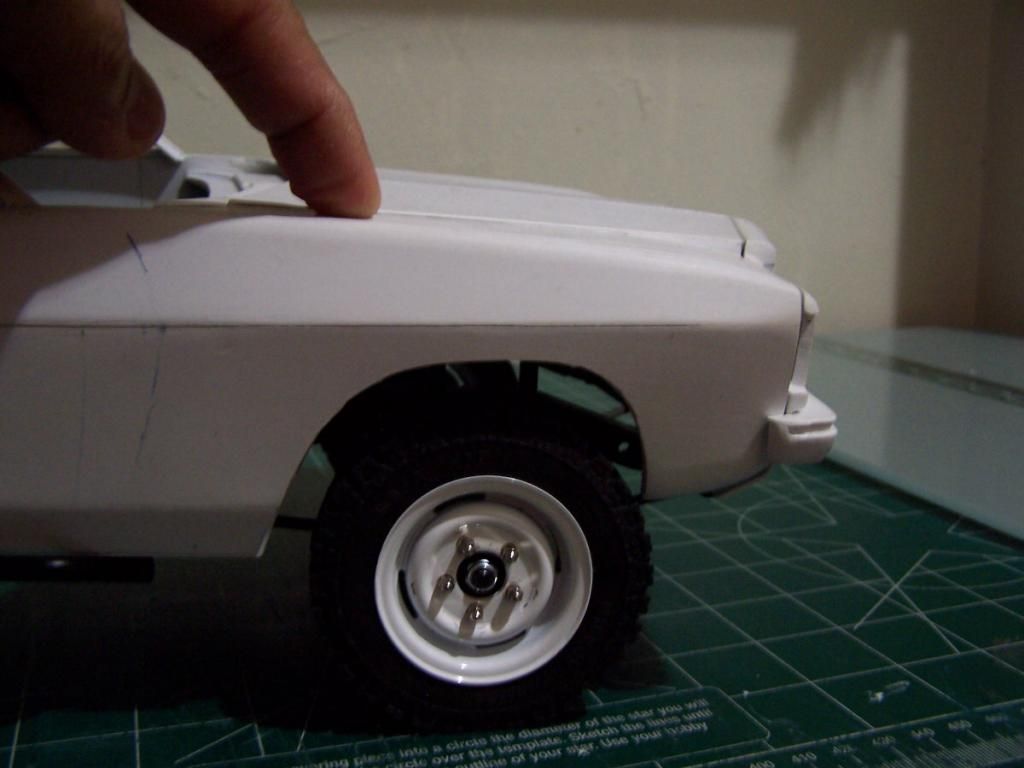
Hey guys...it's :update: time....!! Lol!
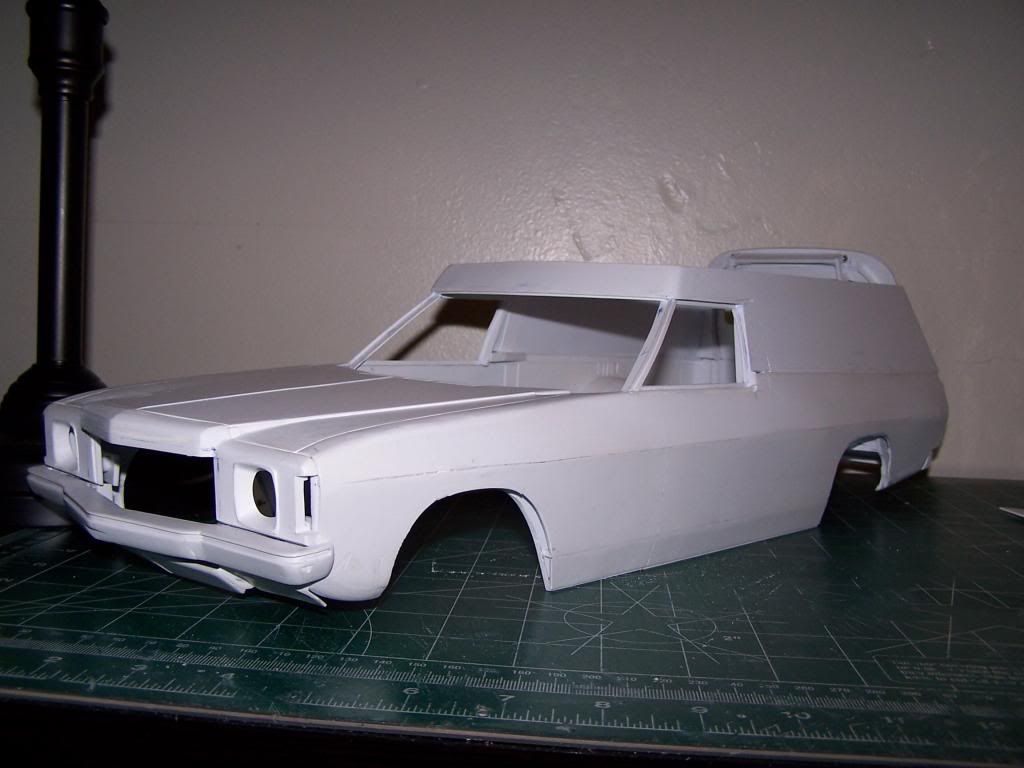
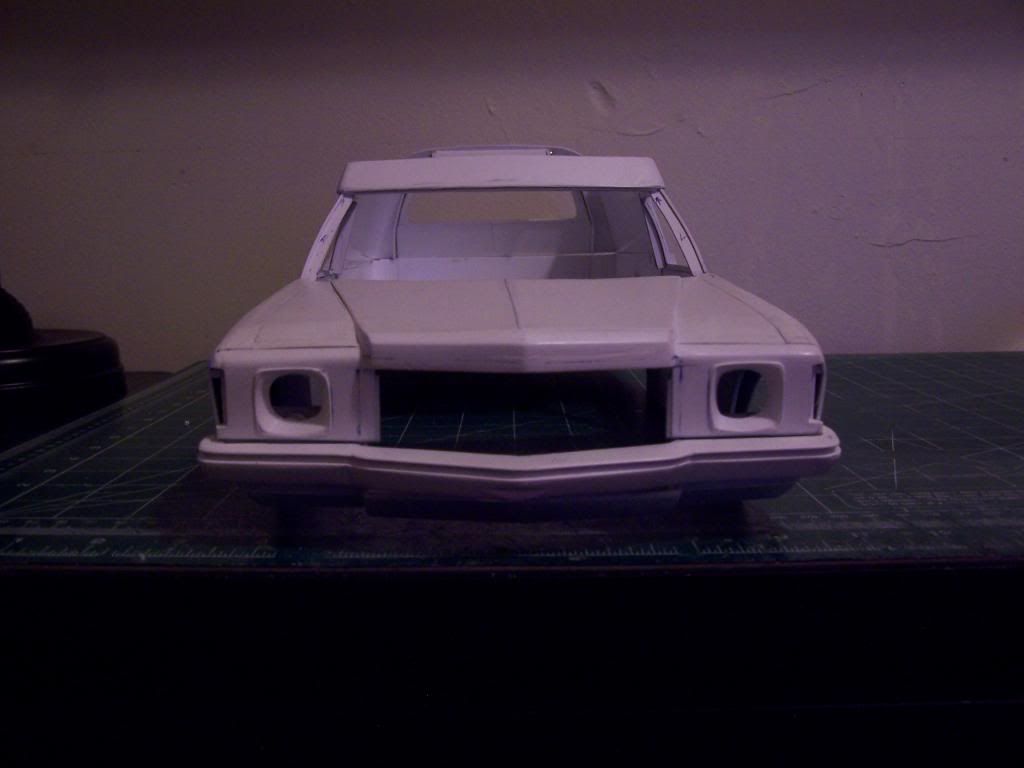
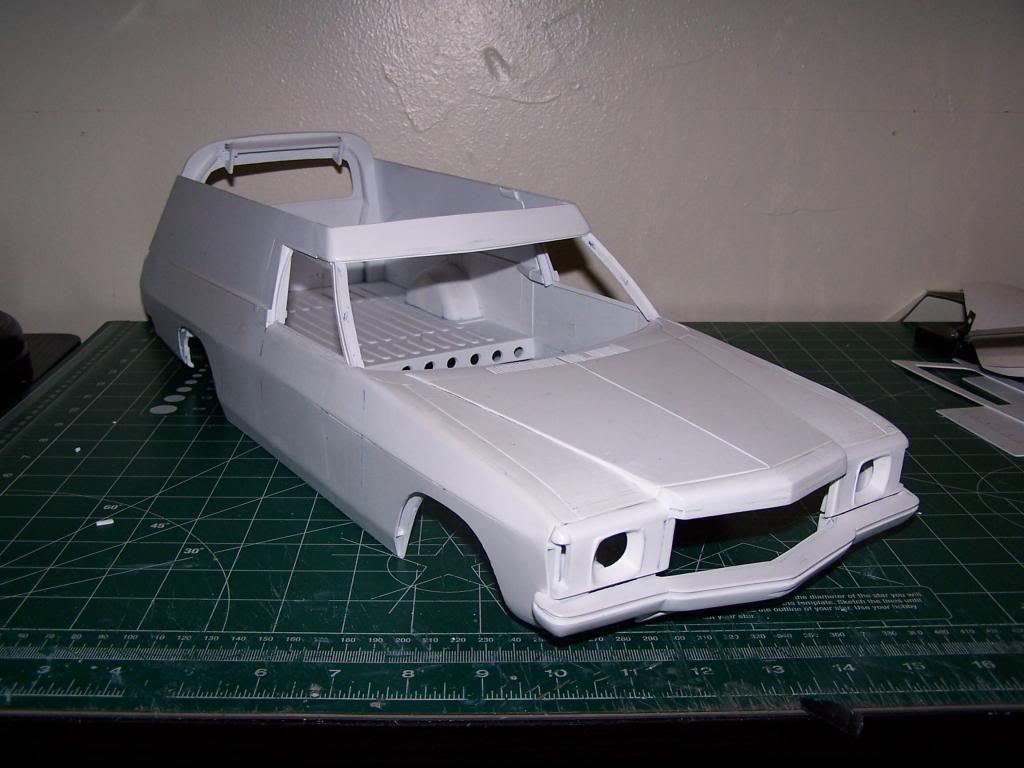
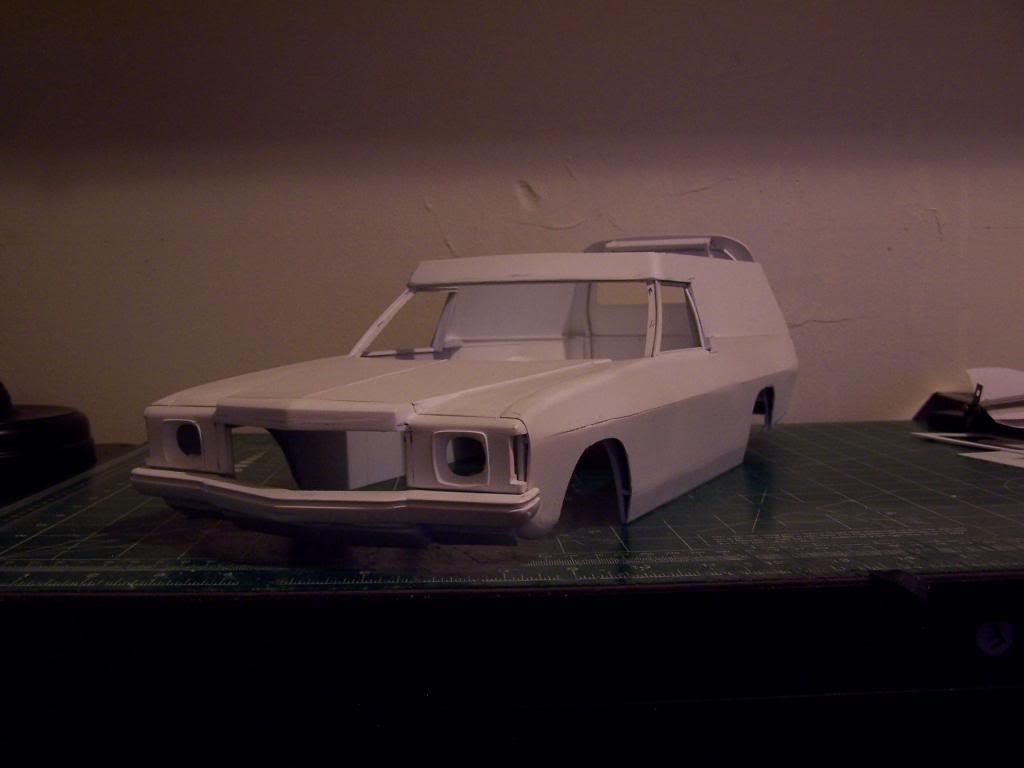
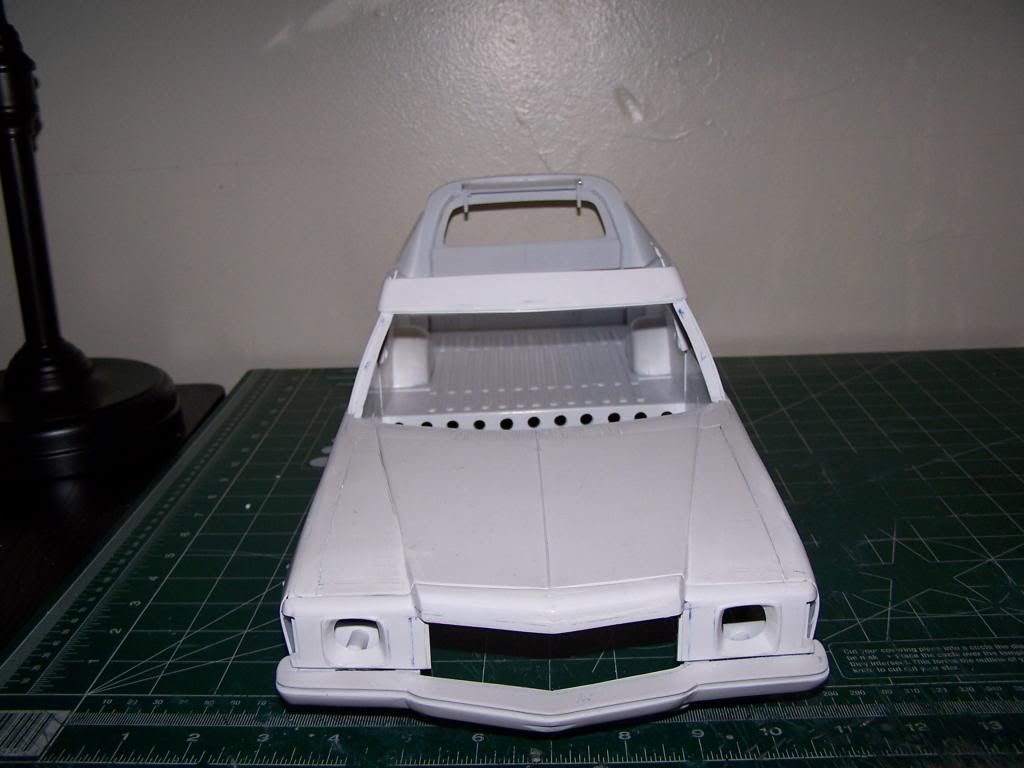
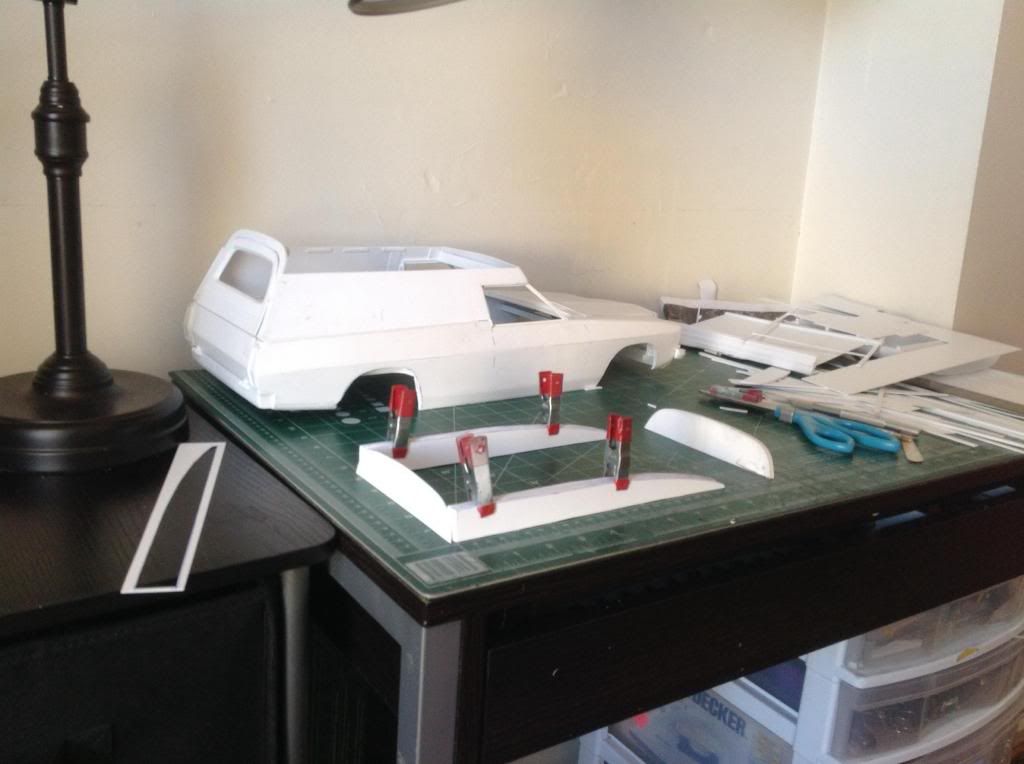
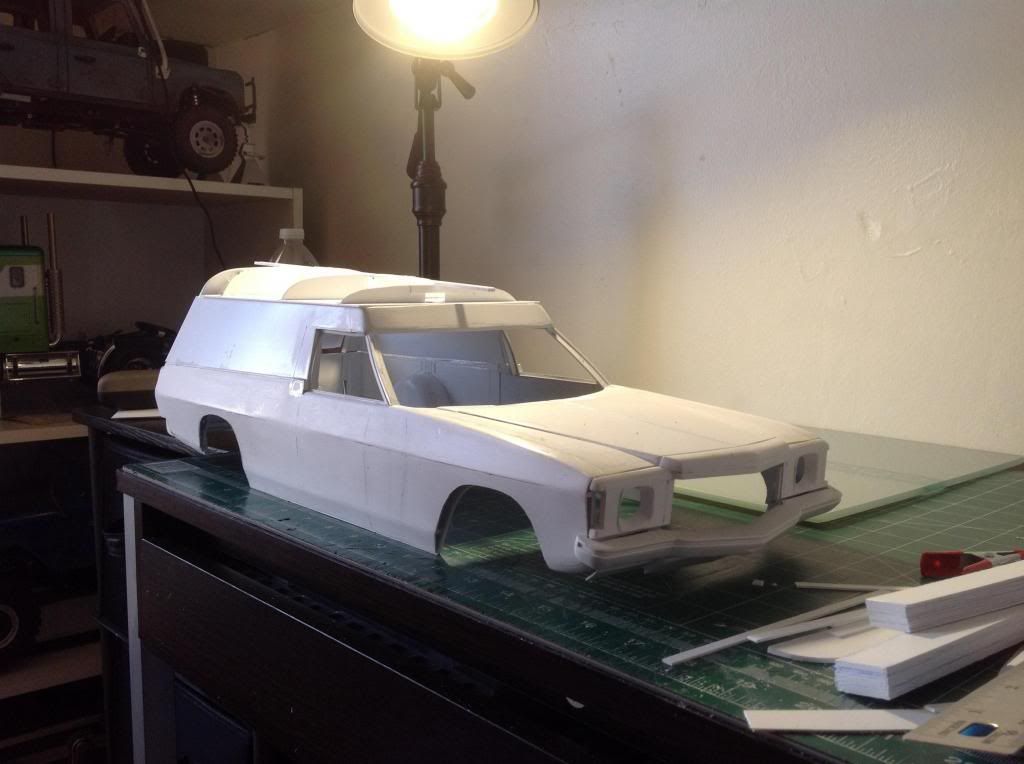
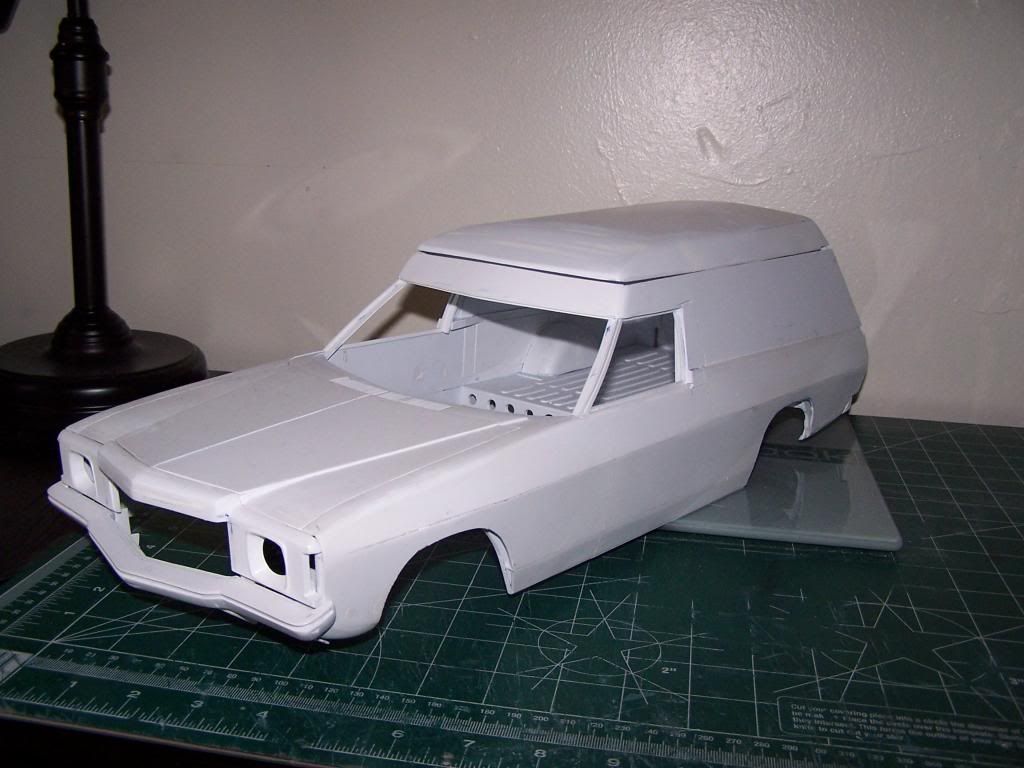
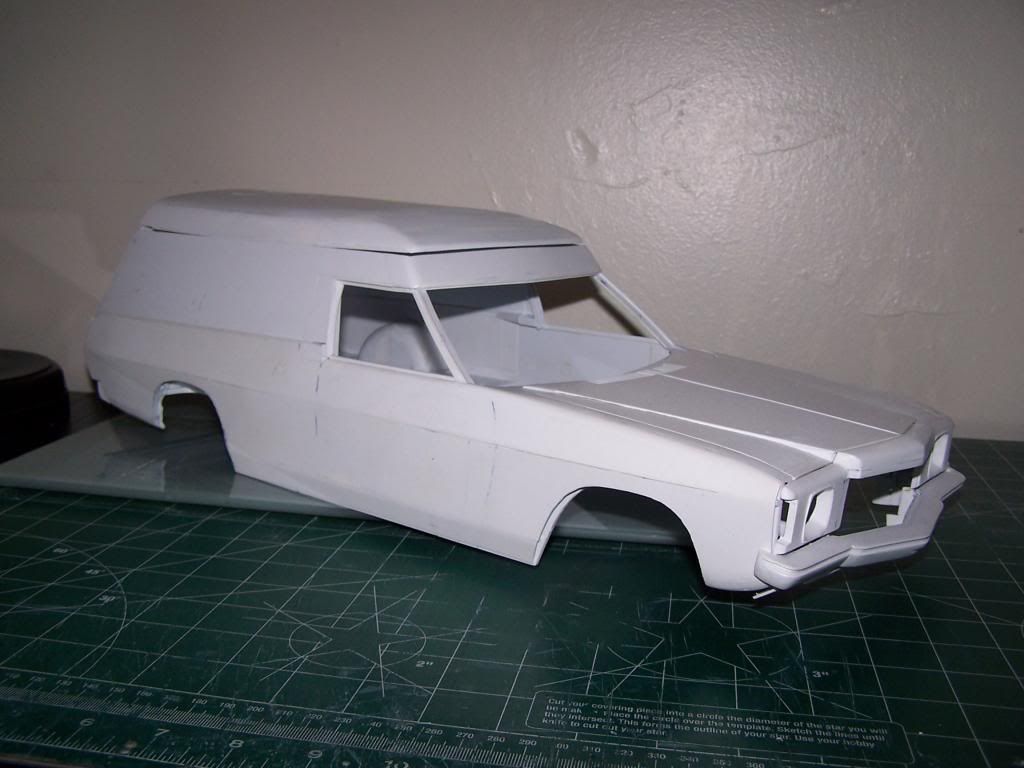
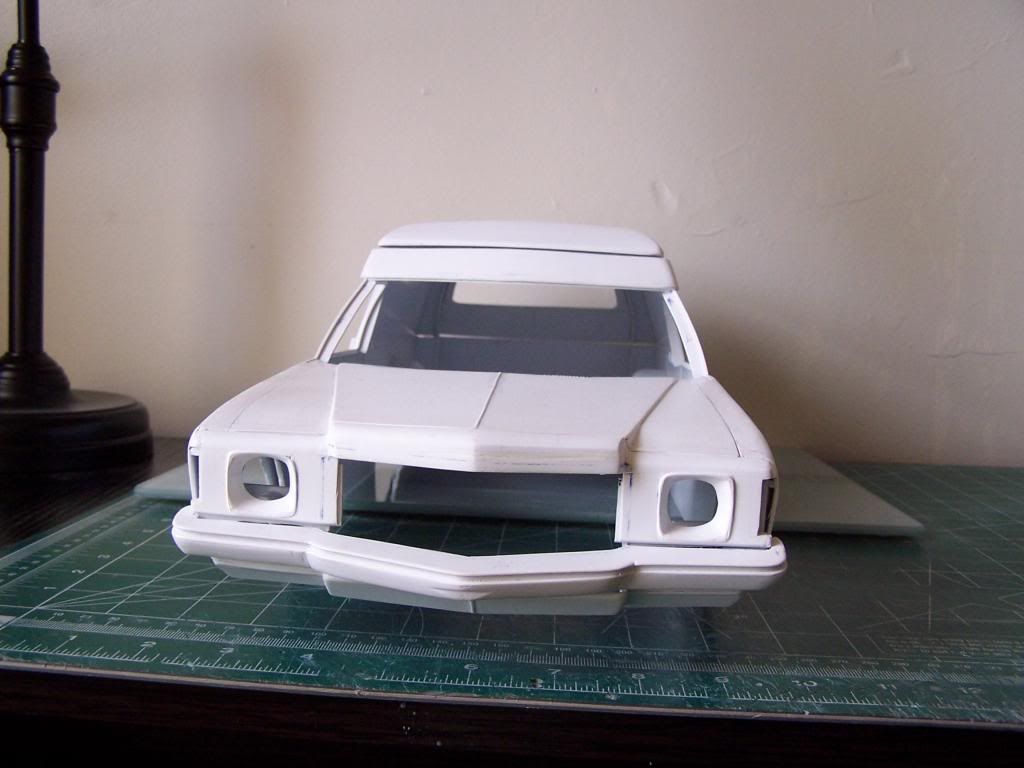
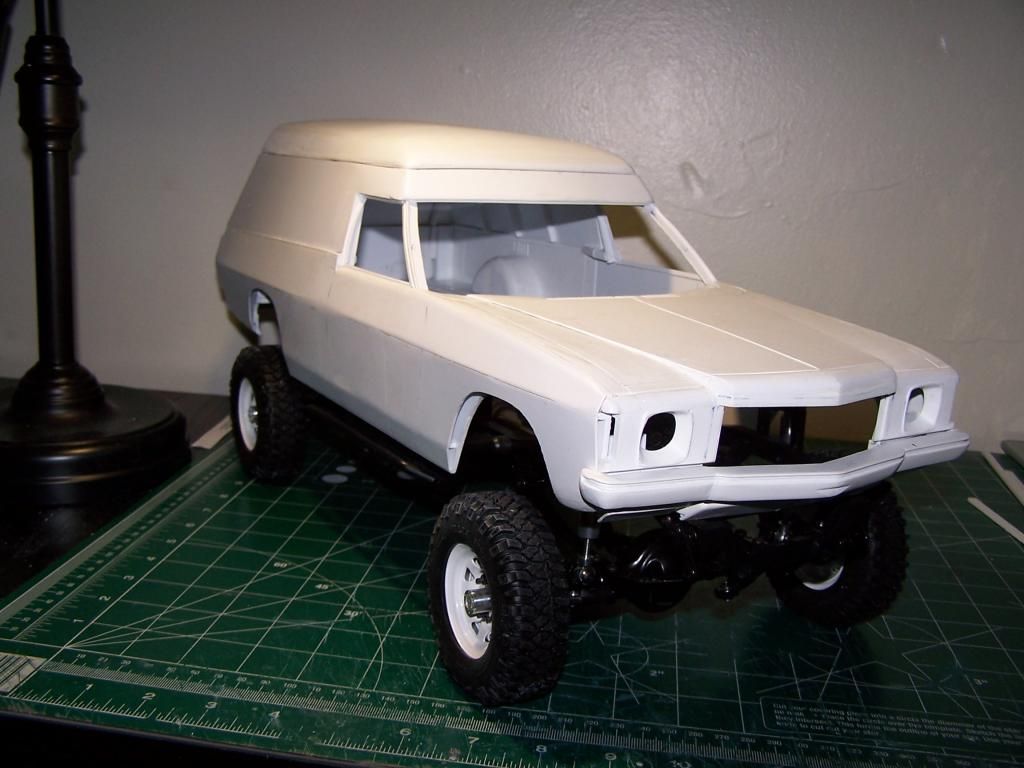
Got the front pillars in. Built the door window frames. Also the side panels plus the tailgate is now permanently fixed in...hope I didn't forget anything that I was supposed to do before attaching it...:lolbeat: that was not part of the plan but needed to be done in order to get the front pillars lined up properly...still need to tidy up the surrounding area as well...
Now it's time to start looking at the roof, building the front grille and rear bumper(s)?....also need to start planning the interior (dash, flooring seats etc.)
Anywho some pics..


 05-17-2014, 11:38 PM
#55
Senior Member
Join Date: Sep 2008
Location: Harleysville, PA
Posts: 1,251
Likes: 0
Received 0 Likes
on
0 Posts
Looks awesome so far. Been watching on scale4x4 as well. I don't have an account there but I have been lurking for years. Still looks like a Monte Carlo wagon to me lol! There's a local guy who's been bringing his Monte Carlo out now that it's nice, identical to the pic I posted on the first page.

 05-20-2014, 11:01 PM
#58
Thread Starter
Join Date: Jan 2004
Location: Queens,
NY
Posts: 559
Likes: 0
Received 0 Likes
on
0 Posts
10-04-2014, 08:55 PM
#59
Thread Starter
Join Date: Jan 2004
Location: Queens,
NY
Posts: 559
Likes: 0
Received 0 Likes
on
0 Posts
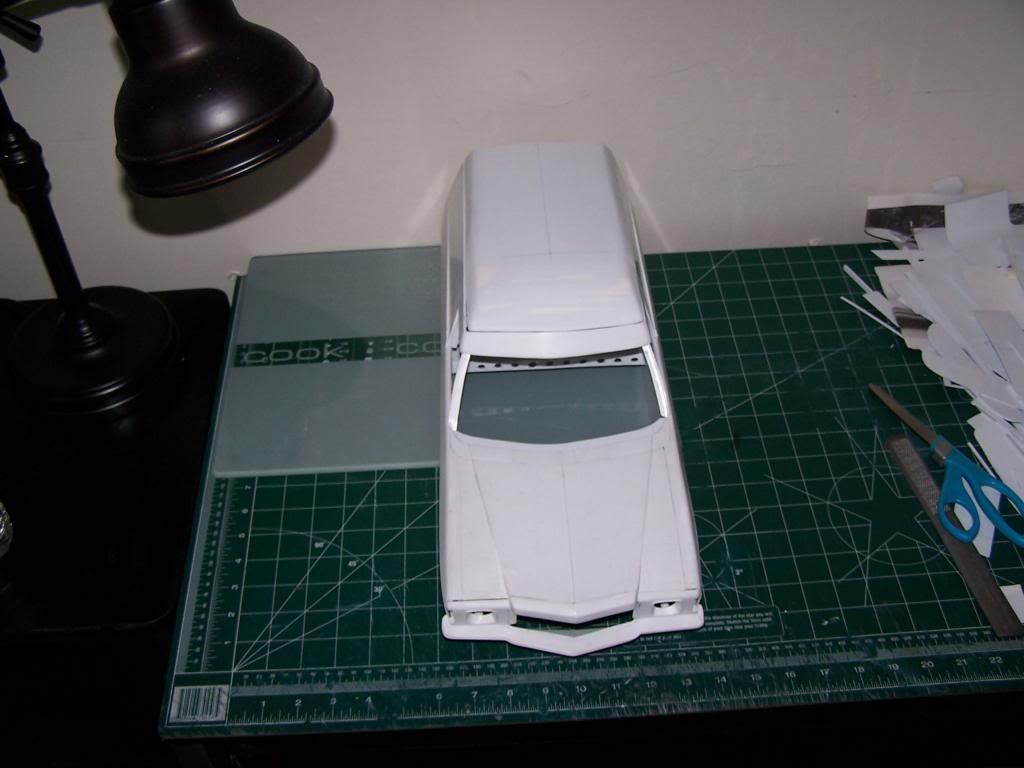
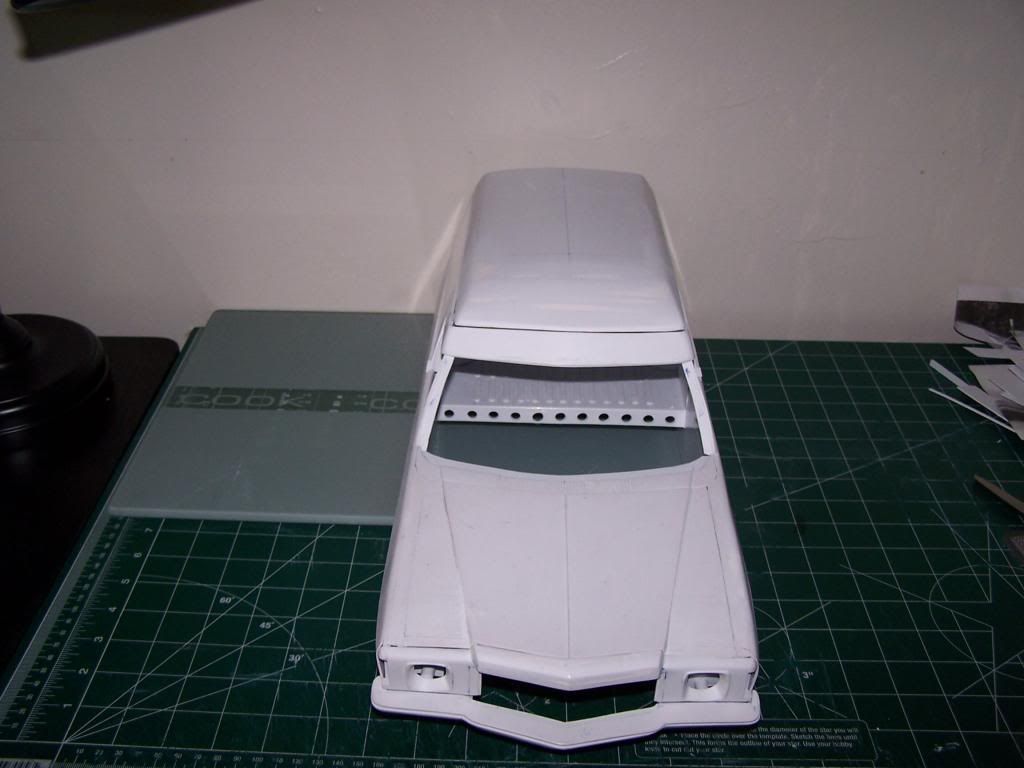
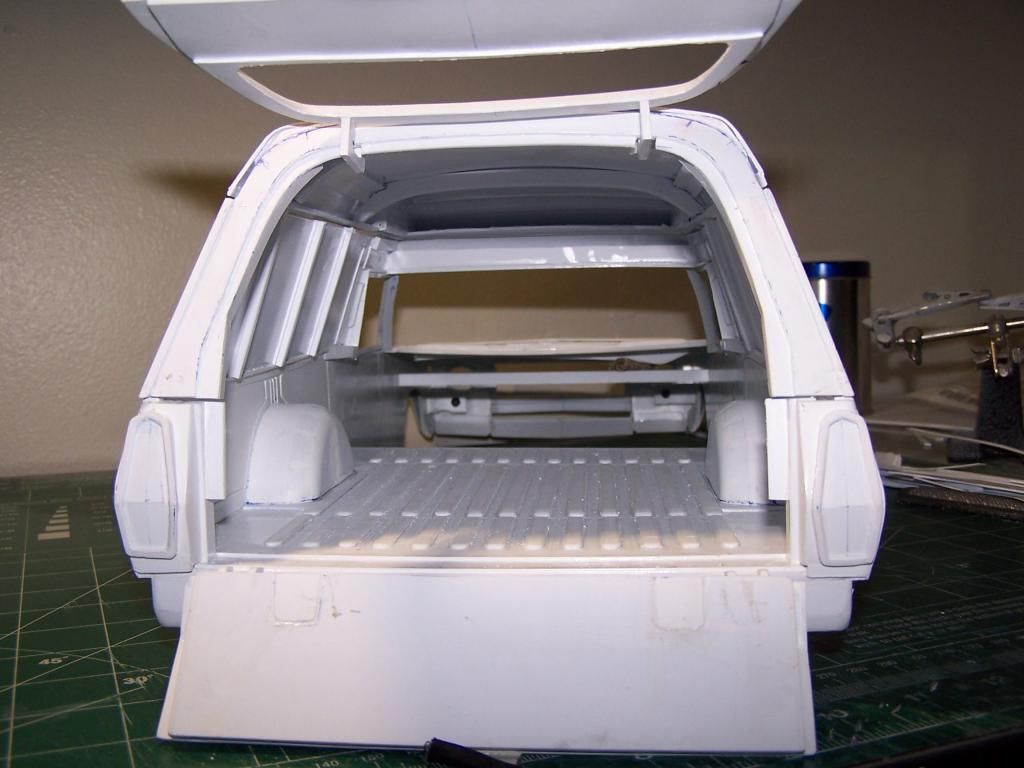
Long overdue update.......
Been out of it for most of the summer with work...
Havent done one a whole lot...got the roof basically done. Just needs some filler putty in the low spots. Got the roof ribs in as well as the ribs on the inside of the side panels...
also managed to get the ride height of the chassis down but haven't taken any pics of that as yet...also started on the front flooring as well as a custom Shaggin' interior for the rear (the plan is to make this removable so I don't permanently cover up the stock rear interior...lol!
anywho.....some pics...


 10-04-2014, 09:02 PM
#60
Thread Starter
Join Date: Jan 2004
Location: Queens,
NY
Posts: 559
Likes: 0
Received 0 Likes
on
0 Posts
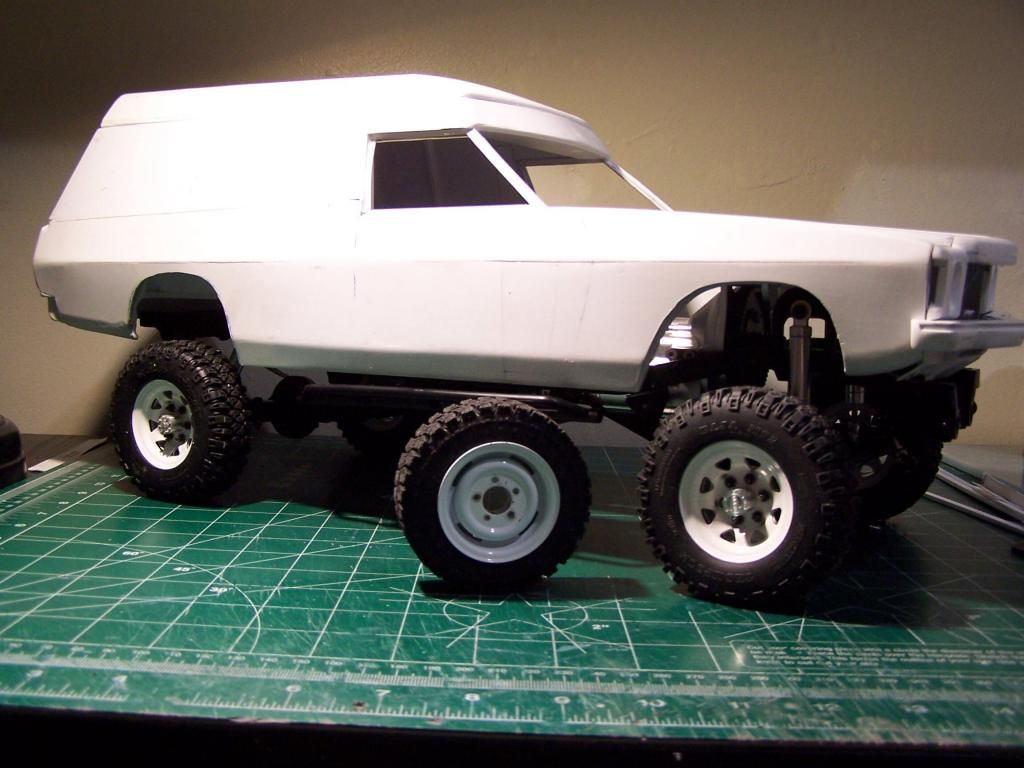
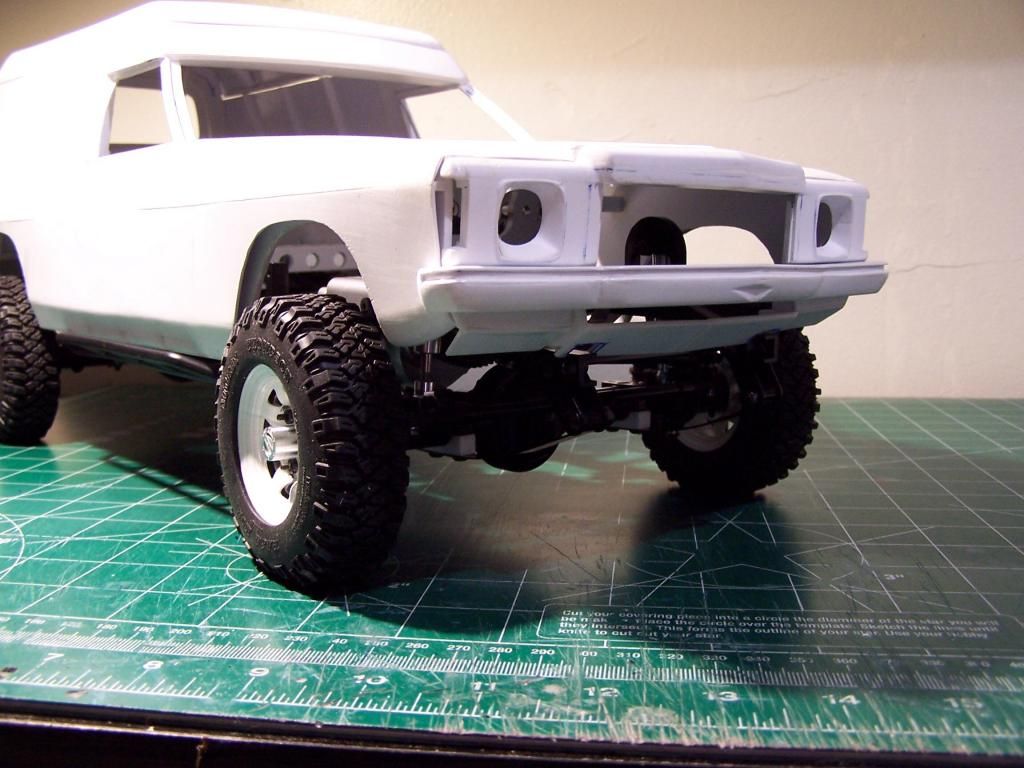
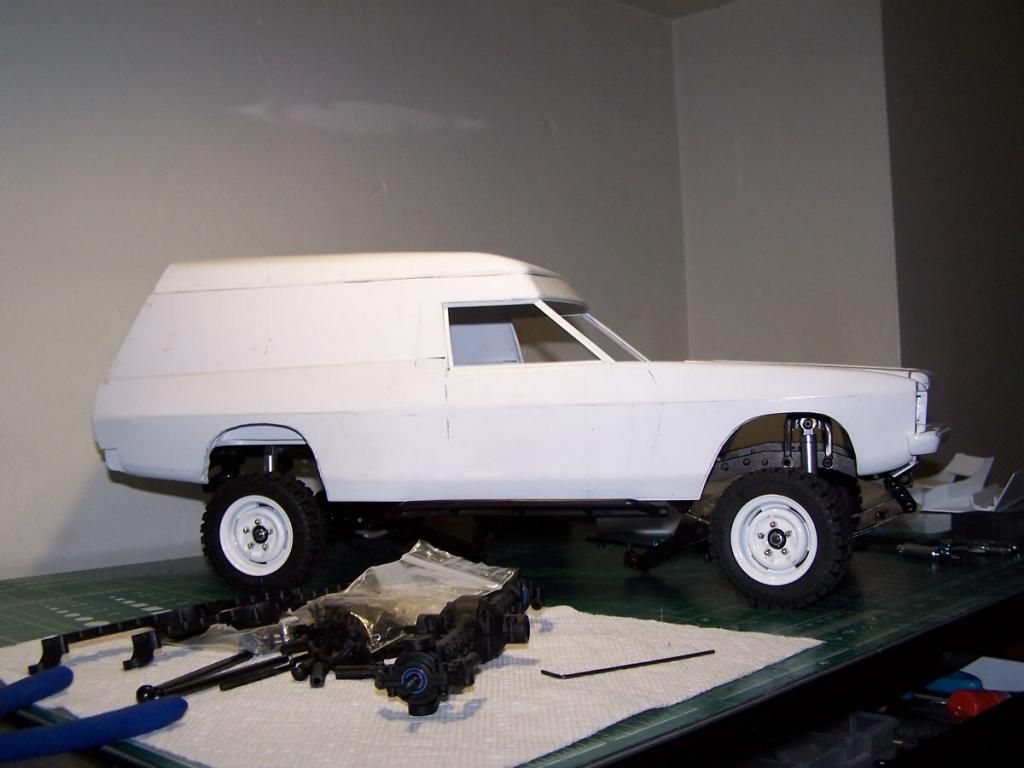
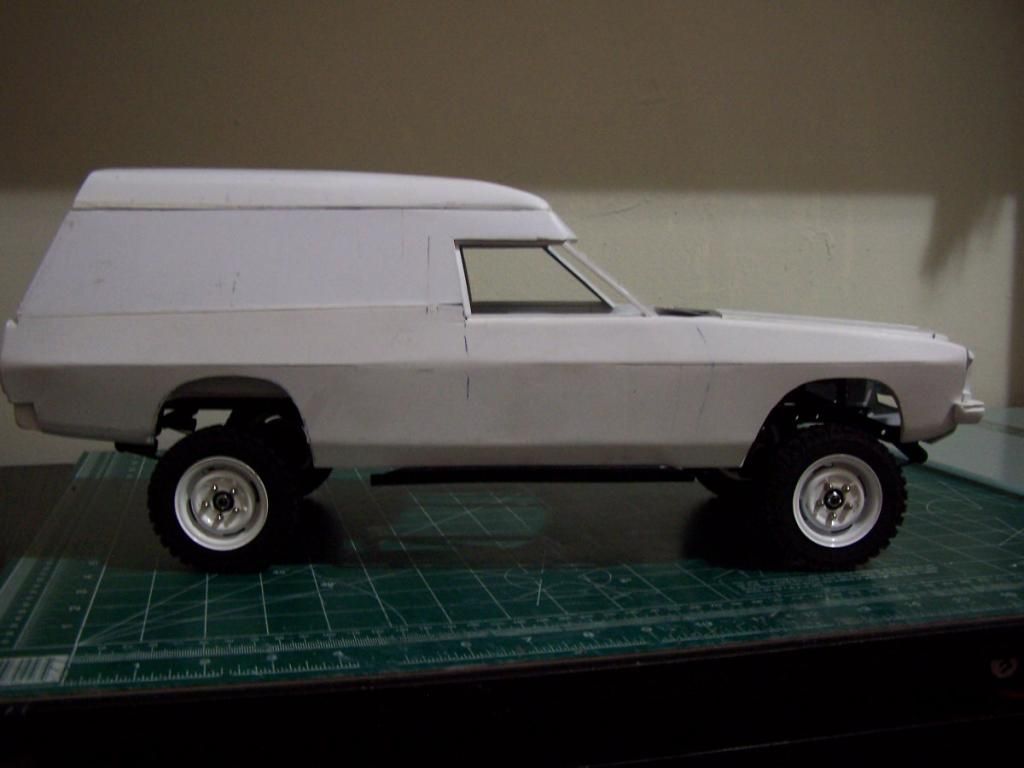
also swapped out the original mud thrashers for the Mickey Thompson MTZs. Looks a lot better...just need to figure out a way to get the chassis lowered a bit...
Okay.....break out the Kingsford boys...cause we got ribs...lol!
Replaced with Mickey T. Baja MTZs.
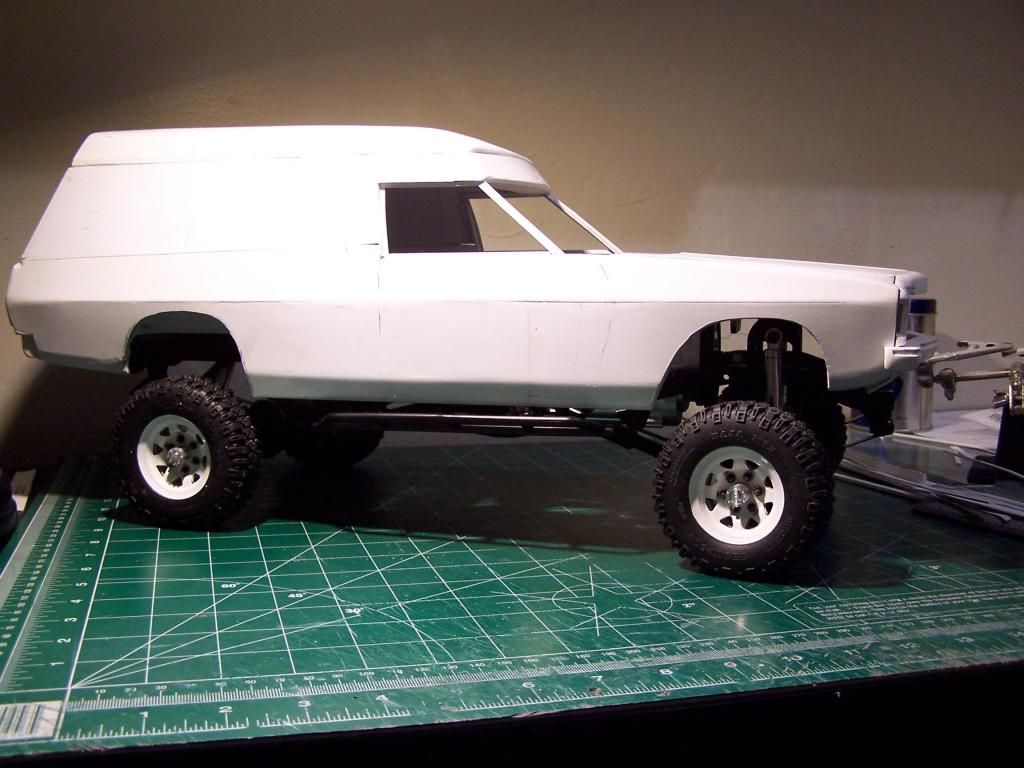
Stock Mud Thrasher for comparison...
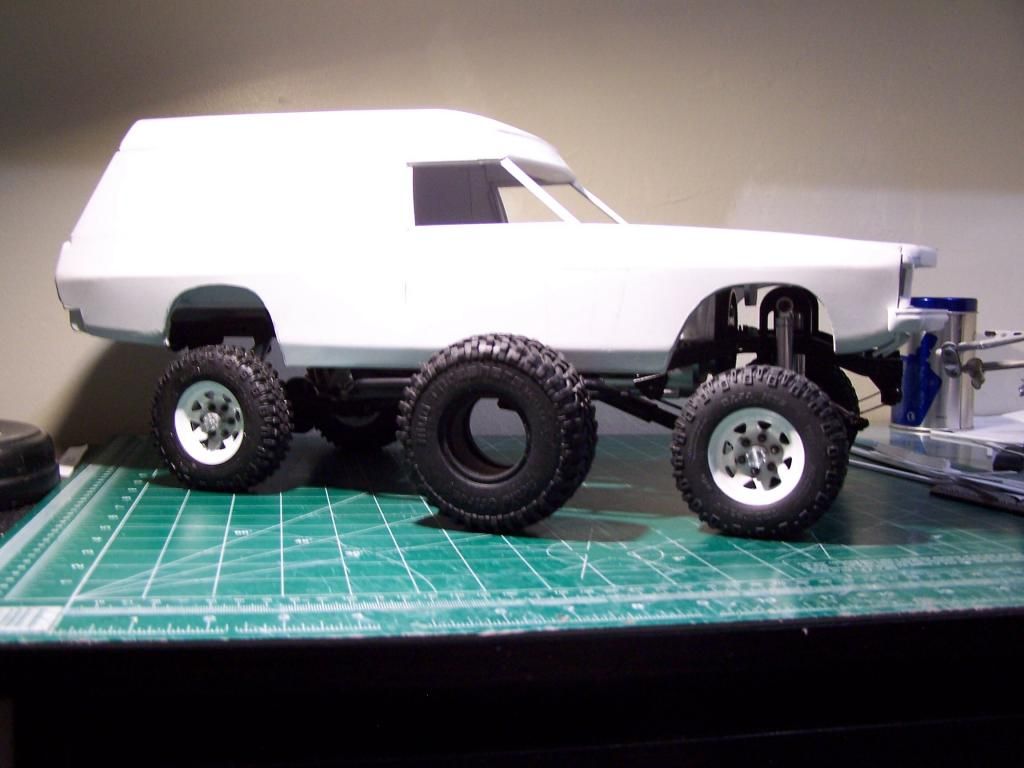
The first cut n shut job for me... Mickey Thompson 1.7 ATZS ...
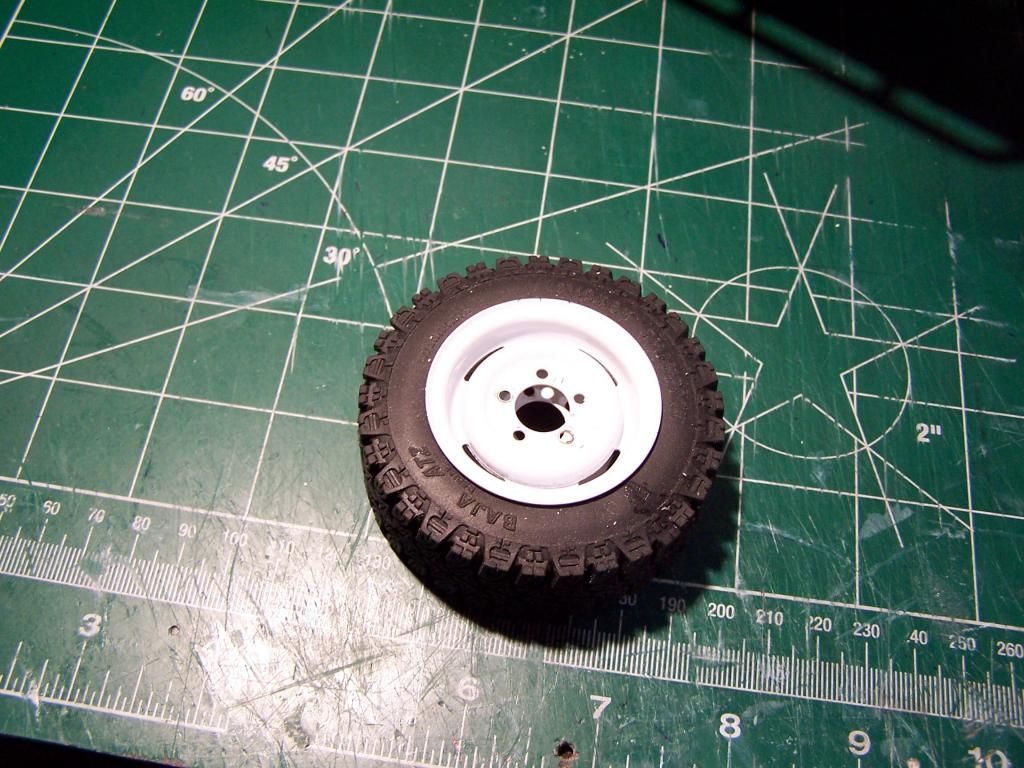
Even better...lol!
Okay.....break out the Kingsford boys...cause we got ribs...lol!


Replaced with Mickey T. Baja MTZs.


Stock Mud Thrasher for comparison...

The first cut n shut job for me... Mickey Thompson 1.7 ATZS ...

Even better...lol!

 10-07-2014, 08:37 AM
#62
Thread Starter
Join Date: Jan 2004
Location: Queens,
NY
Posts: 559
Likes: 0
Received 0 Likes
on
0 Posts
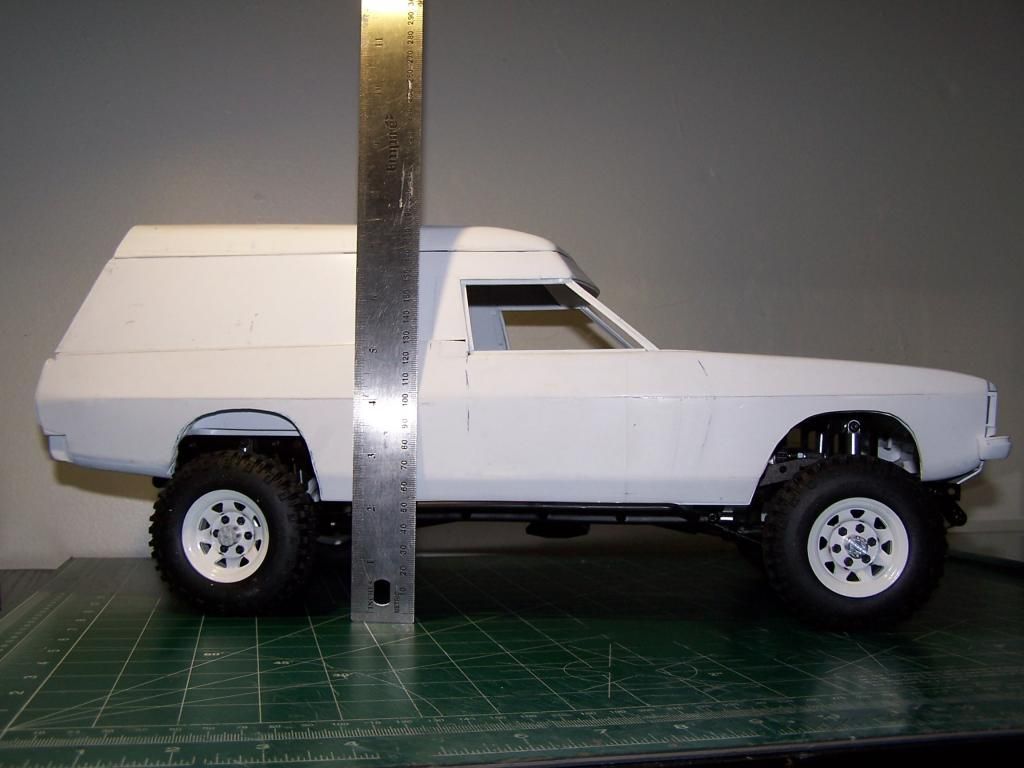
Hey guys...small update..!
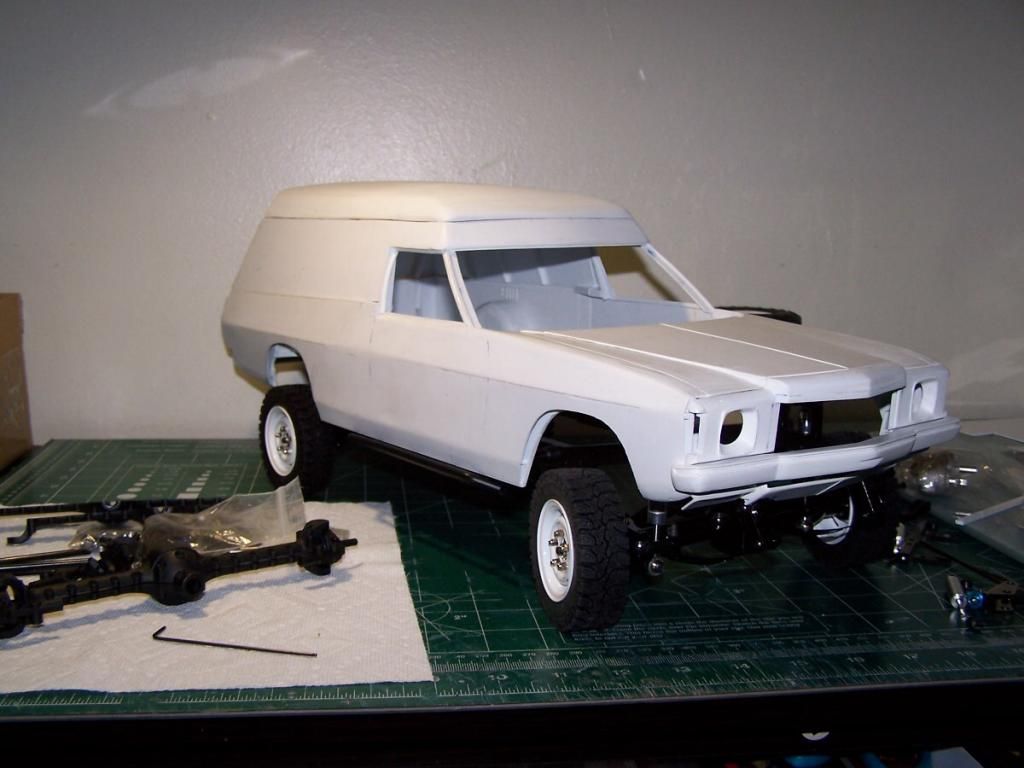
Found the ride height that I'm looking for ...kinda...I really have no idea if I mucked up the suspension but will like to keep it at this height...
Got the front axle over the leaf springs. I made some blocks out of styrene to mount them.
I changed out the shocks all around for shorter shocks..some Tamiya trailer shocks that I had laying around..they really suck as they aren't that smooth and the travel isn't a lot, maybe half an inch...
Anywho...some pics....


 10-11-2014, 11:20 AM
#63
Thread Starter
Join Date: Jan 2004
Location: Queens,
NY
Posts: 559
Likes: 0
Received 0 Likes
on
0 Posts
Hey guys... Not much of an update...
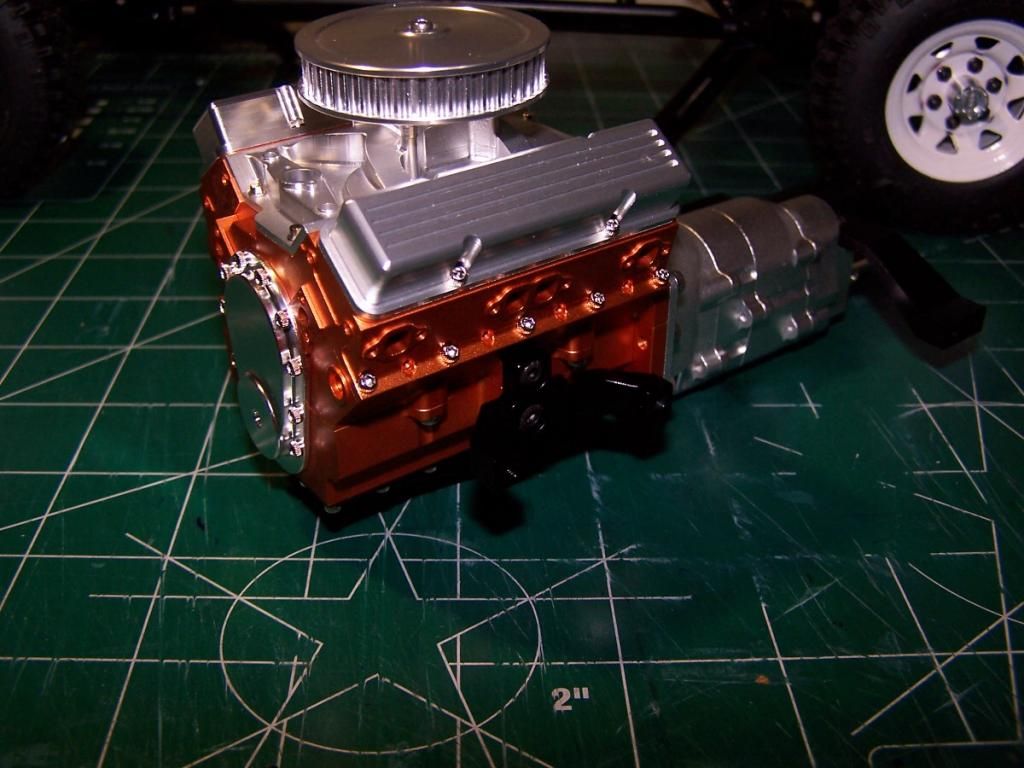
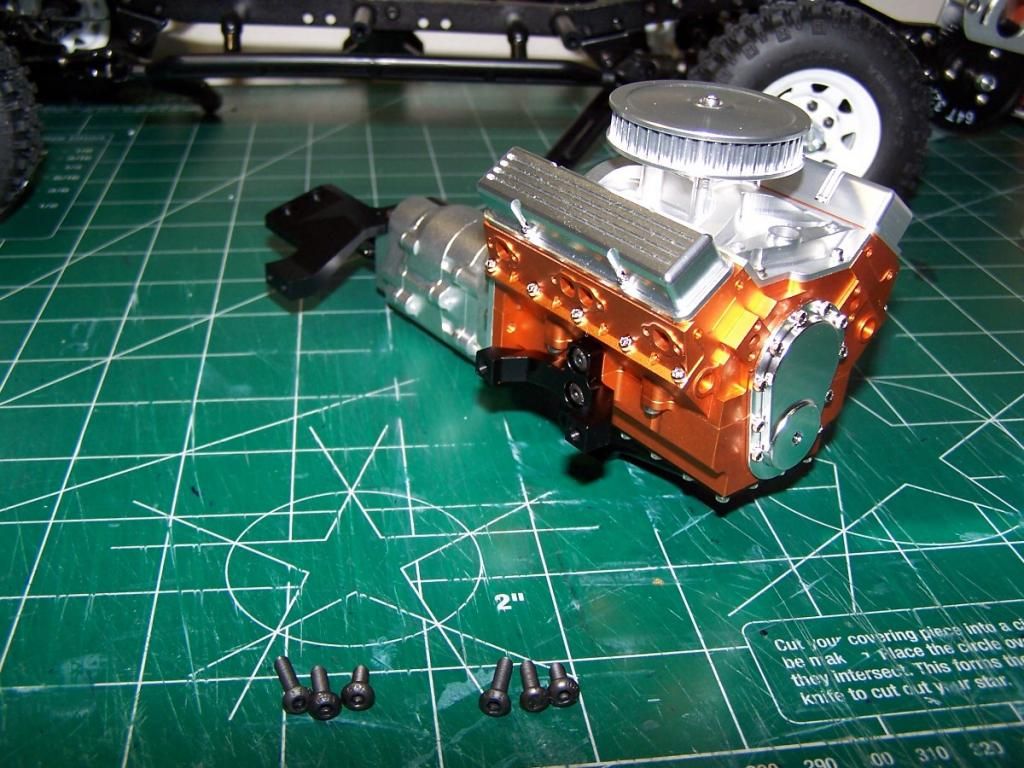
But this bad boy showed up tonight....
so I guess it's no more lame excuses about the completing the floor and trying to get it looking stock....")
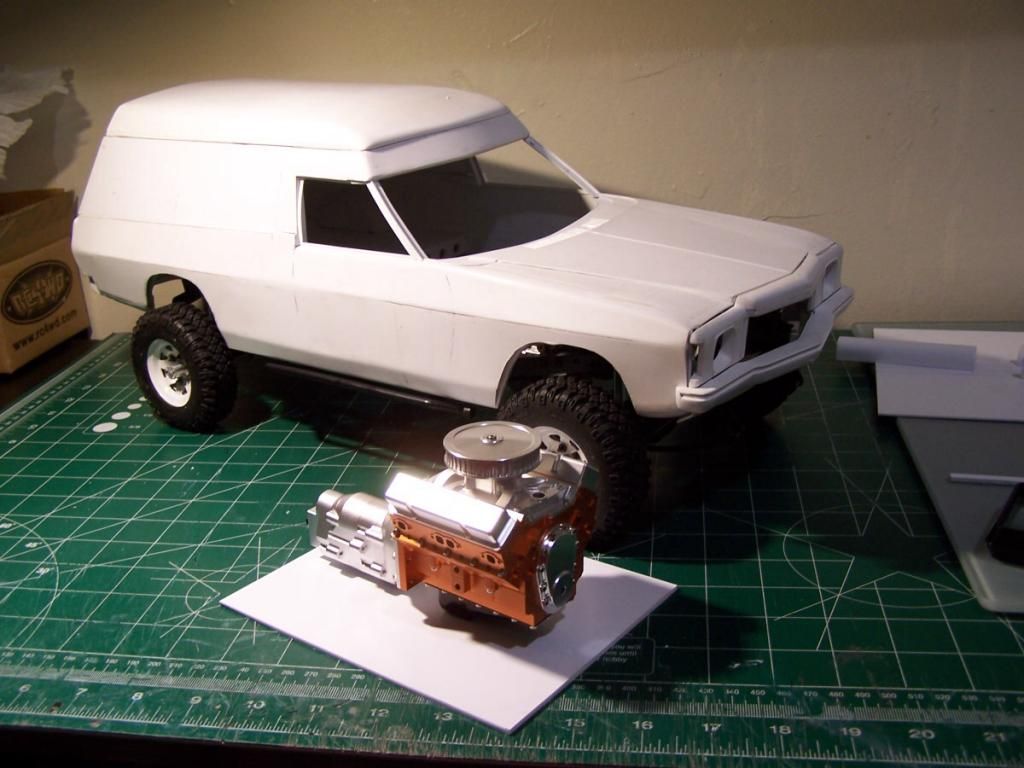
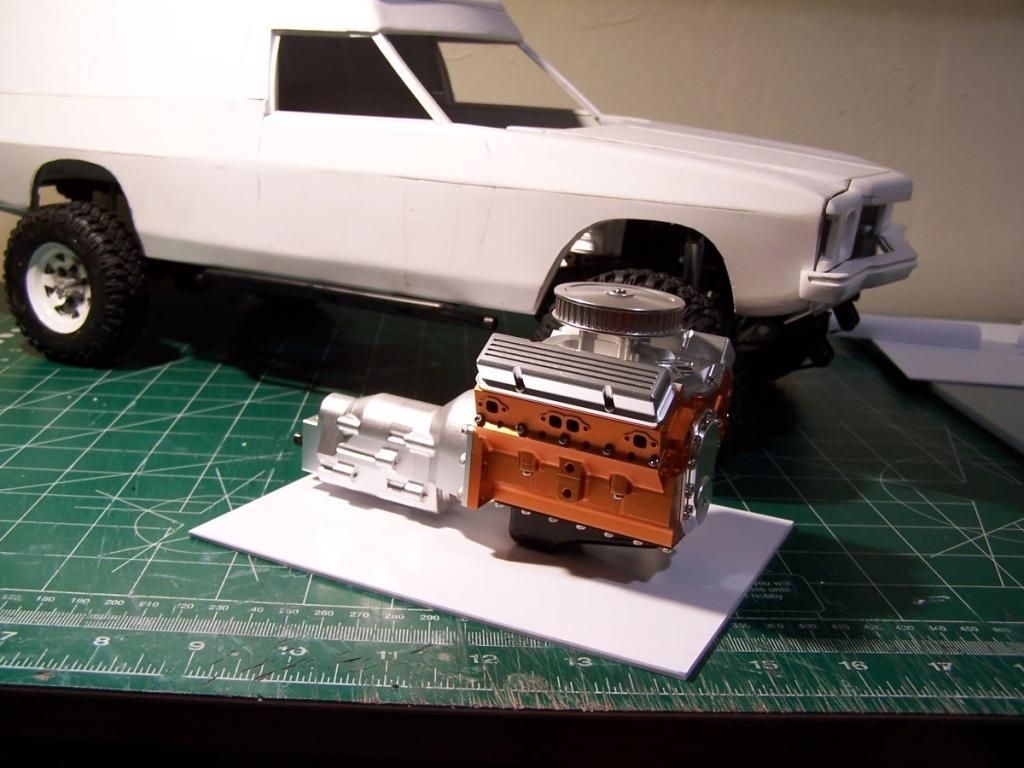
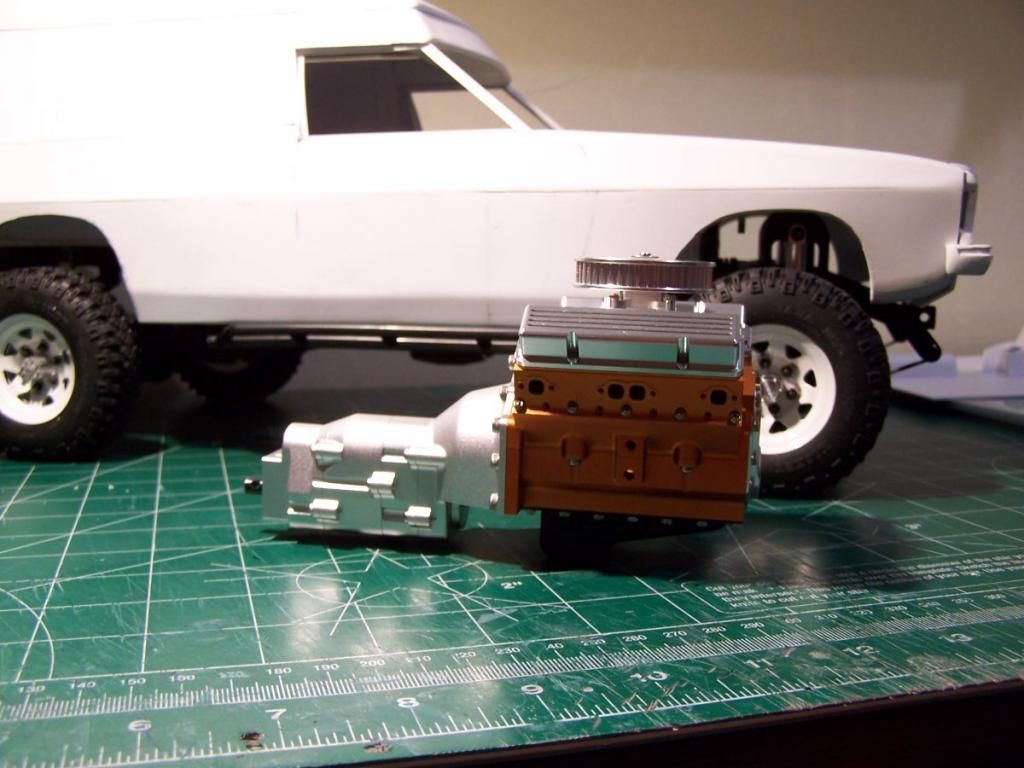
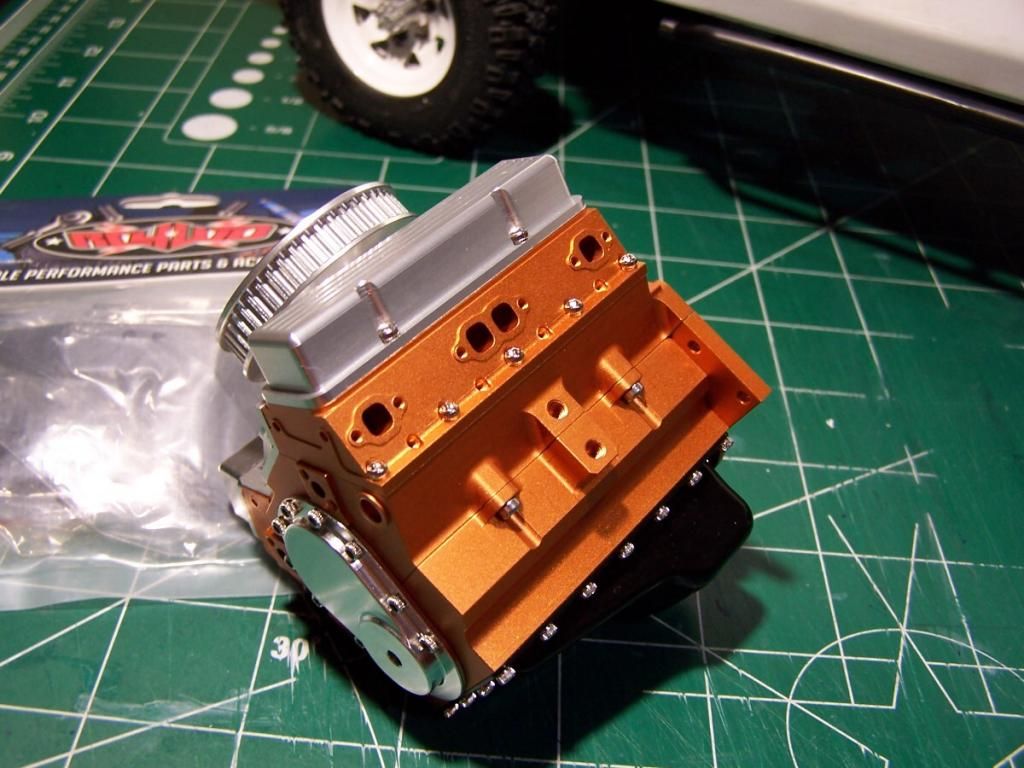
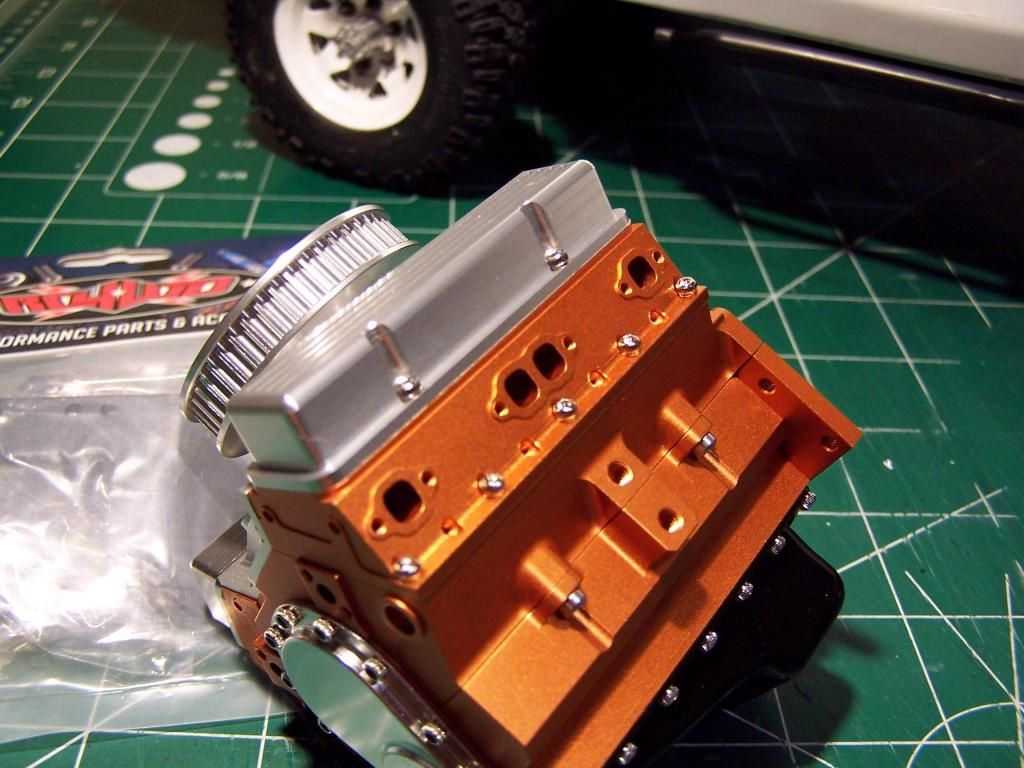
Talk about detail....
No styrene work tonight....just gonna stare at it till I feel sleepy.....
But this bad boy showed up tonight....
so I guess it's no more lame excuses about the completing the floor and trying to get it looking stock....


Talk about detail....
No styrene work tonight....just gonna stare at it till I feel sleepy.....
10-15-2014, 07:39 PM
#64
Thread Starter
Join Date: Jan 2004
Location: Queens,
NY
Posts: 559
Likes: 0
Received 0 Likes
on
0 Posts
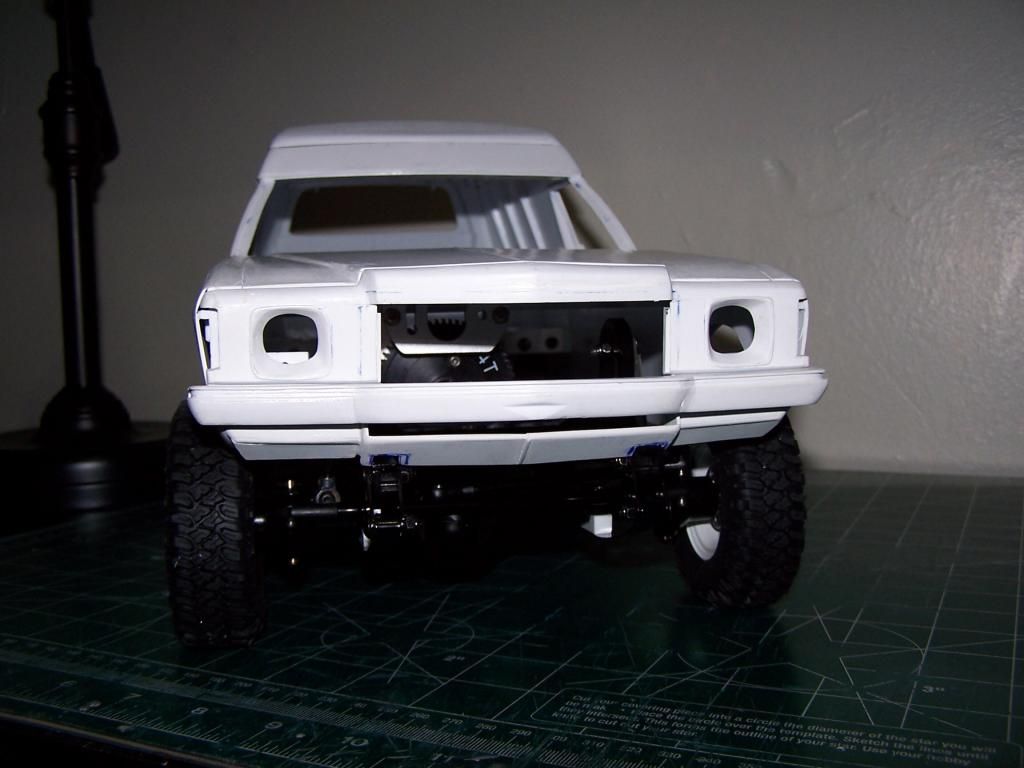
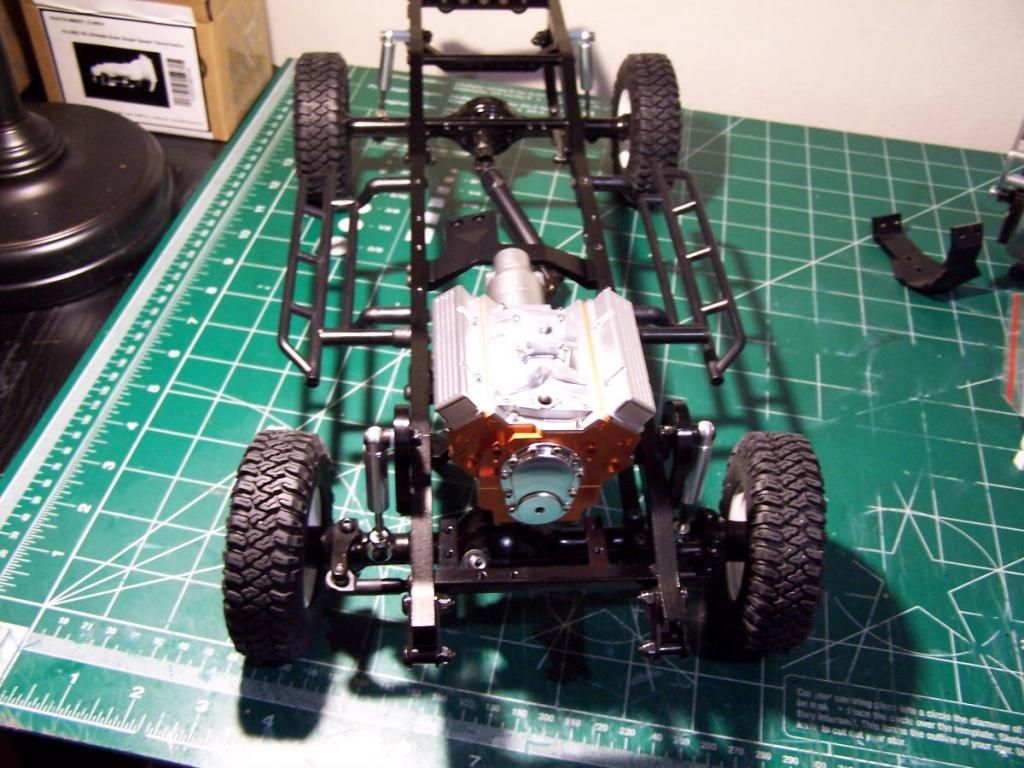
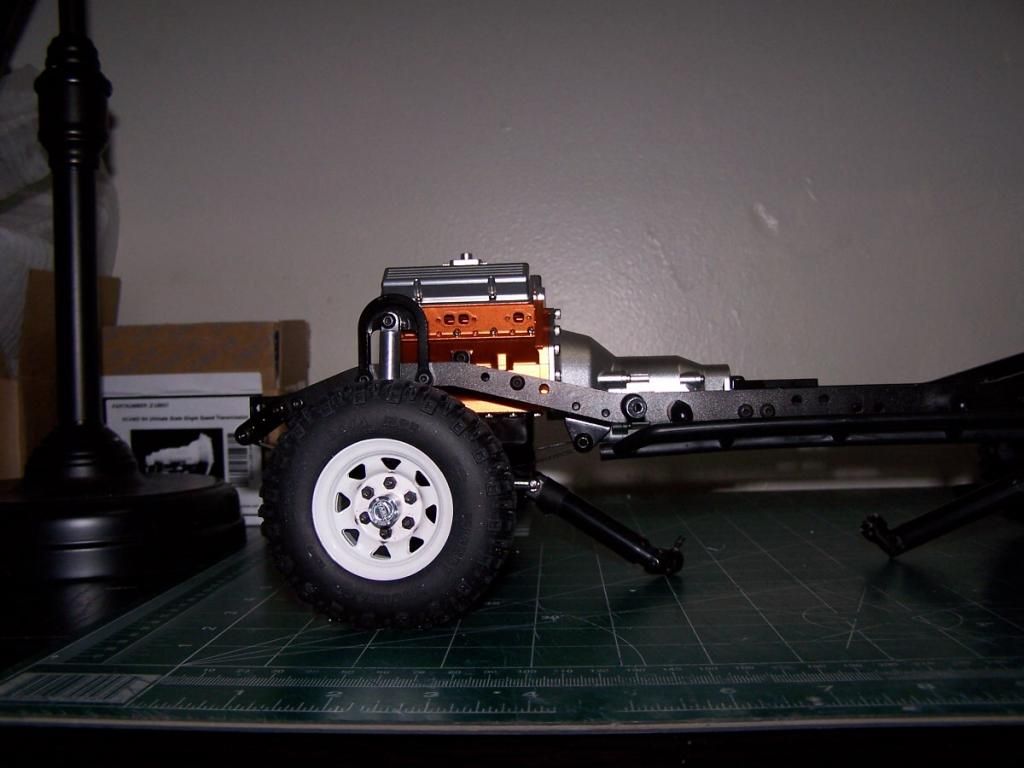
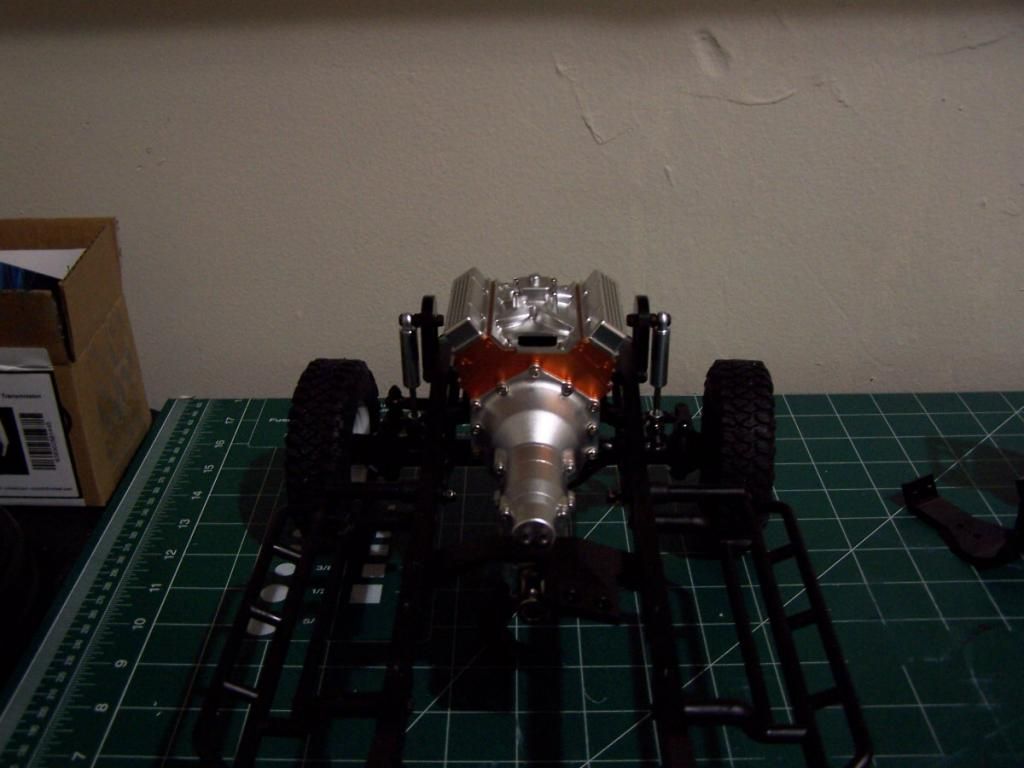
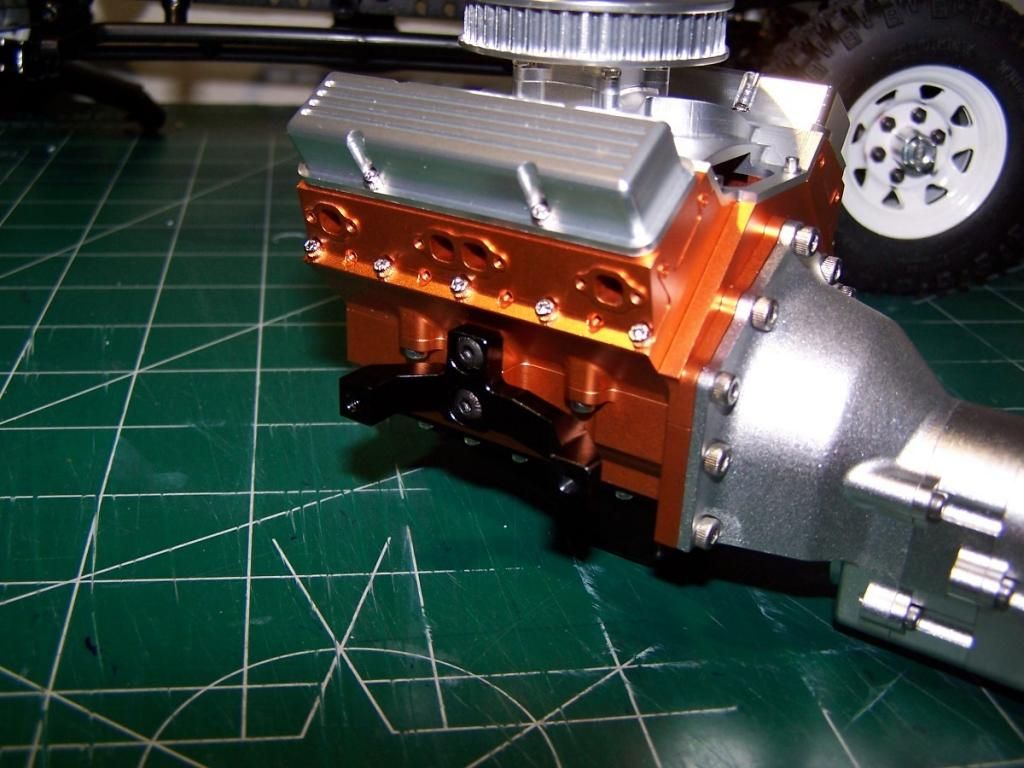
Hey guys...update time again...
Lol....
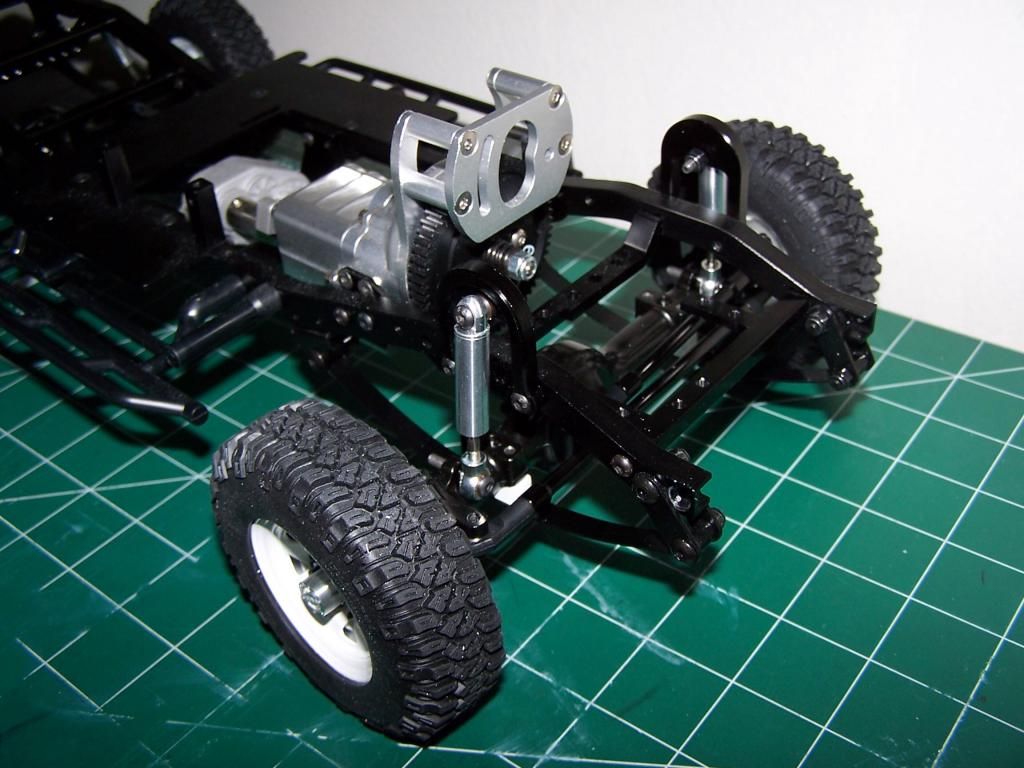
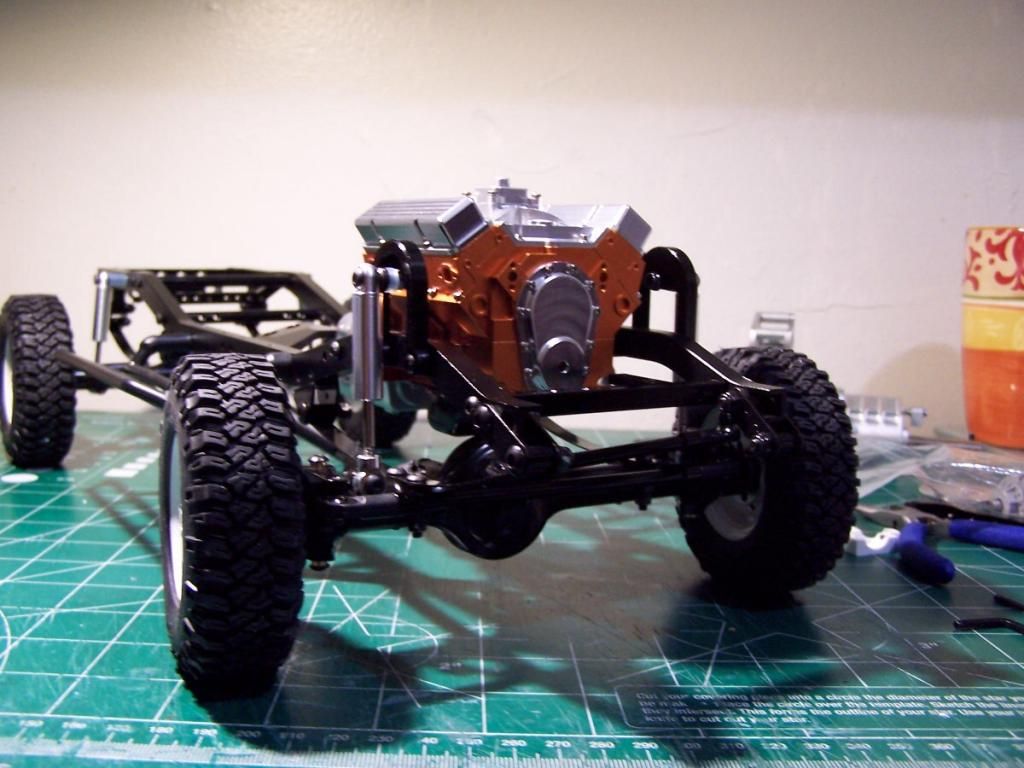
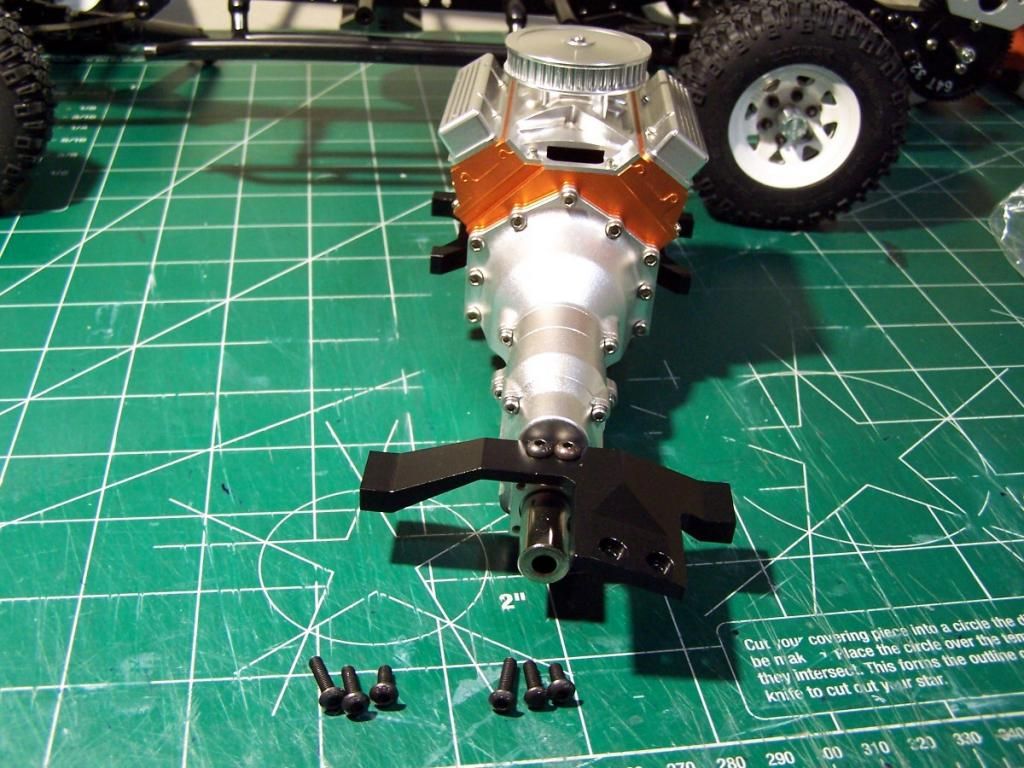
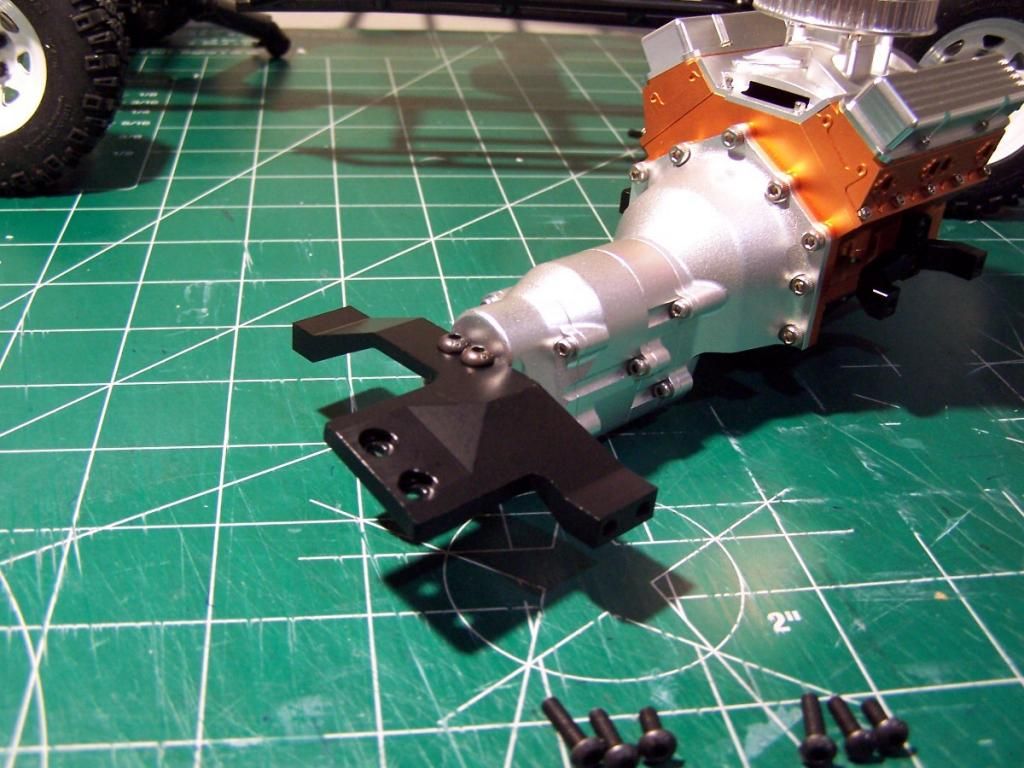
Got it installed...pretty easy...2 engine mounts and the transfer case mount...damn sweet layout for sure!
and while it's spot on for the TF2 stock chassis, I ran into issues for my configuration...no worries though I'll figure it out!
With my front axle over leaf configuration and the shorter shocks the crankcase was touching the axle (pumpkin?), so I reverted to the stock setup with the shorter shocks and I have about 1/2" clearance.
Tonight I plan to try the cut n shut ATZs which I'm hoping will lower the axle somewhat and maybe give a bit of clearance in the axle over leaf layout...
EDIT: just realized the ATZs will lower the axle, but everything else will follow.. Maybe if I lengthen the shocks i will get more space between the axle and the frame?
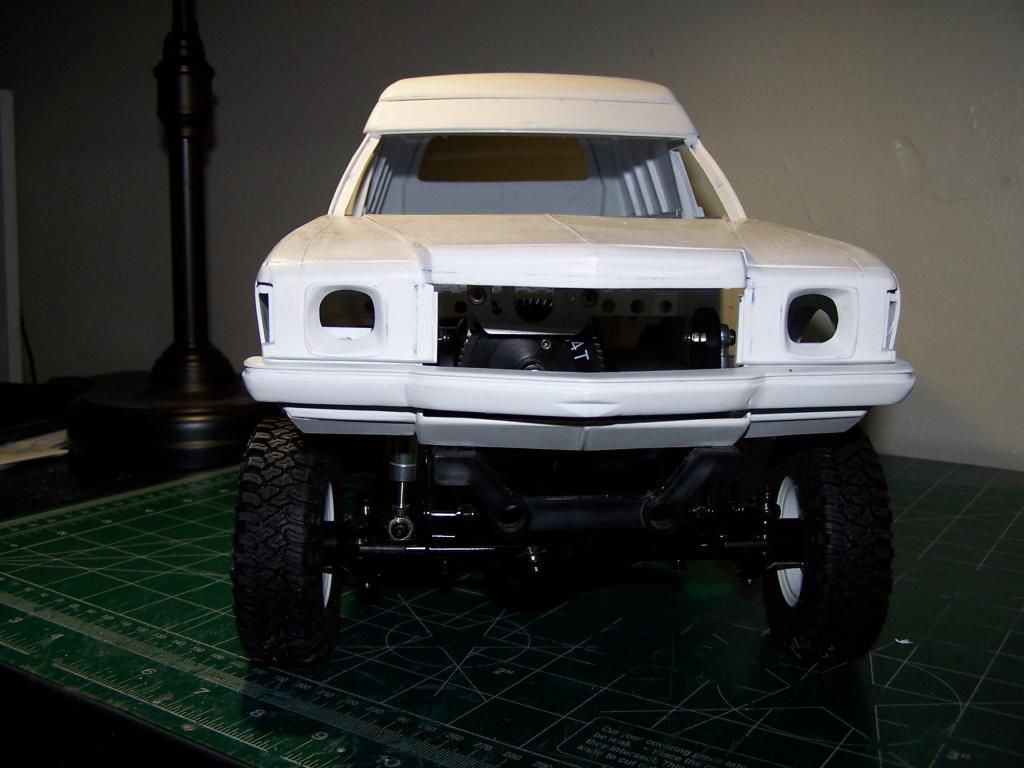
Also the air cleaner pan is too tall, it's hitting the hood and keeping the body from resting properly on the chassis. With the air cleaner off its fine with maybe 3/8-1/4" clearance. So I'm planning a homemade air cleaner pan. I thought about one of those hood scoops, but I really don't want to mess with the hood at all as I want to keep the body looking stock....
Anywho some pics...
:bacondance:

Lol....
Got it installed...pretty easy...2 engine mounts and the transfer case mount...damn sweet layout for sure!
and while it's spot on for the TF2 stock chassis, I ran into issues for my configuration...no worries though I'll figure it out!
With my front axle over leaf configuration and the shorter shocks the crankcase was touching the axle (pumpkin?), so I reverted to the stock setup with the shorter shocks and I have about 1/2" clearance.
Tonight I plan to try the cut n shut ATZs which I'm hoping will lower the axle somewhat and maybe give a bit of clearance in the axle over leaf layout...
EDIT: just realized the ATZs will lower the axle, but everything else will follow.. Maybe if I lengthen the shocks i will get more space between the axle and the frame?
Also the air cleaner pan is too tall, it's hitting the hood and keeping the body from resting properly on the chassis. With the air cleaner off its fine with maybe 3/8-1/4" clearance. So I'm planning a homemade air cleaner pan. I thought about one of those hood scoops, but I really don't want to mess with the hood at all as I want to keep the body looking stock....
Anywho some pics...
:bacondance:


 10-27-2014, 05:22 PM
#65
Thread Starter
Join Date: Jan 2004
Location: Queens,
NY
Posts: 559
Likes: 0
Received 0 Likes
on
0 Posts
Hey guys, haven't had a chance to update, so here goes..
I have decided to change the axles on the TF2. Man, it's like one step forward and two steps back...lol!
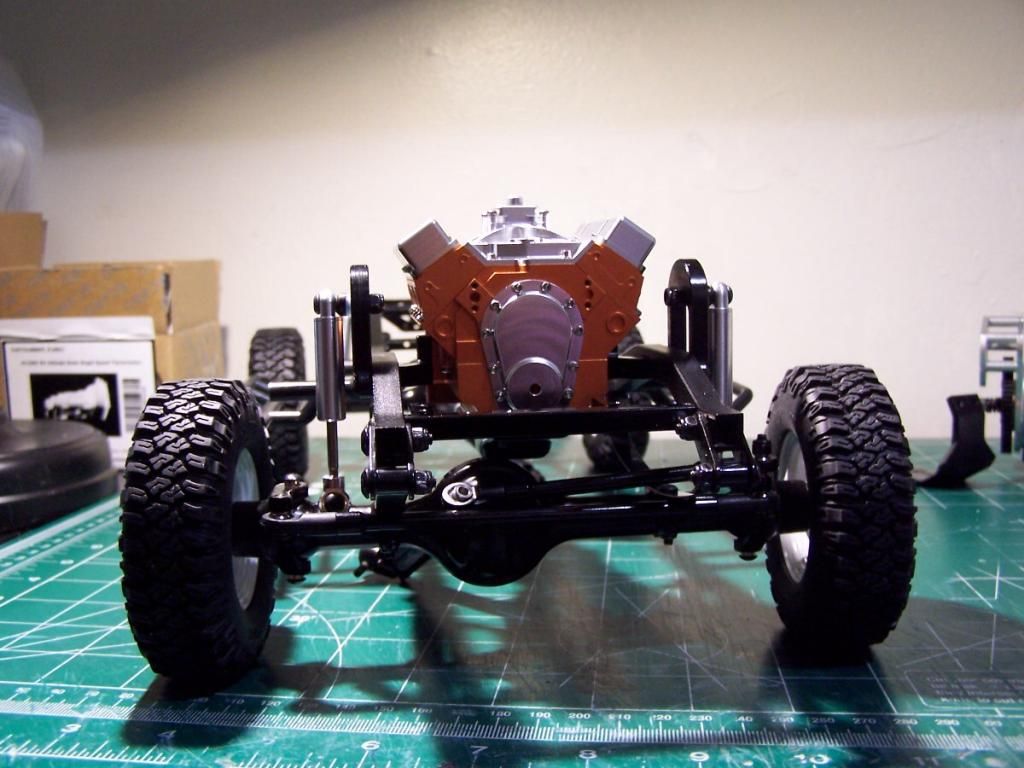
Because of the height of the engine block, I had to raise the suspension so the crankcase pan clears the diff housing. But once I do that, it throws off the look I'm after, the ride height is just too tall.
What I realized is, that the diff housing on the Yota axles is just too big in diameter. If I could get an axle with a smaller diff housing, I could get the clearance between the diff housing and the crankcase and still have the ride height I'm after....
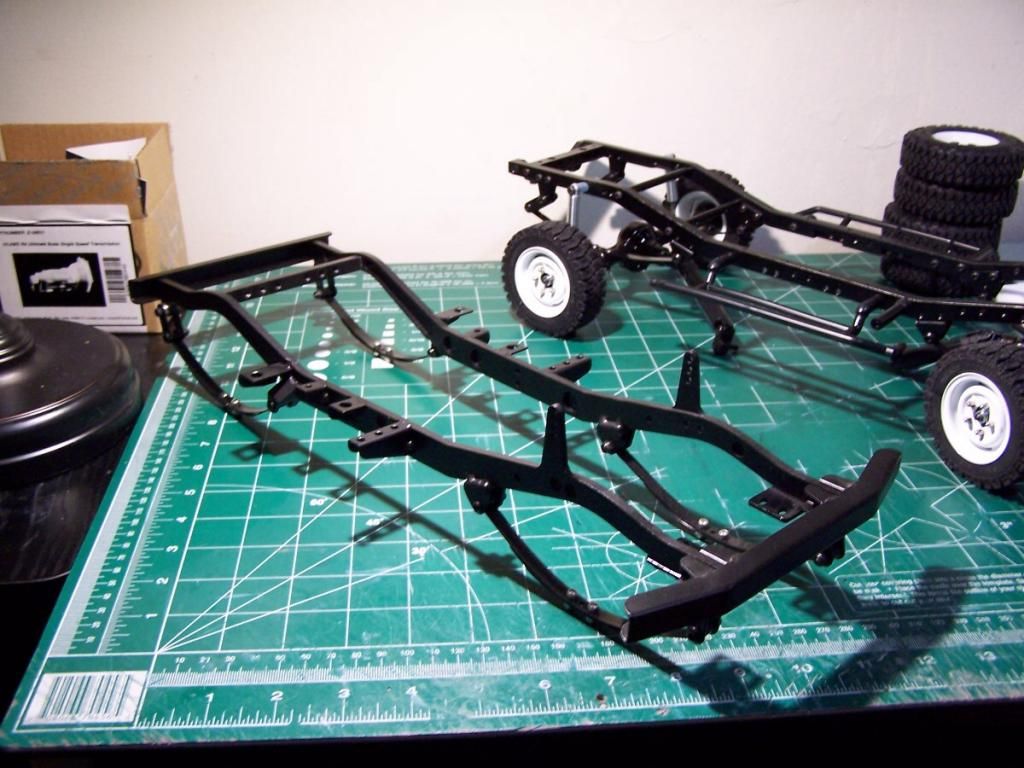
Sooo.... I had a set of SDI axles (version 1) stashed away for an FJ40 project that I was accumulating parts for, and wouldn't you know it, the diff housing is a good 10mm smaller in diameter! However the SDI axles are like 10mm wider than the Yota, so will have to shorten those, pretty easy with the SDIs!
Also the chassis I bought for the FJ40 build is the Fracture Chassis from RC4WD, which uses the Yota axles! So it's a direct swap ..lol!
So hopefully over the next couple of days I can get the axles built and installed on the Overlander then get the engine fitted in and finally get back to the flooring and opening up the hood...!
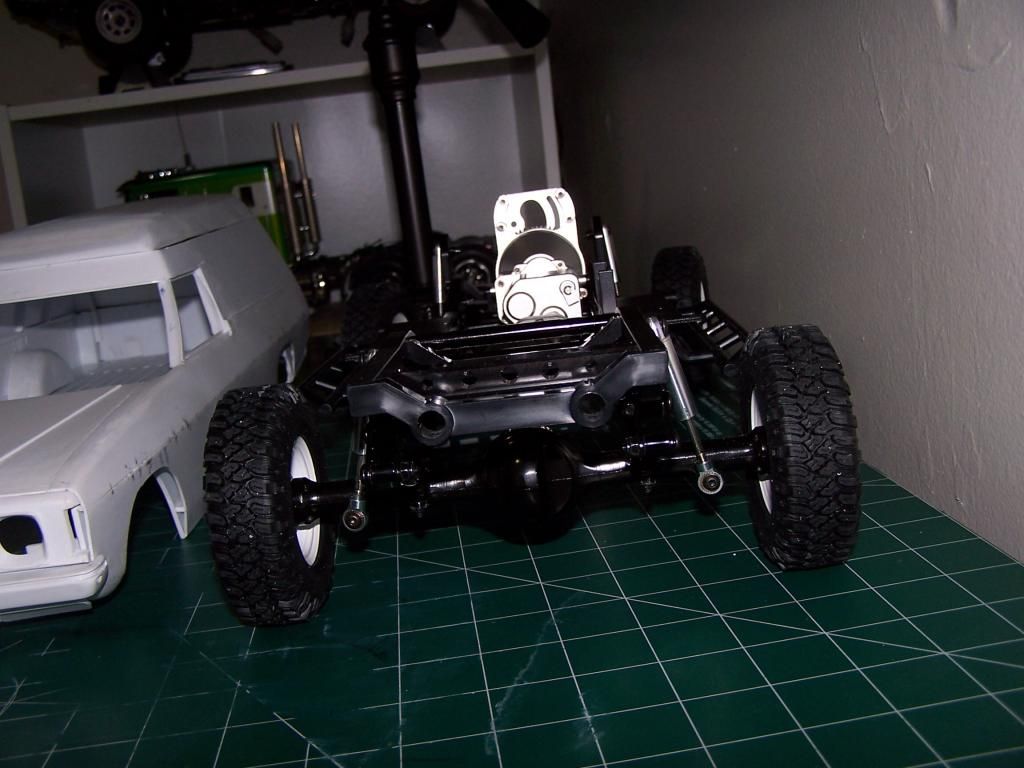
Some pics with the cut n shut ATZs, and the FJ40 chassis.
I have decided to change the axles on the TF2. Man, it's like one step forward and two steps back...lol!
Because of the height of the engine block, I had to raise the suspension so the crankcase pan clears the diff housing. But once I do that, it throws off the look I'm after, the ride height is just too tall.
What I realized is, that the diff housing on the Yota axles is just too big in diameter. If I could get an axle with a smaller diff housing, I could get the clearance between the diff housing and the crankcase and still have the ride height I'm after....
Sooo.... I had a set of SDI axles (version 1) stashed away for an FJ40 project that I was accumulating parts for, and wouldn't you know it, the diff housing is a good 10mm smaller in diameter! However the SDI axles are like 10mm wider than the Yota, so will have to shorten those, pretty easy with the SDIs!
Also the chassis I bought for the FJ40 build is the Fracture Chassis from RC4WD, which uses the Yota axles! So it's a direct swap ..lol!
So hopefully over the next couple of days I can get the axles built and installed on the Overlander then get the engine fitted in and finally get back to the flooring and opening up the hood...!
Some pics with the cut n shut ATZs, and the FJ40 chassis.


 10-27-2014, 05:24 PM
#66
Thread Starter
Join Date: Jan 2004
Location: Queens,
NY
Posts: 559
Likes: 0
Received 0 Likes
on
0 Posts
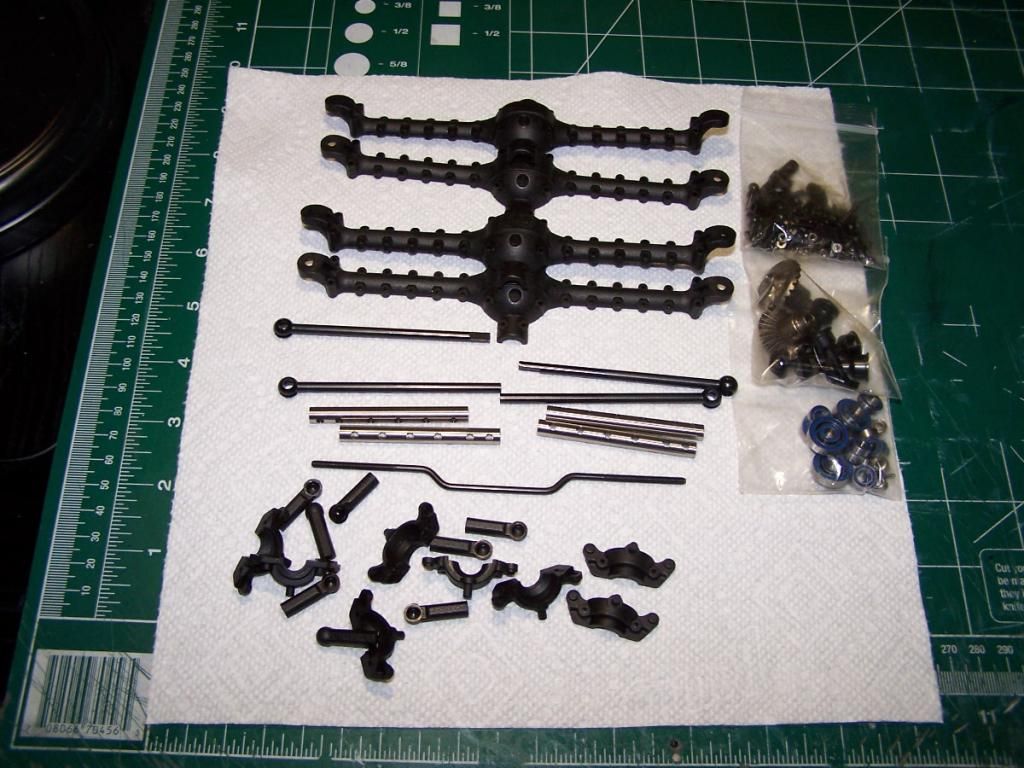
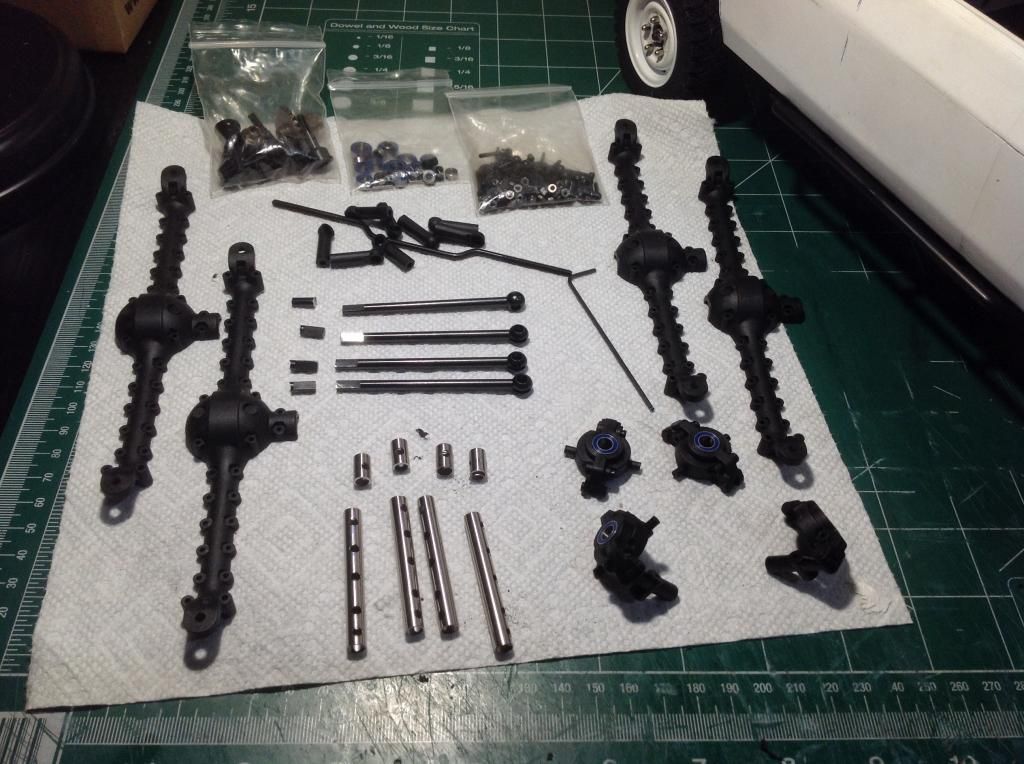
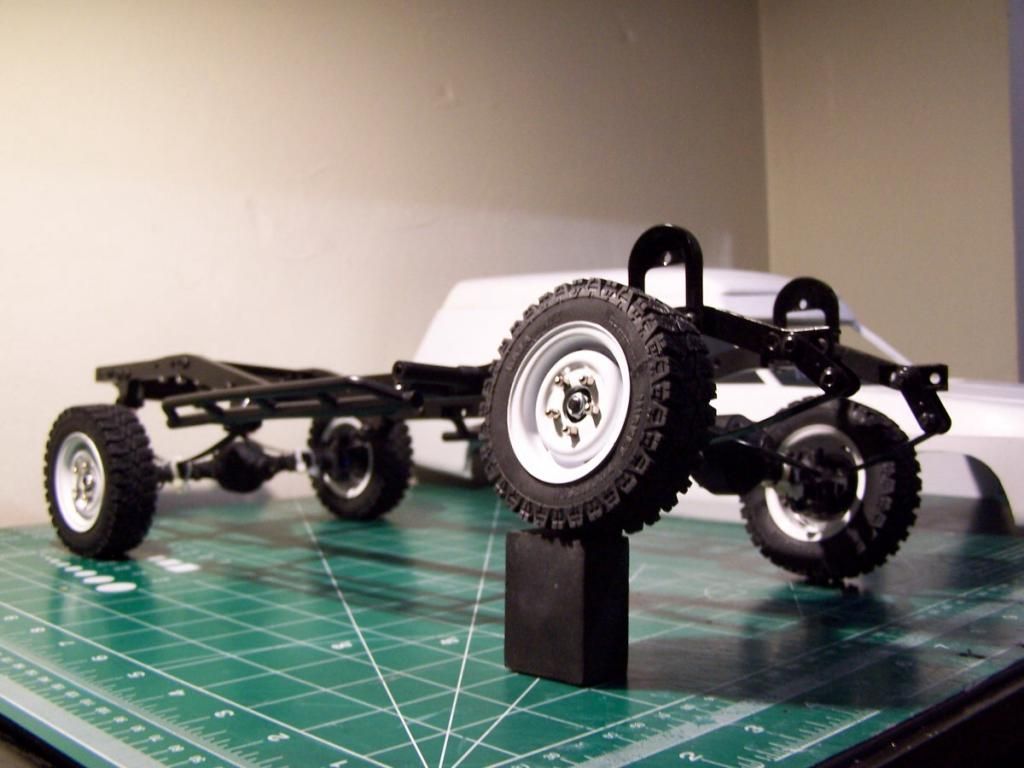
Well.....axle shafts have been cut and filed, tubes have been cut and knuckles assembled.....!:banana:
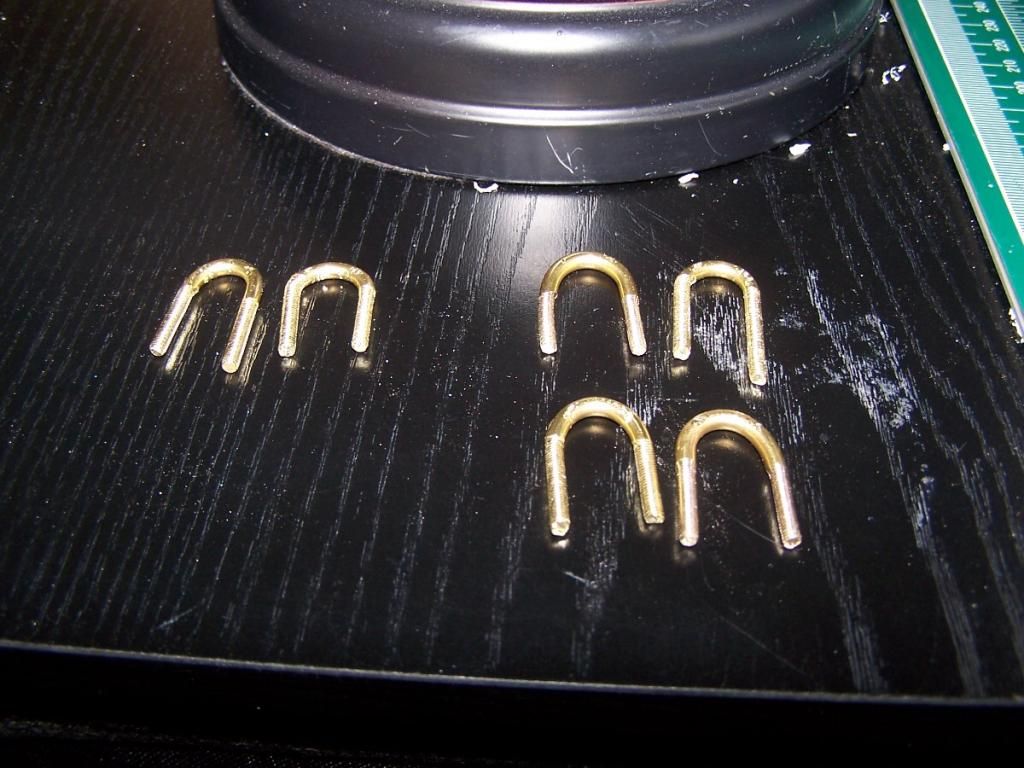
Just need to shorten the axle cases now and build some U-Bolts and plates to install on the car...! G ( RC4WD has the U-bolt kit @ 30.00 / pair :blink: Wha? Heh I think I will build my own...won't be as fancy though..:lolbeat.
Just need to shorten the axle cases now and build some U-Bolts and plates to install on the car...! G
( RC4WD has the U-bolt kit @ 30.00 / pair :blink: Wha? Heh I think I will build my own...won't be as fancy though..:lolbeat. 


 10-27-2014, 05:31 PM
#71
Thread Starter
Join Date: Jan 2004
Location: Queens,
NY
Posts: 559
Likes: 0
Received 0 Likes
on
0 Posts
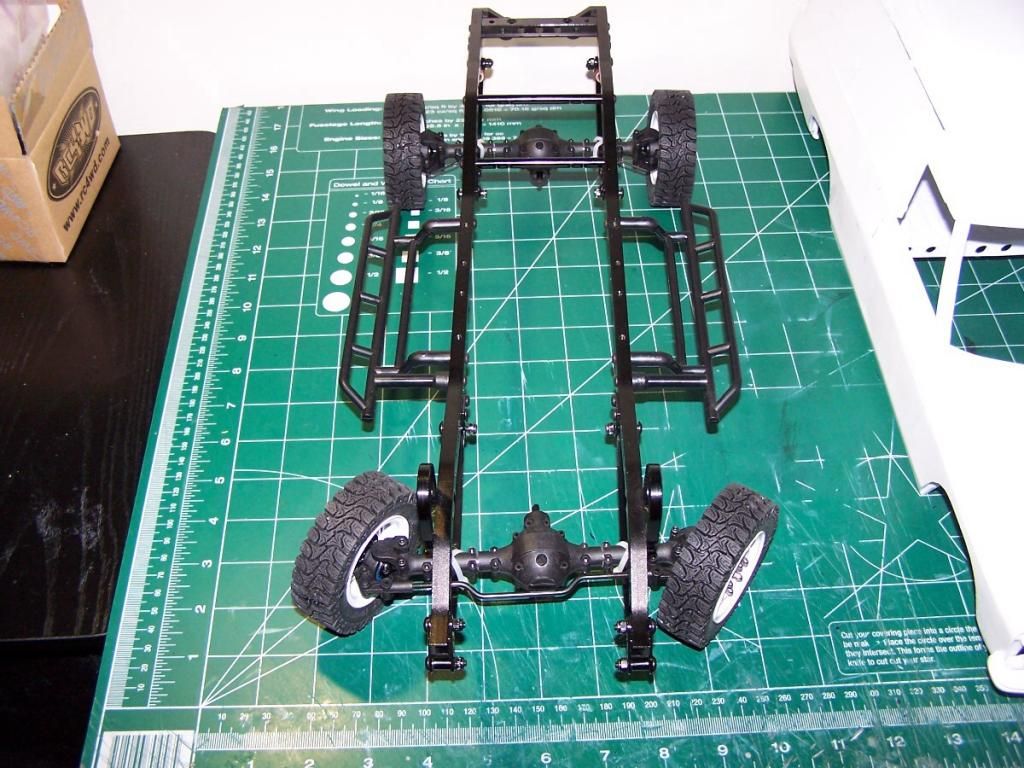
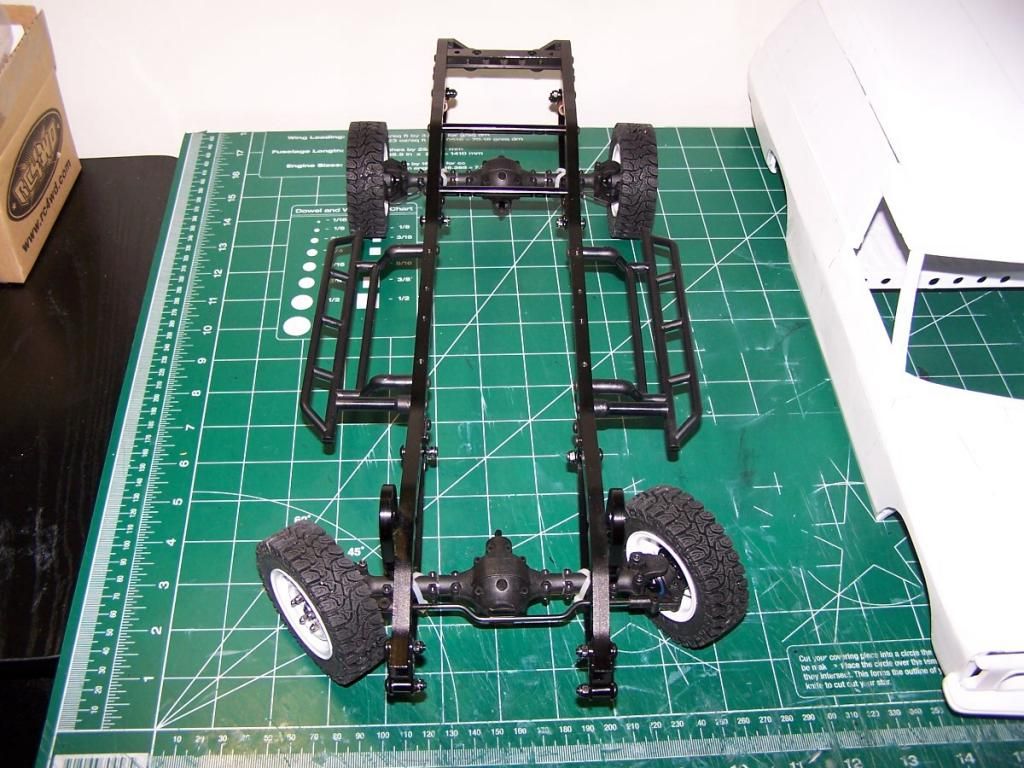
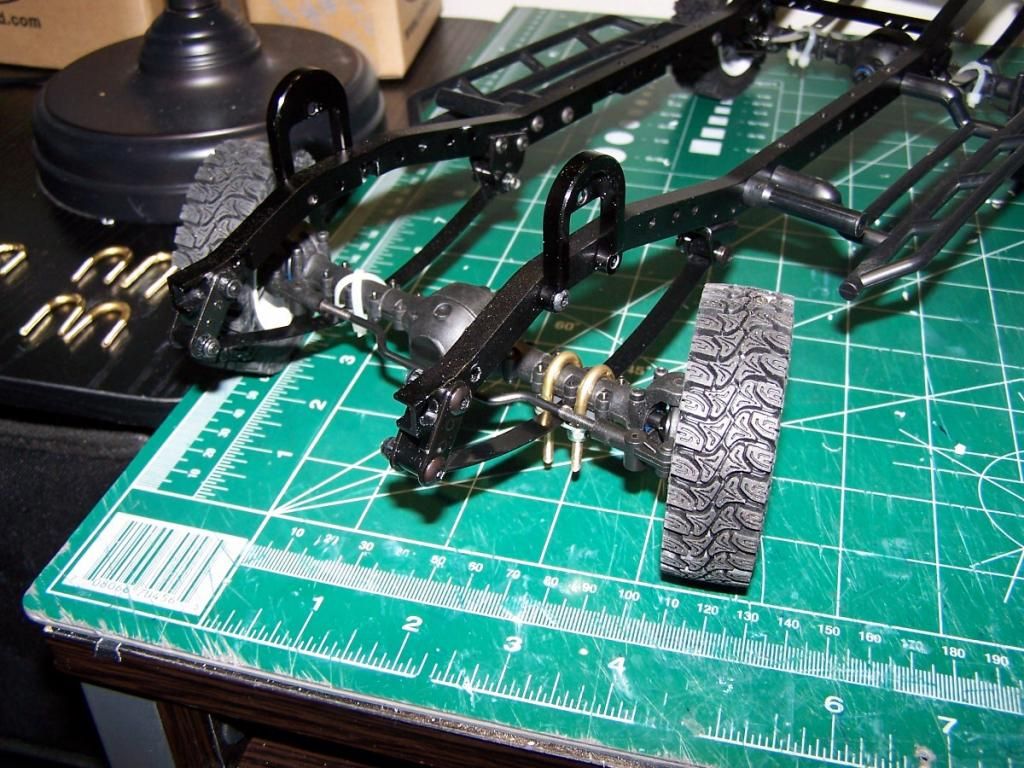
Hey guys...haven't yet completed making the U-bolts and back plates to mount the axles on the leaf springs...
In the meantime I just couldn't resist!! So I used the next best thing...zip ties ...lol! I still need to figure out some shock mounts to fit on the axle...
Soooo....a few pics. :banana:

In the meantime I just couldn't resist!! So I used the next best thing...zip ties ...lol! I still need to figure out some shock mounts to fit on the axle...
Soooo....a few pics. :banana:


 10-27-2014, 05:34 PM
#72
Thread Starter
Join Date: Jan 2004
Location: Queens,
NY
Posts: 559
Likes: 0
Received 0 Likes
on
0 Posts
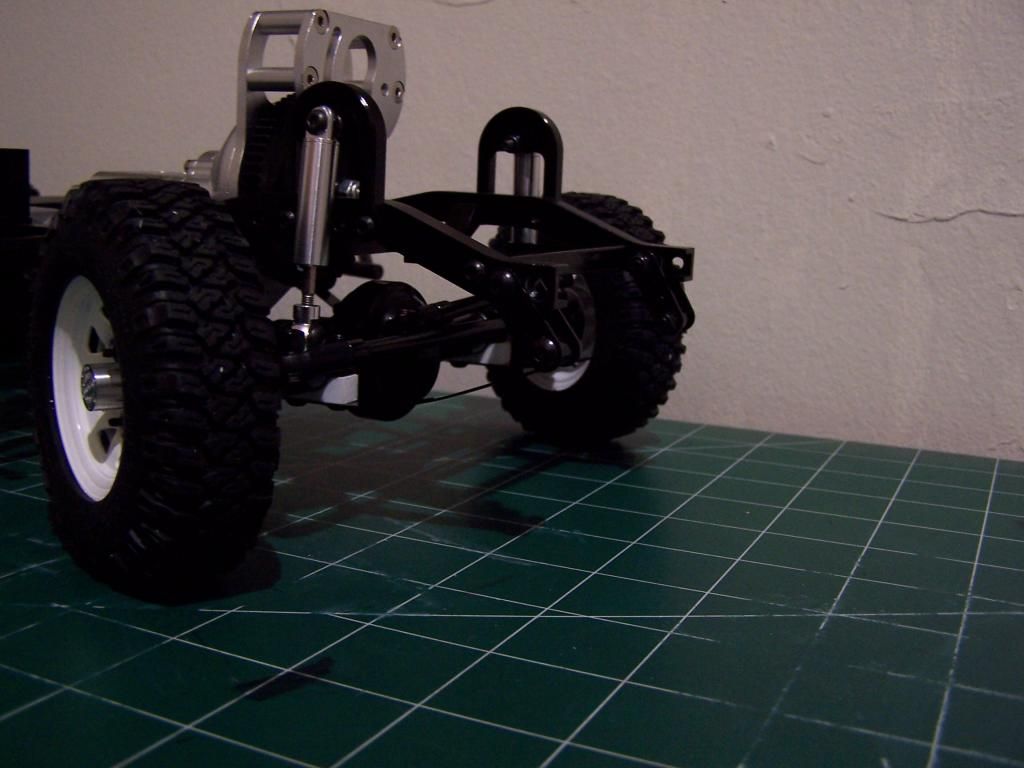
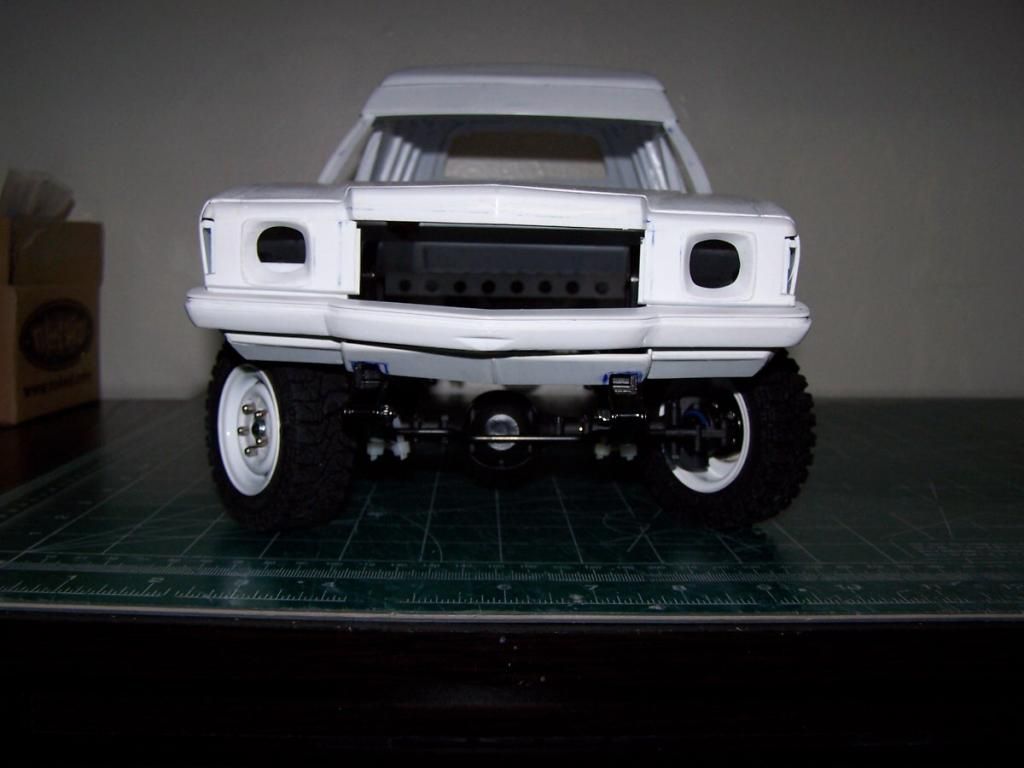
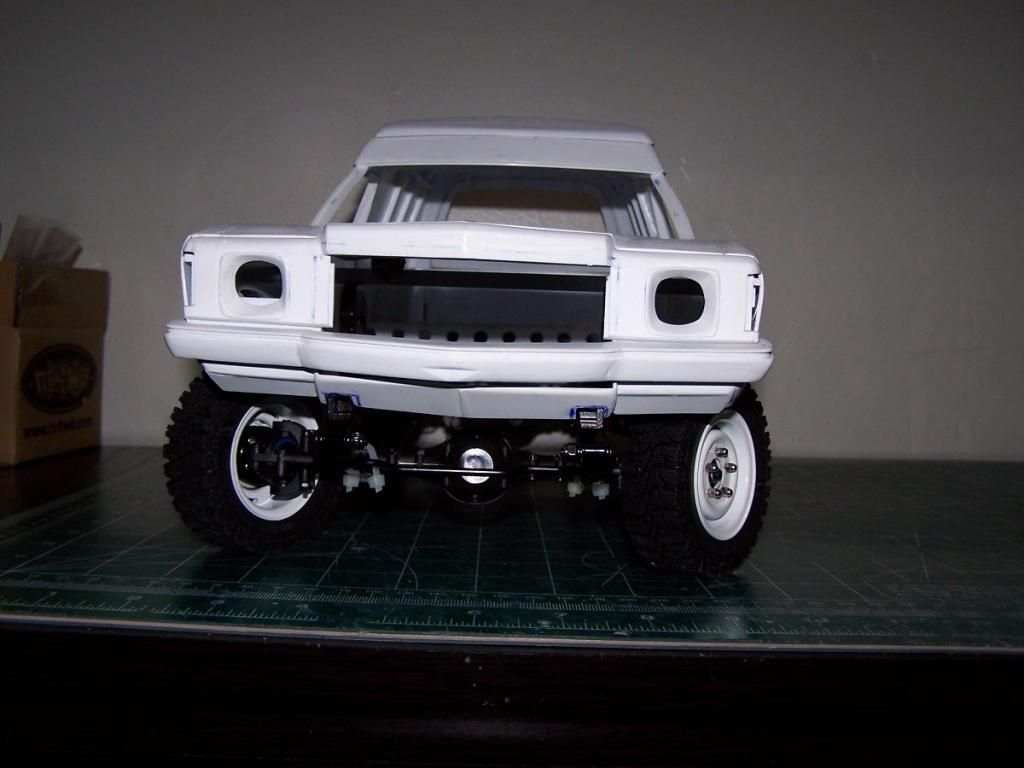
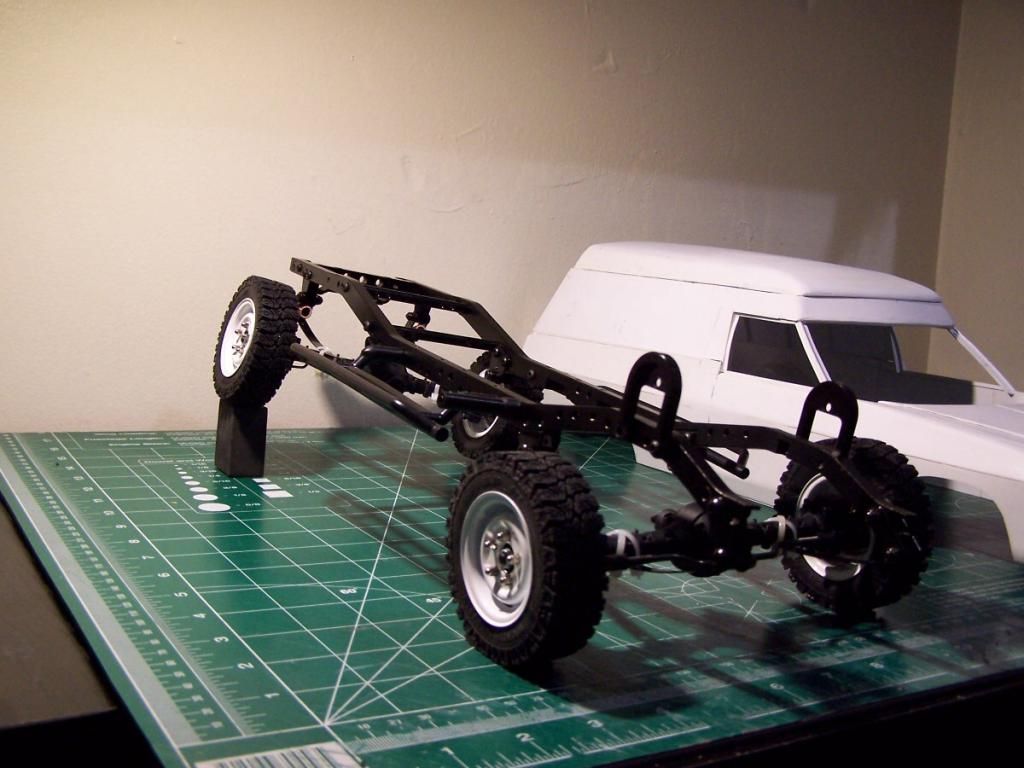
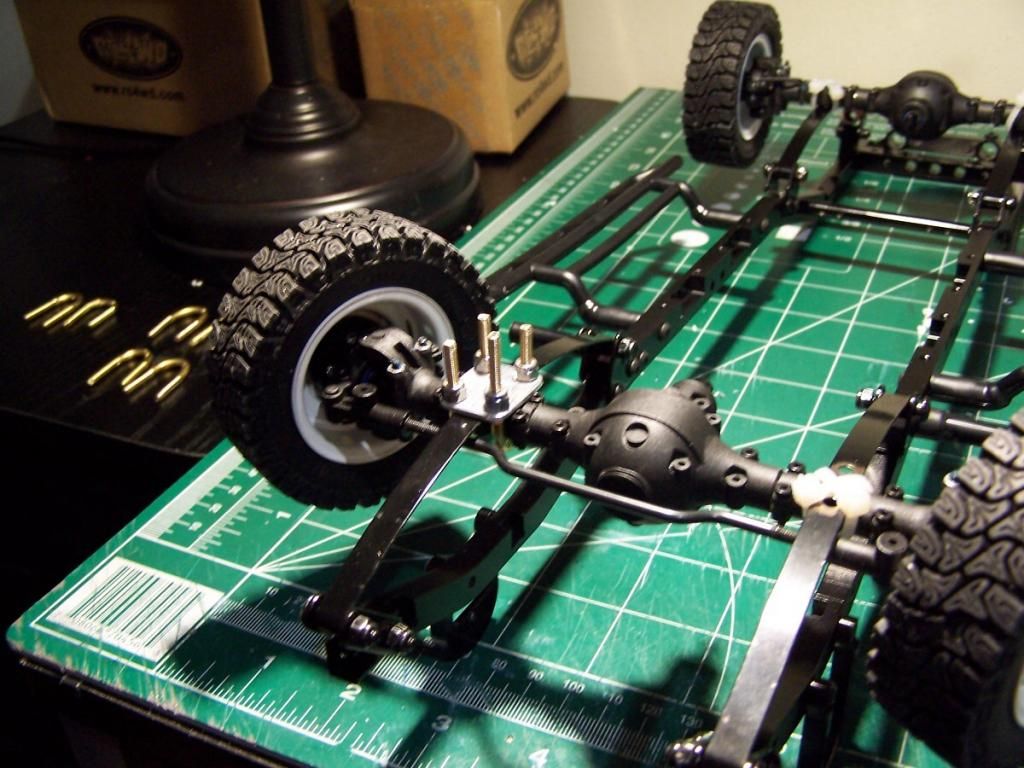
First few pics show the steering lock....
Last pics show the suspension compression...
Note that this is without shocks and weight on the chassis. Also don't have the front chassis cross member on. Needed to remove it to spread the rails for the engine/tranny fit. Will install it after I'm done...lol!
Last couple pics show the spring compression...lol!


 10-27-2014, 05:36 PM
#73
Thread Starter
Join Date: Jan 2004
Location: Queens,
NY
Posts: 559
Likes: 0
Received 0 Likes
on
0 Posts
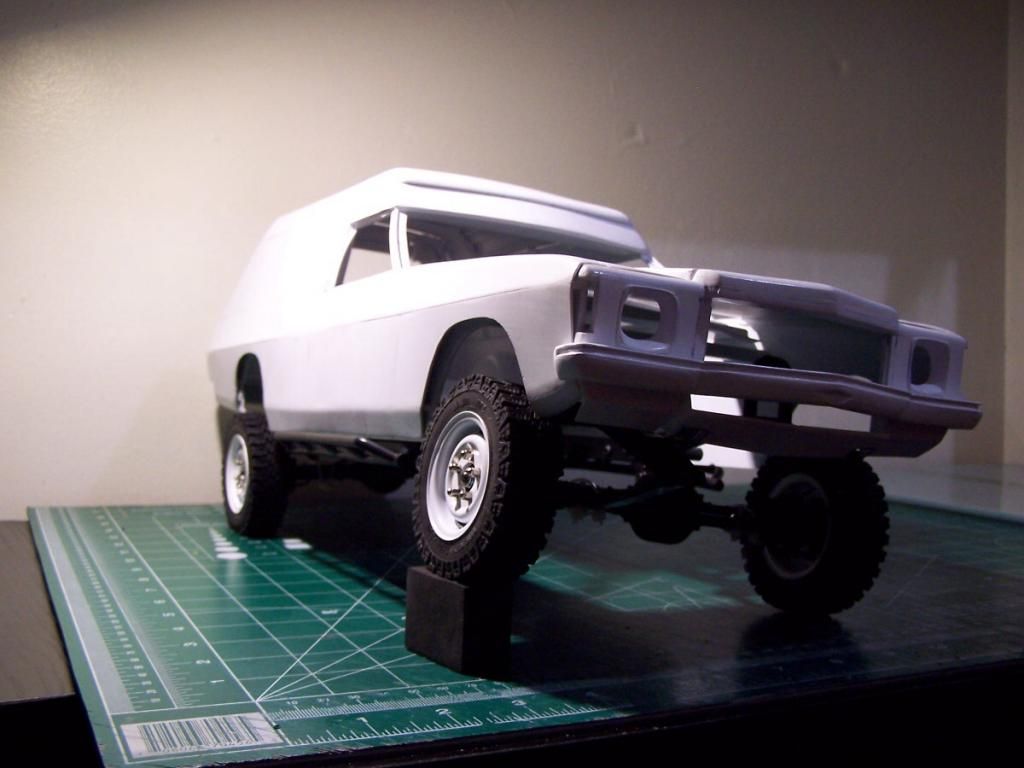
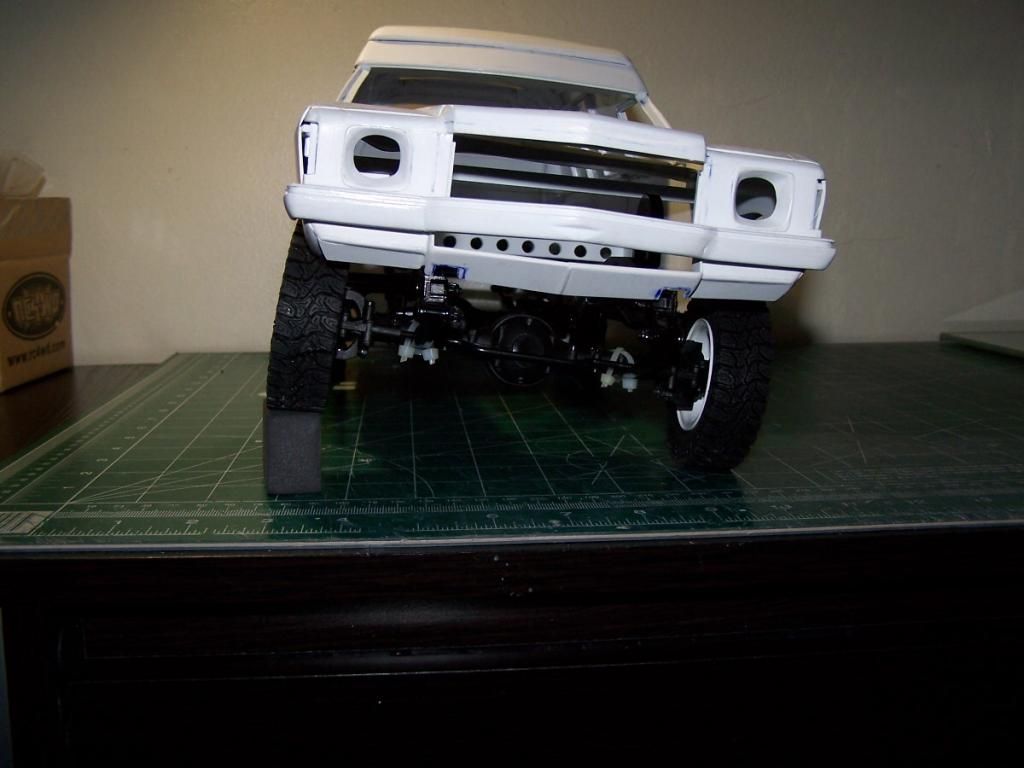
Hey guys ....... :update: lol!
Got the U-bolts made...also managed to get one of the back plates made tonight..
Still need to figure out how I'm mounting the shocks to the axle. May leave one of the U-bolts studs a little longer to attach a bracket for mounting the shock, the other studs are gonna get chopped at the nuts :lolbeat: ha! Did I just say that? Lol!:rolling:
Any other suggestions for mounting the shock to the axle are welcome!
Anywho...some pics..


 10-27-2014, 06:18 PM
#74

Hey Preson! Great stance and I love the suspension action pics.
Did you do some progress on the lights lenses? Like grinding them down in diameter to fit your buckets?
Also I was wondering if you know of a product that would be good to fill up the unused holes once finished with mounting the SDI axles. I did not order milliput when I ordered my set, and I am not sure what else would work nicely. Maybe epoxy, but I would like to put something more pliable that will make it possible to re-open later...
10-27-2014, 06:27 PM
#75
Thread Starter
Join Date: Jan 2004
Location: Queens,
NY
Posts: 559
Likes: 0
Received 0 Likes
on
0 Posts
Hey thanks Fred!
havent done anything with the lenses as yet...lol! Guess I will start working on them when I start the grille...
also so didn't order the milliput from him as he said it was being discontinued. But I believe I found it here in the states some time ago, but didn't order yet...Actually I haven't a clue what else will work. I think the reason he recommend the milliput is that you can mold it to the shape you want while it's drying....I will let you know what I find!